
Hyper-SD and Hyper-SDXL are distilled Stable Diffusion models that claim to generate high-quality images in 1 to 8 steps. We will find out how good they are in this article.
I will cover:
- How does the Hyper Stable Diffusion model work.
- Difference between Hyper-SD and other fast models such as LCM, Turbo, and Lightning.
- How to use them in AUTOMATIC1111 and ComfyUI.
- Best image settings.
Table of Contents
Software
I will cover two ways to use Hyper-SD models.
You will need ComfyUI to use the Hyper-SD UNet and LoRA models released by the authors. The LoRA models are compatible with any checkpoint models.
You can use either AUTOMATIC1111 or ComfyUI if you want to use custom checkpoint models trained with the Hyper-SD method.
AUTOMATIC1111
AUTOMATIC1111 is a popular and free Stable Diffusion software. Check out the installation guides on Windows, Mac, or Google Colab.
If you are new to Stable Diffusion, check out the Quick Start Guide or take the Stable Diffusion course.
Check out the AUTOMATIC1111 Guide if you are new to AUTOMATIC1111.
ComfyUI
ComfyUI is an alternative to AUTOMATIC1111.
Read the ComfyUI installation guide and ComfyUI beginner’s guide if you are new to ComfyUI.
Check out our Stable Diffusion courses if you want to learn AUTOMATIC1111 or ComfyUI step-by-step.
What are Hyper Stable Diffusion models?
The Hyper SD models belong to a class of models that aim to speed up image generation by reducing the number of sampling steps. Let’s review how sampling works in Stable Diffusion.
Sampling in latent space
Stable Diffusion models speed up the image generation process by sampling in the latent space. The speed-up is huge.
For a 1024×1024 image with 3 color channels (red, green, and blue), the dimension is 1024 x 1024 x 3 = 3,145,728! In other words, each image has more than 3 million values.
To make it more efficient, the variational auto-encoder (VAE) compresses a 1024×1024 image into 128x128x4 = 65,536 dimensions, a 48-time reduction. In other words, Stable Diffusion uses a VAE architecture to speed up image generation by ~48 times.
Sampling process
The sampling process is typically done by solving a reverse diffusion process. It is a continuous process but we solve it numerically by dividing it into many sampling steps. Read how Stable Diffusion works if you want to learn more.
It is difficult to visualize a diffusion process in 65,536 dimensions. So, I projected it to 2 dimensions using principal component analysis (PCA), as shown below.
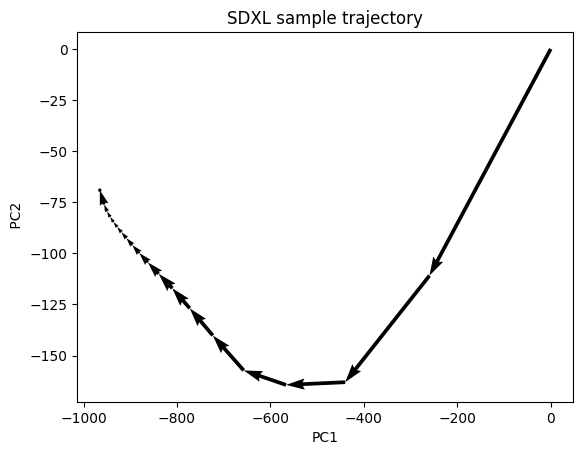
The diffusion takes big steps initially, defining the image’s global composition. The smaller final steps refine small local details.
Initially, the sample is a random noise. It gradually converges to a clear image during sampling.
LCM model
To understand the Hyper-SD model, we must first understand the Latent Consistency Model (LCM) and its limitations.
The LCM model is ambitious. It trains a model to jump directly from random noise to a clear image in one step.

In reality, it doesn’t work perfectly. It is more like this:
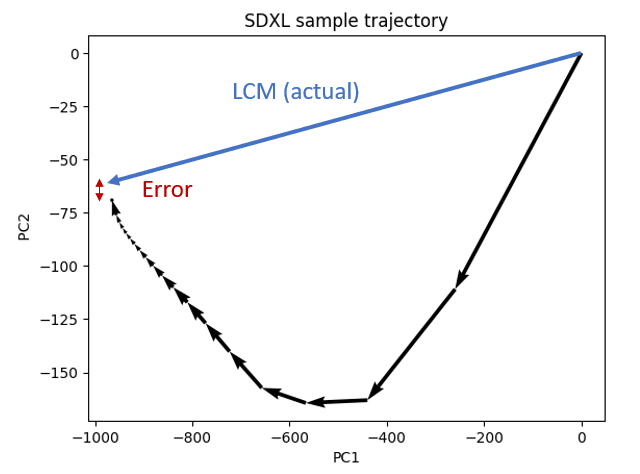
It doesn’t jump to the correct point. It makes a small error. You typically don’t get the same image when using an LCM LoRA to speed up sampling.
A ramification is to concede that a 1-step LCM model is difficult to achieve. We train a new LCM model to do a multi-step LCM sampling instead.
- Apply the LCM model to get the “final” image.
- Add back noise to match the noise schedule (sigma).
- Apply the LCM model to get a better “final” image.
- Repeat 2 and 3 until the end of the noise schedule.
Below is a visualization of LCM sampling for 2 steps.

Hyper-SD models
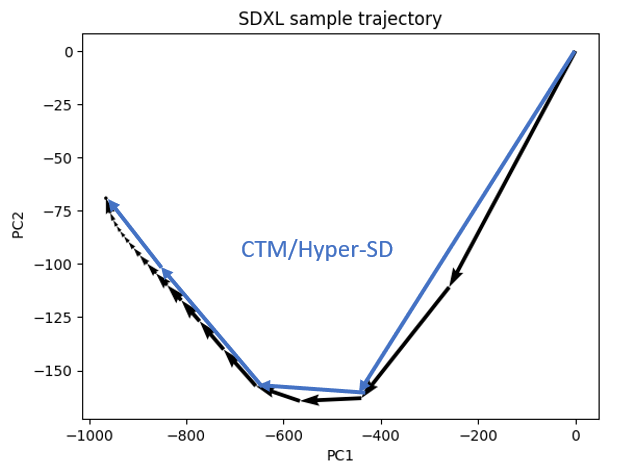
Hyper-SD and Hyper-SDXL models fall under the umbrella of the Consistency trajectory models (CTM).
CTM recognizes the importance of respecting the sample trajectory when speeding up sampling. It makes bigger steps along the sample trajectory.
The improvements of Hyper-SD over the original CTM are:
- Making a specific choice of how the sampling trajectory is divided into 8, 4, 2, and 1 steps.
- Use a hybrid loss function to balance between correctness and looking good.
- Incorporate human feedback to boost performance.
The model is trained with 8 steps, followed by 4, 2, and 1 steps. Since the 1-step model is trained last and is initialized with the higher step models, the 1-step model is also called the unified model, capable of performing 1, 2, 4, and 8 steps.
Difference from other fast models
Hyper-SDXL vs Stable Diffusion Turbo
Stable Diffusion Turbo is a fast model method implemented for SDXL and Stable Diffusion 3. The Turbo model is trained to generate images from 1 to 4 steps using Adversarial Diffusion Distillation (ADD). ADD uses a combination of reconstruction and adversarial loss to improve image sharpness.
The SDXL Turbo model is limited to 512×512 pixels and is trained without the ability to use negative prompts (i.e. CFG), limiting its use.
Turbo’s multiple-step sampling roughly follows the sample trajectory, but it doesn’t explicitly train to follow it. Hyper-SD should be more accurate.
Hyper-SDXL vs LCM
Hyper-SD and LCM are the same when trained with 1 step. As I said, the sampling process differs: LCM predicts the final image directly and adds the noise back to match the expected noise level. Hyper-SD predicts the noisy images along the original sampling path.
I expect Hyper-SD’s training to be easier to get right than LCM.
Hyper-SDXL vs SDXL Lightning
SDXL Lightning uses reconstruction and adversarial loss similar to Turbo. It improves the discriminator using the pre-trained U-Net backbone from the Stable Diffusion model. This enabled it to generate higher-quality images than Turbo because it can discriminate directly in the latent space.
The Hyper-SDXL team found its model quantitatively better than SDXL Lightning.
How to use Hyper-SDXL in ComfyUI
I am only going to list the models that I found useful below. You can see all Hyper-SDXL and Hyper-SD models and the corresponding ComfyUI workflows.
Hyper-SDXL 1-step LoRA
This LoRA can be used for 1, 2, 4, and 8 sampling steps.
Download Hyper-SDXL 1-step LoRA. Put the model file in the folder ComfyUI > models > loras.
Download the ComfyUI workflow below.
Set the CFG scale between 0.6 and 1.2.
This LoRA is not trained with classifier-free guidance, so negative prompts are not supported.
Hyper-SDXL 8-step LoRA with CFG
This SDXL LoRA supports higher CFG scale 5 – 8. You must use 8 steps
Download the Hyper-SDXL 8-step CFG LoRA model.
Download the ComfyUI workflow below.
Using the workflows
To use the workflows, you can use ComfyUI Manager to install the missing nodes. Install it before following the instructions below.
Drop the workflow to ComfyUI. You should see the new workflow loaded.
Click Manager > Install Missing Custom Nodes.
Install the missing nodes and restart ComfyUI.
How to use Hyper-SDXL in AUTOMATIC1111
These are checkpoint models trained with the Hyper-SDXL method. They can be used as regular checkpoint models with special settings.
You don’t need special custom nodes in ComfyUI or extensions in AUTOMATIC1111 to use them.
I will provide instructions for using Hyper-SDXL. Using Hyper-SD (SD 1.5) is similar but with small changes.
Step 1: Download a Hyper-SDXL model
Go to Civitai.com and select the models tab.
To find Hyper-SD models, click Filters on the top right corner and select SDXL Hyper.
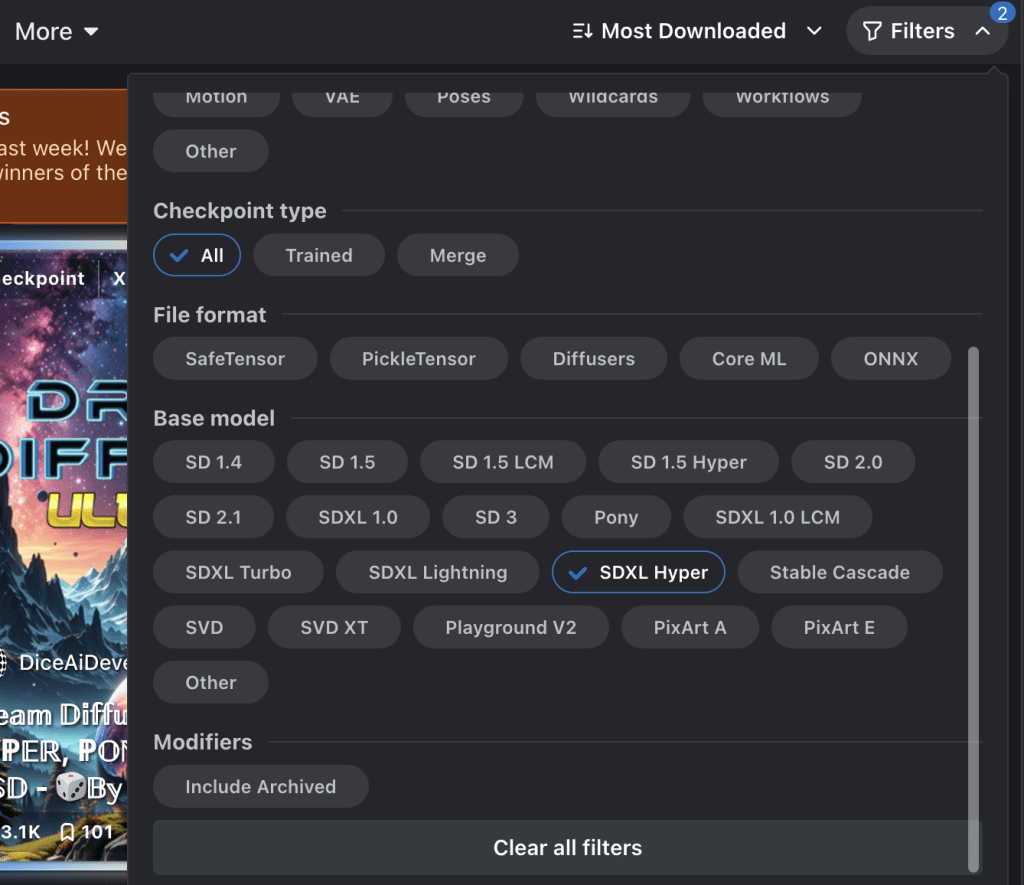
You can also select SD 1.5 Hyper if you want to find an SD 1.5 Hyper model.
Download a Hyper-SDXL model you like. I will use Juggernaut X Hyper.
Step 2: Use the Hyper-SDXL model
The best practice is reading the model description. If it is a fast model like Hyper, the author normally provides suggested settings.
AUTOMATIC1111
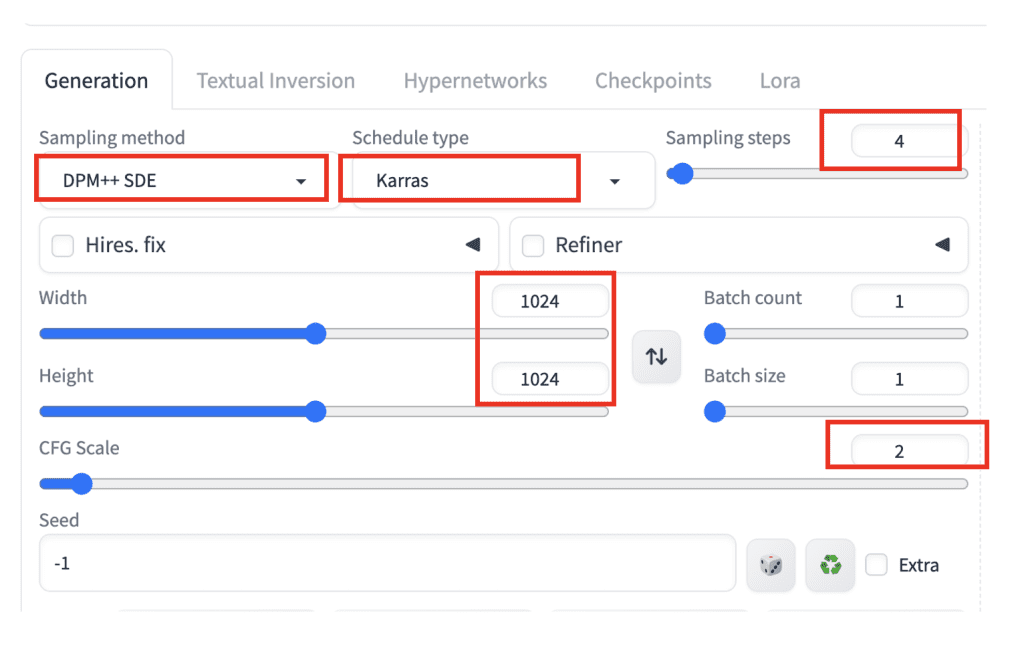
Use the following settings for Hyper-SDXL.
- Checkpoint model: Select a Hyper-SDXL model
- Sampling method: DPM++ SDE
- Schedule type: Karras
- Sampling steps: 4
- CFG scale: 2
- Width: 1024
- Height: 1024
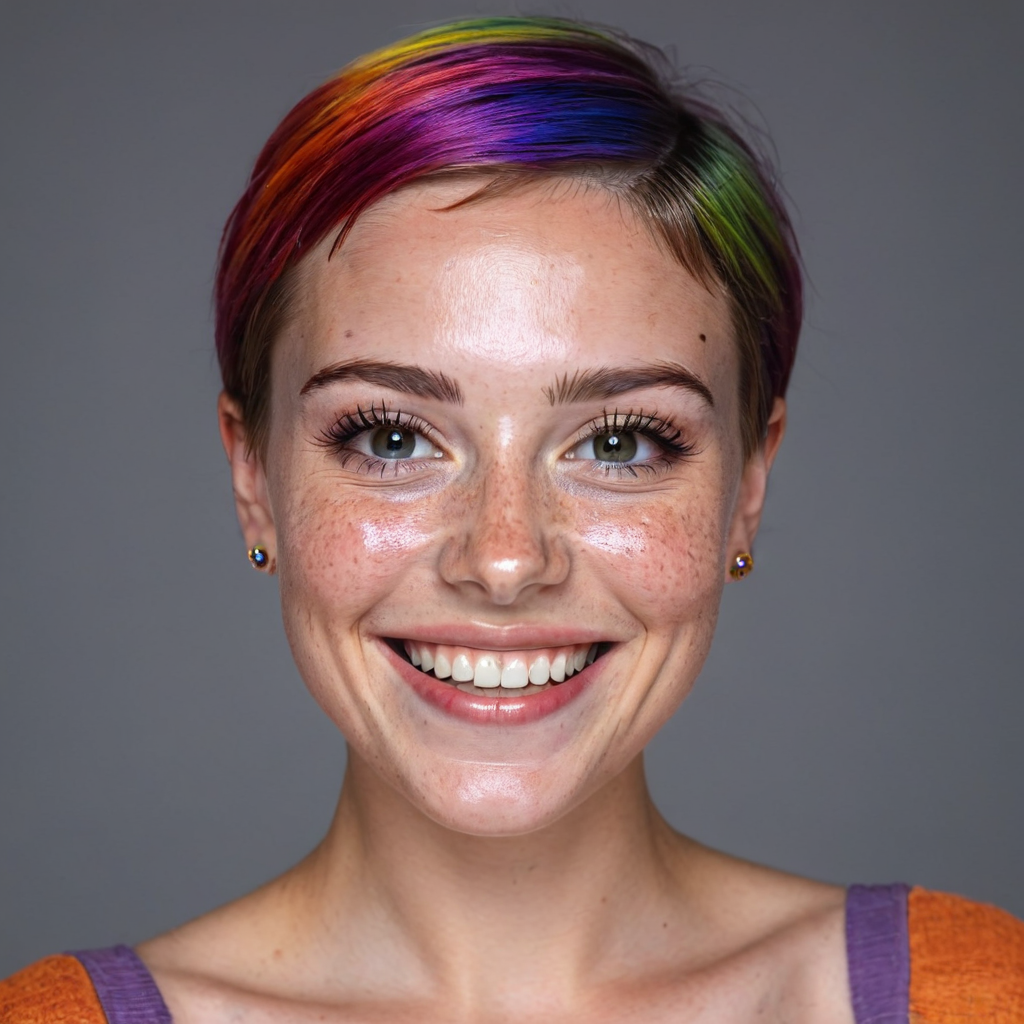
- prompt:
beautiful lady, (freckles), big smile, brown hazel eyes, Short hair, rainbow color hair, dark makeup, hyperdetailed photography, soft light, head and shoulders portrait, cover
bad eyes, cgi, airbrushed, plastic, watermark
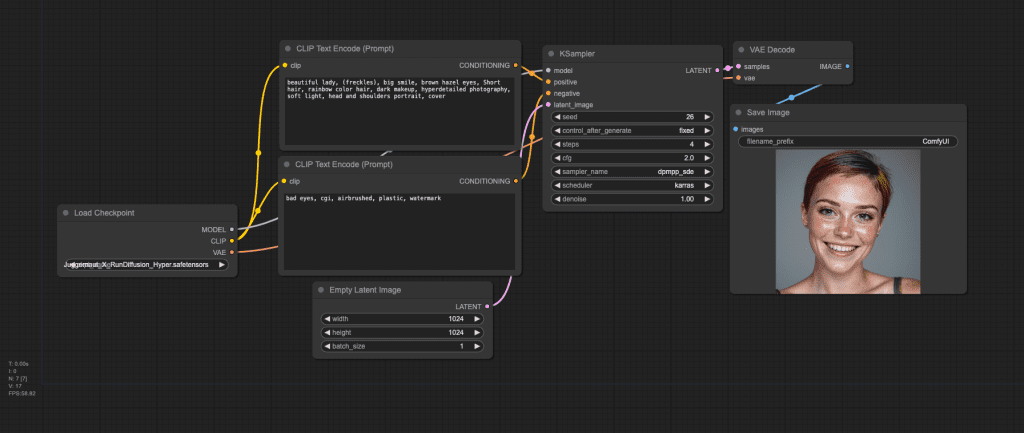
ComfyUI
You can use the following workflow JSON for Hyper-SDXL.
Hyper-SDXL image comparison
I will focus on Hyper-SDXL since most people are interested in speeding it up.
I won’t compare the custom Hyper-SDXL checkpoint because it is a finetuned model that contains other effects.
1-step SDXL UNet model
Let’s first compare the 1-step UNet SDXL model and workflow. I didn’t recommend this model. Let’s see why.
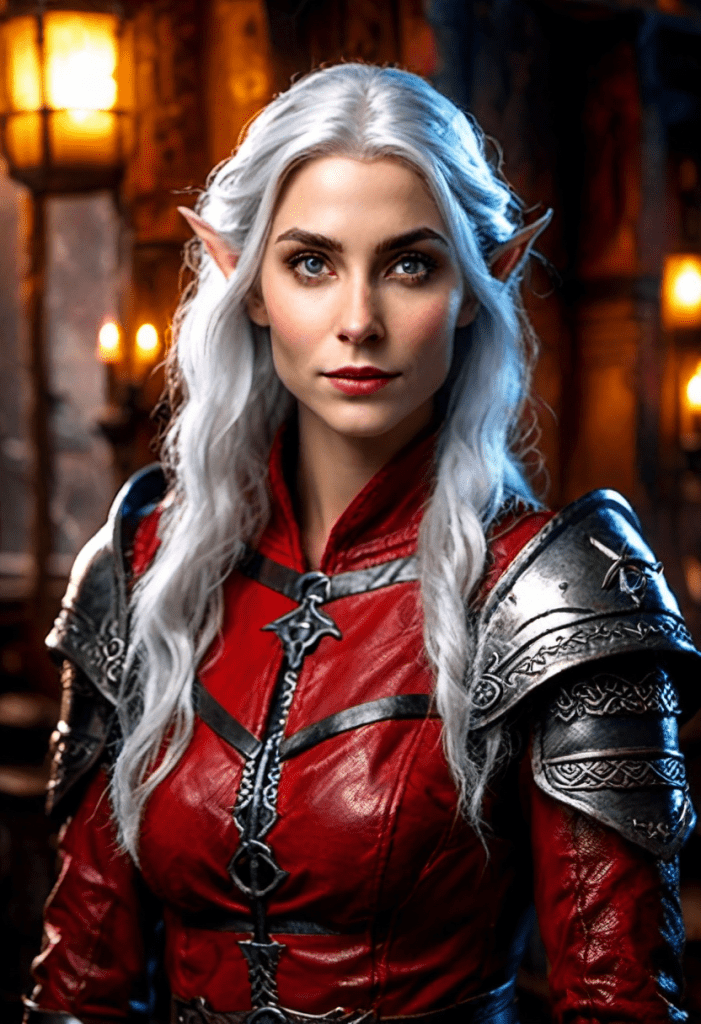
I used this prompt:
beautiful female elf 25 yo silver hair, movie still, full body photo, , d&d adventurer in red torn leather armor, boot with two hands, cellar, dimly lit, breakthrough light from window, looking at viewer, mysterious smile, unusual angle
Compare between the 1-step UNet and the SDXL Base model.
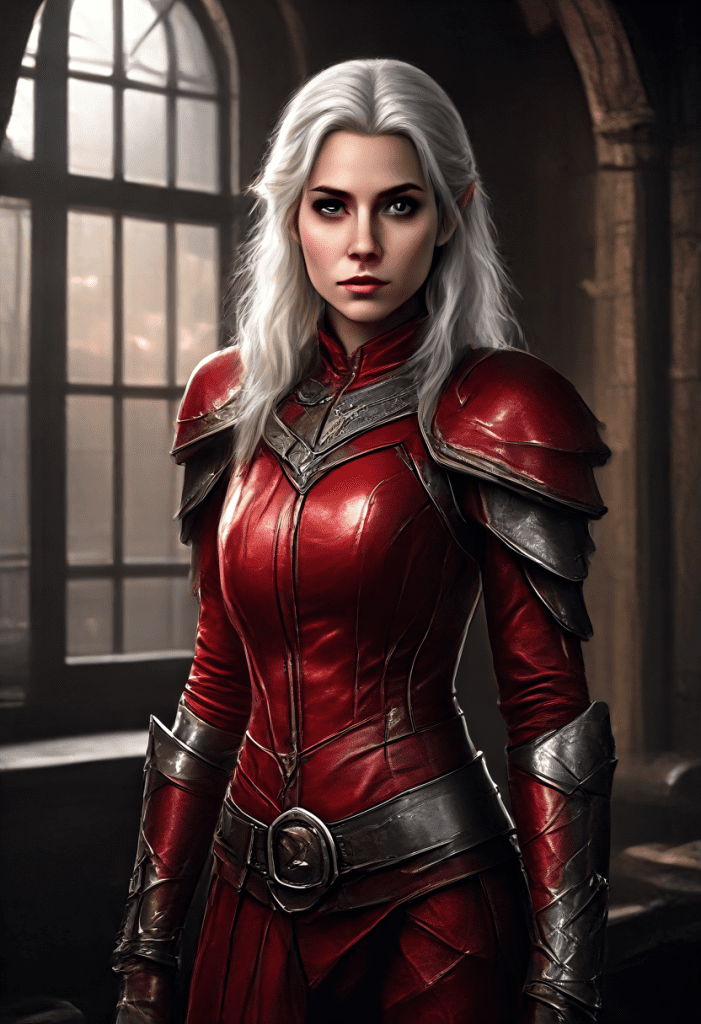

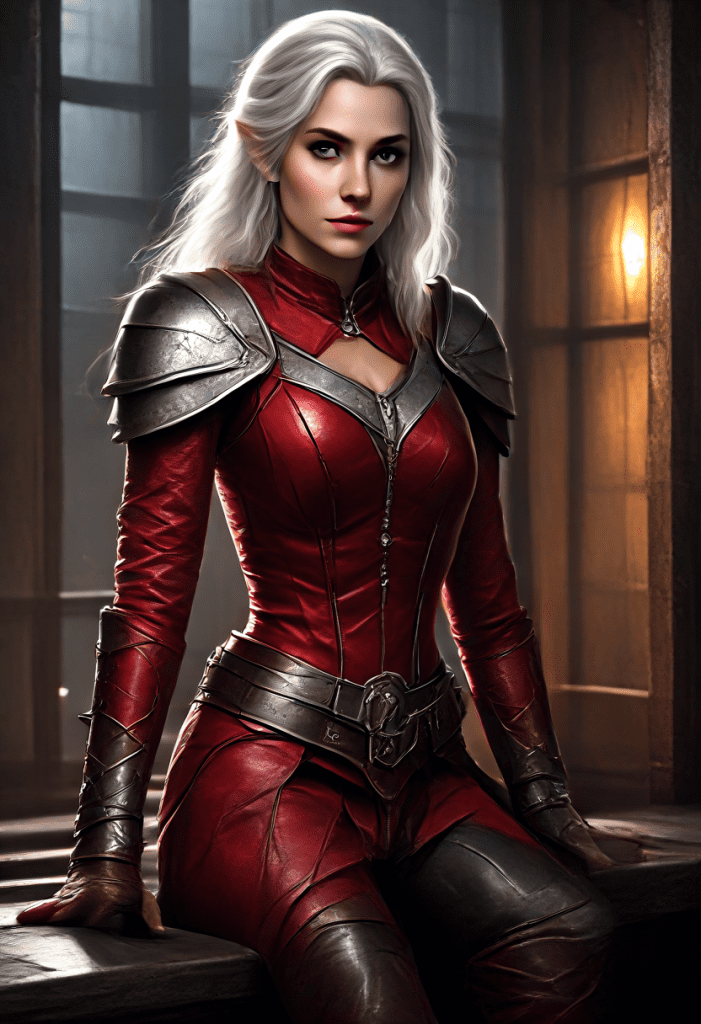
Although the speed of the 1-step Hyper-SDXL UNet model is impressive, the image lacks details compared to the SDXL base model.
The UNet model also cannot generate a realistic photo style. Another prompt confirms this.
color photo of a man in suit, city


The image is cartoony despite specifying “photo” in the prompt. The body of the man is elongated. The UNet model seems to have an issue with global composition.
1-step is a nice idea. But perhaps it is too hard.
1-step SDXL LoRA model
The 1-step SDXL LoRA is good for up to 8 steps. Let’s test changing the number of steps from 1 to 8.

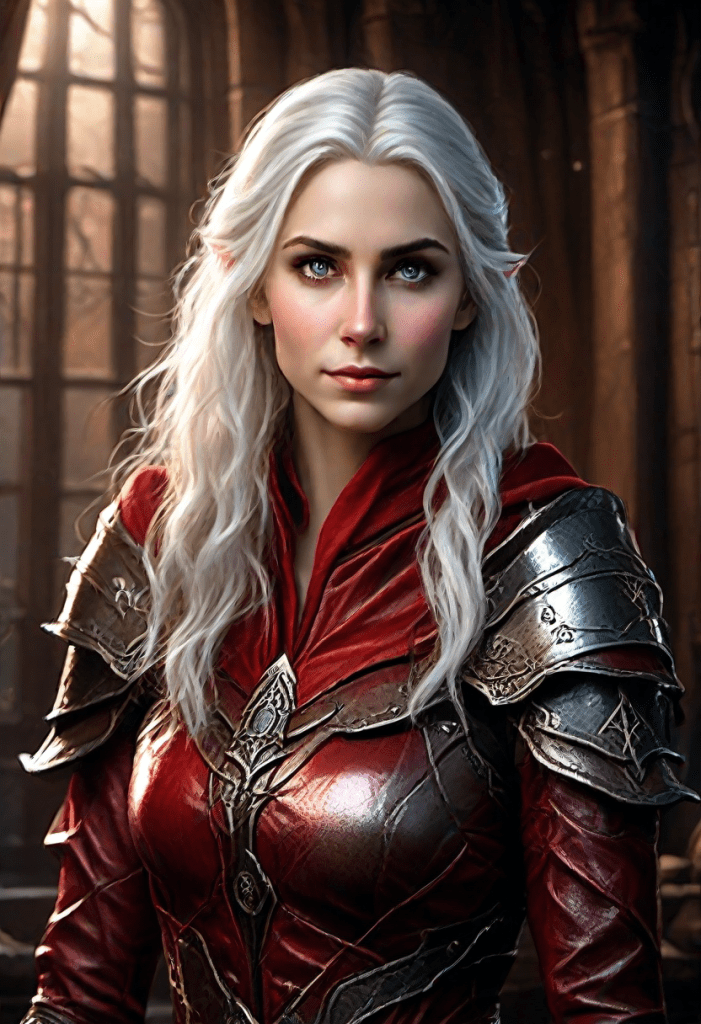
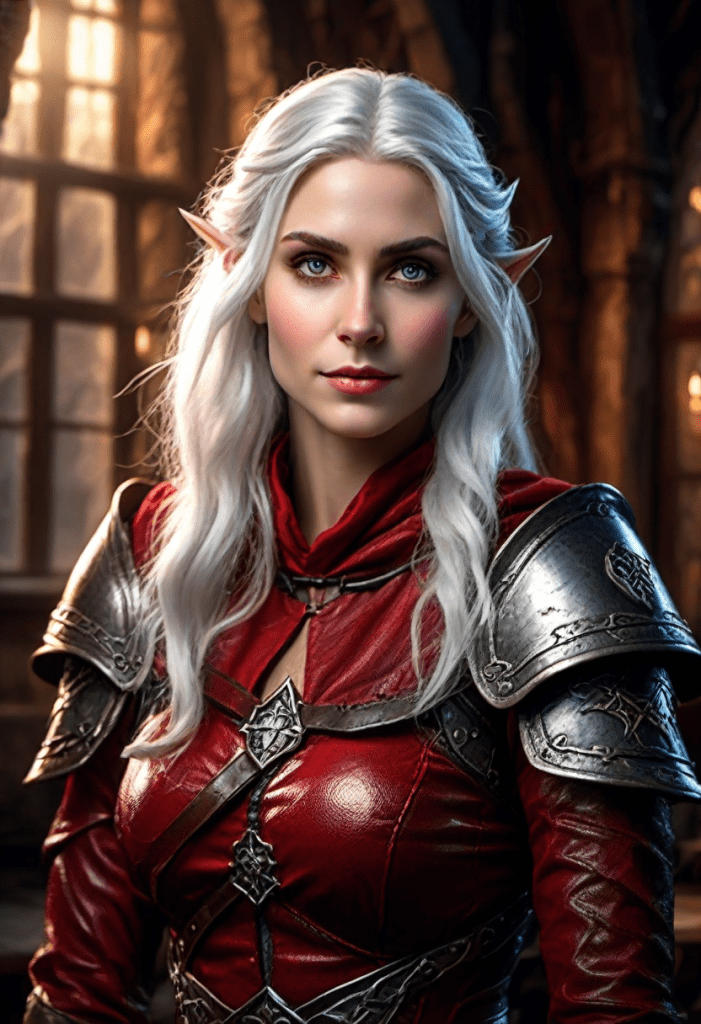
The details progressively improve as the number of steps increases, but the image is over-saturated at 8 steps. The sweet spot seems to be 4 steps.
The saturation can be controlled by changing the CFG value. Reduce the CFG scale if you prefer a softer image.
The level of detail can be further controlled by the eta value in the TCD sampling node.
Lower eta to increase fine details.
My only complaint is that the images are a bit too polished and cartoony. It is not easy to generate a realistic style. However, using the Juggernaut XL model with the LoRA, I was able to generate realistic styles.
So, that’s another advantage of using a LoRA model: You can switch to another checkpoint model.
8-step SDXL CFG LoRA
The 8-step SDXL CFG LoRA can only be used with 8 sampling steps. Anything lower results in blurry images. The images are reasonable and with the benefit of additional control with the negative prompts.
The images are a bit over-smoothed. The compatibility with other SDXL checkpoint models is lower than that with the 1-step LoRA model.
Reference
- Hyper-SD project page
- Research article: SDXL-Lightning: Progressive Adversarial Diffusion Distillation
- Research article: LCM-LoRA: A Universal Stable-Diffusion Acceleration Module
- Research article: Hyper-SD: Trajectory Segmented Consistency Model for Efficient Image Synthesis
- Trajectory Consistency model project page.
- SDXL-Lightning project page.
Can this be used with other Loras, especially character ones?
Some loras may not be compatible with fast models. it should be easy to test it out.
Now I understand the differences between Turbo, Lighting and Hyper better. Before, I was very confused. Thanks Andrew 😊
This is great info! I always struggle with understanding Comfy UIs CFG and step values. Thank you for sharing the knowledge!!!
Excellent post, thanks 👍
Nice article! Really nice to read!
BR Daniel