
The SDXL Turbo model is a fine-tuned SDXL model that generates sharp images in 1 sampling step. In this post, you will learn:
- What SDXL Turbo is
- How to run SDXL Turbo on AUTOMATIC1111 and ComfyUI
- How to set up real-time prompting with SDXL Turbo
- Performance comparison
- Best generation settings
- SDXL Turbo vs LCM LoRA
Table of Contents
What is SDXL Turbo?
The SDXL model is a fine-tuned Stable Diffusion XL model trained to generate sharp images in 1 step.
Training
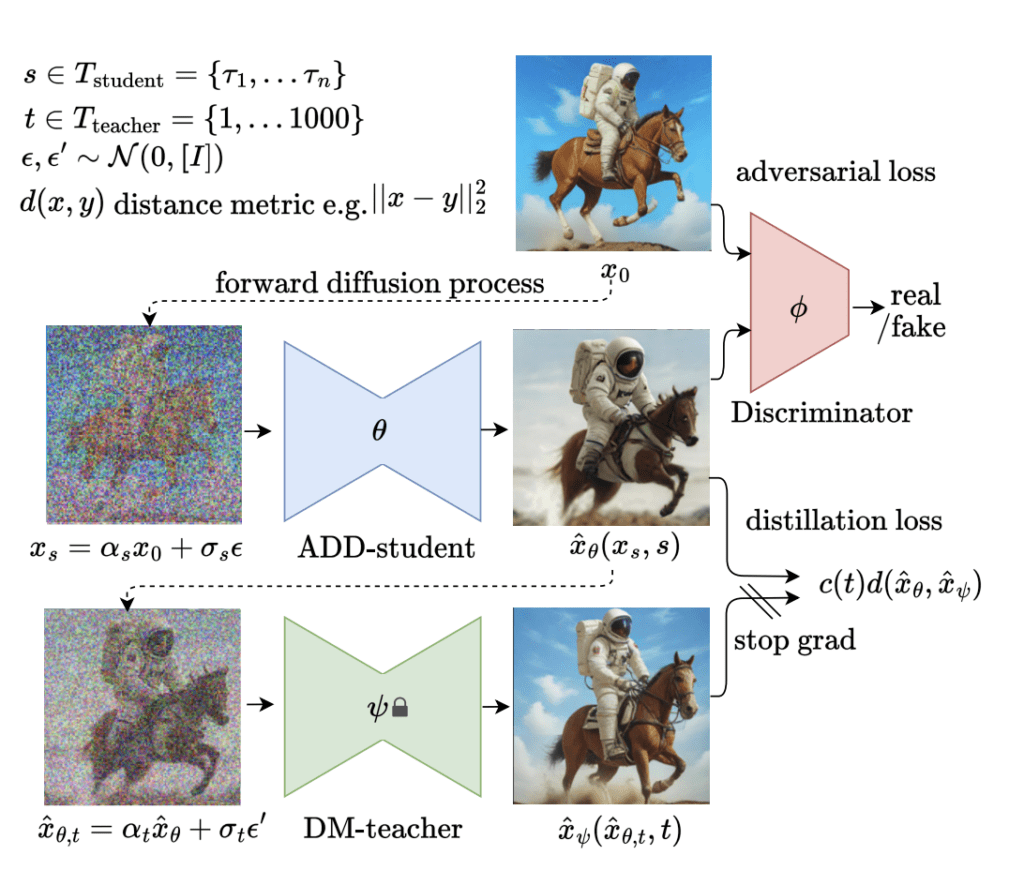
The training is described in the article Adversarial Diffusion Distillation by Axel Sauer and coworkers. The previous effort of speeding up sampling by distillation methods often leads to blurry images at low sampling steps. On the other hand, the Generative Adversarial Network (GAN) can generate crisp images but cannot match the quality of diffusion models.
The new Adversal Diffusion Distillation (ADD…) training method aims to get the best of both worlds. The student model (SDXL Turbo) is trained to generate the same result as the teacher model (SDXL) in one step. This is nothing new. The Consistency model and progressive distillation attempt to do exactly that. The trick for the SDXL Turbo model is adding a GAN discriminator to ensure the model generates high-quality images that are indistinguishable from the teacher model.
The training is summarized in the figure below.
Facts
The SDXL Turbo model is
- fine-tuned from the SDXL base model.
- trained to generate 512×512 images. But custom Turbo models like DreamShaper XL Turbo can generate legit SDXL-size (1024×1024) images.
Run SDXL Turbo with AUTOMATIC1111
Although AUTOMATIC1111 has no official support for the SDXL Turbo model, you can still run it with the correct settings. (You will learn why this is the case in the Settings section.)
You can use this GUI on Windows, Mac, or Google Colab. Check out the Quick Start Guide if you are new to Stable Diffusion. Check out the AUTOMATIC1111 Guide if you are new to AUTOMATIC1111.
Step 1. Download the SDXL Turbo model
Download the SDXL Turbo Model. Put it in the stable-diffusion-webui > models > Stable-diffusion.
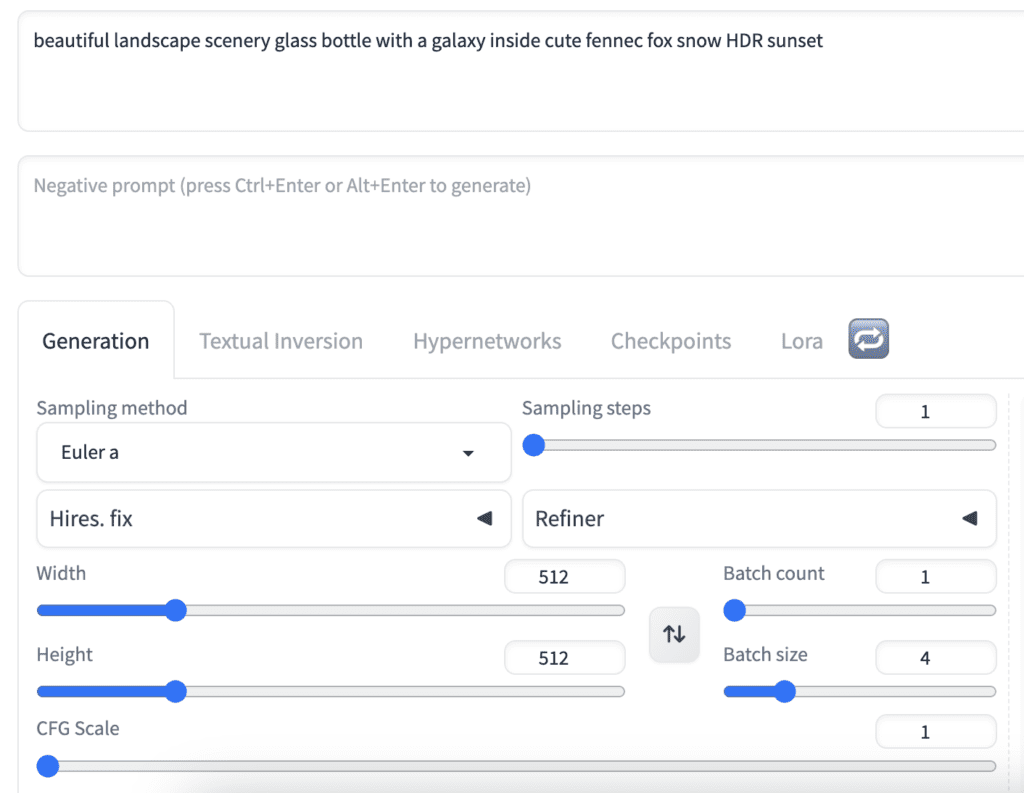
Step 2. Enter txt2img settings
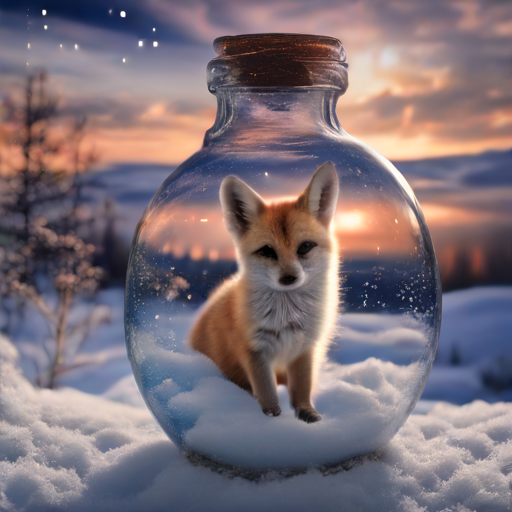
On the txt2img page of AUTOMATIC1111, select the sd_xl_turbo_1.0_fp16 model from the Stable Diffusion Checkpoint dropdown menu.
Prompt:
beautiful landscape scenery glass bottle with a galaxy inside cute fennec fox snow HDR sunset
- Sampling method: Euler a
- Sampling steps: 1
- Size: 512 x 512
- CFG Scale: 1
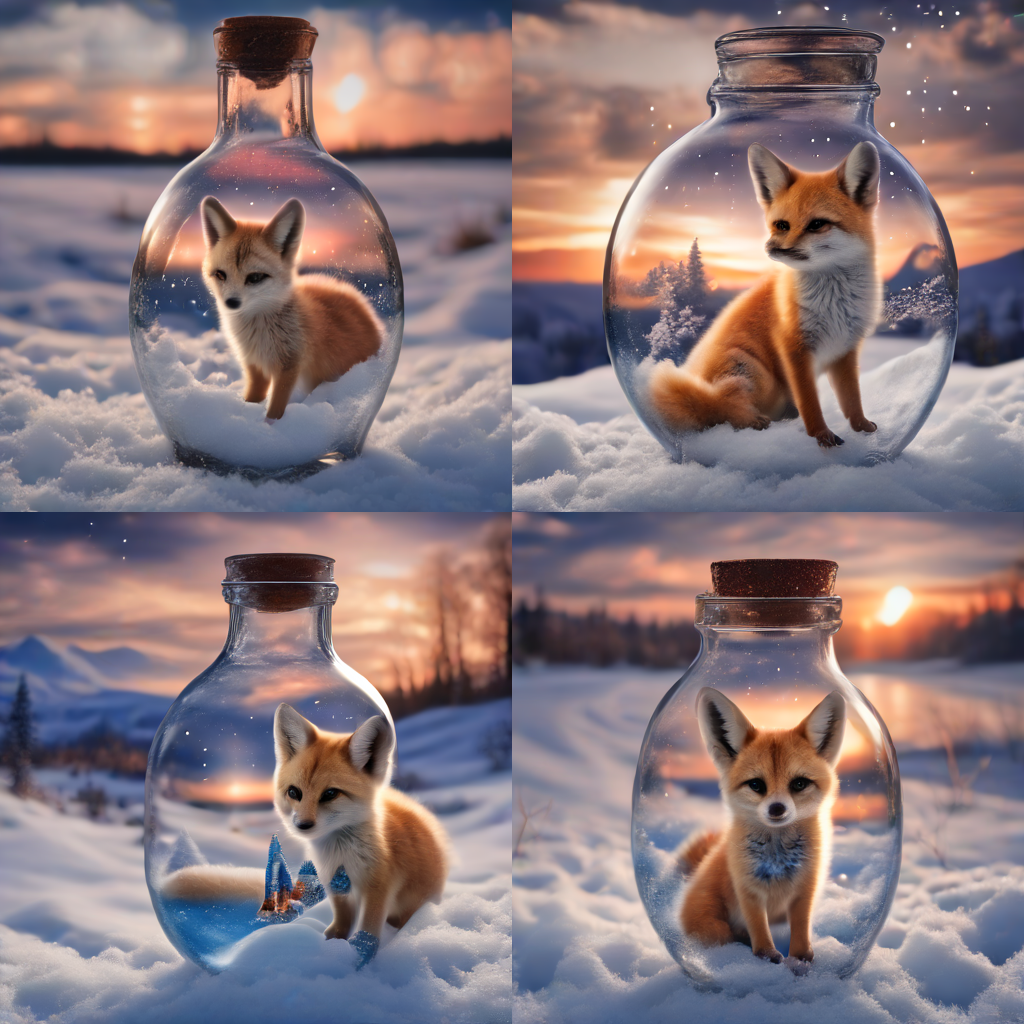
Step 3: Generate images
Press Generate. You should see some sharp images!
Run SDXL Turbo with ComfyUI
ComfyUI has official support for the SDXL Turbo model.
Read the ComfyUI installation guide and ComfyUI beginner’s guide if you are new to ComfyUI.
Step 1. Update ComfyUI
Follow the instructions to update ComfyUI.
Step 2. Load the SDXL Turbo workflow
Download the SDXL Turbo workflow below.
Drag and drop the workflow image file to ComfyUI to load the workflow.
Step 3. Download the SDXL Turbo model
Download the SDXL Turbo Model. Put it in the ComfyUI > models > checkpoints folder.
Step 4. Generate an image
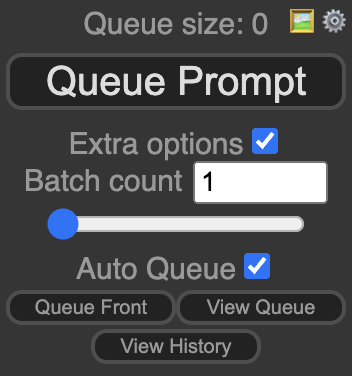
Click Queue Prompt to generate an image.
Real-time prompting
If you have a good GPU card, you can do interesting things locally, like real-time prompting on ComfyUI.
To enable real-time prompting in ComfyUI, check Extra Option and Auto Queue under the Queue Prompt button.
Best settings for SDXL Turbo
The working settings are quite different from other Stable Diffusion models. It’s worth paying attention to.
The observations below are from the official ComfyUI workflow with the Turbo scheduler.
CFG scale
Similar to the LCM LoRA, the CFG scale cannot deviate too much from 1.
The images start to degrade below a CFG scale of 1. The images are brighter and start to saturate when the CFG scale is slightly above 1.


Setting the CFG value to 1 to 1.2 works well.
Negative prompt
You specify what you don’t want to see in the negative prompt. It is an essential feature because there are images you cannot generate without using negative prompts.
At CFG of 1, the negative prompt has no effect. It doesn’t change a pixel.


At higher CFG values like 1.1 – 1.3, the negative prompt changes the image but does not achieve the intended effect. See the examples below.
At CFG = 1.2, no negative prompt:
Compared with CFG = 1.2 with the negative prompt “tree, car”, the brightness changes slightly, but the compositions are the same.
My recommendation is don’t bother with the negative prompt. It doesn’t work.
Sampling steps
The model is trained to do 1-step inference. It is evident in the degraded quality at high sampling steps 5 – 10. The denoiser cannot estimate the noise level correctly when it is too low.
Keep the sampling steps to 1 to 4.

Noise Schedule
The noise schedule defines the noise level at each sampling step.
The Turbo noise schedule is quite different from all other noise schedules. The noise almost drops linearly with the sampling step, while others drop faster in the beginning. For this reason, other noise schedules may not work well with the SDXL Turbo model.
But in practice, using the default txt2img workflow with the Karras noise schedule and the Euler ancestral sampler yields a similar result.
The best part is if you use 1 step, the Turbo and Karas schedules are the same. That’s why SDXL Turbo works on AUTOMATIC1111 without official support!
Use a low sampling step 1 – 4. Either the Turbo or Karras noise schedules are fine.
Performance comparison
Speed on Mac
Mac is not cut for running Stable Diffusion because most powerful GUIs do not have native code to take advantage of Apple Silicon. Let’s see if SDXL Turbo changes that.
I will compare the SDXL turbo and v1.5 base models since they both produce 512×512 images. Note that the SDXL Turbo is a larger model compared to v1.5 but requires fewer steps.
ComfyUI
On my freshly restarted Apple M1, SDXL Turbo takes 71 seconds to generate a 512×512 image with 1 step with ComfyUI. Stable Diffusion v1.5 takes 41 seconds with 20 steps. So, SDXL Turbo is still slower. This is due to the larger size of the SDXL Turbo model.
AUTOMATIC1111
The speed on AUTOMATIC1111 is quite different. Again, using an Apple M1, SDXL Turbo takes 6 seconds with 1 step, and Stable Diffusion v1.5 takes 35 seconds with 20 steps. The difference is likely due to the difference in memory management. ComfyUI seems to be offloading the model from memory after generation.
Speed on Windows
Equipped with an Nvidia GPU card, the sampling steps on a Windows machine are the bottleneck. I do see the speed gain of SDXL Turbo when comparing real-time prompting with SDXL Turbo and SD v1.5 in ComfyUI.
Image quality
Let’s do a few comparisons in this section.
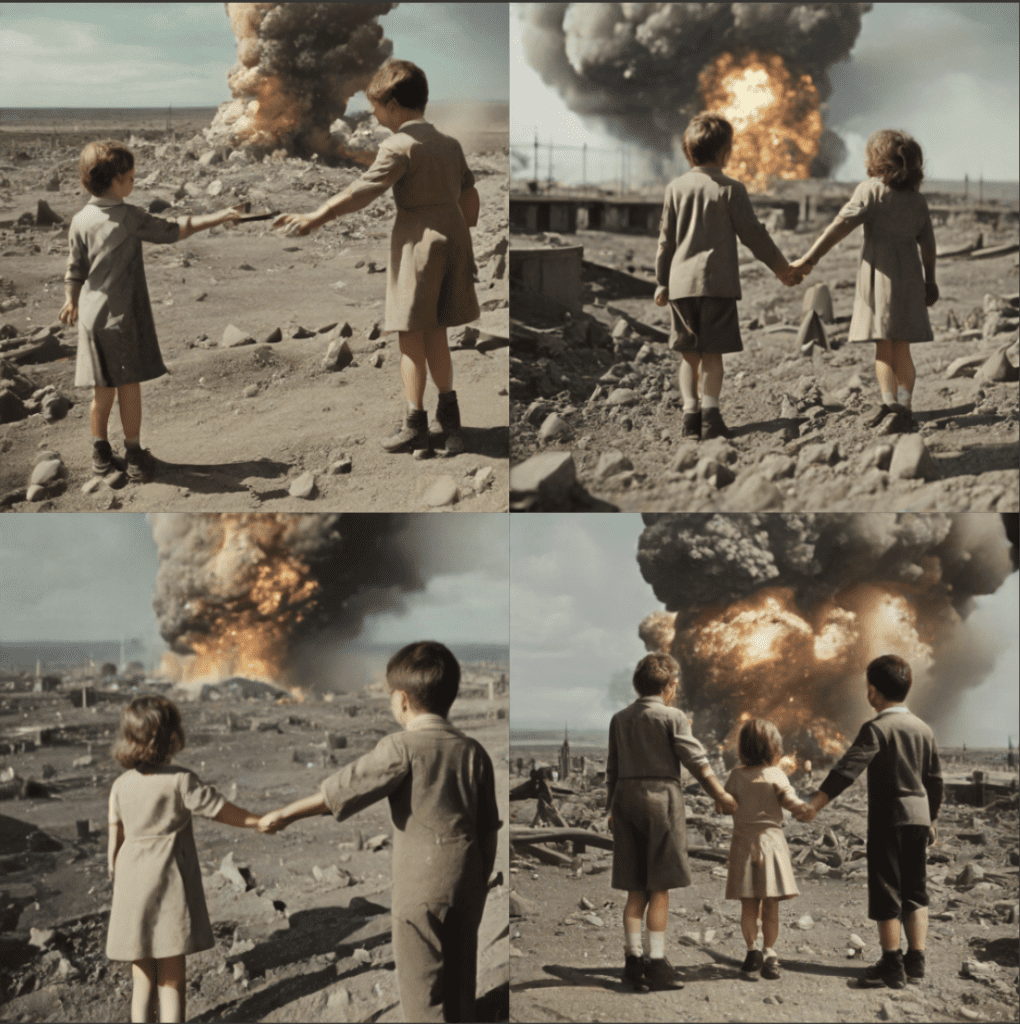
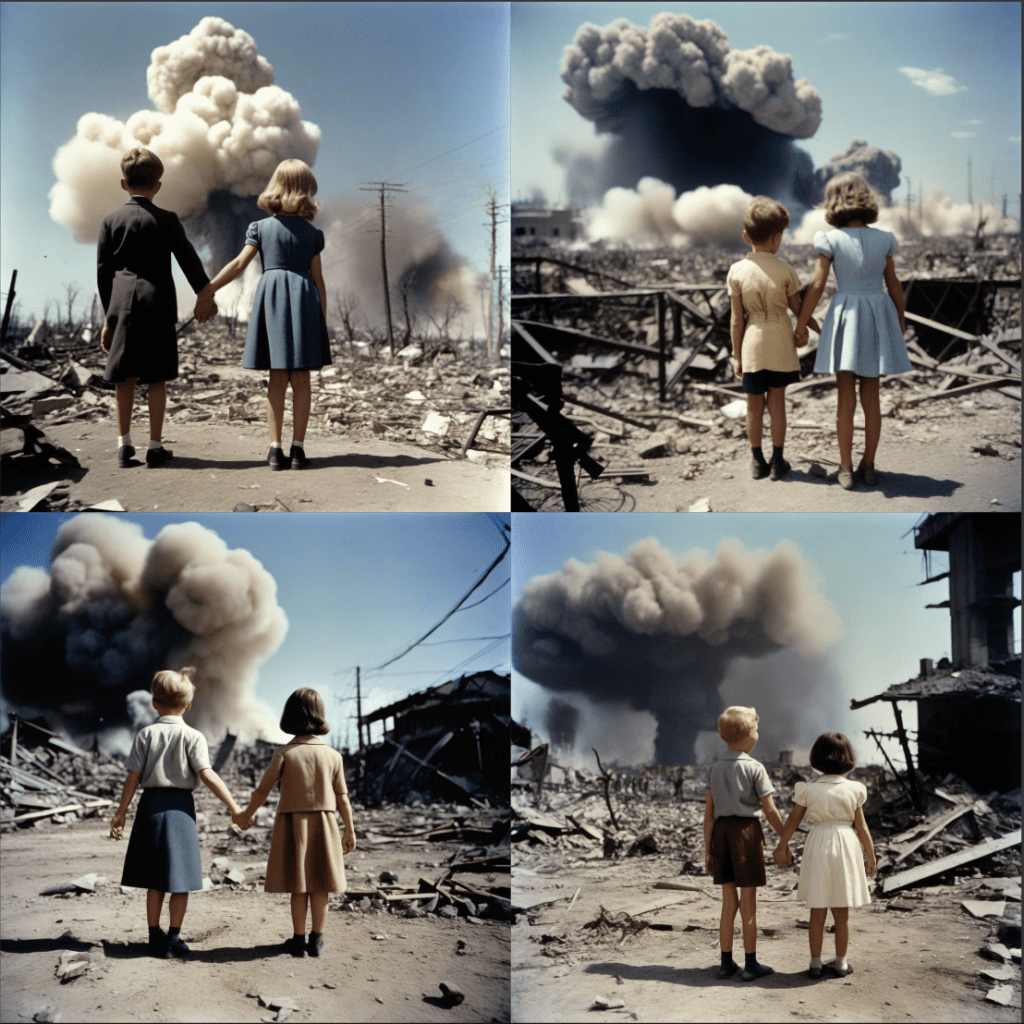
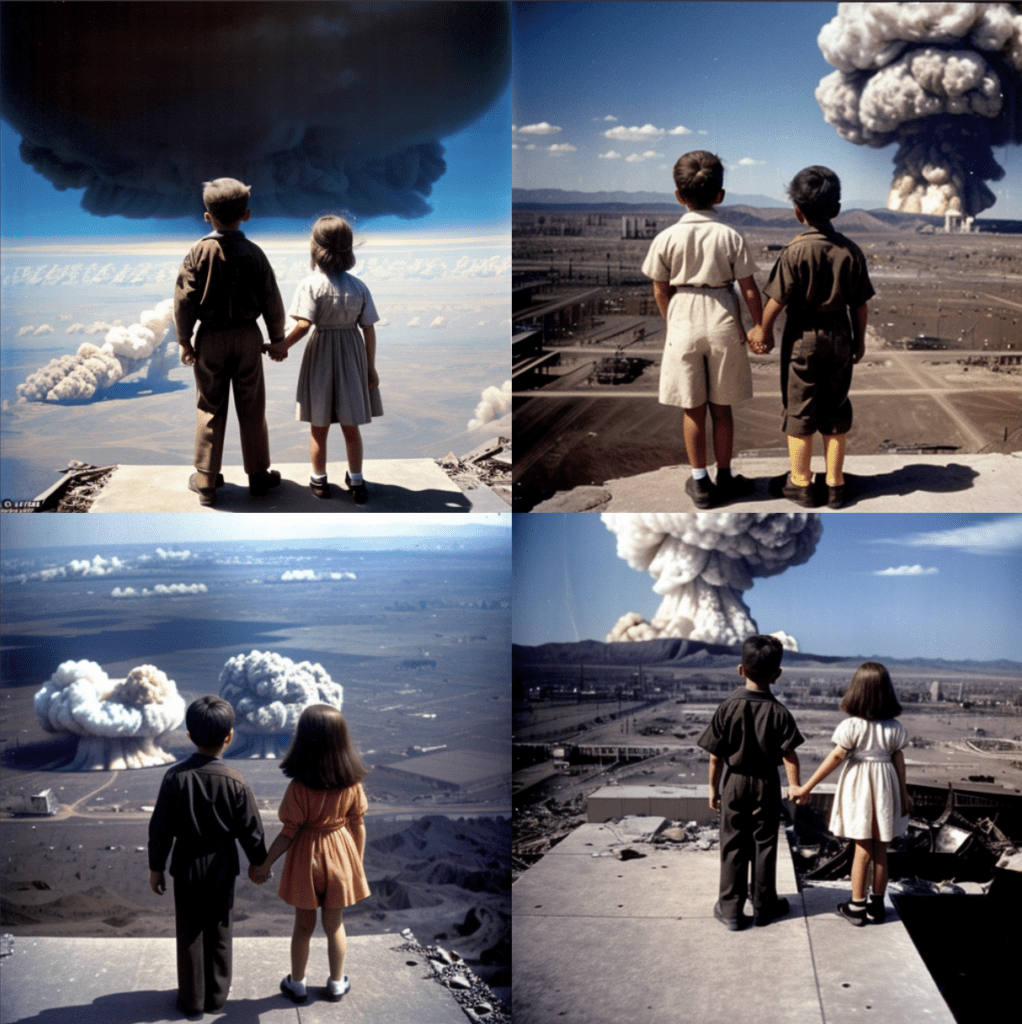
A color photo of a young boy and girl holding hands, witnessing the aftermath of an atomic bomb detonation from an elevated vantage point.
SDXL Turbo:
SDXL Base: (1024×1024)
Realistic Vision (v1.5 model):
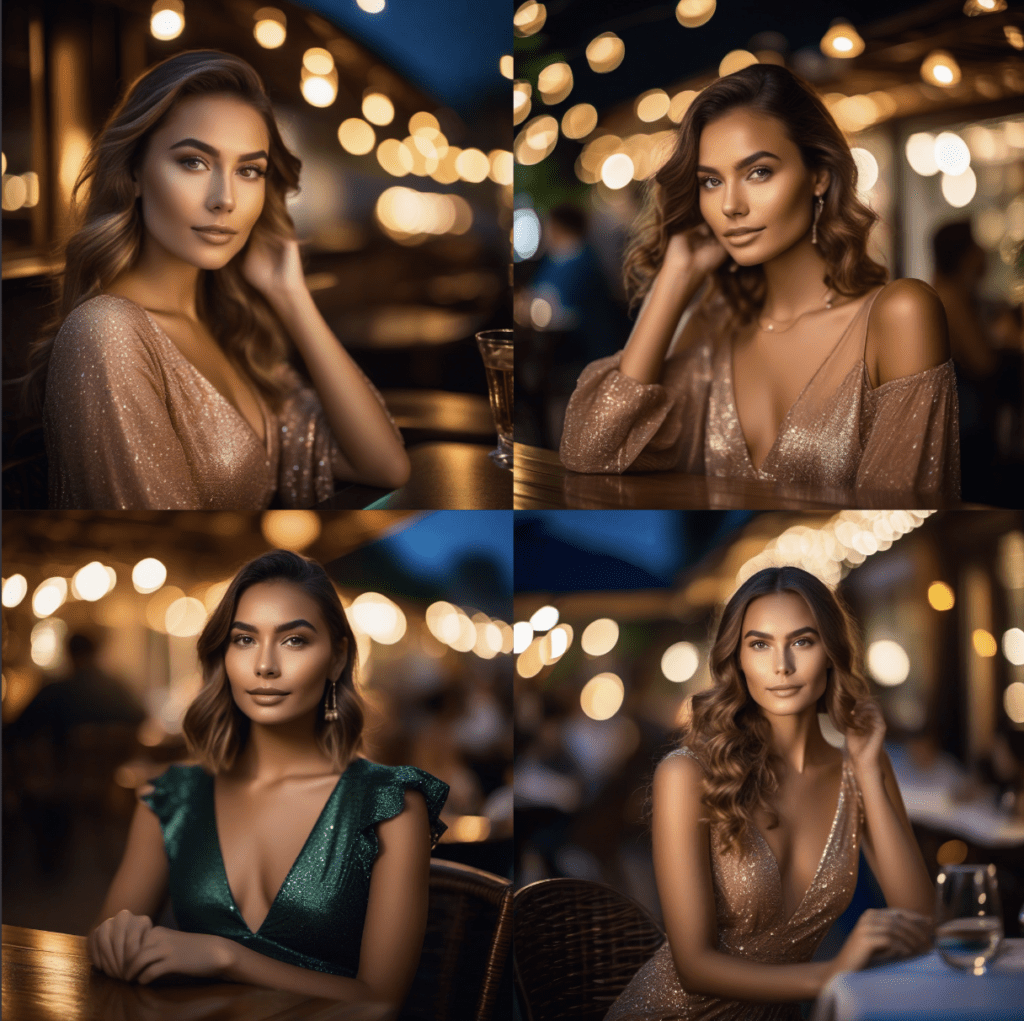
Now, let’s compare a photoshoot style with the following prompt and negative prompt.
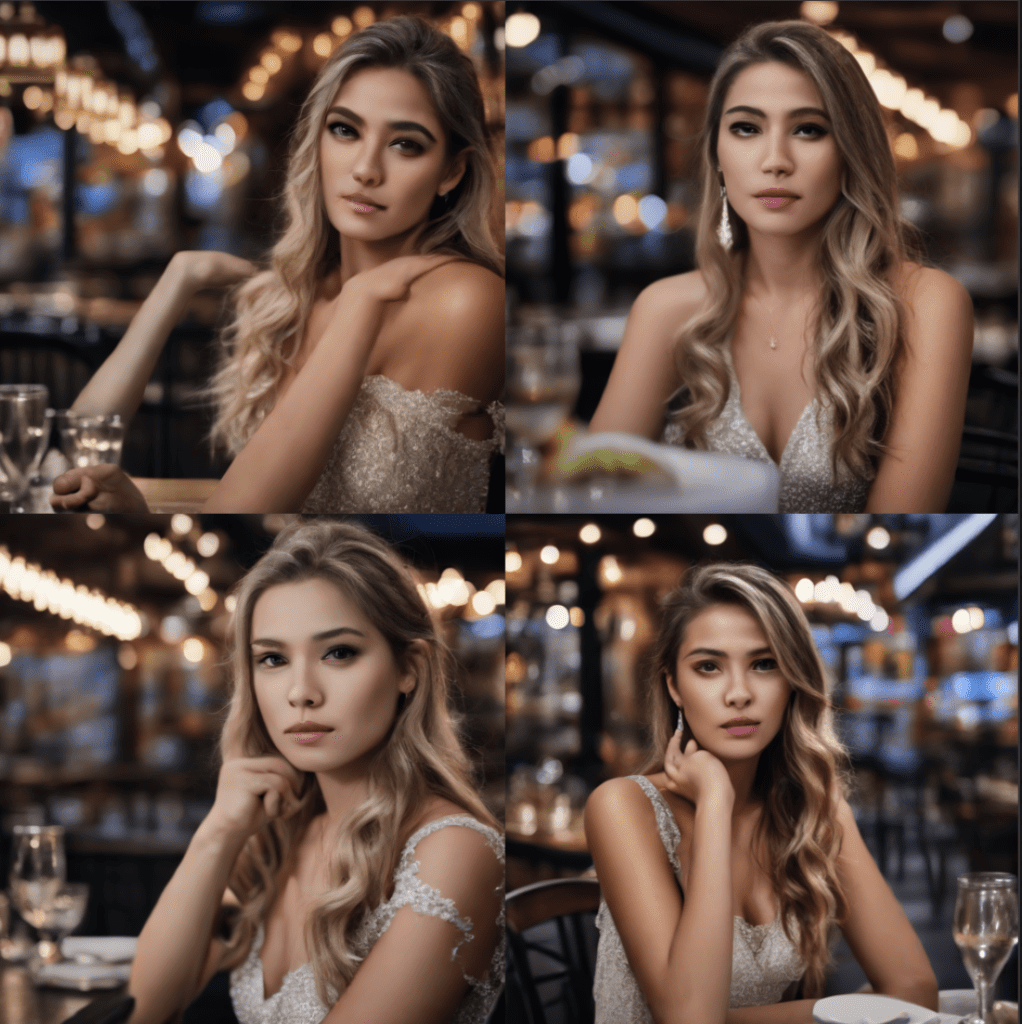
photo of young woman, highlight hair, sitting outside restaurant, wearing dress, rim lighting, studio lighting, looking at the camera, dslr, ultra quality, sharp focus, tack sharp, dof, film grain, Fujifilm XT3, crystal clear, 8K UHD, highly detailed glossy eyes, high detailed skin, skin pores
disfigured, ugly, bad, immature, cartoon, anime, 3d, painting, b&w
SDXL Turbo:
SDXL:
Realistic Vision:
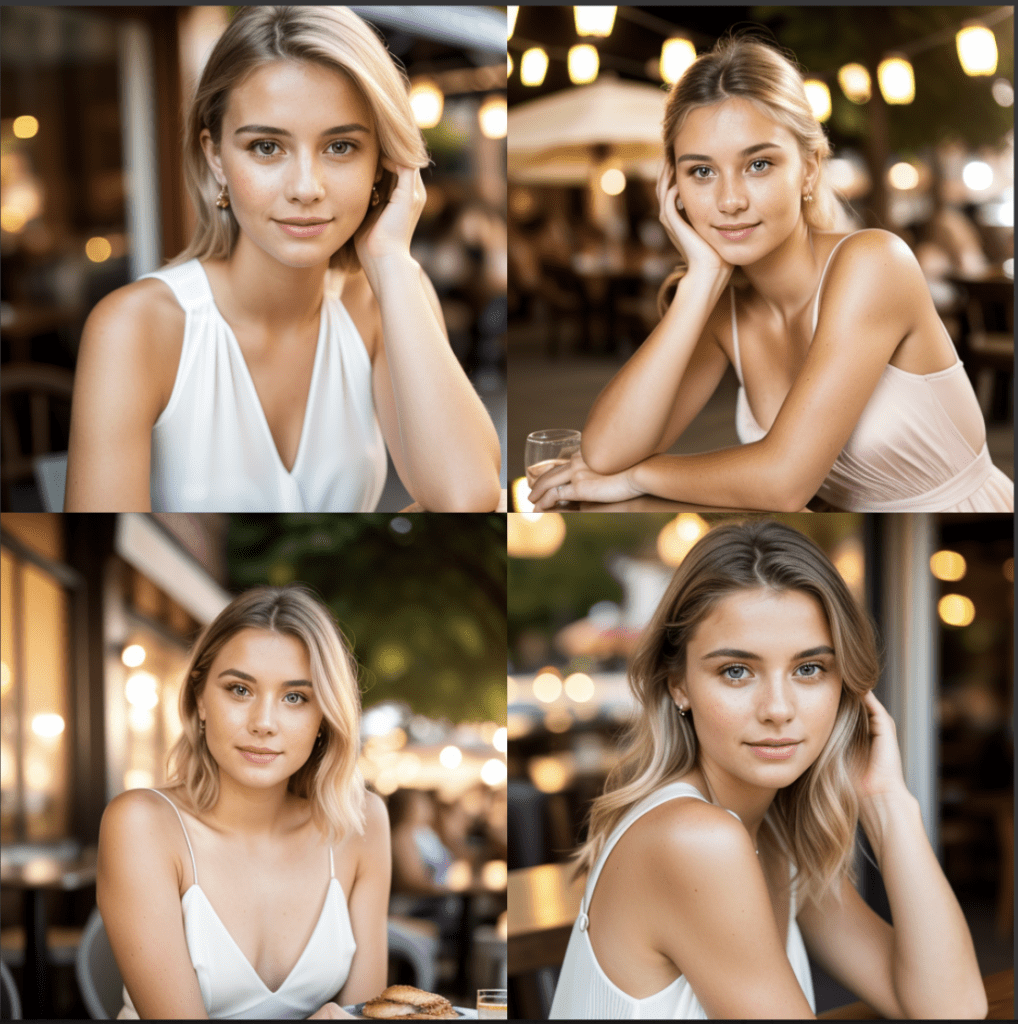
It is not clear if SDXL Turbo matches the quality of a v1.5 or SDXL models. Perhaps it is a base model meant for further fine-tuning. It seems to be more prone to generating duplicate images and incorrect anatomy. The fact that negative prompts don’t work does not help.
SDXL Turbo vs LCM-LoRA
These two speed-up technology came out almost at the same time. Let’s do a comparison to see which one you should use.
Quality
Although delivering unprecedented speed, the lower image quality of the SDXL Turbo model is likely to limit its application. I hope this can be resolved by further fine-tuning with high-quality images.
LCM-LoRA, on the other hand, does not have the burden of fine-tuning. It is designed to be a universal accelerator for any Stable Diffusion model. It can take advantage of fine-tuning of other models.
The XL LCM-LoRA speeds up generations of 1024×1024 images. SDXL Turbo can only generate 512×512 images.
In this area of quality, LCM-LoRA has the upper hand.
LCM-LoRA with SDXL 1.0 base model: (1024×1024, 4 steps, LCM sampler)
SDXL Turbo: (512×512, 1 step, Euler a sampler)
Speed
SDXL Turbo achieves the fastest speed possible: 1 step. LCM-LoRA needs at least 4 steps. SDXL Turbo is the winner in speed without question.
Flexibility
LCM-LORA is more flexible. It is a LoRA, which can be used with any Stable Diffusion model. SDXL Turbo is a checkpoint model.
Final Thoughts
It would be nice if Stability AI could provide a LoRA version of Turbo. I’m not sure what the technical hurdle is, but if that works, we can do one step of any SDXL model!
Likewise, training a 1024×1024 version would be great. Part of the appeal of the SDXL model is higher image resolution. The SDXL Turbo model undoes that.
The inability to use negative prompts is a bumper. This significantly limits the model’s capability.
Fine-tuned SDXL Turbo models
Fine-tuned SDXL Turbo models started appearing shortly after the release of SDXL Turbo. This section is an addition to the original article, documenting the testing of these fine-tuned models.
DreamShaper XL Turbo
Experience users are no strangers to the DreamShaper series models. They are general-purpose models that deliver more aesthetic results.
Now, they have released the DreamShaper XL Turbo. It is significantly faster thanks to the Turbo training.
The recommended settings are:
- Sampling steps: 4 (!)
- Sampling method: DPM++ SDE Karras
- CFG Scale: 2
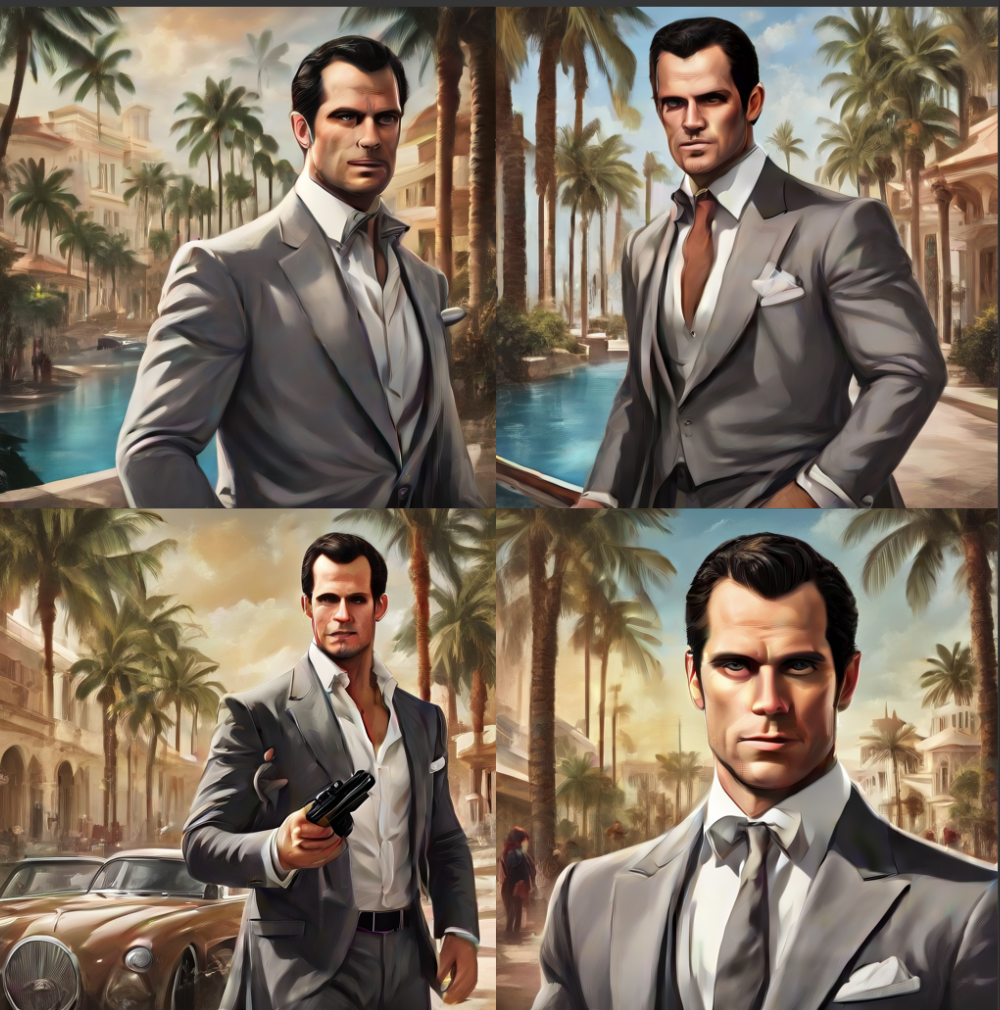
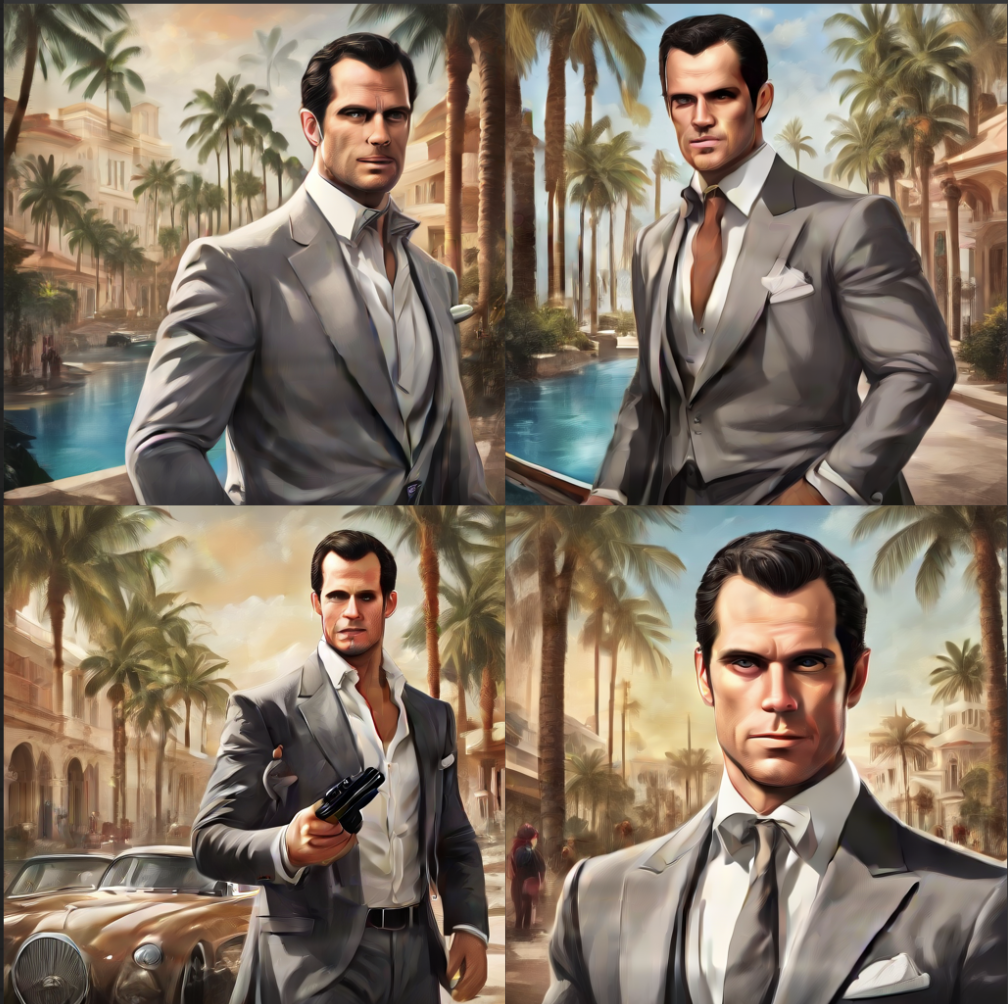
Below is a comparison between the DreamShaper Turbo and the Alpha 2 models. The Alpha 2 model uses 25 steps and CFG Scale of 7 instead.
Dr. Evil, (Tony Stark:0.9), photo of a man working out in gym, looking at the camera, dslr, ultra quality, sharp focus, tack sharp, dof, film grain, Fujifilm XT3, crystal clear, 8K UHD, highly detailed glossy eyes, high detailed skin, skin pores
The best part is the DreamShaper Turbo model can generate SDXL image size (close to 1024 x 1024)!
And negative prompts work!
mustache
I expect more Turbo XL models coming. Reducing the sampling step to 4 will definitely help global warming…
Resources
Introducing SDXL Turbo: A Real-Time Text-to-Image Generation Model – Official Press release
SDXL Turbo model card (Hugging Face)
Adversarial Diffusion Distillation (2023) – Research paper
I’m on an M2 (Max) Mac and seeing several updates a second. I can put “Auto queue” on and it’s doing about 2-3 a second.
Hello Andrew, Is it possible to create stable diffusion SDXl models with this method ? If yes how ? Everytime I try to create a Custom model and ticking SDXL I have the same error :
subprocess.CalledProcessError: Command ‘[‘/usr/bin/python3’, ‘./sdxl_train_network.py’, ‘–pretrained_model_name_or_path=runwayml/stable-diffusion-v1-5’, ‘–train_data_dir=/content/drive/MyDrive/AI_Project2/training/XIAPictures’, ‘–resolution=512,650’, ‘–output_dir=/content/drive/MyDrive/AI_Project2/Lora’, ‘–network_alpha=64’, ‘–save_model_as=safetensors’, ‘–network_module=networks.lora’, ‘–text_encoder_lr=5e-05’, ‘–unet_lr=0.0001’, ‘–network_dim=64’, ‘–output_name=Xiatrainingsdxl1’, ‘–lr_scheduler_num_cycles=1’, ‘–no_half_vae’, ‘–learning_rate=0.0001’, ‘–lr_scheduler=constant’, ‘–train_batch_size=3’, ‘–max_train_steps=567’, ‘–save_every_n_epochs=1’, ‘–mixed_precision=fp16’, ‘–save_precision=fp16’, ‘–seed=1234’, ‘–caption_extension=.txt’, ‘–cache_latents’, ‘–optimizer_type=AdamW8bit’, ‘–max_data_loader_n_workers=1’, ‘–clip_skip=2’, ‘–bucket_reso_steps=64’, ‘–mem_eff_attn’, ‘–xformers’, ‘–bucket_no_upscale’, ‘–noise_offset=0.05′]’ returned non-zero exit status 1.
Can you help us with that ? I used excatly the same settings as you said except for the model
It seems you are trying to train a LoRA? (This is not the right post)
It’s on my list to update the post for SDXL models.
You do not need a negative prompt at all. Quoting directly from the SDXL Turbo Model Card:
“SDXL-Turbo does not make use of guidance_scale or negative_prompt, we disable it with guidance_scale=0.0”
Hi, Turbo model is not working in A1111. I have solid black image in result.
Can you detail the minimum hardware requirements for both SDXL Turbo and LCM-LoRA?
Please do create a guide about leonardos sdxl models, please do a comparison, i think it will help since many people are using leonardo. Thanks
im on a mac (M1) and it’s taking 3-4 seconds, nowhere near the 71 seconds you see.
I was using the ComfyUI workflow. I see the sampling steps can take that fast, but the total generation time is a lot slower. What’s your setup?
Thank you for a very useful article.
Your ComfyUI workflow file (sdxlturbo_example-1.png) doesn’t include the necessary tEXt chunks. Perhaps your server stripped them out.
There is an SDXL Turbo workflow at https://comfyanonymous.github.io/ComfyUI_examples/sdturbo/ I don’t know if this differs from yours.
Thanks for reporting. Yes they are the same. I now change it to json.