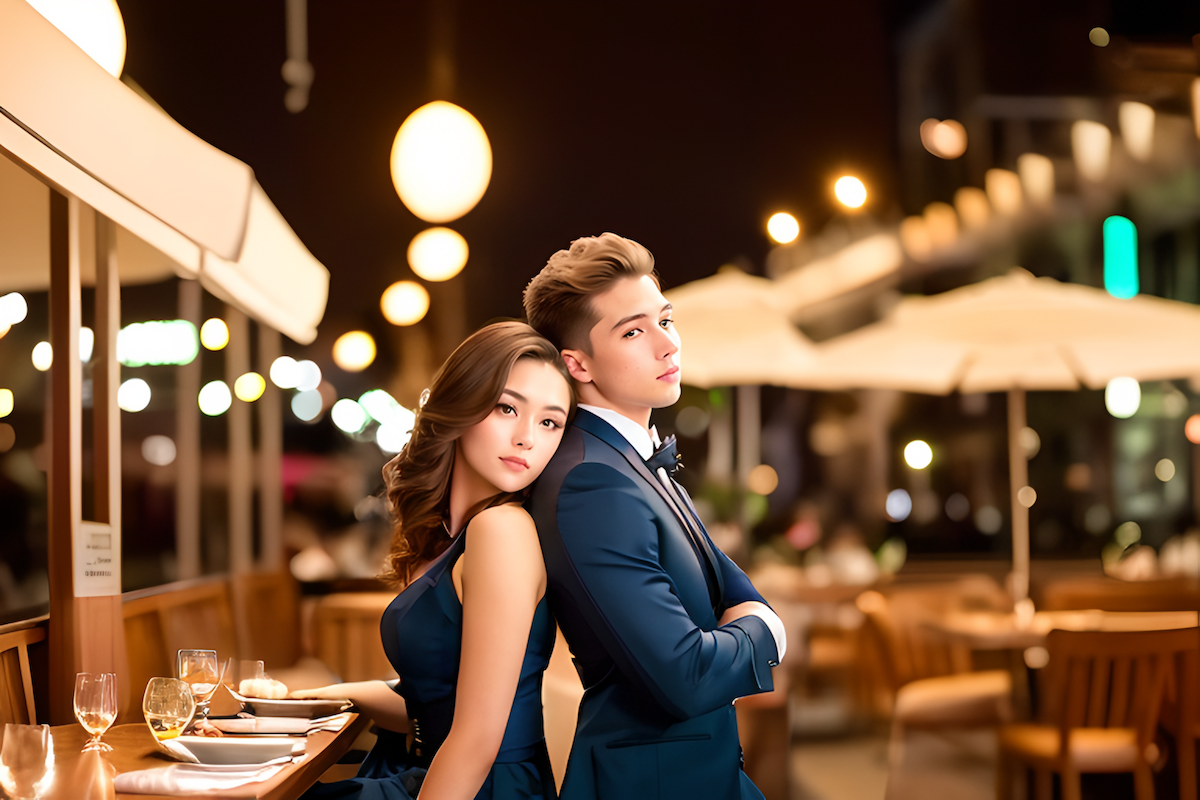
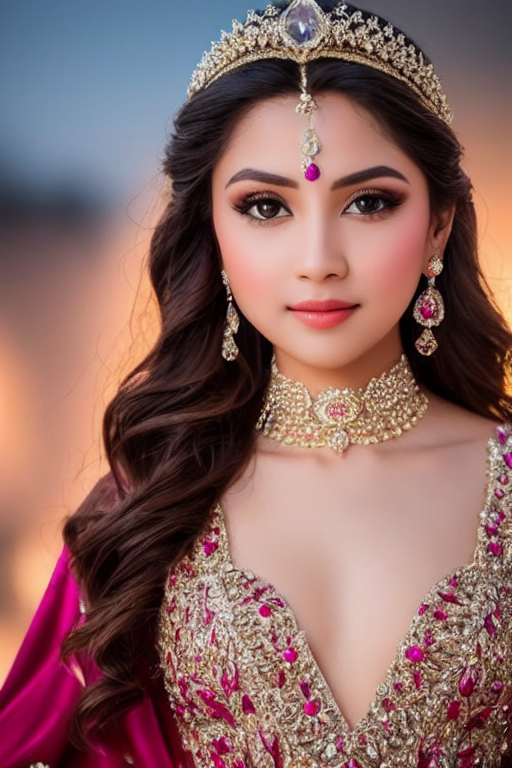
One of the most popular uses of Stable Diffusion is to generate realistic people. They can look as real as taken from a camera. In this post, you will learn the mechanics of generating photo-style portrait images. You will learn about prompts, models, and upscalers for generating realistic people.
Table of Contents
Software
We will use AUTOMATIC1111 Stable Diffusion GUI to generate realistic people. You can use this GUI on Windows, Mac, or Google Colab.
Prompt
In this section, you will learn how to build a high-quality prompt for realistic photo styles step-by-step.
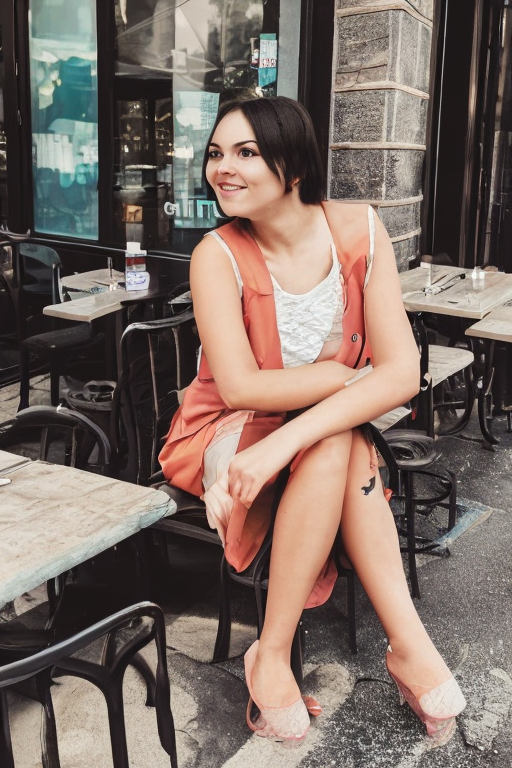
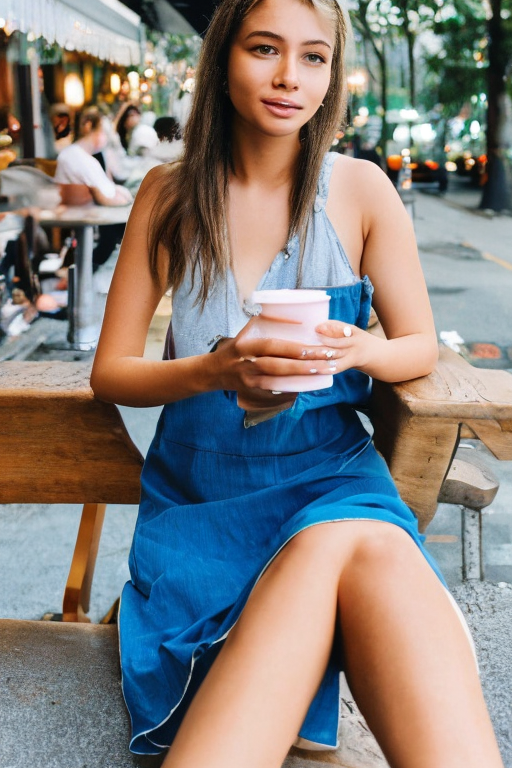
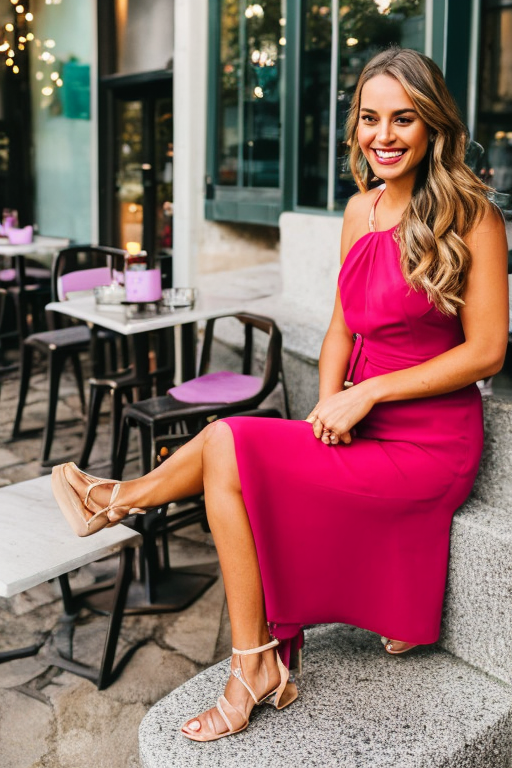
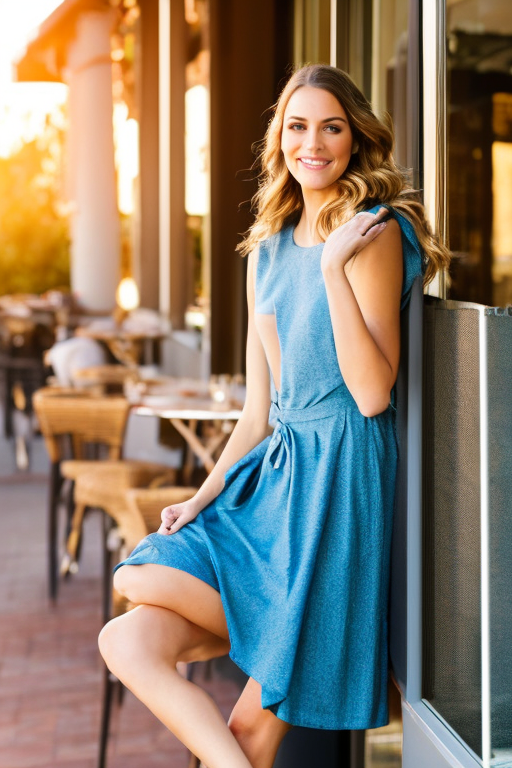
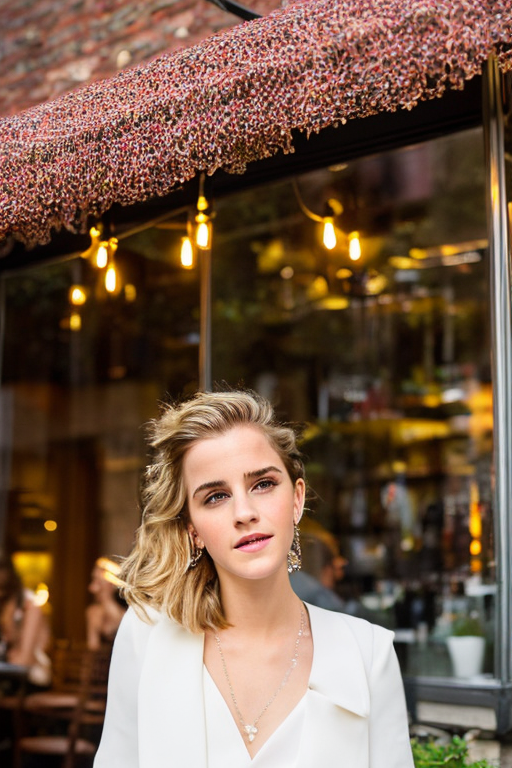
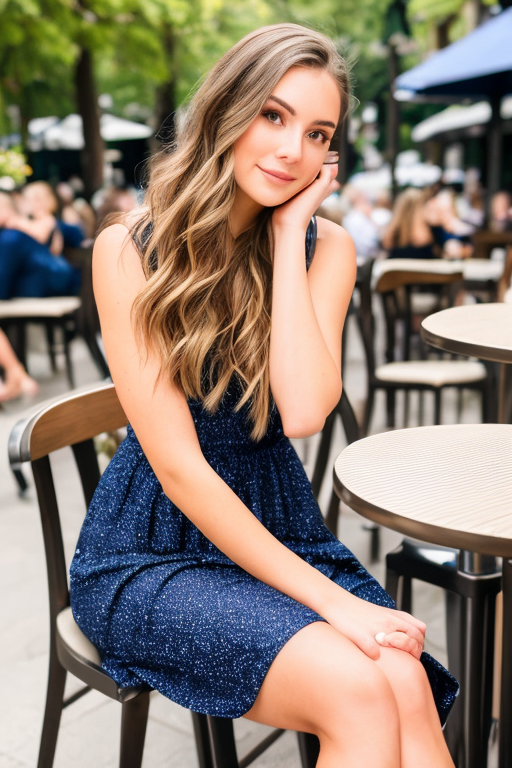
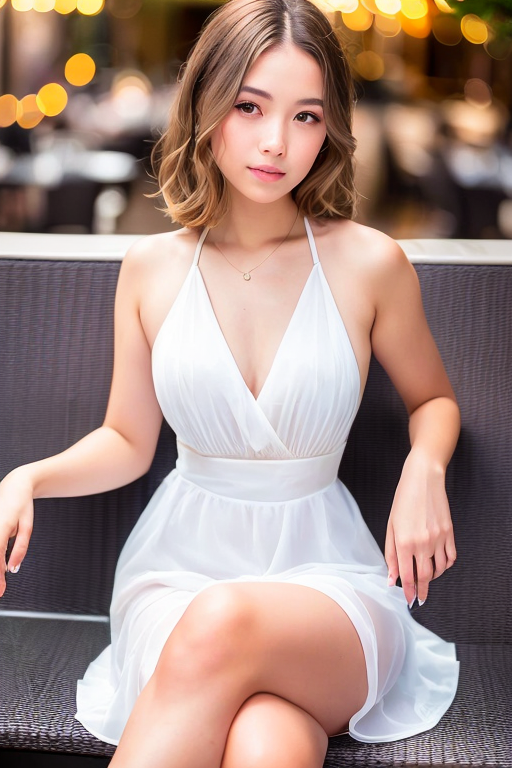
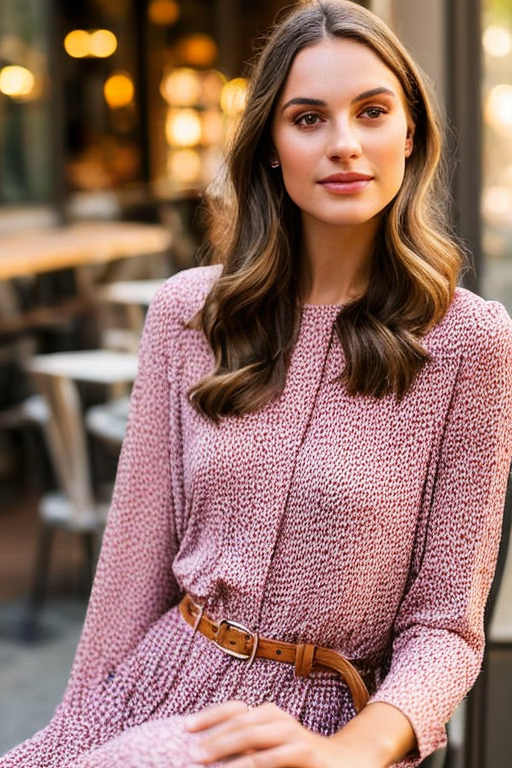
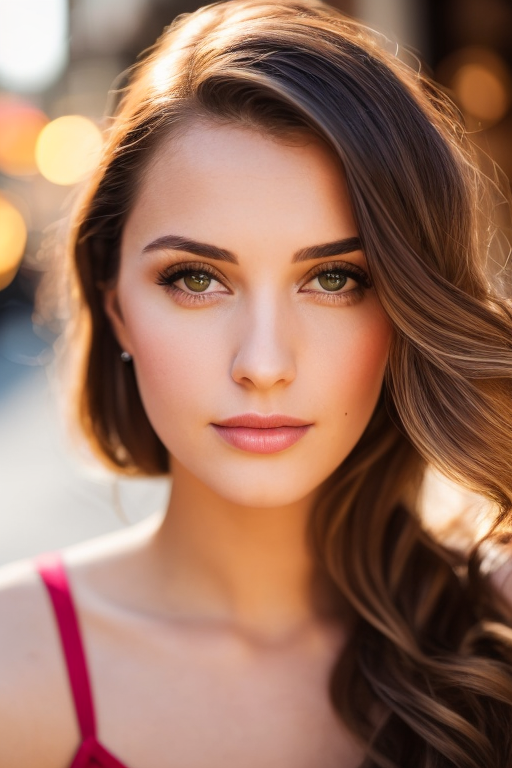
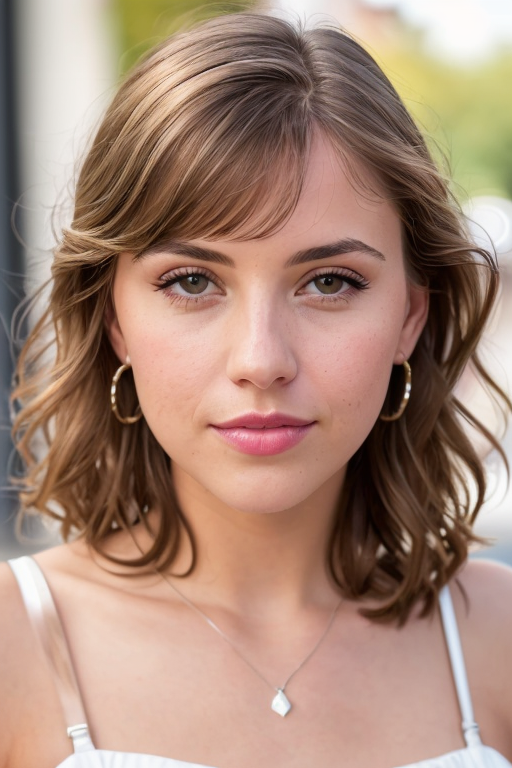
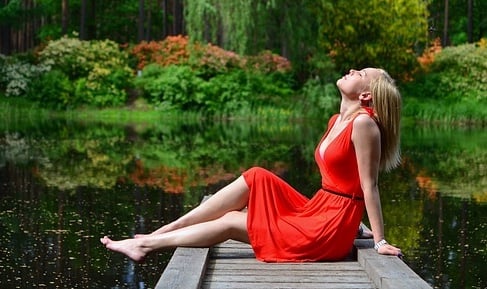
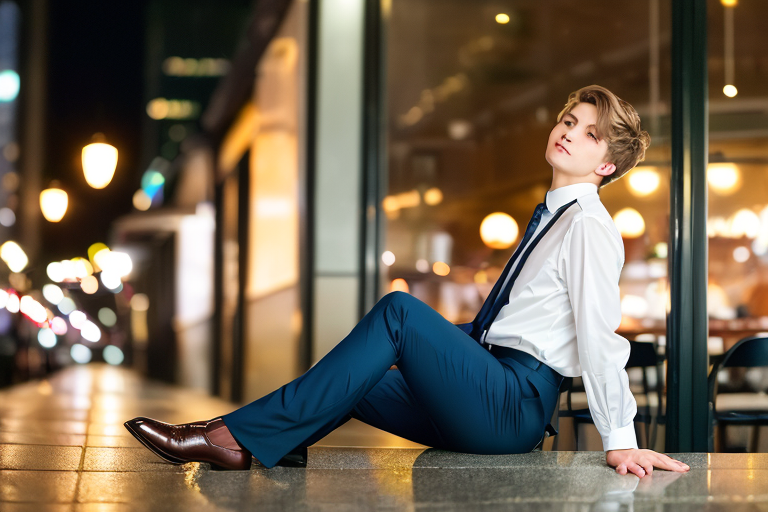
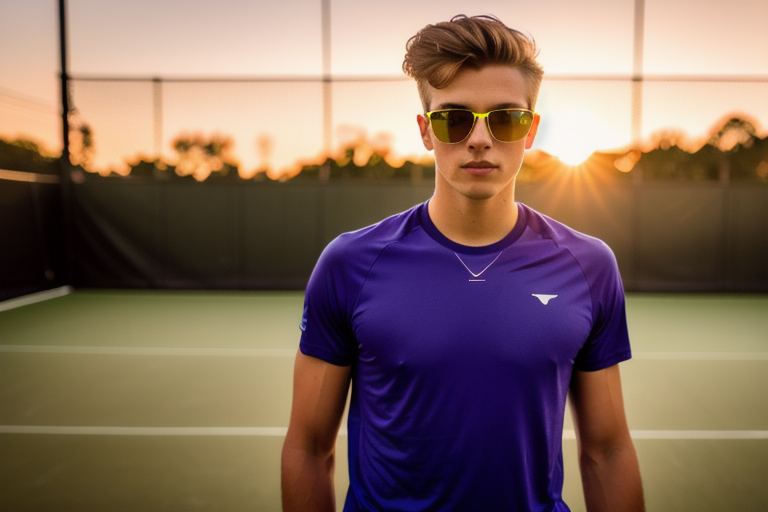
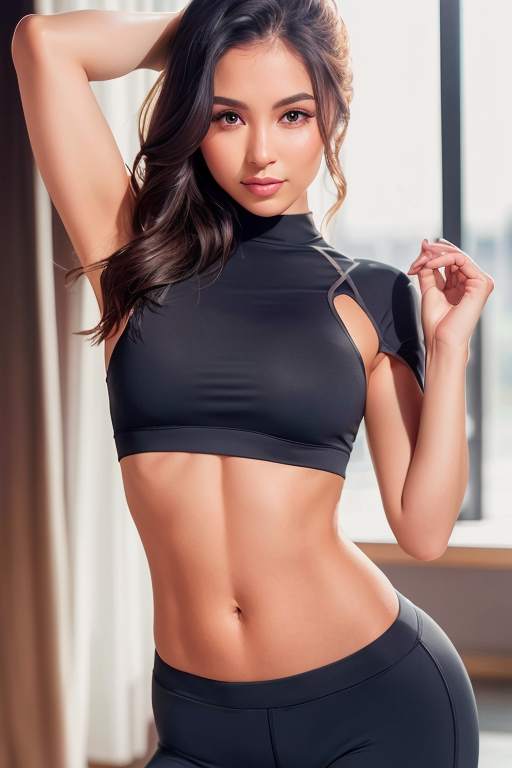
Let’s start with a simple prompt of a woman sitting outside of a restaurant. Let’s use the v1.5 base model.
Prompt:
photo of young woman, highlight hair, sitting outside restaurant, wearing dress
Model: Stable Diffusion v1.5
Sampling method: DPM++ 2M Karras
Sampling steps: 20
CFG Scale: 7
Size: 512×768

Well, that didn’t go so well…
Negative prompt
Let’s add a negative prompt. This negative prompt is quite minimalistic. It is intended to generate better anatomy and steer away from non-realistic styles.
Negative Prompt:
disfigured, ugly, bad, immature, cartoon, anime, 3d, painting, b&w
It’s doing something: The women look better. The Upper bodies look pretty good.
But the anatomy of the lower bodies is still problematic. There’s still a lot of room for improvement.
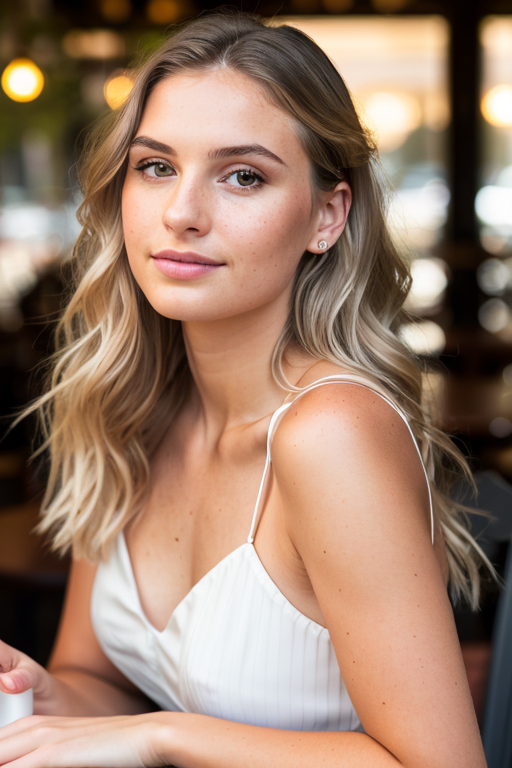
Lighting keywords
A large part of a photographer’s job is to set up good lighting. A good photo has interesting lights. The same applies to Stable Diffusion. Let’s add some lighting keywords and a keyword that controls the viewing angle.
- rim lighting
- studio lighting
- looking at the camera
Prompt:
photo of young woman, highlight hair, sitting outside restaurant, wearing dress, rim lighting, studio lighting, looking at the camera
Negative prompt:
disfigured, ugly, bad, immature, cartoon, anime, 3d, painting, b&w
The photos instantly look more interesting. You may notice the anatomy is not quite right. Don’t worry. There are many ways to fix it. I will tell you in the later part of the article.
Camera keywords
Keywords like dslr, ultra quality, 8K, UHD can improve the quality of images.
Prompt:
photo of young woman, highlight hair, sitting outside restaurant, wearing dress, rim lighting, studio lighting, looking at the camera, dslr, ultra quality, sharp focus, tack sharp, dof, film grain, Fujifilm XT3, crystal clear, 8K UHD
Negative prompt:
disfigured, ugly, bad, immature, cartoon, anime, 3d, painting, b&w
I cannot say they are definitely better, but it certainly doesn’t hurt to include them…
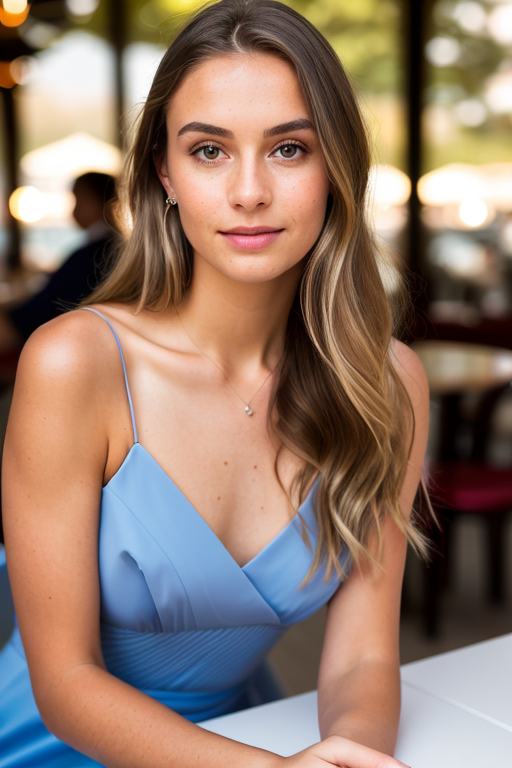
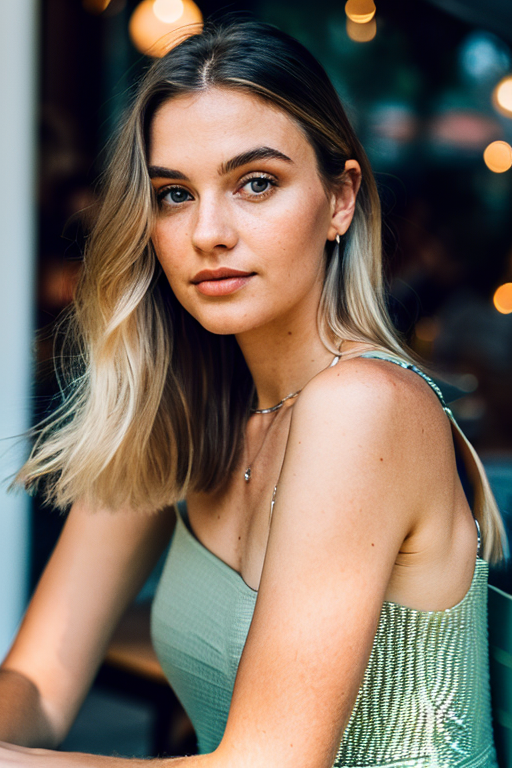
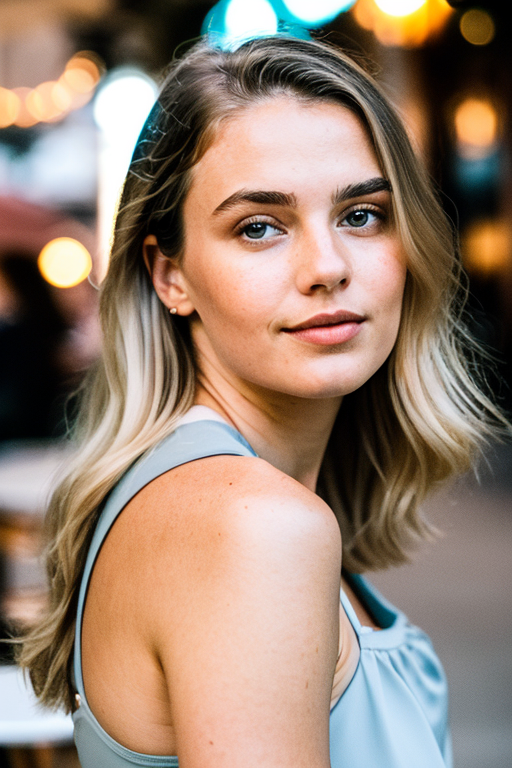
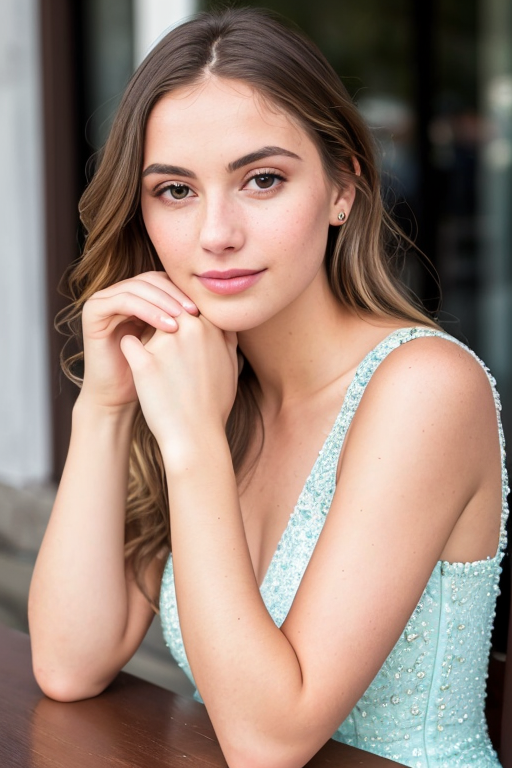
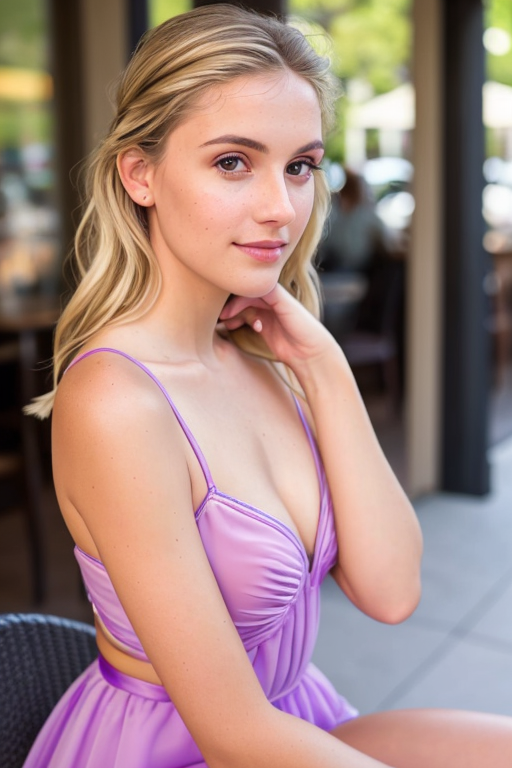
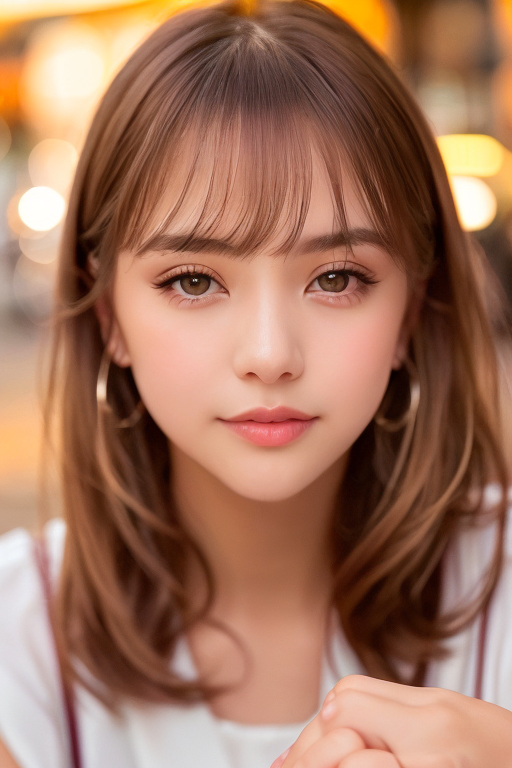
Facial details
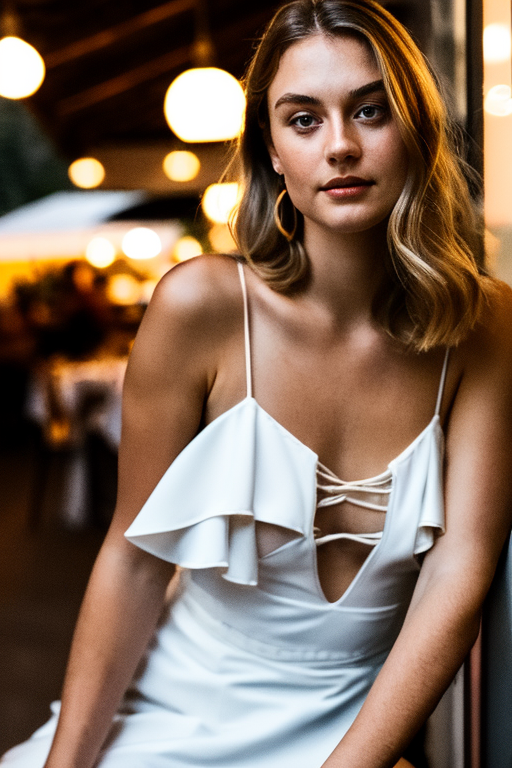
Finally, some keywords can be used as sweeteners to describe eyes and skin. These keywords intend to render a more realistic face.
- highly detailed glossy eyes
- high detailed skin
- skin pores
A side effect of using these keywords is drawing the subject closer to the camera.
Putting them together, we have the following final prompt.
Prompt:
photo of young woman, highlight hair, sitting outside restaurant, wearing dress, rim lighting, studio lighting, looking at the camera, dslr, ultra quality, sharp focus, tack sharp, dof, film grain, Fujifilm XT3, crystal clear, 8K UHD, highly detailed glossy eyes, high detailed skin, skin pores
Negative prompt
disfigured, ugly, bad, immature, cartoon, anime, 3d, painting, b&w
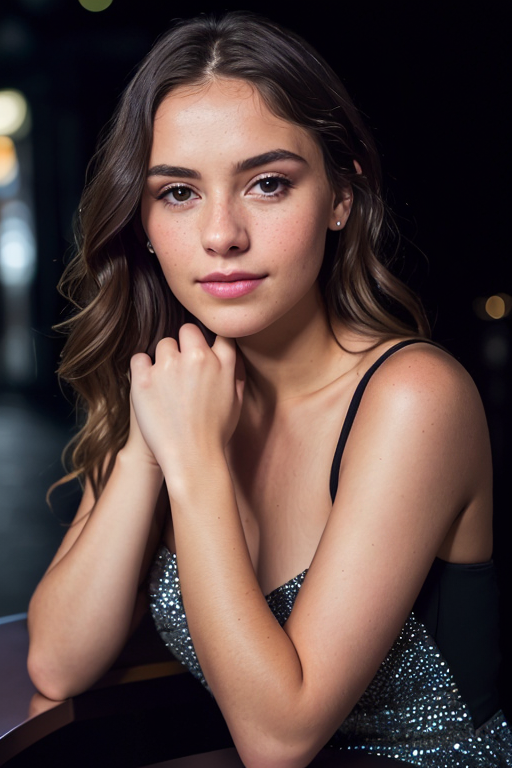
Are you surprised that the base model can generate these high-quality realistic images? We haven’t even used special photo-realistic models yet. It will only get better.
Controlling faces
Blending two names
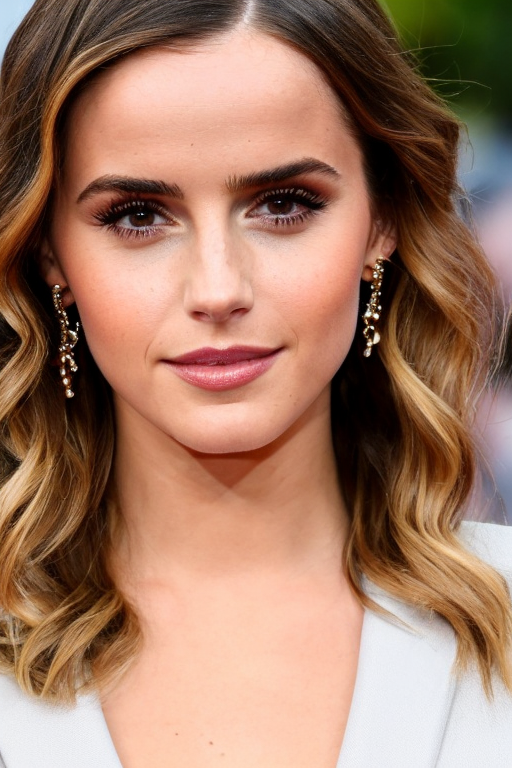
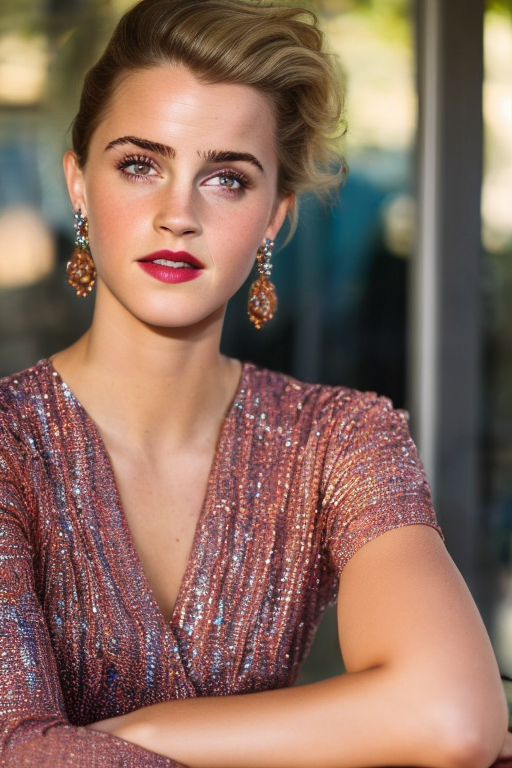
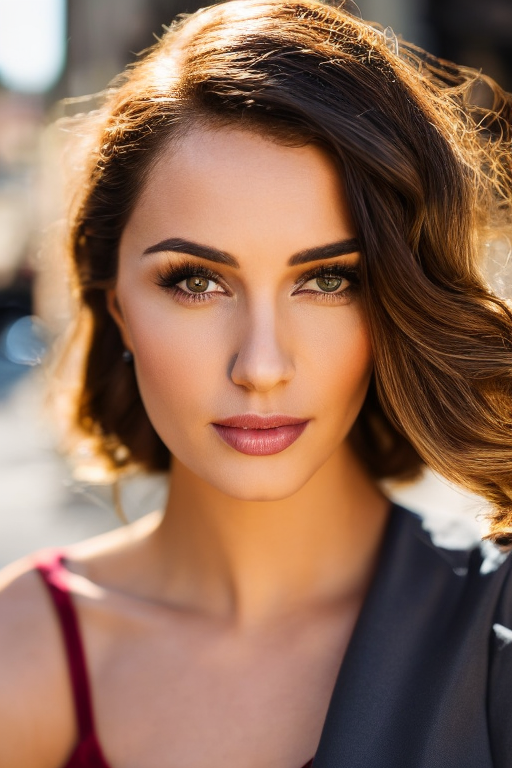
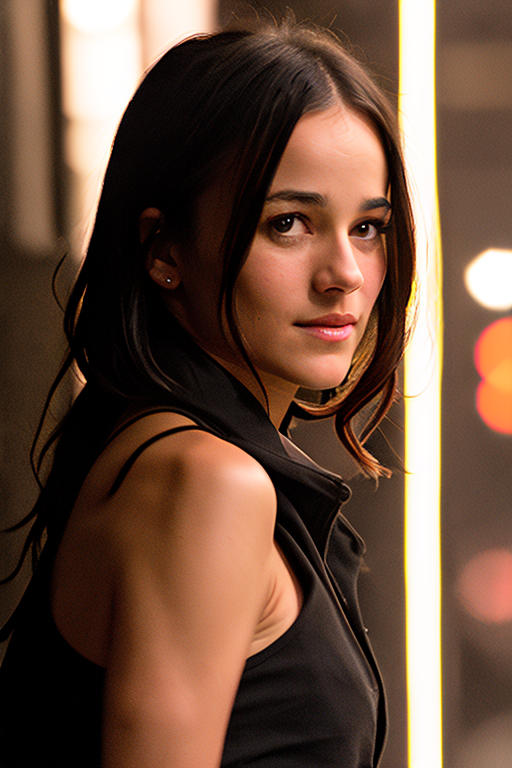
Do you want to generate the same look across multiple images? One trick is to take advantage of celebrities. Their looks are the most recognizable part of their bodies. So they are guaranteed to be consistent.
But we usually don’t want to use their face. They are just too recognizable. You want a new face with a certain look.
The trick is to blend two faces using prompt scheduling. The syntax in AUTOMATIC1111 is
[person 1: person2: factor]
factor is a number between 0 and 1. It indicates the fraction of the total number of steps when the keyword switches from person 1 to person 2. For example, [Ana de Armas:Emma Watson:0.5] with 20 steps means the prompt uses Ana de Armas in steps 1 – 10, and uses Emma Watson in steps 11-20.
You can simply throw that into the prompt like below.
Prompt:
photo of young woman, [Ana de Armas:Emma Watson:0.5], highlight hair, sitting outside restaurant, wearing dress, rim lighting, studio lighting, looking at the camera, dslr, ultra quality, sharp focus, tack sharp, dof, film grain, Fujifilm XT3, crystal clear, 8K UHD, highly detailed glossy eyes, high detailed skin, skin pores
Negative prompt
disfigured, ugly, bad, immature, cartoon, anime, 3d, painting, b&w
By carefully adjusting the factor, you can dial in the proportion of the two faces.
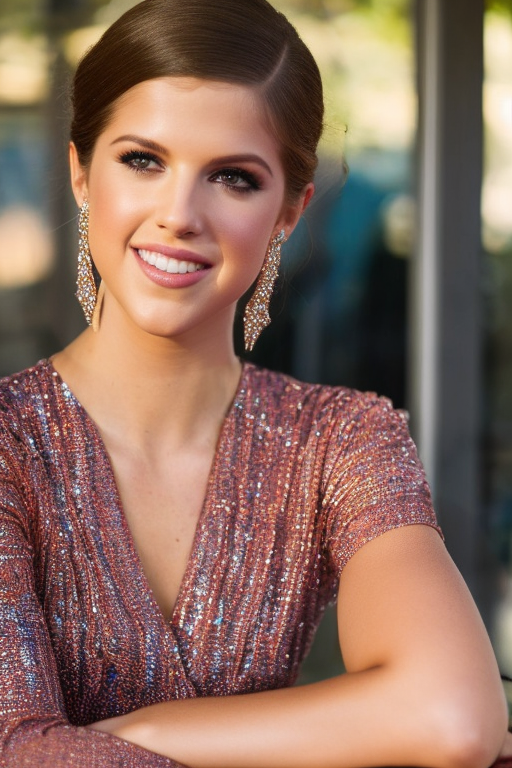
Blending one name
Did you notice the background and composition have changed drastically when using two names? It’s the association effect. Photos of actresses often associate with certain settings, such as award ceremonies.
The overall composition is set by the first keyword because the sampler denoises most in the first few steps.
Taking advantage of this idea, we can still use woman in the first few steps and only swap in a celebrity name later on. This keeps the composition while offering to blend a generic face with a celebrity.
The prompt is something like this:
photo of young [woman:Ana de Armas:0.4], highlight hair, sitting outside restaurant, wearing dress, rim lighting, studio lighting, looking at the camera, dslr, ultra quality, sharp focus, tack sharp, dof, film grain, Fujifilm XT3, crystal clear, 8K UHD, highly detailed glossy eyes, high detailed skin, skin pores
The negative prompt can stay the same.
disfigured, ugly, bad, immature, cartoon, anime, 3d, painting, b&w
Using this technique, we can keep the composition while controlling the face to some extent.
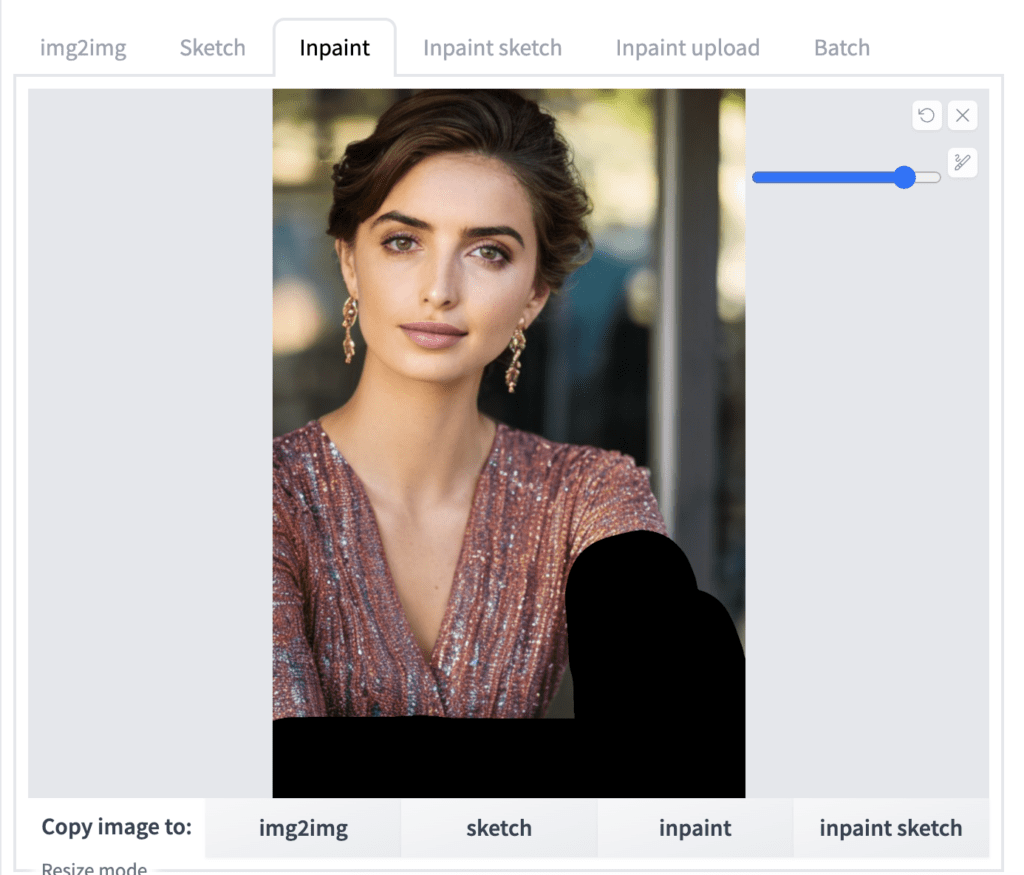
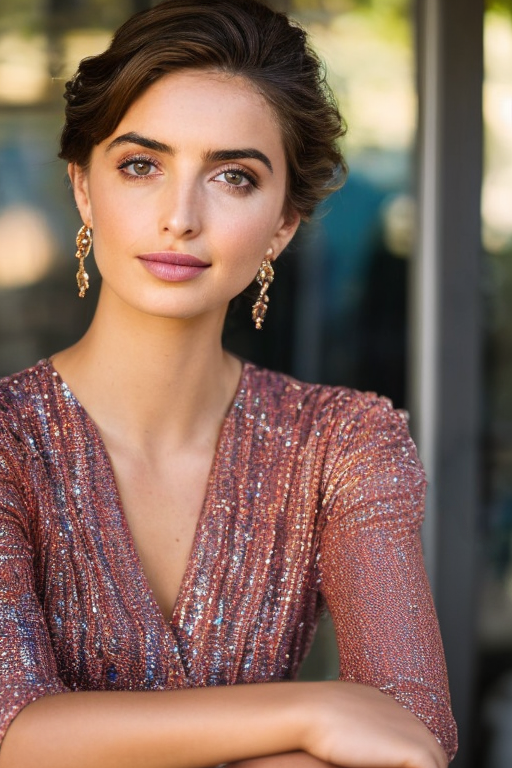
Inpainting faces
Inpainting is a technique to keep both the composition and have total control of the face.
After generating an image in txt2img tab, click on Send to inpainting.
In the inpainting canvas, draw a mask covering the face.
Now modify the prompt to include blending of two faces. E.g.
photo of young [Emma Watson: Ana de Armas: 0.4], highlight hair, sitting outside restaurant, wearing dress, rim lighting, studio lighting, looking at the camera, dslr, ultra quality, sharp focus, tack sharp, dof, film grain, Fujifilm XT3, crystal clear, 8K UHD, highly detailed glossy eyes, high detailed skin, skin pores
Set denoising strength to 0.75 and batch size to 8. Hit Generate and cherry-pick one that works the best.
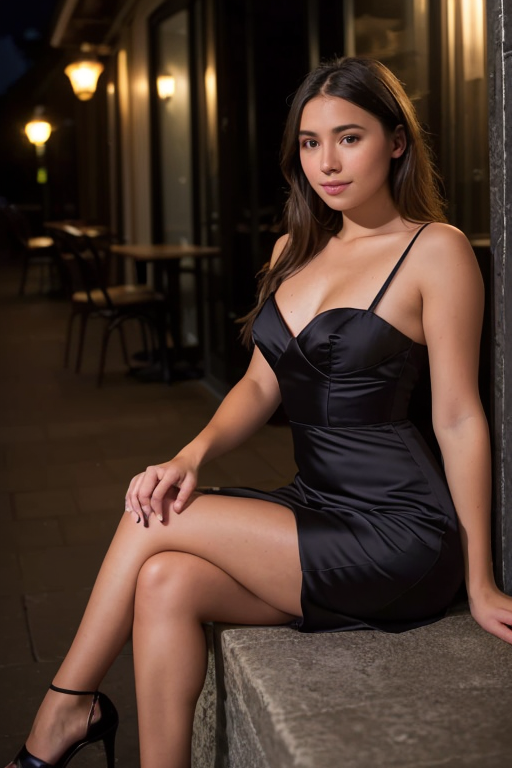
Fixing defects
You don’t need to generate realistic people with correct anatomy in one shot. It is fairly easy to re-generate part of the image.
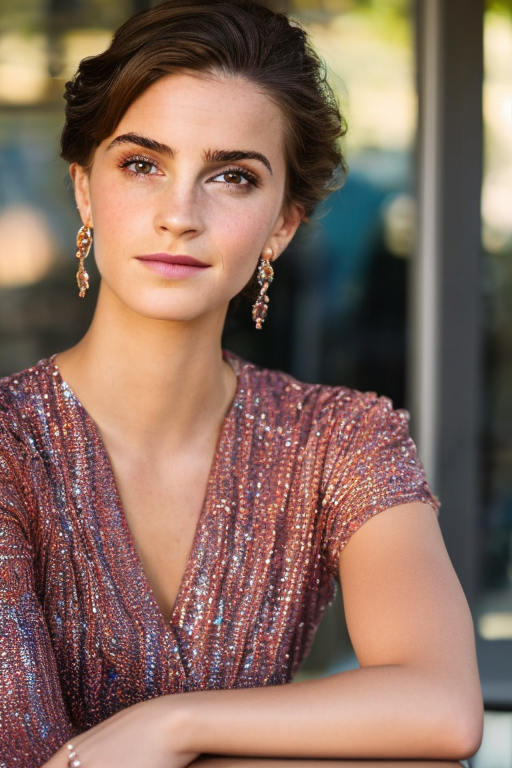
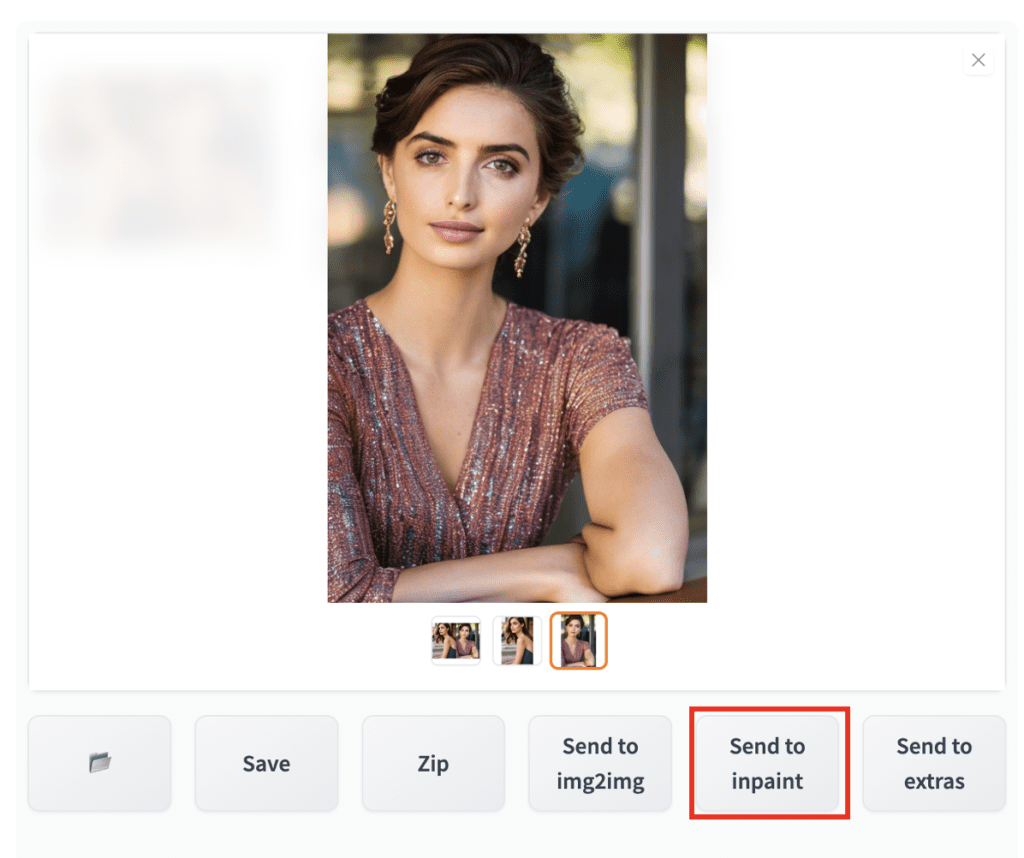
Let’s go through an example. The image below looks good, except the arms are deformed.
To fix it, first click on Send to inpaint to send the image and the parameters to the inpainting section of the img2img tab.
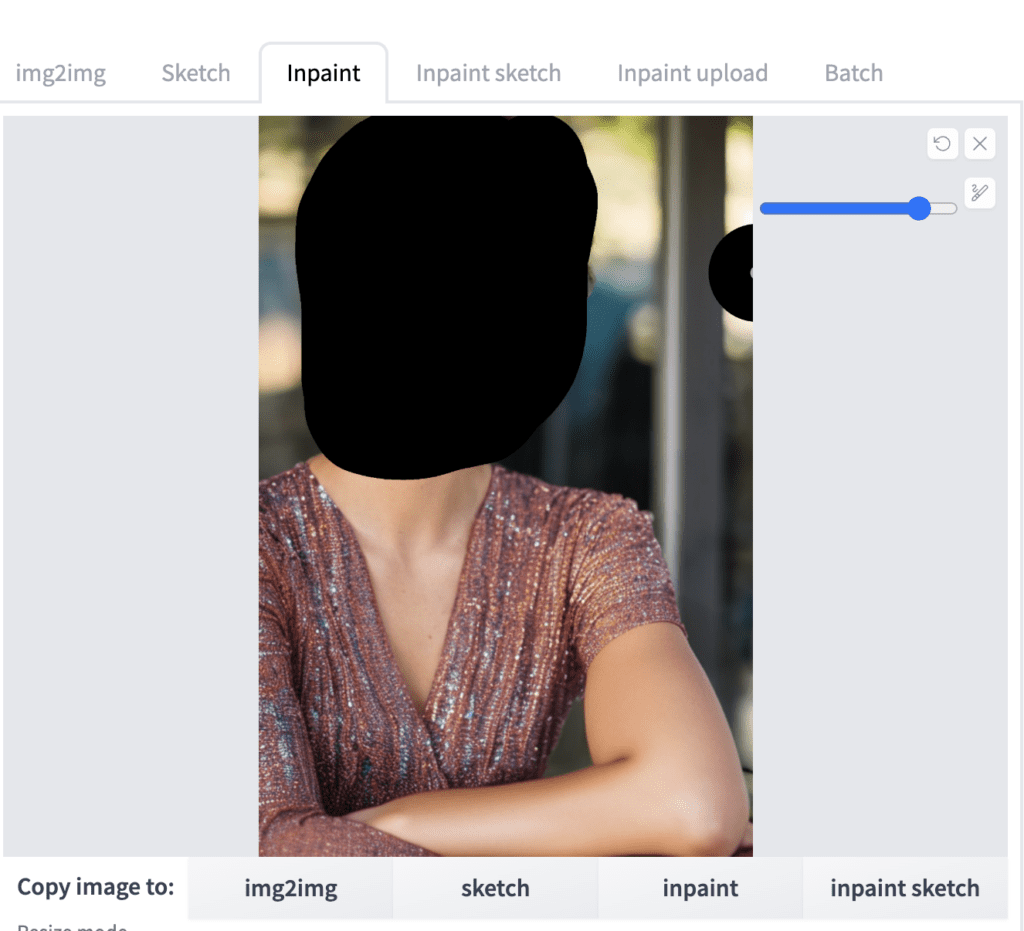
In the inpainting canvas of the img2img tab, draw a mask over the problematic area.
Set Seed to -1 (random), denoising strength to 1, and batch size to 8.
You can experiment with the inpaint area setting – whole picture or only masked.
Hit Generate.
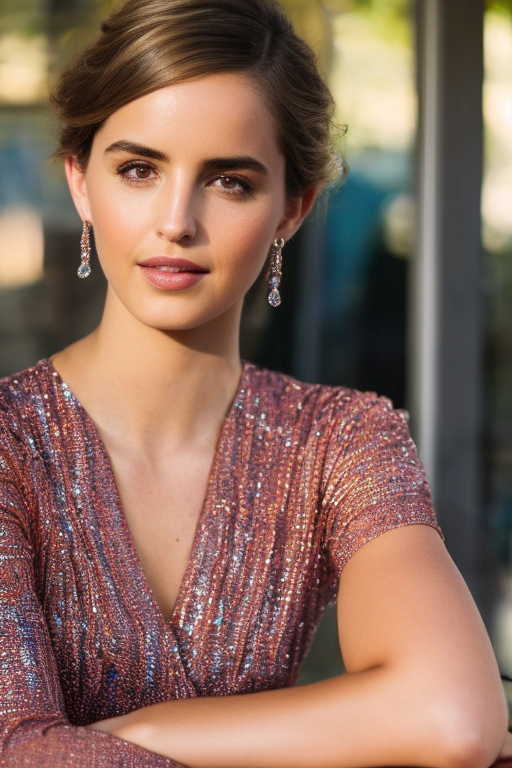
You will have some bad ones. But by sheer chance, you should see a decent one. If not, press Generate again.

You don’t need to get to the perfect inpainting in one go. You can refine an image iteratively with inpainting. When you see an image moving in the right direction, press Send to inpaint.
Now you are acting on the new image. Reduce the denoising strength gradually so that it preserves the content of the image. Below is an example of doing a second round of inpainting. The denoising strength was set to 0.6.
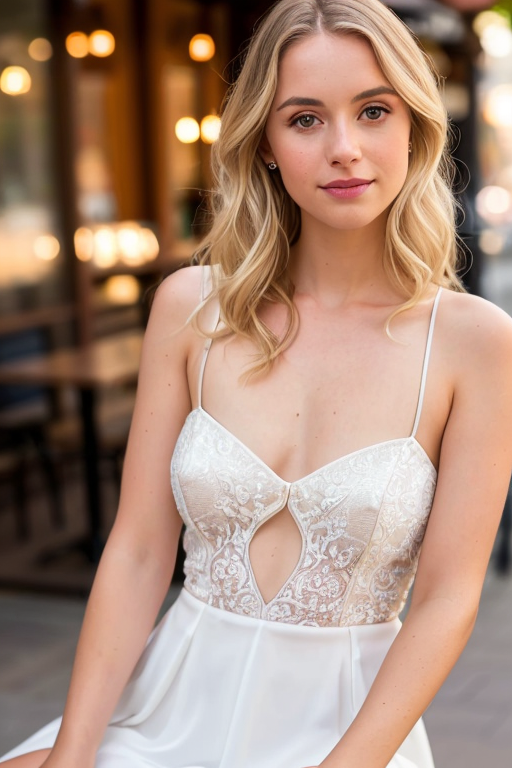
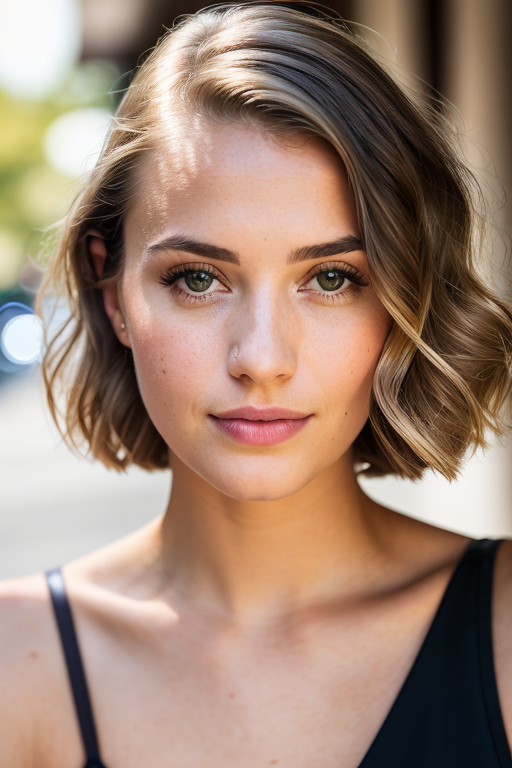
Models
So far, we have only used the Stable Diffusion v1.5 base model to generate realistic people. Do you know there are models that are specifically trained to generate realistic images?
Things will only get better when you use them.
You will learn about some commonly used ones. We will study
- F222
- Hassan blend 1.4
- Realistic Vision v2
- Chillout Mix
- Dreamlike Photoreal
- URPM
I know I have missed some but bear with me.
I will use the same prompt
photo of young woman, highlight hair, sitting outside restaurant, wearing dress, rim lighting, studio lighting, looking at the camera, dslr, ultra quality, sharp focus, tack sharp, dof, film grain, Fujifilm XT3, crystal clear, 8K UHD, highly detailed glossy eyes, high detailed skin, skin pores
and the negative prompt
disfigured, ugly, bad, immature, cartoon, anime, 3d, painting, b&w
I will include the direct download link for each model. You can simply copy and paste the link to the “Model_from_URL” field in our AUTOMATIC1111 Colab notebook.
Caution
- Nearly all of them are prone to generating explicit images. Use clothing terms like dress in the prompt and nude in the negative prompt to suppress them.
- Some models have their own more restrictive licenses. Read them before using or incorporating them into a product.
F222
Direct download link:
https://huggingface.co/acheong08/f222/resolve/main/f222.ckpt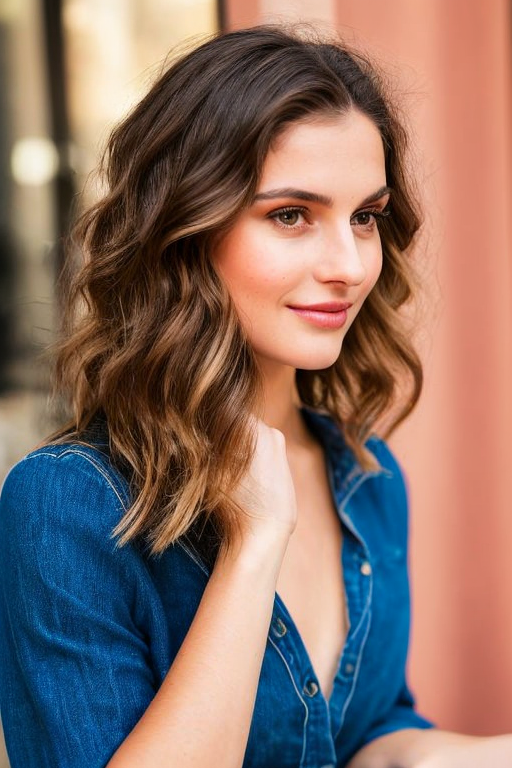

F222 generates realistic people with beautiful clothing. Sadly, the model is no longer in development.
Hassan blend 1.4
Direct download link
https://huggingface.co/hassanblend/hassanblend1.4/resolve/main/HassanBlend1.4_Safe.safetensors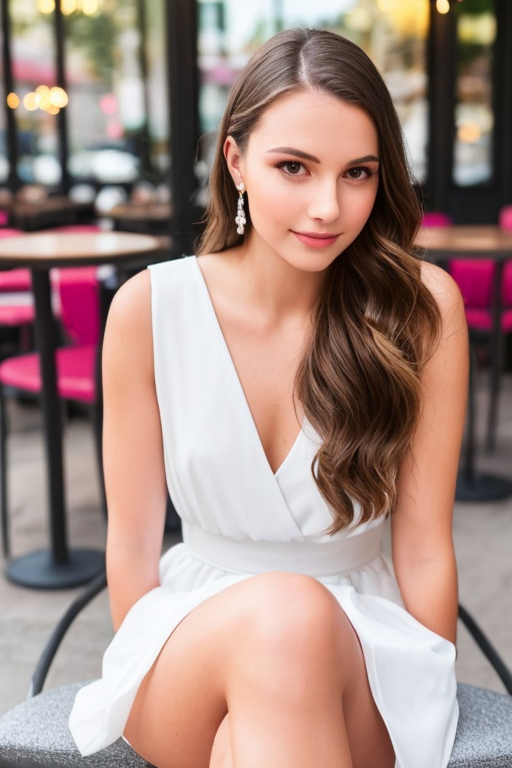
Hassan Blend v1.4 is fine-tuned on a large number of explicit images.
Realistic Vision v2.0
Direct download link
https://civitai.com/api/download/models/29460
Realistic Vision v2 is an all-rounded model for generating photograph-style images. In addition to realistic people, it is also good for animals and scenes.
The anatomy is excellent, in my experience.
Chillout Mix
Direct download link
https://civitai.com/api/download/models/11745Chillout Mix is the Asian counterpart of F222. It is trained to generate photo-style Asians.

Dreamlike Photoreal
Direct download link
https://huggingface.co/dreamlike-art/dreamlike-photoreal-2.0/resolve/main/dreamlike-photoreal-2.0.ckpt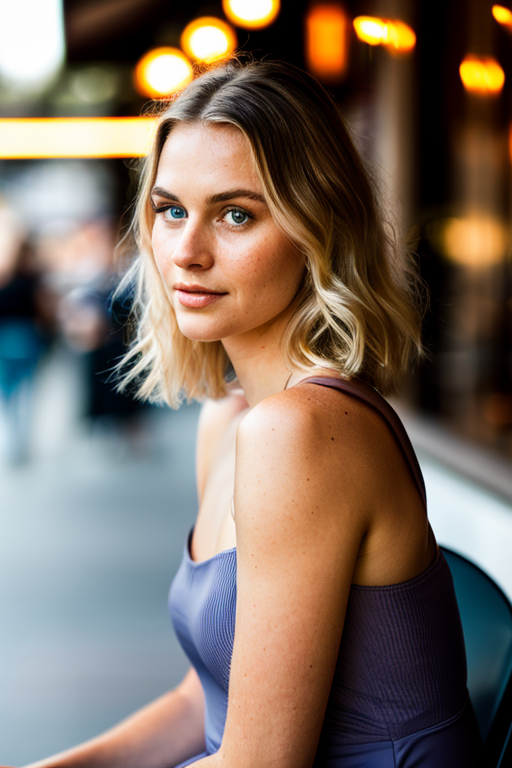
Dreamlike Photoreal is an all-rounded photo-style model. The portrait images tend to be a little bit saturated.
URPM
Direct download link
https://civitai.com/api/download/models/15640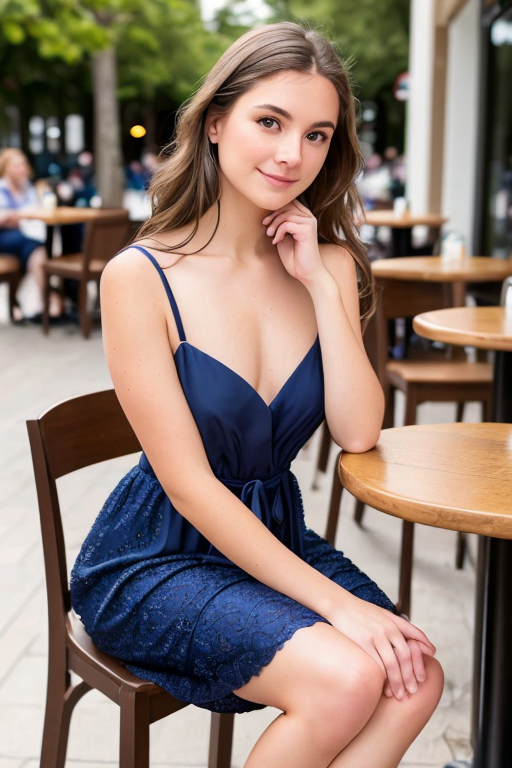
URPM is a model fine-tuned with explicit images. The anatomy is usually excellent. Images are similar to Realistic Vision v2 but a bit more polished.
Comparison
In order to let you directly compare the realistic models, I used ControlNet to fix the pose. (More on this later)
The same prompt, negative prompt, and seed are used.
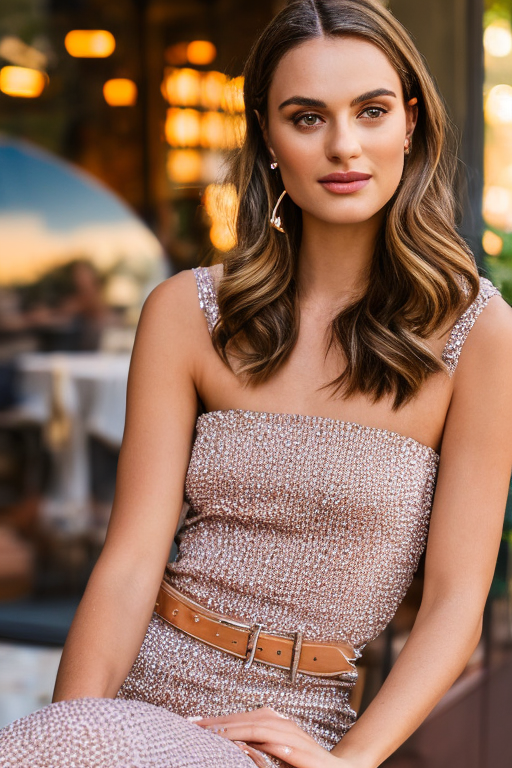
Close-up view:
Which realistic model is your favorite? Let me know in the comment!
LoRA, hypernetwork, textual inversion
You can further dial in the model by supplementing model modifiers such as LoRAs, hypernetworks, and textual inversions.
The best place to find them is civitai.
Korean aesthetic
Korean idol looks can be achieved by using a Korean LoRA with Chillout Mix.
Darker images
epi_noiseoffset is a LoRA that can induce darker images than normally possible in Stable Diffusion. Use dark keywords like “dark studio”, “night”, “dimly lit”, etc.
Prompt:
night, (dark studio:1.3) photo of young woman, highlight hair, sitting outside restaurant, wearing dress, rim lighting, studio lighting, looking at the camera, dslr, ultra quality, sharp focus, tack sharp, dof, film grain, Fujifilm XT3, crystal clear, 8K UHD, highly detailed glossy eyes, high detailed skin, skin pores <lora:epiNoiseoffset_v2:1>
Negative prompt:
disfigured, ugly, bad, immature, cartoon, anime, 3d, painting, b&w
Images below are generated with the URPM model.
Celebrity LoRA
There are a large number of fan-made LoRA models paying tribute to their favorite artists.
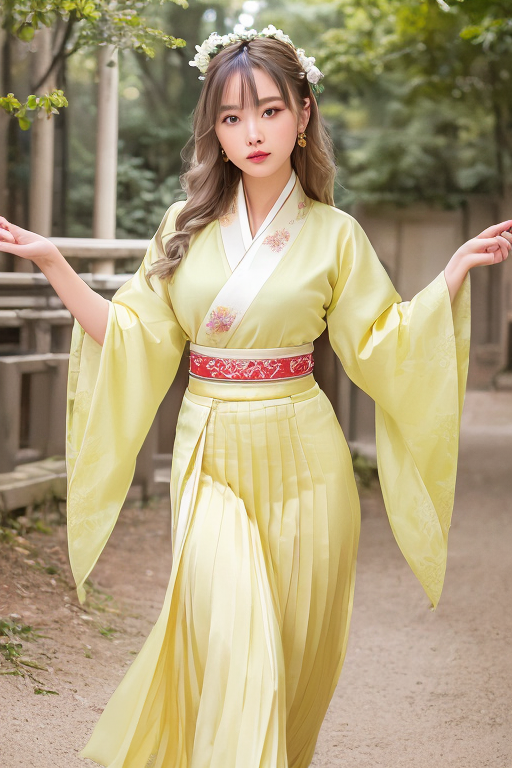
Clothing
This Chinese Han outfit LoRA (applied on Chillout Mix) is excellent in generating beautiful traditional Han clothing.
Controlling poses
ControlNet
ControlNet has emerged as the de facto standard for controlling human poses and portrait composition.
But how to get reference images? One easy way is to go to free photo sites like Unsplash. Search with keywords like man, woman, stand, sit, etc. You will find an image with the right composition.
Use openpose ControlNet. See the ControlNet article for details.
ControlNet for two
Without ControlNet, it is almost impossible to control the composition and poses of two or more people in a scene. Now, you simply find a reference image, and you are in business.
Upscaler
The native resolution of SD v1 model is 512×512 pixels. To prevent issues such as duplicate characters, you should set as least one side to 512 pixels.
As a result, the images are likely too small for later use.
You can use AI upscalers to enlarge an image without worrying about getting blurry. They have the ability to create content to fill in the details as you enlarge the image.
Tips on using upscalers for realistic people
A few points on upscalers for realistic photos
- Most upscalers alter the image.
- Experiment with applying two upscalers. The first one is a traditional one like Lanczos. The second one is an AI upscaler like R-ESRGAN. You should apply the least amount of the AI upscaler possible.
- Same for face restoration. Applying it at full strength is going to introduce artifacts. Apply the least amount you can get away with.
- You can scale up to large than what you need. Then scale it back down. This way, you can afford the scaled-up image to be a bit blurry.
No upscalers with ControlNet
You can experiment with generating images with the final resolution when using ControlNet. It could work because ControlNet fixes the poses and prevents common issues like generating two duplicate heads or bodies.
Go ahead and try setting the image size to, for example, 1200×800. There’s a chance that you can get away with using upscalers!
Image-to-image following upscaling
To remove artifacts introduced by the upscalers, you can do an image-to-image with low denoising strength (e.g. 0.1 to 0.3), while keeping the prompt the same.
This trick lets the model generate details that are consistent with the style of the model while not changing the image too much.
The drawback is that the image will be altered slightly, depending on the denoising strength you use.
Improving details
To improve details and upscale simultaneously, use ControlNet Tile upscale.
Summary
Below are some take-homes.
- Start with the boilerplate prompt and the negative prompt at the beginning of the Models section. You can customize the image by changing
- Ethnicity – African American, Hispanic, Russian, European…
- Hairstyle – long, short, bun, ponytail, braid…
- Outfits – dress, top, jeans, jackets. Go to the website of your favorite clothing store and get some keyword ideas.
- Activity – What he or she is doing
- Surroundings – Busy street, inside a house, on a beach…
- Choose a model
- F222 or Realistic Vision v2 for balanced, realistic people.
- Hassan Blend v1.4 or URPM for a more polished look.
- Chillout Mix for Asians.
- SD 1.5 if you want to show off your supreme prompting skill…
- Throw in a LoRA, textual inversion or hypernetwork to dial in your desired effect.
- Aim for good composition. Don’t be afraid to use multiple rounds of inpainting to fix defects or regenerate faces.
- Use ControlNet with a stock photo to achieve good pose and composition.
- Be gentle with AI upscalers.
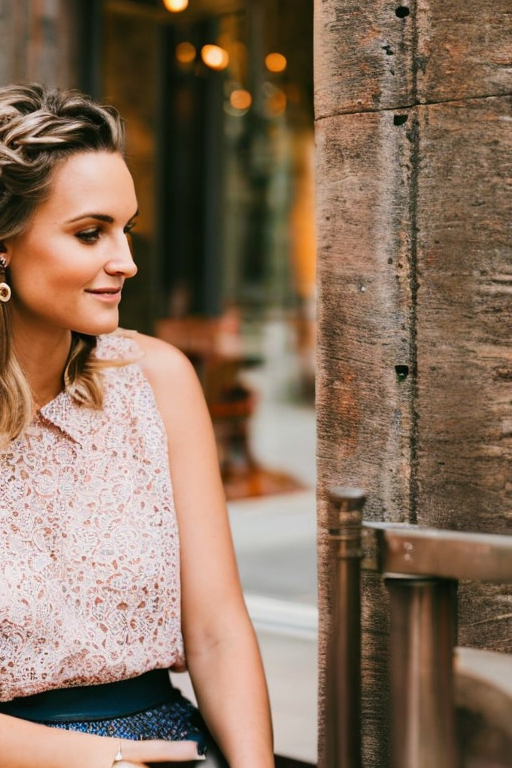
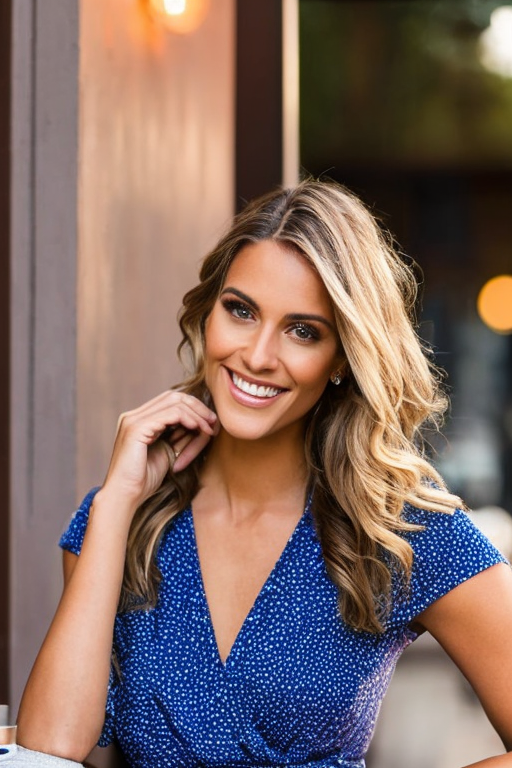
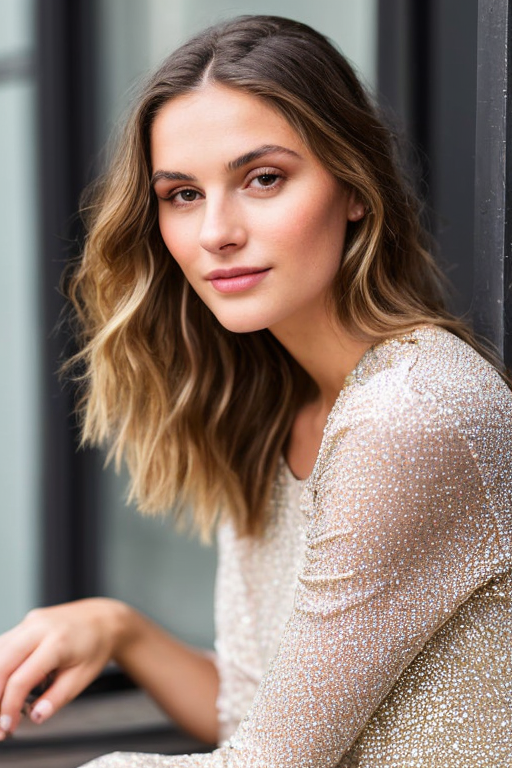
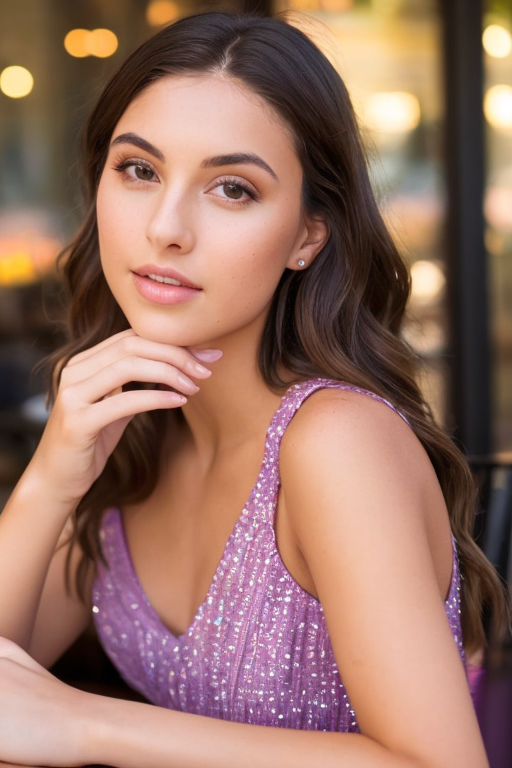
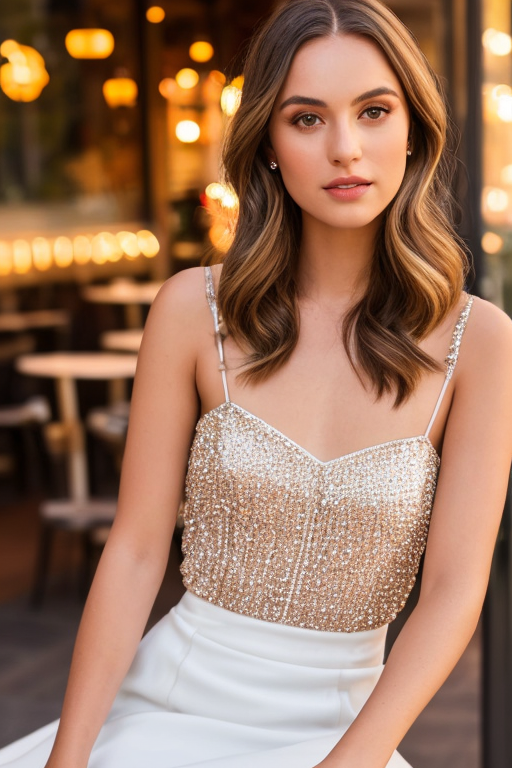
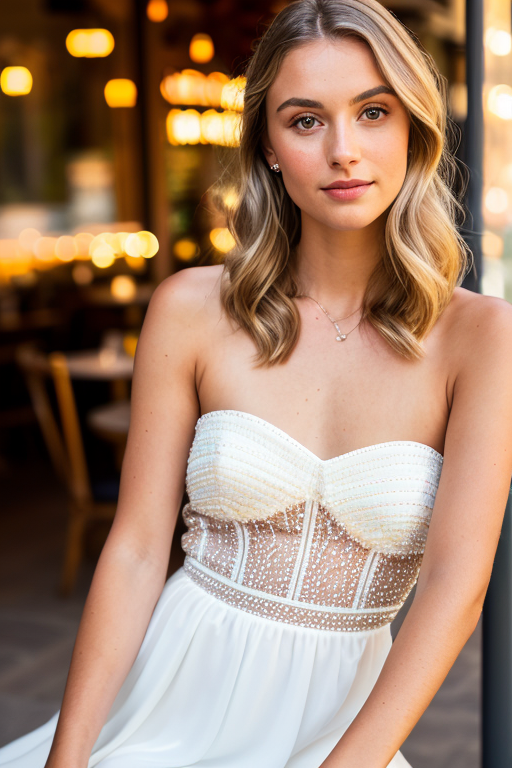
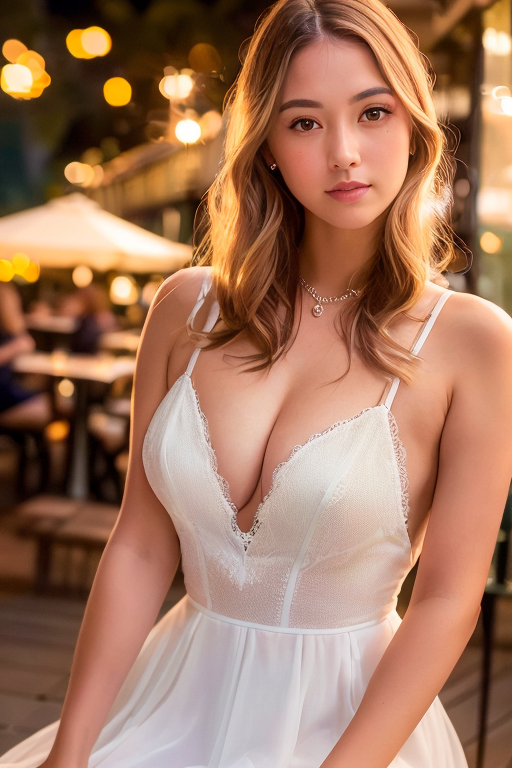
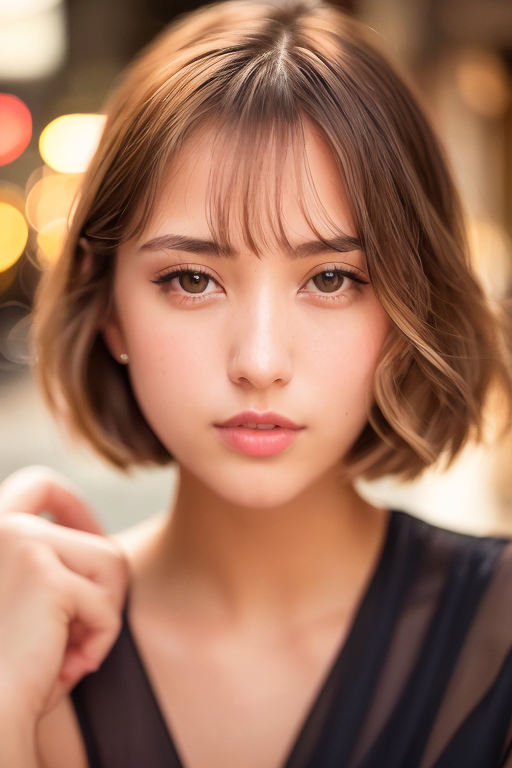
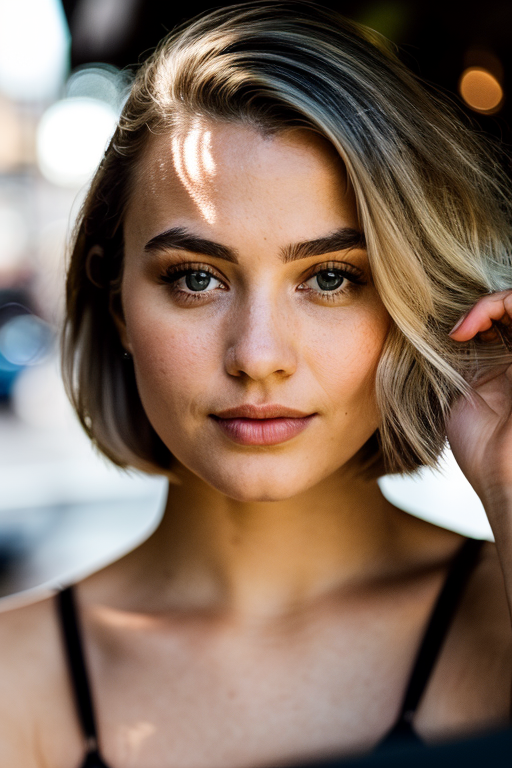
Gallery
Finally, a gallery of realistic people…
I would update your article to warn about the risk of using .cpkt (checkpoint) model files. Safetensor is a supported model format starting in SD1.5. There are tutorials out there that explain how to convert .ckpt with some python coding to safetensor format. There are also few alternate sources like hugging face where legacy models like F222 and UPRM that stopped their development have been converted to safetensor files to prevent the insertion of malicious code into the model.
Looking at generated picture or photos, my fav are Chillout Mix & URPM
Hmmm the images dont look very realistic to me. the skin is mostly too smooth and has not enough details. Why is it like this? I tried midjourney and you can create images of people that could be from cinema movie (which probably is also the training data).
Is this not possible with Stable diffusion?
These images are generated with SD 1.5. You can try the improved SDXL.
How would you approach of creating multiple images of same AI persona?
I wanna create ai influencer with multiple images, poses, backgrounds with same AI persona face and body. Stable diffusion would just create random people no? Im noob so please explain
Check this out: https://stable-diffusion-art.com/consistent-face/
great tutorial .. very helpful indeed.
What’s the best method used to generate perfect pictures of multiple people (i.e. male and female, female and female, male and male)? I need to eventually be using python code to automate this.
just let me know how can i generate bold images for a fashion magzines , u know what i mean and what fashion magazines require a great cheast, toned body , big **** etc / etc ….
I would put in those words in the prompt to see what I get. These models are default to geneerate this kind of images
There’s also tons of lora trained to do that.
bro just one more help how to use stable diffusion , is it a app, website, discord server.
and one more thing how to keep the face of the image same each time for a different generation.
there are so many ways to do this. Take a look: https://stable-diffusion-art.com/consistent-face/
where to use stable diffusion
pls if possible can u make a yt video for the complete SD as a course
Hi, you can read the quick start guide to start using. https://stable-diffusion-art.com/beginners-guide/
Seems that Ulzzang-6500 is no longer available. Maybe its been replaced with something else? Its function is exactly what we’re looking for.
Try put this in google search. You will find file locations on huggingface.
How do you add two people without their characteristics mixing? ex: i want to add a girl with pink curly hair and a girl with blue hair with a pony tail. how do i make sure the attributes don’t get mixed up?
Hi, use regional prompter.
https://stable-diffusion-art.com/regional-prompter/
it was a pleasure to read this article! thanks 🙂
Thanks for the tutorial!
Is it possible to make selfies in SD?
The quality in your tutorial is amazing, but i feel like these photo looks unnatural due to format of photo (it looks like a photoshoot).
So the question is how to make photos so they would look like they’re from typical Instagram with iPhone quality?)
you can try adding “selfie” to prompt. SDXL may have a better shot.
you can also try controlnet.
Can you blend more than two people? Can I do something like this? (As an example):
[StanaKatic:NataliePortman:0.1:AnaDeArmas:0.2:ZoeSaldana:0.7]
Doesn’t seem to be the case; is there another way? Thanks so much, and love your site!
Yes, you can blend more than 2 people. You will need to use
[Stana Katic:Natalie Portman:0.1], [Ana De Armas:Zoe Saldana:0.7]
Or
(Stana Katic:0.1), (Natalie Portman: 0.5), (Ana De Armas:0.7), (Zoe Saldana: 0.3)
Awesome, thanks so much!
I am really sorry, I have a lot of questions to ask and I am tired of looking for answers to these questions and I have wasted a lot of time. It would be very useful if you could guide me in the right direction by answering these questions. I don’t want to waste time on something that is impossible to do or really not worth the effort
I discovered this site today and I have been reading your articles for hours even though I’m not good at English. You really give detailed and valuable information with a simple and clean expression. When I watch some video tutorials on YouTube, there is a lot of information that I do not understand and confuse me. Here I understand by reading it in one go. thank you for that.
In short, I’m a graphic designer. And I want to improve myself even more. That’s why I started learning Blender. It’s an enjoyable process. But I want much more. I really want to be an expert in SD. I want it to contribute not only as a hobby but also to my profession.
I have been researching for a long time about whether to use SD for product photography. And I never really got enough information about it. Although I read pages and pages of reddit posts. What is the reason for this? I don’t think the SD is useless about this. But when I check to prompt and model sites, I see that there are always artistic works. There is almost nothing about product photography. I’m about to give up hope on this.
Actually, it can be useful for many people in product photography. For example, a tshirt designer can show his designed products on a Model through SD, he can change color, designs, Model(he/she), pose. Or he can prepare a composition in SD for any product and photograph it.
This is even more options. For example, there is one more thing I am curious about. For example, I have a high quality car interior photo. Can I upload this photo to SD and add some objects generated on SD like, people, accessories or change of the photo’ ambient lighting (day, night etc.) without distorting the image?
Some of these things can be done with mockups in photoshop, but I want to be more free. Now it came to my mind. Instead of modeling objects in blender, we can create the object we want in SD. Of course, I guess it is impossible to be as realistic and detailed as blender. However, it can be used for the following purpose, 3d visuals can be produced quickly for an object that i want to produce and inspiration can be taken. For example, I want to make a product that has never been made before and is not on the internet ‘a seat with wings like a bird’. it takes a lot of time to prepare a sketch on paper. But SD can do that quickly.
SD is a generative AI tool which tends to modify the objects you put in. It can do an acceptable job if you are ok with some changes to the objects that you put in.
Do you know about StylePile script or have you used it before? I think it does a very detailed job in creating prompts and composition, but i just started using SD, so i can’t give a correct feedback on the use of the script. Is it worth learning this script? Do you think to prepare a tutorial about it?
I haven’t used it but can take a look!
I would be very happy, I am looking forward to it. I am glad to discovered this site, there is so much to learn 🙂
Almost all Stable Diffision tutorials are about human models, animal models, and fantasy arts. Why is that? Is it useless for different purposes? For example, can I train furnitures I want (cot, cabinet, table, etc.) with real photos? And can I place these objects in a room different angles with Stable Diffision? Can I place a human model in this room? In other words, I want to use it for purposes such as product photography. Rendering processes take too long in programs such as 3dmax, blender.
By the way i love your tutorials, thank you.
if possible can you prepare a tutorial on this topic?
will look into them.
I would be interested in this as well. I was trying to setup a POS system for a concessions stand with pictures for the items on the terminal. They are fairly generic, but I had the hardest time trying to get it to generate what I want. People were easy, objects were much harder. For example no mater how many different ways I tried to put in the prompt and negative, if I tried to generate a plain hamburger on a bun centered in front of a solid white background it would always add cheese and fixings and do stuff like put it on a cutting board or have it zoomed in cutting off part of the object I cared about. Even if I used the negative to not have those artifacts, it would generate them anyway. Is there a model you know of that would help with that?
Thanks for the tips! After reading your article I came to realize some prompt tags are actually quite important (like I didn’t know 4K or 8K actually affects how SD renders things).
Question: I think with these tips we can get AI to render a single person very well. How do we do images with multiple persons? Also how to get AI to draw the proper interactions between these people?
The best way is to use controlnet and use a prompt to describe what they are doing. See the section “controlnet for two” in this article.
Are all the models like Chillout Mix like 2+ GB in size? Since I live in the country with very slow and limited bandwidth, I would need to download the files on my cell phone and transfer them to my pc. How would that work?
I also don’t understand “This Chinese Han outfit LoRA (applied on Chillout Mix)” comment. Any help on that?
I purchased your ebook “ Beginners Guide to Stable Diffusion” and found it useful although some of the links must be outdated as they don’t work.
Thanking you in advance.
Yes, the sizes of the models are all measured in GBs. I don’t have experience downloading large files from a phone.
A LoRA model needs to be used with a checkpoint model. In this case, the checkpoint model is Chillout mix. See the following post on how to use a LoRA model.
https://stable-diffusion-art.com/lora/
Thanks for buying the book. If you don’t mind, please let me know the outdated links so that I can correct them.
What is your usual negative prompt for realistic photos? Is it as concise as in this article? I found that using the prompt in the article helped me produce higher quality images compared to my negative prompt, which were 4-5 times longer. It was a very useful and thorough article. Thank you very much.
That’s what I used. I told you all I know :). Sometimes I use even shorter ones. My approach is to use the minimum number of keywords I can get away with. Add only if you want to remove an effect.
Thank you for reading!
Thank you for the excellent guide, as always easy to understand and well-executed. I wanted to ask if it would be possible to create one dedicated to multidiffusion upscaler for automatic1111. I’ve seen that incredible results can be obtained with remarkable resolutions even at 4k and 8k, but it’s not easy to manage/use (at least for me…). It would be greatly appreciated and useful, I think, for the community to be able to achieve high-definition images with high resolutions. Thank you in advance for everything!
Ah, I see.
Thanks for the suggestion. Putting it in the queue.
Hi Andrew,
as usual wonderful tutorial, thanks!
I’ve one question:
there is any difference in writing:
[person1: person2: 0.5]
or
person1 | person2
?
Thanks in advance!
Good question!
[person1 | person2] switches between persion1 and person2 during sampling.
[person1 : person2 :0 .5] use person1 in the first half and person2 in the second half.
Both are valid.
The first method can only do 50% blend.
You can experiment with both to see which one you like.
Mmh in the person1:person2:0.5 method the person2 is too much predominant and it isn’t so much “50%” the result.. I think because the last half of steps is more relevant..I need to experiment 😀
Fantastic!
Thank you so Much
Awesome tutorial, thank you!
like your tutorial,I have read all of them~
thanks for reading!