Not a born-artist? Stable Diffusion can help. Img2img (image-to-image) can improve your drawing while keeping the color and composition.
Table of Contents
What is img2img?
Image-to-image (img2img for short) is a method to generate new AI images from an input image and text prompt. The output image will follow the color and composition of the input image.
The input image is just a guide. It does not need to be pretty or have any details. The important part is the color and the composition.
The prompt requirement is the same as text-to-image. You can view image-to-image as a generalization of text-to-image: Text-to-image starts with an image of random noise. Image-to-image starts with an image you specify and then adds noise.
Software setup
We will use AUTOMATIC1111 Stable Diffusion WebUI. It’s a free and popular choice. You can use this software on Windows, Mac, or Google Colab.
Check out the Quick Start Guide if you are new to Stable Diffusion. Check out the AUTOMATIC1111 Guide if you are new to AUTOMATIC1111.
Step-by-step guide to Img2img
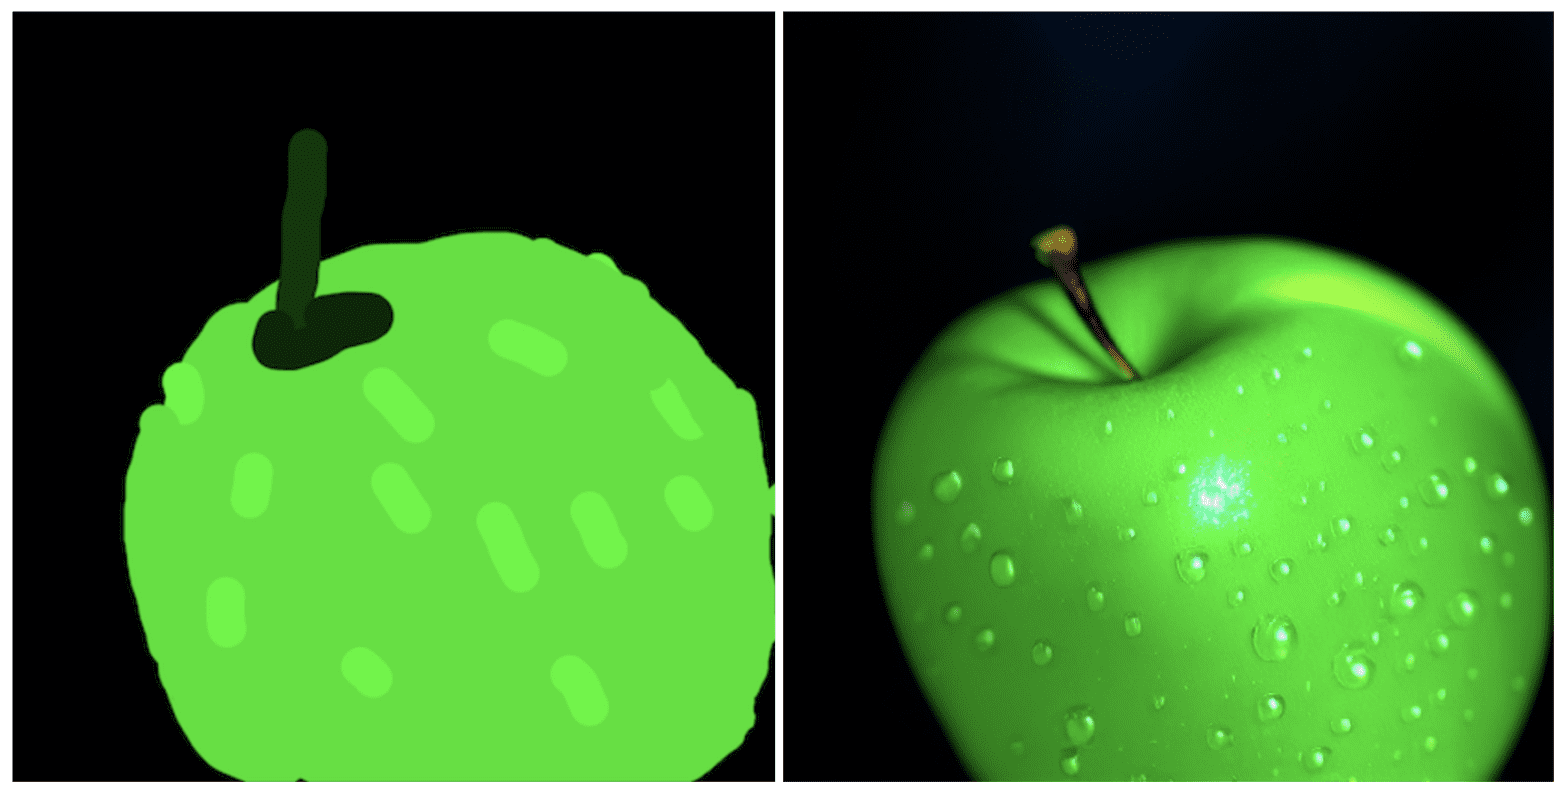
I just saw a YouTube video of a professional artist painstakingly drawing a realistic gourmet apple on an iPad. This is a good subject for showcasing the power of image-to-image.
Step 1: Create a background
You can start with a white or a black background.
They are both 512×512 pixels, the same as the default image size of Stable Diffusion v1.5.
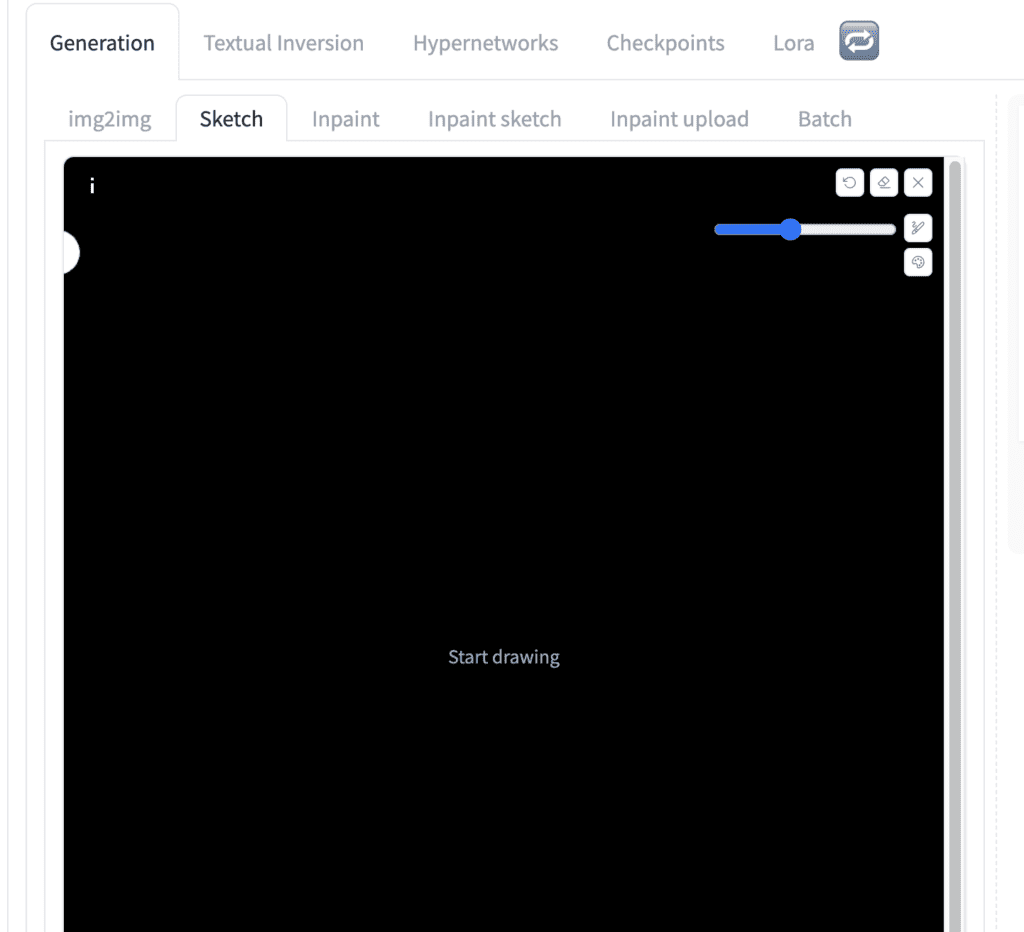
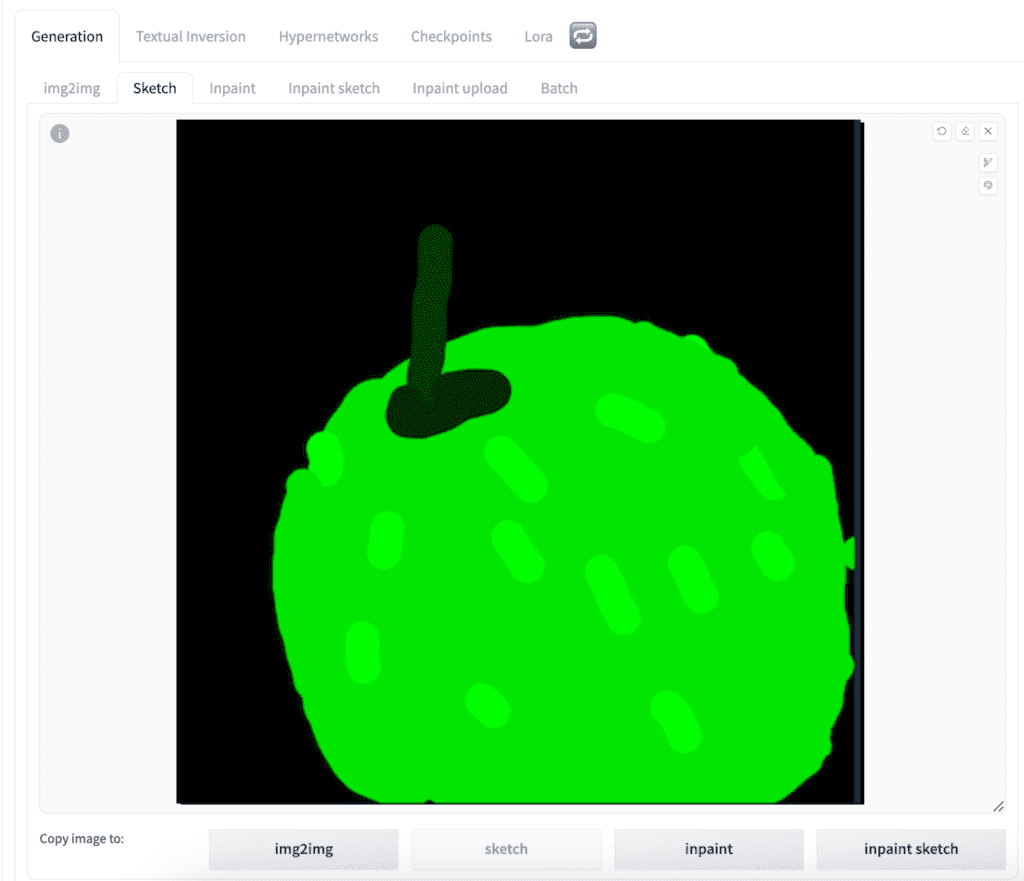
In AUTOMATIC1111, go to the img2img page. Select Generation tab > Sketch tab. This tab let you draw on the canvas directly.
Upload the background to the canvas.
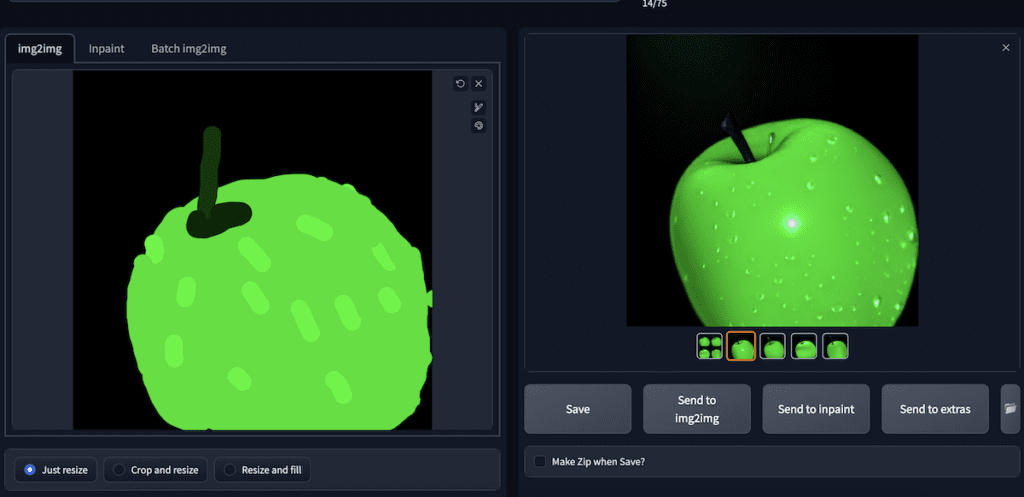
Step 2: Draw an apple
Let’s draw the apple with the color palette tool.
Don’t spend too much time on what you draw. Just aim at getting the color, shape, and composition in the right neighborhood.
This is the apple I drew. (The little light green strips are water drops… just so you know…)
Step 3: Enter img2img settings
In the Stable Diffusion checkpoint dropbox, select v1-5-pruned-emaonly.ckpt to use the v1.5 model. (You can also experiment with other models.)
Come up with a prompt that describes your final picture as accurately as possible.
photo of perfect green apple with stem, water droplets, dramatic lighting
Put this in the prompt text box.
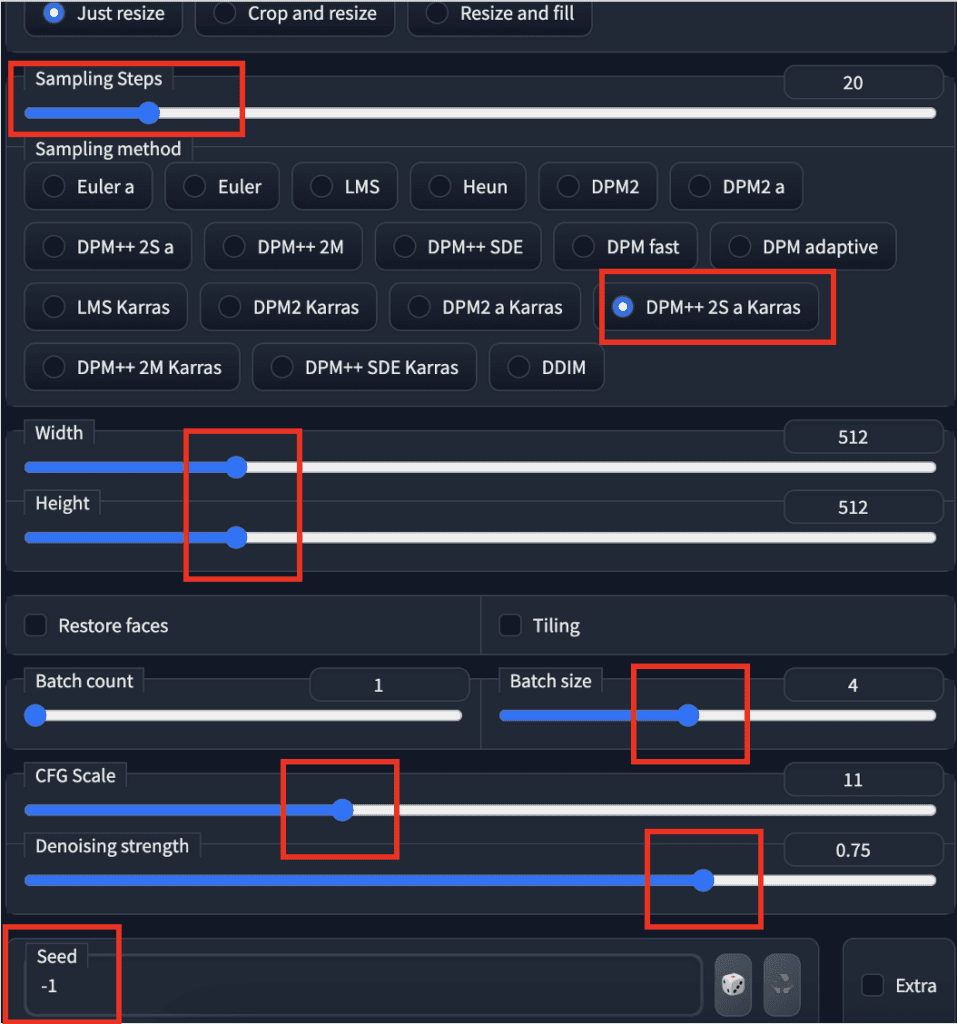
Set image width and height to 512.
Set sampling steps to 20 and sampling method to DPM++ 2M Karras.
Set the batch size to 4 so that you can cherry-pick the best one.
Set seed to -1 (random).
The two parameters you want to play with are the CFG scale and denoising strength. In the beginning, you can set the CFG scale to 11 and denoising strength to 0.75.
Hit Generate to get a set of four new images.
Increase denoising strength if you want the images to change more. Decrease if you want them to be closer to your original drawing.
Once you are happy with what you get, save the image.
Step 4: Second img2img
You can stop here if you are happy with the result. But doing one or more rounds of img2img adds more details. You can optionally use a different prompt.
Upload the image you just generated.
I feel the stem is a bit too dark for mine, so I painted it a bit lighter. (I used the color picker tool to get the color of the stem and dial up the color values.)
I reused the same settings, including the prompt.
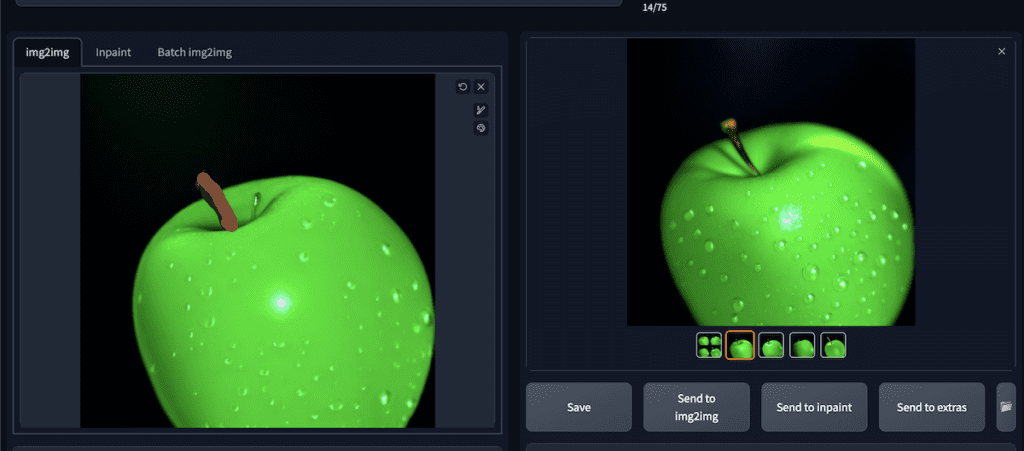
In the new batch, I get something I like:
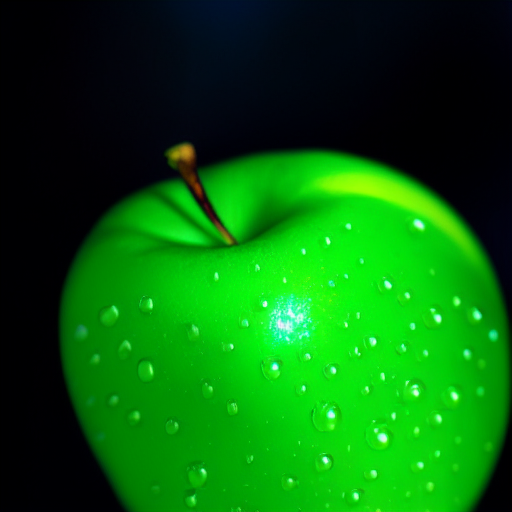
It has a lot more realistic details and better lighting. Doing a second round of img2img adds complexity to the scene.
img2img is a versatile technique to control the composition and color of the image. It provides additional control to text-to-image.
Hey, I love your blog, instructions are amaisingly simple and yet very informative.
I am trying to find a way to transform lineart into a photorealistic image, while following the outlines, similar to what Vizcom does. Img2img does not give good results, no matter the prompt used. Is there a way SD can do this?
Thanks, Vesna
Hi, you should use controlnet line art. https://stable-diffusion-art.com/controlnet/
I managed to do that, thanks a lot! I did not quite figured how it works at first 🙂
i cant draw in img2img. only in sketch, inpaint or inpaint sketch
Yes now it’s called sketch.