ControlNet is a neural network that controls image generation in Stable Diffusion by adding extra conditions. Details can be found in the article Adding Conditional Control to Text-to-Image Diffusion Models by Lvmin Zhang and coworkers.
It is a game changer. You can use ControlNet to, to name a few,
- Specify human poses.
- Copy the composition from another image.
- Generate a similar image.
- Turn a scribble into a professional image.
In this post, You will learn everything you need to know about ControlNet.
- What is ControlNet, and how it works.
- How to install ControlNet on Windows, Mac, and Google Colab.
- How to use ControlNet.
- All ControlNet models explained.
- Some usage examples.
This guide is for ControlNet with Stable Diffusion v1.5 models. See the guide for ControlNet with SDXL models.
Table of Contents
- What is ControlNet?
- Installing Stable Diffusion ControlNet
- Using ControlNet – a simple example
- Preprocessors and models
- Copying a face with ControlNet
- ALL ControlNet settings explained
- Multiple ControlNets
- Some ideas for using ControlNet
- Difference between the Stable Diffusion depth model and ControlNet
- How does ControlNet work?
- More readings
What is ControlNet?
ControlNet is a neural network model for controlling Stable Diffusion models. You can use ControlNet along with any Stable Diffusion models.
The most basic form of using Stable Diffusion models is text-to-image. It uses text prompts as the conditioning to steer image generation so that you generate images that match the text prompt.
ControlNet adds one more conditioning in addition to the text prompt. The extra conditioning can take many forms in ControlNet.
Let me show you two examples of what ControlNet can do: Controlling image generation with (1) edge detection and (2) human pose detection.
Edge detection example
As illustrated below, ControlNet takes an additional input image and detects its outlines using the Canny edge detector. An image containing the detected edges is then saved as a control map. It is fed into the ControlNet model as an extra conditioning to the text prompt.
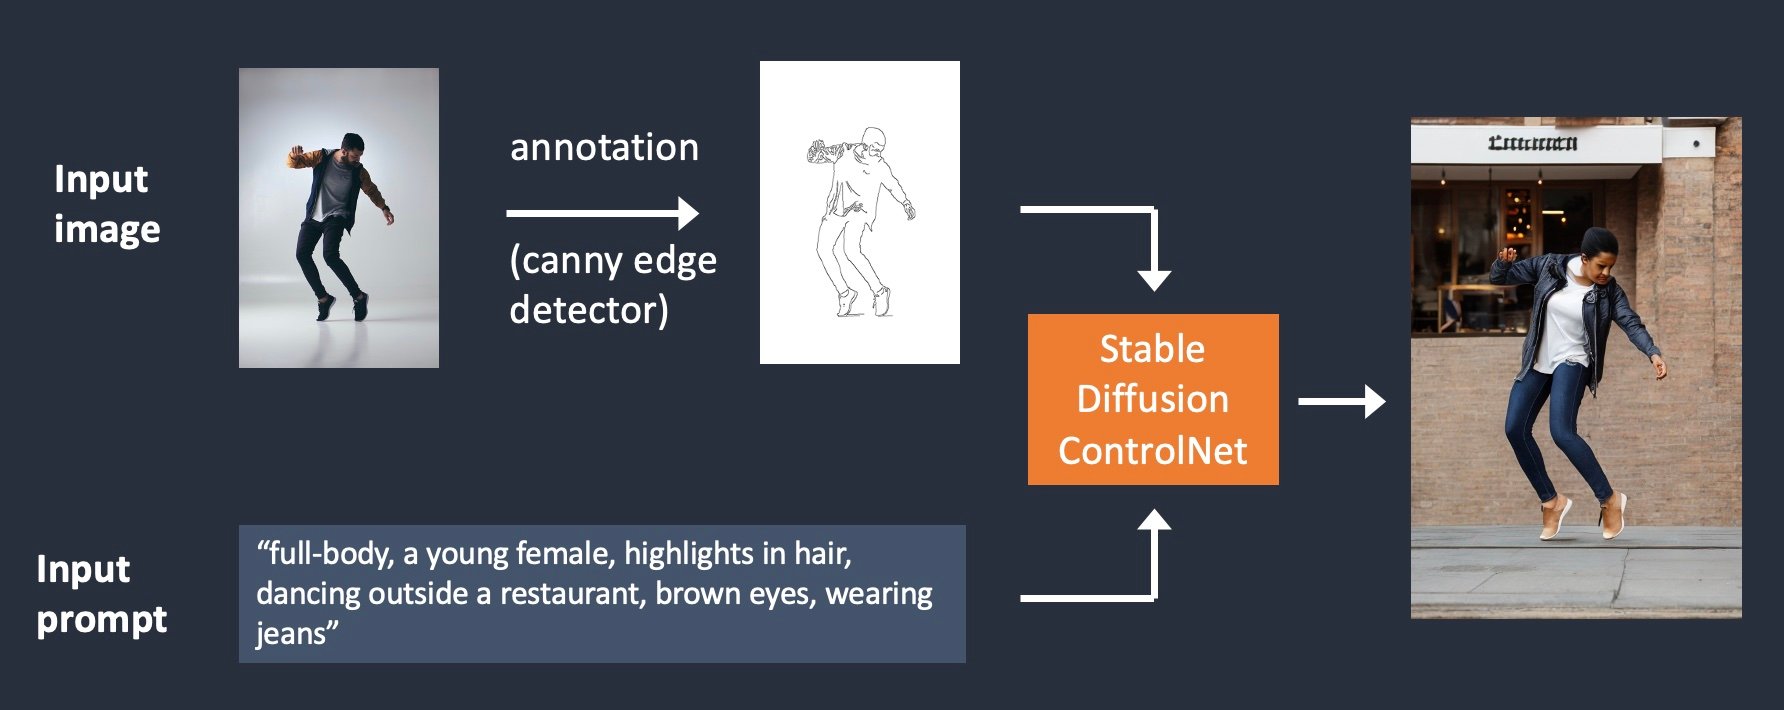
The process of extracting specific information (edges in this case) from the input image is called annotation (in the research article) or preprocessing (in the ControlNet extension).
Human pose detection example
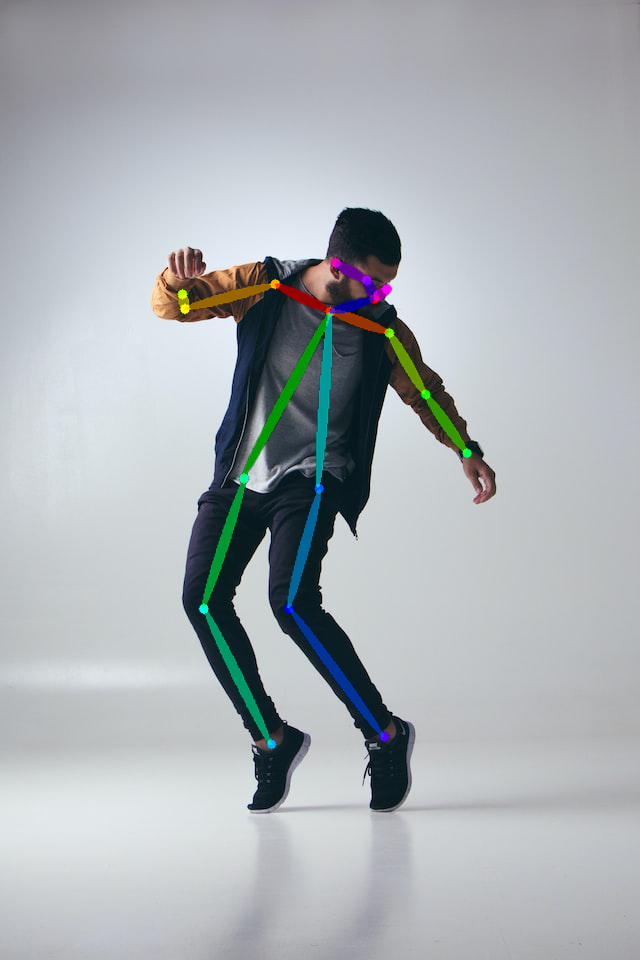
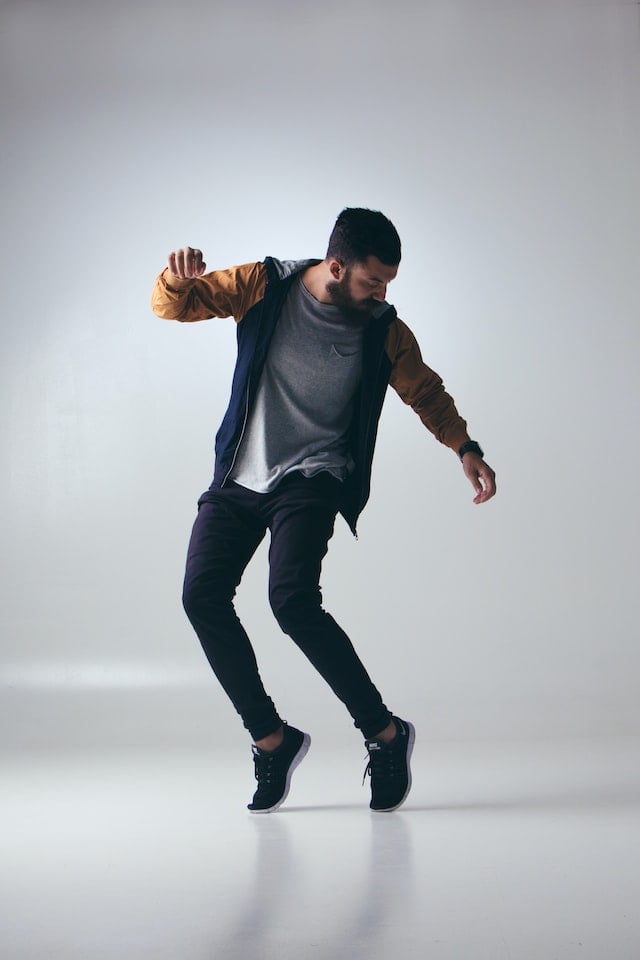
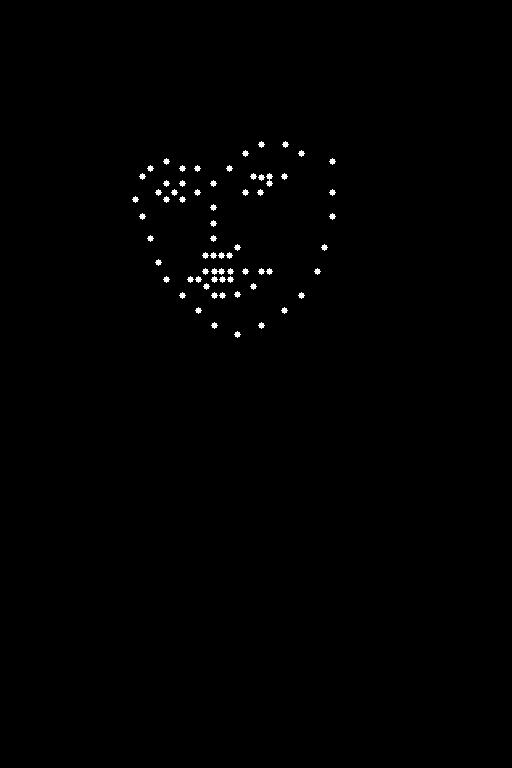
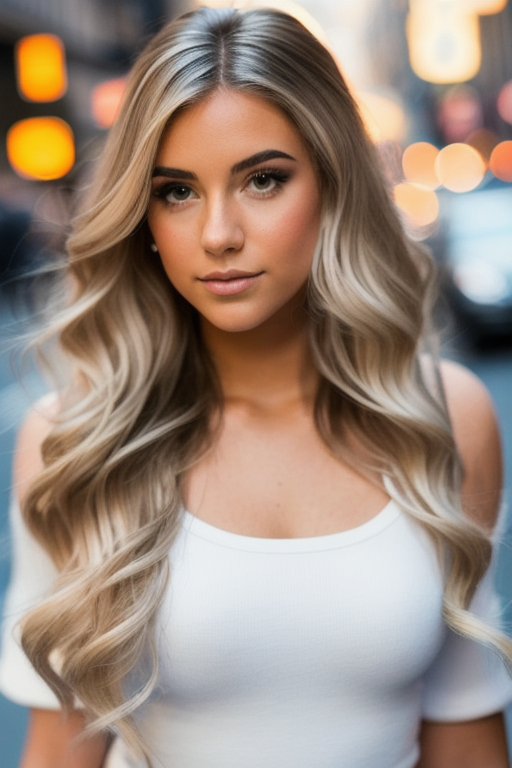
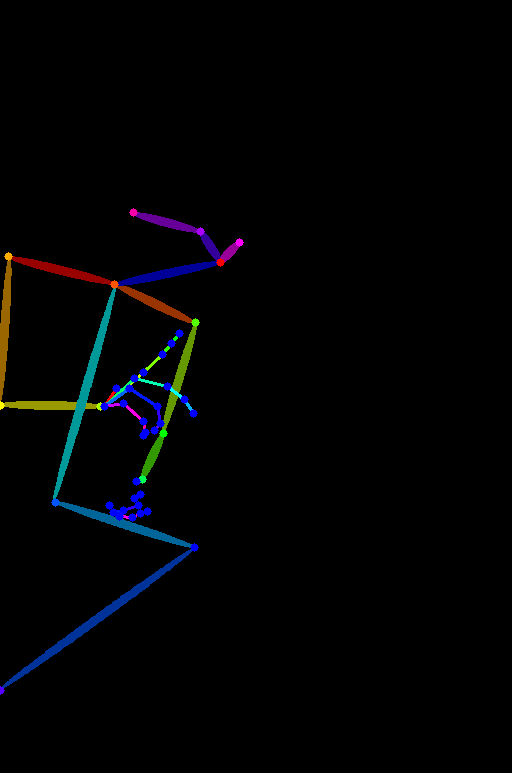
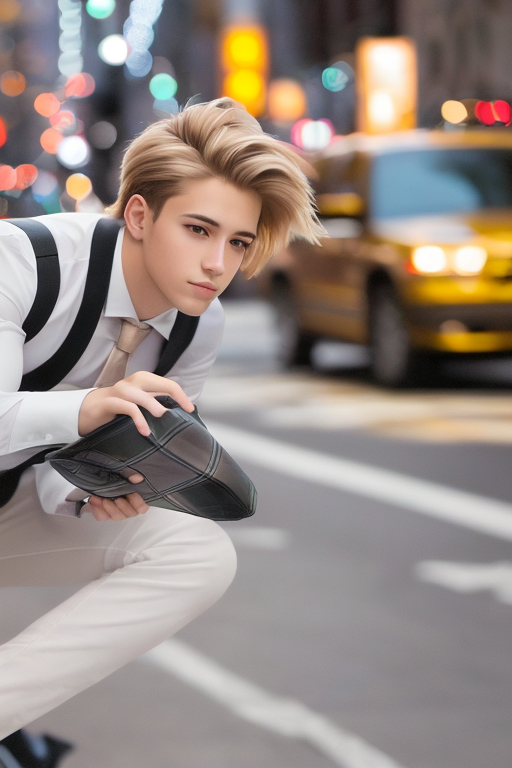
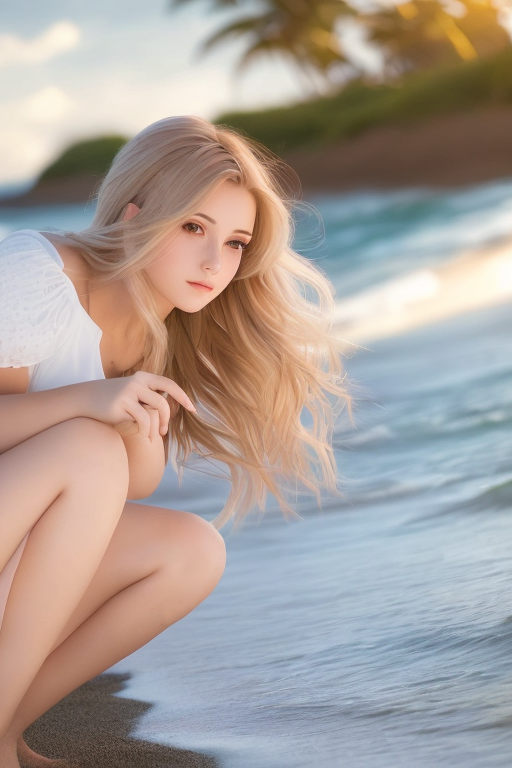
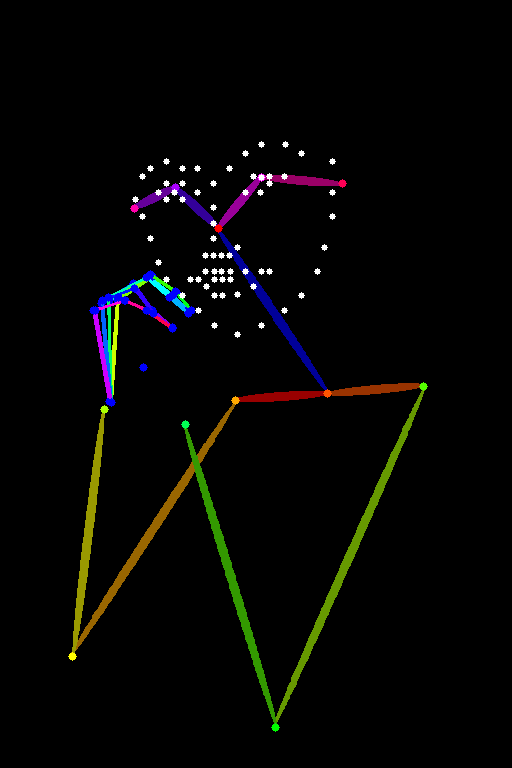
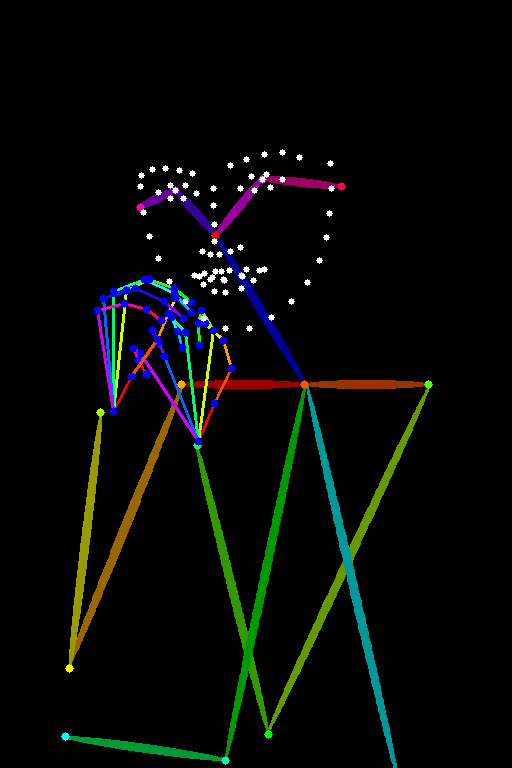
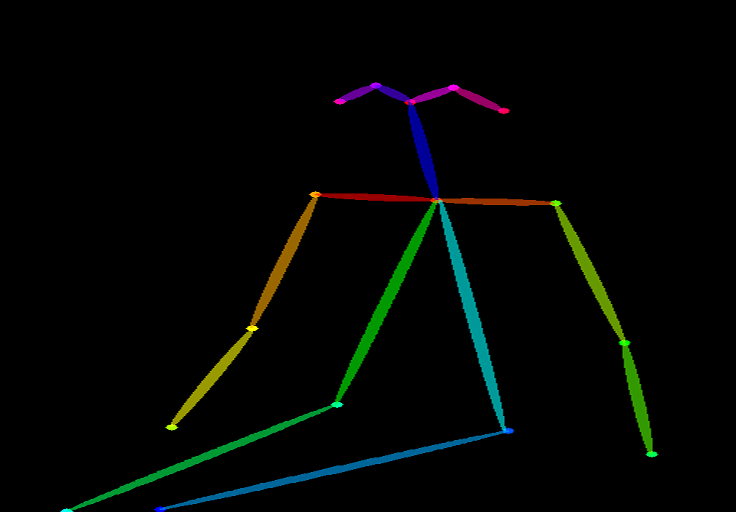
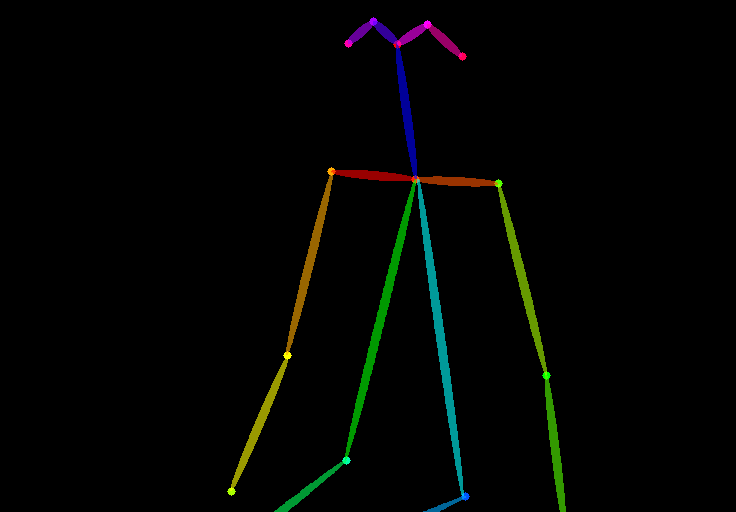
Edge detection is not the only way an image can be preprocessed. Openpose is a fast human keypoint detection model that can extract human poses like positions of hands, legs, and head. See the example below.
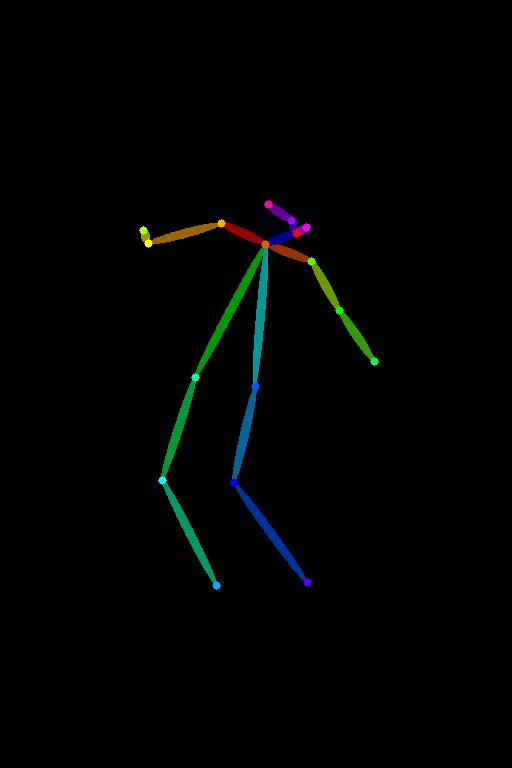
Below is the ControlNet workflow using OpenPose. Keypoints are extracted from the input image using OpenPose, and saved as a control map containing the positions of key points. It is then fed to Stable Diffusion as an extra conditioning together with the text prompt. Images are generated based on these two conditionings.
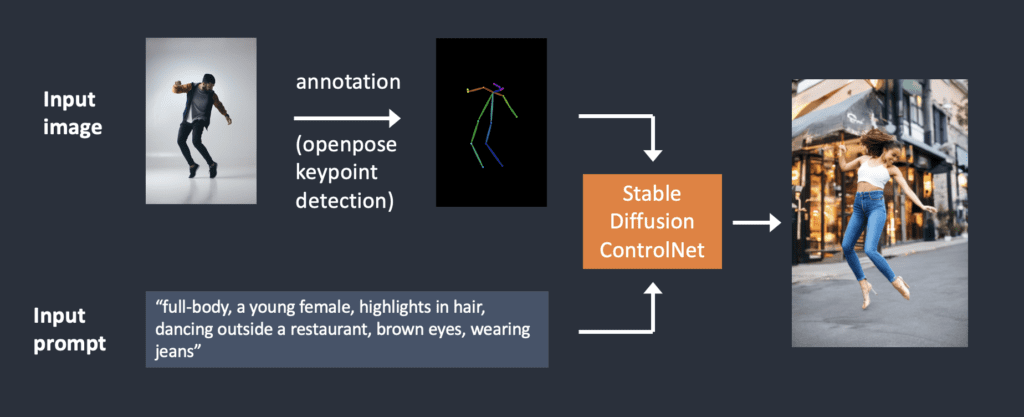
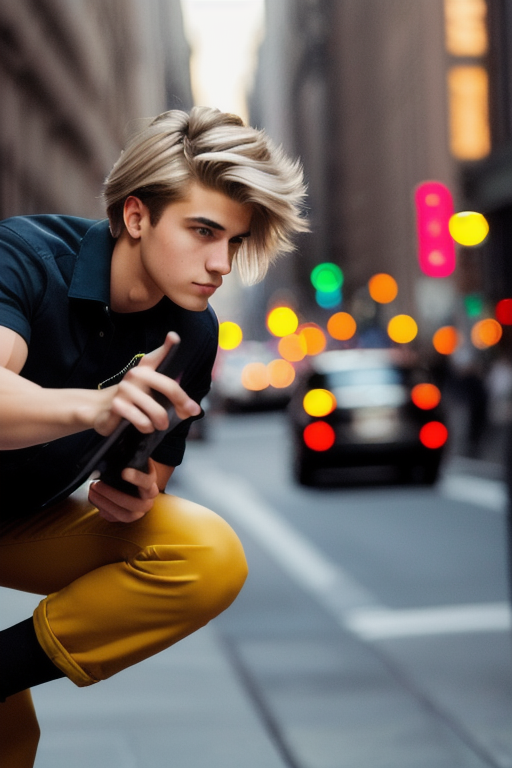
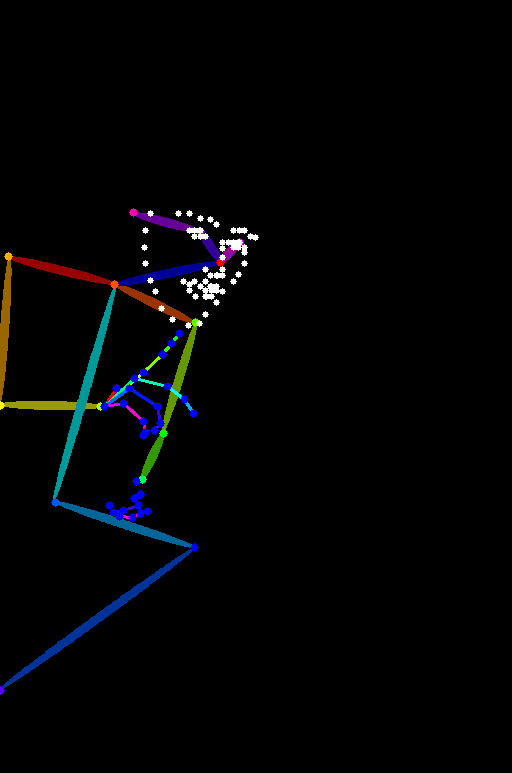
What’s the difference between using Canny edge detection and Openpose? The Canny edge detector extracts the edges of the subject and background alike. It tends to translate the scene more faithfully. You can see the dancing man became a woman, but the outline and hairstyle are preserved.
OpenPose only detects human key points such as positions of the head, arms, etc. The image generation is more liberal but follows the original pose.
The above example generated a woman jumping up with the left foot pointing sideways, different from the original image and the one in the Canny Edge example. The reason is that OpenPose’s keypoint detection does not specify the orientations of the feet.
Installing Stable Diffusion ControlNet
(The instructions are updated for ControlNet v1.1)
Let’s walk through how to install ControlNet in AUTOMATIC1111, a popular and full-featured (and free!) Stable Diffusion GUI. We will use this extension, which is the de facto standard, for using ControlNet.
If you already have ControlNet installed, you can skip to the next section to learn how to use it.
Install ControlNet in Google Colab
It’s easy to use ControlNet with the 1-click Stable Diffusion Colab notebook in our Quick Start Guide.
In the Extensions section of the Colab notebook, check ControlNet.
Press the Play button to start AUTOMATIC1111. That’s it!
Install ControlNet on Windows PC or Mac
You can use ControlNet with AUTOMATIC1111 on Windows PC or Mac. Follow the instructions in these articles to install AUTOMATIC1111 if you have not already done so.
If you already have AUTOMATIC1111 installed, make sure your copy is up-to-date.
Install ControlNet extension (Windows/Mac)
- Navigate to the Extensions page.
2. Select the Install from URL tab.
3. Put the following URL in the URL for extension’s repository field.
https://github.com/Mikubill/sd-webui-controlnet4. Click the Install button.
5. Wait for the confirmation message saying the extension is installed.
6. Restart AUTOMATIC1111.
7. Visit the ControlNet models page.
8. Download all model files (filename ending with .pth).
(If you don’t want to download all of them, you can download the openpose and canny models for now, which are most commonly used.)
9. Put the model file(s) in the ControlNet extension’s models directory.
stable-diffusion-webui\extensions\sd-webui-controlnet\modelsRestart AUTOMATIC1111 webui.
If the extension is successfully installed, you will see a new collapsible section in the txt2img tab called ControlNet. It should be right above the Script drop-down menu.
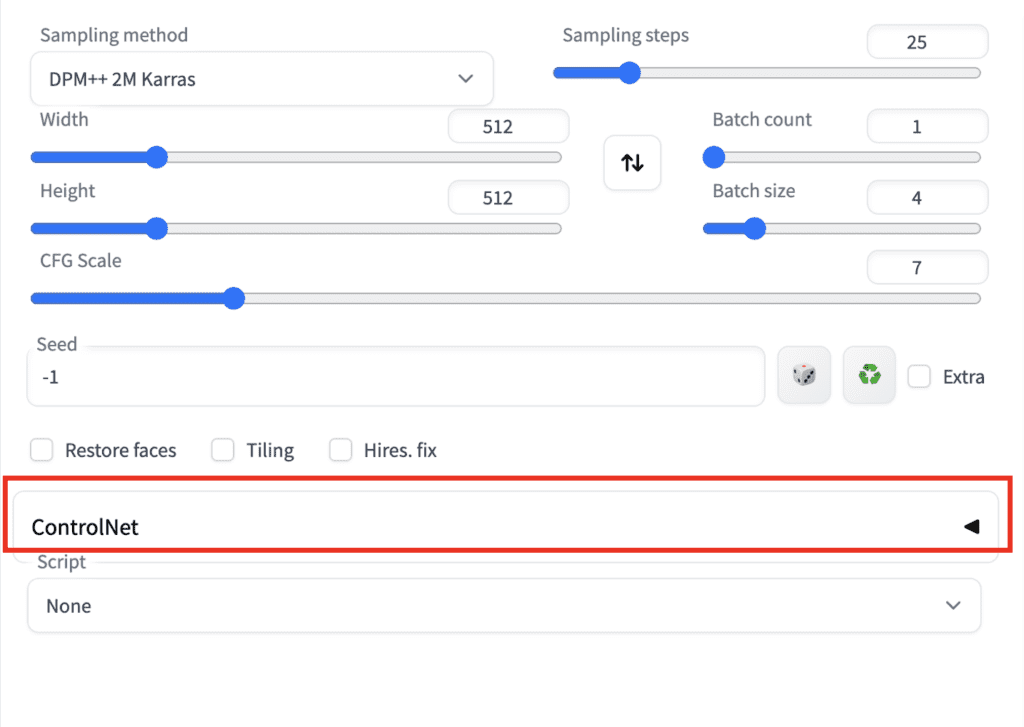
This indicates the extension installation was successful.
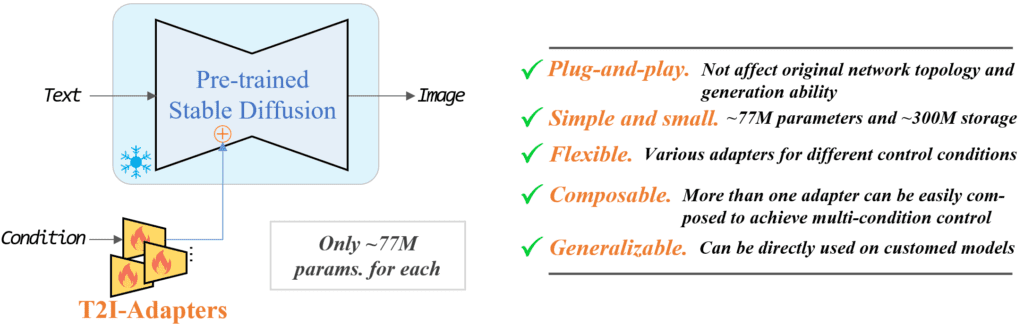
Installing T2I adapters
T2I adapters are neural network models for providing extra controls to image generations of diffusion models. They are conceptually similar to ControlNet but with a different design.
The A1111 ControlNet extension can use T2I adapters. You will need to download the models here. Grab the ones with file names that read like t2iadapter_XXXXX.pth
The functionalities of many of the T2I adapters overlap with ControlNet models. I will only cover the following two.
Put them in ControlNet’s model folder.
stable-diffusion-webui\extensions\sd-webui-controlnet\modelsUpdating the ControlNet extension
ControlNet is an extension that has undergone rapid development. It is not uncommon to find out your copy of ControlNet is outdated.
Updating is needed only if you run AUTOMATIC1111 locally on Windows or Mac. The Colab notebook of the site always runs the latest of the ControlNet extension.
To determine if your ControlNet version is up-to-date, compare your version number in the ControlNet section on the txt2img page with the latest version number.
Option 1: Update from Web-UI
The easiest way to update the ControlNet extension is using the AUTOMATIC1111 GUI.
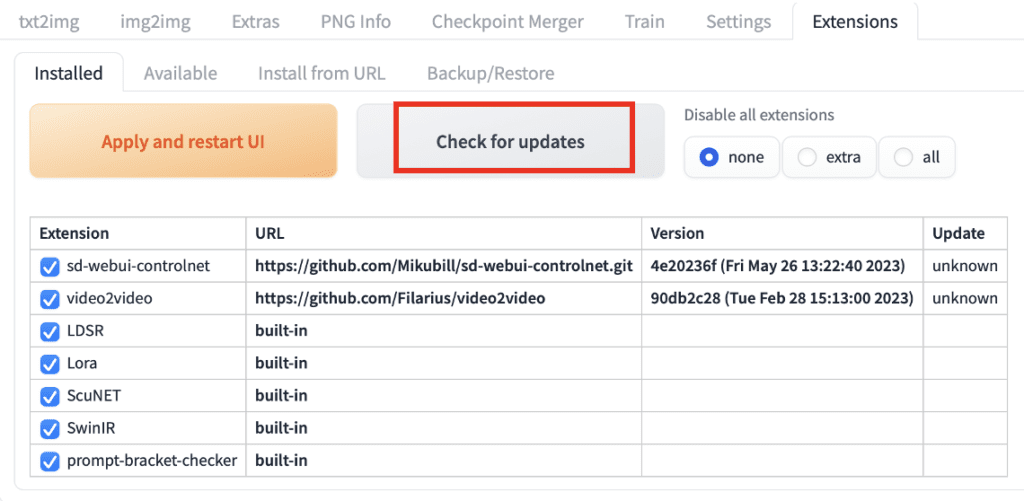
- Go to the Extensions page.
- In the Installed tab, click Check for updates.
- Wait for the confirmation message.
- Completely close and restart AUTOMATIC1111 Web-UI.
Option 2: Command line
If you are comfortable with the command line, you can use this option to update ControlNet, which gives you the comfort of mind that the Web-UI is not doing something else.
Step 1: Open the Terminal App (Mac) or the PowerShell App (Windows).
Step 2: Navigate to ControlNet extension’s folder. (Adjust accordingly if you installed somewhere else)
cd stable-diffusion-webui/extensions/sd-webui-controlnetStep 3: Update the extension by running the following command.
git pullUsing ControlNet – a simple example
Now you have ControlNet installed, let’s go through a simple example of using it! You will see a detailed explanation of each setting later.
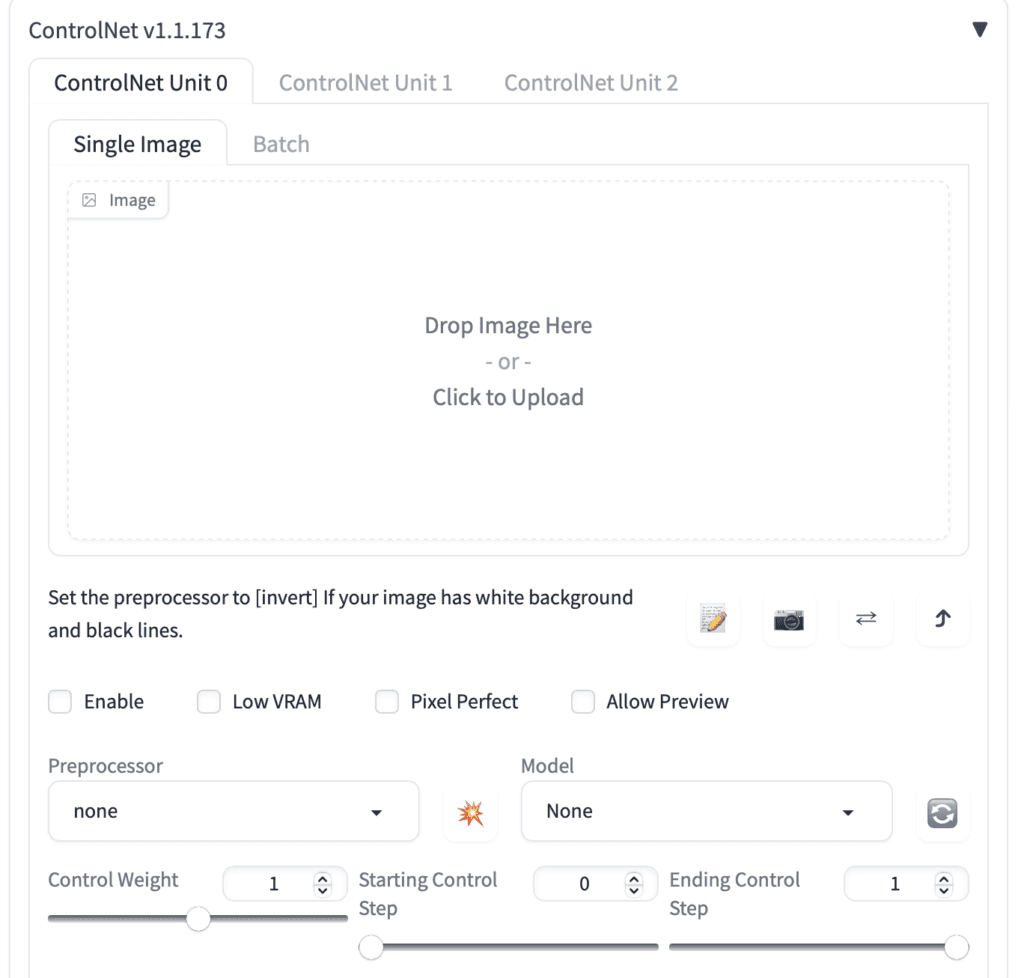
You should have the ControlNet extension installed to follow this section. You can verify by seeing the ControlNet section below.
Press the caret on the right to expand the ControlNet panel. It shows the full section of control knobs and an image upload canvas.
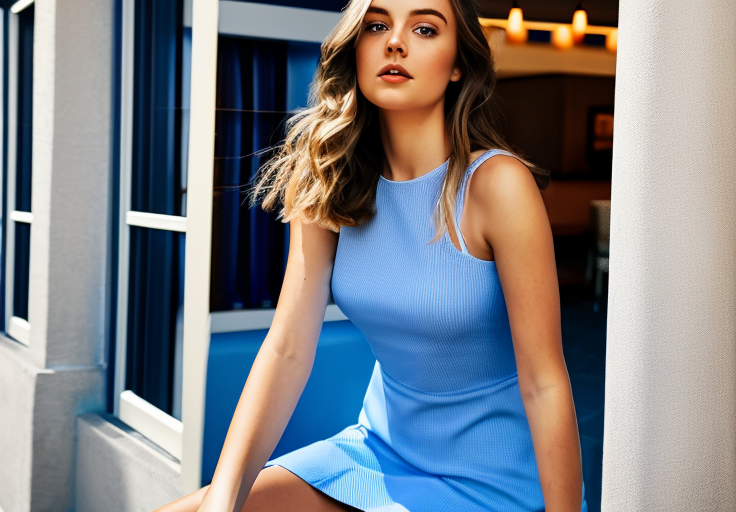
I will use the following image to show you how to use ControlNet. You can download the image using the download button to follow the tutorial.

Text-to-image settings
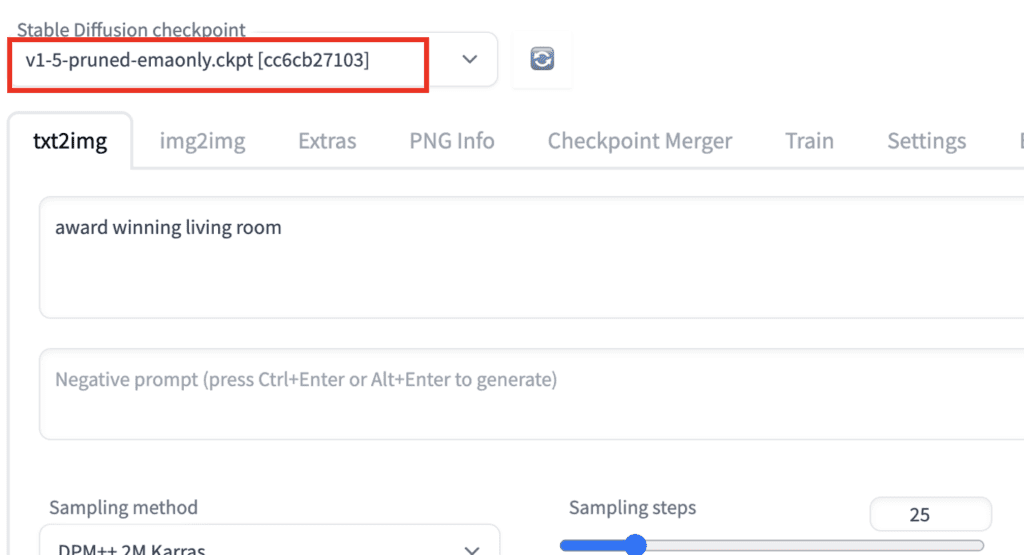
ControlNet will need to be used with a Stable Diffusion model. In the Stable Diffusion checkpoint dropdown menu, select the model you want to use with ControlNet. Select v1-5-pruned-emaonly.ckpt to use the v1.5 base model.
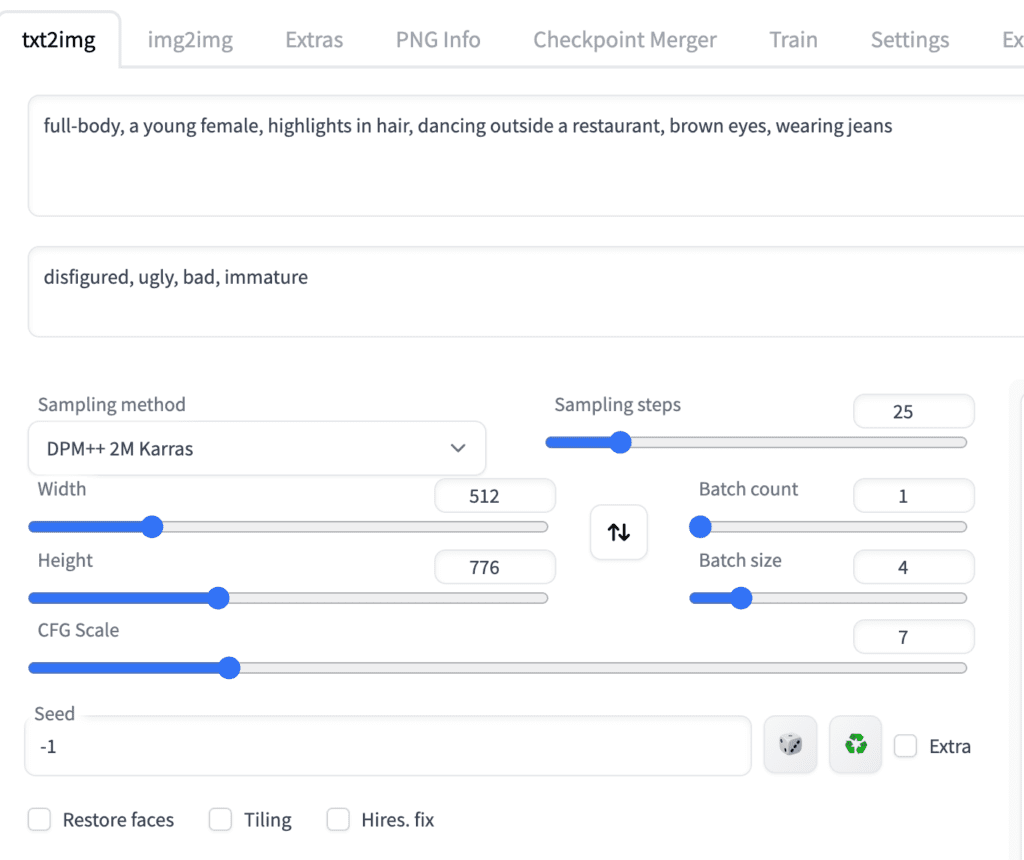
In the txt2image tab, write a prompt and, optionally, a negative prompt to be used by ControlNet. I will use the prompts below.
Prompt:
full-body, a young female, highlights in hair, dancing outside a restaurant, brown eyes, wearing jeans
Negative prompt:
disfigured, ugly, bad, immature
Set image size for image generation. I will use width 512 and height 776 for my demo image. Note that the image size is set in the txt2img section, NOT in the ControlNet section.
The GUI should look below.
ControlNet settings
Now let’s move on to the ControlNet panel.
First, upload an image to the image canvas.
Check the Enable checkbox.
You will need to select a preprocessor and a model. Preprocessor is just a different name for the annotator mentioned earlier, such as the OpenPose keypoint detector. Let’s select openpose as Preprocessor.
The selected ControlNet model has to be consistent with the preprocessor. For OpenPose, you should select control_openpose-fp16 as the model.
The ControlNet panel should look like this.
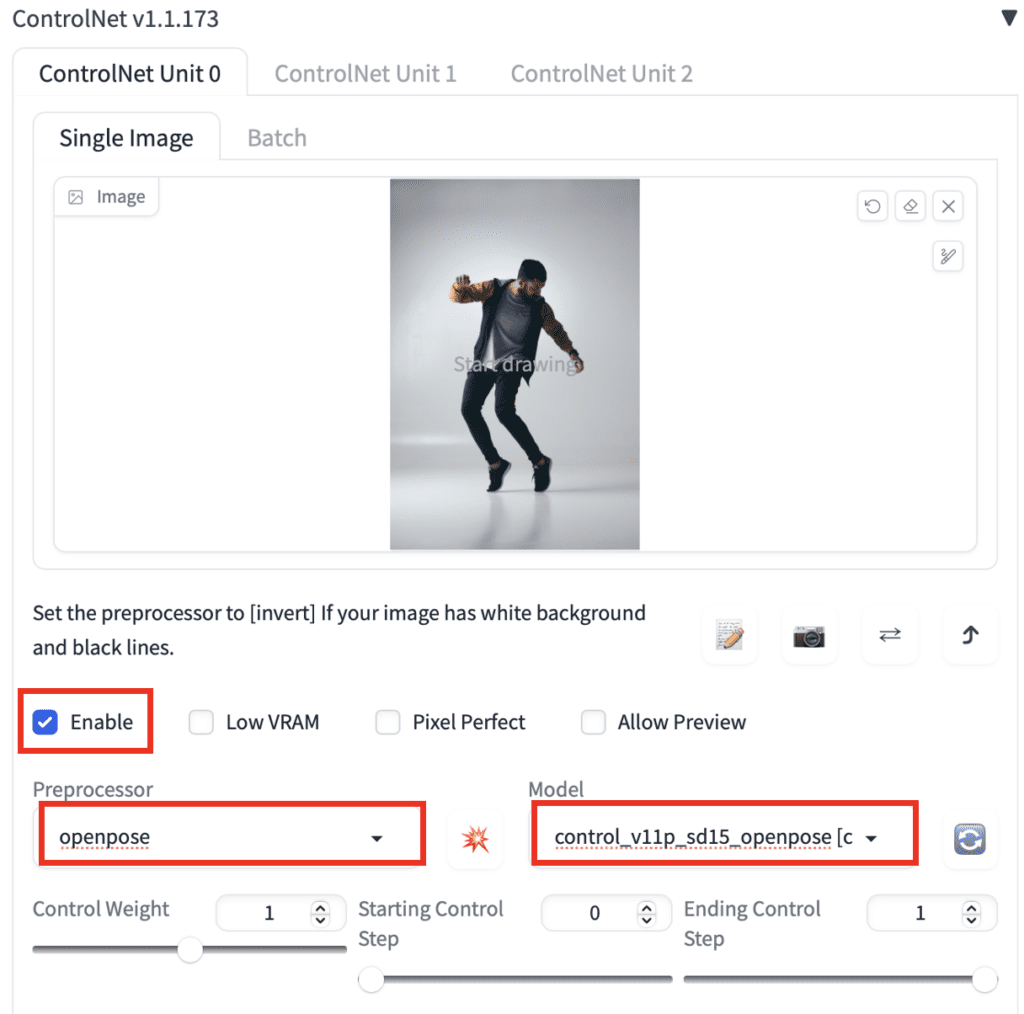
That’s all. Now press Generate to start generating images using ControlNet.
You should see the images generated to follow the pose of the input image. The last image is straightly from the preprocessing step. In this case, it is the keypoints detected.
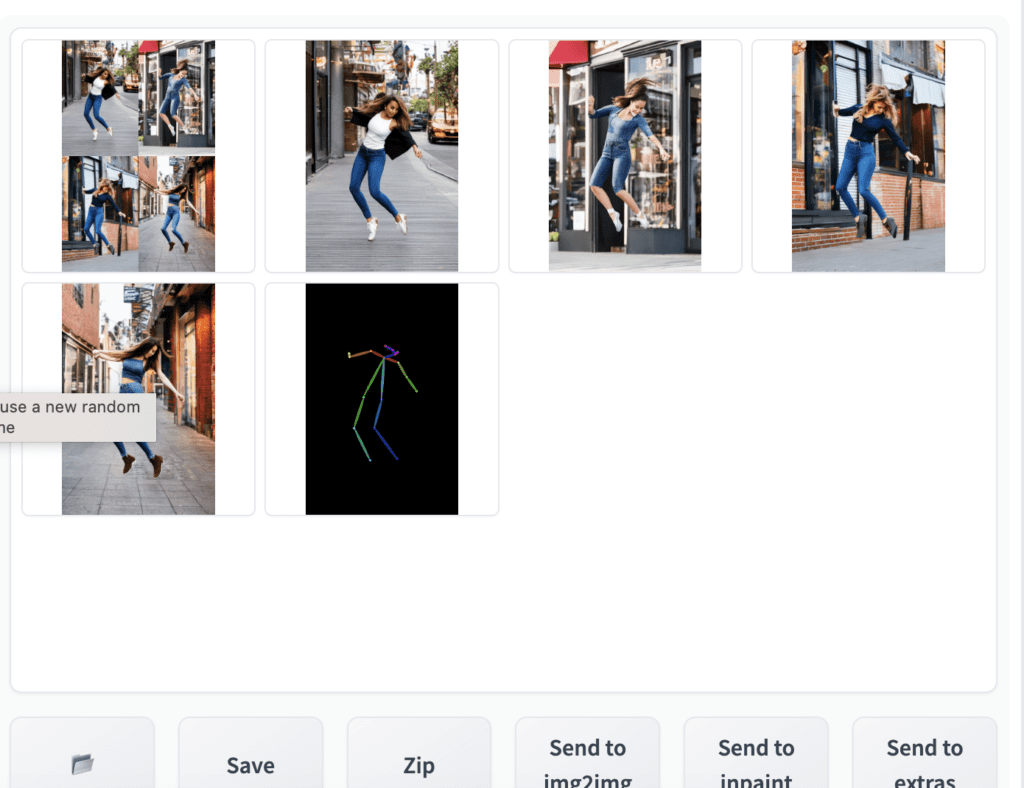
When you are done, uncheck the Enable checkbox to disable the ControlNet extension.
This is the basics of using ControlNet!
The rest is to understand
- What preprocessors are available (There are many!)
- ControlNet settings
Preprocessors and models
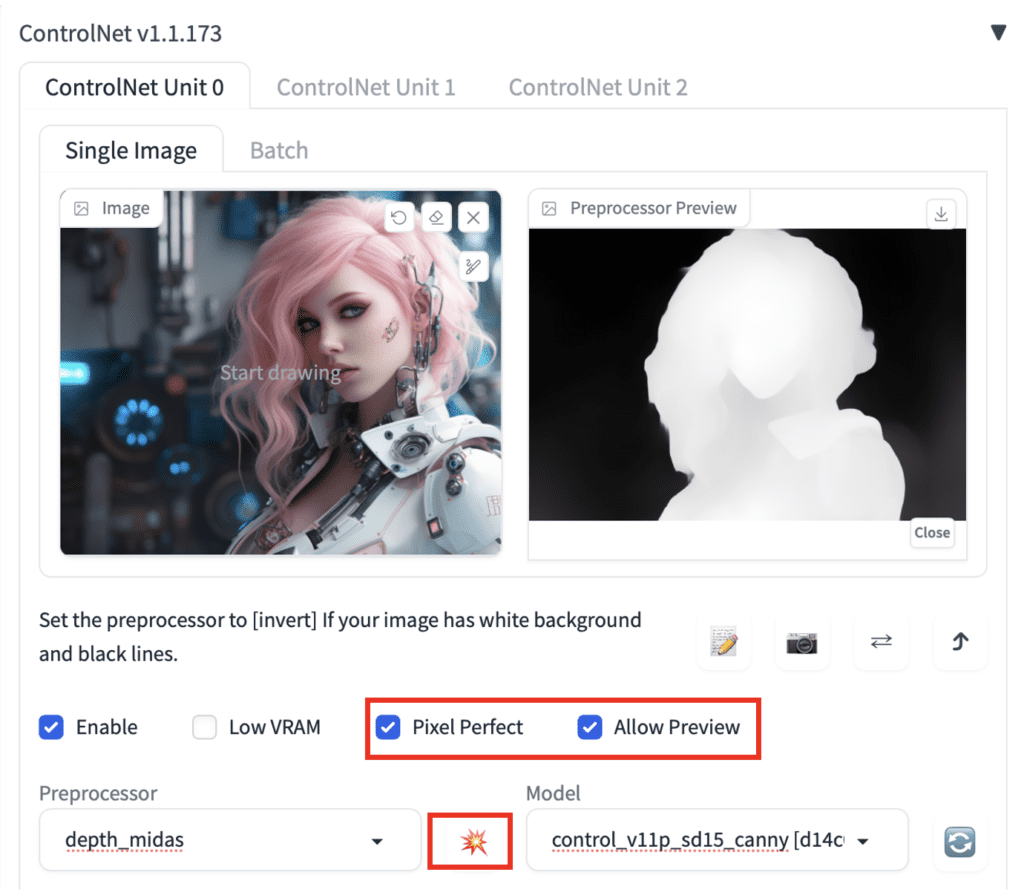
The first step of using ControlNet is to choose a preprocessor. It is helpful to turn on the preview so that you know what the preprocessor is doing. Once the preprocessing is done, the original image is discarded, and only the preprocessed image will be used for ControlNet.
To turn on the preview:
- Select Allow Preview.
- Optionally select Pixel Perfect. ControlNet will use the image height and width you specified in text-to-image to generate the preprocessed image.
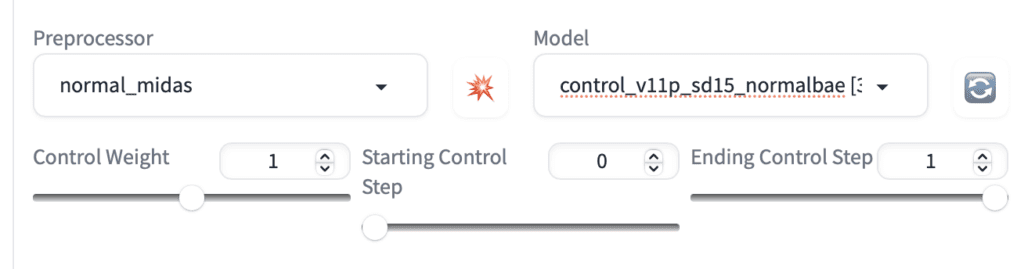
- Click on the explosion icon next to the Preprocessor dropdown menu.
Some Control models may affect the image too much. Reduce the Control Weight if you see color issues or other artifacts.
Choosing the right model
Once you choose a preprocessor, you must pick the correct model.
It is easy to tell which is the correct model to use in v1.1. All you need to do is to select the model with the same starting keyword as the preprocessor.
For example:
| Preprocessor | Model |
|---|---|
| depth_xxxx | control_xxxx_depth |
| lineart_xxxx | control_xxxx_lineart |
| openpose_xxxx | control_xxxx_openpose |
OpenPose
There are multiple OpenPose preprocessors.
OpenPose detects human key points such as positions of the head, shoulders, hands, etc. It is useful for copying human poses without copying other details like outfits, hairstyles, and backgrounds.
All openpose preprocessors need to be used with the openpose model in ControlNet’s Model dropdown menu.
The OpenPose preprocessors are:
- OpenPose: eyes, nose, eyes, neck, shoulder, elbow, wrist, knees, and ankles.
- OpenPose_face: OpenPose + facial details
- OpenPose_hand: OpenPose + hands and fingers
- OpenPose_faceonly: facial details only
- OpenPose_full: All of the above
- dw_openPose_full: An enhanced version of OpenPose_full
Pro tip: Use Dw OpenPose to extract all details.
OpenPose
OpenPose is the basic OpenPose preprocessor that detects the positions of the eyes, nose, eyes, neck, shoulder, elbow, wrist, knees, and ankles.
OpenPose_face
OpenPose_face does everything the OpenPose processor does but detects additional facial details.
It is useful for copying the facial expression.

Sample images:
OpenPose_faceonly
OpenPose face only detects only the face but not other keypoints. This is useful for copying the face only but not other keypoints.
See samples from text-to-image below. The body is not constrained.

OpenPose_hand
OpenPose_hand detects the keypoint as OpenPose and the hands and fingers.

Sample images:

OpenPose_full
OpenPose full detects everything openPose face and openPose hand do.
Sample images:
dw_openpose_full
DWPose is a new pose detection algorithm based on the research article Effective Whole-body Pose Estimation with Two-stages Distillation. It accomplishes the same task as OpenPose Full but does a better job. You should use dw_openpose_full instead of openpose_full.
Update ControlNet if you don’t see dw_openpose_full in the preprocessor menu.

Tile resample
The Tile resample model is used for adding details to an image. It is often used with an upscaler to enlarge an image at the same time.
See the ControlNet Tile Upscaling method.
Reference
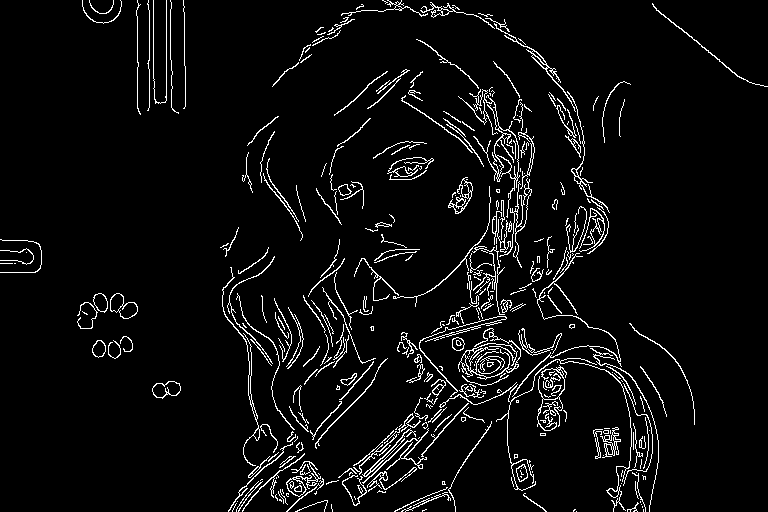
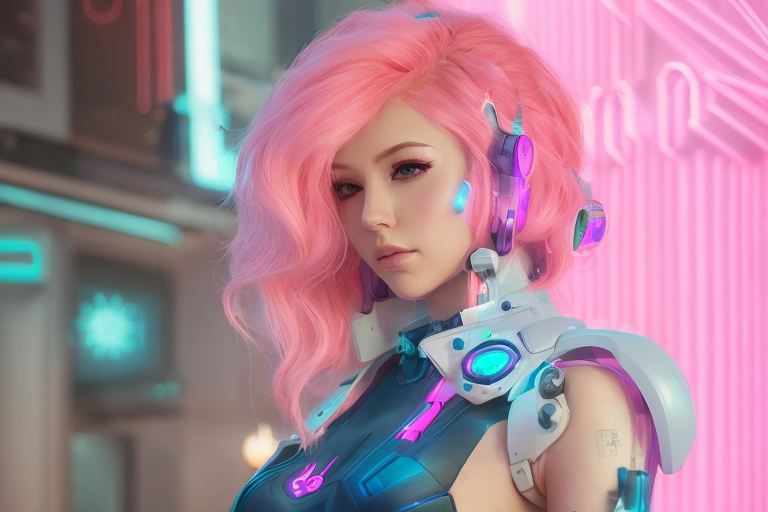
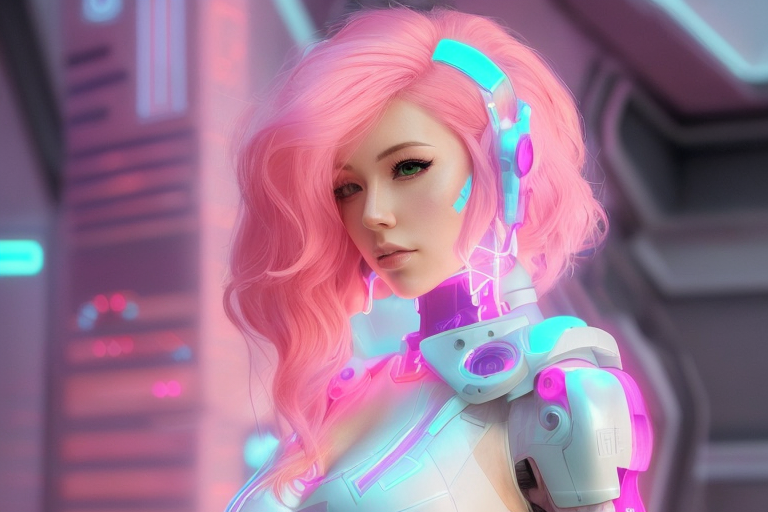
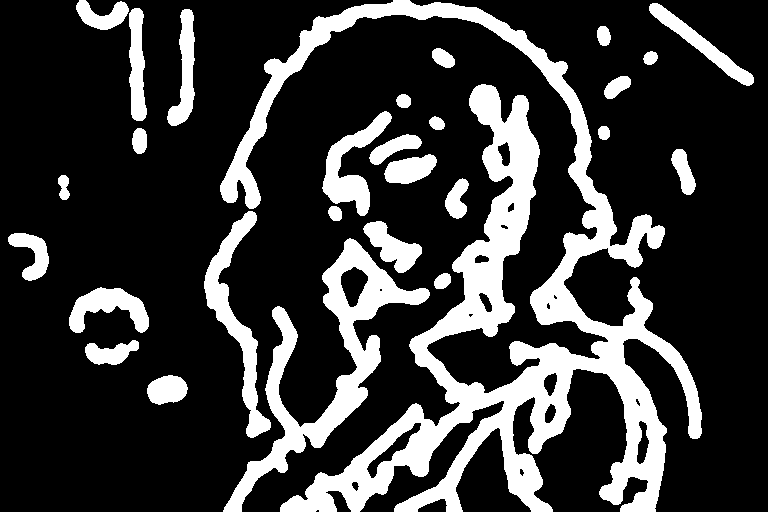
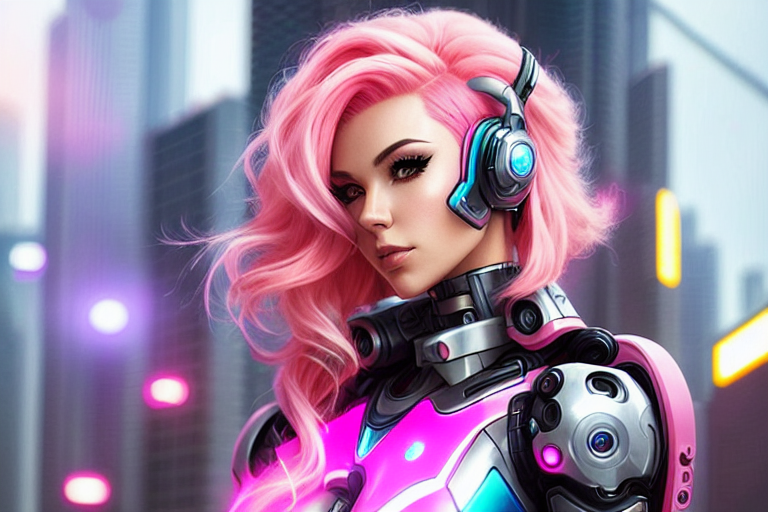
Reference is a set of preprocessors that lets you generate images similar to the reference image. The Stable Diffusion model and the prompt will still influence the images.
Reference preprocessors do NOT use a control model. You only need to select the preprocessor but not the model. (In fact, the model dropdown menu will be hidden after selecting a reference preprocessor.)
There are 3 reference preprocessors.
- Reference adain: Style transfer via Adaptive Instance Normalization. (paper)
- Reference only: Link the reference image directly to the attention layers.
- Reference adain+attn: Combination of above.
Select one of these preprocessors to use.
Below is an example.
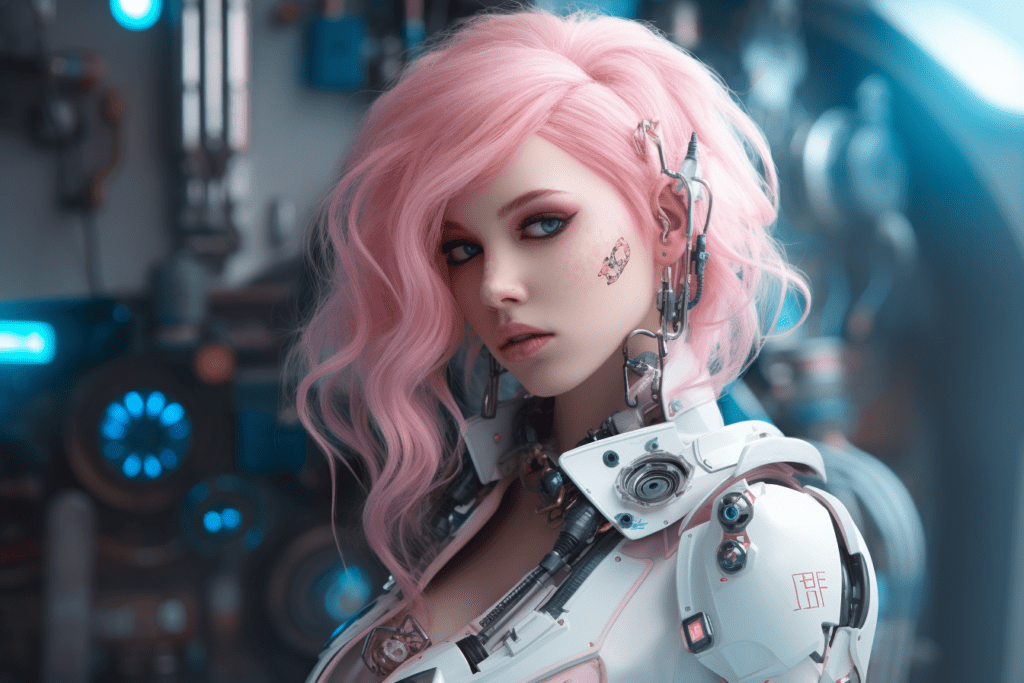
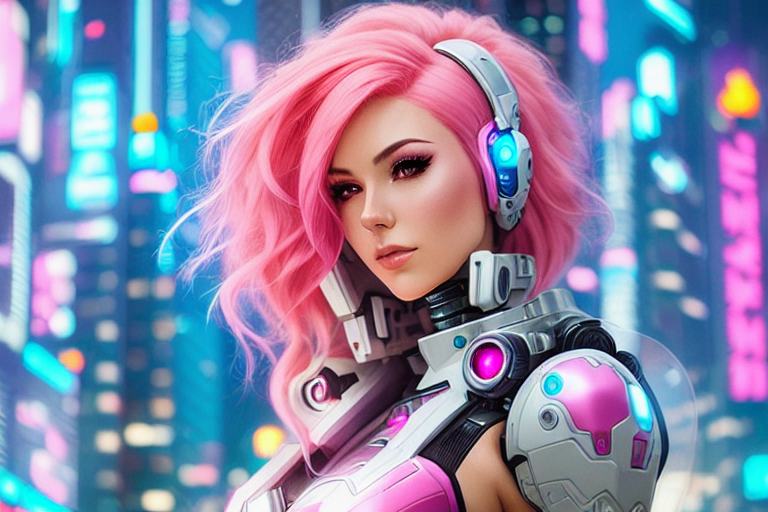
Using CLIP interrogator to guess the prompt.
a woman with pink hair and a robot suit on, with a sci – fi, Artgerm, cyberpunk style, cyberpunk art, retrofuturism
disfigured, ugly, bad, immature
Model: Protogen v2.2
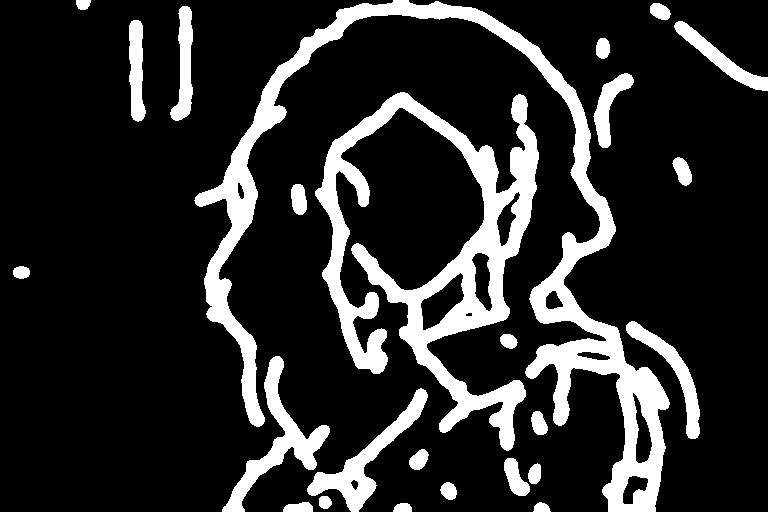
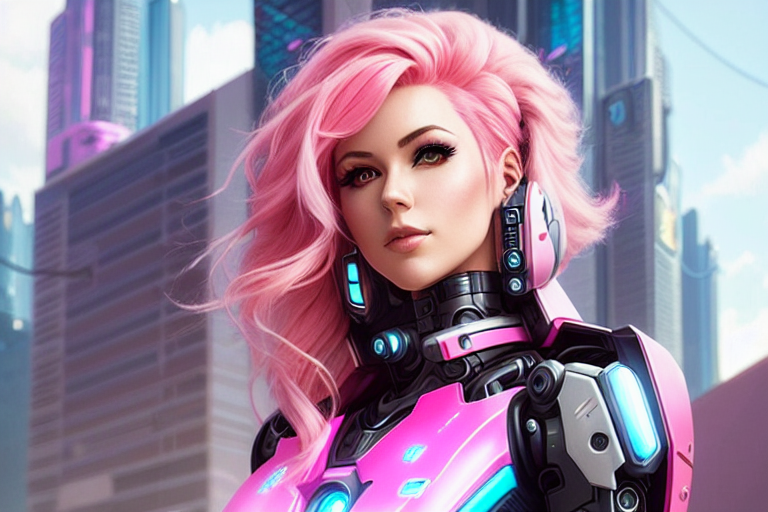
Reference adain
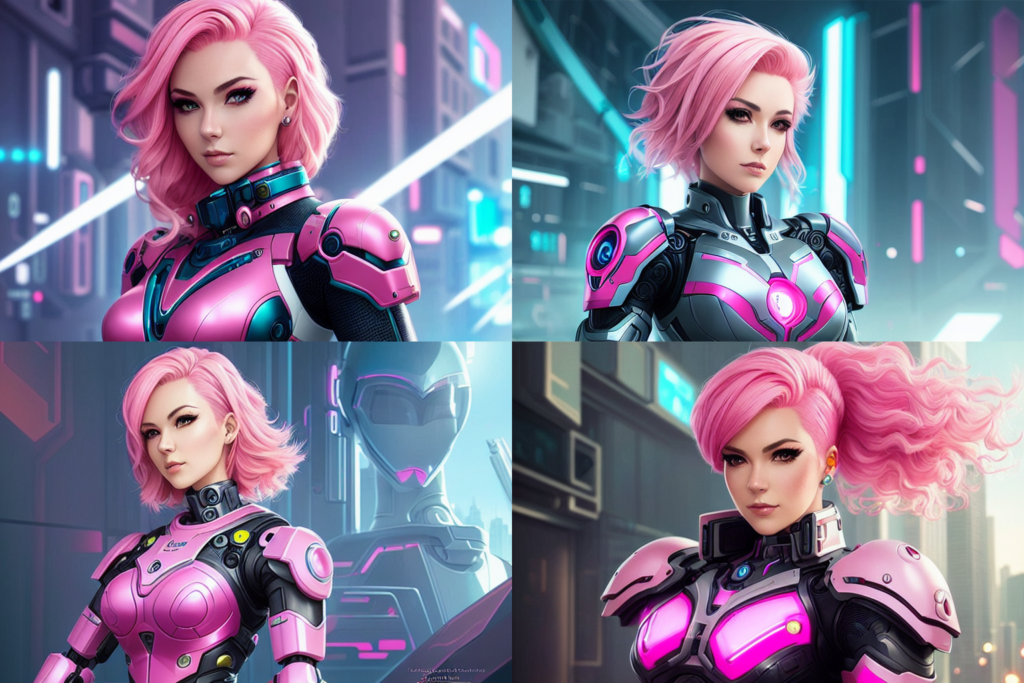
Reference only
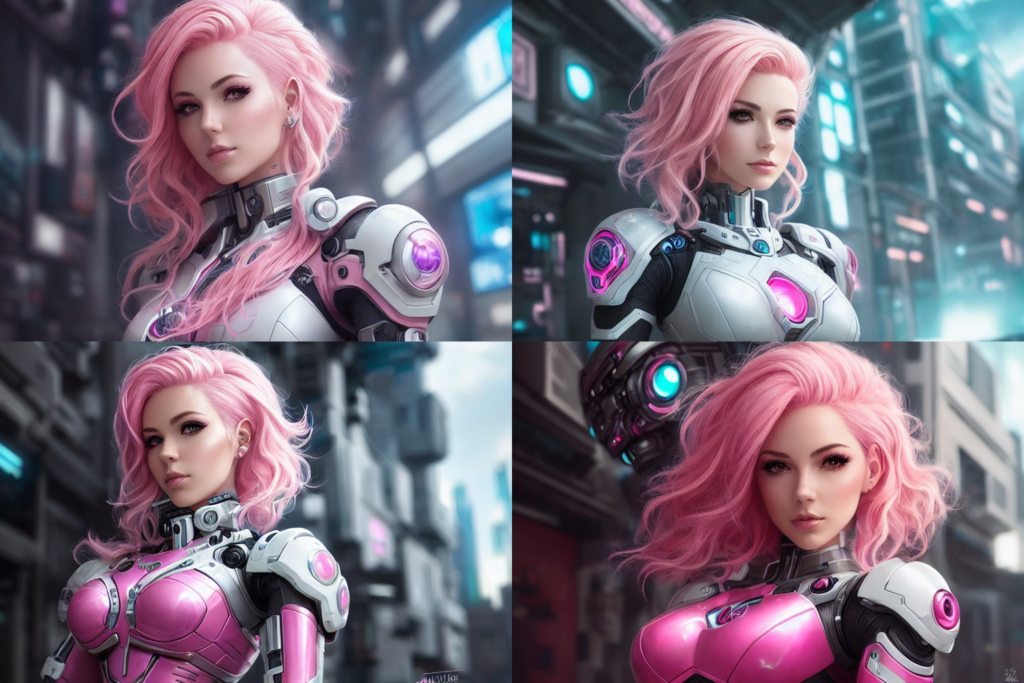
Reference adain+attn
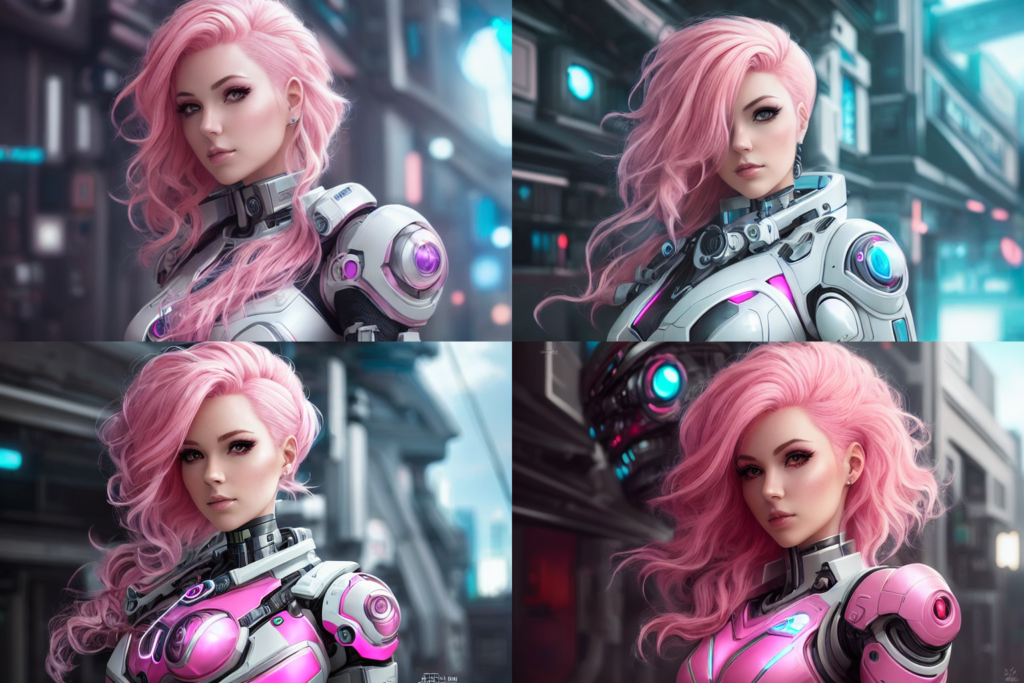
I would say reference-only works best if you twist my arm.
The above images are all from the balance mode. I don’t see a big difference in changing the style fidelity.
Image Prompt adapter (IP-adapter)
An Image Prompt adapter (IP-adapter) is a ControlNet model that allows you to use an image as a prompt. Read the article IP-Adapter: Text Compatible Image Prompt Adapter for Text-to-Image Diffusion Models by He Ye and coworkers and visit their Github page for implementation details.
Install IP-adapter models
Before using the IP adapters in ControlNet, download the IP-adapter models for the v1.5 model.
Put them in ControlNet’s model folder.
stable-diffusion-webui > extensions > sd-webui-controlnet > models
Using IP-adapter
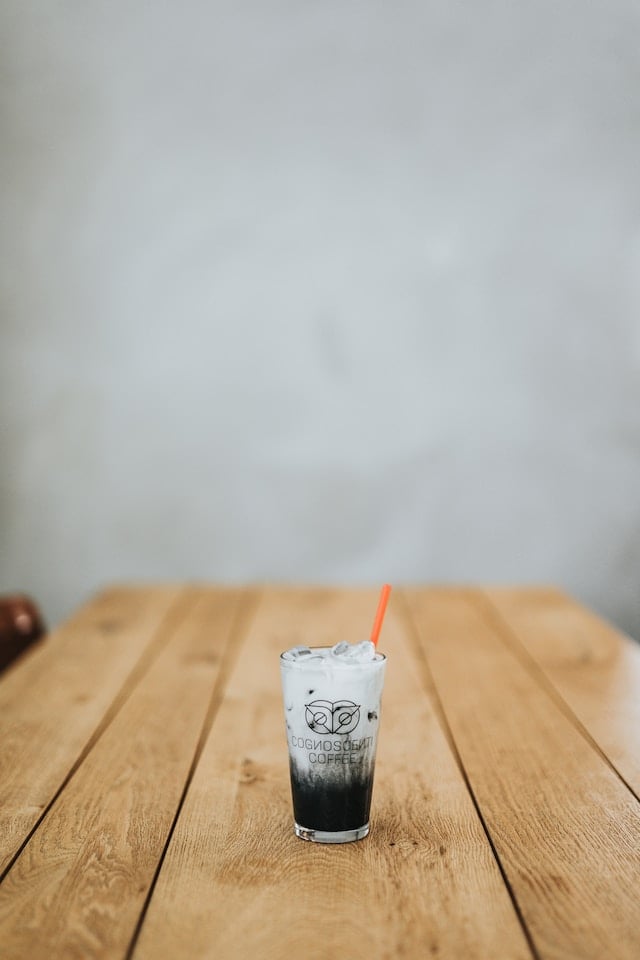
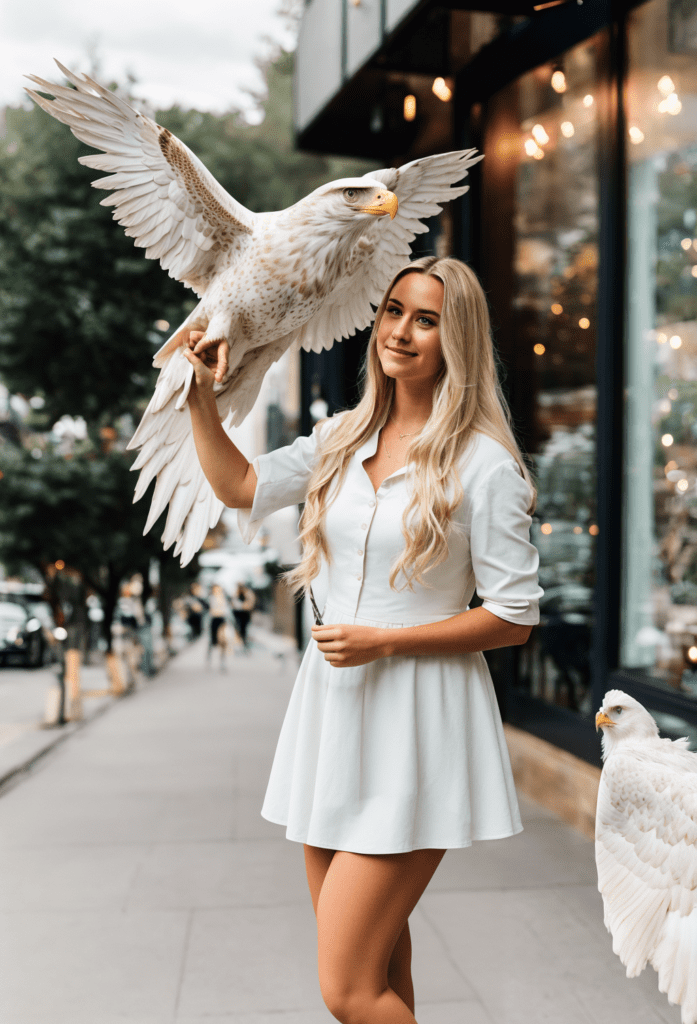
The IP-adapter allows you to use an image as a prompt, so you will need to supply a reference image. Let’s use the following image.
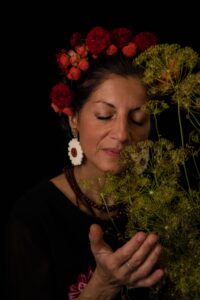
In the ControlNet section, upload the image to the image canvas.
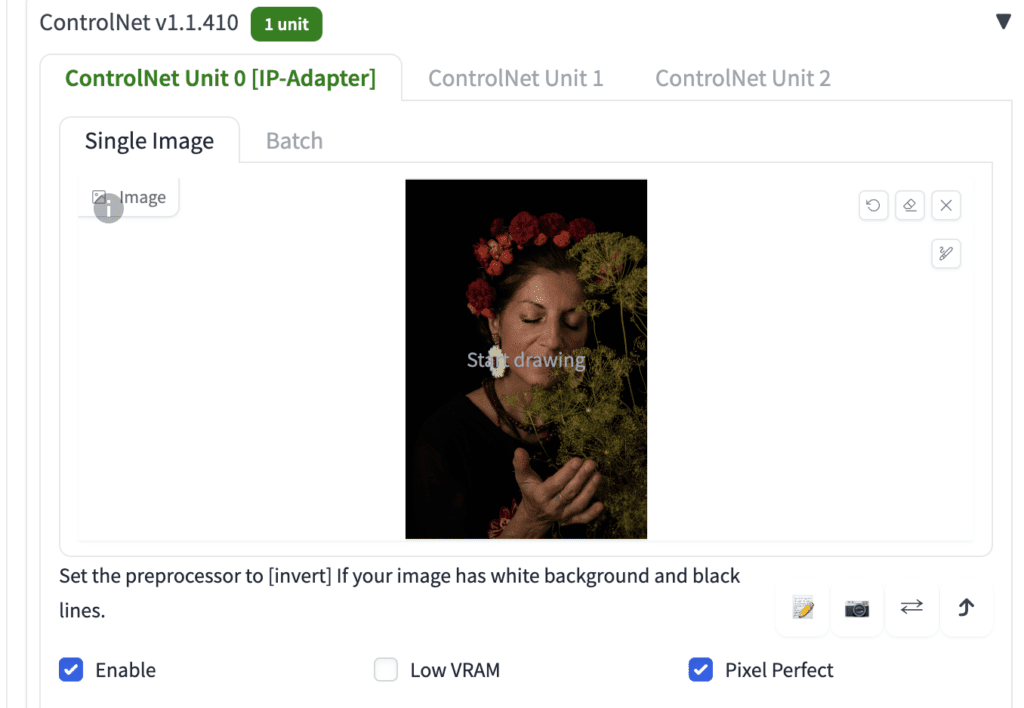
Here are the rest of the ControlNet settings to use IP-adapter
- Enable: Yes
- Pixel Perfect: Yes
- Control Type: IP-Adapter
- Preprocessor: ip-adapter_clip_sd15
- Model: ip-adapter_sd15
Below are images with and without the IP-adapters.
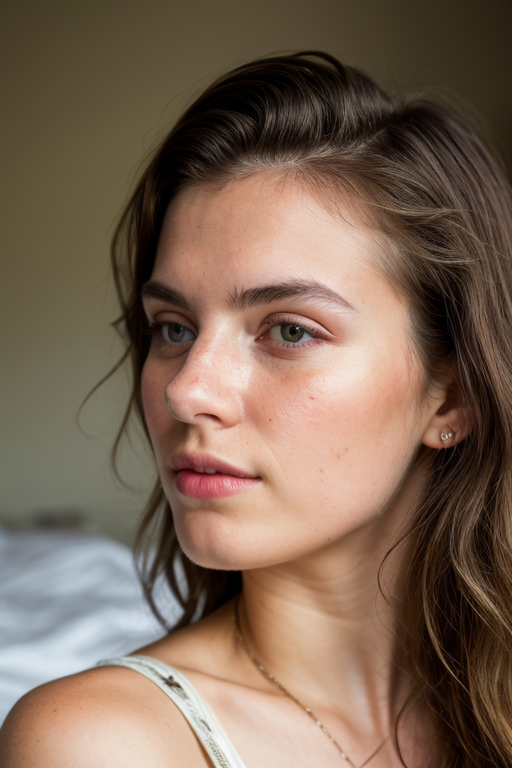
See the features of the reference image like the flowers and darker colors transferred to the generated image!
The SD 1.5 Plus IP-Adapter model does something similar but exerts a stronger effect.
The SD1.5 Plus model is very strong. It will almost copy the reference image. You can reduce the Control Weight to tune it down.
Canny
Canny edge detector is a general-purpose, old-school edge detector. It extracts the outlines of an image. It is useful for retaining the composition of the original image.
Select canny in both Preprocessor and Model dropdown menus to use.
The generated images will follow the outlines.
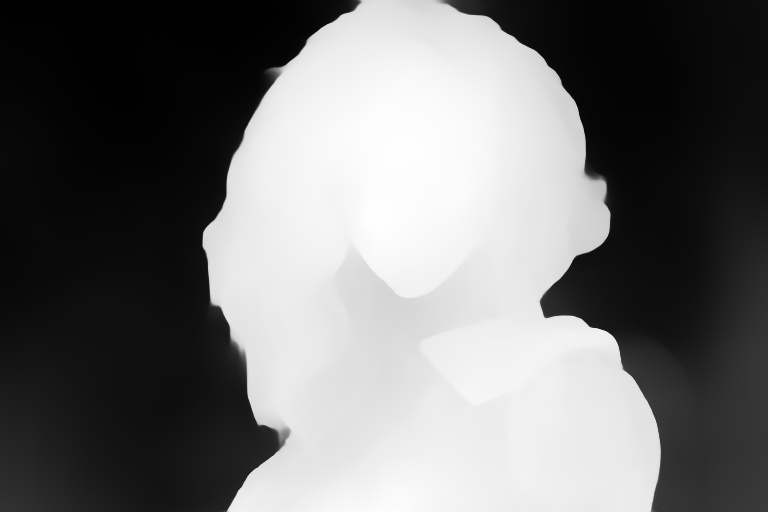
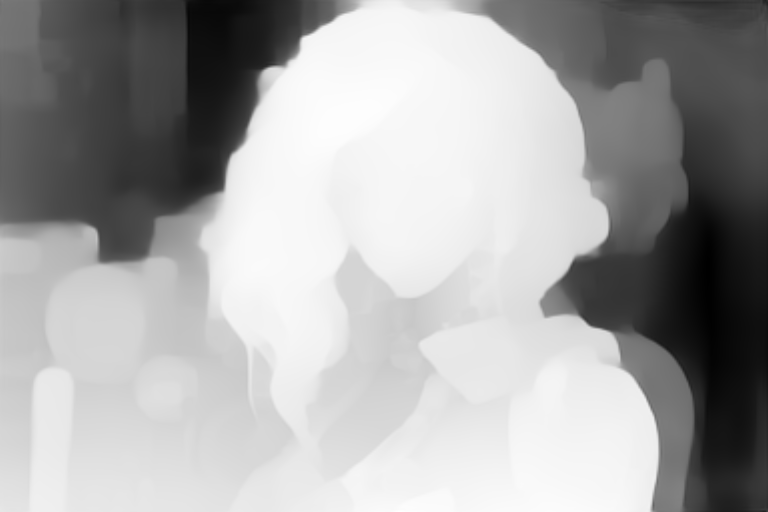
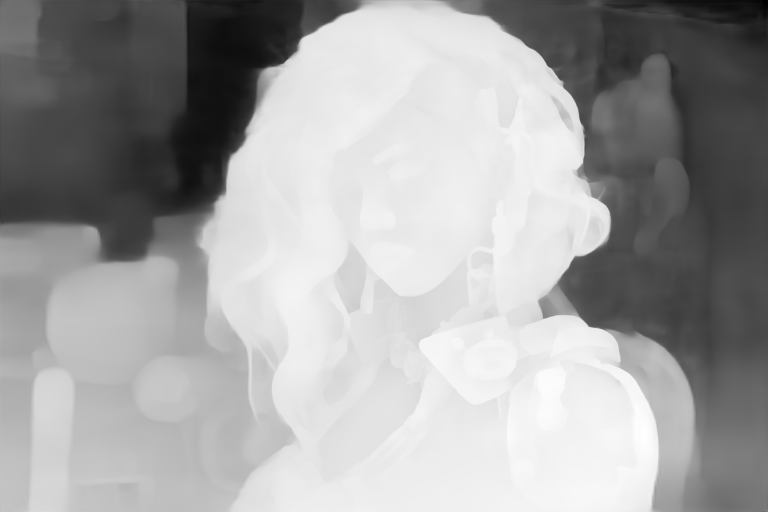
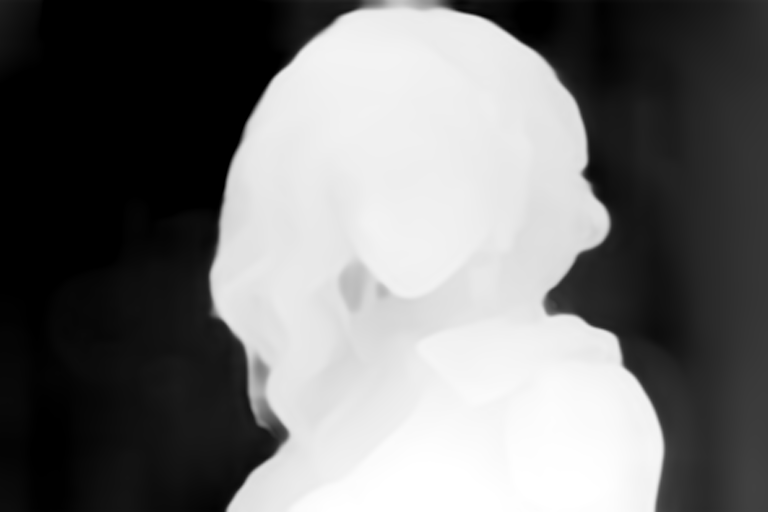
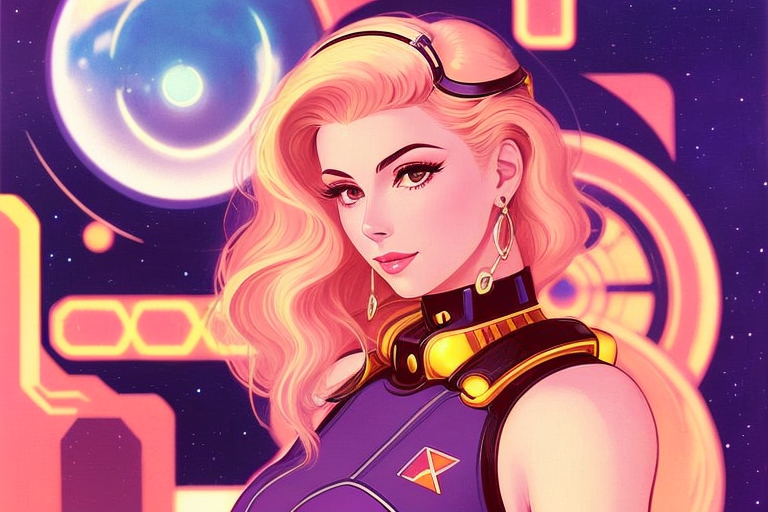
Depth
The depth preprocessor guesses the depth information from the reference image.
- Depth Midas: A classic depth estimator. Also used in the Official v2 depth-to-image model.
- Depth Leres: More details but also tend to render background.
- Depth Leres++: Even more details.
- Zoe: The level of detail sits between Midas and Leres.
- Depth Anything: A newer and enhanced depth model.
- Depth Hand Refiner: For fixing hands in inpainting.
Reference Image:
Depth maps:
Prompt and negative prompt:
a woman retrofuturism
disfigured, ugly, bad, immature
You can see the generated image follows the depth map (Zoe).
Compare with the more detailed Leres++:
Line Art
Line Art renders the outline of an image. It attempts to convert it to a simple drawing.
There are a few line art preprocessors.
- Line art anime: Anime-style lines
- Line art anime denoise: Anime-style lines with fewer details.
- Line art realistic: Realistic-style lines.
- Line art coarse: Realistic-style lines with heavier weight.
Use with the lineart control model.
Images below are generated with Control Weight setting to 0.7.
Line Art Anime
Line Art Anime Denoise

Line Art Realistic
Line Art Coarse

MLSD
M-LSD (Mobile Line Segment Detection) is a straight-line detector. It is useful for extracting outlines with straight edges like interior designs, buildings, street scenes, picture frames, and paper edges.
Curves will be ignored.

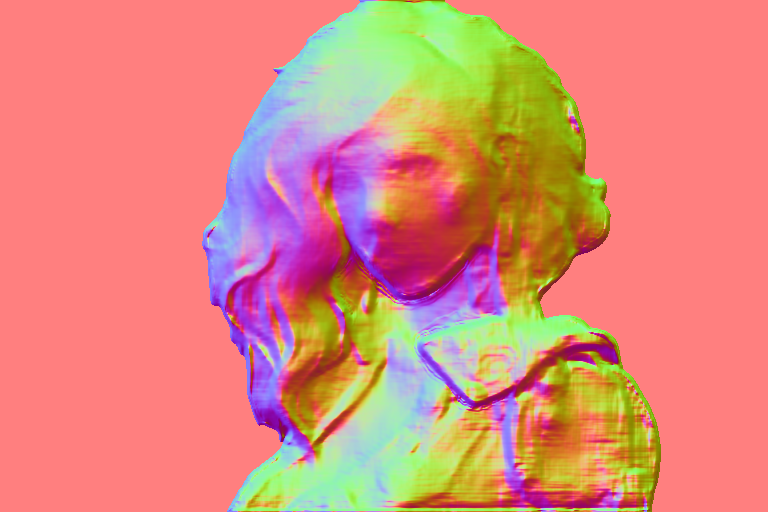
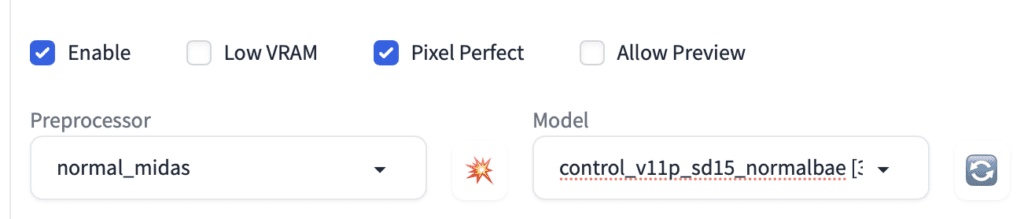
Normal maps
A normal map specifies the orientation of a surface. For ControlNet, it is an image that specifies the orientation of the surface each pixel rests on. Instead of color values, the image pixels represent the direction a surface is facing.
The usage of normal maps is similar to the depth maps. They are used to transfer the 3D composition of the reference image.
Normal map preprocessors:
- Normal Midas: Estimate the normal map from the Midas depth map.
- Normal Bae: Estimate the normal map using the normal uncertainty method proposed by Bae et al.
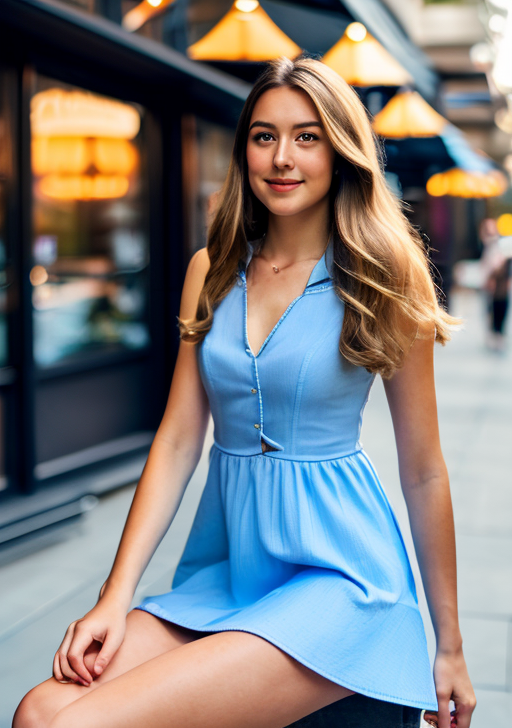
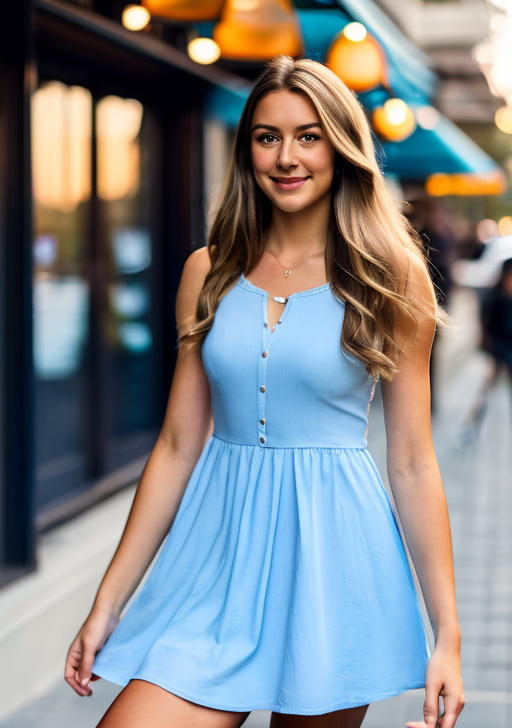
Normal Midas
Like the Midas depth map, the Midas normal map is good for isolating subject from the background.
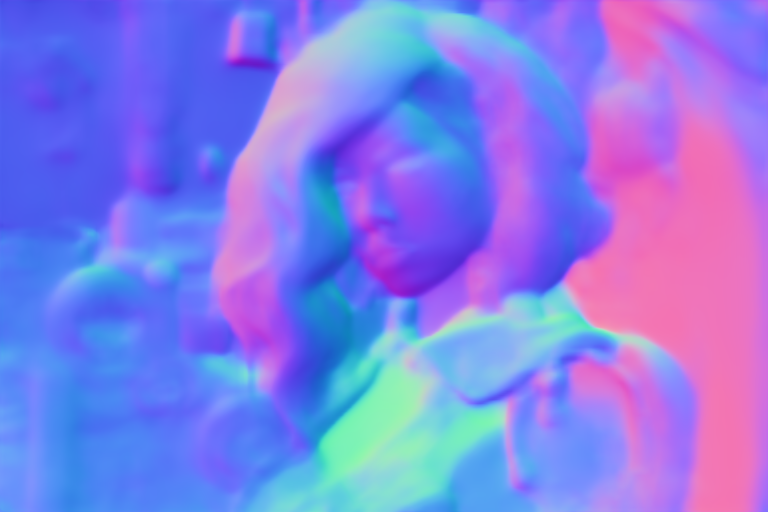
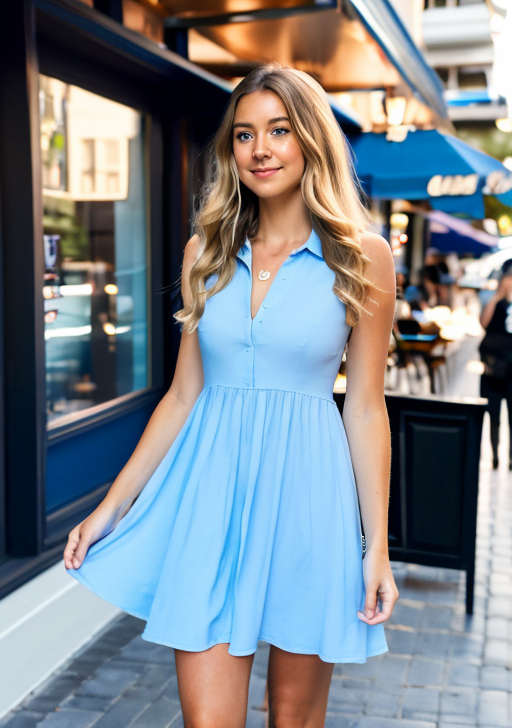
Normal Bae
The Bae normal map tends to render details in both background and foreground.
Scribbles
Scribble preprocessors turn a picture into a scribble, like those drawn by hand.
- Scribble HED: Holistically-Nested Edge Detection (HED) is an edge detector good at producing outlines like an actual person would. According to ControlNet’s authors, HED is suitable for recoloring and restyling an image.
- Scribble Pidinet: Pixel Difference network (Pidinet) detects curves and straight edges. Its result is similar to HED but usually results in cleaner lines with fewer details.
- Scribble xdog: EXtended Difference of Gaussian (XDoG) is an edge detection method technique. It is important to adjust the xDoG threshold and observe the preprocessor output.
All these preprocessors should be used with the scribble control model.
Scribble HED
HED produces coarse scribble lines.
Scribble Pidinet
Pidinet tends to produce coarse lines with little detail. It’s good for copying the board outline without fine details.
Scribble xDoG
The level of detail is controllable by adjusting the XDoG threshold, making xDoG a versatile preprocessor for creating scribbles.

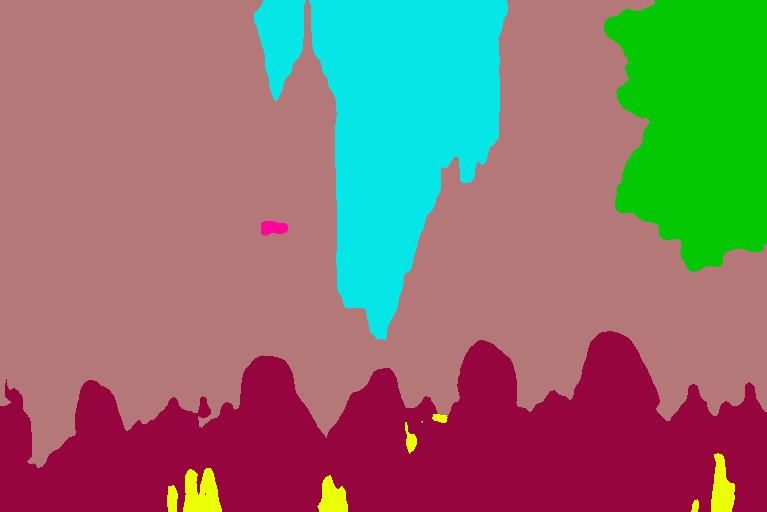
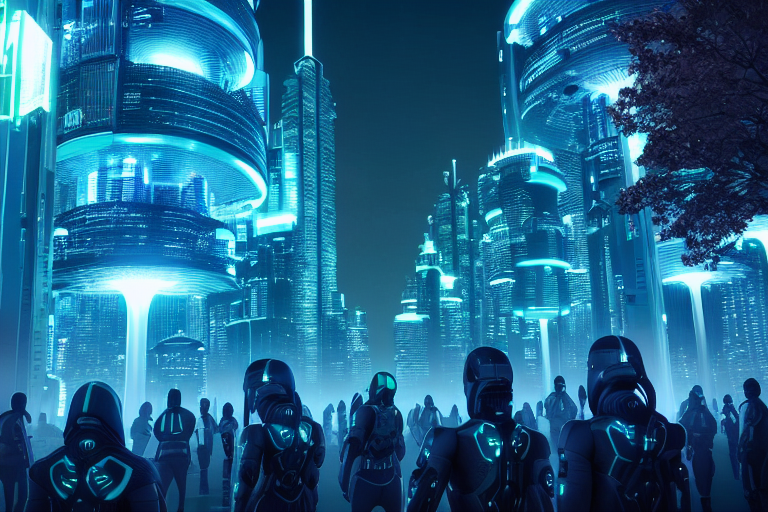
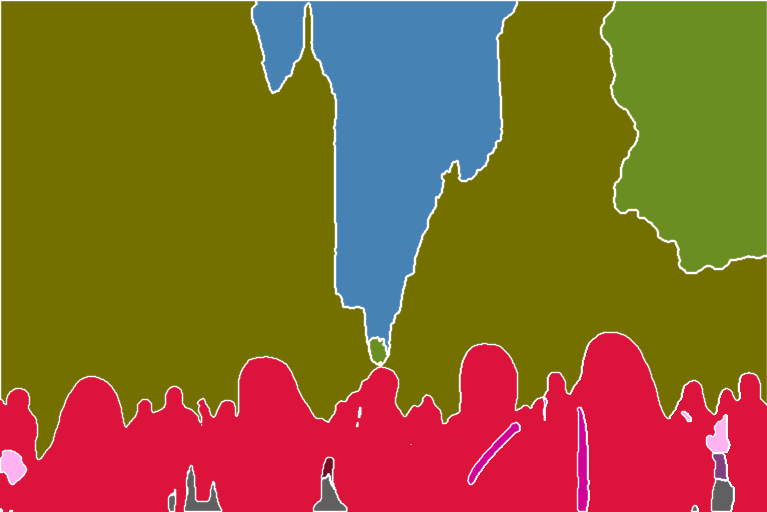
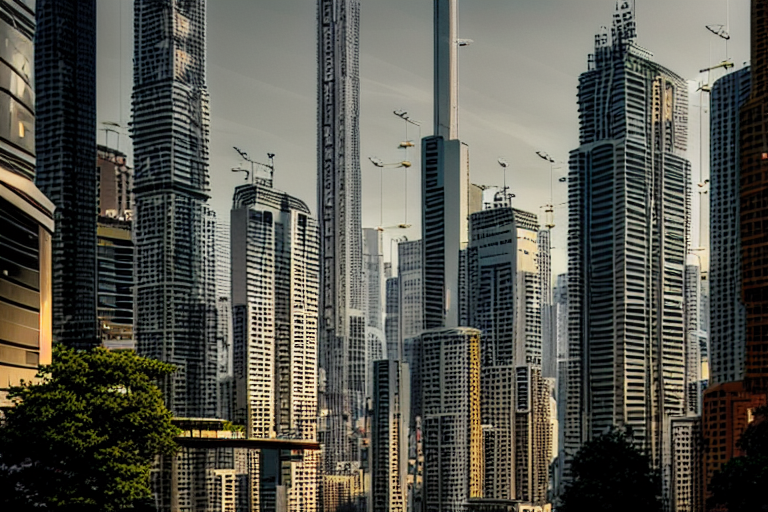
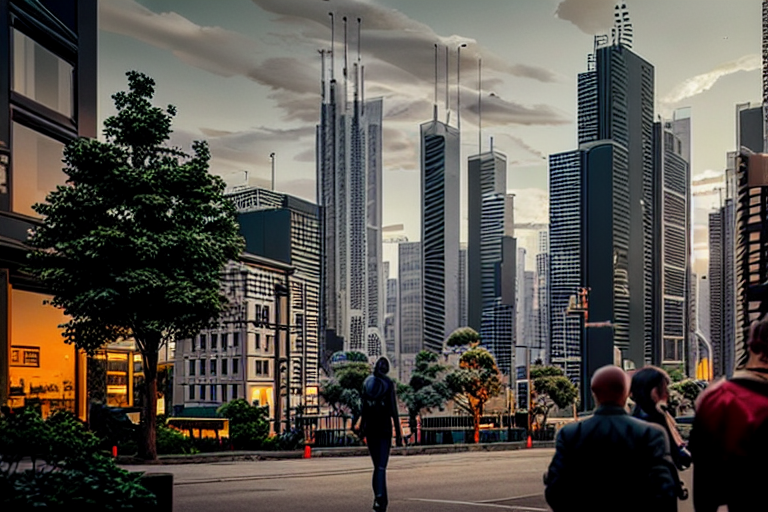
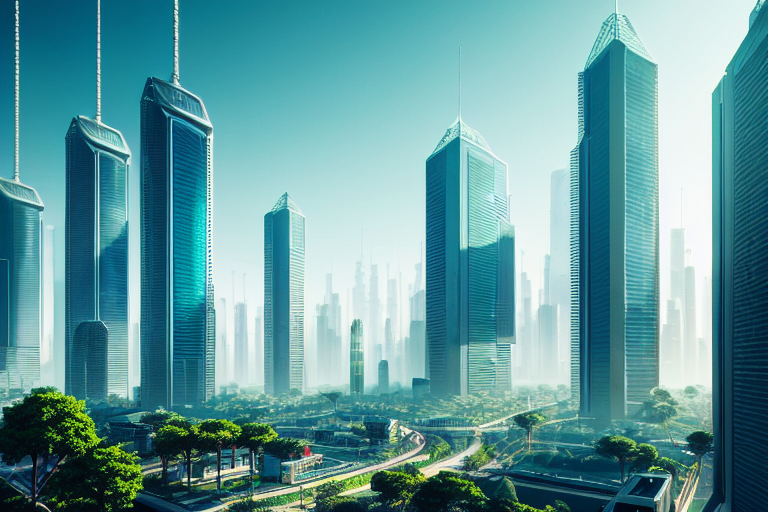
Segmentation
Segmentation preprocessors label what kind of objects are in the reference image.
Below is a segmentation processor in action.
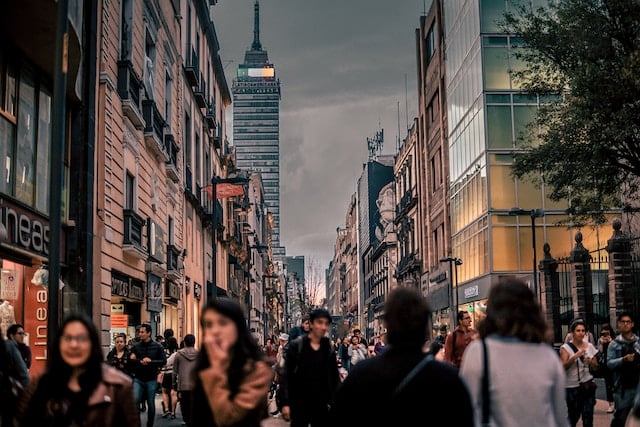

The buildings, sky, trees, people, and sidewalks are labeled with different and predefined colors.
You can find the object categories and colors in the color map here for ufade20k and ofade20k.
There are a few segmentation options
- ufade20k: UniFormer (uf) segmentation trained on ADE20K dataset.
- ofade20k: OneFormer (of) segmentation trained on ADE20k dataset.
- ofcoco: OnFormer segmentation trained on COCO dataset.
Note that the color maps of ADE20k and COCO segmentations are different.
You can use segmentation preprocessors to transfer the location and shape of objects.
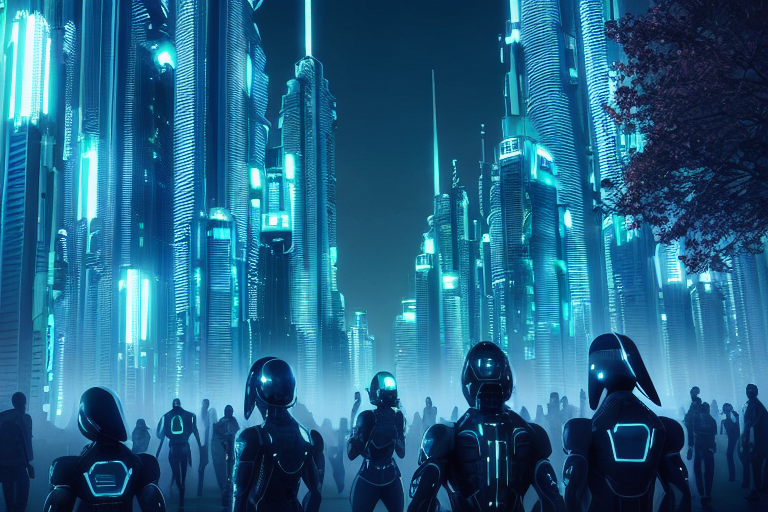
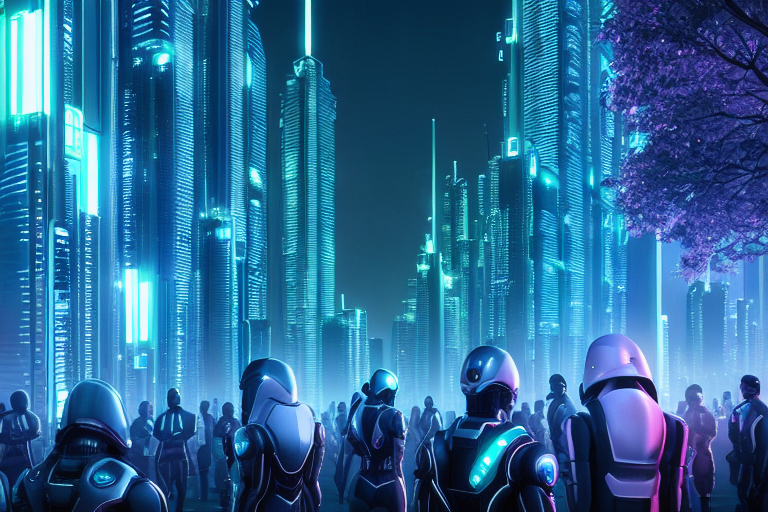
Below are using these preprocessors with the same prompt and seed.
Futuristic city, tree, buildings, cyberpunk
UniFormer ADE20k (ufade20k)
Uniformer labels everything accurately in this example.
OneFormer ADE20k (ofade20k)
OneFormer is a bit more noisy in this case, but doesn’t affect the final image.

OneFormer COCO (ofcoco)
OneFormer COCO performs similarly, with some mislabels.
Segmentation is a powerful technique. You can further manipulate the segmentation map to put objects at precise locations. Use the color map for ADE20k.
Shuffle
The Shuffle preprocessor stirs up the input image. Let’s see the shuffle in action.
Together with the Shuffle control model, the Shuffle preprocessor can be used for transferring the color scheme of the reference image.
Input image:
Shuffle preprocessor:
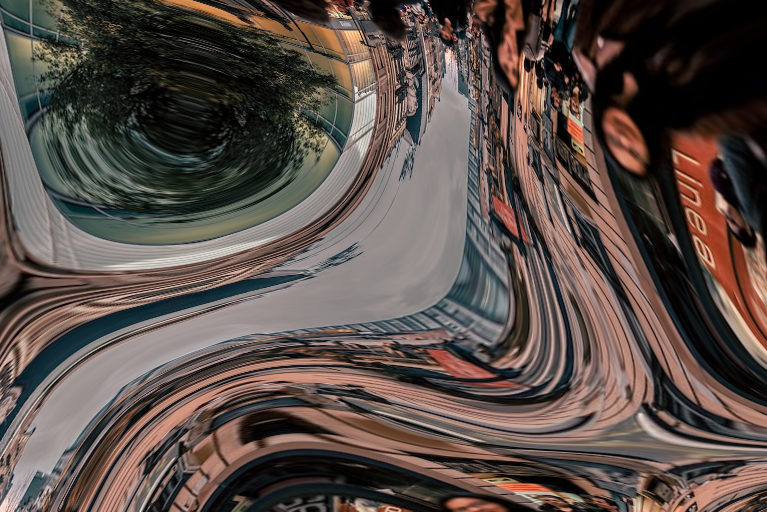
Unlike other preprocessors, the Shuffle preprocessor is randomized. It will be affected by your seed value.
Use the Shuffle preprocessor with the Shuffle control model. The Shuffle control model can be used with or without the Shuffle preprocessor.
The image below is with ControlNet Shuffle preprocessor and Shuffle model (Same prompt as the last section). The color scheme roughly follows the reference image.
The image below is with the ControlNet Shuffle model only (Preprocessor: None). The image composition is closer to the original. The color scheme is similar to the shuffled.
For your reference, the image below is with the same prompt without ControlNet. The color scheme is drastically different.
Color grid T2I adapter
Color grid T2i adapter preprocessor shrinks the reference image to 64 times smaller and then expands it back to the original size. The net effect is a grid-like patch of local average colors.
Original reference image:
Preprocessed with t2ia_color_grid:
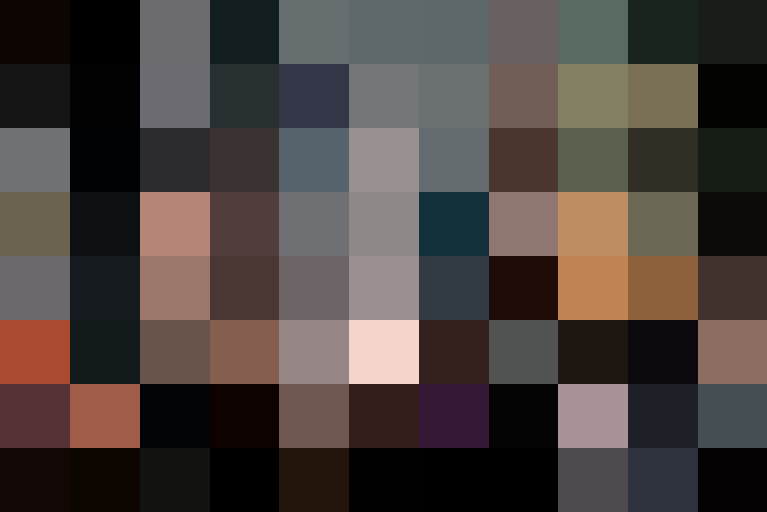
The preprocessed image can then be used with the T2I color adapter (t2iadapter_color) control model.
The image generation will loosely follow the color scheme spatially.
A modern living room
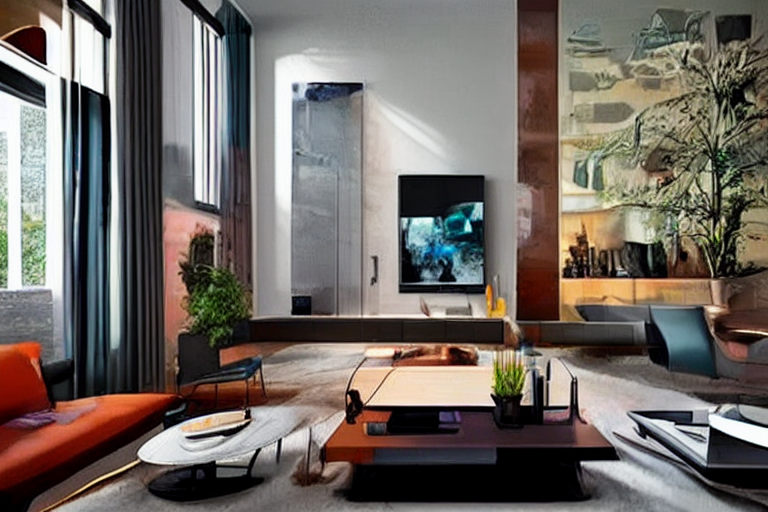
Increase the ControlNet weight to have it follow more closely.
You can also use preprocessor None for this T2I color model.
In my opinion, it is pretty similar to image-to-image.
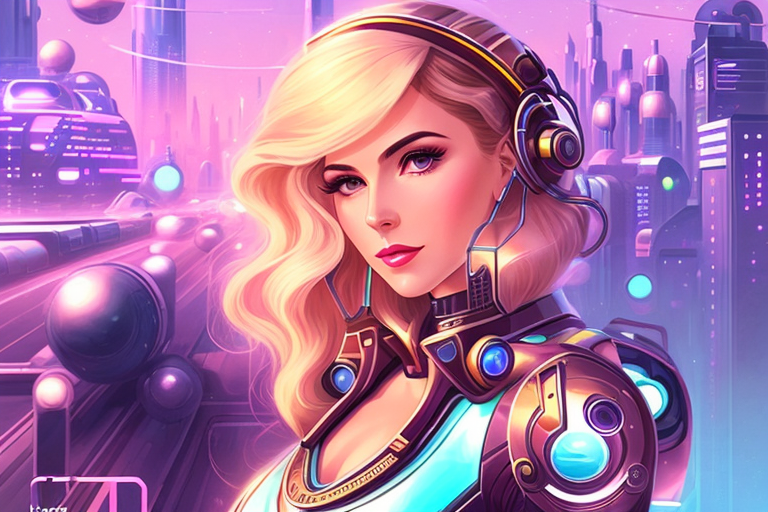
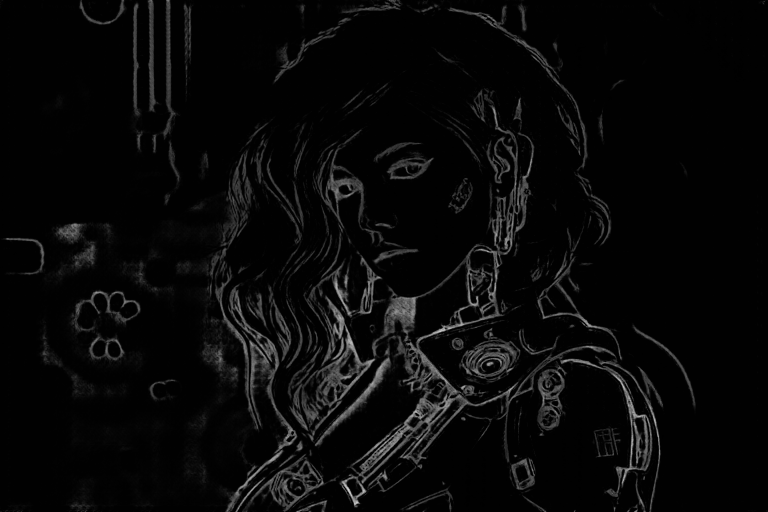
Clip vision style T2I adapter
t2ia_style_clipvision converts the reference image to the CLIP vision embedding. This embedding contains rich information on the image’s content and style.
You will need to use the Control model t2iadapter_style_XXXX.
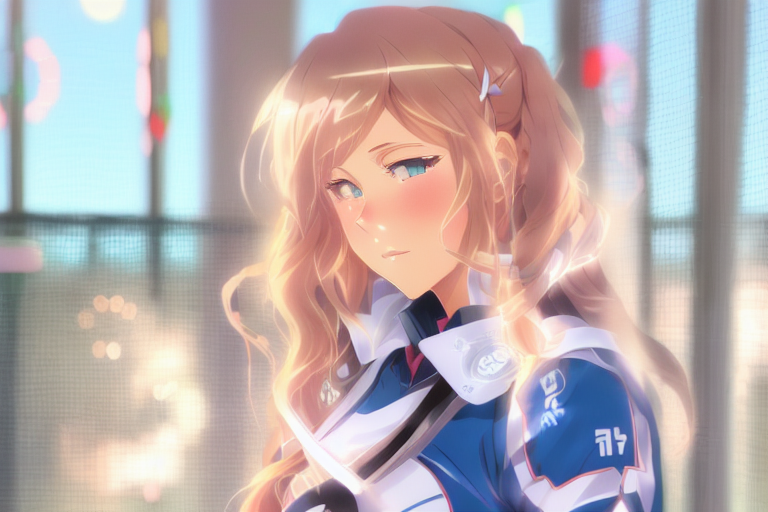
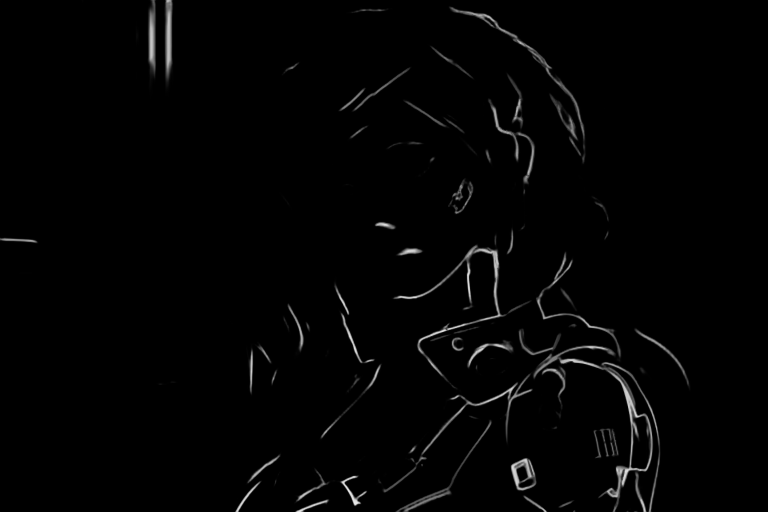
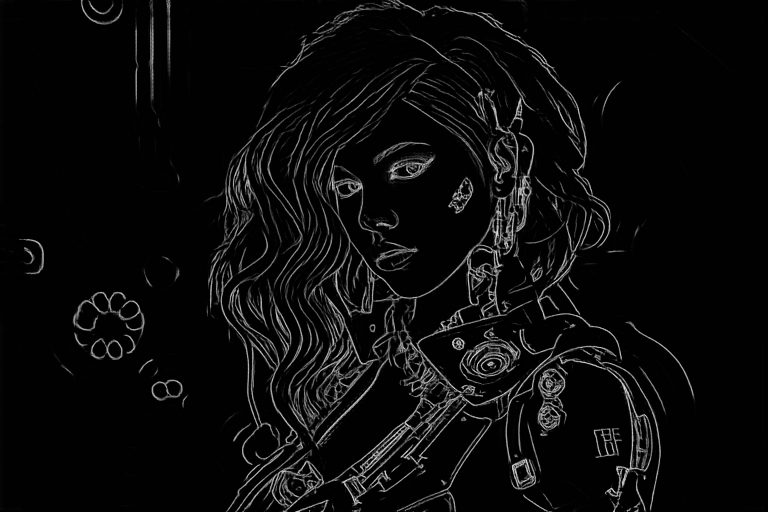
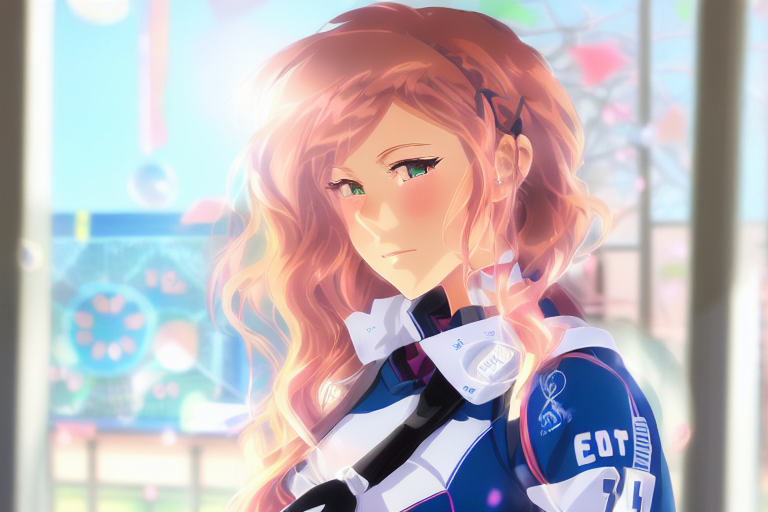
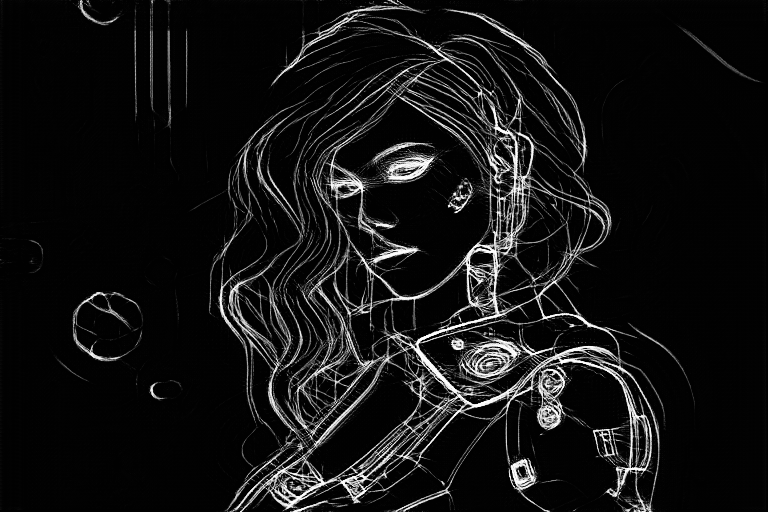
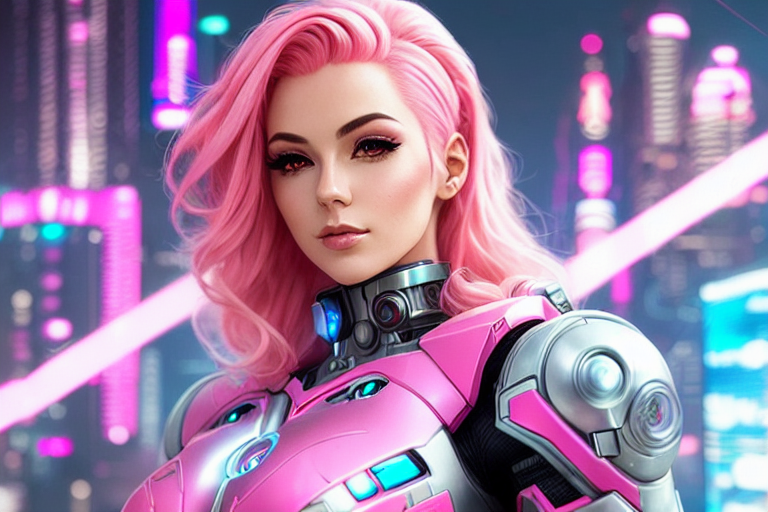
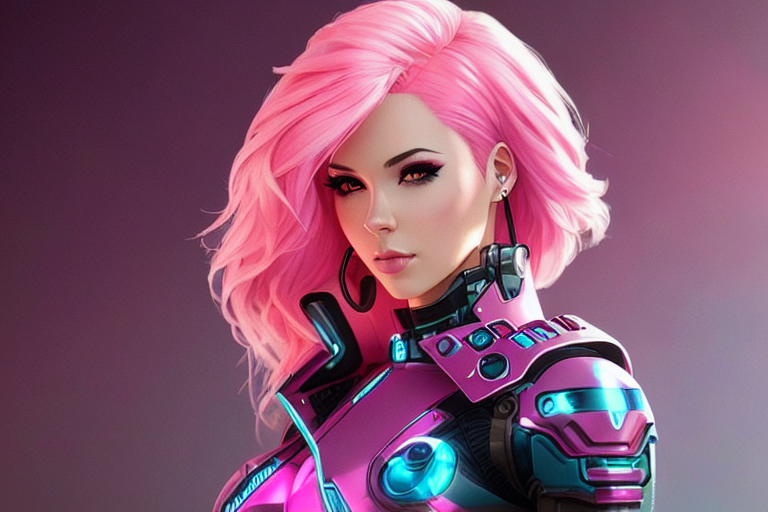
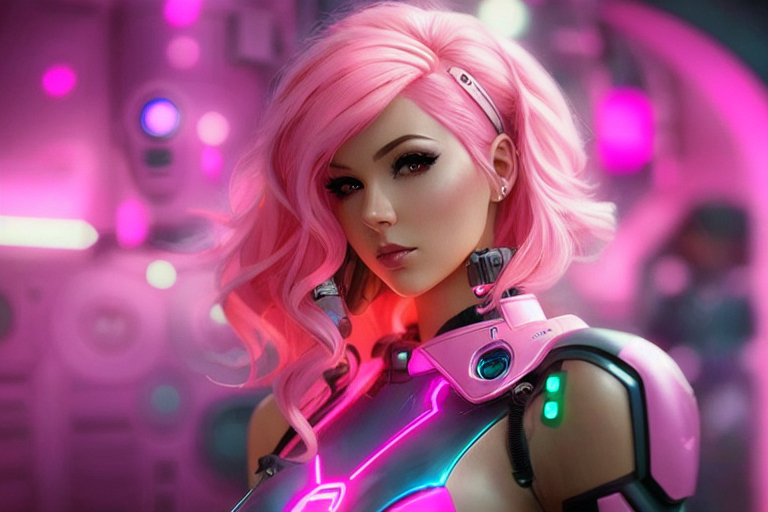
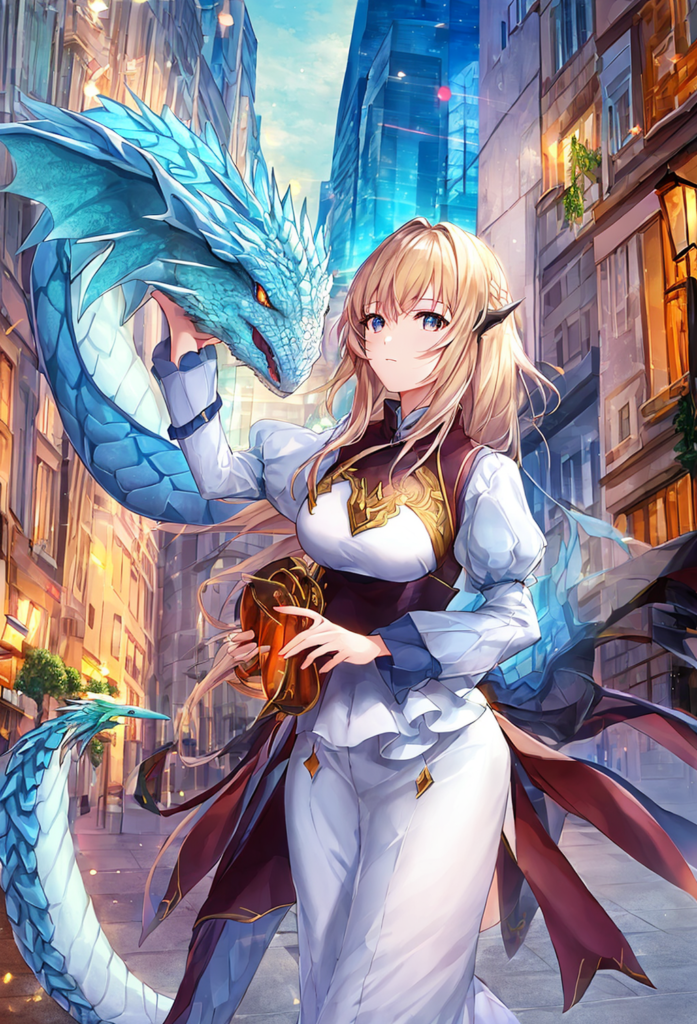
See this amazing style transfer in action:
Reference image:
T2I adapter – CLIP vision:
sci-fi girl
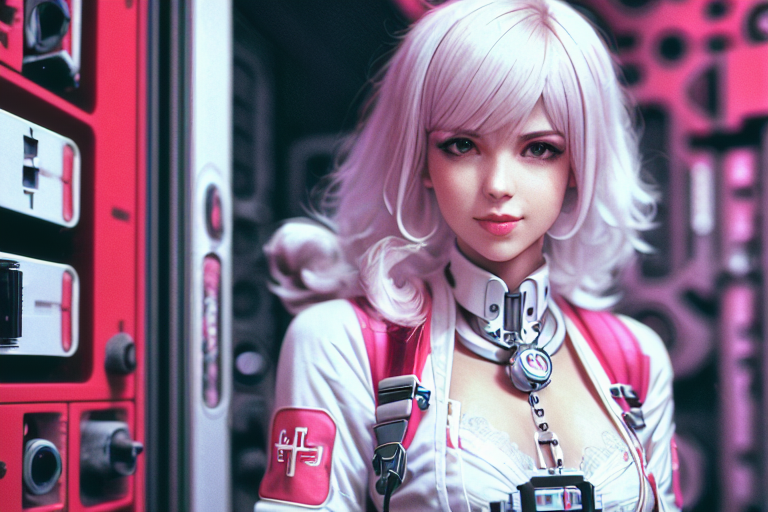
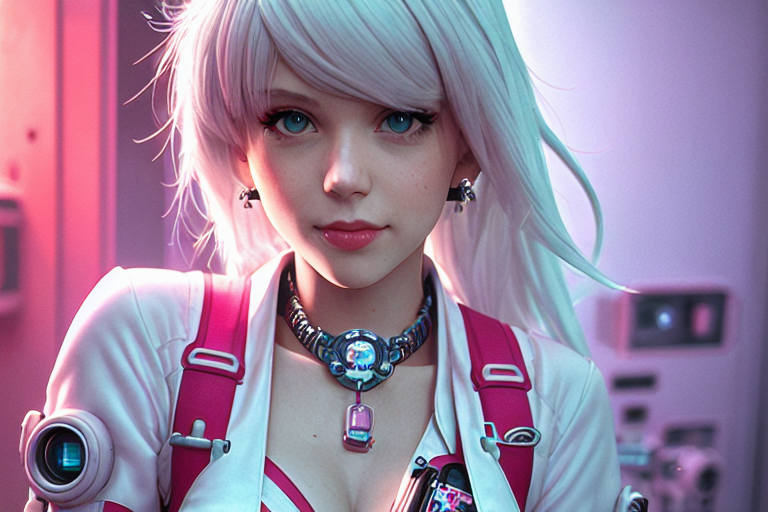
Below are what this prompt would generate if you turn the ControlNet off.
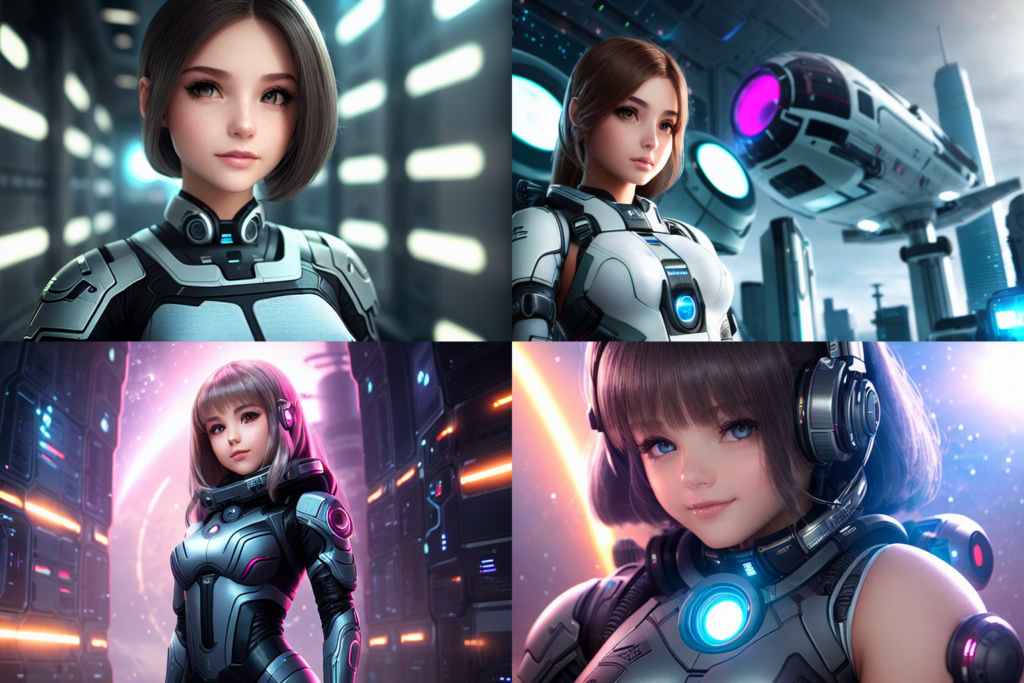
The function is pretty similar to Reference ControlNet, but I would rate T2IA CLIP vision higher.
ControlNet Inpainting
ControlNet inpainting lets you use high denoising strength in inpainting to generate large variations without sacrificing consistency with the picture as a whole.
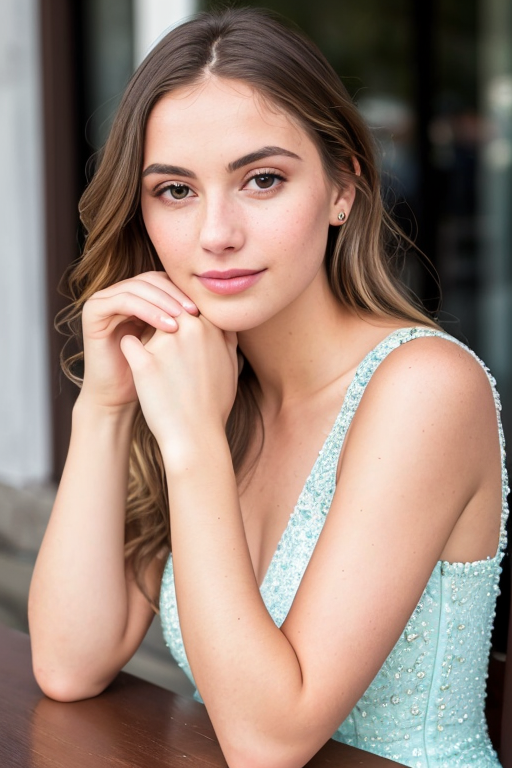
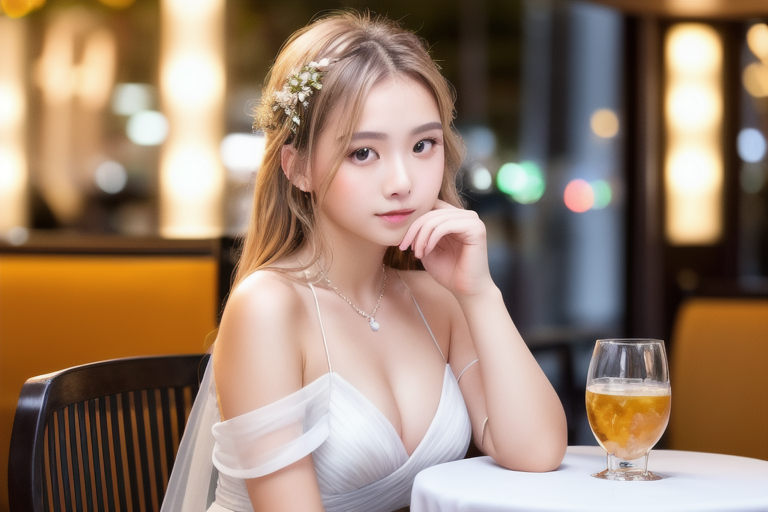
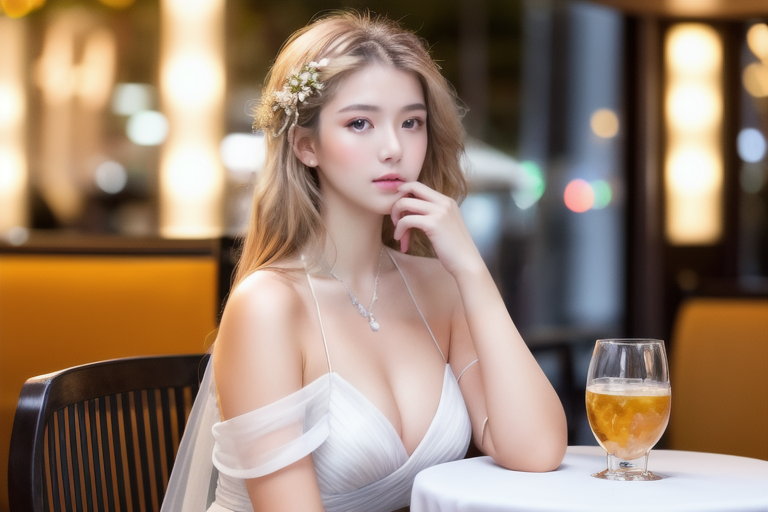
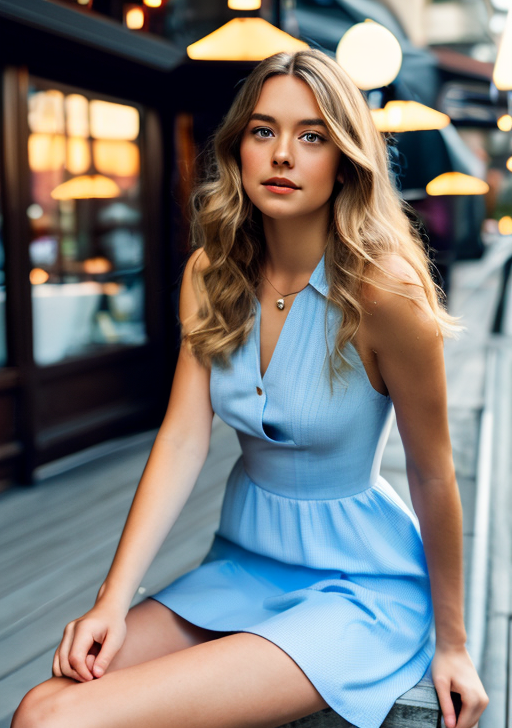
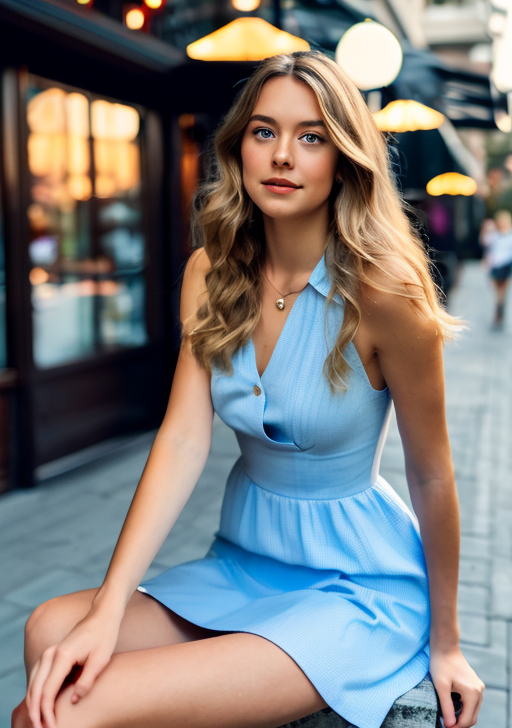
For example, I used the prompt for realistic people.
Model: HenmixReal v4
photo of young woman, highlight hair, sitting outside restaurant, wearing dress, rim lighting, studio lighting, looking at the camera, dslr, ultra quality, sharp focus, tack sharp, dof, film grain, Fujifilm XT3, crystal clear, 8K UHD, highly detailed glossy eyes, high detailed skin, skin pores
Negative prompt
disfigured, ugly, bad, immature, cartoon, anime, 3d, painting, b&w
I have this image and want to regenerate the face with inpainting.
If I inpaint the face with a high denoising strength (> 0.4), the result will likely to be globally inconsistent. Below are the unpainted images with denoising strength 1.
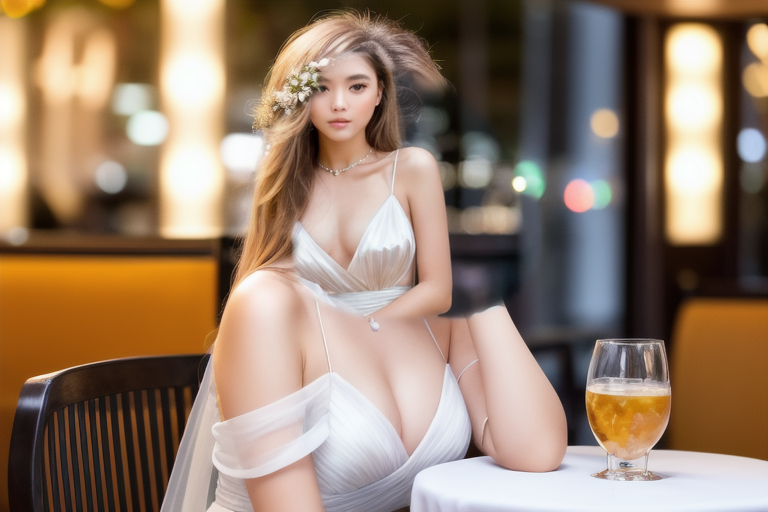
ControlNet Inpainting is your solution.
To use ControlNet inpainting:
- It is best to use the same model that generates the image. After generating an image on the txt2img page, click Send to Inpaint to send the image to the Inpaint tab on the Img2img page.
2. Use the paintbrush tool to create a mask over the area you want to regenerate. See the beginner’s tutorial on inpainting if you are unfamiliar with it.
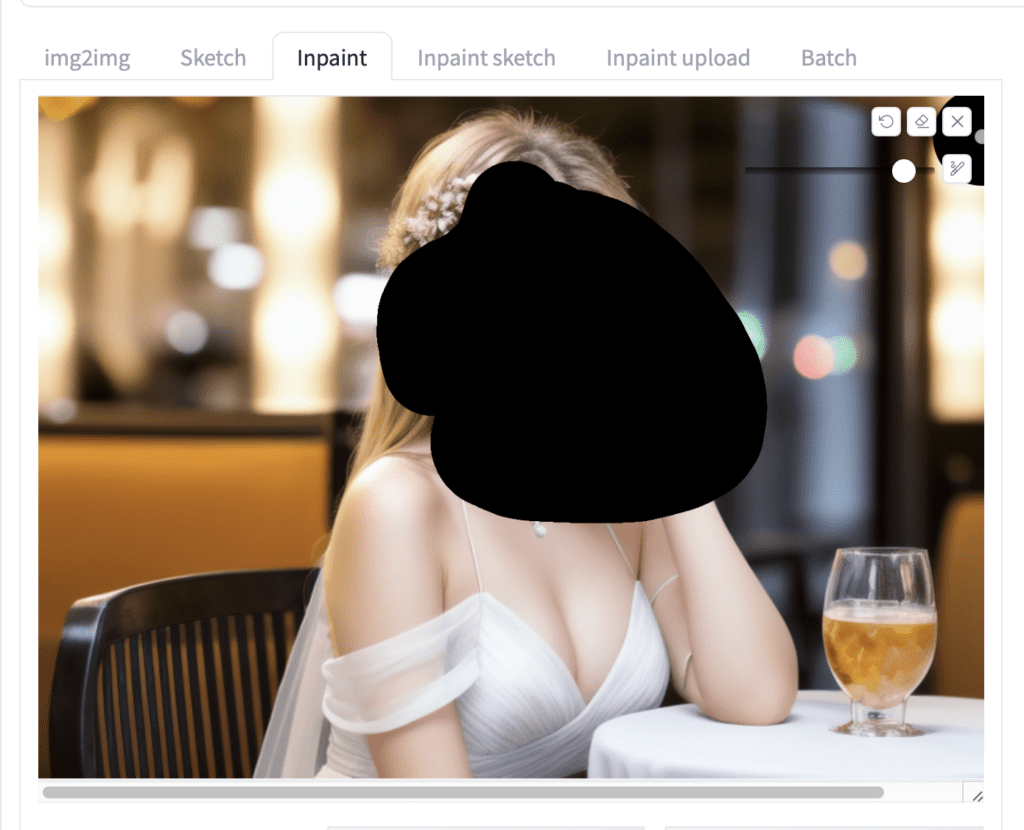
3. Set Inpaint area to Only masked. (Whole picture also works)
4. Set denoising strength to 1. (You won’t normally set this this high without ControlNet.)
5. Set the following parameters in the ControlNet section. You don’t need to upload a reference image.
Enable: Yes
Preprocessor: Inpaint_global_harmonious
Model: ControlNet
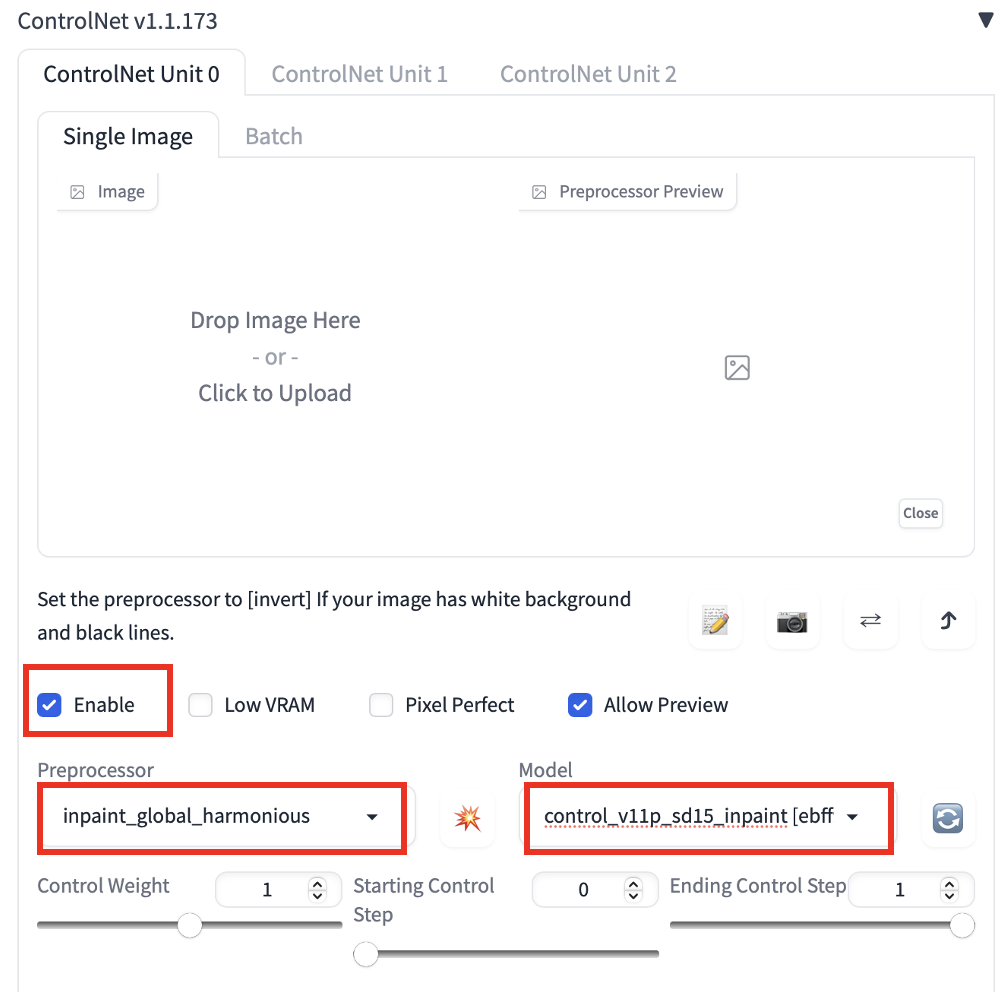
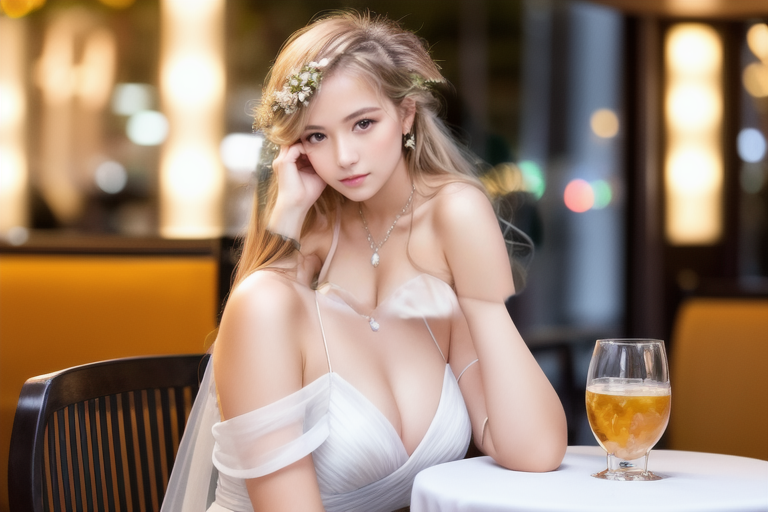
6. Press Generate to start inpainting.
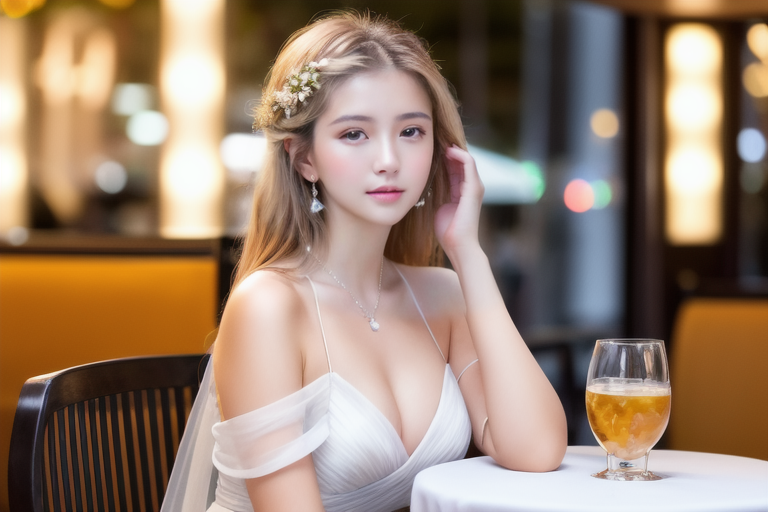
Now I get new faces consistent with the global image, even at the maximum denoising strength (1)!
Currently, there are 3 inpainting preprocessors
- Inpaint_global_harmonious: Improve global consistency and allow you to use high denoising strength.
- Inpaint_only: Won’t change unmasked area. It is the same as Inpaint_global_harmonious in AUTOMATIC1111.
- Inpaint_only+lama: Process the image with the lama model. It tends to produce cleaner results and is good for object removal.

Copying a face with ControlNet
You can use a special IP-adapter face model to generate consistent faces across multiple images.
Installing the IP-adapter plus face model
- Make sure your A1111 WebUI and the ControlNet extension are up-to-date.
2. Download the ip-adapter-plus-face_sd15.bin and put it in stable-diffusion-webui > models > ControlNet.
3. Rename the file’s extension from .bin to .pth. (i.e., The file name should be ip-adapter-plus-face_sd15.pth)
Using the IP-adapter plus face model
To use the IP adapter face model to copy a face, go to the ControlNet section and upload a headshot image.
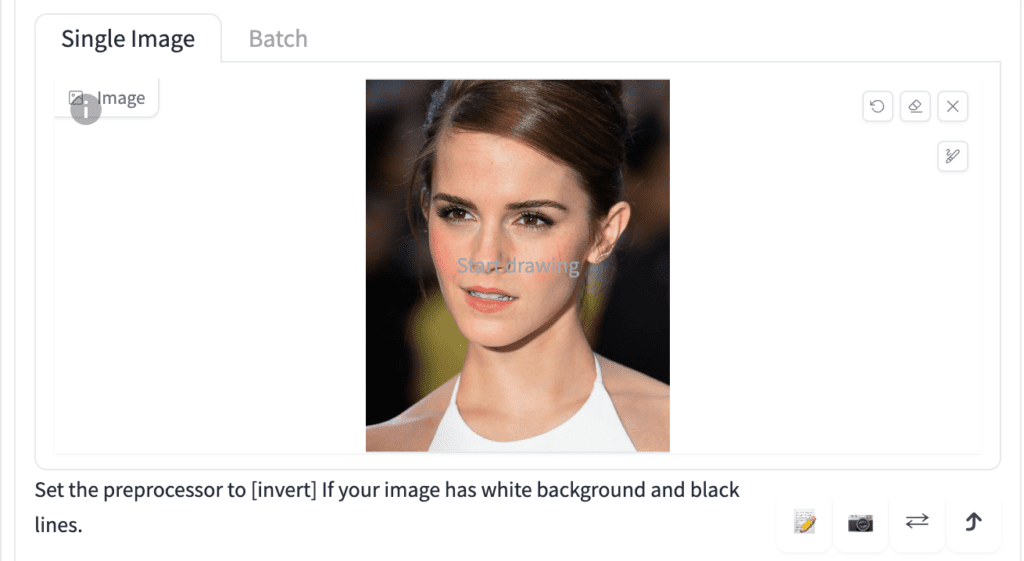
Important ControlNet Settings:
- Enable: Yes
- Preprocessor: ip-adapter_clip_sd15
- Model: ip-adapter-plus-face_sd15
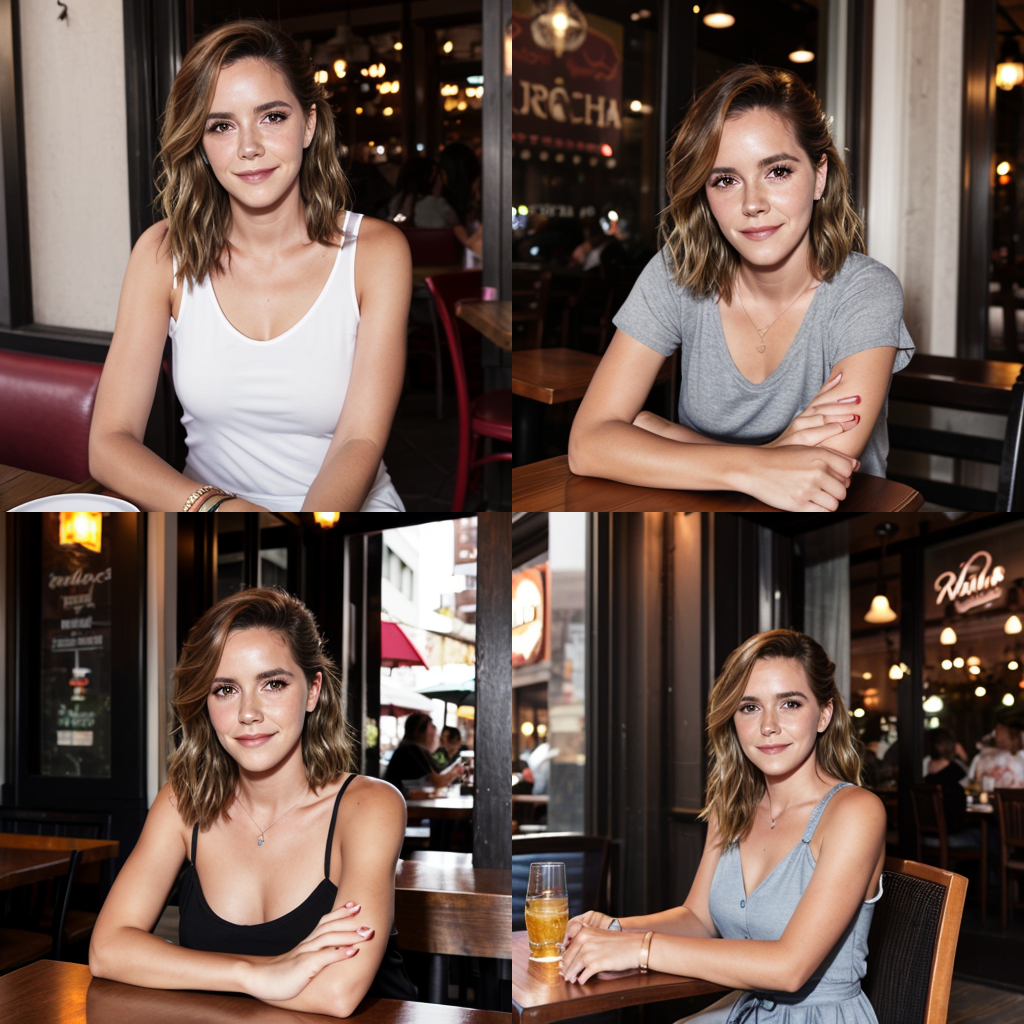
The control weight should be around 1. You can use multiple IP-adapter face ControlNets. Make sure to adjust the control weights accordingly so that they sum up to 1.
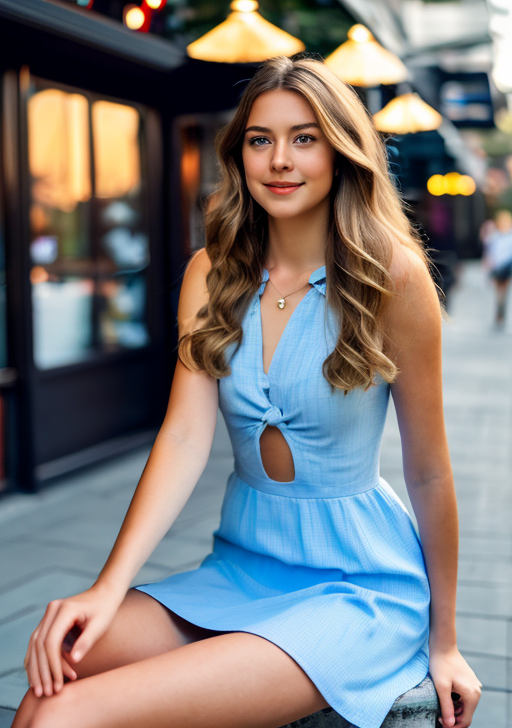
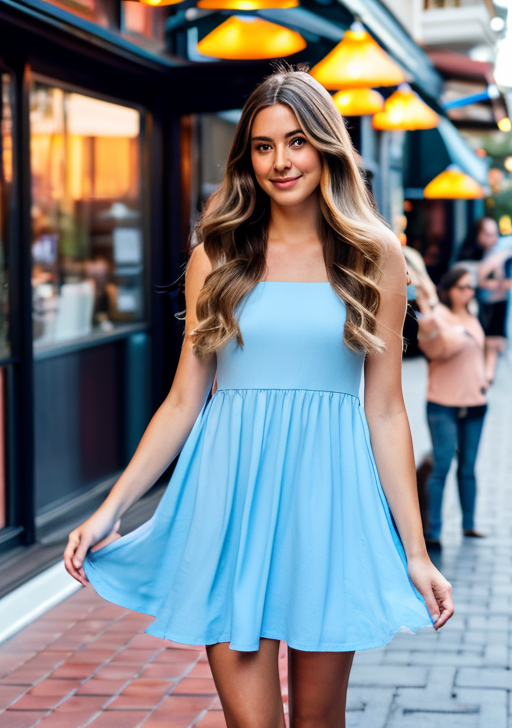
With the prompt:
A woman sitting outside of a restaurant in casual dress
Negative prompt:
ugly, deformed, nsfw, disfigured
You get:
ALL ControlNet settings explained
You see a lot of settings in the ControlNet extension! It can be a bit intimidating when you first use it, but let’s go through them one by one.
It’s going to be a deep dive. Take a break and go to the bathroom if you need to…
Input controls
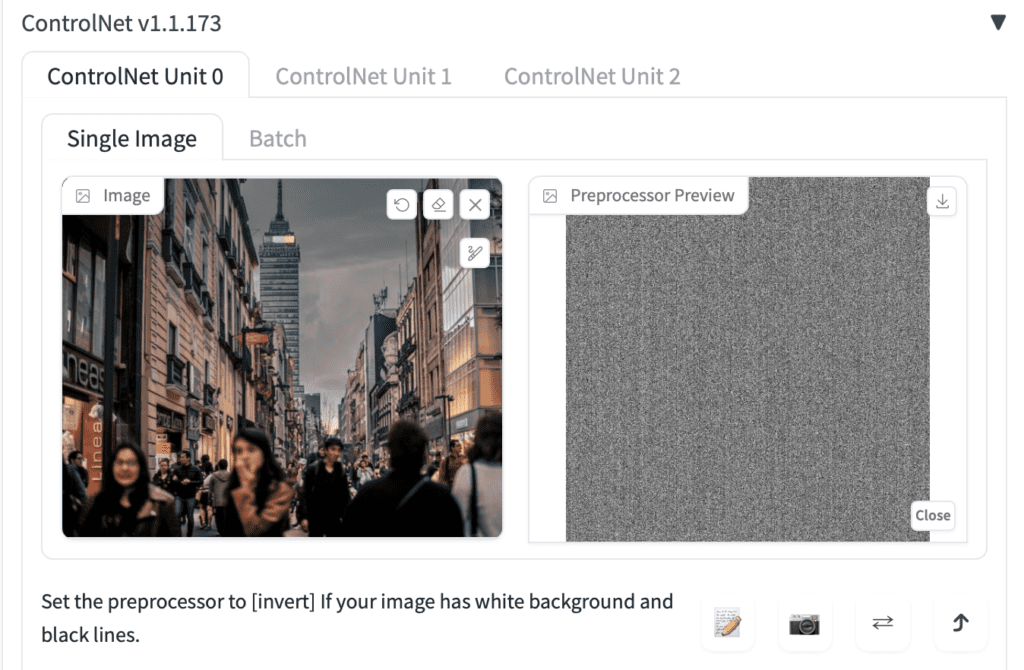
Image Canvas: You can drag and drop the input image here. You can also click on the canvas and select a file using the file browser. The input image will be processed by the selected preprocessor in the Preprocessor dropdown menu. A control map will be created.
Write icon: Create a new canvas with a white image instead of uploading a reference image. It is for creating a scribble directly.
Camera icon: Take a picture using your device’s camera and use it as the input image. You will need to grant permission to your browser to access the camera.
Model selection
Enable: Whether to enable ControlNet.
Low VRAM: For GPU with less than 8GB VRAM. It is an experimental feature. Check if you are out of GPU memory, or want to increase the number of images processed.
Allow Preview: Check this to enable a preview window next to the reference image. I recommend you to select this option. Use the explosion icon next to the Preprocessor dropdown menu to preview the effect of the preprocessor.
Preprocessor: The preprocessor (called annotator in the research article) for preprocessing the input image, such as detecting edges, depth, and normal maps. None uses the input image as the control map.
Model: ControlNet model to use. If you have selected a preprocessor, you would normally select the corresponding model. The ControlNet model is used together with the Stable Diffusion model selected at the top of AUTOMATIC1111 GUI.
Control Weight
Below the preprocessor and model dropdown menus, you will see three sliding bars to let you dial in the Control effect: Control Weight, Starting and ending Control Steps.
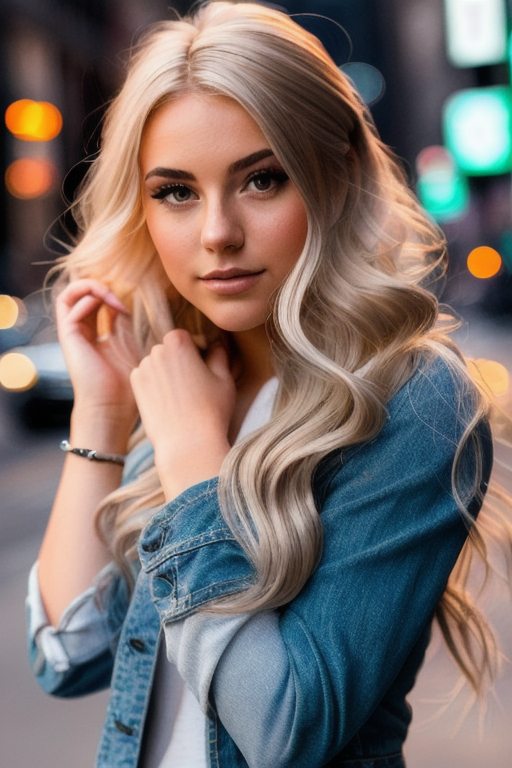
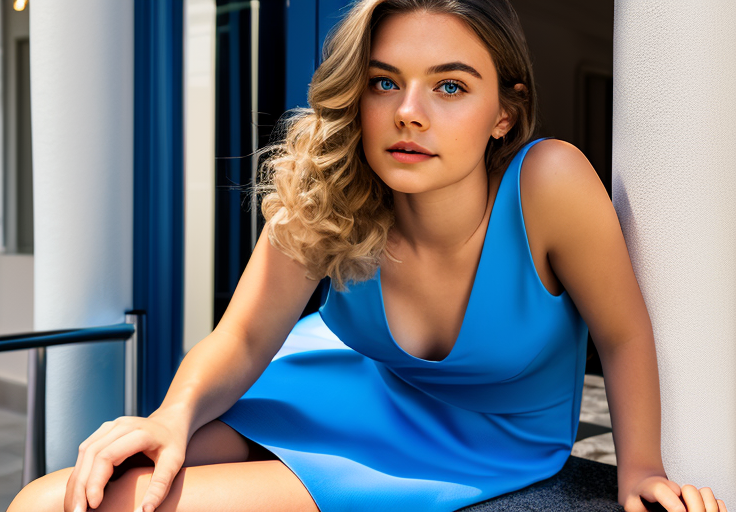
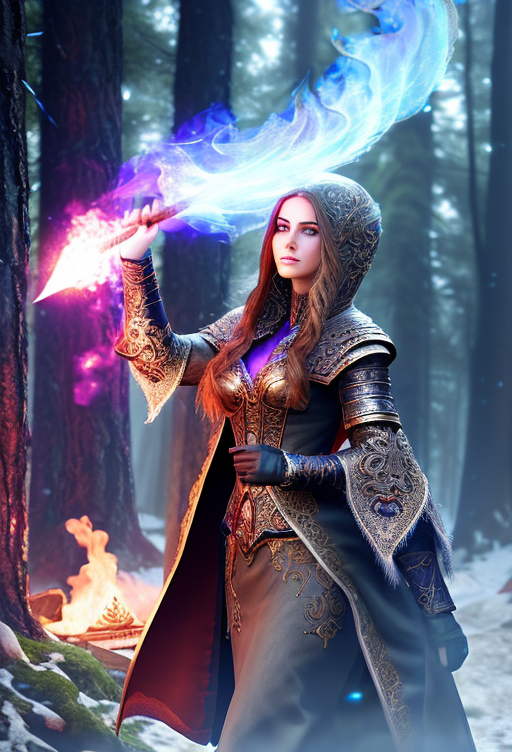
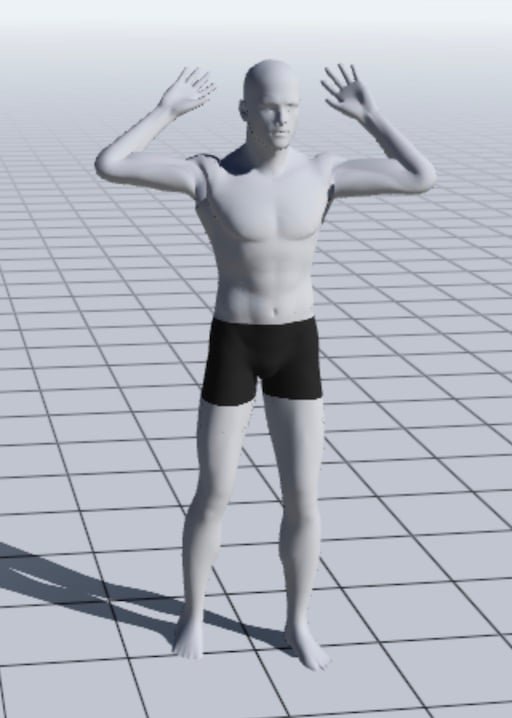
I will use the following image to illustrate the effect of control weight. It’s an image of a girl sitting down.

But in the prompt, I will ask to generate a woman standing up.
full body, a young female, highlights in hair, standing outside restaurant, blue eyes, wearing a dress, side light
Weight: How much emphasis to give the control map relative to the prompt. It is similar to keyword weight in the prompt but applies to the control map.
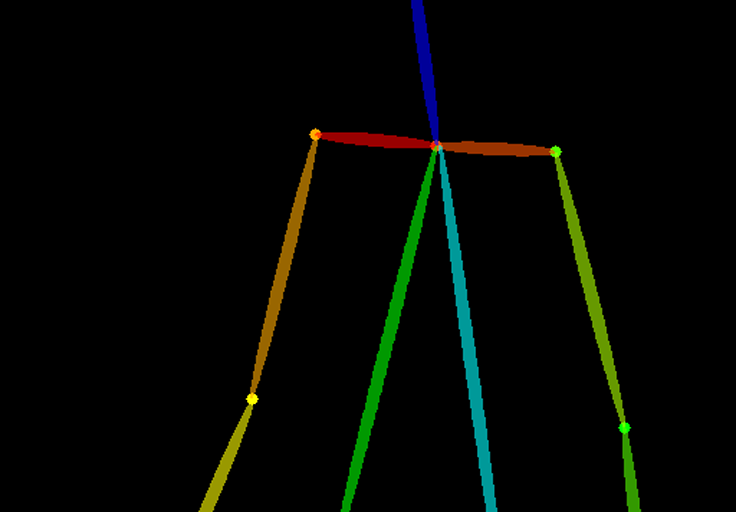
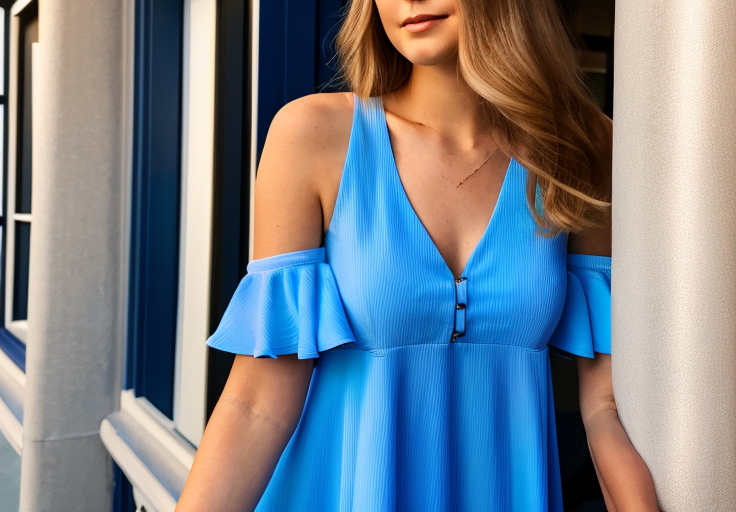
The following images are generated using ControlNet OpenPose preprocessor and with the OpenPose model.

As you can see, Controlnet weight controls how much the control map is followed relative to the prompt. The lower the weight, the less ControlNet demands the image to follow the control map.
Starting ControlNet step: The step ControlNet first applies. 0 means the very first step.
Ending ControlNet step: The step ControlNet ends. 1 means the last step.
Let’s fix the starting step fixed at 0 and change the ending ControlNet step to see what happens.
Since the initial steps set the global composition (The sampler removes the maximum amount of noise in each step, and it starts with a random tensor in latent space), the pose is set even if you only apply ControlNet to as few as 20% of the first sampling steps.
In contrast, changing the ending ControlNet step has a smaller effect because the global composition is set in the beginning steps.
Control Mode

Balanced: The ControlNet is applied to both conditioning and unconditoning in a sampling step. This is the standard mode of operation.
My prompt is more important: The effect of ControlNet is gradually reducing over the instances of U-Net injection (There are 13 of them in one sampling step). The net effect is your prompt has more influence than the ControlNet.
ControlNet is more important: Turn off ControlNet on unconditioning. Effectively, the CFG scale also acts as a multiplier for the effect of the ControlNet.
Don’t worry if you don’t fully understand how they actually work. The option labels accurately state the effect.
Resize mode

Resize mode controls what to do when the size of the input image or control map is different from the size of the images to be generated. You don’t need to worry about these options if they are in the same aspect ratio.
I will demonstrate the effect of resize modes by setting text-to-image to generate a landscape image, while the input image/control map is a portrait image.
Just Resize: Scale the width and height of the control map independently to fit the image canvas. This will change the aspect ratio of the control map.
The girl now needs to lean forward so that she’s still within the canvas. You can create some interesting effect with this mode.
Crop and Resize: Fits the image canvas to be within the control map. Crop the control map so that it is the same size as the canvas.
Because the control map is cropped at the top and the bottom, so does our girl.
Resize and fill: Fit the whole control map to the image canvas. Extend the control map with empty values so that it is the same size as the image canvas.
Compared to the original input image, there are more spaces on the side.
OK, now (hopefully) you know all the settings. Let’s explore some ideas for using ControlNet.
Multiple ControlNets
You can use ControlNets multiple times to generate an image. Let’s walk through an example.
Model: Protogen v2.2
Prompt:
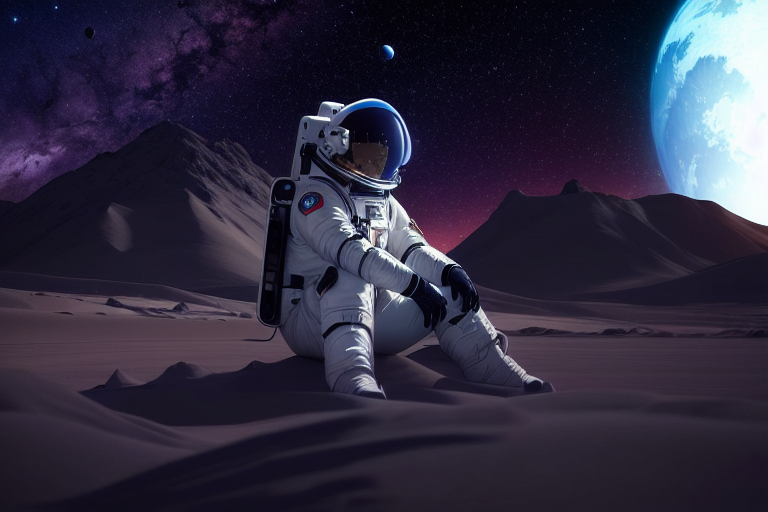
An astronaut sitting, alien planet
Negative prompt:
disfigured, deformed, ugly
This prompt generates images with varieties of composition.
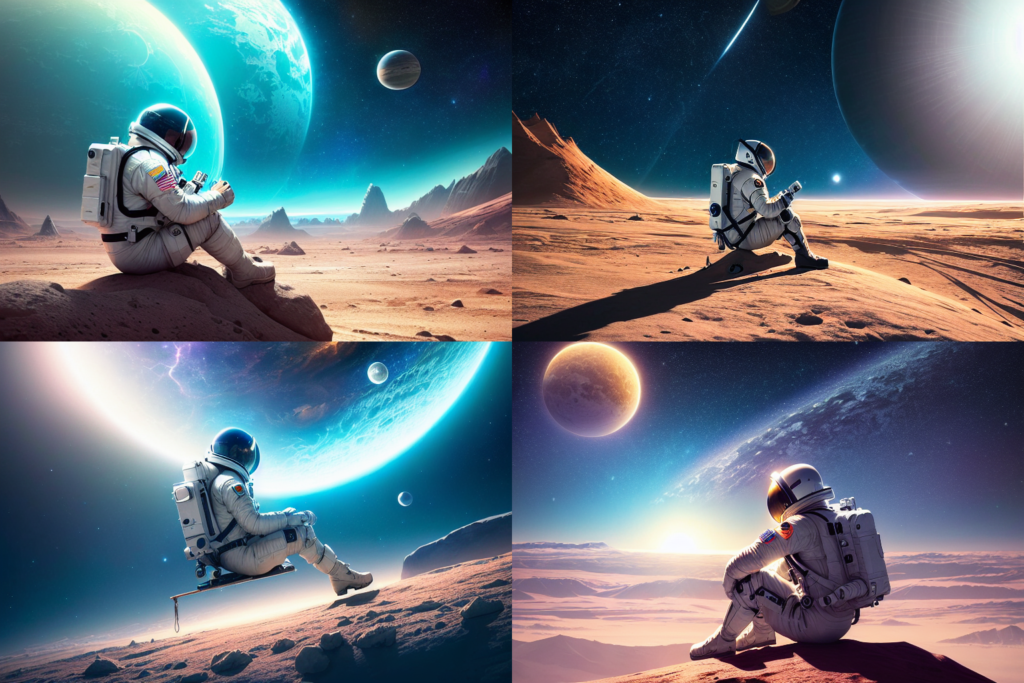
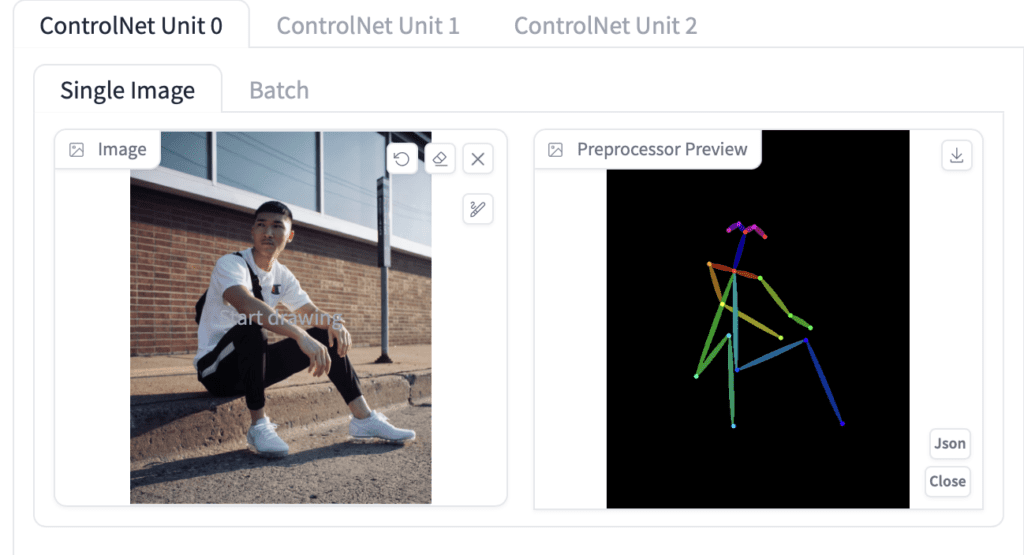
Let’s say I want to control the composition of the astronaut and background independently. We can use multiple (in this case 2) ControlNets for this.
I will use this reference image for fixing the pose of the astronaut.
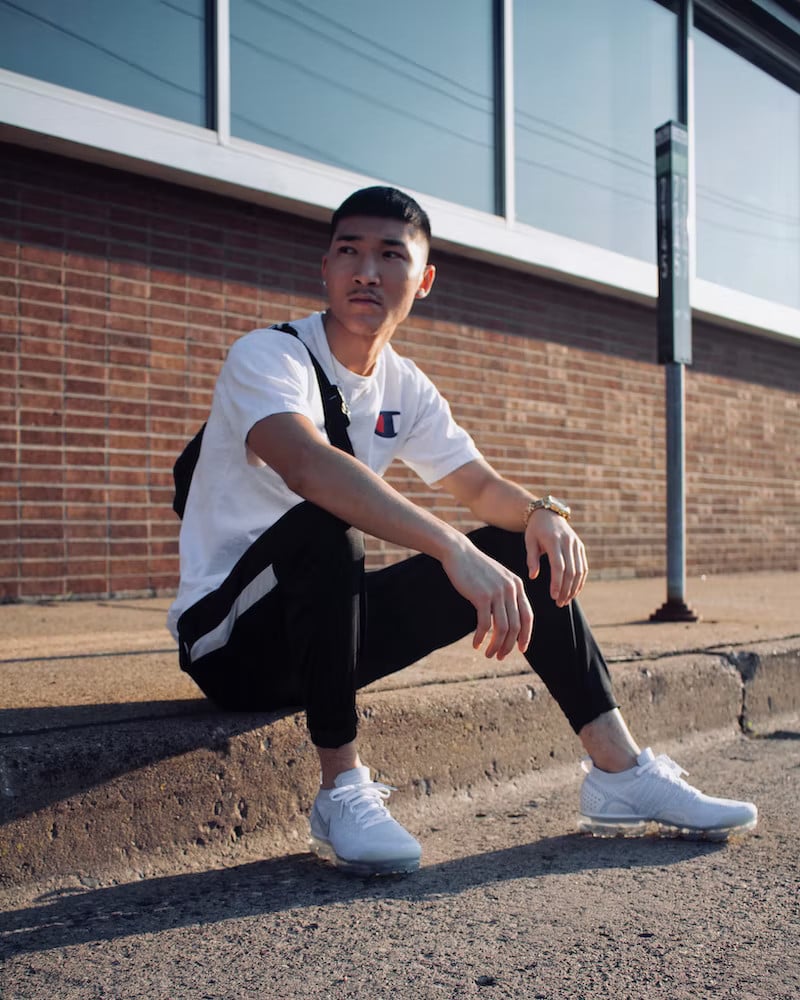
Settings for ControlNet 0:
- Enable: Yes
- Preprocessor: OpenPose
- Model: control_xxxx_openpose
- Resize mode: Resize and Refill (Since my original reference image is in portrait)
I will use the following reference image for the background.
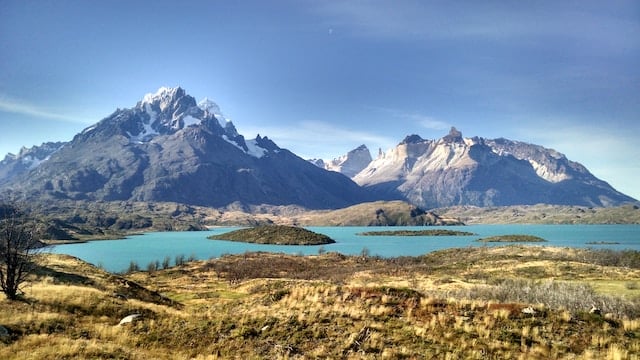
The depth models are perfect for this purpose. You will want to play with which depth model and setting gives the depth map you want.
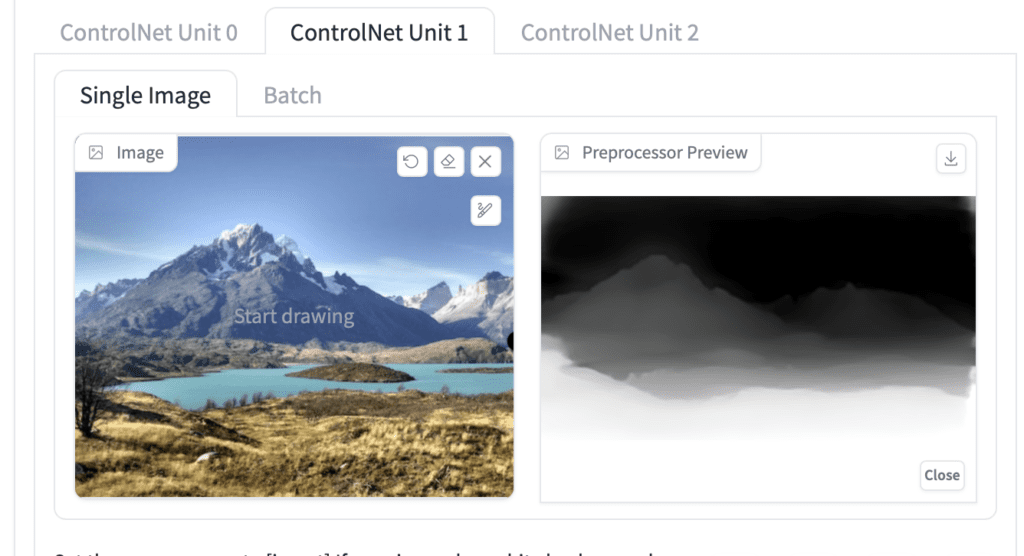
Settings for ControlNet 1:
- Enable: Yes
- Control Weight: 0.45
- Preprocessor: depth_zeo
- Model: control_XXXX_depth
- Resize mode: Crop and resize
Now I can control the composition of the subject and the background independently:
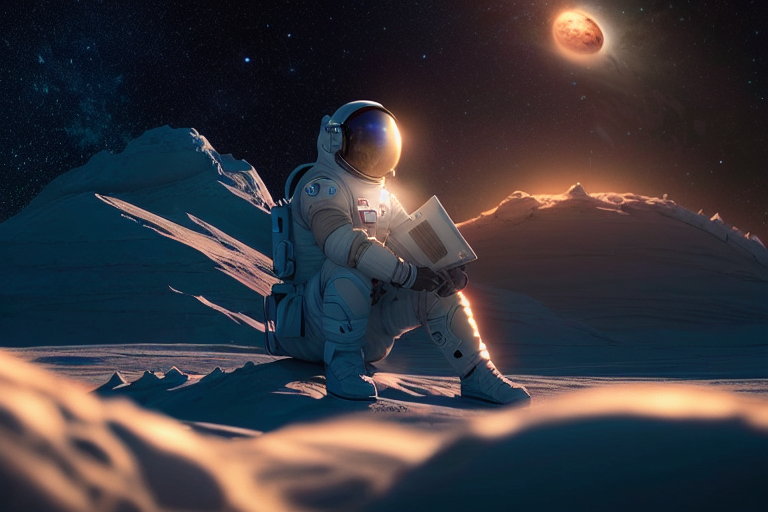
Tips:
- Adjust ControlNet weights if one of them does not do its job.
- Pay attention to the resize mode if you have reference images of different sizes of the final image.
Some ideas for using ControlNet
Copying human pose
Perhaps the most common application of ControlNet is copying human poses. This is because it is usually hard to control poses… until now! The input image can be an image generated by Stable Diffusion or can be taken from a real camera.
OpenPose model
To use ControlNet for transferring human poses, follow the instructions to enable ControlNet in AUTOMATIC1111. Use the following settings.
Preprocessor: openpose
Model: control_…._openpose
Make sure you have checked Enable.
Here are a few examples.
Example 1: Copying pose from an image
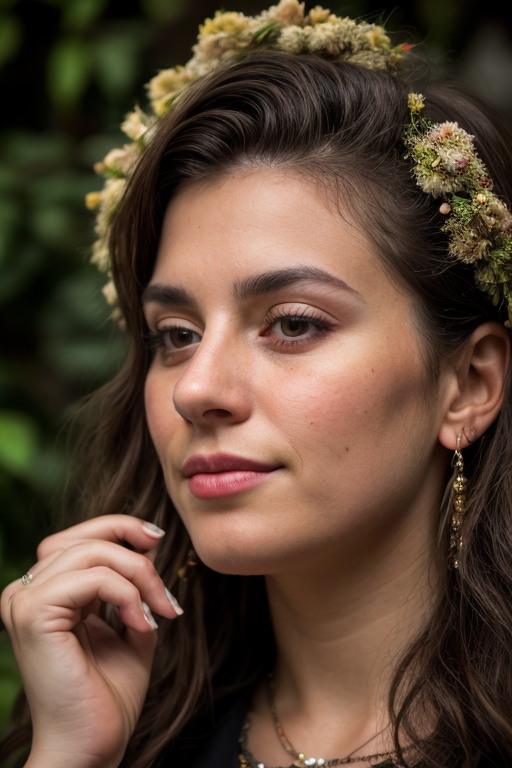
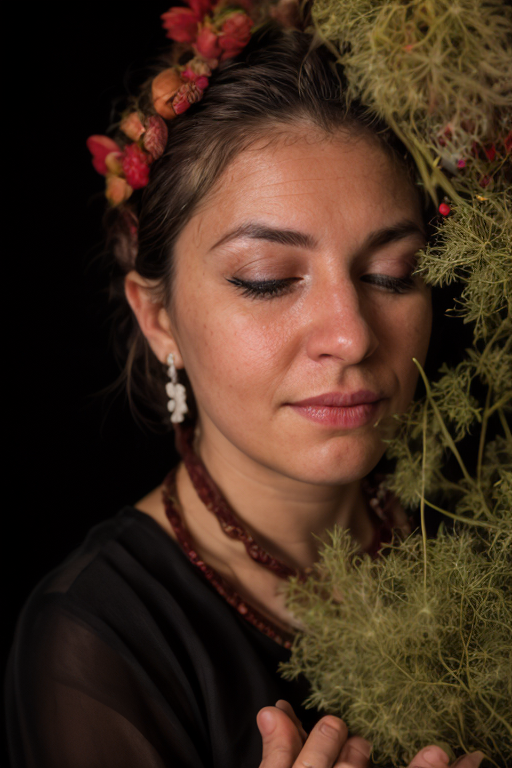
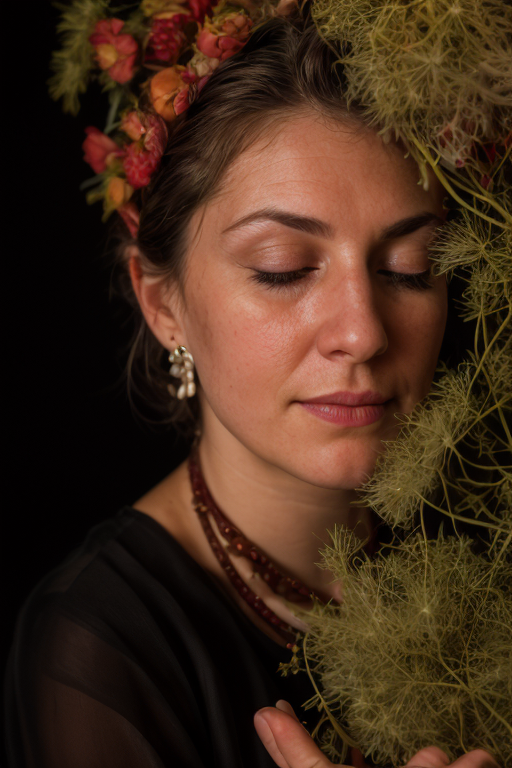
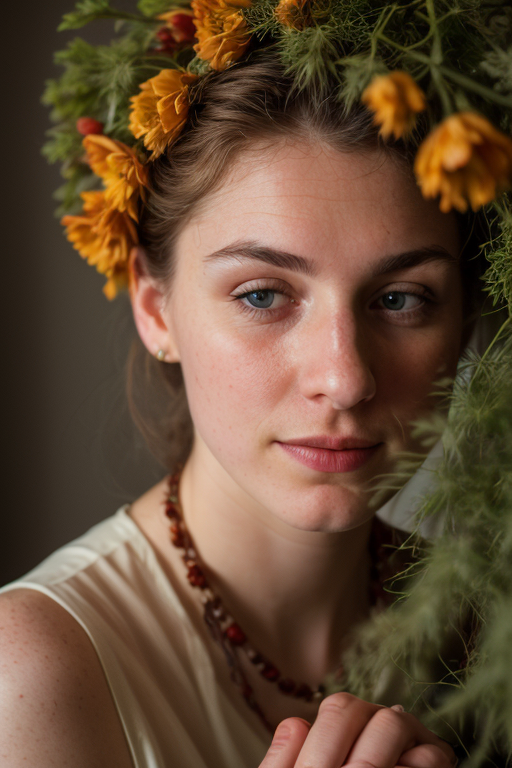
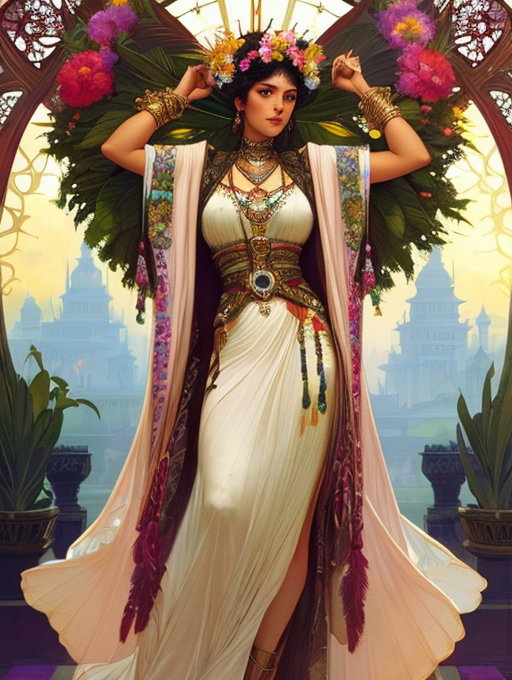
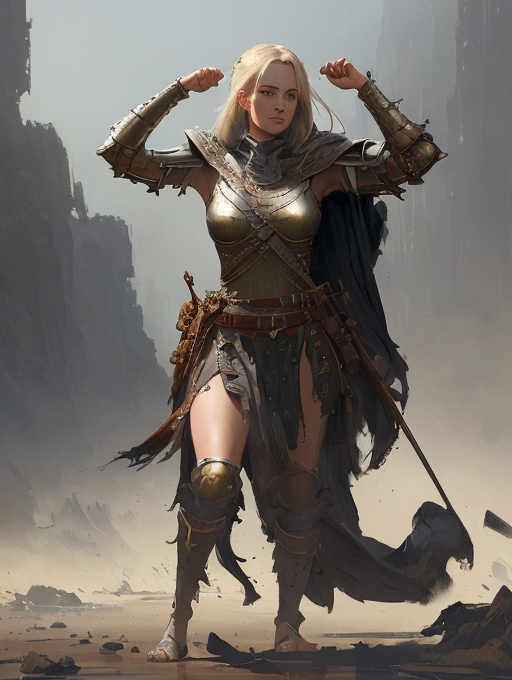
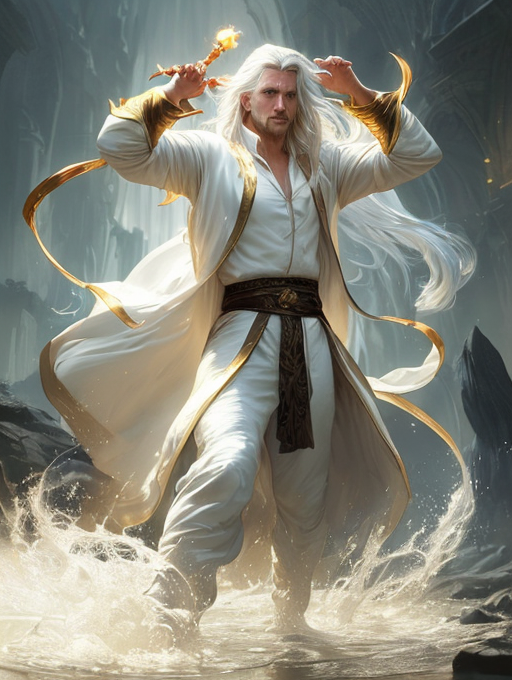
As a basic example, let’s copy the pose of the following image of a woman admiring leaves.
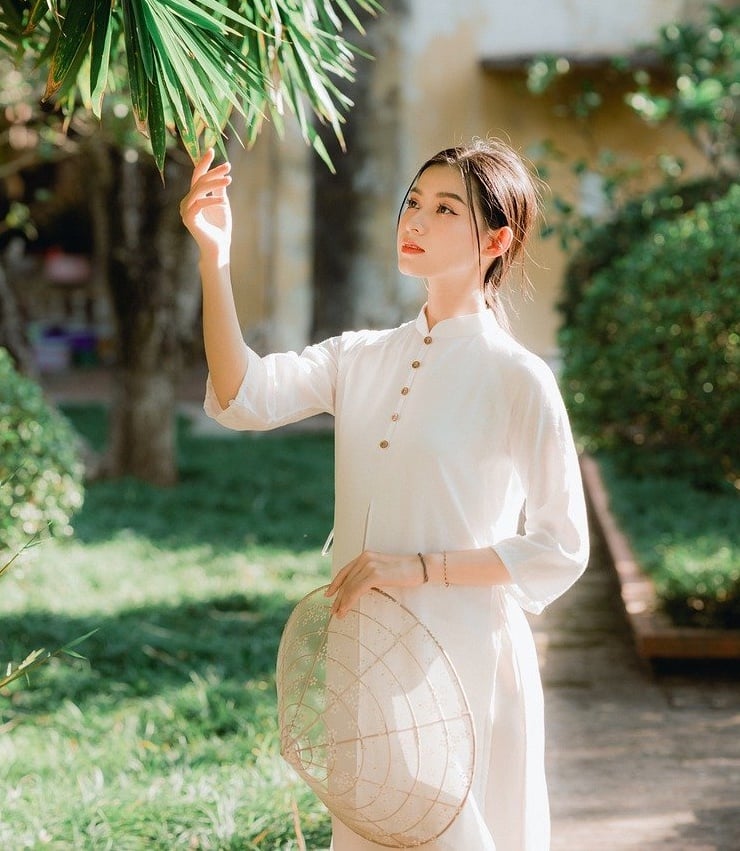
Using various models and prompts, you can dramatically change the content but keep the pose.
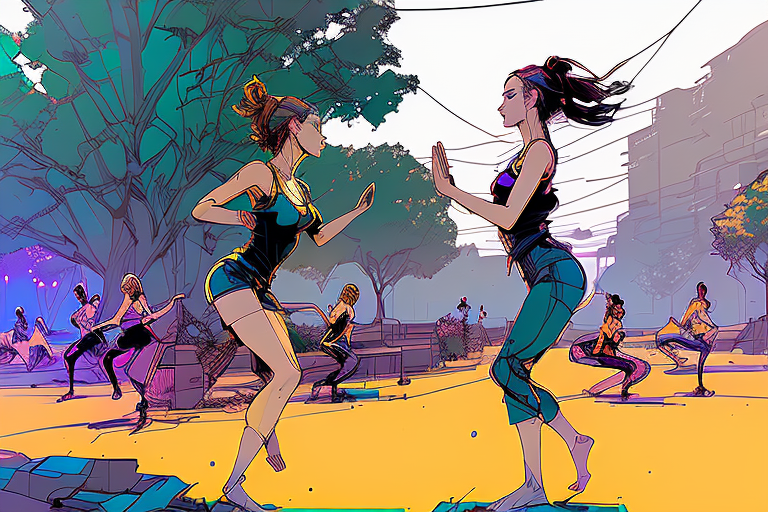
Example 2: Remix a movie scene
You can recast the iconic dance scene in Pulp Fiction to some yoga exercises in the park.
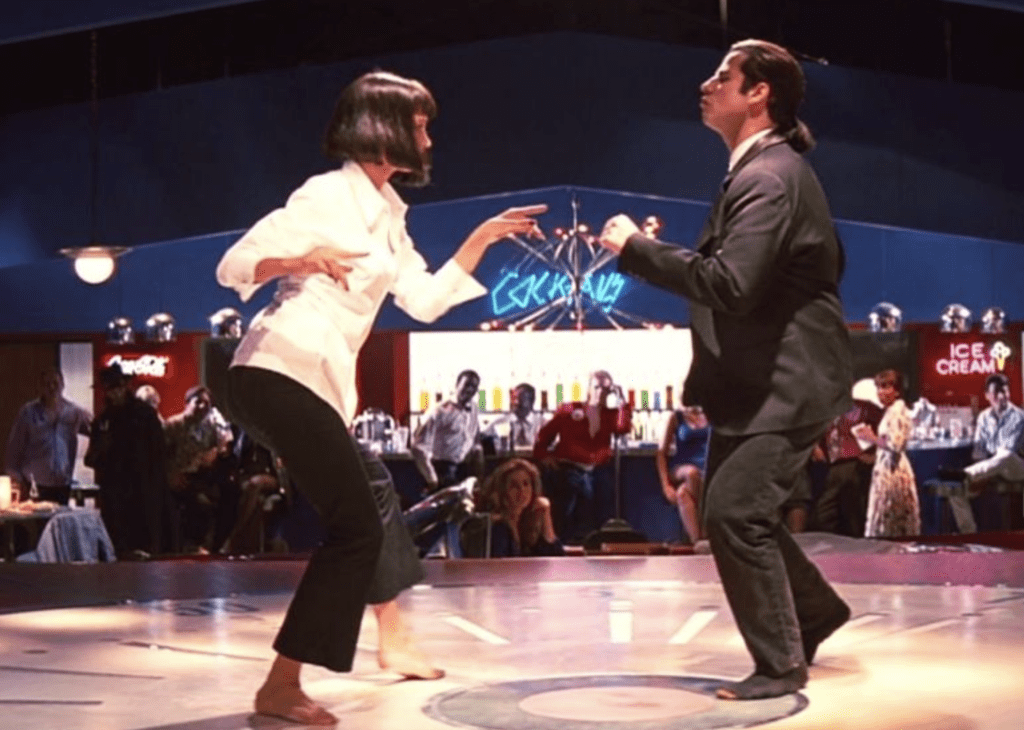
This uses ControlNet with DreamShaper model.
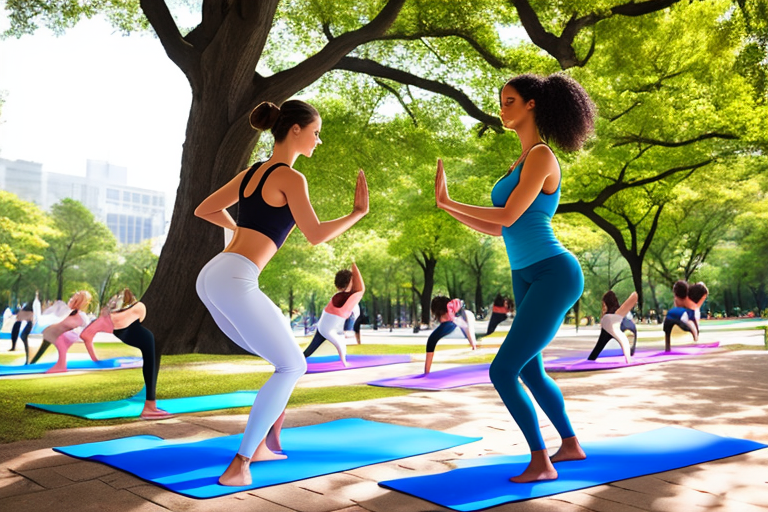
This is with the same prompt, but using Inkpunk Diffusion model. (You will need to add the activation keyword nvinkpunk to the prompt)
Stylize images with ControlNet
Using prompts
Below are with v1.5 model but various prompts to achieve different styles. ControlNet with various preprocessing was used. It is best to experiment and see which one works best.
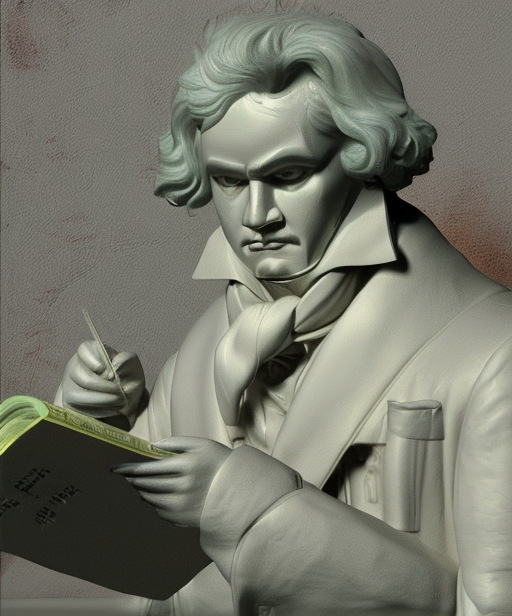
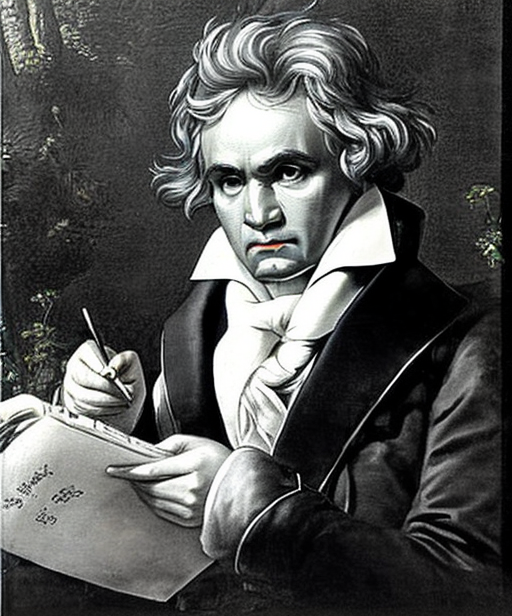
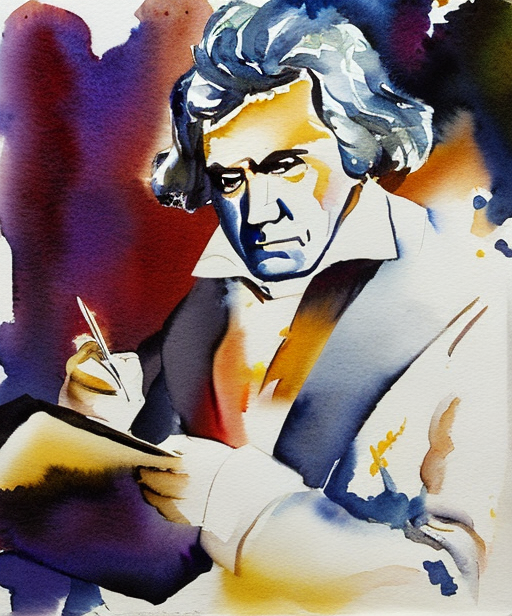
Using models
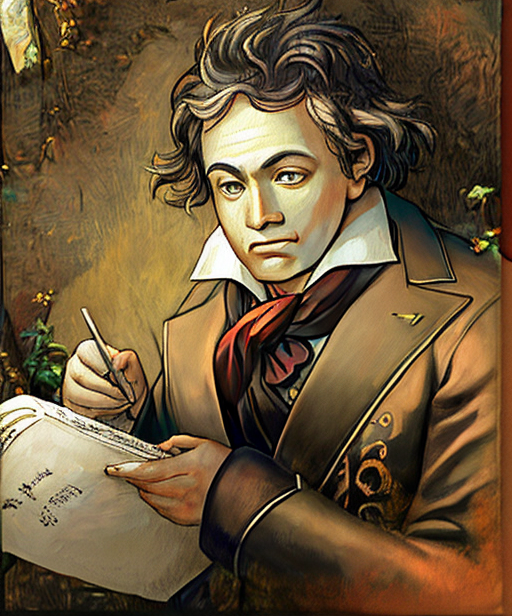
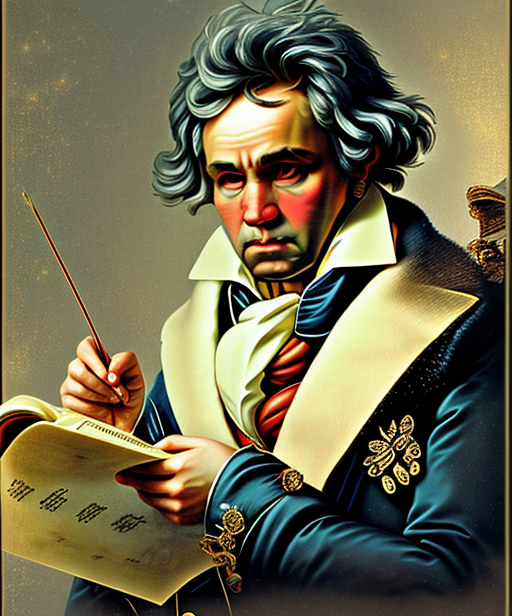
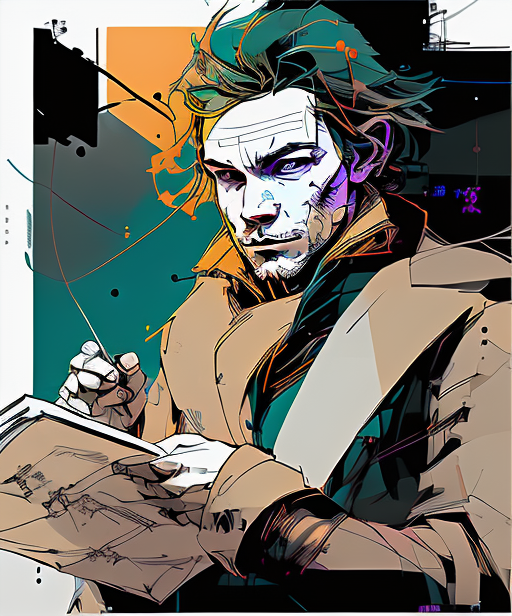
You can also use models to stylize images. Below are generated using the prompt “Painting of Beethoven” with Anythingv3, DreamShaper, and OpenJourney models.

Controlling poses with Magic Pose
Sometimes you may be unable to find an image with the exact pose you want. You can create your custom pose using software tools like Magic Poser (credit).
Step 1: Go to the Magic Poser website.
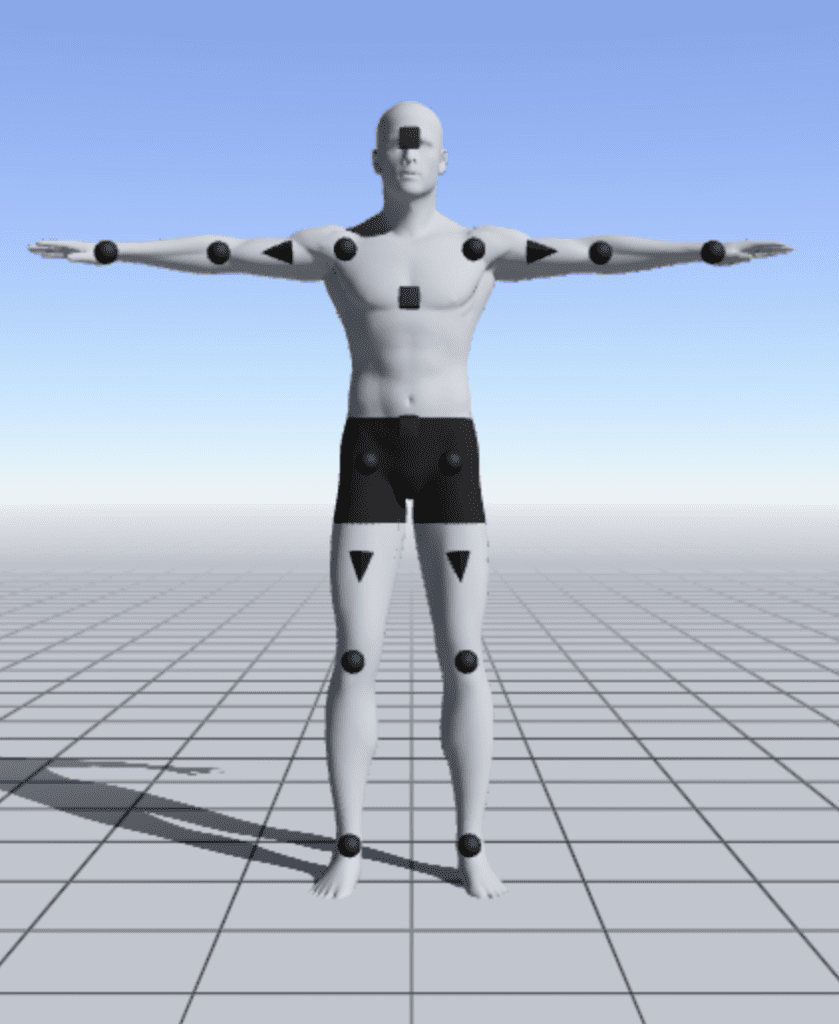
Step 2: Move the keypoints of the model to customize the pose.
Step 3: Press Preview. Take a screenshot of the model. You should get an image like the one below.
Step 4: Use OpenPose ControlNet model. Select the model and prompt of your choice to generate images.
Below are some images generated using 1.5 model and DreamShaper model. The pose was copied well in all cases.
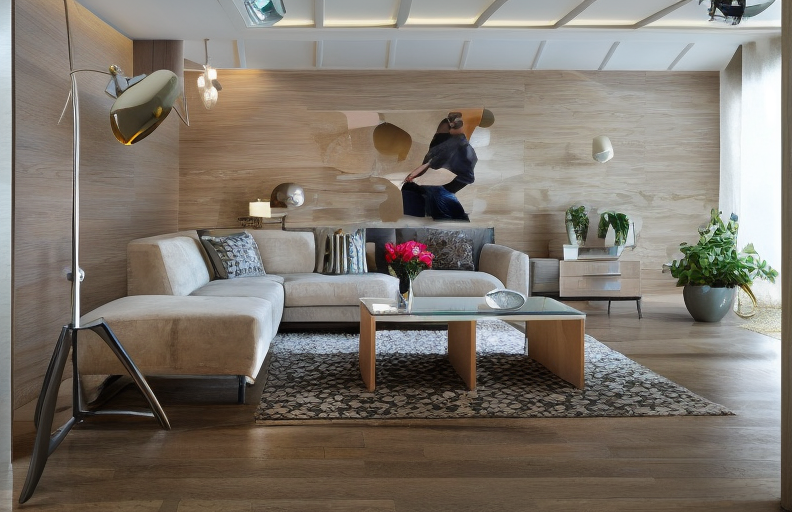
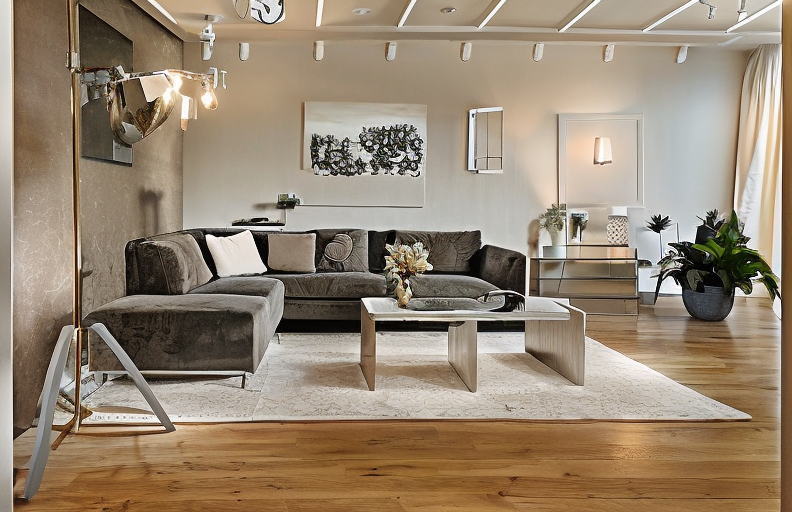
Interior design ideas
You can use Stable Diffusion ControlNet’s straight-line detector MLSD model to generate interior design ideas. Below are the ControlNet settings.
Preprocessor: mlsd
Model: mlsd
Start with any interior design photos. Let’s use the one below as an example.
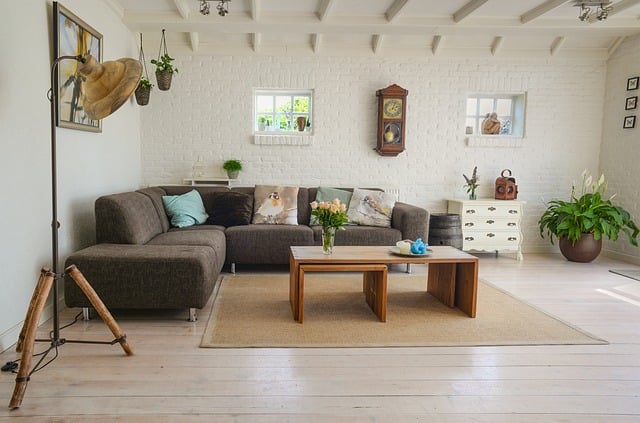
Prompt:
award winning living room
Model: Stable Diffusion v1.5
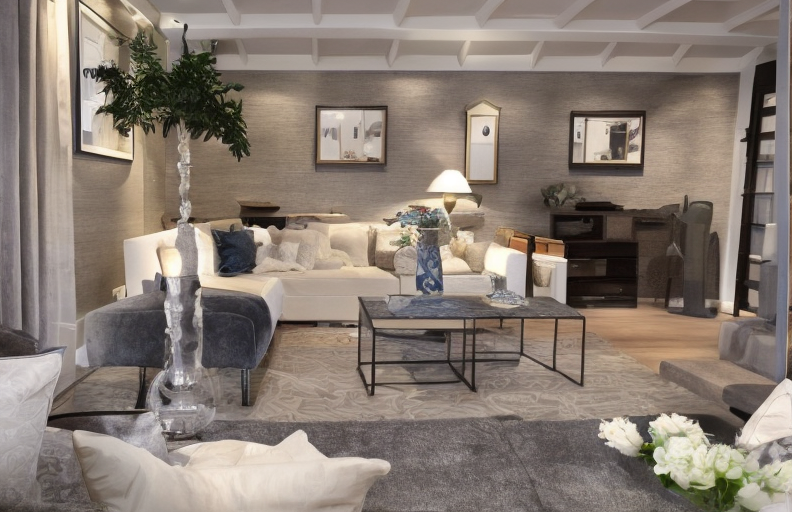
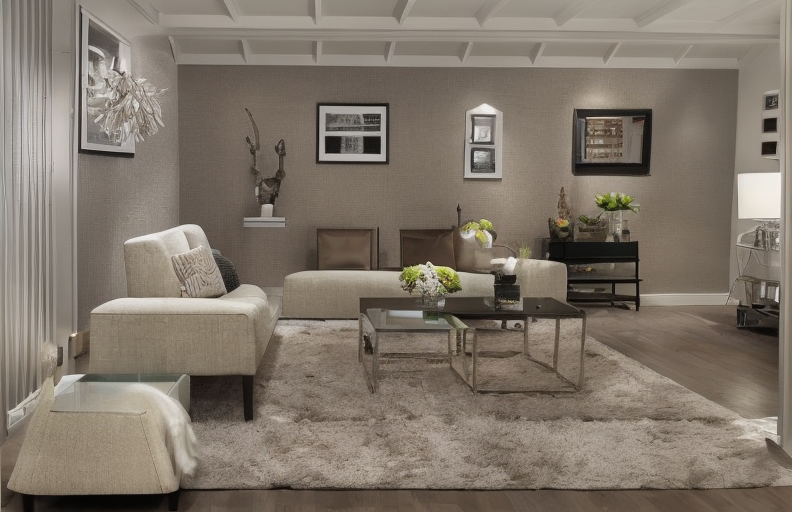
Below are a few design ideas generated.

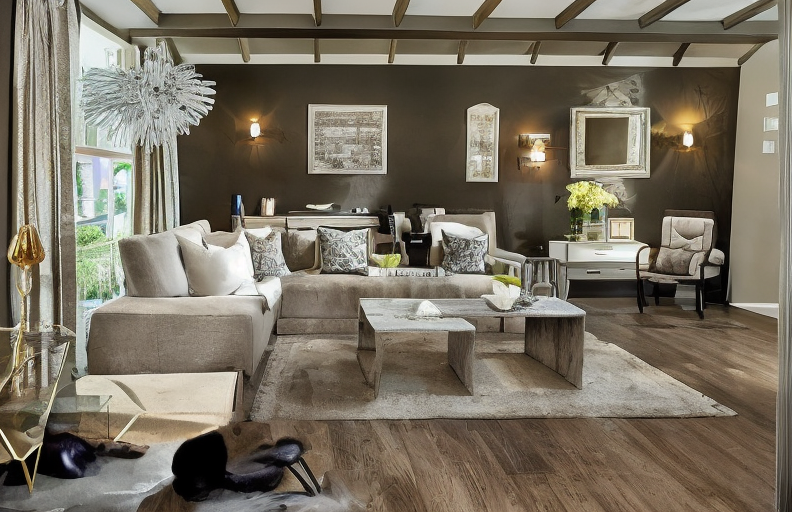
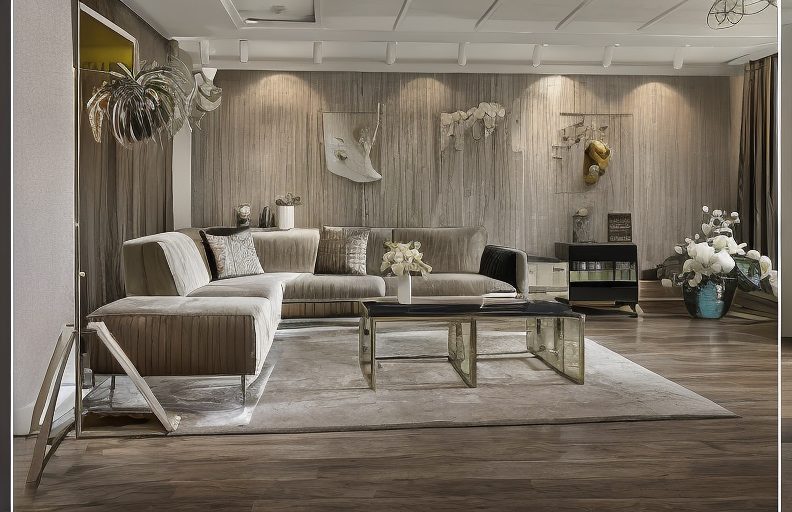
Alternatively, you can use the depth model. Instead of straight lines, it will emphasize preserving the depth information.
Preprocessor: Depth Midas
Model: Depth
Generated images:

Difference between the Stable Diffusion depth model and ControlNet
Stability AI, the creator of Stable Diffusion, released a depth-to-image model. It shares a lot of similarities with ControlNet, but there are important differences.
Let’s first talk about what’s similar.
- They are both Stable Diffusion models…
- They both use two conditionings (a preprocessed image and text prompt).
- They both use MiDAS to estimate the depth map.
The differences are
- Depth-to-image model is a v2 model. ControlNet can be used with any v1 or v2 models. This point is huge because v2 models are notoriously hard to use. People have a hard time generating good images. The fact that ControlNet can use any v1 model not only opened up depth conditioning to the v1.5 base model, but also thousands of special models that were released by the community.
- ControlNet is more versatile. In addition to depth, it can also condition with edge detection, pose detection, and so on.
- ControlNet’s depth map has a higher resolution than depth-to-image’s.
How does ControlNet work?
This tutorial won’t be complete without explaining how ControlNet works under the hood.
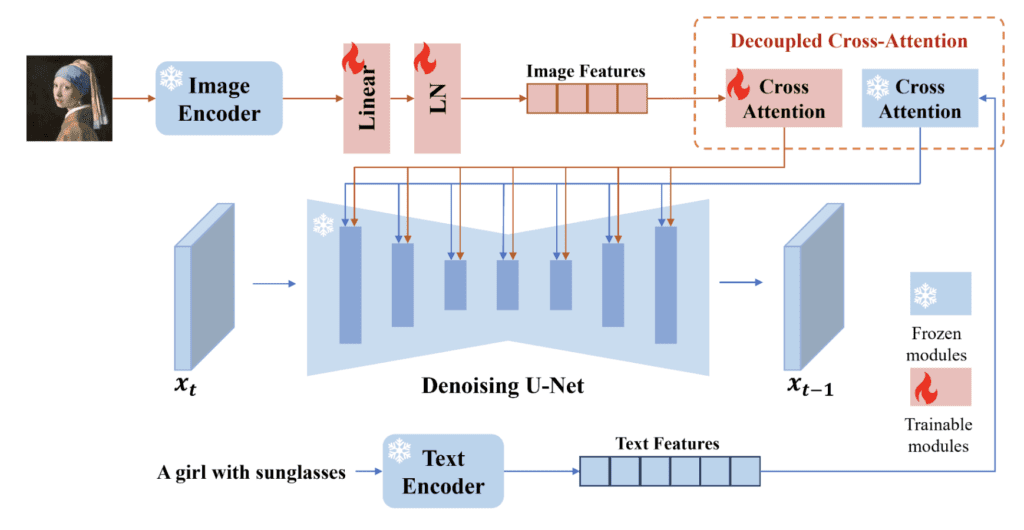
ControlNet works by attaching trainable network modules to various parts of the U-Net (noise predictor) of the Stable Diffusion Model. The weight of the Stable Diffusion model is locked so that they are unchanged during training. Only the attached modules are modified during training.
The model diagram from the research paper sums it up well. Initially, the weights of the attached network module are all zero, making the new model able to take advantage of the trained and locked model.
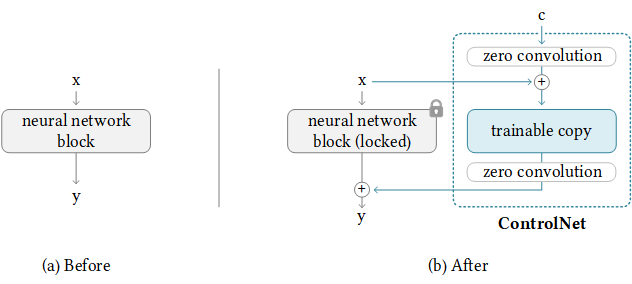
During training, two conditionings are supplied along with each training image. (1) The text prompt, and (2) the control map such as OpenPose keypoints or Canny edges. The ControlNet model learns to generate images based on these two inputs.
Each control method is trained independently.
More readings
- Some images generated with Magic Poser and OpenPose.
- Research article: Adding Conditional Control to Text-to-Image Diffusion Models (Feb 10, 2023)
- ControlNet v1.0 Github page
- ControlNet v1.1 model files (HuggingFace)
- ControlNet v1.1 Github page
- ControlNet Extension for AUTOMATIC1111 Web-UI
Hello Andrew, i am trying to do the hair style swap. Using the majicmixRealistic_v7, img2img inpaint with manual mask; controlnet with openpose, ipadapter with faceid, ipadapter with reference image. The face and other details such as pose, dress is retained but the hair style is not rendering properly and the reference image is honored only to some extent. Do you have any suggestion on the setup.
Thanks in advance.
J
hard to comment without seeing the workflow. maybe you can break out the hair style as a separate step with inpainting.
Looks like this site (https://www.spiceworks.com/tech/artificial-intelligence/articles/what-is-controlnet/) is using your content…using both girl in blue dress and spaceman…thought I would let you know.
Thanks for reporting! It’s ok since the author links back here.
Such a great tutorial. Do you ever do illusion-like images? I think many of us are here trying to find a comprehensive guide on that — and we’re willing to figure out ControlNet — but I think a guide on that would be greatly appreciated by the community + check out the search volume for ‘stable diffusion illusion image’
I’m looking to adapt 2 models to controlnet. Sam 2 and depth pro. Any hints where to find materials to adapt this?
In case we would like to use Openpose_hand for ControlNet in ComfyUI, where can we find the model? The only resource I can find for Openpose is:
https://huggingface.co/lllyasviel/sd-controlnet-openpose
My OpenPose images include hand but I cannot figure out how to add hands in the model! Does it automatically detect if hands are included?
You can try the hand refiner depth controlnet model. https://stable-diffusion-art.com/fix-hands/
Hello
Is it possible to generate a pose using openpose and then somehow instruct the AI to generate an image with that pose but from a different angle?
The openpose stick figure will need to be edited to reflect the new angle.
The best help! Thank you!
Gracias por el tutorial. Ahora entiendo esto mejor.
Wonderful and detailed tutorial as always!
Can you make a tutorial (workflow) on how to add a pose to an existing portrait. For example a half body portrait of a woman where the hands is not showing then I want to change the position of the arms where it is placed above her head generating a hand and the rest of the arm in the process and positioning it as well to the desired place. And is it possible to do everything inside a1111 web ui if possible.
I saw a similar workflow on reddit here’s the image if you’re interested https://imgur.com/66aj5q3
The workflow you posted is pretty spot on. I have a similar one at the end of this article: https://stable-diffusion-art.com/inpainting-remove-extra-limbs/
You can use inpaint sketch in A1111 but its buggy and is faster to use an external program like photoshop.
Hi Andrew,
Thanks a lot for enlighted us with this article (Especially for MLSD!).
Greetinbs from Thailand.
Khampol.
You are welcome!
Hi there,
I only want to change the clothes of the character. I do NOT want to change the face, the background. I just want to change the clothing, BUT I would like to upload the image of the clothes, which the character should wear.
Can this be done through pure coding and without automatic1111?
Pls help
Hi, you can follow this guide. I am sure you can do it with codes.
https://stable-diffusion-art.com/change-clothes-ai/
Hi. All the explanations are made for Stable Diffusion 1.5 models. But it’s not clear for me to use what when I’m working with SDXL models. Is there specific Preprocessor and models for SDXL?
Thx,
See https://stable-diffusion-art.com/controlnet-sdxl/
Hi, great overview of controlnet 🙂
Is there a way to batch loads of images and save out the openpose images only in controlnet? I have exported a short video as individual frames, but can’t seem to figure out if it’s possible do!
Hi Andrew – Another great guide! Looking for the model:Model: ip-adapter_sd15, not seeing it after selecting the correct preprocessor. Maybe the notebook updated?
I updated the notebook and sees this preprocessor. pls check it out.
Hello Andrew, I hope you are doing well. So, I have this question, let us assume I have 4 open poses images with me, I want to generate a person with 4 of these poses at the same time in a batch. How to achieve this in comfyui? Now, I tried this, but all I am getting is the poses seems to be random for a person.
Hi, do you mean you have 1 prompt but 4 control images, and you want to generate 4 different images each following one of the control image?
Some nodes in animatediff video-to-video workflow is using a batch of control images to an image batch. I would start from there and steal some nodes.
Yes, I meant that only. I got it working but somehow the face is not coming good, used upscaling and face detailer to fix it. But not sure why it is doing it. Thanks for the reply.
The issue is the face not recovering with enough pixels. If high res fix or detailer can fix it.
Hi Andrew, wonderful article. Do you happen to know how we can use controlnet to virtually stage an empty room? I have seen some examples but I can’t figure it out.
Use can use the depth control map and an empty room as the reference image
Hi, I’m getting this error. Could you help?
RuntimeError: Expected query, key, and value to have the same dtype, but got query.dtype: c10::Half key.dtype: float and value.dtype: float instead.
Did you solve this by chance? I have the exact same error when running ip adapters on m1 mac.
Thanks you for your excellent article, I need to use COntrolNet more!
The article was long and I doubted whether I would be able to complete it. But I did. It was just amazingly satisfying to keep scrolling down and read each section, and before I could doubt twice, I had completed it. And the most important part is, I understood it all.
Hello Andrew,
huge thanks for this guide!
After downloading the models, they won’t show up in the checkpoint (there’s only “model.ckpt”).
Would be amazing if you could help me out.
Thanks in advance!
Hi Ella, the controlnet model shows up in model menu the controlnet section of the txt2img page.
Greetings, since yesterday outta nowhere i started getting this error : “TypeError: ‘tuple’ object does not support item assignment”.
While using Gif2Gif script in image2image section. And when i disable controlnet from extensions, error is gone. I’ve tried reinstalling controlnet and stable diffusion, but non of that worked. Please help what do i need to do, i really need controlnet.
You can try deleting the venv folder and restart.
The best description of a controlnet I’ve seen. Bravo!
Thanks 🙂
Hello Andrew – thanks for everything you’re doing for this community. I’m using the Google Colab notebook to run Automatic1111. I’m struggling to work out how to load a control model for use with ControlNet. When I add the model to Google Drive in the models folder, or load via URL, I can see it as a checkpoint option, rather than a selectable model within ControlNet. Specifically, I’m trying to use Controlnet QR Code Monster v2 For SD-1.5 from Hugging Face. Thanks for your support, Jon.
Man, Your articles are incredible!! So easy to understand for beginners.
keep going man…
I don’t know what difference appears when Pixel Perfect is on or off. Can someone please tell me?
When “pixel perfect” is on, the control image and the generated image will be the same size.
It usually doesn’t matter except when you are working on very small features.
Hi, I love this site and have been able to learn a lot here. Thank you very much for the effort and the love with which this site is made, it’s really unique!
Do you also use a Mac? I still have one with an Intel chip and am desperately trying to get ControlNet to work. I always get the error message: “RuntimeError: Placeholder storage has not been allocated on MPS device! Unfortunately, I can’t find a solution. Has anyone else experienced something similar?
With kind regards
schmees
Thank you for this great article, truly the best tutorial on controlnet.
I have a question about the inpainting section. The two inpaint output pictures which URLs are
https://i0.wp.com/stable-diffusion-art.com/wp-content/uploads/2023/05/image-173.png?w=768&ssl=1
and
https://i0.wp.com/stable-diffusion-art.com/wp-content/uploads/2023/05/image-174.png?w=768&ssl=1
have a color issue. It is obviously that color of the masked inpainted area (model’s face, left hand, left shoulder) is slightly colder or lighter than the other part of the model. Nevertheless, when I tried to inpaint some real photos in your way exactly. I encountered the same problem. Color of the inpainted area is always lighter. Do you have any recommendations to fix this problem?
Best Regards.
This seems to be a limitation of the model.
You can try increasing the number of pixels of the mask padding to see if it helps.
Alternatively, you can use Photoshop to adjust the inpainted area if you are willing to go through the trouble. Create a mask in Photoshop. Use inpaint upload for inpainting. Go back to Photoshop to adjust only the masked.
You save my day. Thanks!
This is the best text tutorial I’ve ever seen, I’ve learned so much from it, thank you so much for sharing!
On Windows, to download a bunch of models from Git or HuggingFace quicker, you can use the Git “Large File System”.
Within HuggingFace, click on the 3-dot menu, and choose “Clone repository”, copy the URL, the default according to the instructions above is included below
First, navigate within the command prompt to the appropriate directory (stable-diffusion-webui\extensions\sd-webui-controlnet\models). Then execute the following commands:
git lfs install
git clone https://huggingface.co/lllyasviel/ControlNet-v1-1
git lfs pull
This is SO much faster than click-saving each from the web browser.
Thank you for listing the command!
Hey!
Thank you for this amazing guide!
I wanted to try Clip vision style T2I adapter.
I set t2ia_style_clivision as preprocessor but when I want to choose the control model there is no t2iadapter_style_XXXX. Actually nothing with t2iadapter.
I have t2iadapter_style_sd14v1 into the Controlnet folder but it does not show in the dropbar menu.
Does anybody know what im doing wrong?
Screenshot here:
https://ibb.co/zZrkLwV
Thank you and all the best!
Chris
Yes, it’s done. In the slider bar I have chosen 2 units and I have restarted SD but only one tab appears …
You need to completely shut down and restart SD to take effect.
Update ControlNet if it doesn’t work.
Thank you! I’ve looked and it was already set at 3, but somehow didn’t load them. I set them to 6, saved the settings and reloaded the UI, then the tabs showed up. Scaled them back down to 3, saved again and reloaded. Now they are finally there. Thank you, I’ve looked everywhere except in the settings, thought I installed something wrong or so lol.
Yes. Drop it (the image file of the openpose) in the image box of ControlNet, then select NONE as the preprocessor and Control_V11p_sd15_openpose as the Model and you’re all set.
What is this setting called? I don’t see it.
Thank You Andrew for this detailed guide for noobs like myself. It would take a loooong time to figure out these things myself. You are Godsend \^o^/
I have a question about the multiple ControlNets. I wanted to switch up the pose for a photo and switch the background just like written in this article. Problem for me is my ControlNet is on v1.1.224 and it does not have the ControlNet Unit 0, 1 or 2 tabs. It only has “Single Image” and “Batch” to choose from. How exactly do I get those Unit tabs?
Hi, you can enable multiple tabs in Settings -> controlent.
It’s really very detailed, it would take a long time to write an article like this!
Oops – turns out all I had to do was to use the correct model with the preprocessor set to “None”!
Say I already have an OpenPose control map generated via another software and want to directly apply it without having to go through the “upload image and have the preprocessor create a control map from it” step: Is that possible with Auto1111 ControlNet?
Thanks a lot for this article, Andrew.
I have several questions regarding to Multi-ControlNet, and wish that I could have your kind help and comments.
The general question would be, can we use Multi ControlNet to change the pose and specific clothes for my 2D character?
If we can, which specific preprocessor and model that should we use for the reference pictures of characters, poses, and clothes? And among different control weights and steps etc.
Thanks a lot in advanced.
Say,
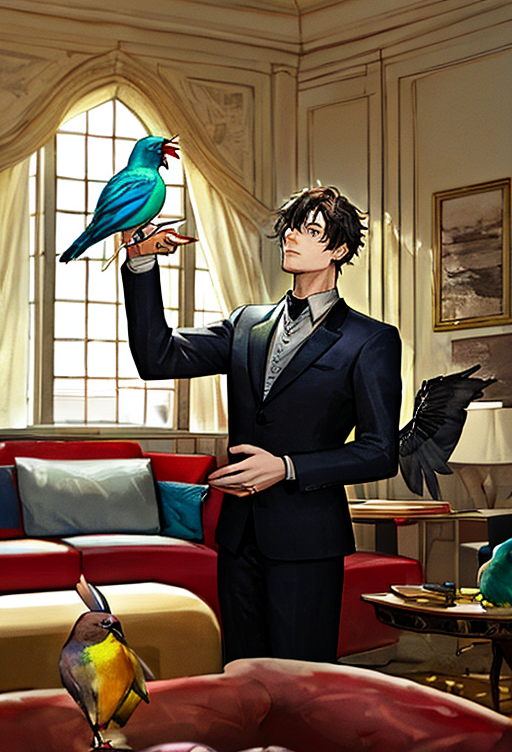
Picture 1 for art style reference, so, preprocessor would be Reference_Only? (Please protect your arm well. :p )
Picture 2 for Pose reference, so Model should be Control_XXX_OpenPose, and leave Preprocessor open?
Picture 3 for the Face of the character, so preprocessor and model would be OpenPose_FaceOnly and Control_XXX_OpenPose?
Picture 4 for the clothes ref, no idea here.
And different control weights and steps etc.
I tried a lot combinations this afternoon, and I will keep trying, meanwhile, would be lovely to have your insight and comments.
Thanks a lot.
Hi, I think you are on the right track. It might be difficult to achieve all the objectives in a single generation. I would break it out achieving one at a time with inpainting and openpose editor.
Thanks for your reply and advise, Andrew. I will surely give it a try and keep you posted. Have a great day. Thanks.
Amazingly detailed guide. Every option and setting is made very clear with the images. Thank you Andrew.
One small thing that isn’t crystal clear is the “t2iadapter_color” model mentioned in the colour grid preprocessor. There doesn’t seem to be a controlnet model with that name in the huggingface repo. Clarifying that would make this guide even more awesome !
Hi, the model is https://huggingface.co/TencentARC/T2I-Adapter/blob/main/models/t2iadapter_color_sd14v1.pth
Love these guides. So I have more Preprocessors than I do Models. Is there a folder I should check for this? My models stable-diffusion-webui\extensions\sd-webui-controlnet\models has a big list but when I use the drop down in control net I only see openpose,lineart,normalbae
Ok I just googled for the .PTH of the ones I was missing that I wanted to use and added them. Hope I didnt do something odd
Hi, as stated in the guide, all pth files are available at:
https://huggingface.co/lllyasviel/ControlNet-v1-1/tree/main
Hi, do you have any content on using the controlnet inpainting model?
OK added!
Your latest edits are stellar. This is a great tutorial, Andrew. Really appreciate it.
Good one, Thanks
Andrew, thanks for reply. The code gets executed by Auto1111 if I use the OpenPose model. So my manually doing anything will not help. Same code will execute I think. Can you please check what gets logged in your CMD window when you preview Control Net for OpenPose. I suspect same code , for some reasons, it is going to https://huggingface.co/lllyasviel/Annotators/resolve/main/body_pose_model.pth , does not make sense
Let me explain more about the error that I think you are encountering…
When you use a preprocessor for the very first time, the extension will need to download the preprocessor’s model since it doesn’t come with installation. That’s why it needs to access “https://huggingface.co/lllyasviel/Annotators/resolve/main/body_pose_model.pth”. You can try visit this url with your browser and you should not be able to download it… So first find a way to download this file.
Then save the file as “C:\Users\satis\stable-diffusion-webui\extensions\sd-webui-controlnet\annotator\downloads\openpose\body_pose_model.pth”. The extension uses this model but with a different name.
You can run ControlNet with the Colab Notebook in the Quick Start Quick. That you can see the log in the console window.
Thanks Andrew, you are awesome : ). Thanks for the explanation. I had to download several models (face, hand etc.) but finally it worked. SSL certificate verification still should be resolved but I am not stuck anymore. Thanks and did I mention you are awesome 🙂
Control Net is giving a Run time error . [SSL: CERTIFICATE_VERIFY_FAILED] certificate verify failed: unable to get local issuer certificate (_ssl.c:1007)
Here is the complete. Please see if you can help
“ControlNet preprocessor location: C:\Users\satis\stable-diffusion-webui\extensions\sd-webui-controlnet\annotator\downloads
Downloading: “https://huggingface.co/lllyasviel/Annotators/resolve/main/body_pose_model.pth” to C:\Users\satis\stable-diffusion-webui\extensions\sd-webui-controlnet\annotator\downloads\openpose\body_pose_model.pth
Traceback (most recent call last):
File “C:\Program Files\WindowsApps\PythonSoftwareFoundation.Python.3.10_3.10.3056.0_x64__qbz5n2kfra8p0\lib\urllib\request.py”, line 1348, in do_open
h.request(req.get_method(), req.selector, req.data, headers,
File “C:\Program Files\WindowsApps\PythonSoftwareFoundation.Python.3.10_3.10.3056.0_x64__qbz5n2kfra8p0\lib\http\client.py”, line 1283, in request
self._send_request(method, url, body, headers, encode_chunked)
File “C:\Program Files\WindowsApps\PythonSoftwareFoundation.Python.3.10_3.10.3056.0_x64__qbz5n2kfra8p0\lib\http\client.py”, line 1329, in _send_request
self.endheaders(body, encode_chunked=encode_chunked)
File “C:\Program Files\WindowsApps\PythonSoftwareFoundation.Python.3.10_3.10.3056.0_x64__qbz5n2kfra8p0\lib\http\client.py”, line 1278, in endheaders
self._send_output(message_body, encode_chunked=encode_chunked)
File “C:\Program Files\WindowsApps\PythonSoftwareFoundation.Python.3.10_3.10.3056.0_x64__qbz5n2kfra8p0\lib\http\client.py”, line 1038, in _send_output
self.send(msg)
File “C:\Program Files\WindowsApps\PythonSoftwareFoundation.Python.3.10_3.10.3056.0_x64__qbz5n2kfra8p0\lib\http\client.py”, line 976, in send
self.connect()
File “C:\Program Files\WindowsApps\PythonSoftwareFoundation.Python.3.10_3.10.3056.0_x64__qbz5n2kfra8p0\lib\http\client.py”, line 1455, in connect
self.sock = self._context.wrap_socket(self.sock,
File “C:\Program Files\WindowsApps\PythonSoftwareFoundation.Python.3.10_3.10.3056.0_x64__qbz5n2kfra8p0\lib\ssl.py”, line 513, in wrap_socket
return self.sslsocket_class._create(
File “C:\Program Files\WindowsApps\PythonSoftwareFoundation.Python.3.10_3.10.3056.0_x64__qbz5n2kfra8p0\lib\ssl.py”, line 1071, in _create
self.do_handshake()
File “C:\Program Files\WindowsApps\PythonSoftwareFoundation.Python.3.10_3.10.3056.0_x64__qbz5n2kfra8p0\lib\ssl.py”, line 1342, in do_handshake
self._sslobj.do_handshake()
ssl.SSLCertVerificationError: [SSL: CERTIFICATE_VERIFY_FAILED] certificate verify failed: unable to get local issuer certificate (_ssl.c:1007)
“
You computer cannot connect and download a file.
“https://huggingface.co/lllyasviel/Annotators/resolve/main/body_pose_model.pth” to C:\Users\satis\stable-diffusion-webui\extensions\sd-webui-controlnet\annotator\downloads\openpose\body_pose_model.pth
You can try downloading yourself by other means and put it there.
I have run into issues using Control Net with Automatic 1111 on Windows. Preprocessors were available after the install but Model drop down was empty. I researched and downloaded 14 models ( 2 Gb each) from Github and placed them in the Models folder of control net. So Models show up now but they ERROR when I use them . Only Canny works.
Question is, do you a step by step installation that takes care of any conflicts of version for Python, Control Net, models etc.
I will have another tutorial for controlnet v1.1
The models should be on HF:
https://huggingface.co/lllyasviel/ControlNet-v1-1/tree/main
Press refresh button after copying new models.
Can you do a guide on openpose faces? I’m getting errors on Colab
Sure, putting that in the queue…
Colab notebook updated to 1.1 models. Now face should be working.
Thank you so much for your reply. I guess I’ll have to try your suggestion. Since I have AUTOMATIC1111 running on my local machine and can at least do generation, face restoration, and maybe some other basics, my thought is that maybe I can do the bulk of my creative generation locally, and then try to accomplish the more resource intensive work in ControlNet on Colab. Hopefully that is possible.
For a neophyte to SD, this is such an immensely helpful site! Thank you! Amazingly, I have managed to install and run AUTOMATIC1111 on my laptop with a little NVIDIA GTX 1050 with less than 4G VRAM, and it’ll crank out renders all day… until I try to use ControlNet. Then the memory issues crash the party. My aim is to develop characters that I’m happy with, and then present those characters with a consistent appearance (hairstyle, clothing, etc,.) in series of several images. Are there any other options for achieving this goal without ControlNet? I just can’t run out and replace my lappy without more justification. Thanks for any advice! And thanks again for this great resource!
Welcome to the site! Unfortunately, ControlNet is the only reliable way to control characters. You can try the colab notebook in the quick start guide. It can run controlnet on A1111.
This is the best article about the ControlNet! It helps me a lot! Thank uuuuuuuuuuuuu!
Thank you for this. Now i need a batch funktion to load video sequence images in a row and start generation with the same seed every time to make a video with different faces .
Well explained article! Thank you!
Thanks! This is by far the best information about ControlNet that I’ve ever seen anywhere on the net.
Thanks! That’s what I am aiming for.
Thank you for all the selfless hard work you put into these tutorials!
Thanks for recognition! Indeed I spent a lot of them on them.
I have to say, this is possibly the best ever written article on Stable Diffusion/ControlNet that I’ve came across.
Highly detailed information which will help newcomers to using AI image generators, you’ve done an excellent job of compiling this Andrew.
Looking forward to more articles in the near future.
Your comment made my day! Thank you. Yes, I have been aiming to do what you said in each of my articles.