Stable Diffusion XL (SDXL) is a brand-new model with unprecedented performance. Because of its larger size, the base model itself can generate a wide range of diverse styles.
What’s better? You can now use ControlNet with the SDXL model!
Note: This tutorial is for using ControlNet with the SDXL model. I won’t repeat the basic usage of ControlNet here. See the ControlNet guide for the basic ControlNet usage with the v1 models.
This guide covers
- Installing ControlNet for SDXL model.
- Copying outlines with the Canny Control models.
- Copying depth information with the depth Control models.
- Coloring a black and white image with a recolor model.
- Sharpening a blurry image with the blur control model.
- Copying an image’s content and style with the Image Prompt Adapter (IP-adapter) model.
Table of Contents
Software
AUTOMATIC1111 Web-UI is a free and popular Stable Diffusion software. You can use this GUI on Windows, Mac, or Google Colab.
Check out the Quick Start Guide if you are new to Stable Diffusion.
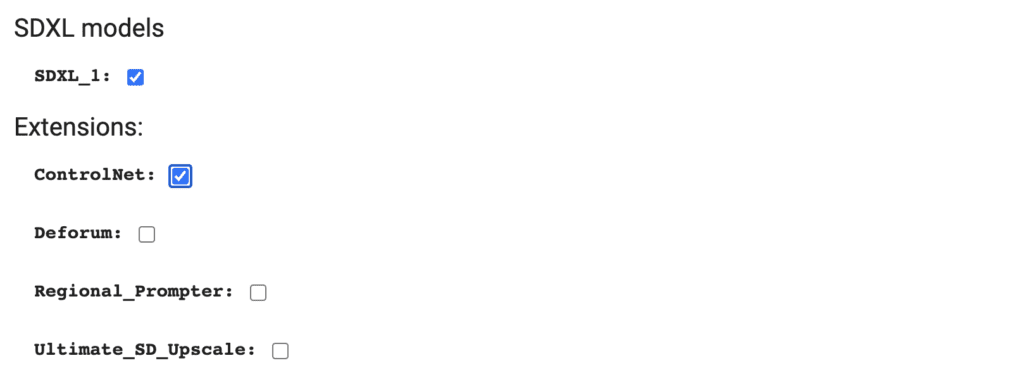
Installing ControlNet for Stable Diffusion XL on Google Colab
If you use our Stable Diffusion Colab Notebook, select to download the SDXL 1.0 model and ControlNet. That’s it!
Installing ControlNet for Stable Diffusion XL on Windows or Mac
Step 1: Update AUTOMATIC1111
AUTOMATIC1111 WebUI must be version 1.6.0 or higher to use ControlNet for SDXL. You can update the WebUI by running the following commands in the PowerShell (Windows) or the Terminal App (Mac).
cd stable-diffusion-webugit pullDelete the venv folder and restart WebUI.
Step 2: Install or update ControlNet
You need the latest ControlNet extension to use ControlNet with the SDXL model.
Read the following section if you don’t have ControlNet installed.
Skip to the Update ControlNet section if you already have the ControlNet extension installed but need to update it.
Installing ControlNet
To install the ControlNet extension in AUTOMATIC1111 Stable Diffusion WebUI:
- Start AUTOMATIC1111 WebUI normally.
2. Navigate to the Extension Page.
3. Click the Install from URL tab.
4. Enter the following URL in the URL for extension’s git repository field.
https://github.com/Mikubill/sd-webui-controlnet5. Wait for the confirmation message that the installation is complete.
6. Restart AUTOMATIC1111.
You don’t need to update ControlNet after installation. You can skip the next section.
Updating ControlNet
You need ControlNet version 1.1.400 or higher to use ControlNet with the SDXL model.
To update the ControlNet extension:
- In AUTOMATIC1111, go to the Extensions page.
2. In the Installed tab, click Check for updates.
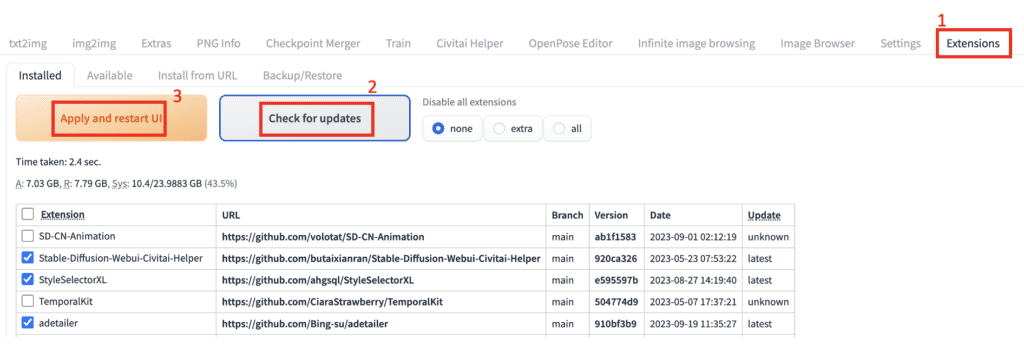
3. Click Apply and restart UI. (Note: This will update ALL extensions. This may be necessary to make it work.)
If AUTOMATIC1111 fails to start, delete the venv folder and start the WebUI.
Step 3: Download the SDXL control models
You can download the ControlNet models for SDXL at the following link.
Download ControlNet Models for SDXL
You can put models in
stable-diffusion-webui\extensions\sd-webui-controlnet\modelsor
stable-diffusion-webui\models\ControlNetThere are so many models. Which ones to download? You can hold off downloading. I will give some guidance when we talk about what the models do.
VRAM settings
If your GPU card has 8 GB to 16 GB VRAM, use the command line flag --medvram-sdxl. You can edit webui-user.bat as
@echo off

set PYTHON=
set GIT=
set VENV_DIR=
set COMMANDLINE_ARGS=--medvram-sdxl --xformers

call webui.bat
If your GPU card has less than 8 GB VRAM, use this instead.
@echo off

set PYTHON=
set GIT=
set VENV_DIR=
set COMMANDLINE_ARGS=--lowvram --xformers

call webui.bat
Canny models
Use the Canny ControlNet to copy the composition of an image.
The Canny preprocessor detects edges in the control image. The Canny control model then conditions the denoising process to generate images with those edges.
The first problem: There are so many Canny Control models to choose from. Which one should you pick?
- diffusers_xl_canny_full
- diffusers_xl_canny_mid
- diffusers_xl_canny_small
- kohya_controllllite_xl_canny_anime
- kohya_controllllite_xl_canny
- sai_xl_canny_128lora
- sai_xl_canny_256lora
- t2i-adapter_xl_canny
- t2i-adapter_diffusers_xl_canny
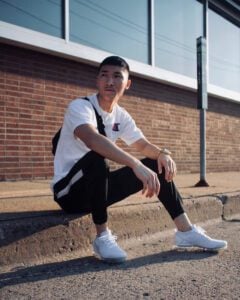
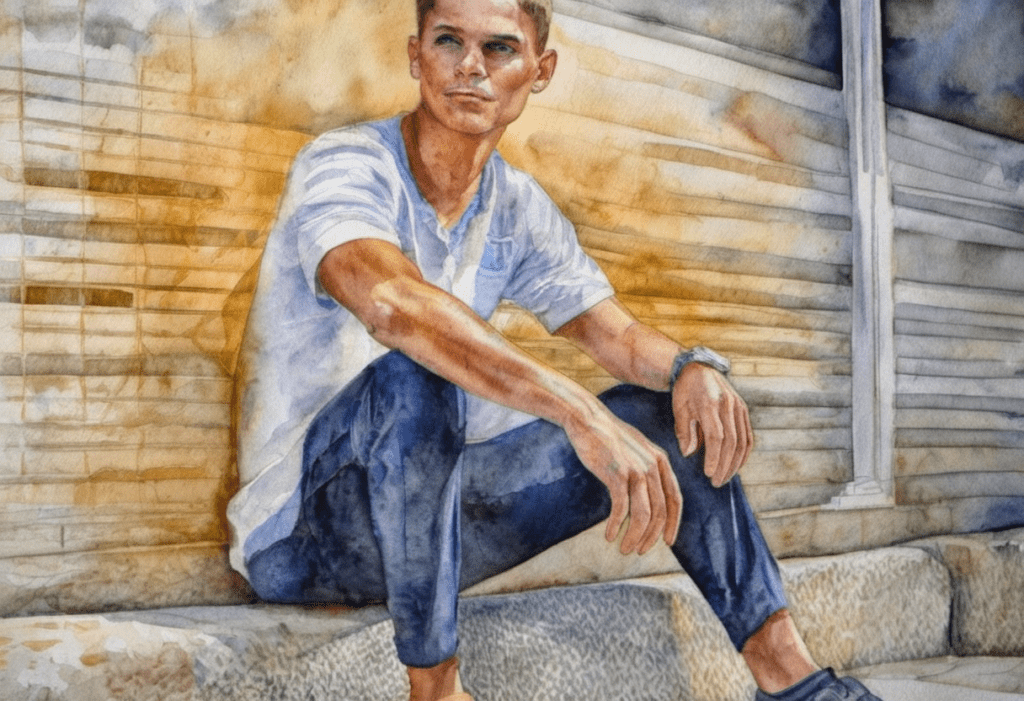
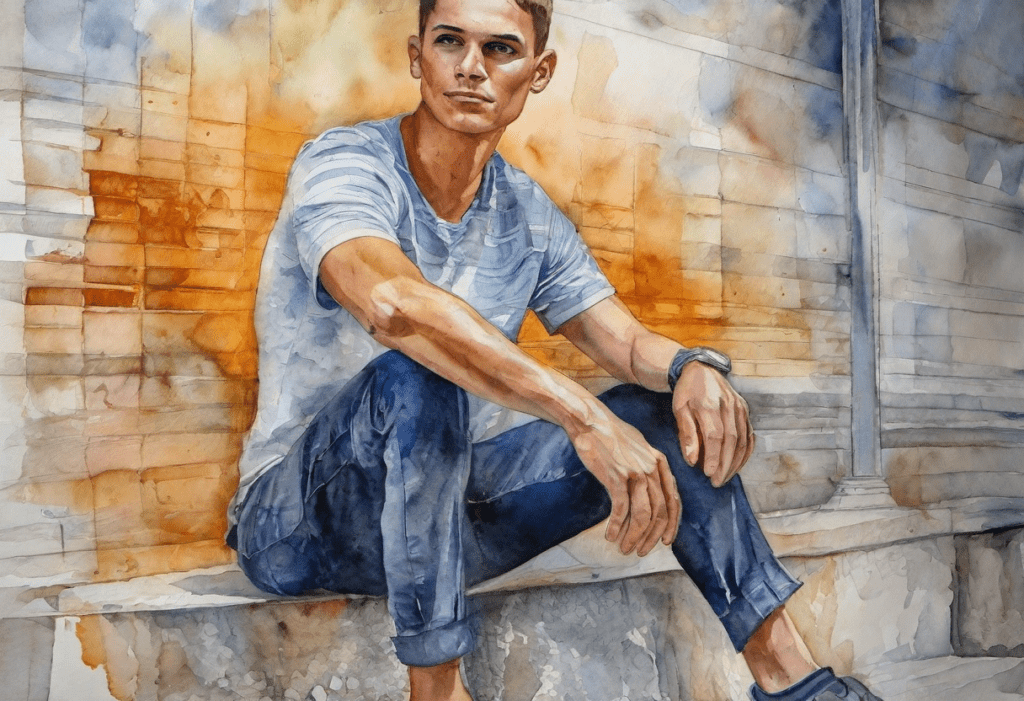
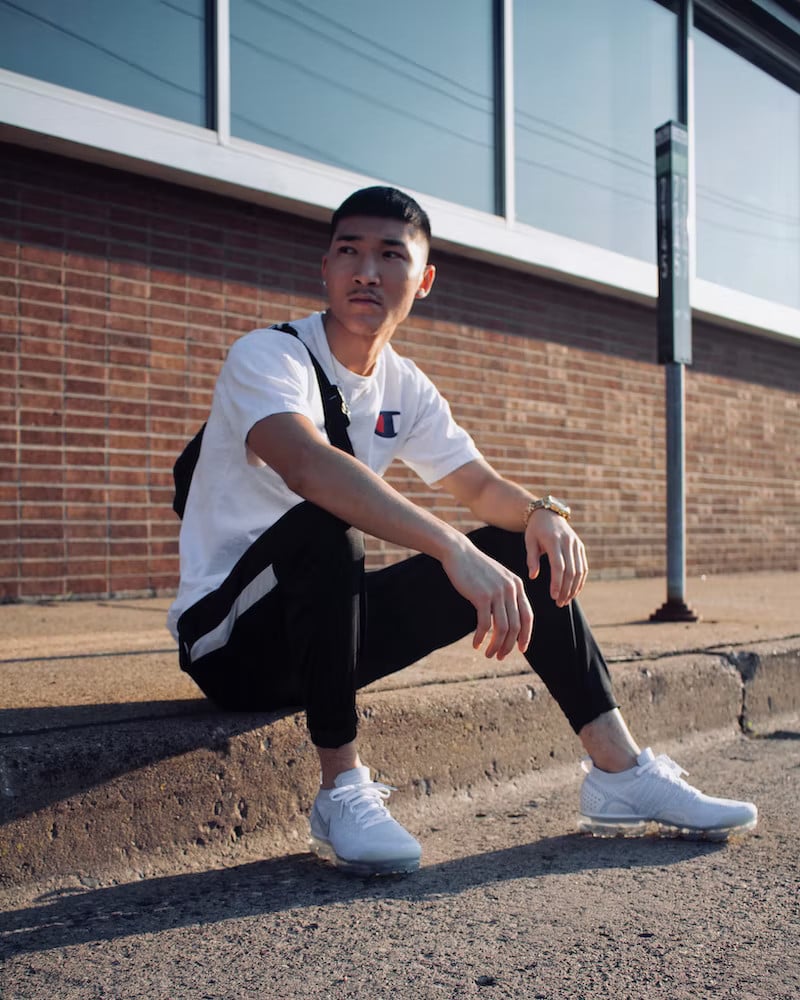
Let’s use ControlNet Canny to steal the composition of the following image for a watercolor drawing.
Txt2img Settings
- Model: SDXL Base 1.0
- Refiner: None
- Width: 1216
- Height: 832
- CFG Scale: 5
- Steps: 20
- Sampler: DPM++ 2M Karras
- Prompt:
Watercolor painting a young man sitting . Vibrant, beautiful, painterly, detailed, textural, artistic
anime, photorealistic, 35mm film, deformed, glitch, low contrast, noisy
This is the style this prompt produces WITHOUT ControlNet:
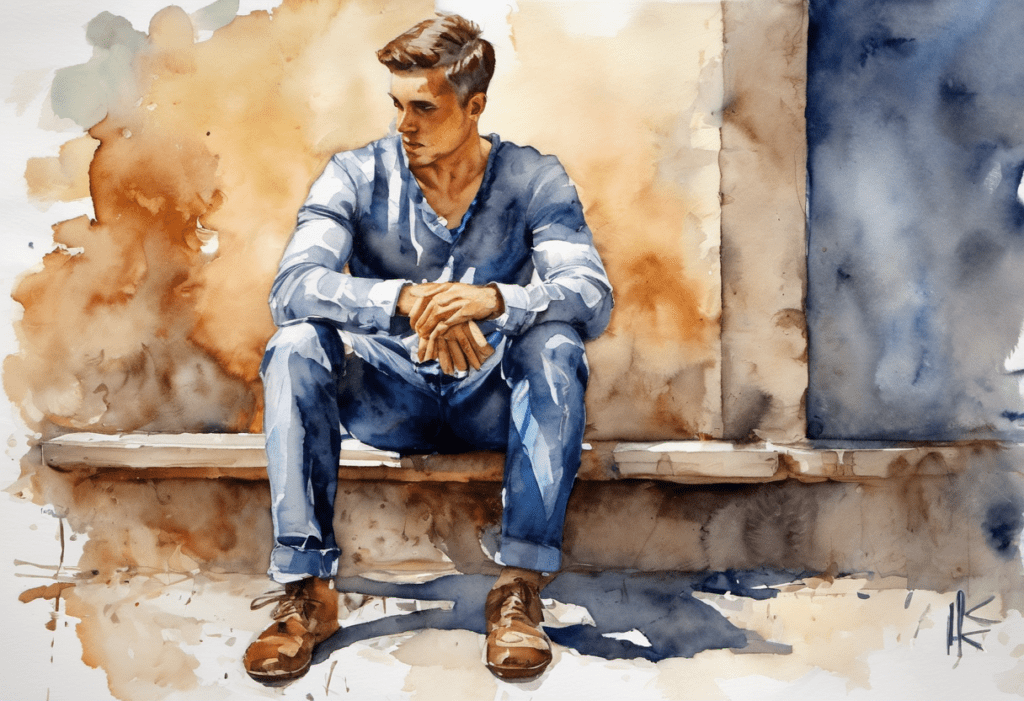
The best Control Model should copy the composition without changing the style.
ControlNet settings:
- Enabled: Yes
- Pixel Perfect: Yes
- Preprocessor: Canny
- Model: Various
- Control Mode: Balanced
- Resize Mode: Crop and Resize
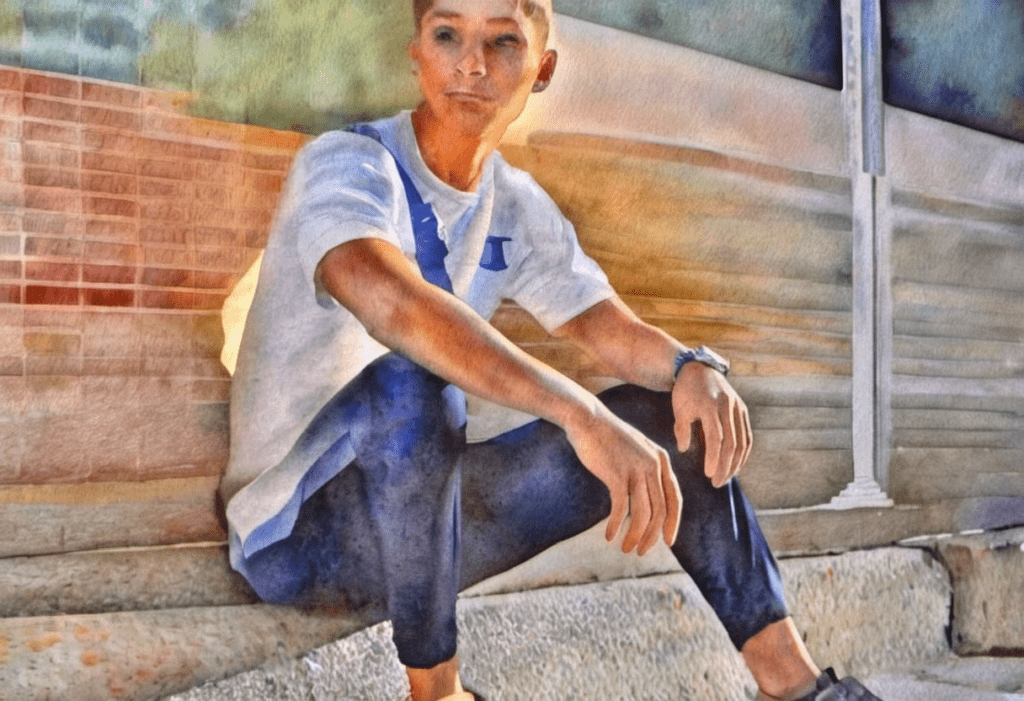
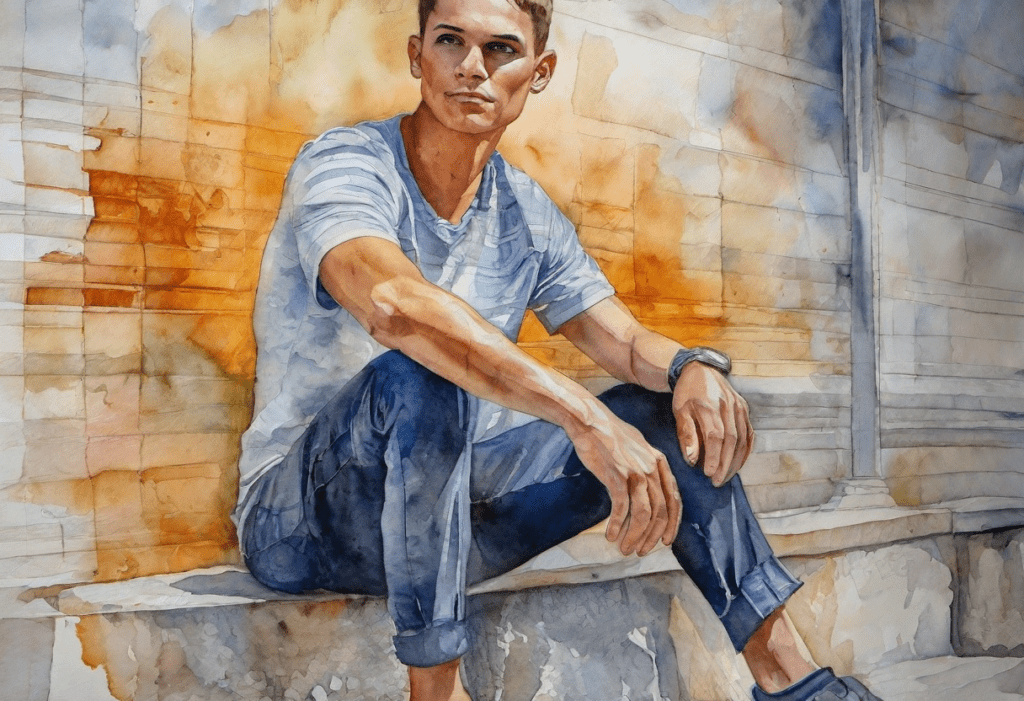
Diffusers Canny control models
- diffusers_xl_canny_full
- diffusers_xl_canny_mid
- diffusers_xl_canny_small
Download the models here.
The diffusers XL control model comes in 3 sizes: full, mid, and small. What’s the difference?
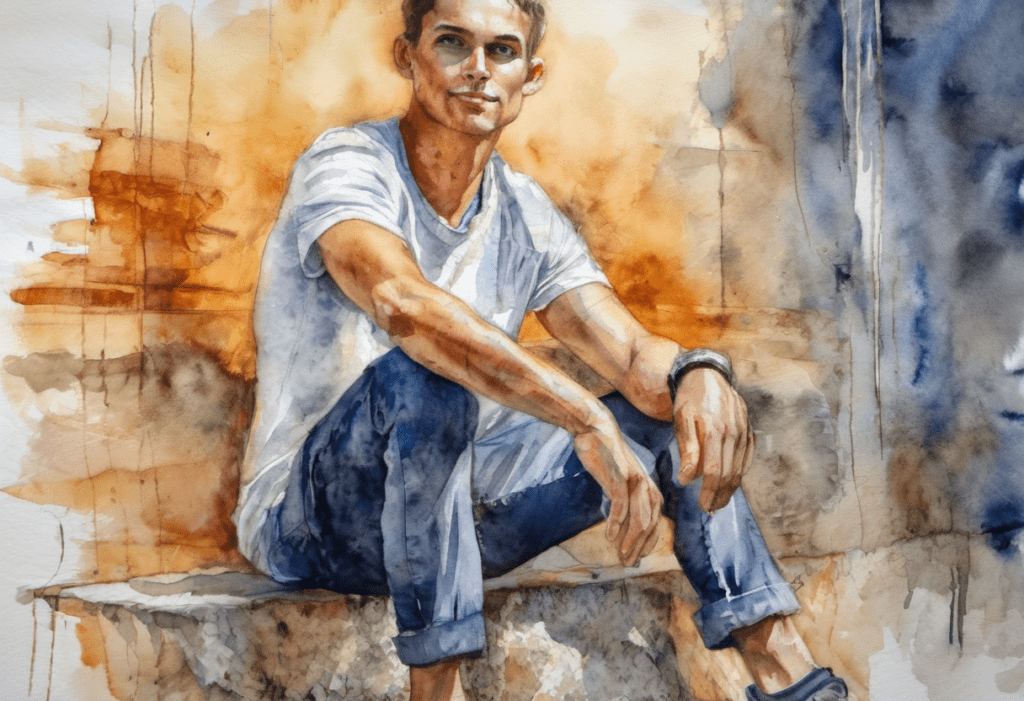
The control weight is set to 0.25 when generating these images. Reducing the control weight and the CFG scale helps to generate the correct style.
The smaller model has a lower controlling effect. A higher control weight value can compensate for it. But you shouldn’t set it too high. Otherwise, the image may look flat.
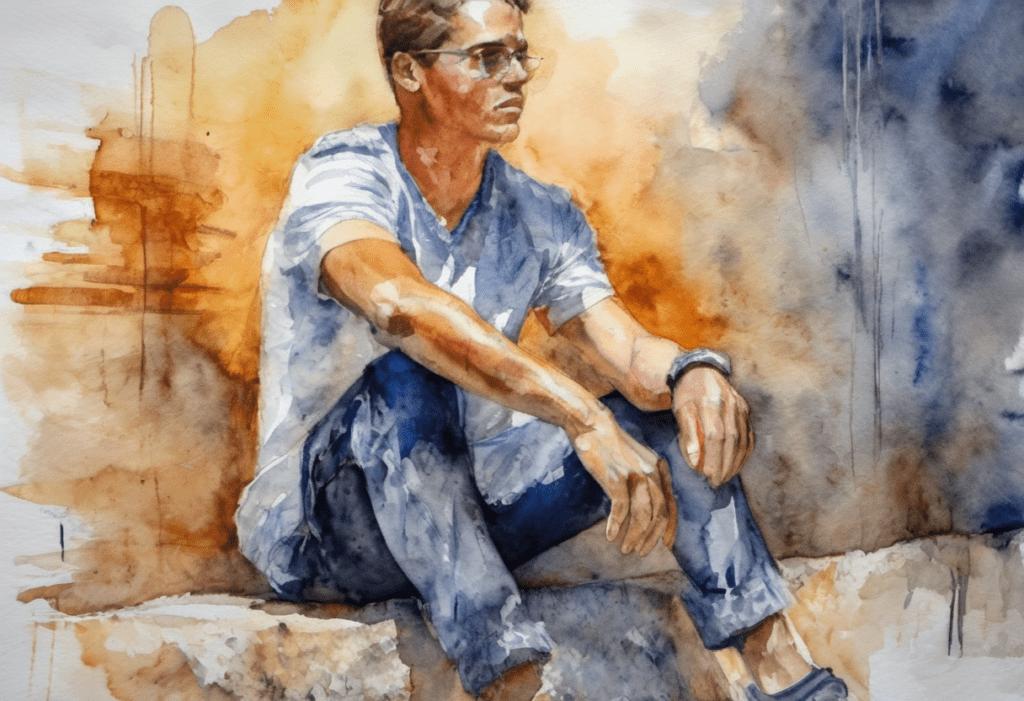
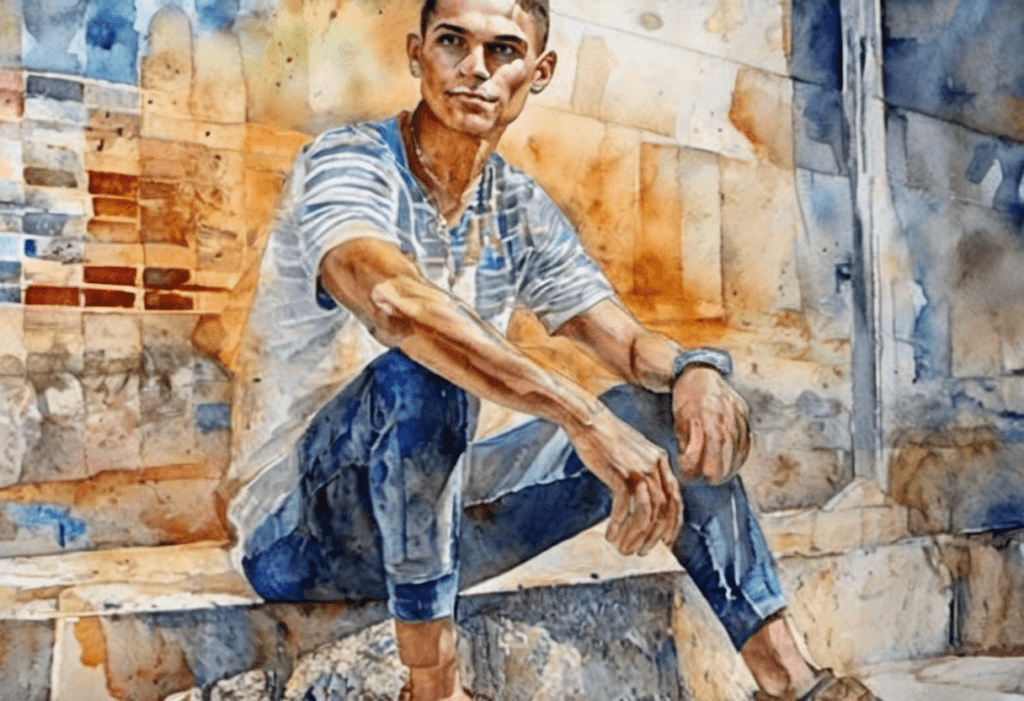
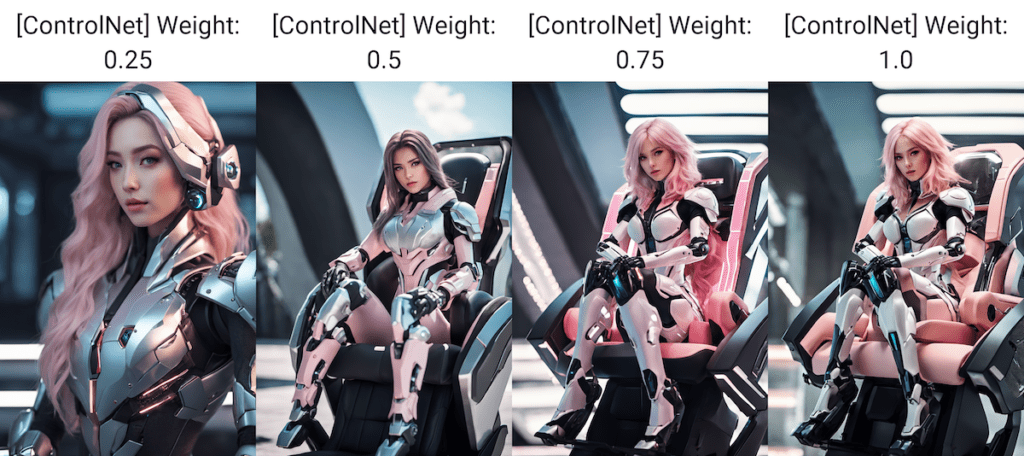
Kohya Canny control models
- kohya_controllllite_xl_canny_anime
- kohya_controllllite_xl_canny
Download the models here.
The advantage of the Kohya control model is its small size. We are talking about under 50 MB!
The anime variant is trained on anime images. It is good for anime or painting styles.
Unlike the diffuser Canny models, the control weight can’t be set too low. Otherwise, there will be no effect. Around 0.75 to 1.0 is about right.
There’s a narrow range of control weight that works. So experimenting is important.
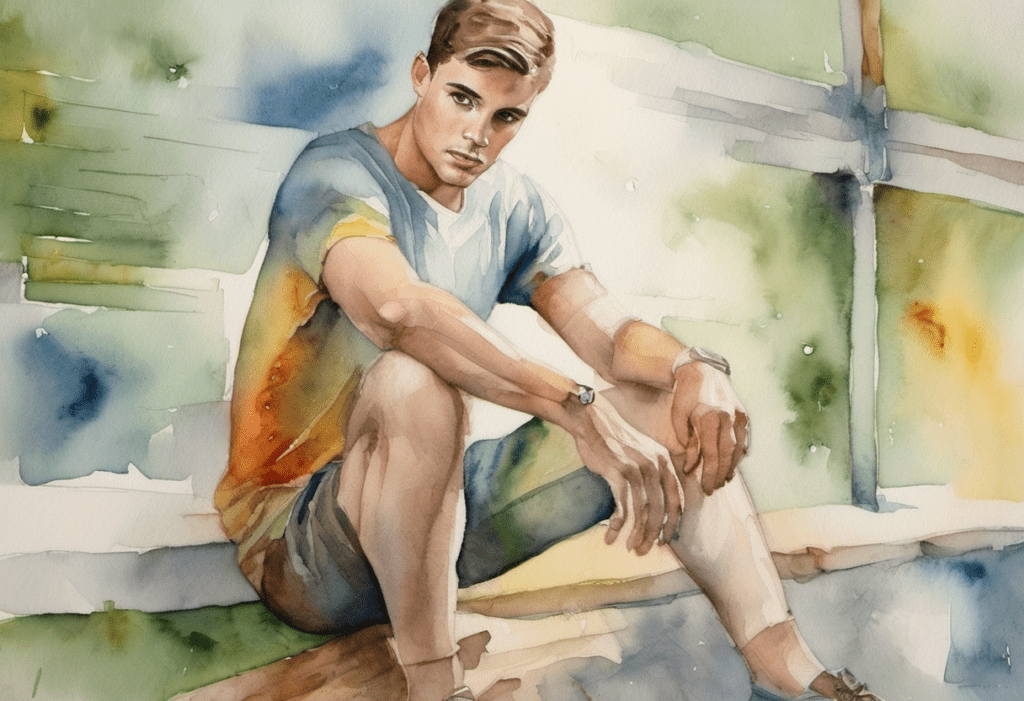
The color is more vibrant with the Kohya Canny Anime model.
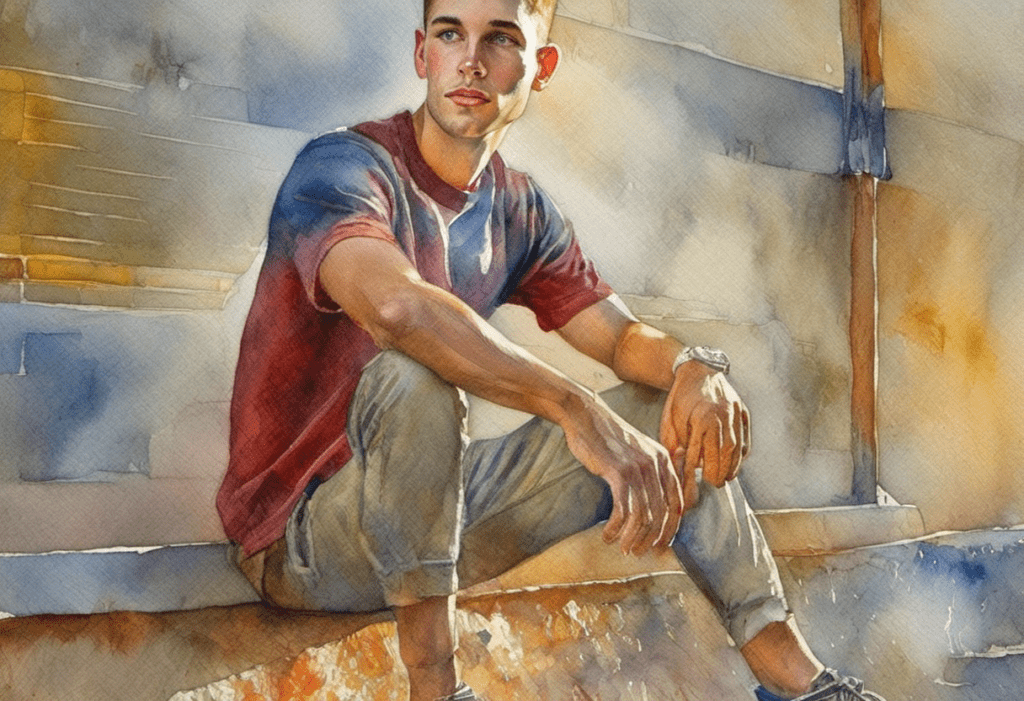
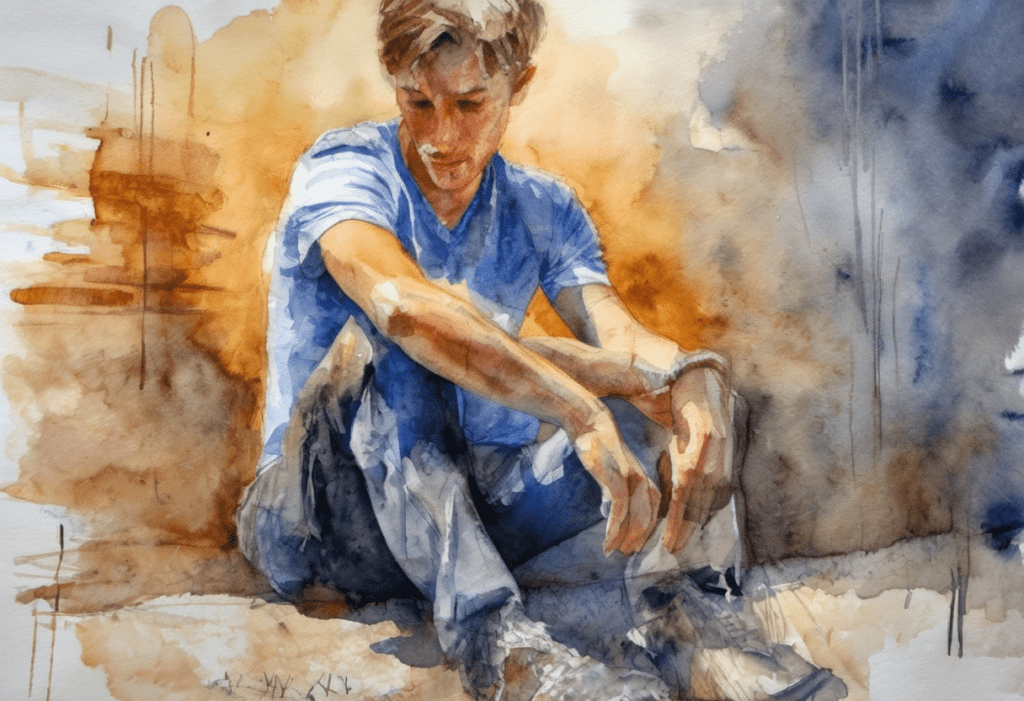
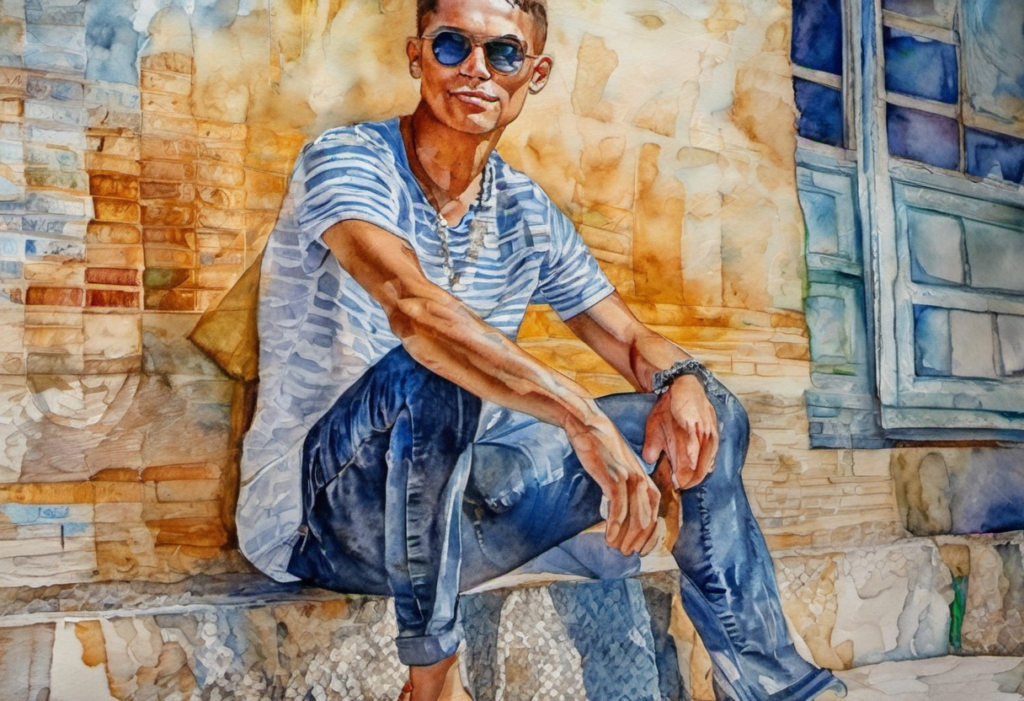
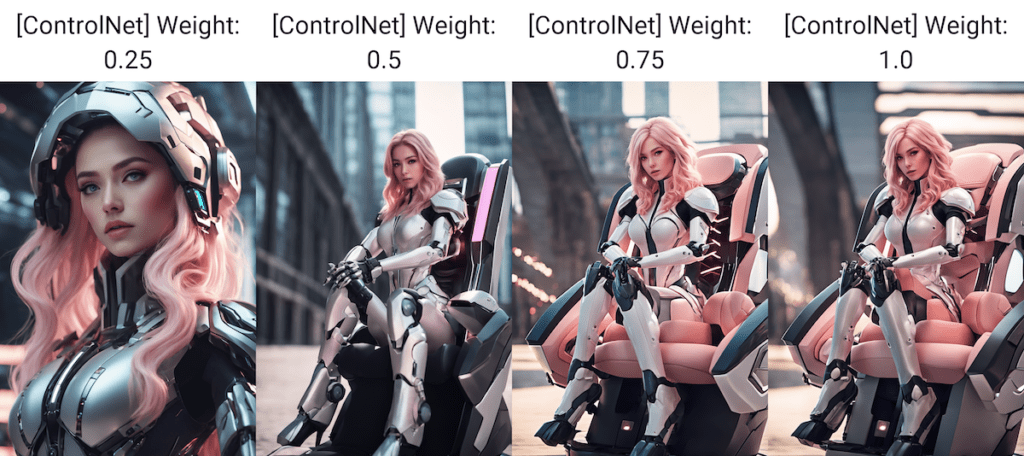
Stability AI Canny Control-LoRA Model
- sai_xl_canny_128lora
- sai_xl_canny_256lora
Download the models here.
The file sizes of these Control-LoRA are pretty reasonable: about 400 MB and 800 MB.
A control weight of around 0.75 seems to be the sweet spot.
The 128 and 256-rank LoRA perform very similarly. You can use the 128 variant if you want to conserve space.
T2I adapter
- t2i-adapter_xl_canny
- t2i-adapter_diffusers_xl_canny
Download the models here.
The T2I adapter versions of Canny Control model run pretty fast. But I am not impressed with the images produced.
Comparison
Impact on style
Applying a ControlNet model should not change the style of the image.
Among all Canny control models tested, the diffusers_xl Control models produce a style closest to the original.
The Kohya’s controllllite models change the style slightly. It is not a problem if you like it.
Speed
Sability AI’s Control-LoRA runs slowest.
Kohya’s controllllite and t2i-adapter models run the fastest.
But overall, the speeds are not terribly different.
| Canny Model | Rendering time (4 images) | File size |
|---|---|---|
| diffusers_xl_canny_full | 18.4 sec | 2,500 MB |
| diffusers_xl_canny_mid | 16.9 sec | 545 MB |
| diffusers_xl_canny_small | 15.9 sec | 320 MB |
| kohya_controllllite_xl_canny | 15.7 sec | 46 MB |
| kohya_controllllite_xl_canny_anime | 15.4 sec | 46 MB |
| sai_xl_canny_128lora | 19.0 sec | 396 MB |
| sai_xl_canny_256lora | 19.7 sec | 774 MB |
| t2i-adapter_diffusers_xl_canny | 14.5 sec | 158 MB |
| t2i-adapter_xl_canny | 15.8 sec | 155 MB |
Size
Although diffusers_xl_canny_full works quite well, it is, unfortunately, the largest. (2.5 GB!)
kohya_controllllite control models are really small. They performed very well, given their small size.
Recommendations for Canny SDXL
Use diffusers_xl_canny_full if you are okay with its large size and lower speed.
Use kohya_controllllite_xl_canny if you need a small and faster model and can accept a slight change in style.
Use sai_xl_canny_128lora for a reasonable file size while changing the style less.
The control weight parameter is critical to generating good images. Most models need it to be lower than 1.
Depth models
Use the ControlNet Depth model to copy the composition of an image. The usage is similar to Canny but the result is different.
Here are the depth models we are going to study.
- diffusers_xl_depth_full
- diffusers_xl_depth_mid
- diffusers_xl_depth_small
- kohya_controllllite_xl_depth_anime
- kohya_controllllite_xl_depth
- sai_xl_depth_128lora
- sai_xl_depth_256lora
- sargezt_xl_depth
- sargezt_xl_depth_faid_vidit
- sargezt_xl_depth_zeed
- t2i-adapter_diffusers_xl_depth_midas
- t2i-adapter_diffusers_xl_depth_zoe
Download the models here.
A depth control model uses a depth map (like the one shown below) to condition a Stable Diffusion model to generate an image that follows the depth information.
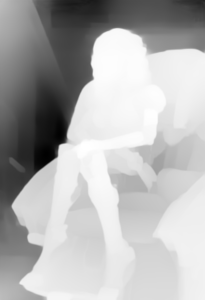
A depth map can be extracted from an image using a preprocessor or created from scratch.
The above is extracted from an image of a woman sitting using the depth_leres preprocessor.
I will use the following ControlNet settings in this section.
- Enabled: Yes
- Pixel Perfect: Yes
- Preprocessor: Depth_leres
- Model: Various
- Control Mode: Balanced
- Resize Mode: Crop and Resize
- Control weight: adjusted according to model
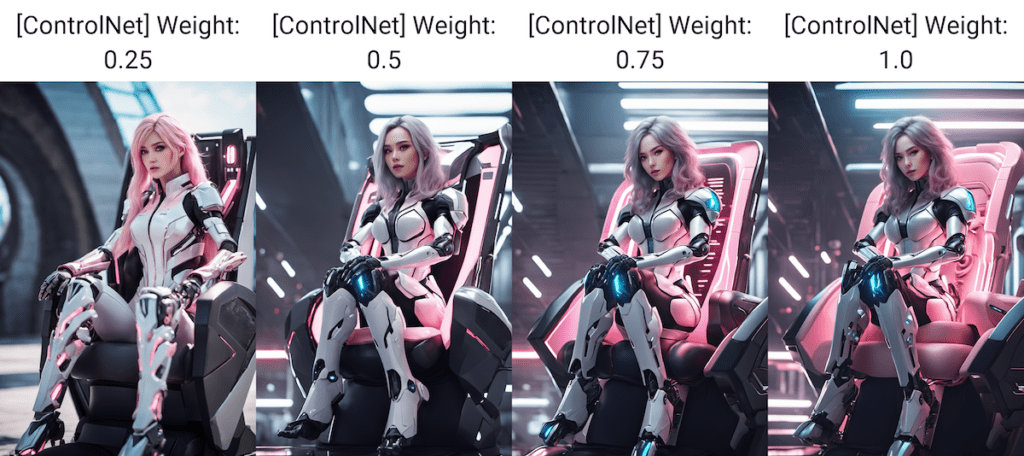
Diffusers depth model
- diffusers_xl_depth_full
- diffusers_xl_depth_mid
- diffusers_xl_depth_small
Download the models here.
All diffusers depth models perform well. They all follow the depth map pretty well.
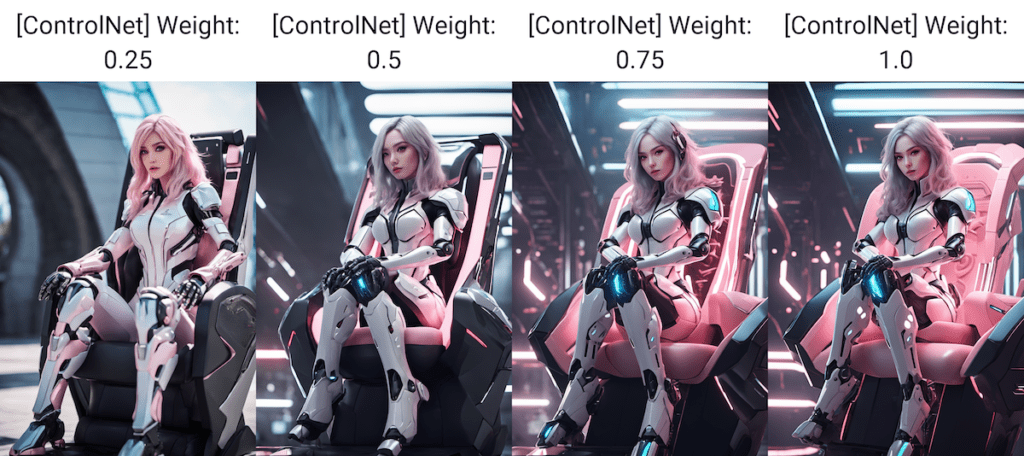
Kohya’s depth model
- kohya_controllllite_xl_depth_anime
- kohya_controllllite_xl_depth
Download the models here.
The kohya_controllllite depth control models follow the depth map well. But it tends to add an anime style.
You can suppress the anime style (to some extent) of the Kohya depth model by adding the following terms to the negative prompt.
painting, anime, cartoon
Stability AI’s depth Control-LoRA
- sai_xl_depth_128lora
- sai_xl_depth_256lora
Download the models here.
For the most part, these two control-LoRA work very similarly, even down to the setting level. There’s only a slight color difference between the two.
You will be happy that they work well in a large range of control weights. This ensures this loRA works out of the box without much tweaking. Use a larger control weight to follow the depth map exactly. Use a lower value to follow loosely.
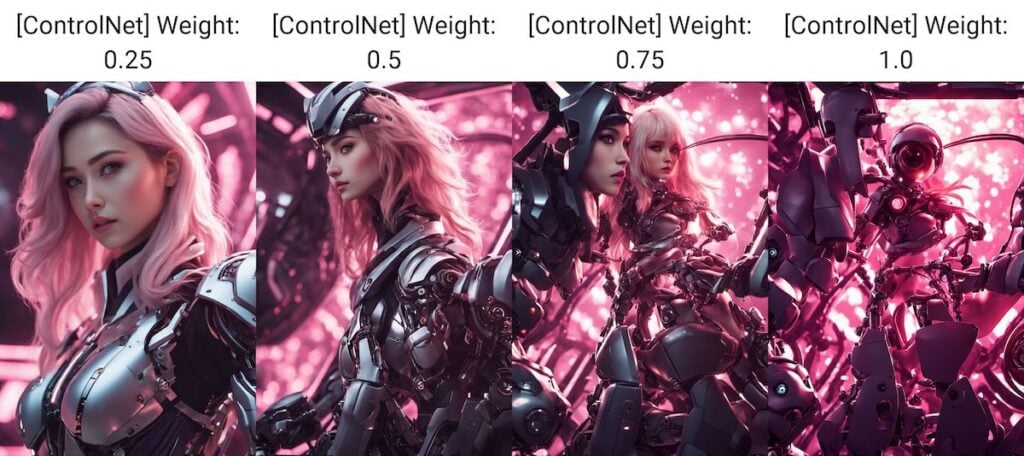
Sargezt’s depth model
Original model page:
Download the models here.
I couldn’t get any of these to work. Let me know if you are able to because some of them can do interesting things, according to the original repository.
This is what I got from the first depth model.
T2I adapter depth
- t2i-adapter_diffusers_xl_depth_midas
- t2i-adapter_diffusers_xl_depth_zoe
Download the models here.
The T2I depth adapters are doing a decent job of generating images that follow the depth information. Overall, the images are decent, with minimal changes to the style.
These T2I adapters are good choices if you are looking for small models.
Recommendation for SDXL Depth
diffusers_xl_depth, sai_xl_depth, and t2i-adapter_diffusers_xl_depth models perform well despite their size differences. All are safe choices.
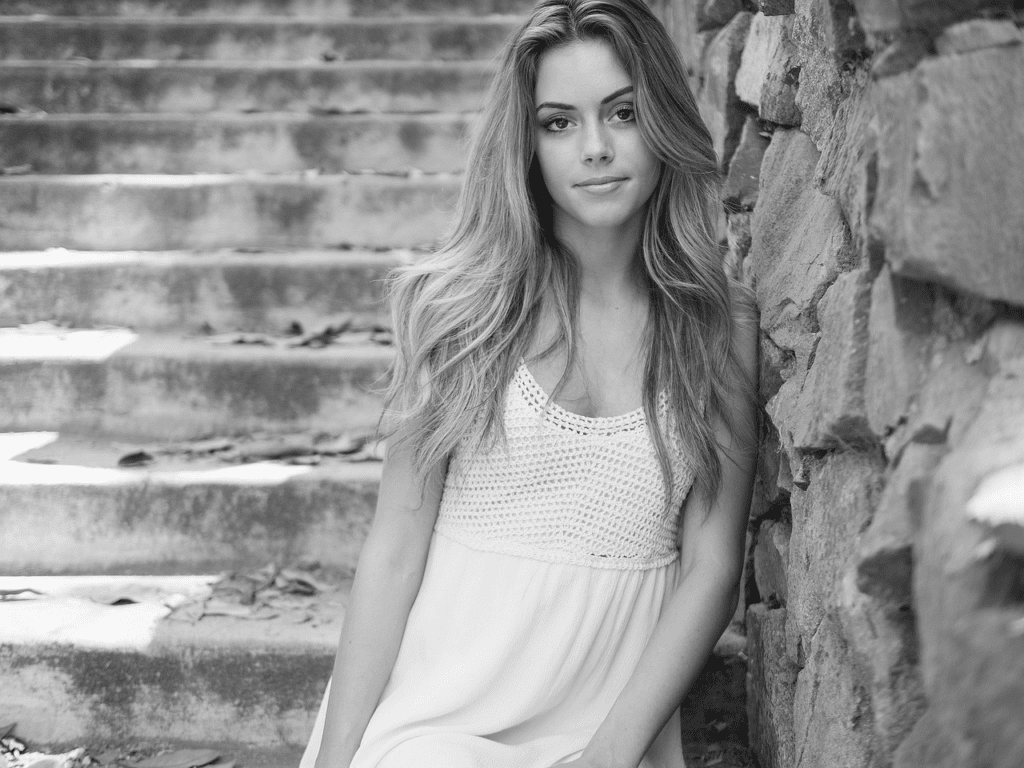
Recolor models
Use the recolor models to color an back-and-white photo.
- sai_xl_recolor_128lora
- sai_xl_recolor_256lora
Download the models here.
To use the recoloring model, navigate to the txt2img page on AUTOMATIC11111. Use the following settings in the Generation tab.
- Model: SDXL Base 1.0
- Refiner: None
- Width: 1216
- Height: 832
- CFG Scale: 7
- Steps: 30
- Sampler: DPM++ 2M Karras
- Prompt:
cinematic photo . 35mm photograph, film, bokeh, professional, 4k, highly detailed
- Negative prompt
drawing, painting, crayon, sketch, graphite, impressionist, noisy, blurry, soft, deformed, ugly
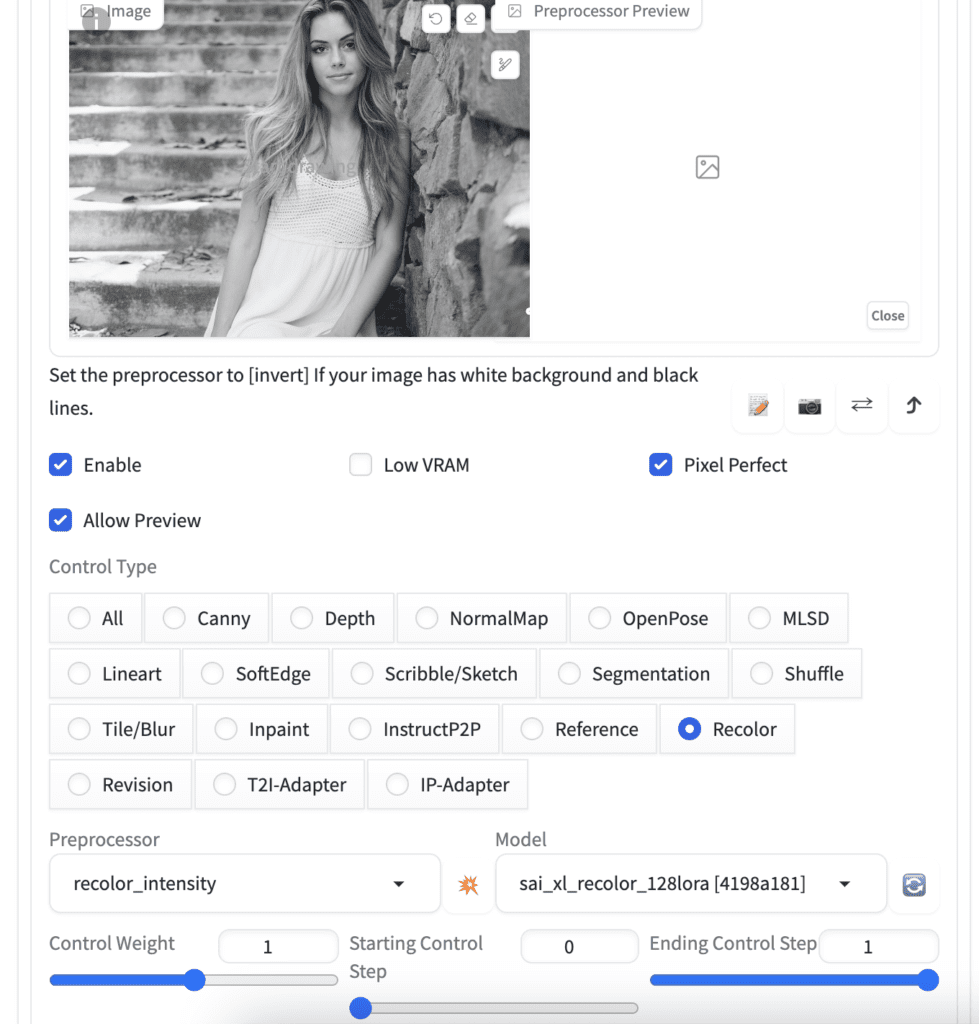
In the ControlNet section:
- Image Canvas: Upload the black-and-white photo you wish to recolor
- Pixel Perfect: Yes
- Preprocessor: recolor_intensity
- Model: sai_xl_recolor_128lora
- Control Mode: Balanced
- Resize Mode: Crop and Resize
- Control weight: 1.0
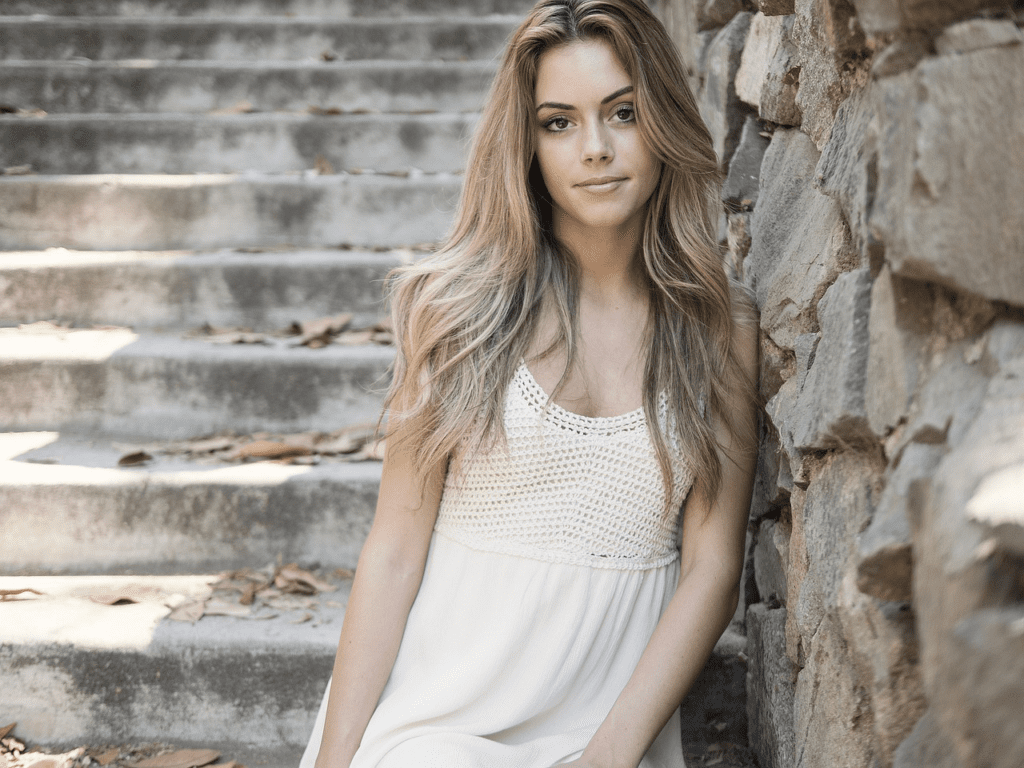
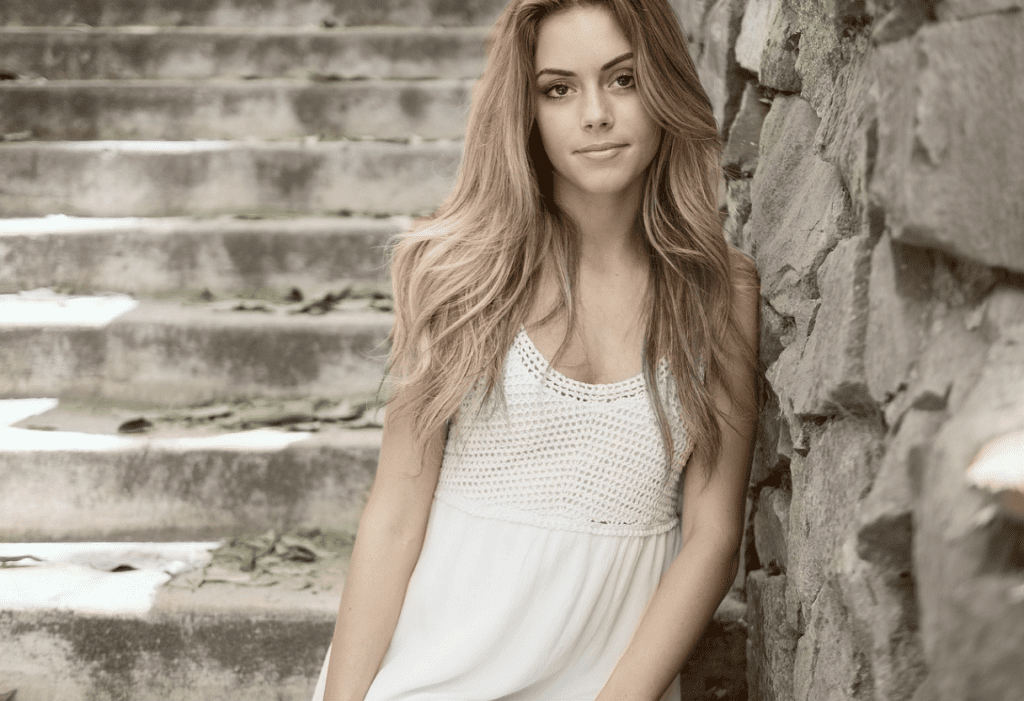
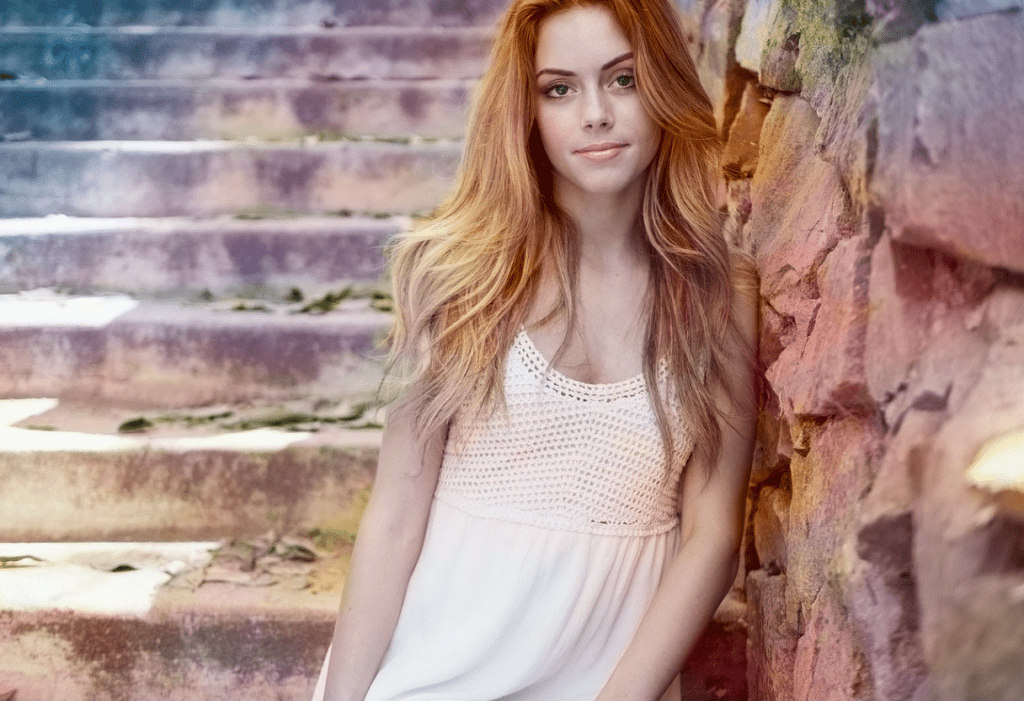
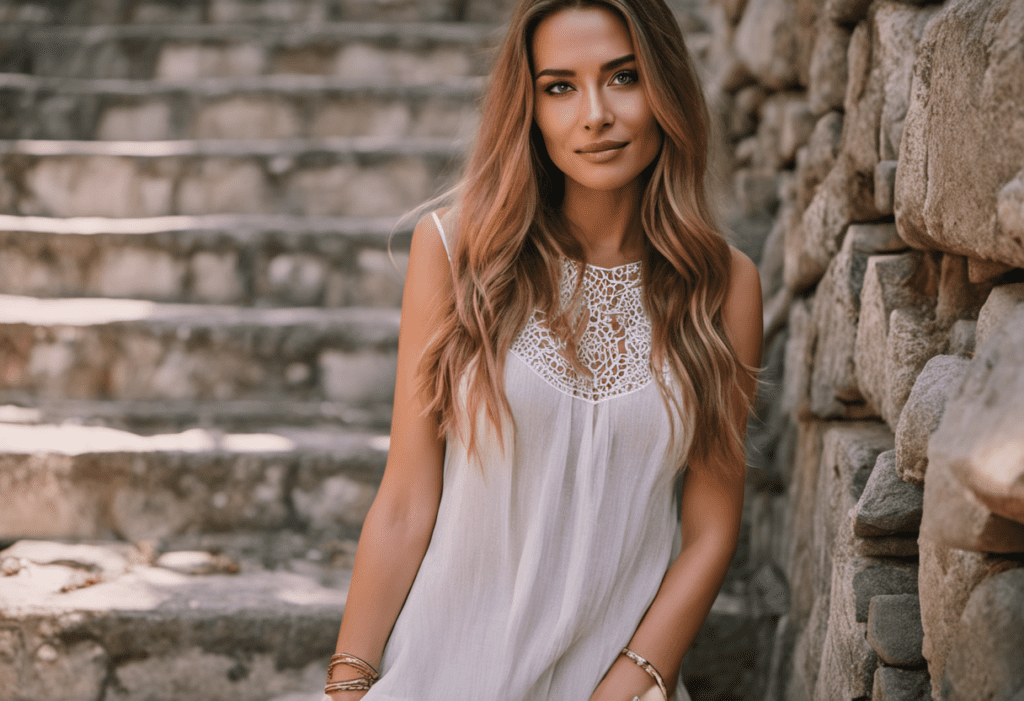
Below is the original image used for testing.
Below are the recolored images, using the preprocessors recolor_intensity and recolor_luminance, and the 128 and 256 variants of the Control-Lora.
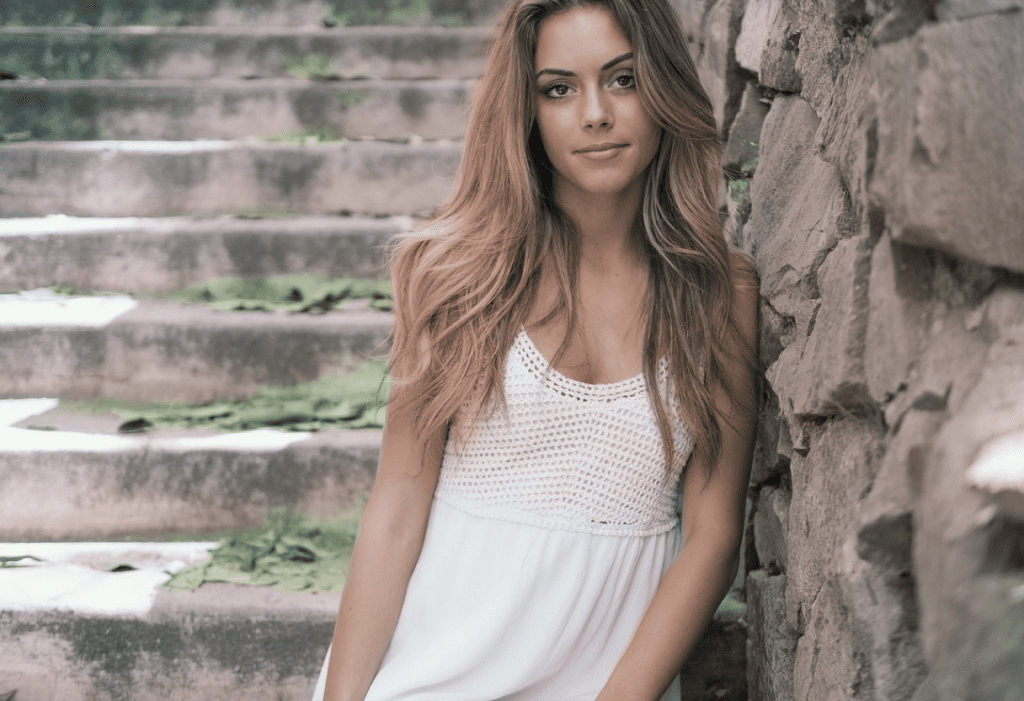
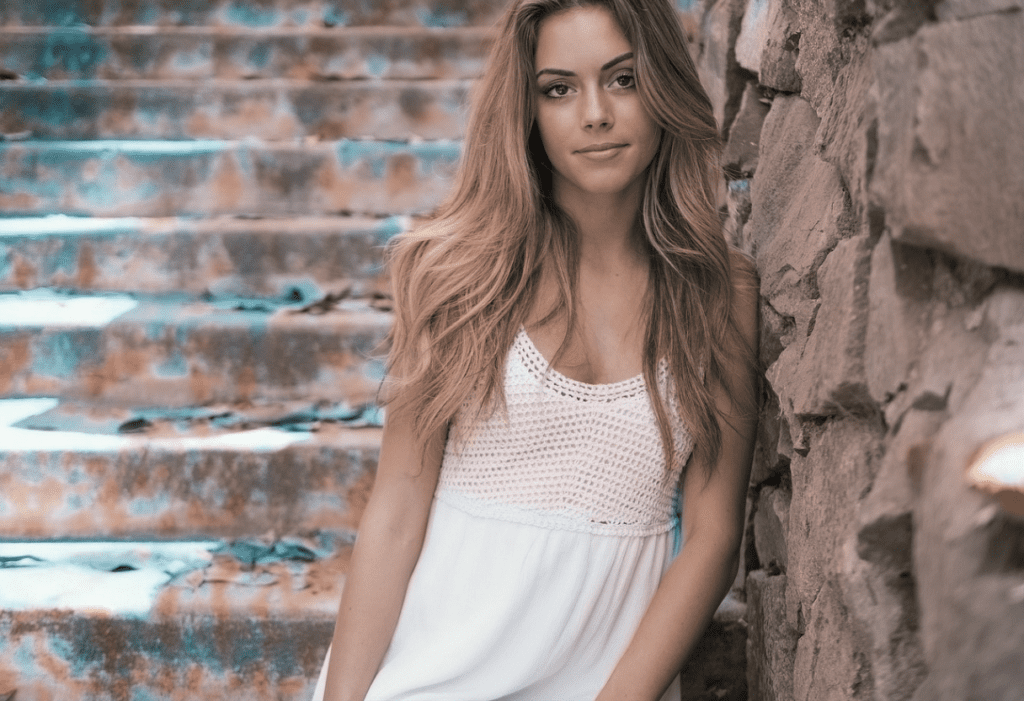
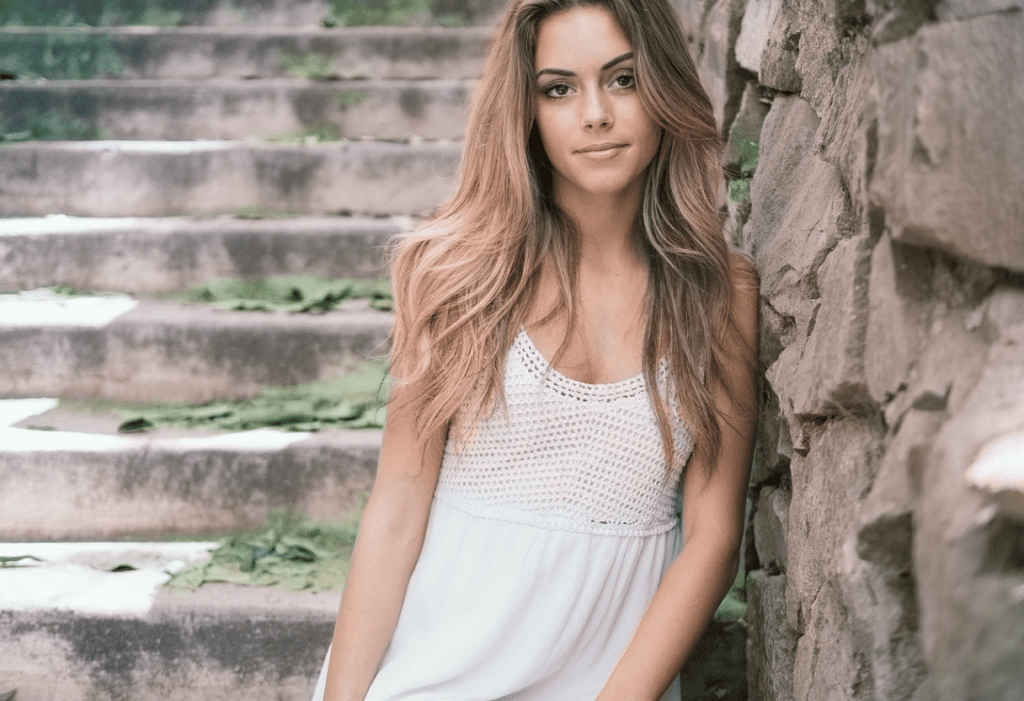
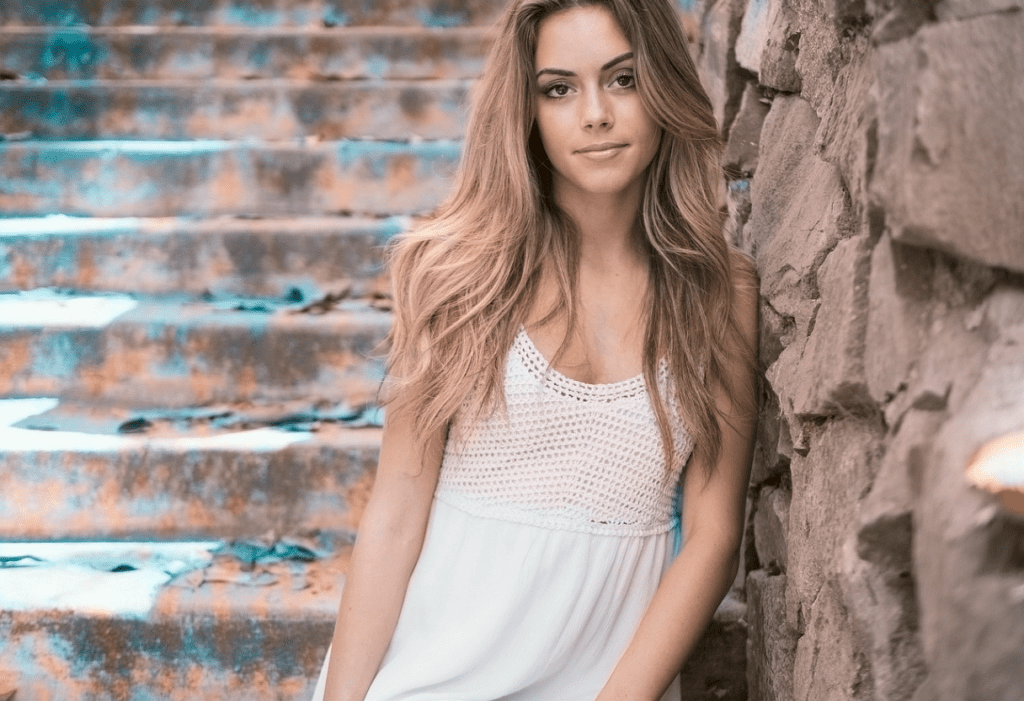
The luminance preprocessor produces brighter images closer to the original one. In this test, the 128-Lora has less artifact on coloring, but this could be specific to this image and prompt. I won’t draw any conclusions based on this.
They definitely work better than I expected.
Pick a good prompt for recoloring
I used a photographic prompt above. Do you really need a prompt to recolor? The answer is yes. The recoloring doesn’t work correctly without a good prompt.
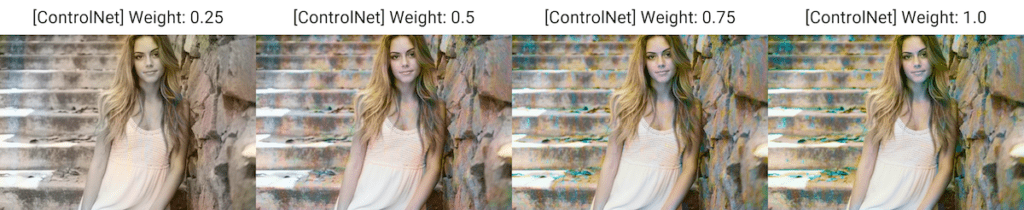
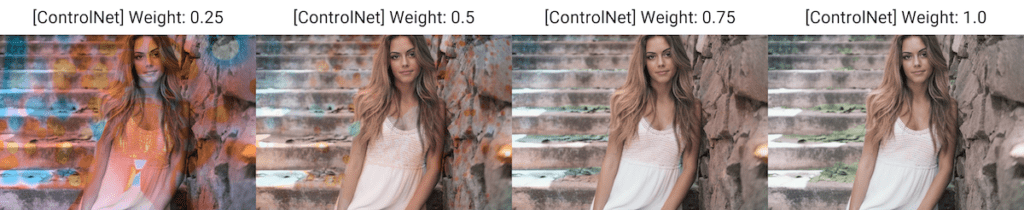
Not all prompts work for this image. I used some SDXL style prompts below for recoloring. You can get drastically different performance.
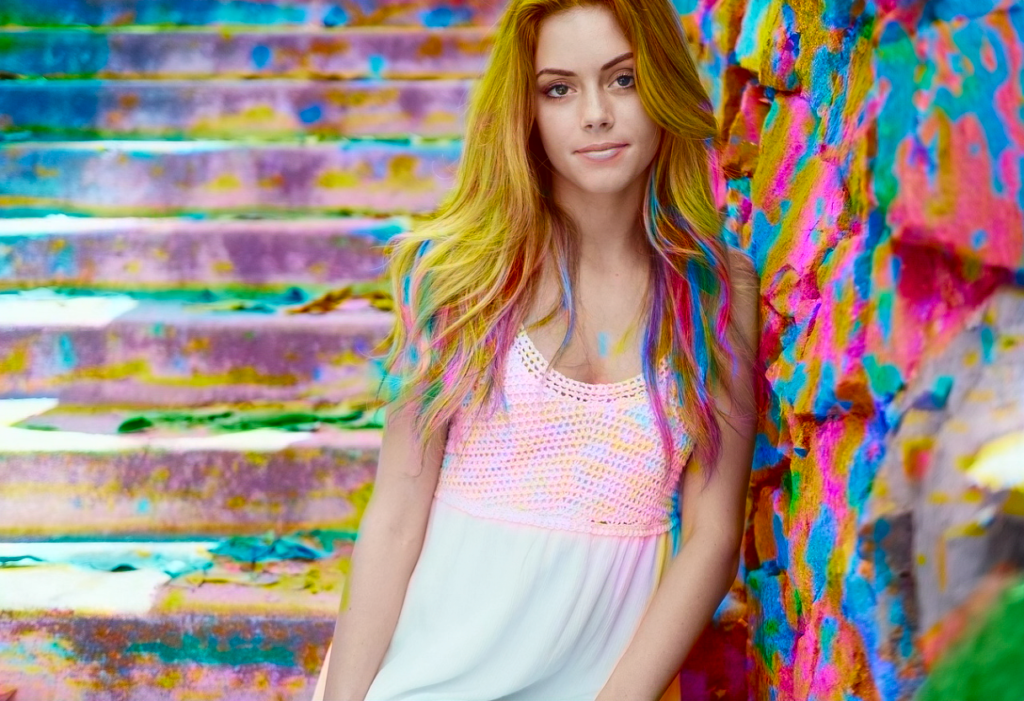
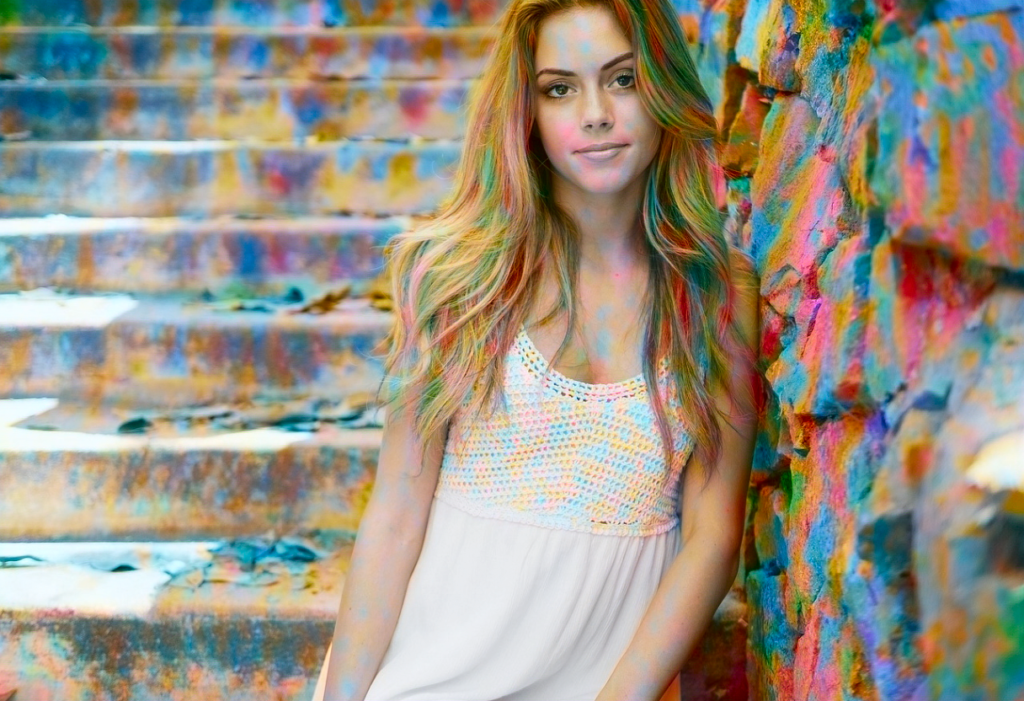
To conclude, you need to find a prompt matching your picture’s style for recoloring.
Recommendations for SDXL Recolor
Both the 128 and 256 Recolor Control-Lora work well.
Use the recolor_luminance preprocessor because it produces a brighter image matching human perception.
Be careful in crafting the prompt and the negative prompt. It can have a big effect on recoloring. Use these SDXL style prompts as your starting point.
You don’t need to use a refiner.
Blur models
Use the Blur model to recover a blurry image.
- kohya_controllllite_xl_blur_anime
- kohya_controllllite_xl_blur
Download the models here.
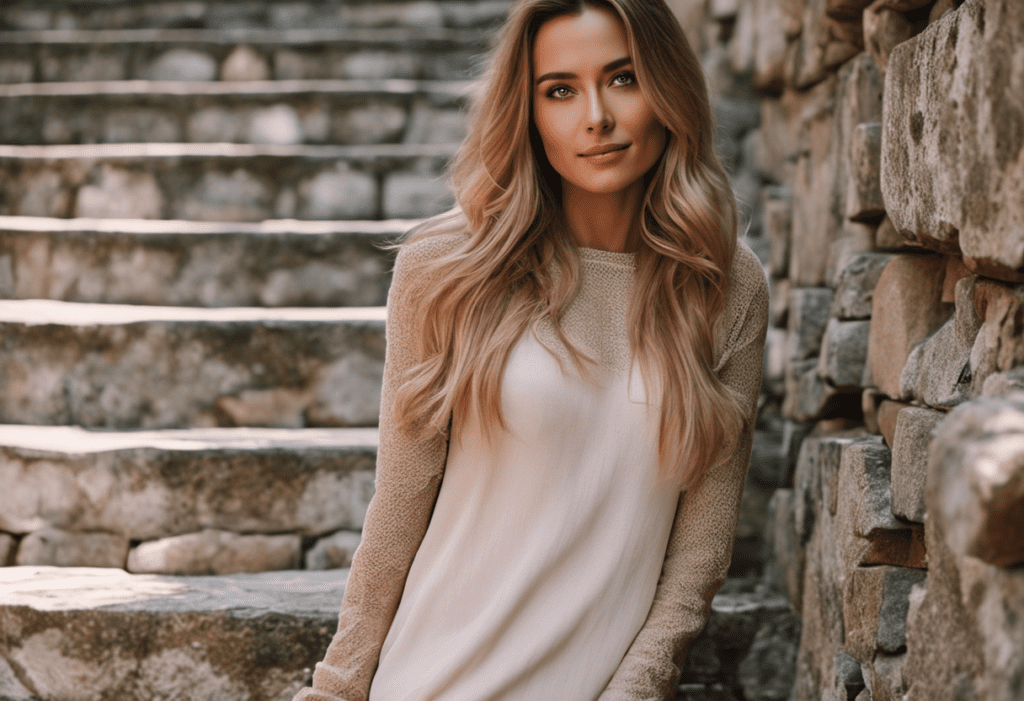
Let’s try to recover this blurred image.
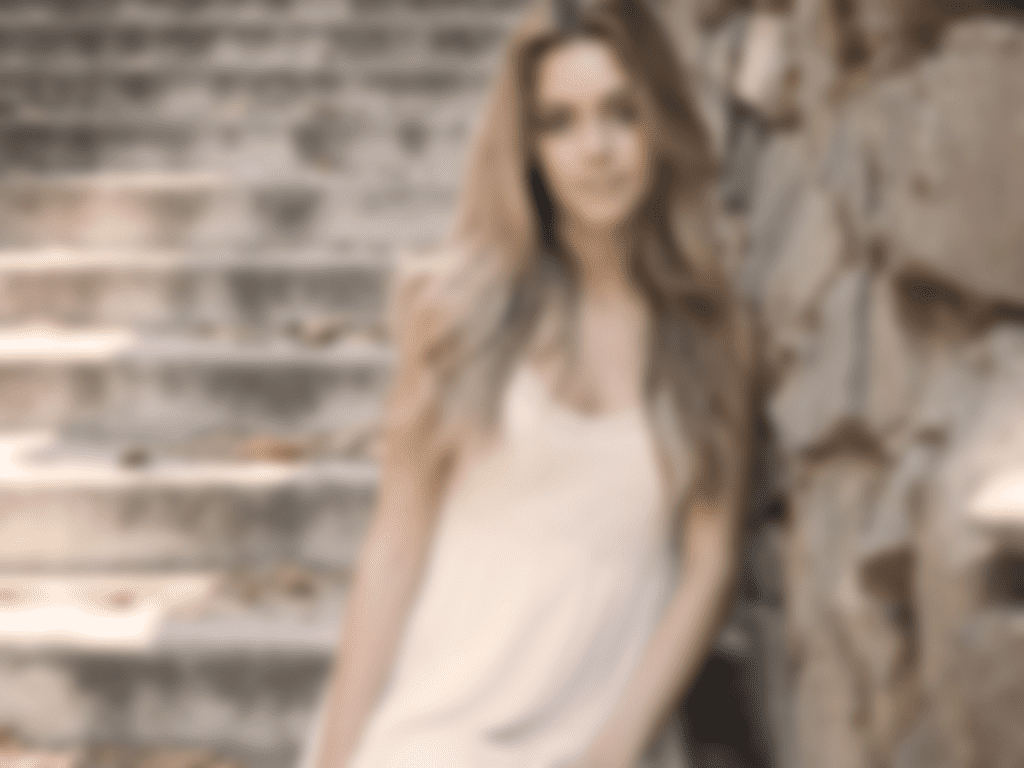
Alternatively, you can use blur_gaussian preprocessor to blur a clear image for testing.
Of course, some image details are lost in the blur, so you should not expect to recover the same image. Instead, let’s see how well it makes up a sharp image that makes sense.
Blur
Txt2img settings:
- Model: SDXL Base 1.0
- Refiner: None
- Width: 1216
- Height: 832
- CFG Scale: 7
- Steps: 30
- Sampler: DPM++ 2M Karras
- Prompt:
cinematic photo . 35mm photograph, film, bokeh, professional, 4k, highly detailed
- Negative prompt
drawing, painting, crayon, sketch, graphite, impressionist, noisy, blurry, soft, deformed, ugly
ControlNet Settings:
- Image Canvas: Upload the blurred image
- Pixel Perfect: Yes
- Preprocessor: None
- Model: kohya_controllllite_xl_blur
- Control Mode: Balanced
- Resize Mode: Crop and Resize
- Control weight: 1.0
The images do look sharp, but the faces lack detail. There are also a lot of irreverent objects added in the background.
Let’s turn on the refiner to polish the images a bit.
- Refiner: sd_xl_refiner_1.0
- Switch at: 0.6
The images do look more detailed and natural. But the backgrounds are wrong.
Write a good prompt
You can write a prompt to describe the image to improve the accuracy. Or you can use the Clip interrogator.
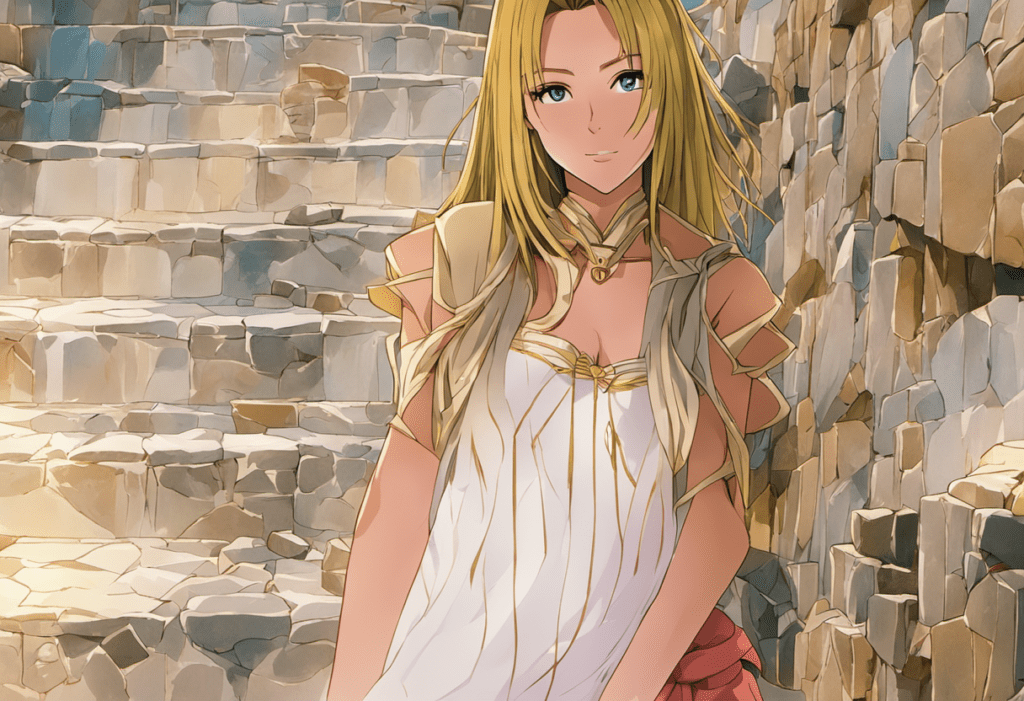
In the img2img page, upload the blur image to the image canvas. Then click Interrogate CLIP. You will get a prompt for the image. It may not be correct so do some editing yourself. Remove all the style keywords. I get this:
a woman leaning against a stone wall next to a stone staircase with steps leading up to it and a stone wall behind her
ADD this prompt to the original prompt and try again. Now, you get something much closer to the original image.
Use a realistic model
You can also use a fine-tuned model to enhance a style. The image below is generated with the realvisxlV20 SDXL model.
Blur anime
Let’s see if we can do something interesting by switching to the blur-anime model and an anime prompt.
Prompt:
anime artwork . anime style, key visual, vibrant, studio anime, highly detailed
Negative prompt:
photo, deformed, black and white, realism, disfigured, low contrast
We got some anime images, as expected. But the staircase in the background is not recovered correctly. You can get something much closer to the original image by using the same technique used in the previous section to revise the prompt.

IP-adapter
- ip-adapter_xl
Download the models here.
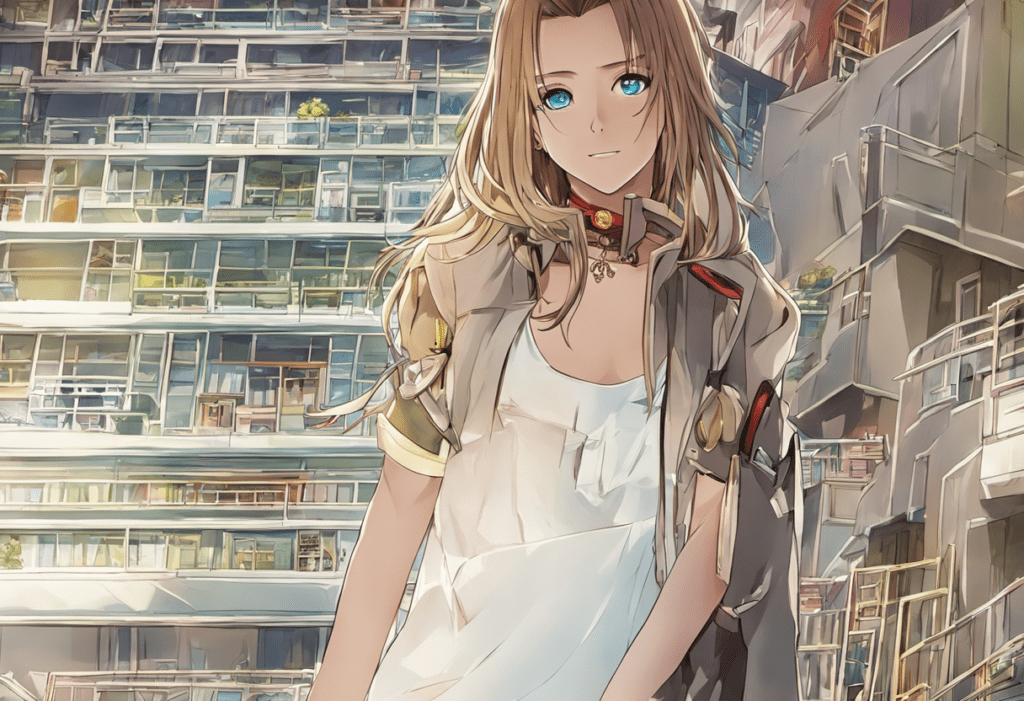
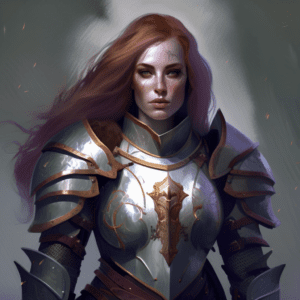
The Image Prompt Adapter (IP-adapter) lets you use an image prompt like MidJourney. Let’s use the original example from the ControlNet extension to illustrate what it does.
- Model: SDXL Base 1.0
- Refiner: SDXL Refiner 1.0
- Width: 832
- Height: 1216
- CFG Scale: 7
- Steps: 30
- Sampler: DPM++ 2M Karras
- Prompt:
Female Warrior, Digital Art, High Quality, Armor
- Negative prompt
anime, cartoon, bad, low quality
In the ControlNet section:
- Image Canvas: Upload an image for image prompt
- Pixel Perfect: Yes
- Preprocessor: ip-adapter_clip_sdxl
- Model: ip-adapter_xl
- Control Mode: Balanced
- Resize Mode: Crop and Resize
- Control weight: 1.0
With ControlNet ON:
With ControlNet OFF:
You can also use IP-Adapter in inpainting, but it has not worked well for me. I won’t go through it here.
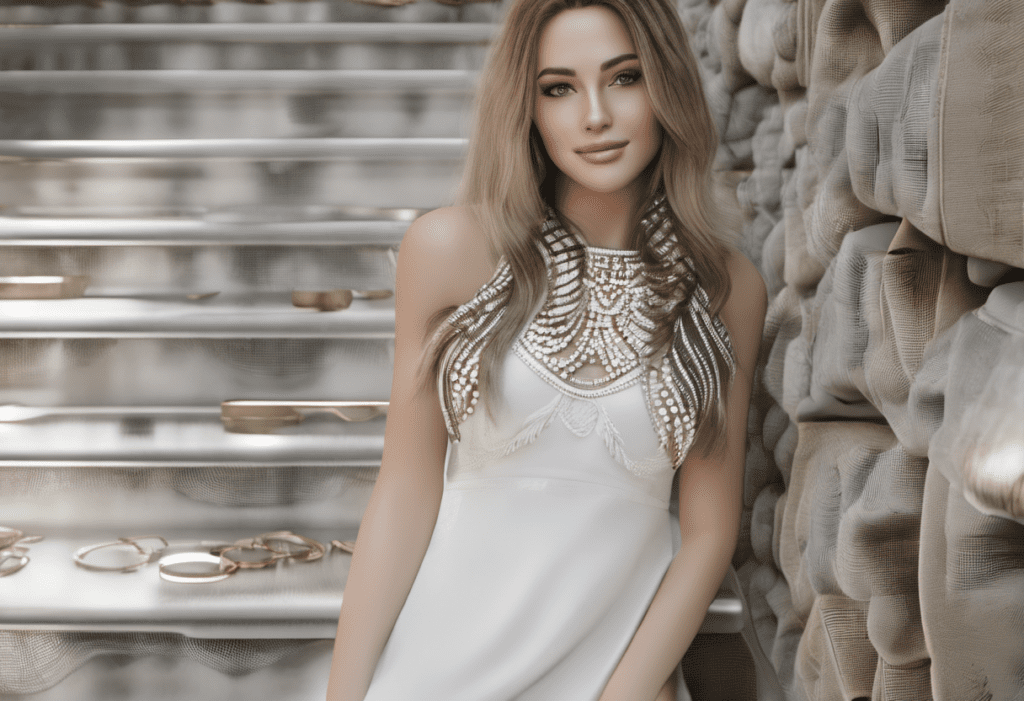
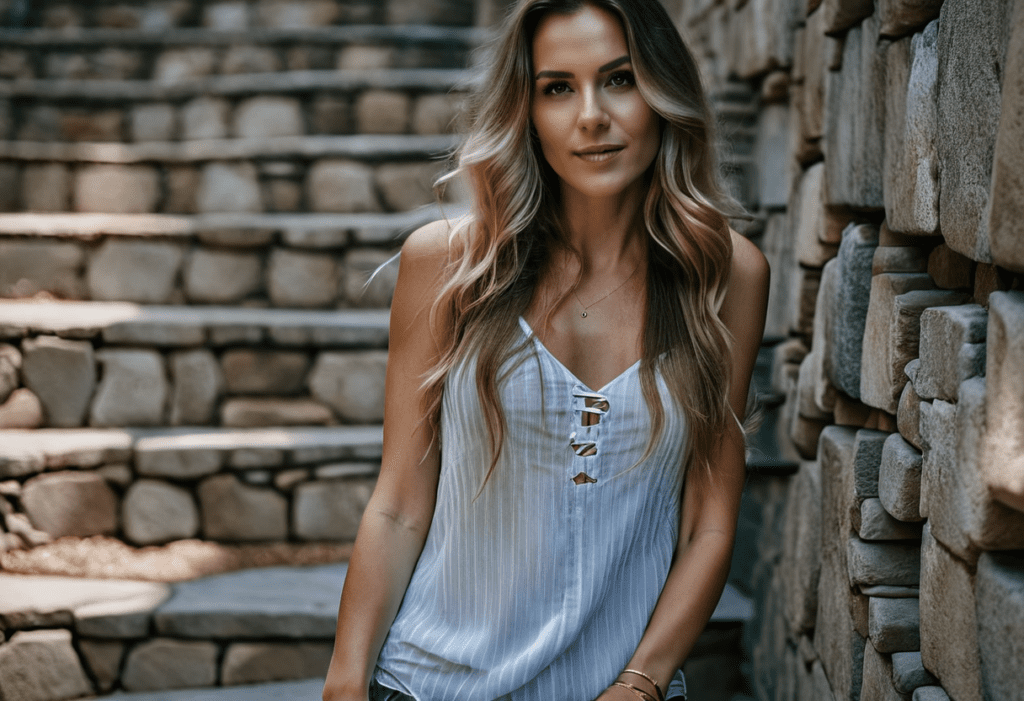
Copy a picture with IP-Adapter
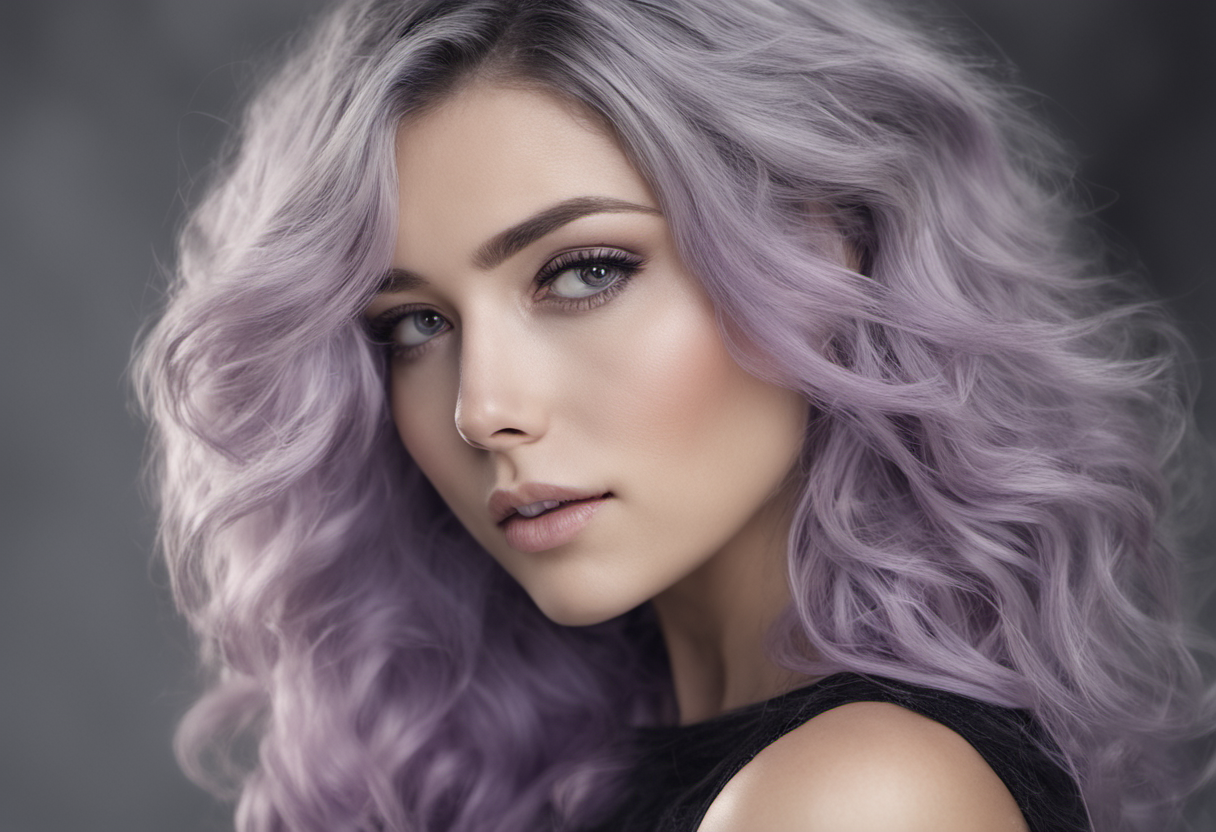
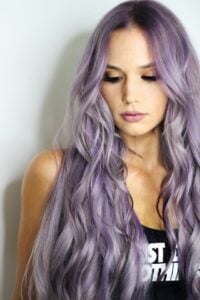
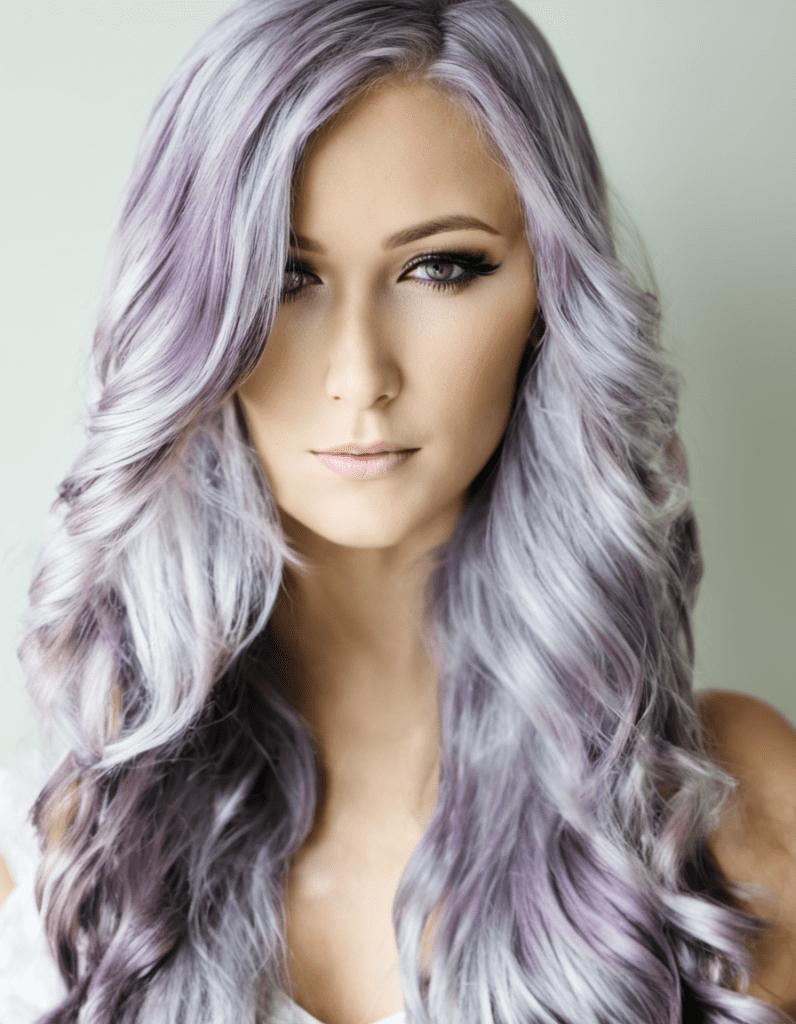
You can use the IP-Apdater to copy a picture and generate more. Let’s use this photo as an example.
Step 1: Come up with a prompt that describes the picture.
You can use the
- Interrogate CLIP function on the img2img page, or
- The Clip Interrogator extension. This is preferred because you can use the language model in SDXL. (ViT-g-14/laion2b_s12b_b42k)
Here’s what I got from the second method.
arafed woman with long purple hair and a black top, eva elfie, gray haired, 8k)), sienna, medium close up, light purple, lacey, vivid and detailed, vintage glow, chunky, cute looking, titanium, mid tone, hd elegant, multi – coloured, wavy, hd 16k, blond, stacks
Step 2: Set txt2img parameters
- Model: SDXL Base 1.0
- Refiner: SDXL Refiner 1.0
- Width: 896
- Height: 1152
- CFG Scale: 7
- Steps: 30
- Sampler: DPM++ 2M Karras
- Prompt: As above.
Step 3: Set ControlNet parameters
- Image Canvas: Upload the reference image for the image prompt.
- Pixel Perfect: Yes
- Preprocessor: ip-adapter_clip_sdxl
- Model: ip-adapter_xl
- Control Mode: Balanced
- Resize Mode: Crop and Resize
- Control weight: 1.0
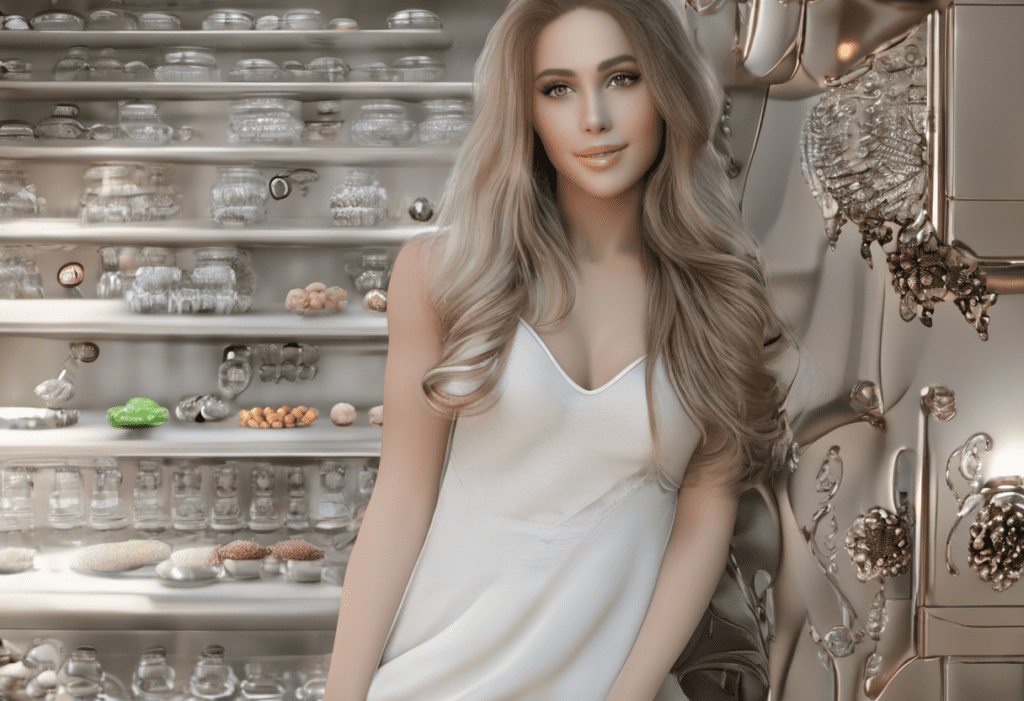
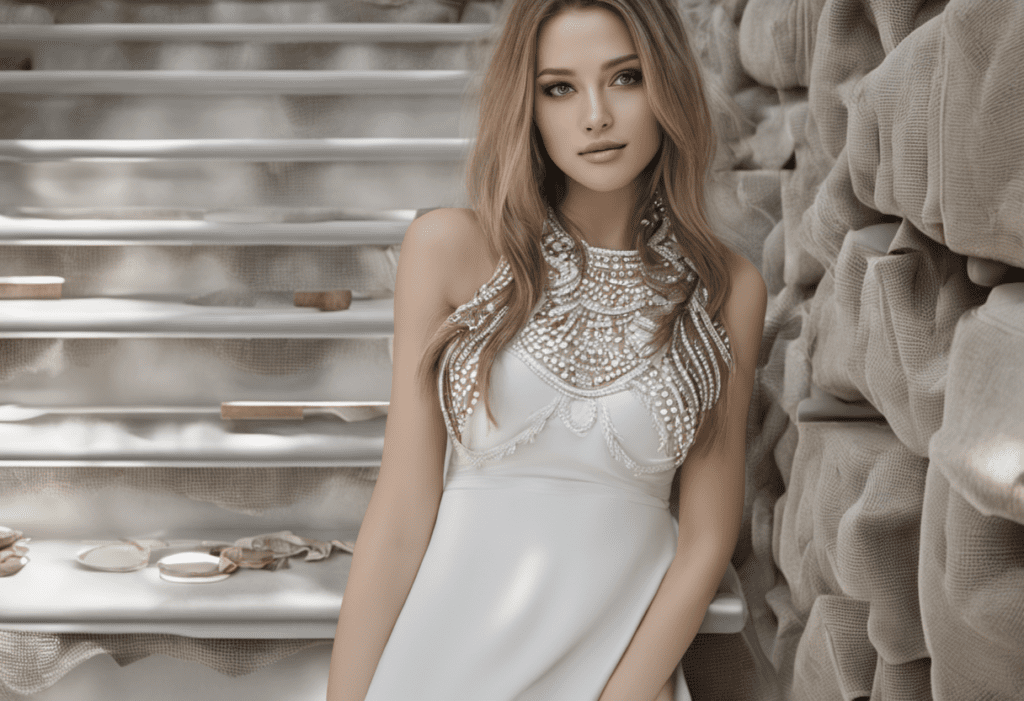
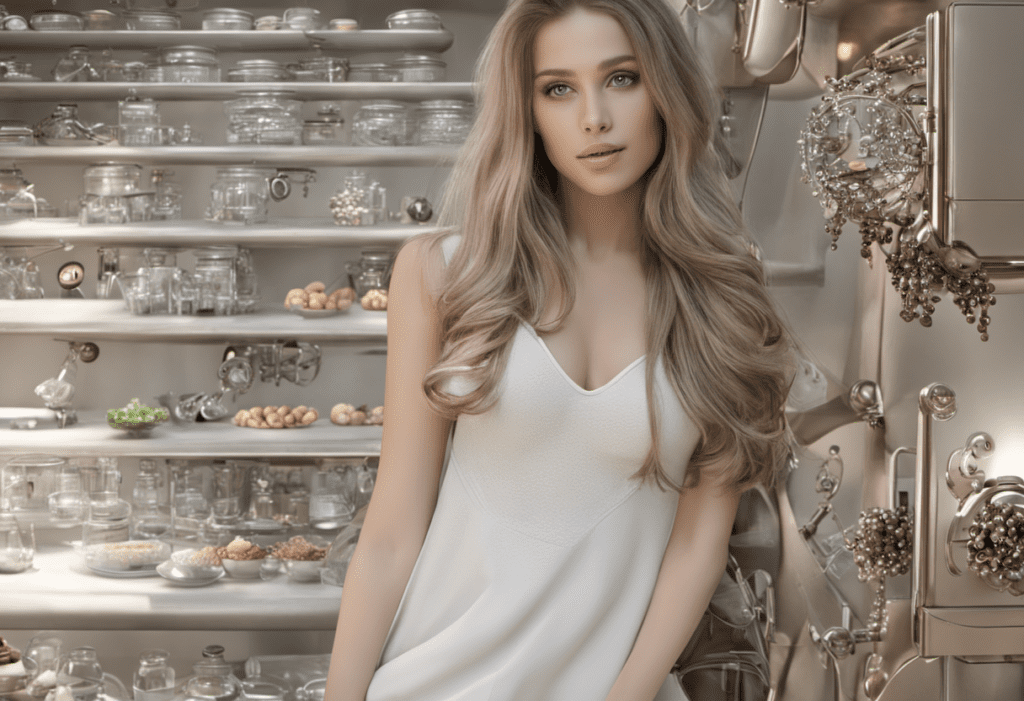
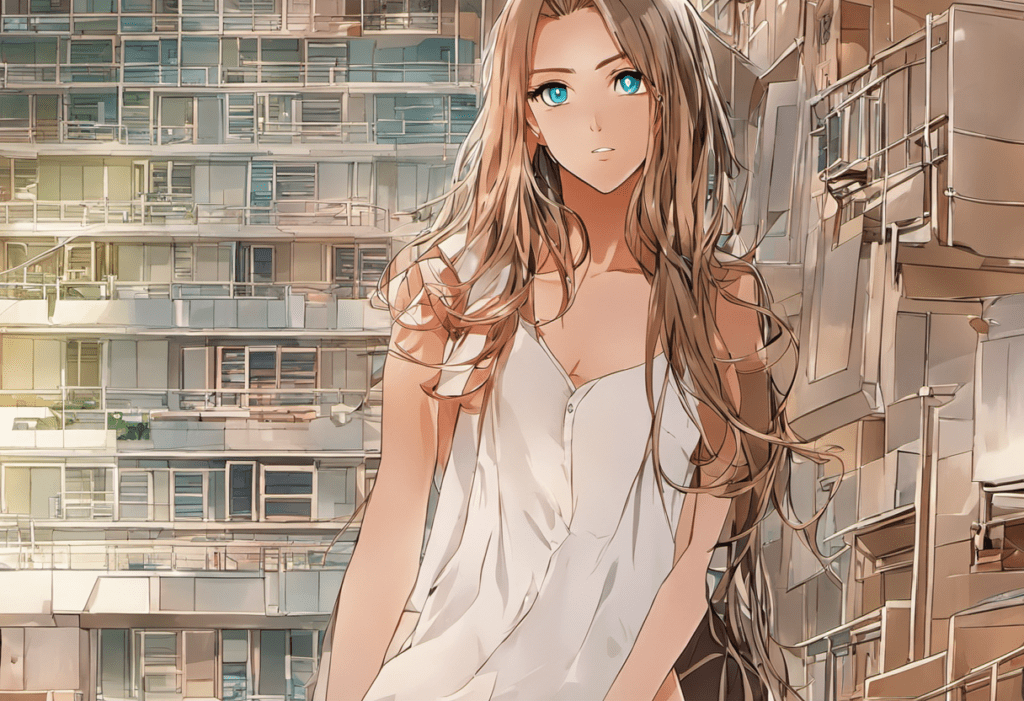
Step 4: Press Generate
Here’s what I got.

OpenPose
The OpenPose ControlNet model is for copying a human pose but the outfit, background and anything else.
There are quite a few OpenPose models available. But the best performing one is xinsir’s OpenPose ControlNet model. You can download it here. Put it in the models > ControlNet folder and rename it to diffusion_xl_openpose.safetensors.
Settings:
- Preprocessor: openpsoe
- Model: diffusion_xl_openpose.safetensors
- Control weight: 1
Below is an example of the generated images.
Good reads
[Major Update] sd-webui-controlnet 1.1.400 – Official writeup of SDXL ControlNet models for WebUI.
Stabilityai/control-lora – An overview of Stability AI’s Control LoRA models.
kohya-ss/controlnet-lllite – Model Card of ControlNet-LLLite.
tencent-ailab/IP-Adapter – GitHub page of the Image Prompt adapter.
Does this also apply to Pony models?
yes
Hi Andrew
In “Use a realistic model”
Should the desired model be used in the txt2img settings or in the checkpoint of the refiner section?
In the SD checkpoint dropdown not the refiner.
Hi Andrew,
Thank you so much for all your hard work! It is really appreciated.
I am having trouble with controlnet. I have followed all the instructions to a t – checked for updates – reinstalled. Everytime I attempt to use controlnet this long error message starting with *** Error running process: /Users/Berg/stable-diffusion-webui/extensions/sd-webui-controlnet/scripts/controlnet.py
And ending by
RuntimeError: You have not selected any ControlNet Model
Do you have any idea what the issue could be
It seems that you didn’t select a model in controlnet.
Are there any models on SDXL that come close to line art and in inverse line art from SD 1.5?
Hi, Andrew,
Thank you for this great guide. Super helpful.
Been having problems running some Preprocessors in ControlNet (a1111 both on SDXL and 1.5) and hoping you can help me.
I’ve tried updating, deleting and reinstalling, I’ve tried running SD a1111 in different browsers, redownloading the models, tried etc., and I just keep getting the following error:
”
urllib.error.URLError:
”
Anything come to mind that could help me solve this?
Like I mentioned, only a few preprocessors work.
For example, for “Depth,” only the “depth_zoe” works, all others give the error. For “OpenPose”, none of the preprocessors work, “Canny” on the other hand, they all work.
This happens both in SDXL and in 1.5 models.
Any ideas would be great. Thank you in advance.
it seems not able to download the preprocessor model. not sure if it is your local ip. you can try turn on or off vpn.
Hi, Andrew
Thank you for taking the time to respond.
I actually was able to figure it out with the help of Chat GPT!
Looking at the entire read-out in the Command Line there was actual paths to the missing Annotators for each of the Preprocessors.
So, while I’m not actually sure what caused the underlying problem, I was able to download the missing files manually, and it seems to be working.
Thank you again!
I’ve used Sarge’s main v1e depth map controlnet , the first link with good results.
I requires a different depth map format that usual did you use the right one ?
It uses the inferno colour map, basically RGB as a single 24 bit value with 0 (black) being the ‘nearest’ value and 8*8*8 (white) being the farthest.
I haven’t tried the others but they look like they use greyscale but again with 0 being the near value, and black being the far value unlike the others with use 1 as the near value.
it’s been a while since I tried. I used controlnet’s preprocessor so it may not be the right one.
Replying to myself actually SargeZT/controlnet-sd-xl-1.0-depth-faid-vidit uses a interesting colour map that repeats I think, it’s hard to tell what goes on in the middle, and it almost looks like a normal map combined with depth. Guess well will never know now SargeZT has passed away.
Thanks for the info. I’ve shifted to XL just today and I was wondering if controlnet got supported. Do you have any info if/when the Reference tab will be available for XL models?
I am not sure what you meant by the reference tab. do you mean the reference control model?
Oh sorry, yes I mean the Reference model in controlnet. When I try to use it, the generated image change slightly compared to without reference (same parameters) , but i’m pretty sure it’s not working as it should since there is not the slightest hint of the referenced image in it. Just some random smudges/noise.
Got it, reference model is kind of old now. You can use IP-adapter. It has an XL model.
But don’t they have different scope? I thought IP adapter was to keep the same face only? (kind of) At least that’s what I got from the official samples provided
There are a few IP adapters.
IP adapter and IP adapter plus copies the whole picture. So it is similar to reference.
IP adapter face and face id copies the face only.
Hello, Andrew, I am wondering if it is possible to obtain a vector image in .svc format from a photograph, using Control Net. If it’s not possible, does Stable Diffusion offer me any other tool to do it?
Thank you very much!
I don’t think this is supported.
Thank you!
OpenPose cannot be used in the XL model that makes me very frustrated. As a result, I can only switch to the 1.5 version of the Stable Diffusion when I want to use ControlNet. And the OpenPose in the XL model has many different versions, but there is no one that can be used.
A particular openpose model works sometime. But I haven’t used often enough to say for sure.
Thanks for step by step guide really useful.
I am puzzled why none of the images using the canny model looked like the model. The pose is correct but the male model’s face looks drastically different. The older version of Controlnet would have reproduced a similar facial feature if you used the canny model. Is there something I am missing?
Good question. Maybe it has something to do with the control weight setting.
Great explanation again – many thanks!
Hi. I would switch to controlNet-xs for SDXL. Its much better and way smaller. Controlnet-xs does not copy the sdxl model internal but its a New and slimmer design to Focus on its task, i. E. To only control the Image generarion process.
Interesting models! I will check it out.
Hi Andrew,
thank you for the sdxl adds!
Do you think would be possible to have implemented on Colab notebook the Infinite zoom?
We are experiencing some issue using it with sdxl uploading from url
Hi, you should be able to install the extension by putting the github link in the Extensions_from_URL field.
??
Thank you Andrew
Hi Andrew, thanks for showing some paths in the jungle. In my experience t2i-adapter_xl_openpose and t2i-adapter_diffusers_xl_openpose work with ComfyUI; however, both support body pose only, and not hand or face keynotes. thibaud_xl_openpose also runs in ComfyUI and recognizes hand and face keynotes; but, it is extremely slow.
What still missing is lineart. There is t2i-adapter_diffusers_xl_lineart, which unfortunately creates lots of sketch and, yes, linearts.
It’s a great miss that openpose is not working A1111. Seems like it can be with some fixes.
Fantastic write up, will be using this as a reference going forward.
Check out the latest in AI video tech. OP, want to write about this? https://youtu.be/pPcSoYOAaX0?si=DtQpdCkpQ4N46DAv
I’m not sure if stable diffusion can do that currently.
Has anyone tested with deforum in hybrid video mode?
For me it gave inconsistent results, as if I wasn’t using any controlnet
Hi,
What about models for QRCodes for instance?
I imagine they all have to be “ported” to SDXL.
If I try to use a model for SD1.5 with SDXL, WebUI crashes.
Looks like there’s a SDXL version available, although I haven’t tested it.
https://huggingface.co/Nacholmo/controlnet-qr-pattern-sdxl/tree/main/automatic1111
Thanks a lot, it works 🙂
Seems refiner must be turned off in the txt2img, but it can still be used via img2img… Only that right now if I use the refiner I lose some of the effect of the controlNet. I guess I’ll have to play to find correct setting.
thanks to clarify this ” jungle ” models 😉
Jungle indeed. I wish the list of models is a bit more opinionated….