A common issue in Stable Diffusion AI images is that limbs may not be generated quite right. Sometimes a person may have one more arm, and the other time one of his legs may be missing. Finally, we got 4 limbs but the anatomy is not quite correct.
A reader suggested making a special tutorial for removing extra limbs. So here you go! In this post, I will show you how to use inpainting to fix these two images with problematic limbs.

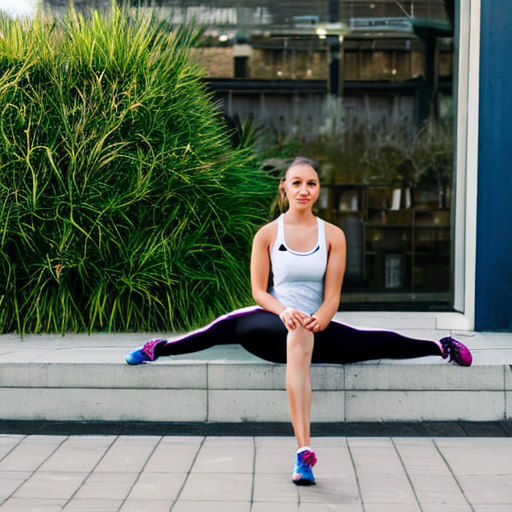
Table of Contents
Software
I will use AUTOMATIC1111 GUI in this tutorial. You can run this GUI with 1-click using the Colab notebook in the Quick Start Guide. You can also install it on Windows and Mac.
We will need the v1.5 inpainting model. Make sure to check the inpainting model when launch the colab notebook in the Quick Start Guide.
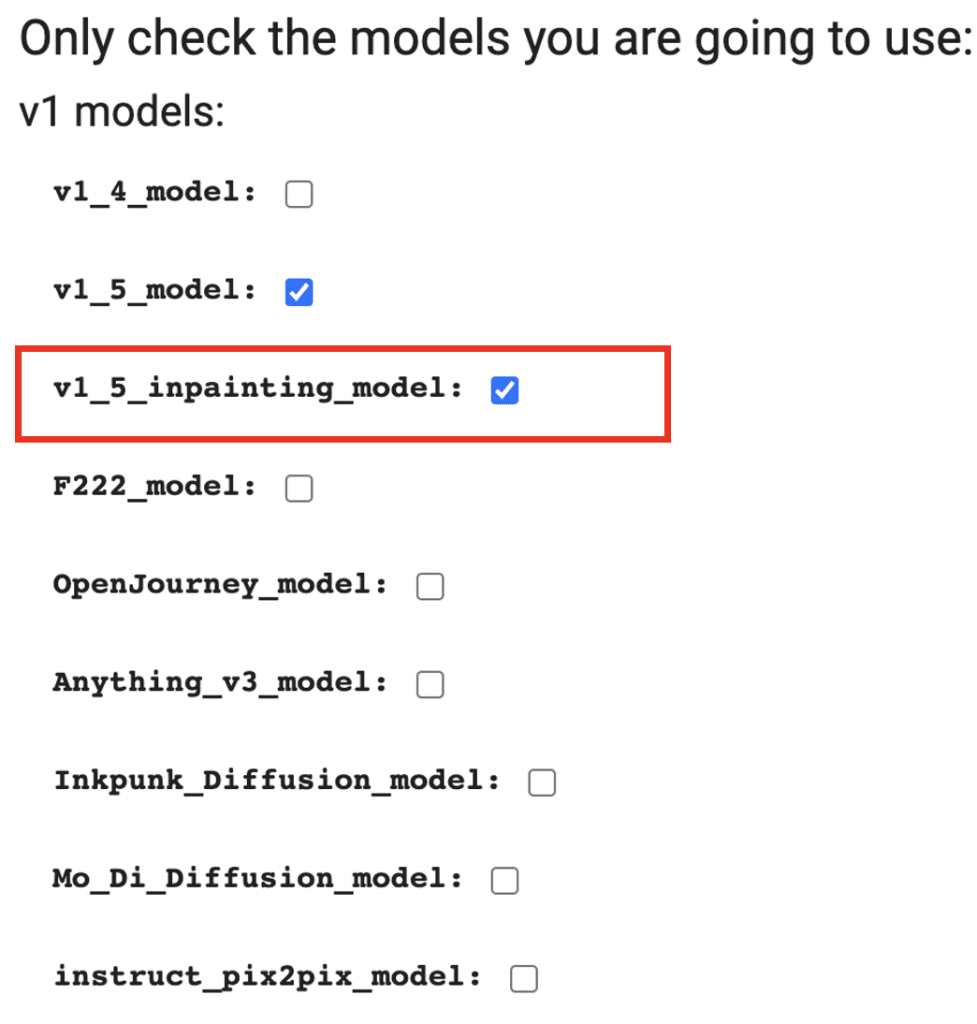
Follow the instructions to install the inpainting model if you run AUTOMATIC1111 locally.
I will use Photoshop to paint over certain areas in the second example. You can use any other photo editing software.
Prompt and negative prompt
The two images to be fixed were generated using the following prompt.
full-body portrait of beautiful female wearing running outfit, highlights in hair, sitting outside restaurant, brown eyes, wearing a dress, side light
And negative prompt is
disfigured, ugly, bad, immature, two heads
We will use the same prompt in the inpainting example.
Example 1: Inpainting only to fix limbs
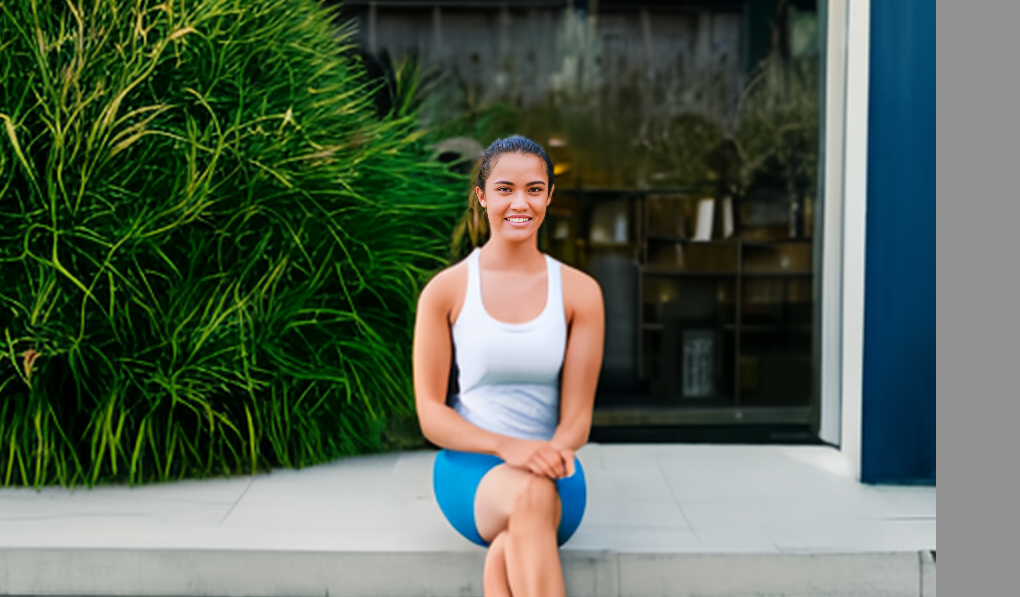
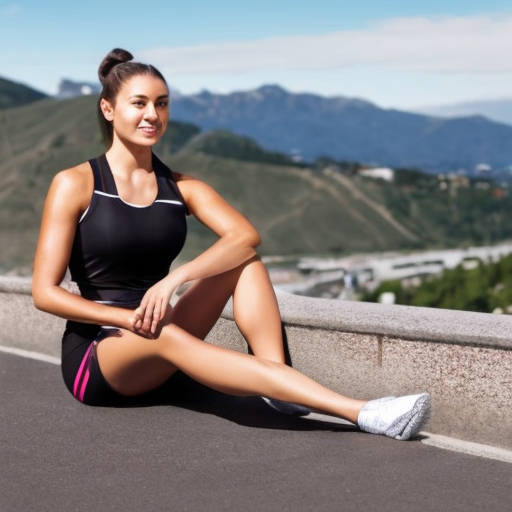
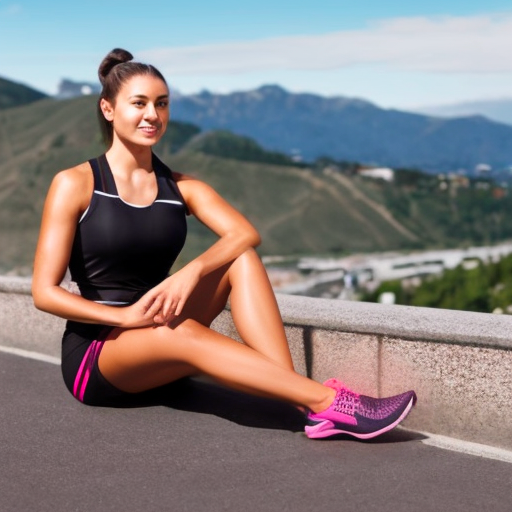
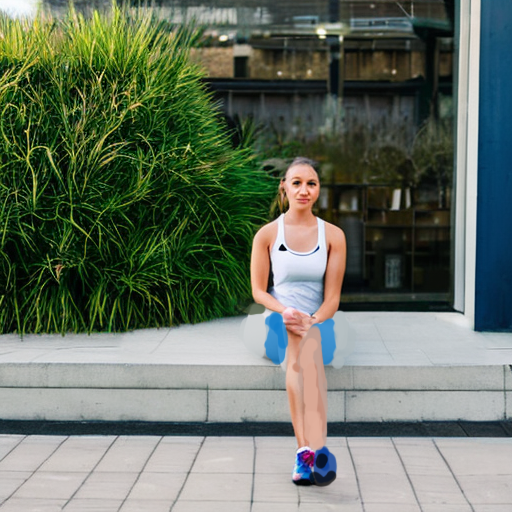
We will fix the following image with distorted limbs.
You can download this image using the button below if you want to follow this tutorial.
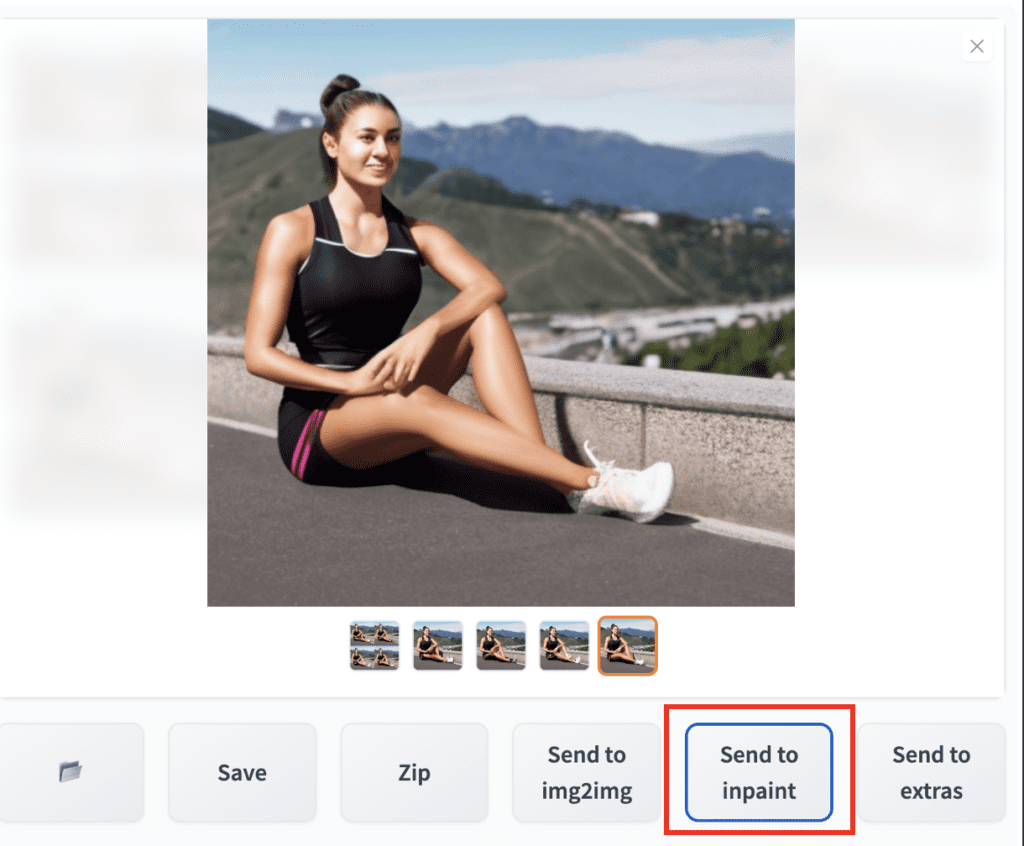
Sending image to inpainting
Obviously the legs are the most problematic. This image was generated using the txt2img tab in AUTOMATIC1111. We will fix this image with inpainting alone. Use the convenient Send to Inpaint button under the image to send a newly generated image to inpainting.
Alternative, if you are using the downloaded image, go to img2img tab and select the Inpaint sub-tab. Write the prompt and negative prompt in the corresponding input boxes. Upload the image by dragging and dropping to the image canvas.
Regardless of the method you use, now you should have setup the GUI like below.

Inpainting parameters
Below is the screenshot of my inpainting setting.

There are so many settings. The important ones are
Prompt and negative prompt: As original.
Sample step: Set to a value reasonably high, like 25.
Inpaint area: “Whole picture” generates images coherent with the whole image. “Only masked” paints the masked area only but with higher resolution. It is useful for painting finer details like faces.
Batch size: Set to a reasonable number like 4 so that you can cherry pick the best one.
Denoising strength is a very important parameter. 0.75 is a good starting point. Increase if you want to it to change more. Decrease if you want it to change less.
Masked content: Keep at Original.
Seed: -1 for random. This is important as you want to generate something different over each trials.
Select the Stable Diffusion v1.5 inpainting model.

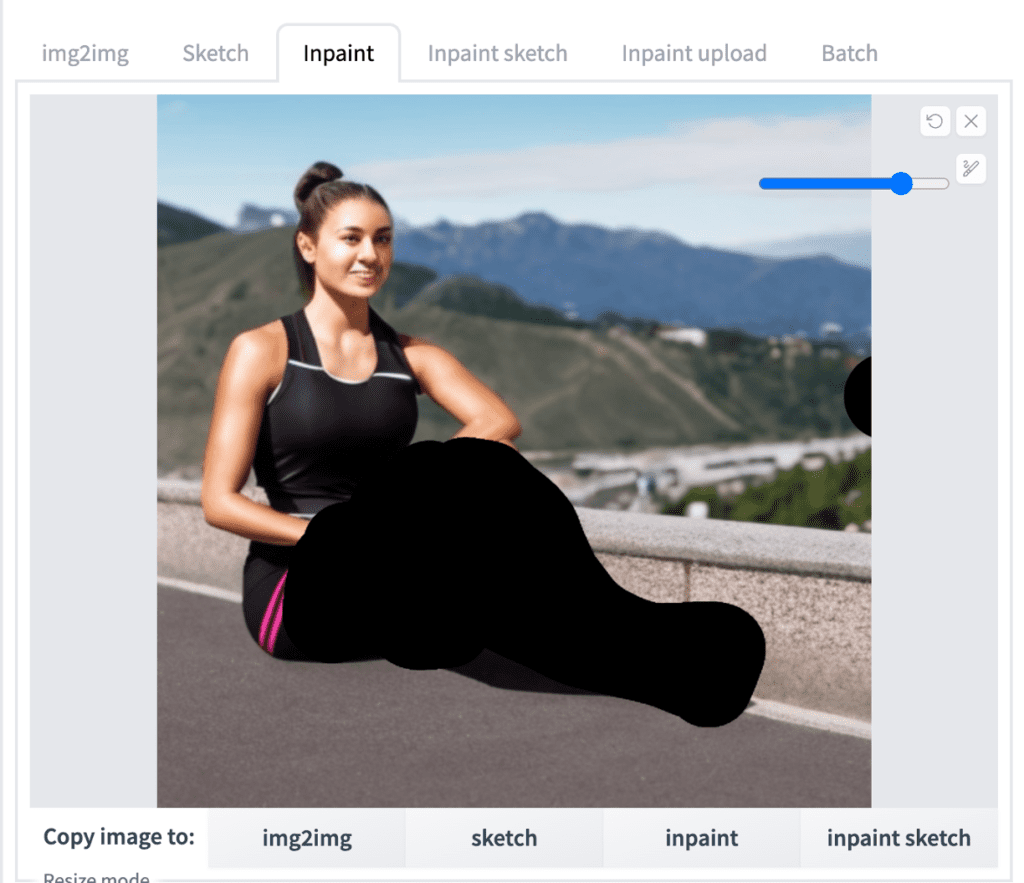
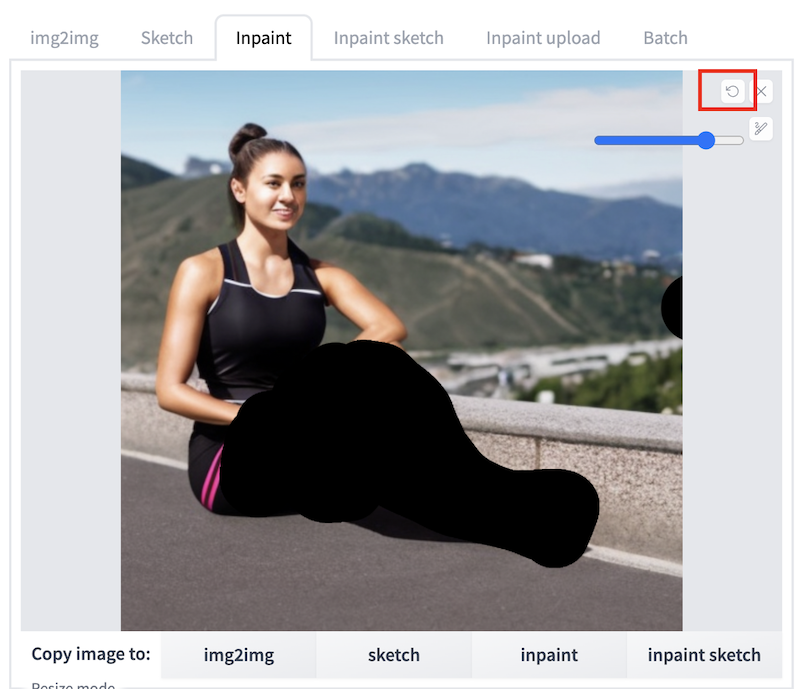
Fixing limbs
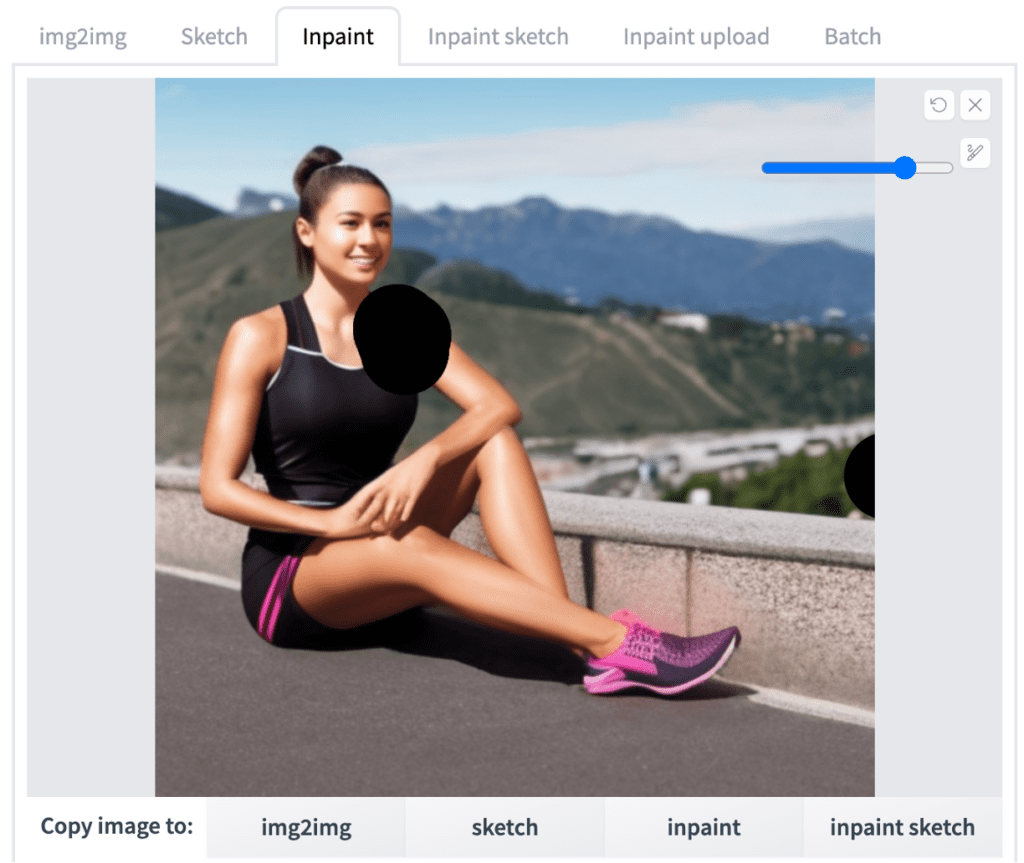
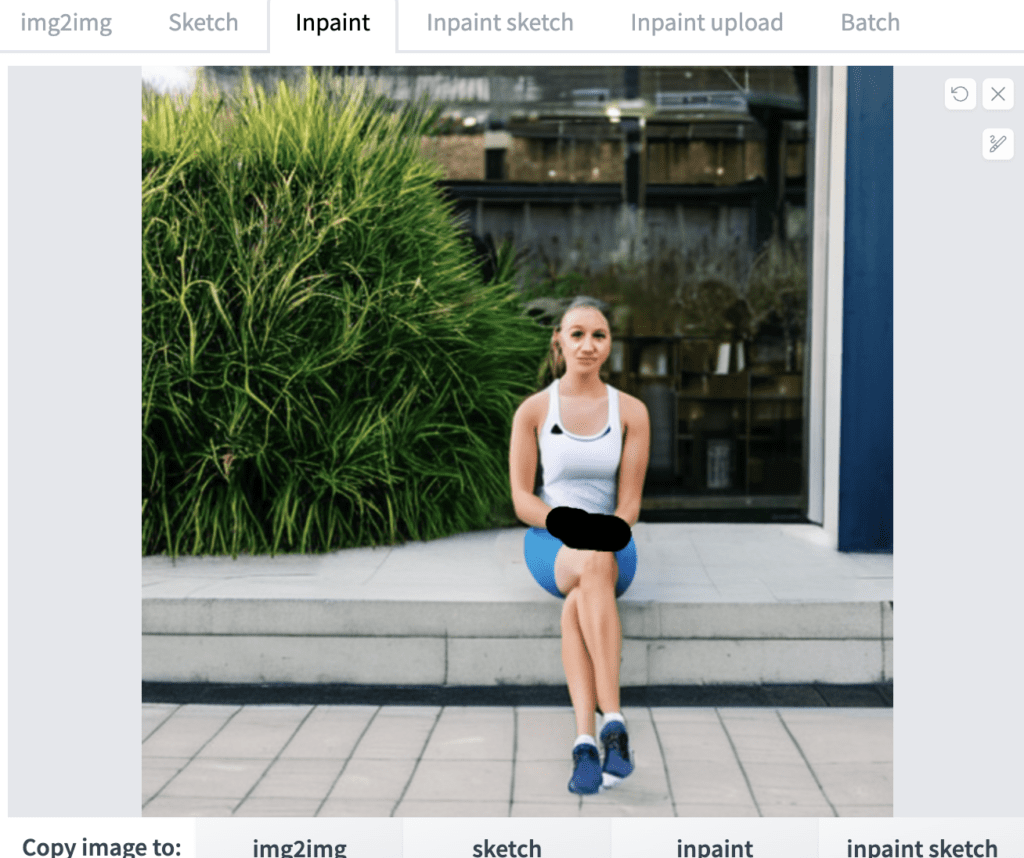
Now, we are ready to use inpainting to fix the limbs. Let’s fix the legs first because they are the most problematic. Use the paintbrush tool next to the inpainting canvas to create a mask around the legs. Cover the part you want to regenerate.
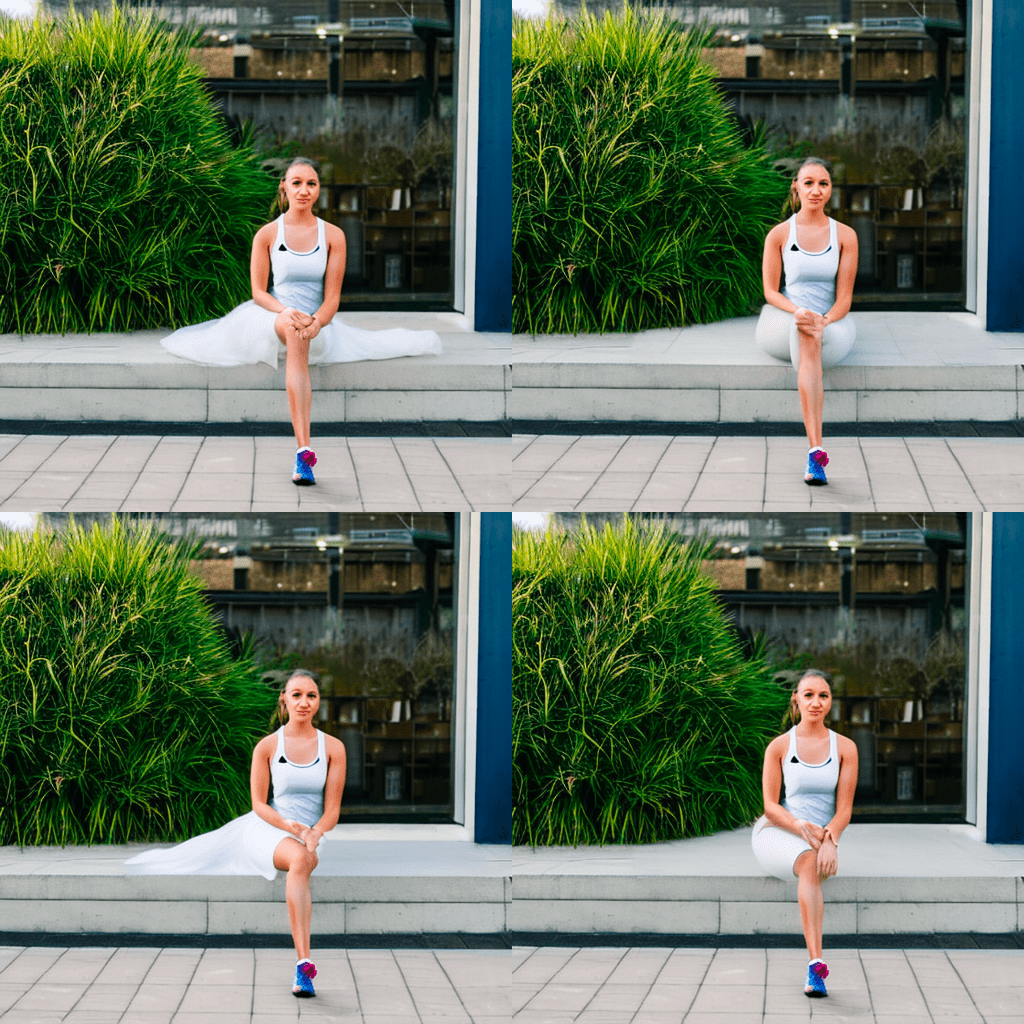
Let’s use denoising strength of 0.75. Press Generate. We see the 4 images generated.
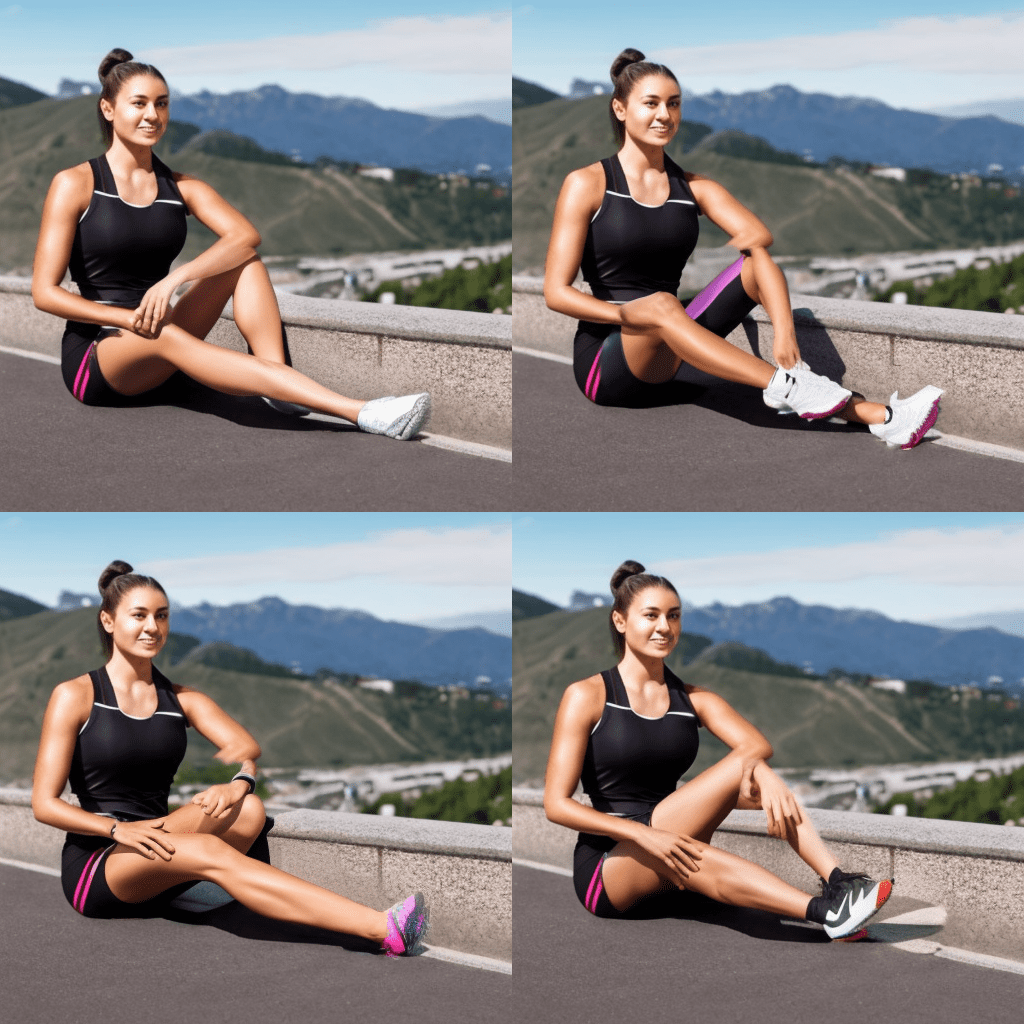
You can see the newly generated images are with varying degree of success. So it’s important to generate multiple images and pick the best one. Although not perfect, let’s pick the top left image because it moves to the right direction. In case you see no improvements, you can regenerate another set of 4. (Make sure seed is set to -1)
So here’s our first iteration:
To use a image for the next round, you select the image in the right canvas and use Send to inpaint button under the image to send it to the inpainting canvas.
After pressing the button, you may wonder why nothing seemed to have changed. The reason is all the changes are under the masked area which are covered by the black paint. You will see the changes if you remove the mask. But because we want to reuse the same mask, we are not going to do that.
Using the same mask and the same parameters, hit Generate button to get another 4. The new 4 are generated based on the improved image above.

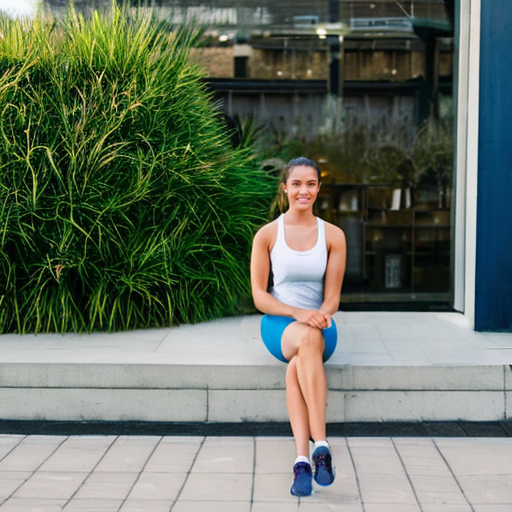
Bottom right is a clear winner. Let’s move forward with it.
Fixing the sneaker
When inpainting to fix limbs or anything, you should start with a large area, and progressively move on to smaller ones. Let’s say we want to change the sneaker she wears.
We will follow similar steps: select the bottom right image and use Send to Inpaint button to send it to the inpaint canvas on the left.
Again, on the inpaint canvas, you would found nothing has changed.
You will need to use the undo button at top right to completely remove the mask. Repaint the mask but only covering the sneaker.

Using the same settings (denoising strength 0.75, original content) and after generating about 16 images, I picked the following image
Fixing the face
Her face is a bit garbled. This is something inpainting is very suitable for fixing. Send the new image to inpainting and creates a mask on her face.

Now we need to use new settings:
Denoising strength: 0.2. We need lower value because the face is not too bad. We already had the eyes, nose and mouth in the right place. So we want very small changes.
Inpaint area: Only masked. This option scales the inpaint area to a larger one, perform inpainting, and scale it back down. Since we are painting a small area with a lot of details, this option helps to improve quality.
Press Generate to generate 4 new images with new faces. Below is what I picked.

Fixing the shoulder
Finally, her shoulder looks a bit unnatural. Let’s fix it also.
Using denoising strength of 0.5 and keeping inpaint area as masked only, we get the following image.
Finally, fix her hands with a similar method.

Comparison and summary
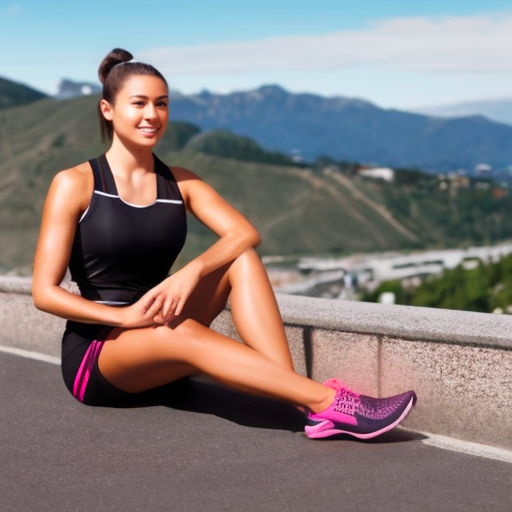
let’s compare the before and after.
You can use inpainting to keep on fixing small details that are less than perfect. But I hope this is a good example to demonstrate how to use inpainting alone to fix limbs.
To sum up, the basic ideas of this technique are
- Reuse the same prompt and negative prompt.
- Keep Masked Content as original, and adjust denoising strength to control how much change we want to make. (0 means no change. 1 means making changes not based on original content at all). This way you don’t need to mess with other masked content setting while achieving similar controls.
- Select inpaint whole picture when painting a large area, and masked area only when inpainting a small area.
- Start with large defects first such as limbs, and gradually move on to smaller areas.
Example 2: Inpainting and paint
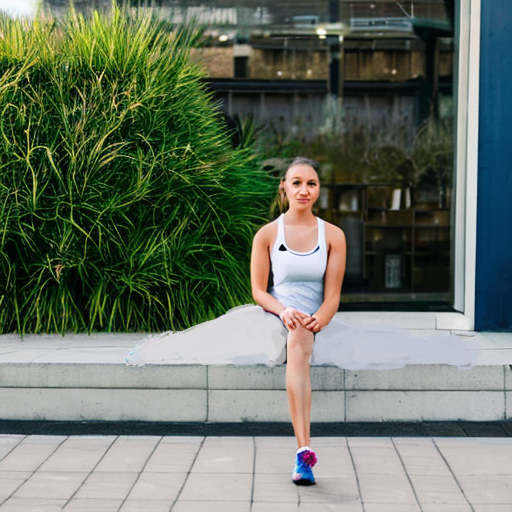
Let’s go through this more challenging example of removing two extra limbs and adding back one in the image below. In practice, you shouldn’t try to fix images like this because it would be far easier to generate new ones that have less defects to start with. But it’s a good picture to demonstrate this technique so that’s what I chose.
You can download this image here.
Amputating two legs
First, I used Photoshop to paint over the two extra limbs while matching the color of the stone ledge. It doesn’t need to match perfectly, close enough is fine because we are going to use inpainting to fix it up.
This step is easier if you have a drawing device like Apple pencil and iPad, but it is totally doable with a mouse. If you don’t have access to Photoshop, you can use Gimp (run locally) or Photopea (online). They are free. In any drawing software, you can use the color dropper tool to pick color of the stone surface nearby and paint the same color over the extra legs.
If the above options doesn’t work for you, you can try to use Inpaint sketch tool in AUTOMATIC1111. But I found it buggy and tried not to use it.
Below is my image after the paint over.
Now let’s use it for inpainting. Use the following settings similar to example 1. But since we have painted the stone ledge over and want Stable Diffusion to use the color we painted, we should set denoising strength at a low value 0.2 – 0.5 and use original content.
Model: v1.5 inpainting model (sd-v1-5-inpainting.ckpt)
Prompt: (same as example 1)
Negative prompt: (same as example 1)
Masked content: original
Inpainted area: Whole picture
Sampling step: 25
Denoising strength: 0.5
I generated 4 images.
Same as before, the first result doesn’t need to be perfect. It only needs to be better because we will inpaint iteratively so over so again. I picked the top right one. Not perfect but at least having the stone surface mostly fixed.

Add back one leg
Now, go back to Photoshop and add the missing leg. Paint the short pants, extra leg and brush up some other small defects. Again, use color dropper tool to match color. Below is what I got after painting in Photoshop.
Upload the picture back to the inpainting canvas. With denoising strength reduced to 0.2, I got these 4 images.

Let’s pick the bottom left image to continue. Go through another round generation using denoising strength of 0.5. We got the following image which is close to what we want.

Fix hands, sneakers and face
Time to fix her hand. Creating a mask around her hands.
Inpaint only the masked area and setting the denoising strength to 0.75, the hands are recovered.

The rest are small fix ups of multiple areas, one at a time: The sneaker, the shirt, and the face. I kept the parameters the same as the last step but adjust denoising strength as needed.
Below is the final image after all the fixes.
Comparison and summary
Let’s put the before and after photo together to see what we have acomplished.
In this second example, we used an external photo editing tool to paint over certain areas to direct the inpainting generations. This allow you to somewhat control the color and composition of the generations.
Hope I have cleared up how to use inpainting to fix up limbs in these two examples. As you have seen, you can really fix anything if you have the patience.
Further readings
Read about basics of inpainting workflows if you are not familiar with this technique. Not only you can repair defects, but also create new objects.
Inpainting is actually a special case of image-to-image. You can read more about how it works at model level here.
This anatomy weird mutation are currently the bane of stable diffusion, I hope newer versions are going to reduce these occurrences to be generated
Very good article, very useful
Thanks for the great tutorial! Taught me a few things. Totally looking forward to one on controlnet which seems to be insanely powerful, but I don’t understand what it is actually good for.
Thank you for reading! Yes it is in the work.