Developing a process to build good prompts is the first step every Stable Diffusion user tackles. This article summarizes the process and techniques developed through experimentations and other users’ inputs. The goal is to write down all I know about prompts so you can know them all in one place.
Table of Contents
Anatomy of a good prompt
A good prompt needs to be detailed and specific. A good process is to look through a list of keyword categories and decide whether you want to use any of them.
The keyword categories are
- Subject
- Medium
- Style
- Art-sharing website
- Resolution
- Additional details
- Color
- Lighting
An extensive list of keywords from each category is available in the prompt generator. You can also find a short list here.
You don’t have to include keywords from all categories. Treat them as a checklist to remind you what could be used.
Let’s review each category and generate some images by adding keywords. I will use the Dreamshaper model, an excellent model for beginners.
To see the effect of the prompt alone, I won’t be using negative prompts for now. Don’t worry. We will study negative prompts in the later part of this article.
All images are generated with 25 steps of DPM++ 2M Karas sampler and an image size of 512×768.
Subject
The subject is what you want to see in the image. A common mistake is not writing enough about the subjects.
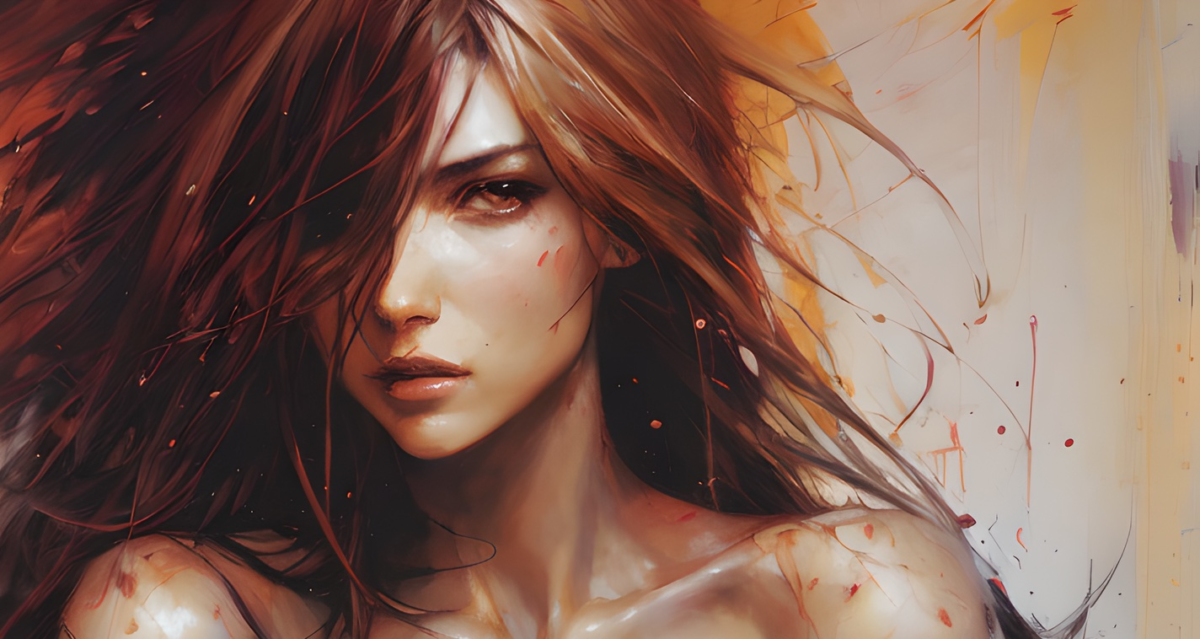
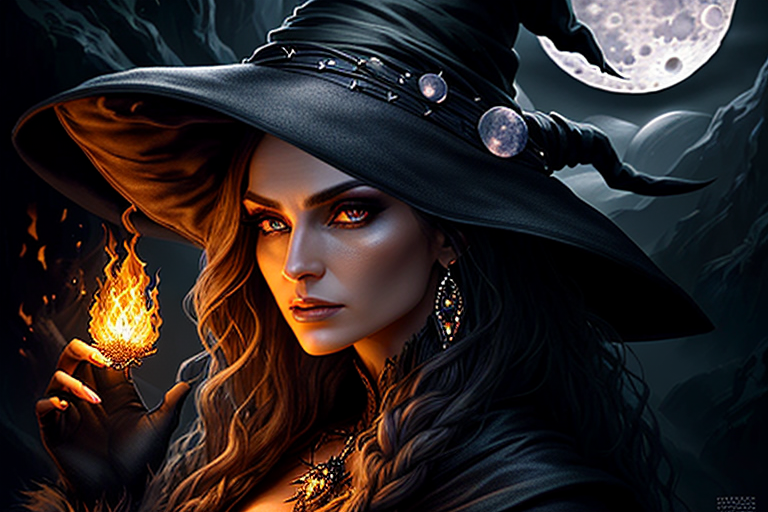
Let’s say we want to generate a sorceress casting magic. A newbie may write
A sorceress
You get some decent images, but this prompt leaves too much room for imagination. (It is common to see the face garbled in Stable Diffusion. There are ways to fix it.)
How do you want the sorceress to look? Do you have any keywords to describe her more specifically? What does she wear? What kind of magic is she casting? Is she standing, running, or floating in the air? What’s the background scene?
Stable Diffusion cannot read our minds. We have to say exactly what we want.
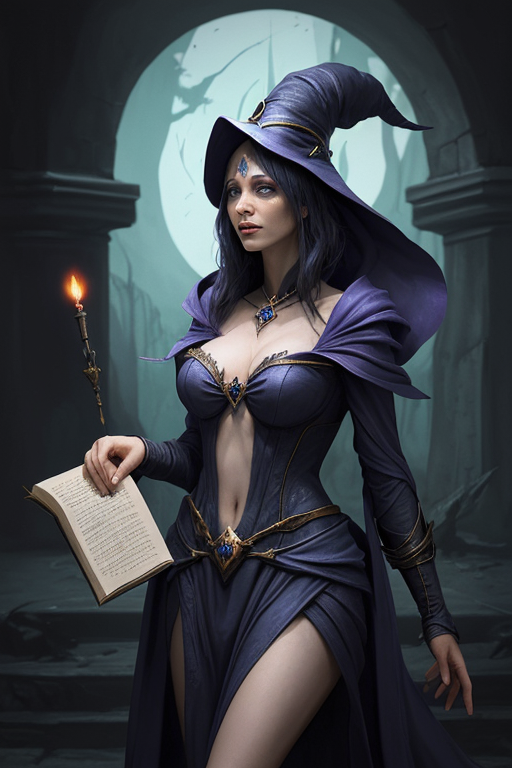
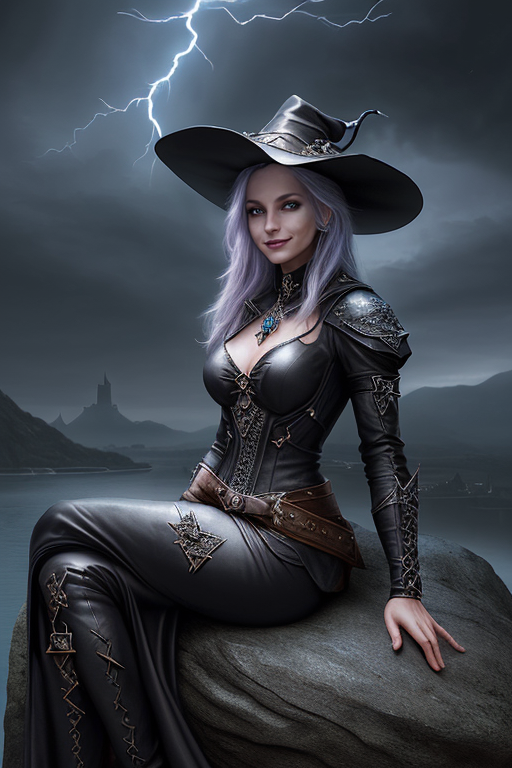
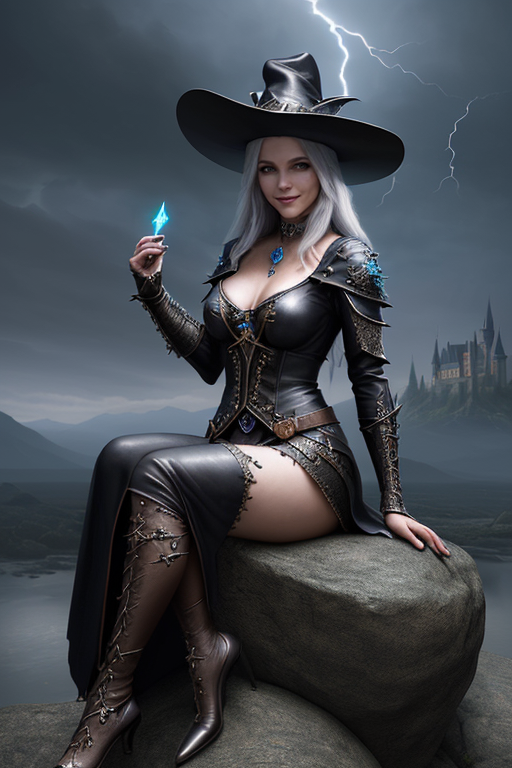
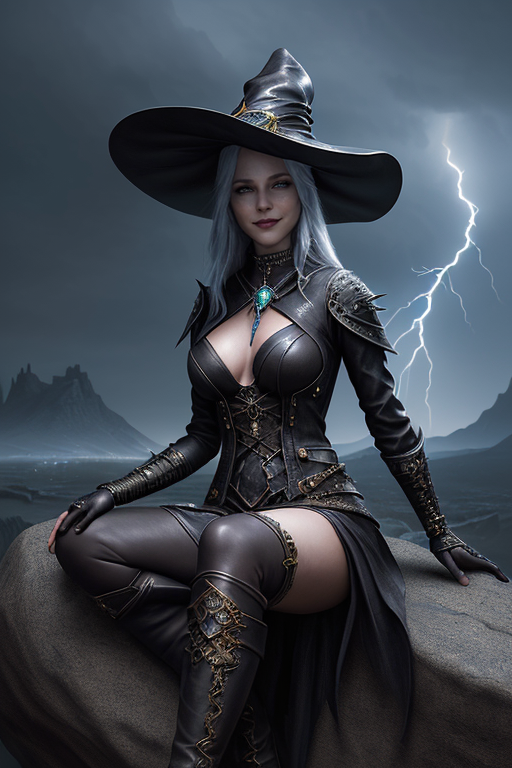
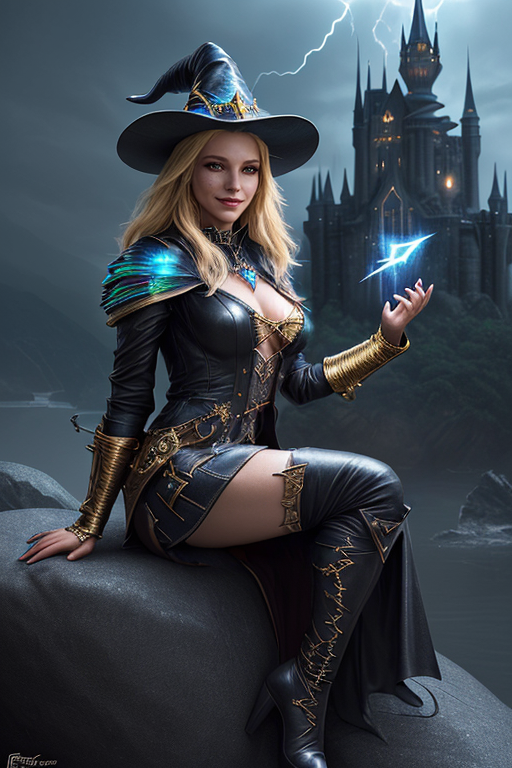
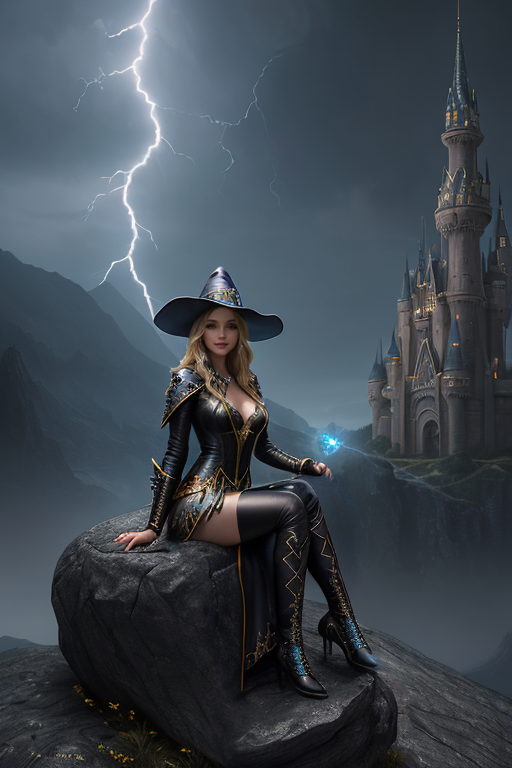
As a demo, let’s say she is powerful and mysterious and uses lightning magic. She wears a leather outfit with gemstones. She sits down on a rock. She wears a hat. The background is a castle.
a beautiful and powerful mysterious sorceress, smile, sitting on a rock, lightning magic, hat, detailed leather clothing with gemstones, dress, castle background
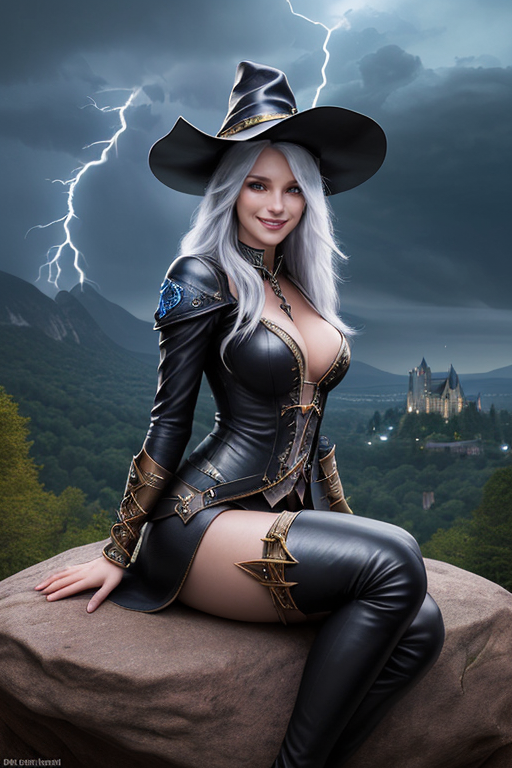
Now, we generate more specific images. The outfit, the pose and the background are consistent across images.
Medium
Medium is the material used to make artwork. Some examples are illustration, oil painting, 3D rendering, and photography. Medium has a strong effect because one keyword alone can dramatically change the style.
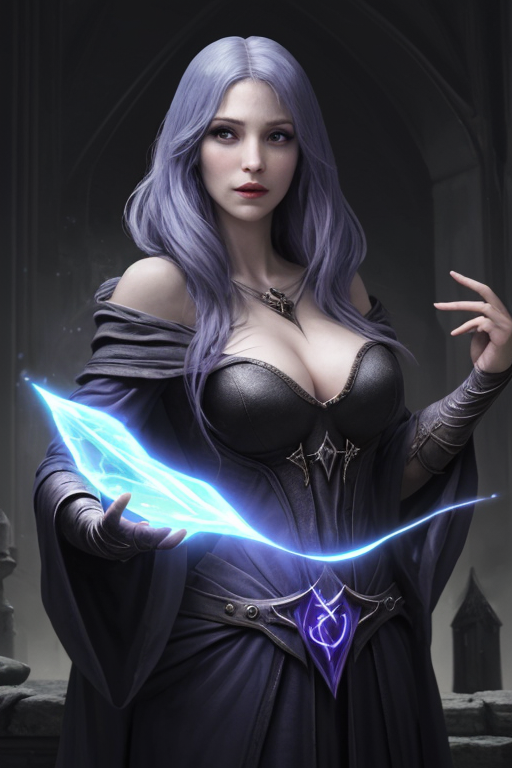
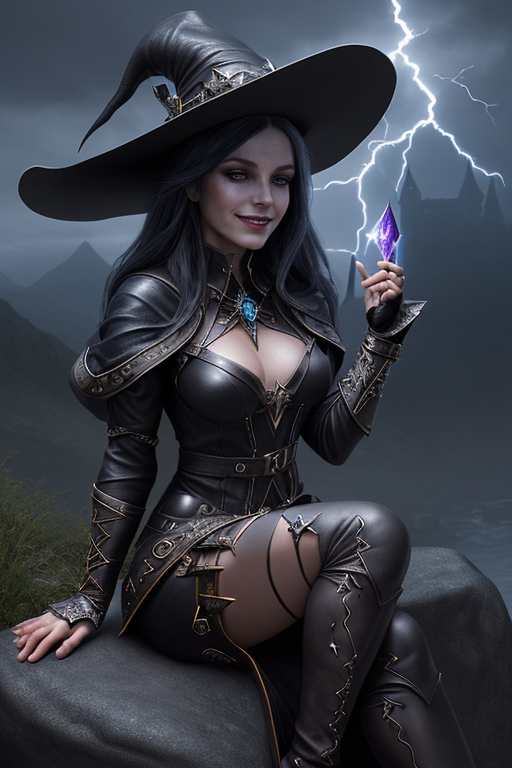
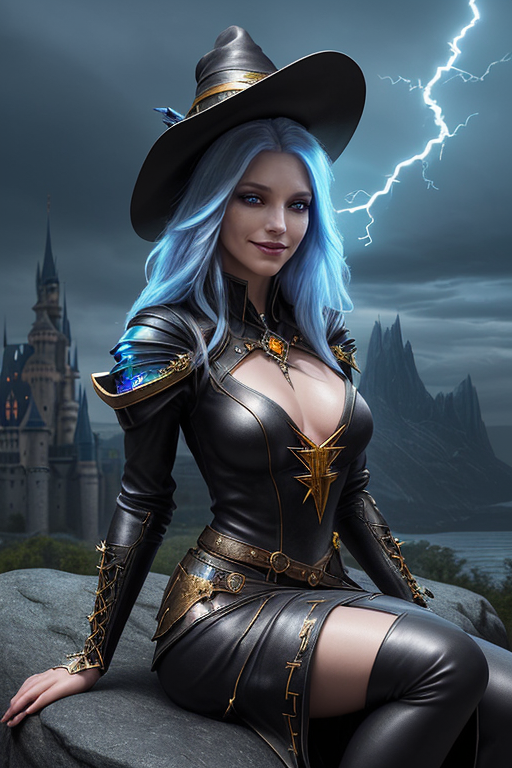
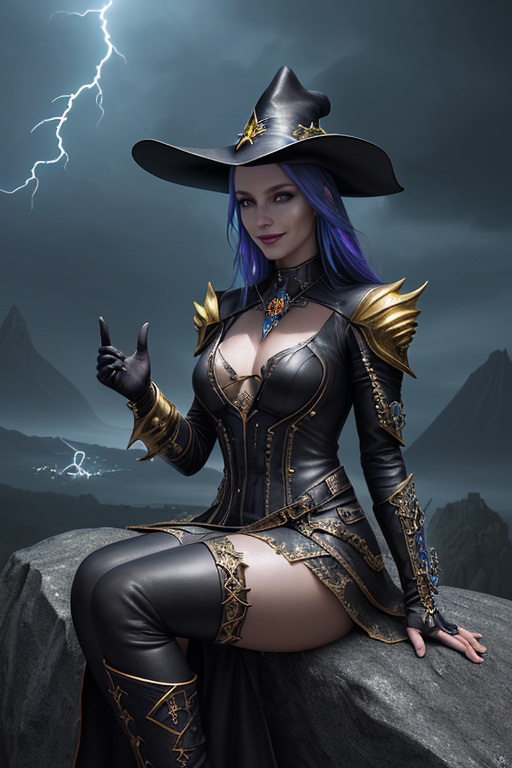
Let’s add the keyword digital art.
a beautiful and powerful mysterious sorceress, smile, sitting on a rock, lightning magic, hat, detailed leather clothing with gemstones, dress, castle background, digital art
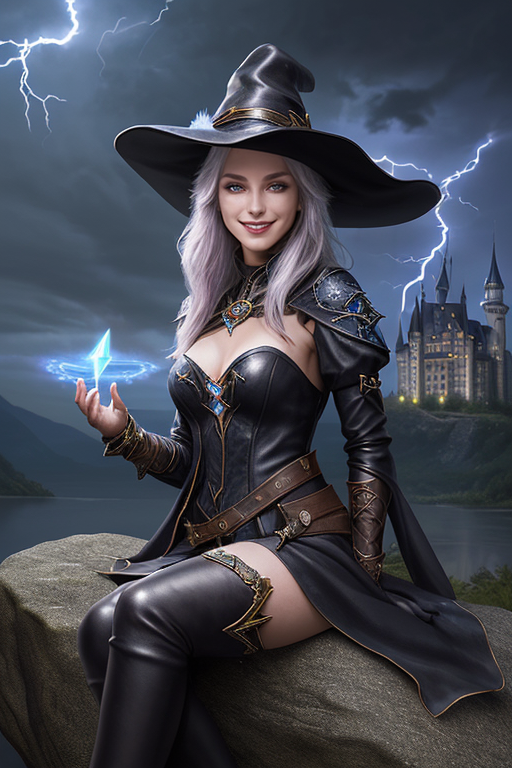
The images switched from a realistic painting style to being more like computer graphics. I think we can stop here. Just kidding.
Style
The style refers to the artistic style of the image. Examples include impressionist, surrealist, pop art, etc.
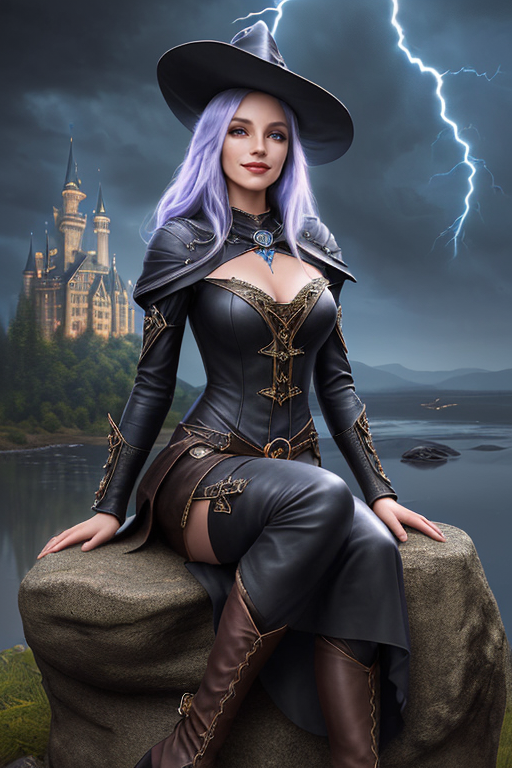
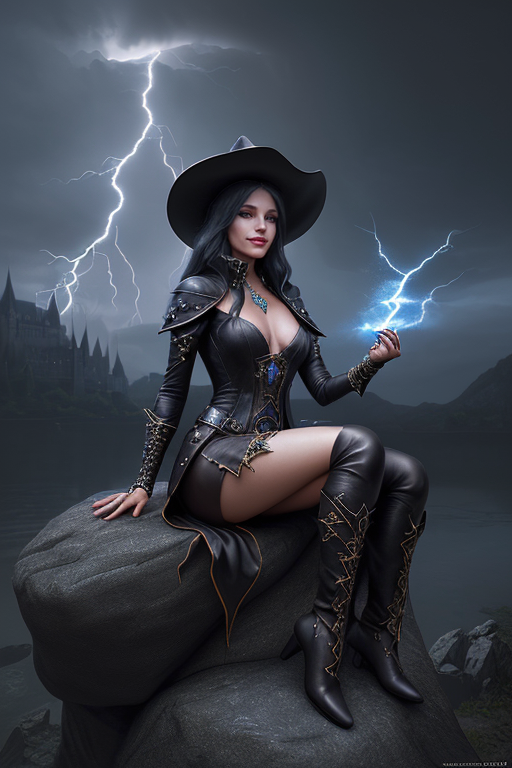
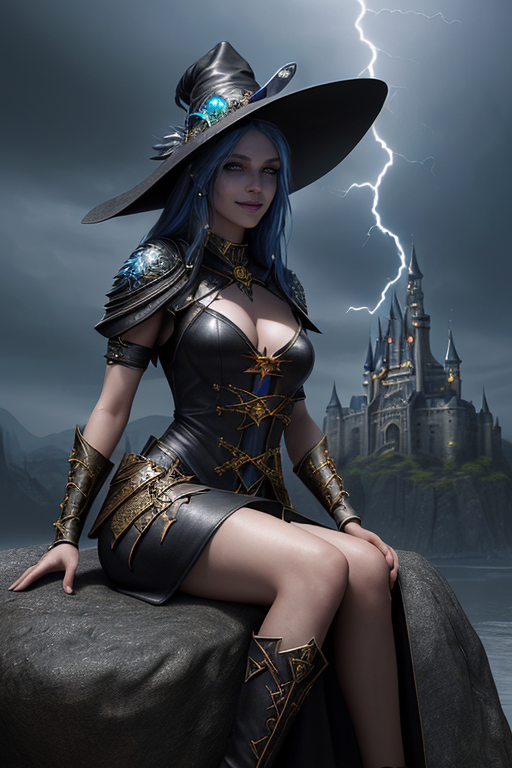
Add hyperrealistic, fantasy, dark art to the prompt.
a beautiful and powerful mysterious sorceress, smile, sitting on a rock, lightning magic, hat, detailed leather clothing with gemstones, dress, castle background, digital art, hyperrealistic, fantasy, dark art
Now, the scene has become darker and more gloomy.
Art-sharing website
Niche graphic websites such as Artstation and Deviant Art aggregate many images of distinct genres. Using them in a prompt is a sure way to steer the image toward these styles.
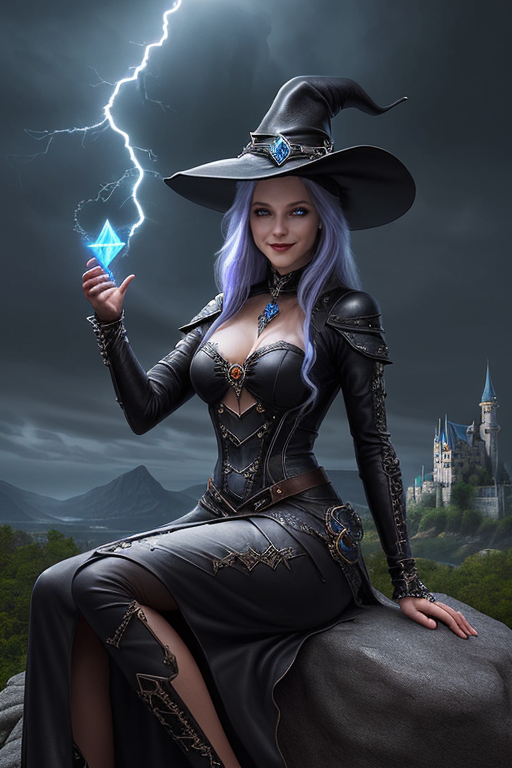
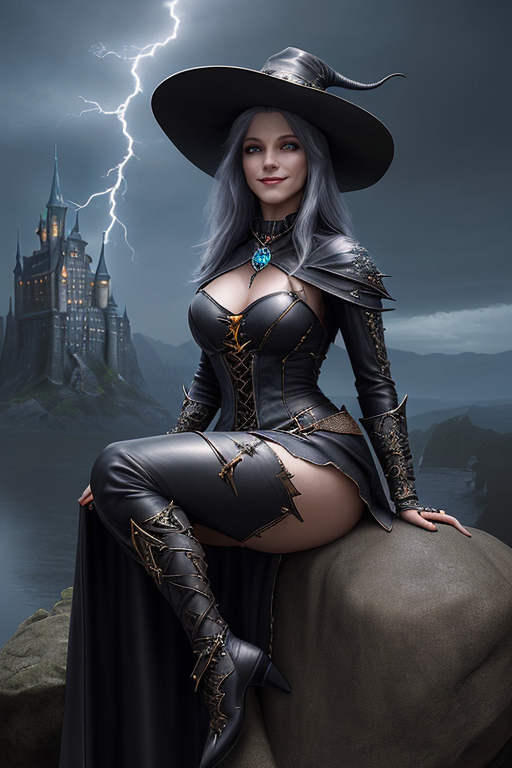
Let’s add artstation to the prompt.
a beautiful and powerful mysterious sorceress, smile, sitting on a rock, lightning magic, hat, detailed leather clothing with gemstones, dress, castle background, digital art, hyperrealistic, fantasy, dark art, artstation
It’s not a huge change, but the images do look like what you would find on Artstation.
Resolution
Resolution represents how sharp and detailed the image is. Let’s add keywords highly detailed and sharp focus.
a beautiful and powerful mysterious sorceress, smile, sitting on a rock, lightning magic, hat, detailed leather clothing with gemstones, dress, castle background, digital art, hyperrealistic, fantasy, dark art, artstation, highly detailed, sharp focus
Well, it’s not a huge effect, perhaps because the previous images are already pretty sharp and detailed. But it doesn’t hurt to add.
Additional details
Additional details are sweeteners added to modify an image. We will add sci-fi and dystopian to add some vibe to the image.
a beautiful and powerful mysterious sorceress, smile, sitting on a rock, lightning magic, hat, detailed leather clothing with gemstones, dress, castle background, digital art, hyperrealistic, fantasy, dark art, artstation, highly detailed, sharp focus, sci-fi, dystopian

Color
You can control the overall color of the image by adding color keywords. The colors you specified may appear as a tone or in objects.
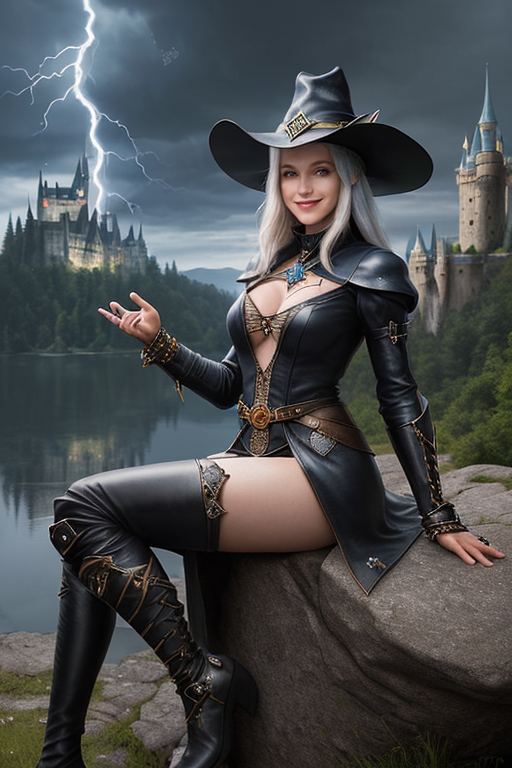
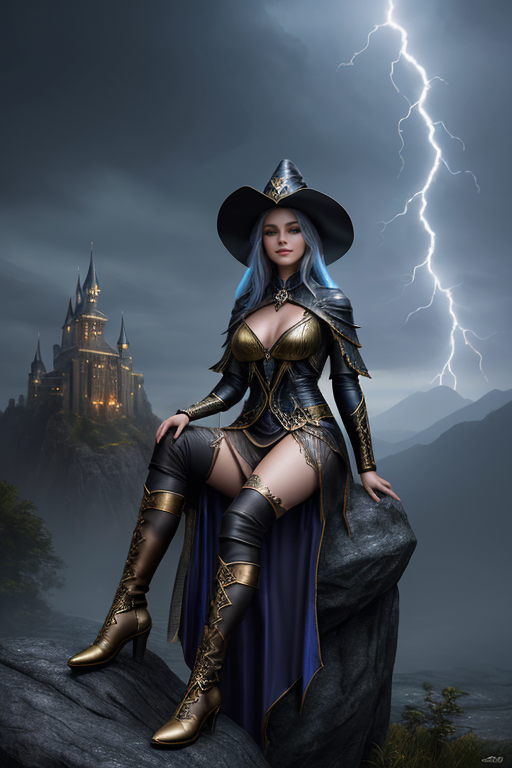
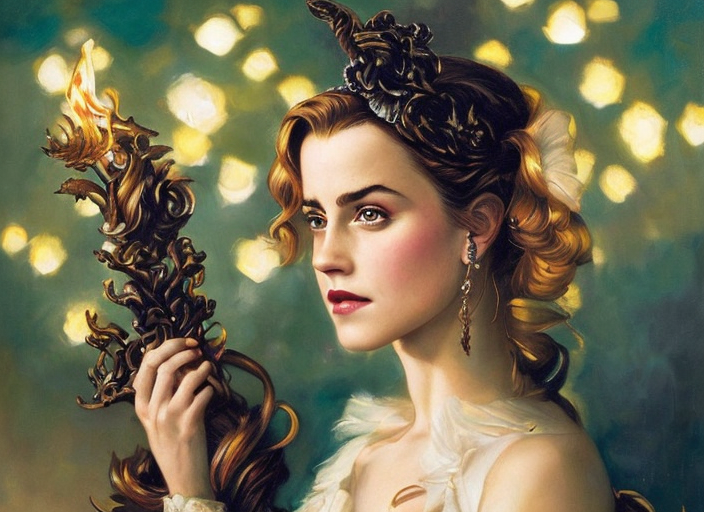
Let’s add some golden color to the image with the keyword iridescent gold.
a beautiful and powerful mysterious sorceress, smile, sitting on a rock, lightning magic, hat, detailed leather clothing with gemstones, dress, castle background, digital art, hyperrealistic, fantasy, dark art, artstation, highly detailed, sharp focus, sci-fi, dystopian, iridescent gold
The gold comes out great in a few places!
Lighting
Any photographer would tell you lighting is key to creating successful images. Lighting keywords can have a huge effect on how the image looks. Let’s add studio lighting to make it studio photo-like.
a beautiful and powerful mysterious sorceress, smile, sitting on a rock, lightning magic, hat, detailed leather clothing with gemstones, dress, castle background, digital art, hyperrealistic, fantasy, dark art, artstation, highly detailed, sharp focus, sci-fi, dystopian, iridescent gold, studio lighting
This completes our example prompt.
Can’t find the right words? Get the FULL LIST with 250+ well-tested keywords.
Remarks
You may have noticed the images are already pretty good with only a few keywords added. More is not always better when building a prompt. You often don’t need many keywords to get good images.
Negative prompt
Using negative prompts is another great way to steer the image, but instead of putting in what you want, you put in what you don’t want. They don’t need to be objects. They can also be styles and unwanted attributes. (e.g., ugly, deformed)
Using negative prompts is a must for v2 models. Without it, the images would look far inferior to v1’s. They are optional for v1 and SDXL models, but I routinely use a boilerplate negative prompt because they either help or don’t hurt.
I will use a simple universal negative prompt that doesn’t modify the style. You can read more about it to understand how it works.
disfigured, deformed, ugly
Process of building a good prompt
Iterative prompt building
You should approach prompt building as an iterative process. As the previous section shows, the images could be pretty good with just a few keywords added to the subject.
I always start with a simple prompt with subject, medium, and style only. Generate at least 4 images at a time to see what you get. Most prompts do not work 100% of the time. You want to get some idea of what they can do statistically.
Add at most two keywords at a time. Likewise, generate at least 4 images to assess its effect.
Using negative prompt
You can use a universal negative prompt if you are starting out.
Adding keywords to the negative prompt can be part of the iterative process. The keywords can be objects or body parts you want to avoid (Since v1 models are not very good at rendering hands, it’s not a bad idea to use “hand” in the negative prompt to hide them.)
Prompting techniques
You can modify a keyword’s importance by switching to a different one at a certain sampling step.
The following syntaxes apply to AUTOMATIC1111 GUI. You can run this GUI with one click using the Colab notebook in the Quick Start Guide. You can also install it on Windows and Mac.
Keyword weight
(This syntax applies to AUTOMATIC1111 GUI.)
You can adjust the weight of a keyword by the syntax (keyword: factor). factor is a value such that less than 1 means less important and larger than 1 means more important.
For example, we can adjust the weight of the keyword dog in the following prompt
dog, autumn in paris, ornate, beautiful, atmosphere, vibe, mist, smoke, fire, chimney, rain, wet, pristine, puddles, melting, dripping, snow, creek, lush, ice, bridge, forest, roses, flowers, by stanley artgerm lau, greg rutkowski, thomas kindkade, alphonse mucha, loish, norman rockwell.
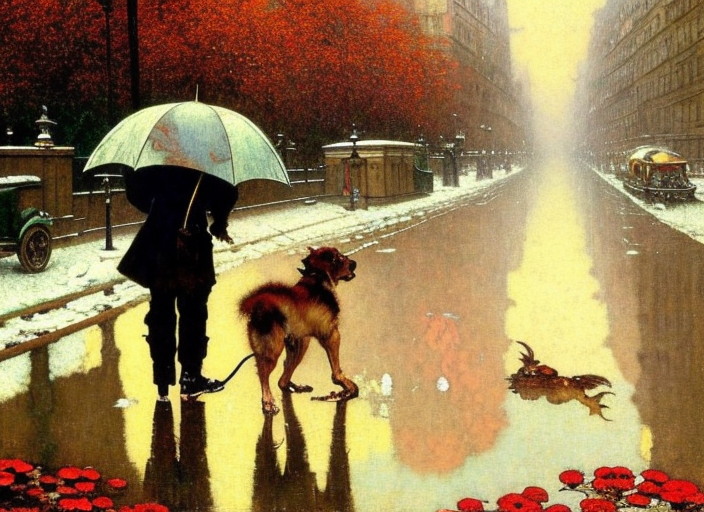
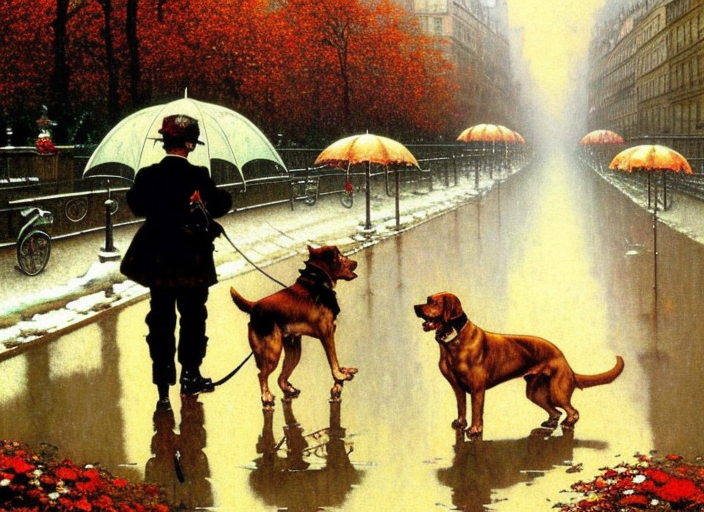
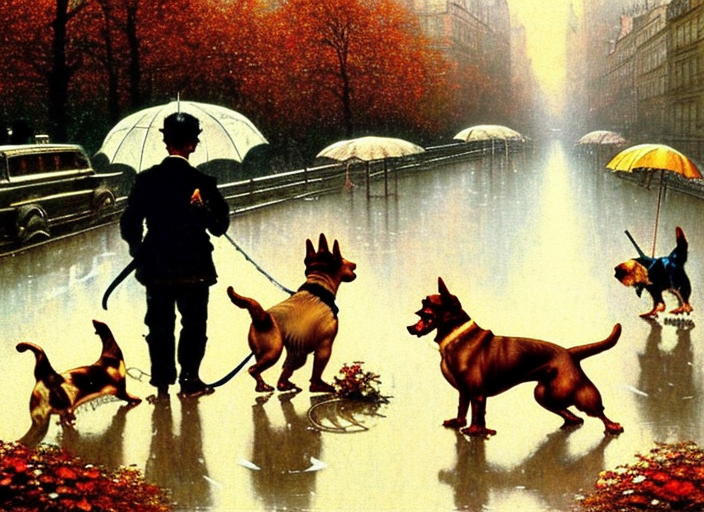
Increasing the weight of dog tends to generate more dogs. Decreasing it tends to generate fewer. It is not always true for every single image. But it is true in a statistical sense.
This technique can be applied to subject keywords and all categories, such as style and lighting.
() and [] syntax
(This syntax applies to AUTOMATIC1111 GUI.)
An equivalent way to adjust keyword strength is to use () and []. (keyword) increases the strength of the keyword by a factor of 1.1 and is the same as (keyword:1.1). [keyword] decrease the strength by a factor of 0.9 and is the same as (keyword:0.9).
You can use multiple of them, just like in Algebra… The effect is multiplicative.
- (keyword) is equivalent to (keyword: 1.1)
- ((keyword)) is equivalent to (keyword: 1.21)
- (((keyword))) is equivalent to (keyword: 1.33)
Similarly, the effects of using multiple [] are:
- [keyword] is equivalent to (keyword: 0.9)
- [[keyword]] is equivalent to (keyword: 0.81)
- [[[keyword]]] is equivalent to (keyword: 0.73)
AUTOMATIC1111 TIP: You can use Ctrl + Up/Down Arrow (Windows) or Cmd + Up/Down Arrow to increase/decrease the weight of a keyword.
Keyword blending
(This syntax applies to AUTOMATIC1111 GUI.)
You can mix two keywords. The proper term is prompt scheduling. The syntax is
[keyword1 : keyword2: factor]
factor controls at which step keyword1 is switched to keyword2. It is a number between 0 and 1.
For example, if I use the prompt
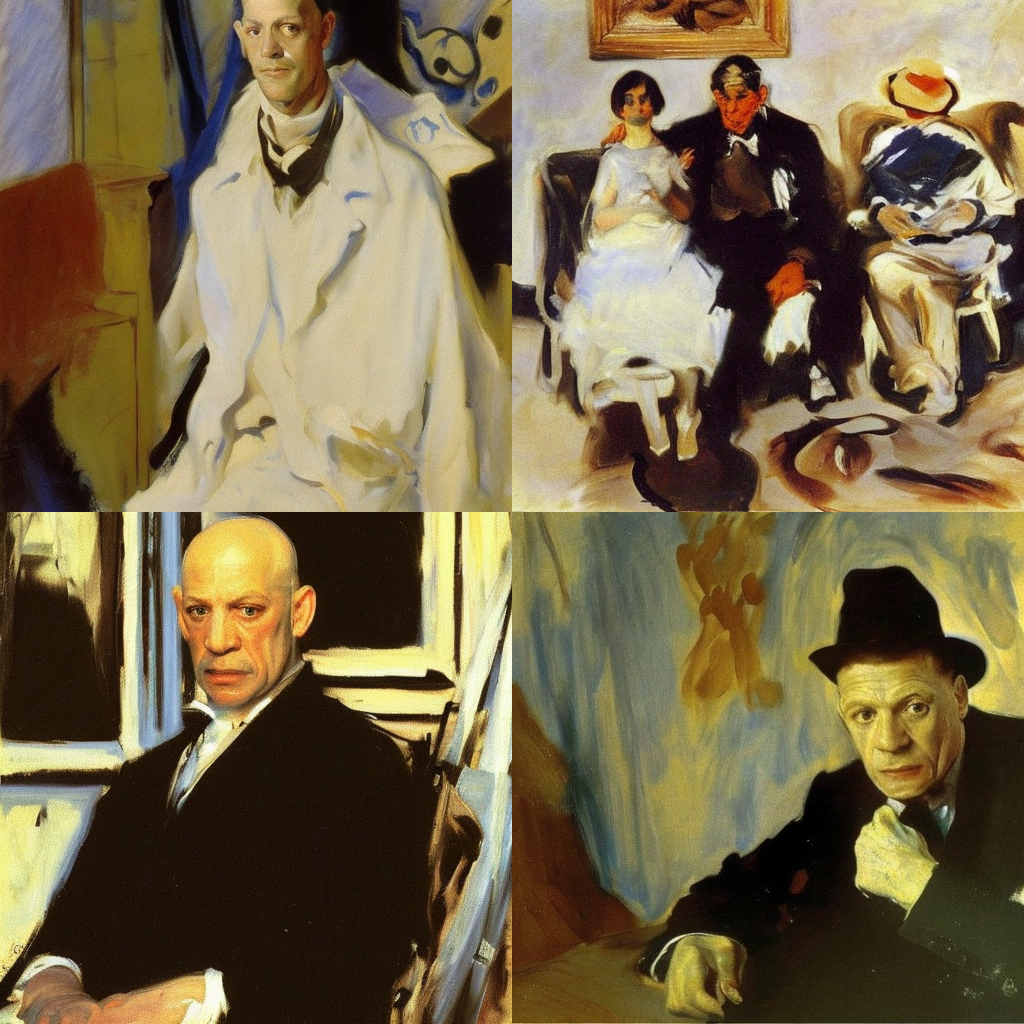
Oil painting portrait of [Joe Biden: Donald Trump: 0.5]
for 30 sampling steps.
That means the prompt in steps 1 to 15 is
Oil painting portrait of Joe Biden
And the prompt in steps 16 to 30 becomes
Oil painting portrait of Donald Trump
The factor determines when the keyword is changed. it is after 30 steps x 0.5 = 15 steps.
The effect of changing the factor is blending the two presidents to different degrees.
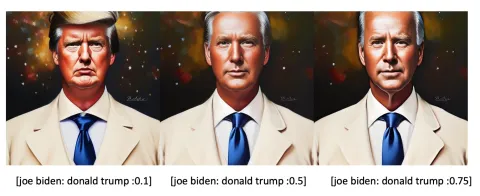
You may have noticed Trump is in a white suit which is more of a Joe outfit. This is a perfect example of a very important rule for keyword blending: The first keyword dictates the global composition. The early diffusion steps set the overall composition. The later steps refine details.
Quiz: What would you get if you swapped Donald Trump and Joe Biden?
Blending faces
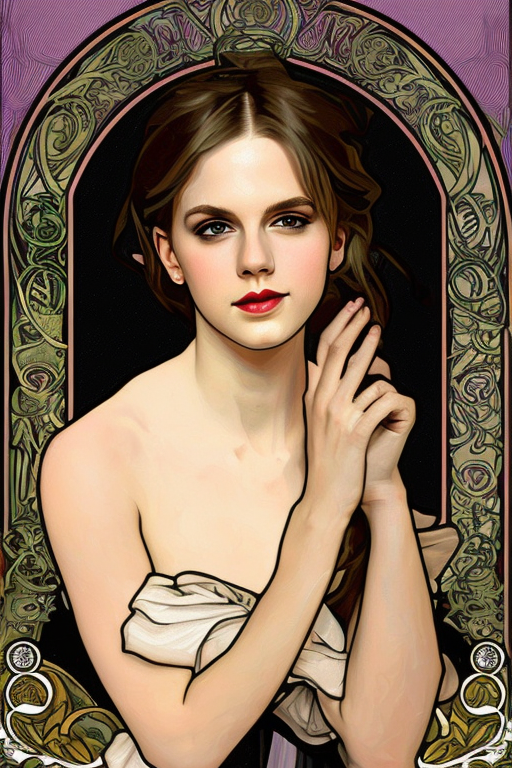
A common use case is to create a new face with a particular look, borrowing from actors and actresses. For example, [Emma Watson: Amber heard: 0.85], 40 steps is a look between the two:
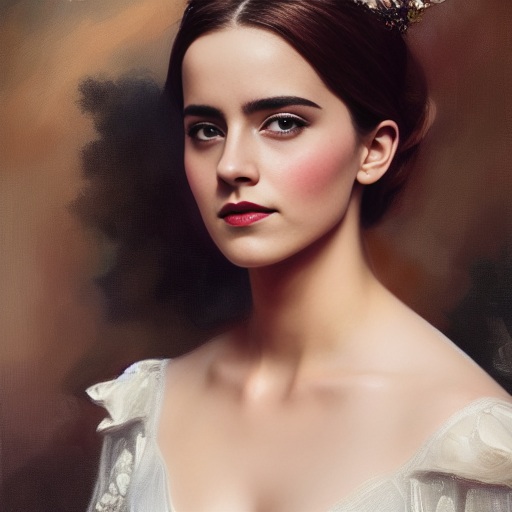
When carefully choosing the two names and adjusting the factor, we can get the look we want precisely.
Alternatively, you can use multiple celebrity names with keyword weights to adjust facial features. For example:
(Emma Watson:0.5), (Tara Reid:0.9), (Ana de Armas:1.2)
See this tutorial if you want to generate a consistent face across multiple images.
Poor man’s prompt-to-prompt
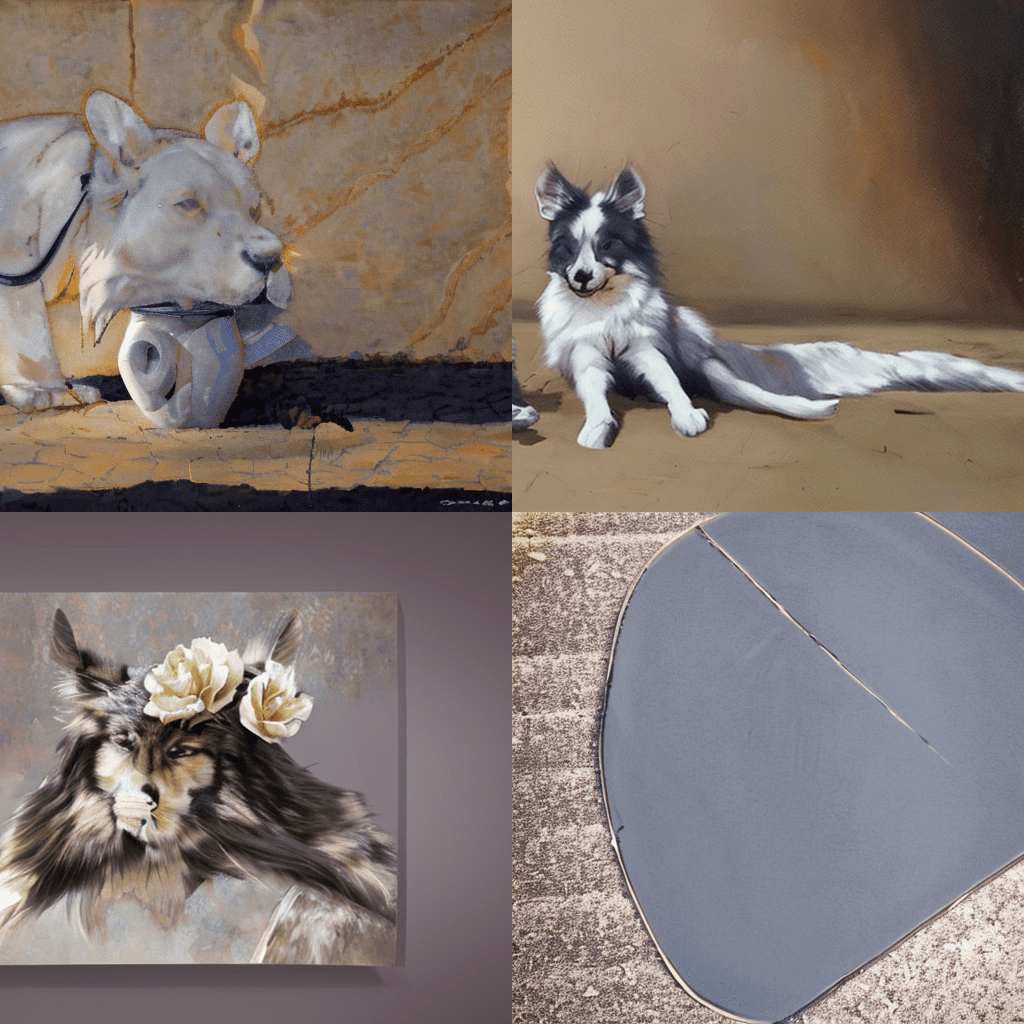
Using keyword blending, you can achieve effects similar to prompt-to-prompt, generating pairs of highly similar images with edits. The following two images are generated with the same prompt except for a prompt schedule to substitute apple with fire. The seed and number of steps were kept the same.
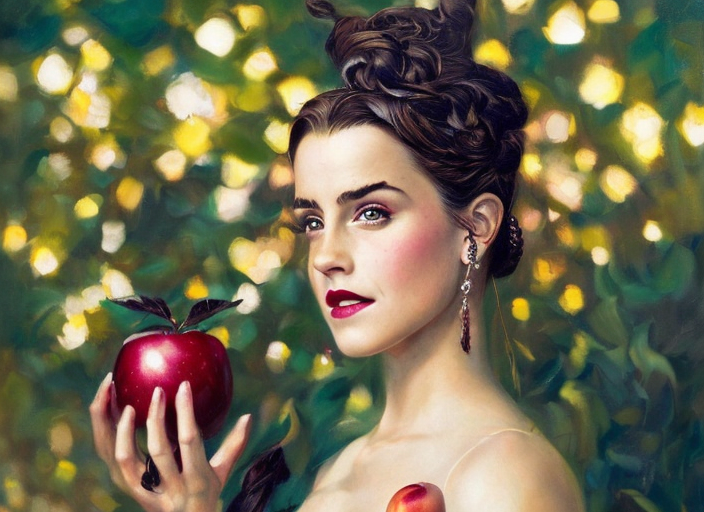
The factor needs to be carefully adjusted. How does it work? The theory behind this is the overall composition of the image was set by the early diffusion process. Once the diffusion is trapped in a small space, swapping any keywords won’t have a large effect on the overall image. It would only change a small part.
Consistent face
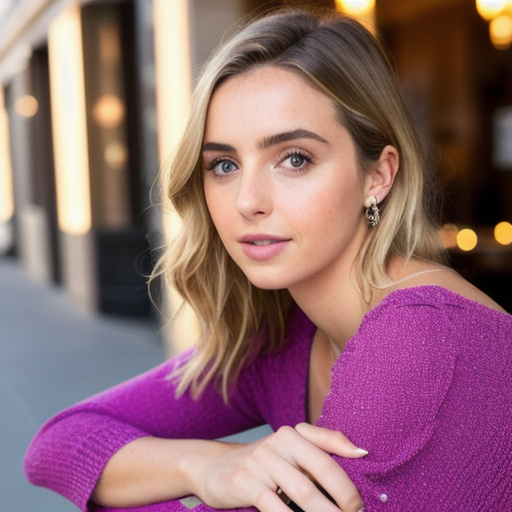
Using multiple celebrity names is an easy way to blend two or more faces. The blending will be consistent across images. You don’t even need to use prompt scheduling. When you use multiple names, Stable Diffusion understands it as generating one person but with those facial features.
The following phrase uses multiple names to blend three faces with different weights.
(Emma Watson:0.5), (Tara Reid:0.9), (Ana de Armas:1.2)
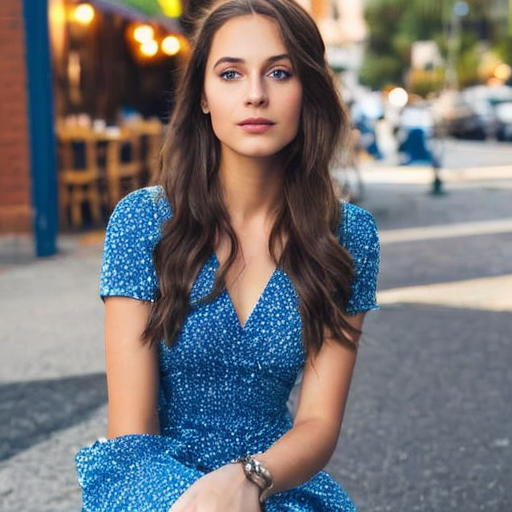
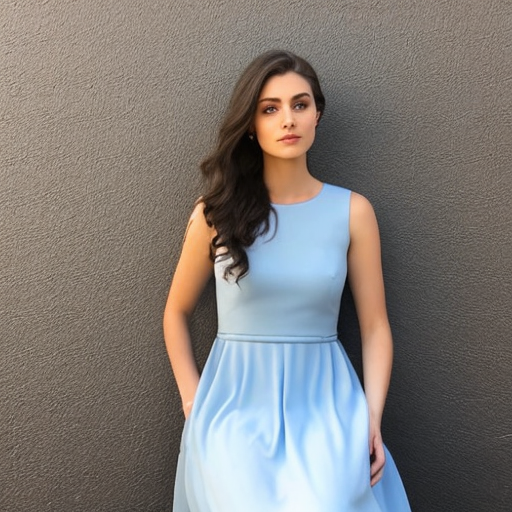
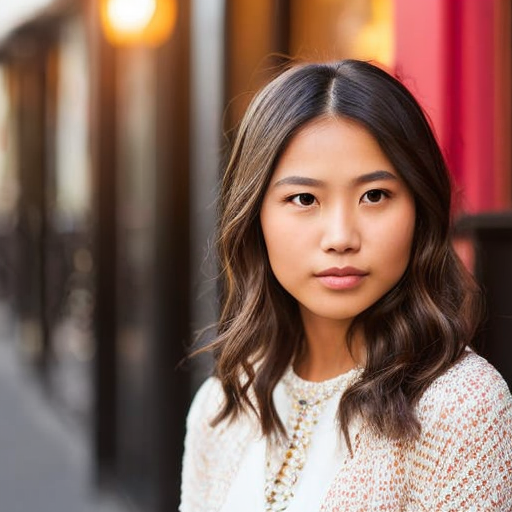
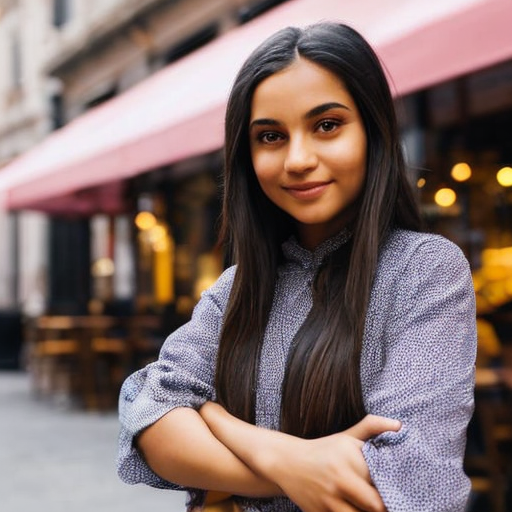
Putting this technique into action, the prompt is:
(Emma Watson:0.5), (Tara Reid:0.9), (Ana de Armas:1.2), photo of young woman, highlight hair, sitting outside restaurant, wearing dress, rim lighting, studio lighting, looking at the camera, dslr, ultra quality, sharp focus, tack sharp, dof, film grain, Fujifilm XT3, crystal clear, 8K UHD, highly detailed glossy eyes, high detailed skin, skin pores
Here are images with the same prompt:


See this face repeating across the images!
Use multiple celebrity names and keyword weights to carefully tune your desired facial feature. You can also use celebrity names in the negative prompt to avoid facial features you DON’T want.
See more techniques to generate consistent faces.
How long can a prompt be?
Depending on what Stable Diffusion service you are using, there could be a maximum number of keywords you can use in the prompt. In the basic Stable Diffusion v1 model, that limit is 75 tokens.
Note that tokens are not the same as words. The CLIP model Stable Diffusion automatically converts the prompt into tokens, a numerical representation of words it knows. If you put in a word it has not seen before, it will be broken up into 2 or more sub-words until it knows what it is. The words it knows are called tokens, which are represented as numbers.
For example, dream is one token and beach is another token. But dreambeach is two tokens because the model doesn’t know this word, and so the model breaks the word up to dream and beach which it knows.
Prompt limit in AUTOMATIC1111
AUTOMATIC1111 has no token limits. If a prompt contains more than 75 tokens, the limit of the CLIP tokenizer, it will start a new chunk of another 75 tokens, so the new “limit” becomes 150. The process can continue forever or until your computer runs out of memory…
Each chunk of 75 tokens is processed independently, and the resulting representations are concatenated before feeding into Stable Diffusion’s U-Net.
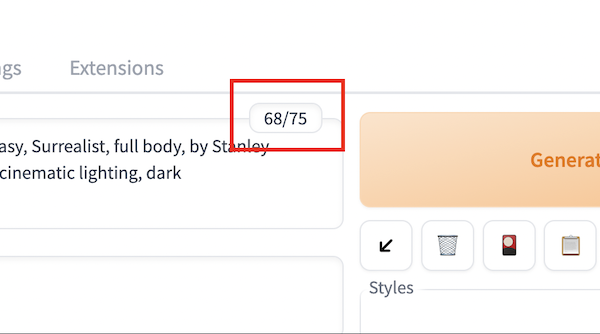
In AUTOMATIC1111, You can check the number of tokens by looking at the small box at the top right corner of the prompt input box.
Starting a new prompt chunk
What if you want to start a new prompt chunk before reaching 75 tokens? Sometimes you want to do that because the token in the beginning of a chunk can be more effective, and you may want to group related keywords in a chunk.
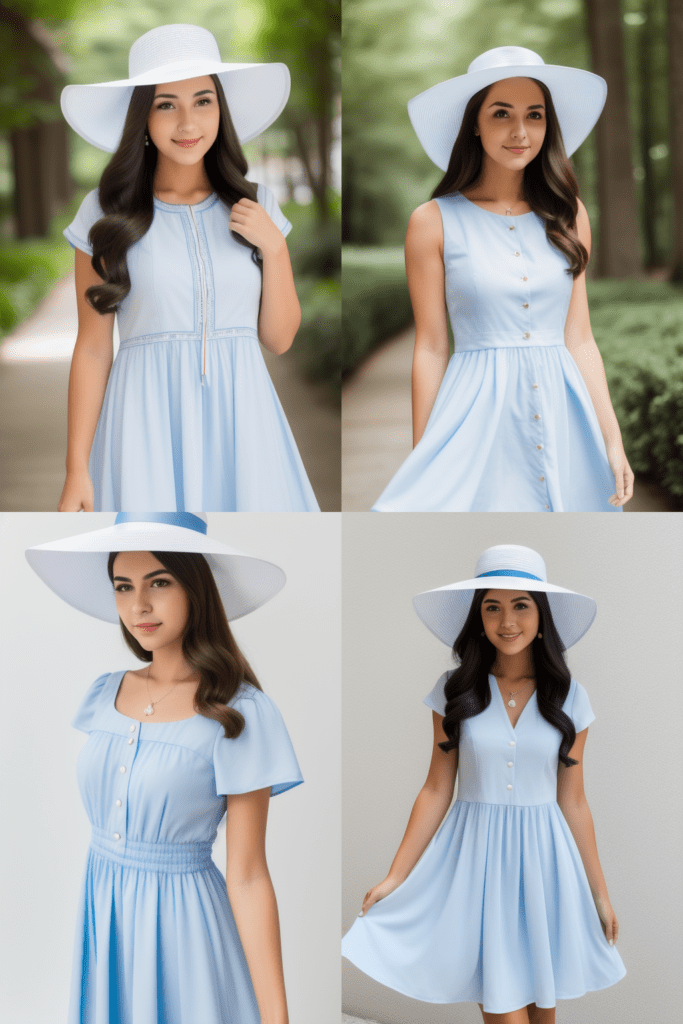
You can use the keyword BREAK to start a chunk. The following prompt uses two chunks to specify the hat is white and the dress is blue.
photo of a woman in white hat
BREAK
blue dress

Without the BREAK, Stable Diffusion is more likely to mix up the color of the hat and the dress.
Checking keywords
The fact that you see people using a keyword doesn’t mean that it is effective. Like homework, we all copy each other’s prompts, sometimes without much thought.
You can check the effectiveness of a keyword by just using it as a prompt. For example, does the v1.5 model know the American portrait painter John Singer Sargent? Let’s check with the prompt
John Singer Sargent
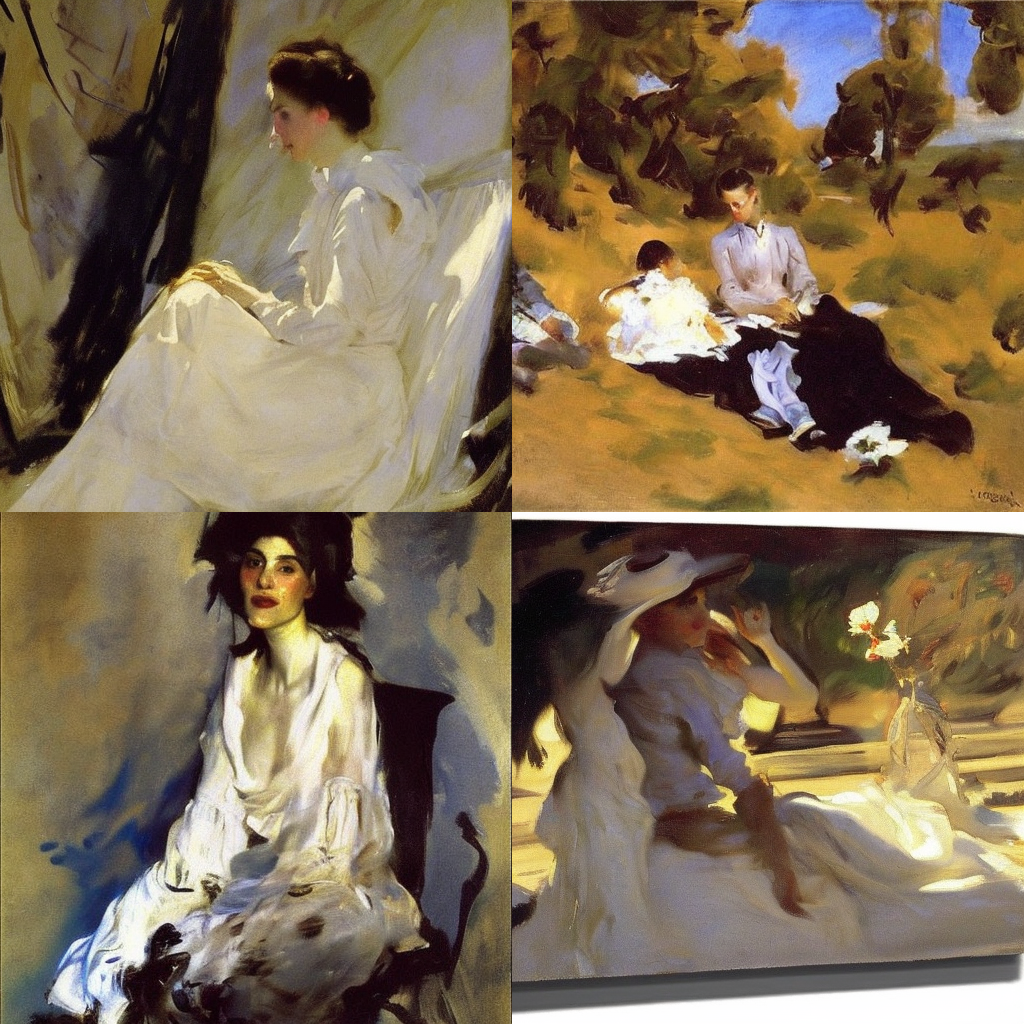
Positive!
How about the Artstation sensation wlop?
wlop
Well, doesn’t look like it. That’s why you shouldn’t use “by wlop”. That’s just adding noise.
You can use this technique to examine the effect of mixing two or more artists.
John Singer Sargent, Picasso
Limiting the variation
To be good at building prompts, you need to think like Stable Diffusion. At its core, it is an image sampler, generating pixel values that we humans likely say it’s legit and good. You can even use it without prompts, and it would generate many unrelated images. In technical terms, this is called unconditioned or unguided diffusion.
The prompt is a way to guide the diffusion process to the sampling space where it matches. I said earlier that a prompt needs to be detailed and specific. It’s because a detailed prompt narrows down the sampling space. Let’s look at an example.
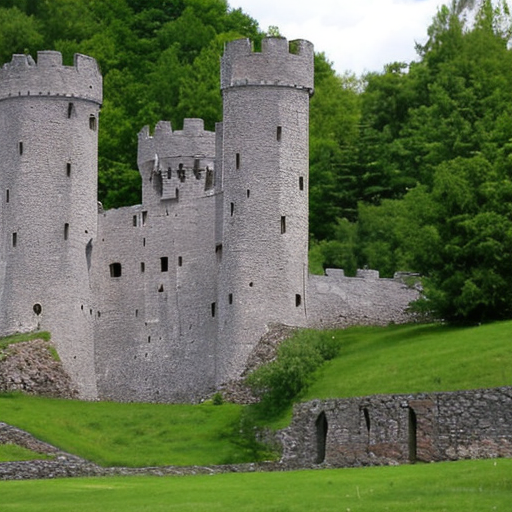
castle
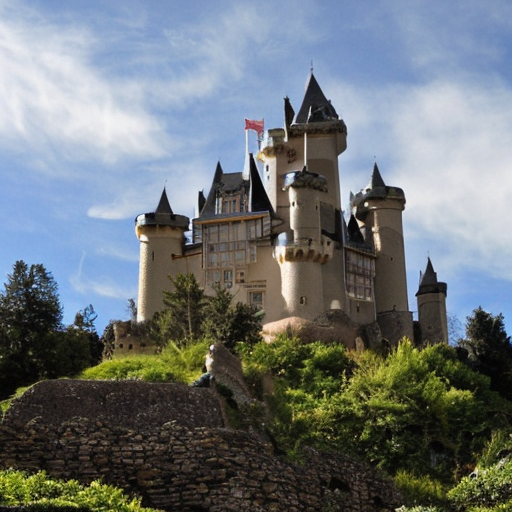
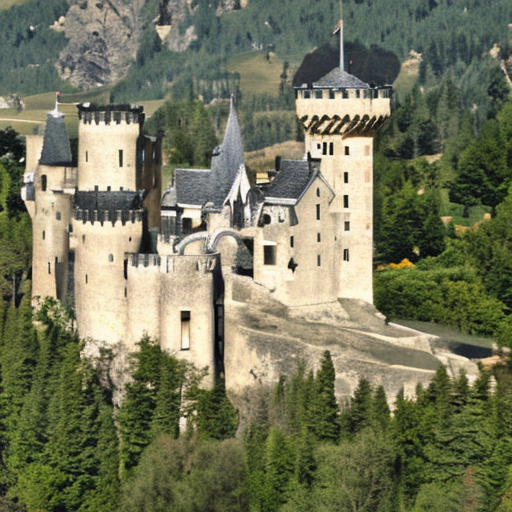
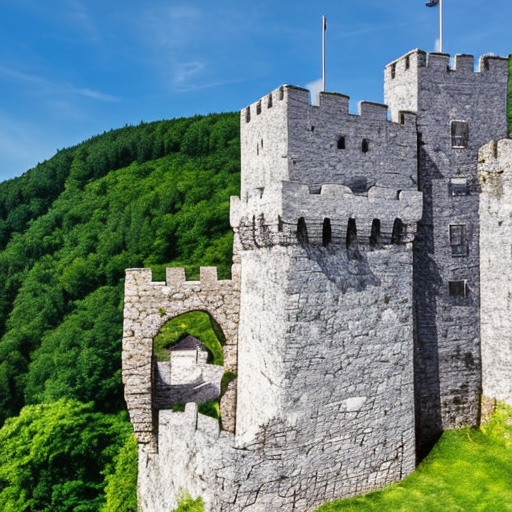
castle, blue sky background
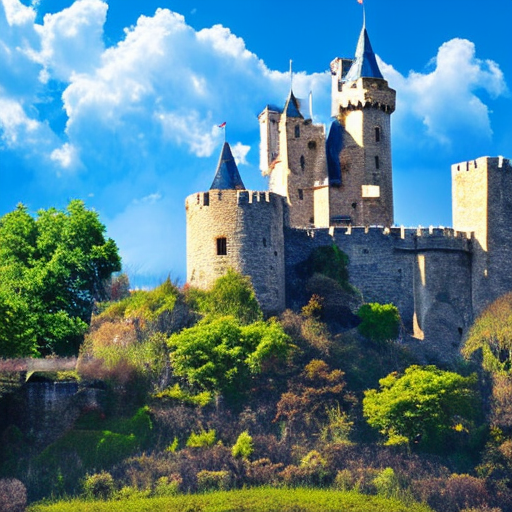
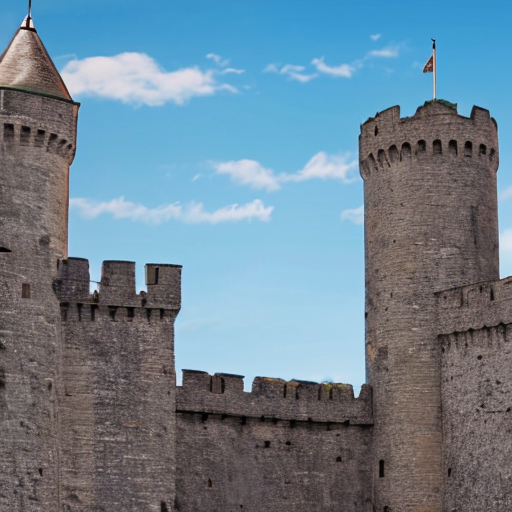
wide angle view of castle, blue sky background
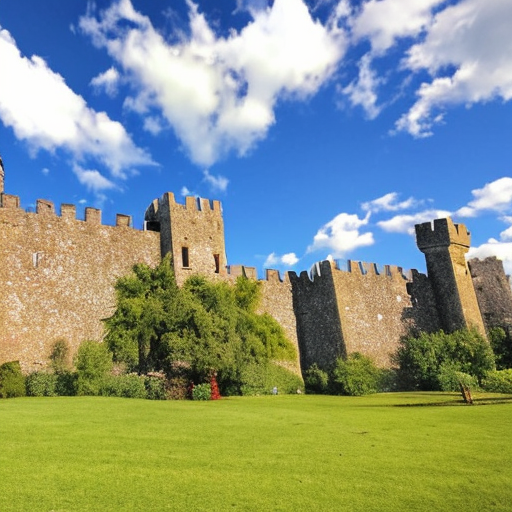
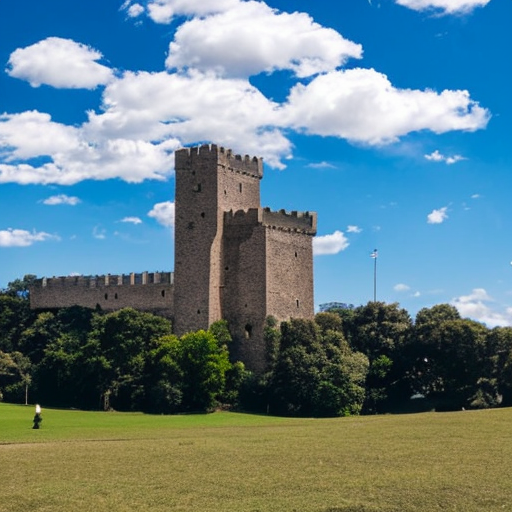
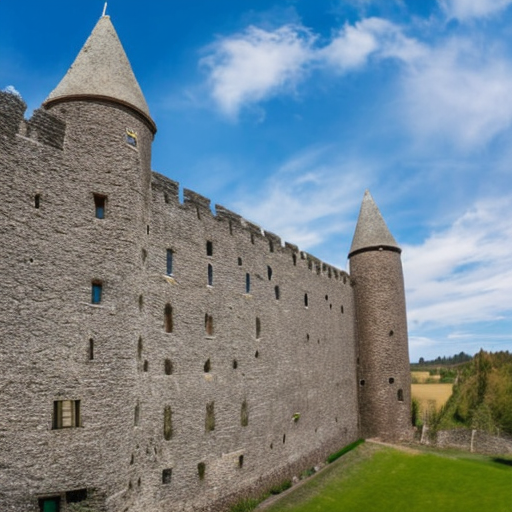
By adding more describing keywords in the prompt, we narrow down the sampling of castles. In We asked for any image of a castle in the first example. Then we asked to get only those with a blue sky background. Finally, we demanded it is taken as a wide-angle photo.
The more you specify in the prompt, the less variation in the images.
Association effect
Attribute association
Some attributes are strongly correlated. When you specify one, you will get the other. Stable Diffusion generates the most likely images that could have an unintended association effect.
Let’s say we want to generate photos of women with blue eyes.
a young female with blue eyes, highlights in hair, sitting outside restaurant, wearing a white outfit, side light
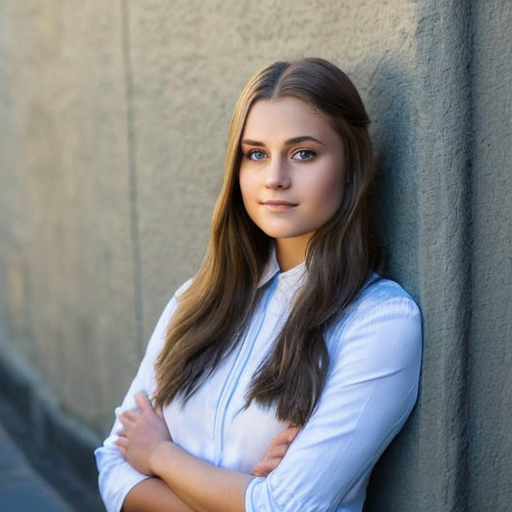
What if we change to brown eyes?
a young female with brown eyes, highlights in hair, sitting outside restaurant, wearing a white outfit, side light
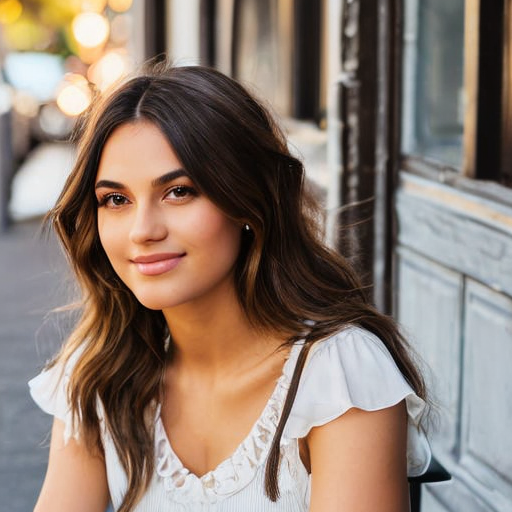
Nowhere in the prompts, I specified ethnicity. But because people with blue eyes are predominantly Europeans, Caucasians were generated. Brown eyes are more common across different ethnicities, so you will see a more diverse sample of races.
Stereotyping and bias is a big topic in AI models. I will confine to the technical aspect in this article.
Association of celebrity names
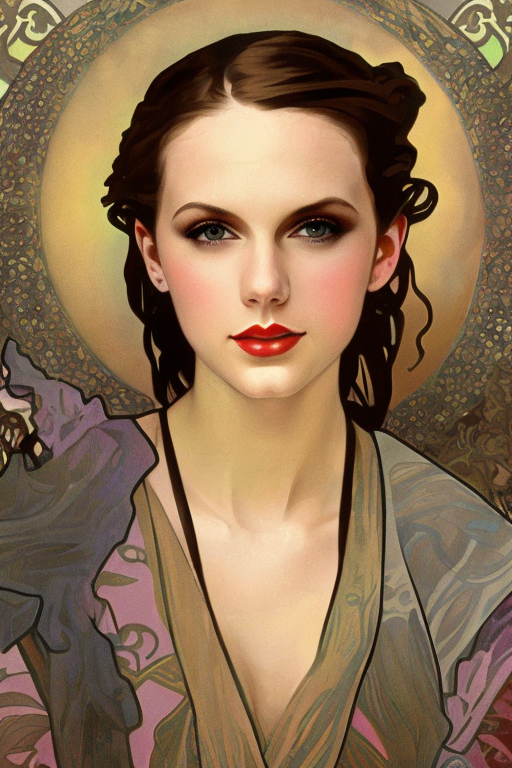
Every keyword has some unintended associations. That’s especially true for celebrity names. Some actors and actresses like to be in certain poses or wear certain outfits when taking pictures, and hence in the training data. If you think about it, model training is nothing but learning by association. If Taylor Swift (in the training data) always crosses her legs, the model would think leg crossing is Taylor Swift too.
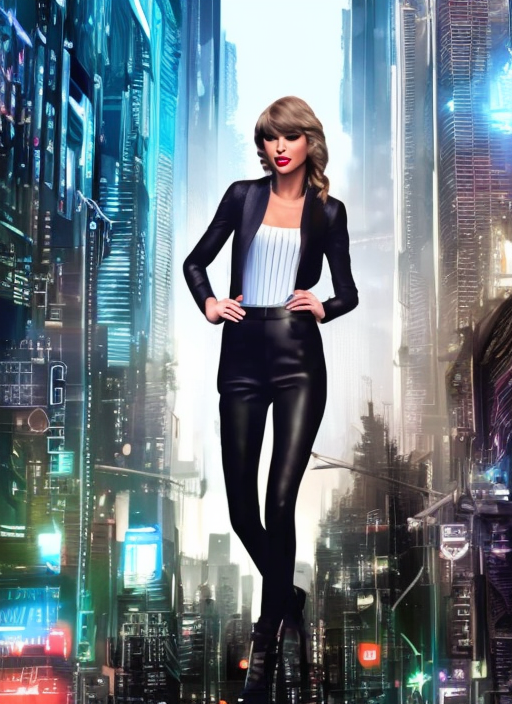
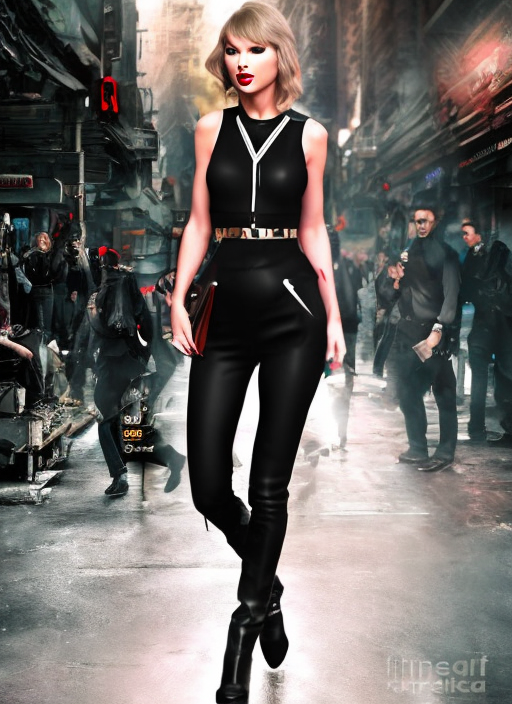
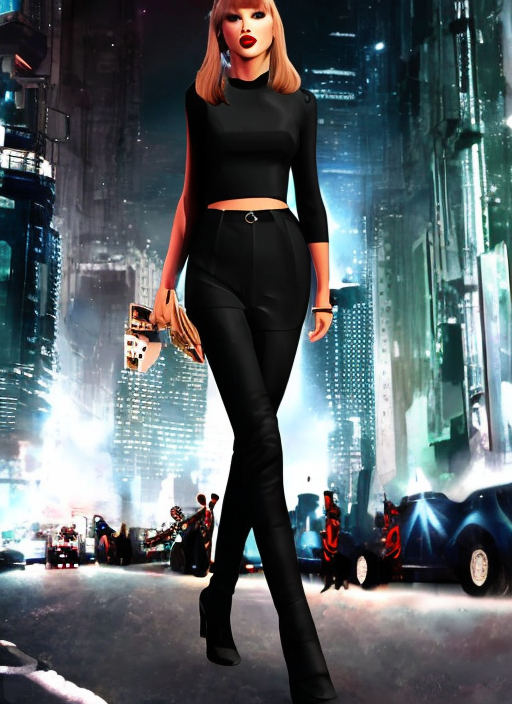
When you use Taylor Swift in the prompt, you may mean to use her face. But there’s an effect of the subject’s pose and outfit too. The effect can be studied by using her name alone as the prompt.
Poses and outfits are global compositions. If you want her face but not her poses, you can use keyword blending to swap her in at a later sampling step.
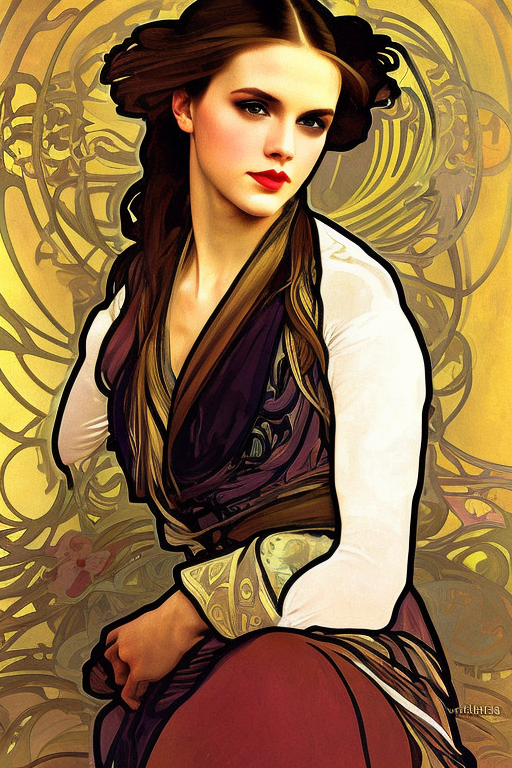
Association of artist names
Perhaps the most prominent example of association is seen when using artist names.
The 19th-century Czech painter Alphonse Mucha is a popular occurrence in portrait prompts because the name helps generate interesting embellishments, and his style blends very well with digital illustrations. But it also often leaves a signature circular or dome-shaped pattern in the background. They could look unnatural in outdoor settings.
Embeddings are keywords
Embeddings, the result of textual inversion, are nothing but combinations of keywords. You can expect them to do a bit more than what they claim.
Let’s see the following base images of Ironman making a meal without using embeddings.
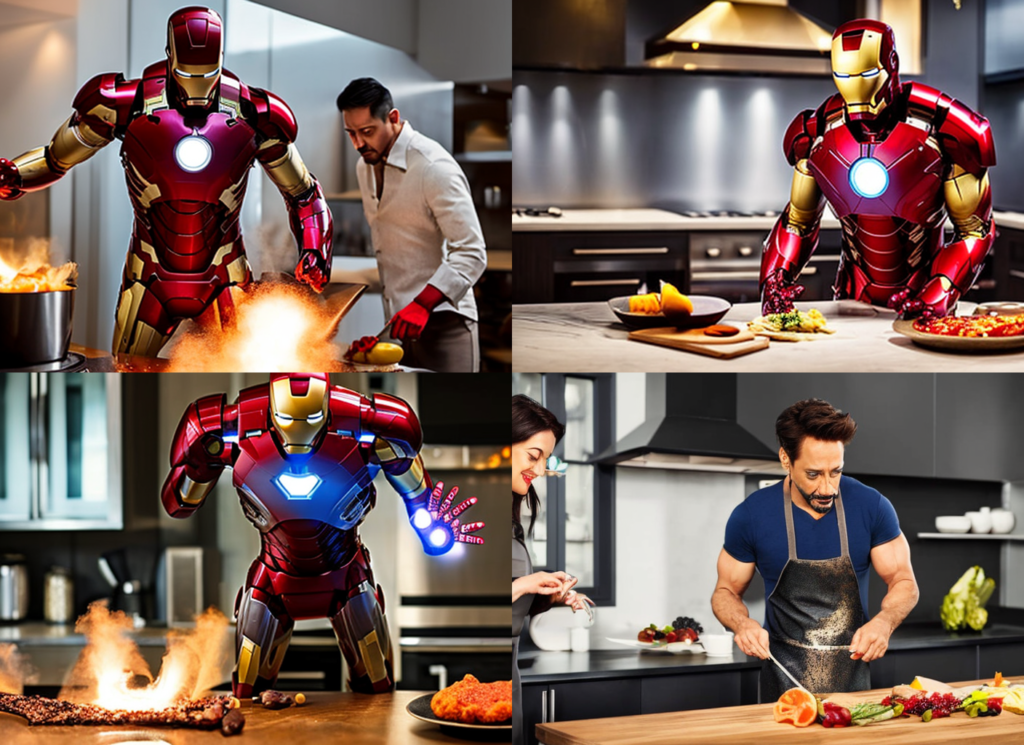
Style-Empire is an embedding I like to use because it adds a dark tone to portrait images and creates an interesting lighting effect. Since it was trained on an image with a street scene at night, you can expect it adds some blacks AND perhaps buildings and streets. See the images below with the embedding added.
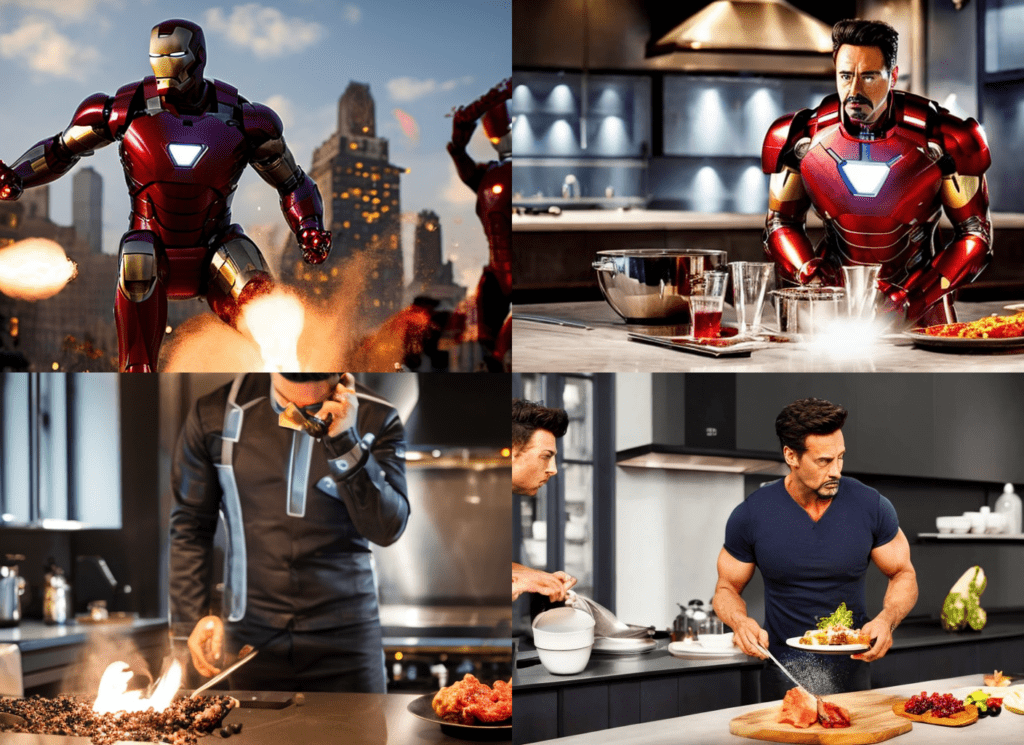
Note some interesting effects
- The background of the first image changed to city buildings at night.
- Iron man tends to show his face. Perhaps the training image is a portrait?
So even if an embedding is intended to modify the style, it is just a bunch of keywords and can have unintended effects.
Effect of custom models
Using a custom model is the easiest way to achieve a style, guaranteed. This is also a unique charm of Stable Diffusion. Because of the large open-source community, thousands of custom models are freely available.
When using a model, we need to be aware that the meaning of a keyword can change. This is especially true for styles.
Let’s use John Singer Sargent as the prompt with the Stable Diffusion v1.5 model.

Using the DreamShaper with the same prompt, a model fine-tuned for realistic portrait illustrations, we get the following images instead.
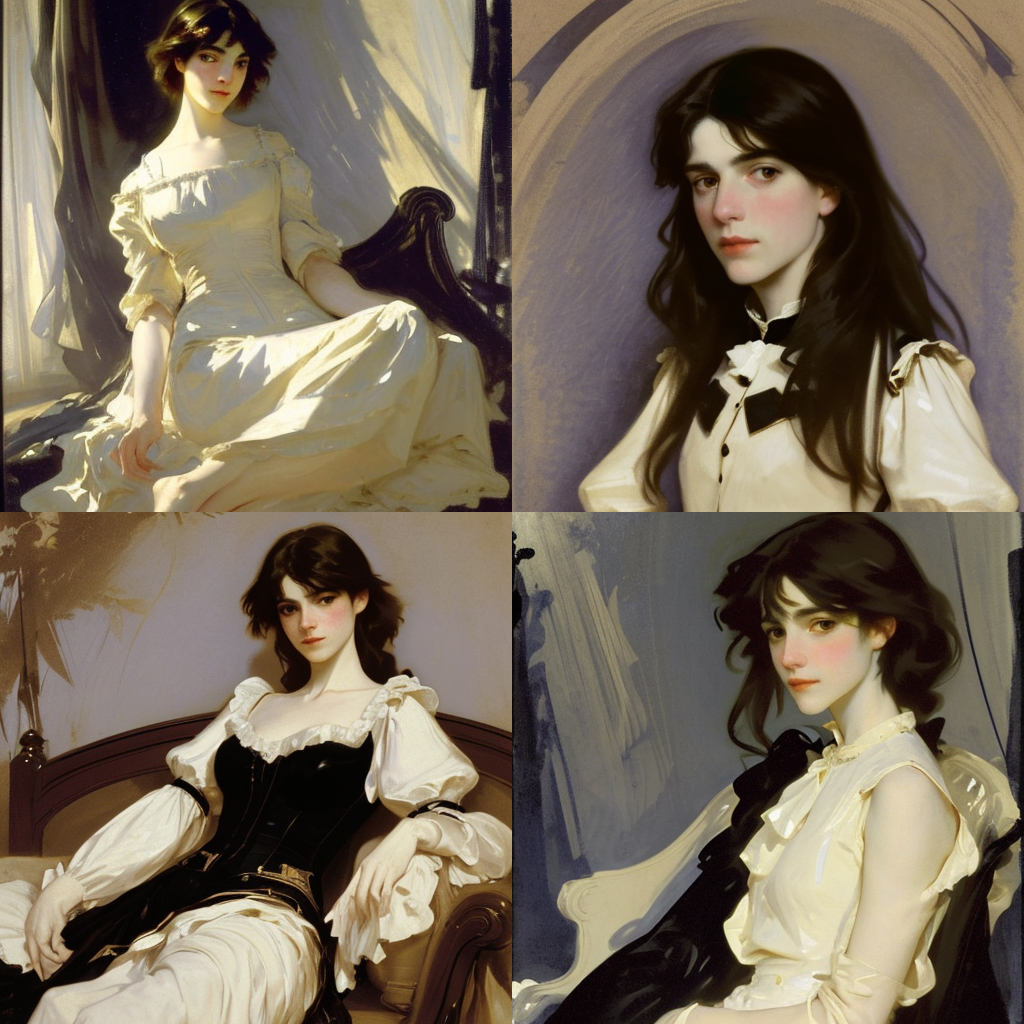
The style becomes more realistic. The DreamShaper model has a strong basis for generating clear and pretty woman faces.
Check before you use a style in a custom model. van Gogh may not be van Gogh anymore!
Region-specific prompts
Do you know you can specify different prompts for different regions of the image?
For example, you can put the moon at the top left:

Or at the top right:
You can do that by using the Regional Prompter extension. It’s a great way to control image composition!
Great article. One thing I’m struggling with is controlling the face direction. Can be hit or miss though not sure it’s actually using any of my suggestions or just after a number of generations the head is in the appropriate direction. Example if I want the subject to be facing the camera and the head looking up, don’t seem to have the magic sauce to make it do that. Thoughts?
For specific face orientation, controlent is a better option.
good article
Hi there
İyi çalışmalar ve teşekkür ederim!
Very helpful, thank you. I use Sea Art, and have trouble getting full body images even if I prompt “full body”, “wide angle”, or “zoom out”. I even negative prompt (closeup) sometimes and tend to get head shots more often than not. Any advice is appreciated.
changing the aspect ratio in portrait should do. Next is to describe what you would see in a full body pic: dress, shoe, legs, etc
> white hat
> BREAK
> blue dress
doesn’t work for me. It still mixes up colors
It is just more likely to work but doesn’t work all the time. Use regional prompter for a more proper technique.
your information is very usefull and upgrade my knowledge. keep goin with it.
id pro poker online
güzel bir makale teşekkürler
sexist image of which in the beginning is frustrating. seem like the porn image style is the new normal.
just take in the information that you need. stop focusing on silly things.
Have you seen any girl before in your life? Just a 2D AI image of a female subject is “sexist” and “porn image style” to you? Go outside, touch some grass and maybe leave the internet.
Does it have to be an art sharing website to be used as a prompt or can it be any website that have images?
Es muy bueno nomás le quedan las fotos chuequitas
Cómo utilizar mima imagen de persona en distintas circunstancia como secuela de imágenes
This is a valuable and informative post, thanks for sharing.
very good
Este está sendo o melhor aprendizado que obtive sobre GENAI
Tenho 72 anos e estas vivências digitais tem dado uma nova dinâmica a minha vida…o Senhor lhe abençoe
Hi Andrew, thanks for your wonderful explanation. My progress was successful until I downloaded the web-ui from AUTOMATIC1111. However, I encountered an issue: ‘fatal: unable to access ‘https://github.com/AUTOMATIC1111/stable-diffusion-webui.git/’: error setting certificate file: E:/Stable diffusion/mingw64/etc/ssl/certs/ca-bundle.’ I noticed that someone else had a similar problem, but I still don’t know how to solve it.
Es muy buena
Bonjour Mbengue ! Je suis heureuse de vous avoir croisé Cependant, je ne suis pas sûr de comprendre exactement ce que vous voulez que l’on face pour amélioré le cour des évènements
Un petit texte de salutation qui invite à entreprendre des événements”. Pourriez-vous s’il vous plaît me donner plus de détails spécifiques pour que nous puissions mieux servir.
Je suis à votre écoute pour entreprendre des évènements surtout en plus des images .😊
Merci,espérons que vous
Voyez ce que je veux dire .
Je fier de vos explications 🥶 je vous recommande vivement
So good 😊😊😊
Hi. What keyword I should use to get full object if it’s not a human (it’s a tank for example)? I see only a front part of a tank when I type “a tank” in prompt. What if I want to see the right/upper right side of my object?
Hi! You can try changing the viewing angles, like side view, wide angle view, etc
Hi, all your tutorials are very interesting. I haven’t figured out how to do a full figure without cutting off the head and legs. Can you give me some advice?
Hi, try these simple tricks. let me know how it goes.
https://stable-diffusion-art.com/common-problems-in-ai-images-and-how-to-fix-them/#Not_showing_full_body_problems
Very good
Lol. Using the same actress 11 times is to limit the randomisation of the output, and isolate the prompt variables impact he’s teaching. You really chose to rant about something you know nothing about, and assume things about someone you know nothing about. Repulsive….
(())=()^2
I seriously can’t believe I just read this. You honestly wasted your time to say this? Is this how you think? You have some issues. Please get off the internet and do some self reflection.
/imagine
Désine moi une bouteille absinthe de Paris une belle bouteille avec la Tour Eiffel
//imagine
Désine moi une bouteille absinthe de Paris une belle bouteille avec la Tour Eiffel
Es muy buena
misogyny???????? Dude… if it was about a guy you would have nothing to say. misogyny is about a guy making a girl feel less. but apricating her. if this misogyny then all guys should just burn out their eyes….
Thanks for the tutorial, but why all the misogyny?
“We get Emma Watson 11 out of 10 times. Her name is such a strong effect on the model. I think she’s popular among Stable Diffusion users because she looks decent, young, and consistent across a wide range of scenes. Trust me, we cannot say the same for all actresses, especially the ones who have been active in the 90s or earlier…”
We get Emma Watson because her identity is constantly stolen for pornographic purposes—look up deepfake porn, her identity is stolen more than any other celebrity. And why the 90s reference with the ellipsis? Why rag on women who are 30 years or older? Why are you afraid of older looking women? Emma Watson is 33 years old.
This is useful information, but it’s so discouraging to see misogyny rampant in the AI community.
This guy gives all the answers to the test, and your biggest issue is he used more women? Well if it helps, the artistic representation of women is a more difficult test to the AI than of men; now, if you want to make it more in your fashion then why don’t you make a few models, LoRA’s or what have you, and develop them in the other direction than complain about the examples in the subject matter.
My comment was on technical aspect of Stable Diffusion v1.5 model. It has something to do with the timing of training and perhaps bias in training data that she looks exceptionally good among all actresses.
I don’t watch deep fake porns so I don’t know how common her identity got stolen. But I think it is irrelevant to why she stands out so well in the model.
It’s an effect that multiplies the keyword by 1.1 in the case of ( ) and by .9 in [ ]. For example (dog) is same as (dog:1.1) but shorter, so If you would like more dog increased 10% to the actual value you can just ((dog)) instead of (dog:1.21) and calculate faster. Same concept with [ ], [dog] == (dog:0.9) and also [[dog]] == (dog:0.81)
how to transform man photo to a beautiful transwomen? Pls guide
Hola.
Great tutorials, thanks
I don’t understand correcty between single, double and triple (), []
Let’s see if I can help explain syntax another way using the same example Andrew gives. (No offence Andrew. I love you stuff and it really helps me enormously. Great work)
Ok let’s say you wanted to create an image looking like a “painting of Paris by Norman Rockwell”. Andrew gives us the whole prompt with many artists etc – but for the sake of simplicity I’m going to narrow it down to 5 keywords but try to keep the feeling. We are going to try to manipulate the “dog” keyword.
> dog, autumn in paris, mist, rain, by norman rockwell.
When I run this I usually get one dog but some times more. We’re saying that the factor of this keyword as it stands alone is 1. by Factor we mean the strength of that keyword on the creation of the image. For my own peace of mind I imagine that the factors range of influence can go from 0 to 2. e.g. a weight of 0 would mean that the keyword has no influence at all. However in practice I’ve been told 0.5 to 1.5 are the useful factors before it starts to break the process. Experiment at leisure.
Ok back to “dog”.
> dog, autumn in paris, mist, rain, by norman rockwell.
Let’s say I want the “dog” keyword to be MORE influential because I want more dogs appearing in my image. You could do the same with “rain”. To make the factor of dog increase I could put curved brackets around it. Everytime I put an additional pair around the keyword it would increase it’s influence by 0.1 or 10%. So if I wanted dog to have a factor of 1.2 I would put two pairs of curved brackets around it and write:
> ((dog)), autumn in paris, mist, rain, by norman rockwell.
Let’s say I now want “mist” keyword to be LESS influential because I want to see further in my image. To make the factor of mist decrease I could put square brackets around it. Every time I put an additional pair around the keyword it would decrease it’s influence by 0.1 or 10%. So if I wanted mist to have a factor of 0.7 (or 30% less effective) I would put three pairs of square brackets around it and write:
> ((dog)), autumn in paris, [[[mist]]], rain, by norman rockwell.
Alternatively, you can also write the factor by placing the keyword in curved brackets and writing the factor after the keyword separated by a colon “:” character. e.g. our example would look like:
> (dog:1.2), autumn in paris, (mist:0.7), rain, by norman rockwell.
Hope that helps.
Let me know if I got any wrong
Some of these images were clearly generated by MidJourney and not SD.
They are all generated with SD.
Whatever AI I use, if I want the photo to start from a photo of me that I upload online, then the result is that the face, height, or everything of the subject of the photo I uploaded always changes. How to NOT change the subject but maybe just the landscape, or clothing?
This cannot be done with prompt alone. You can use inpainting to change just a part of the image, e.g. clothing and background.
https://stable-diffusion-art.com/inpainting_basics/
You will need to train a dreambooth model if you want to generate yourself.
https://stable-diffusion-art.com/dreambooth/
I didn’t learn anything from this but my eyes are blessed to see emma watson in this
Thanks for the reply. Yeah, Inpainting right now is generally how I fix the issue as its easy to handle that way. I just wanted to check if I was missing something or if there was a way to get it to actually associate colors more accurately without requiring the extra steps. Some character or some prompt type I did not know about like an underscore between words or something. Since sometimes the color bleed is really bad, completely altering the entire composition, which makes inpainting a bit more work.
Is there a way to get colors to follow specific guides, for example, in your prompt when you asked for Blue eyes and a White dress you ended up with blue applying to both the eyes AND the dress, with the dress completely ignoring your specified color. Any time I specify two different colors I can almost never get it to actually do what I want. If I ask for say a purple top and white pants, 90% of the time I will end up with either everything purple, or everything white, or with purple pants and white top instead, doing the opposite of what I asked. On top of that all sorts of other objects in the image will be changed to purple or white. I could say a woman sitting under a waterfall in a white top with purple pants and ill end up with a woman sitting under a purple waterfall, with half the rocks being purple, and a purple top. Even if I specifically group and add weights to things. So a woman sitting under a waterfall in a (purple top), and (white pants:1.4). The colors will STILL almost always ignore what I am specifying. Even if I run a script to test this same prompt across 20 different models of all varieties, it will be messed up in every single model. Am I missing something on how to directly tie the aspect of a color to a specific part of the image? Thanks. 🙂
I think this is a limitation of v1 models. The language model is simply not good enough to deal with the complexity. You can try v2.1 models.
Alternatively, make your creation a multi-step process. Correct the color with inpainting.
Use img2img for that! Draw a crude composition in a drawing software of the things you want colored the way you want, and send it to Stable’s Diffusion’s img2img feature with a strength of like 95. If that doesn’t work, use a strength of 60 to get something awful, then reinsert it again with a strength of 60, over and over, until you get a picture that matches your colors.
If you don’t know how to compose it, just get your generation that will be wrong, and crudely paint over the elements with the color that you want them, and do the above steps. I recommend this method over inpainting because all the time img2img gives me better results than whatever I was generating initially, the more times a picture is sent through img2img the better it gets, and you can even change the prompt between passes for best results.
Sometimes I get something that leaves me in awe and think “this is it”, because it doesn’t even look like something generated by AI anymore. And I’m talking about sending an image 20 times through img2img, changing prompts, copying over pieces of old generations that were the best (which can be done crudely) and using the next img2img to make them blend in. And, of course, using img2img with different models.
SD1.5 isn’t good at composition, anime models like Anything V4 (from dezgo) make great compositions, but then everyone looks the same, but you can send them to img2img to a model like Epic Diffusion and get great output. I’ve been unable to draw certain things no matter what prompts I use, but can produce them in Anything V4 and then use img2img to redraw them in more varied styles, specially, Anything V4 can do good photorealism too, all you need to do is fix the anime face (because once it’s in the picture SD recognizes it even if no prompt will produce it.)
As a last tip, if you’re generating cartoons, try adding “by KlaysMoji” at the beginning of your list of artists to give them a nice spin ?
This is an excellent tutorial, thank you for sharing.
One thing I noticed was that when I introduced the negative prompts, the images produced had multiple faces. Emma Watson’s face and head had another Emma Watson face and head on the original one. Some images had two faces and bodies merged/intertwined.
Hi, it should have more to do with the size of the image. The native resolution of SD v1 is 512×512. It will generate two heads or bodies if you deviates too much from it.
So thats what it is! I was wondering why when I try and do like a tall 2:3 picture they usually end up with a second torso at the bottom.
0628033082
realy good article. Thanks!
Thanks for the explanation!
I was wondering what () and [] did for the people that are already working with SD a bit longer.
It was clear that it highlighted stuff in positive and negative, but not by how much!
Now i know.
las imagenes salen borrosas y nose como hacer para que se vea.
Good Job and thank you !