Are you looking for ways to generate consistent faces across multiple images with Stable Diffusion? You may be working on illustrations of a storybook or a comic strip. In this post, you will find 3 methods to generate consistent faces.
- Multiple celebrity names
- Face swap with Reactor
- Dreambooth
- LoRA
- ControlNet IP adapter face
Table of Contents
Software
We will use AUTOMATIC1111 Stable Diffusion GUI. You can use this GUI on Windows, Mac, or Google Colab.
Check out the Quick Start Guide if you are new to Stable Diffusion.
Method 1: Multiple celebrity names
Using celebrity names is a sure way to generate consistent faces. Let’s study the following base prompt, which generates a generic face.
Base prompt:
photo of young woman, highlight hair, sitting outside restaurant, wearing dress, rim lighting, studio lighting, looking at the camera, dslr, ultra quality, sharp focus, tack sharp, dof, film grain, Fujifilm XT3, crystal clear, 8K UHD, highly detailed glossy eyes, high detailed skin, skin pores
We will use the same negative prompt for the rest of this article.
disfigured, ugly, bad, immature, cartoon, anime, 3d, painting, b&w
They are nice faces, but they are different. There are occasions when you want to generate the same face across multiple images.
As we have studied in the prompt guide, celebrity name is a powerful effect. Using them is a proven way to generate consistent faces.
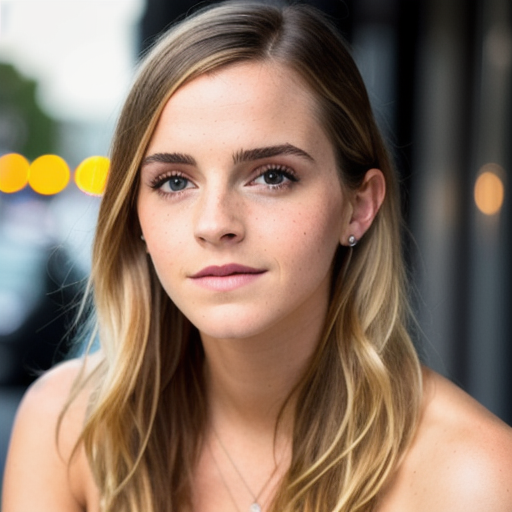
Let’s add a strong name in Stable Diffusion — Emma Waston, to the prompt.
Emma Watson, photo of young woman, highlight hair, sitting outside restaurant, wearing dress, rim lighting, studio lighting, looking at the camera, dslr, ultra quality, sharp focus, tack sharp, dof, film grain, Fujifilm XT3, crystal clear, 8K UHD, highly detailed glossy eyes, high detailed skin, skin pores
We get Emma in all images.
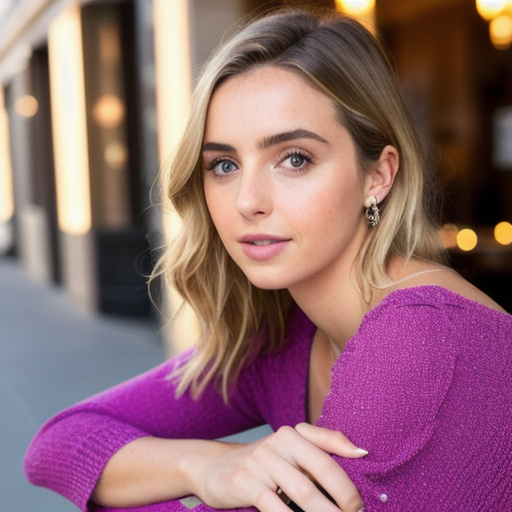
But what if you don’t want images of any recognizable face? You just want a generic face in multiple images. There’s a technique for that. You can use multiple celebrity names to blend their faces into a single, consistent face.
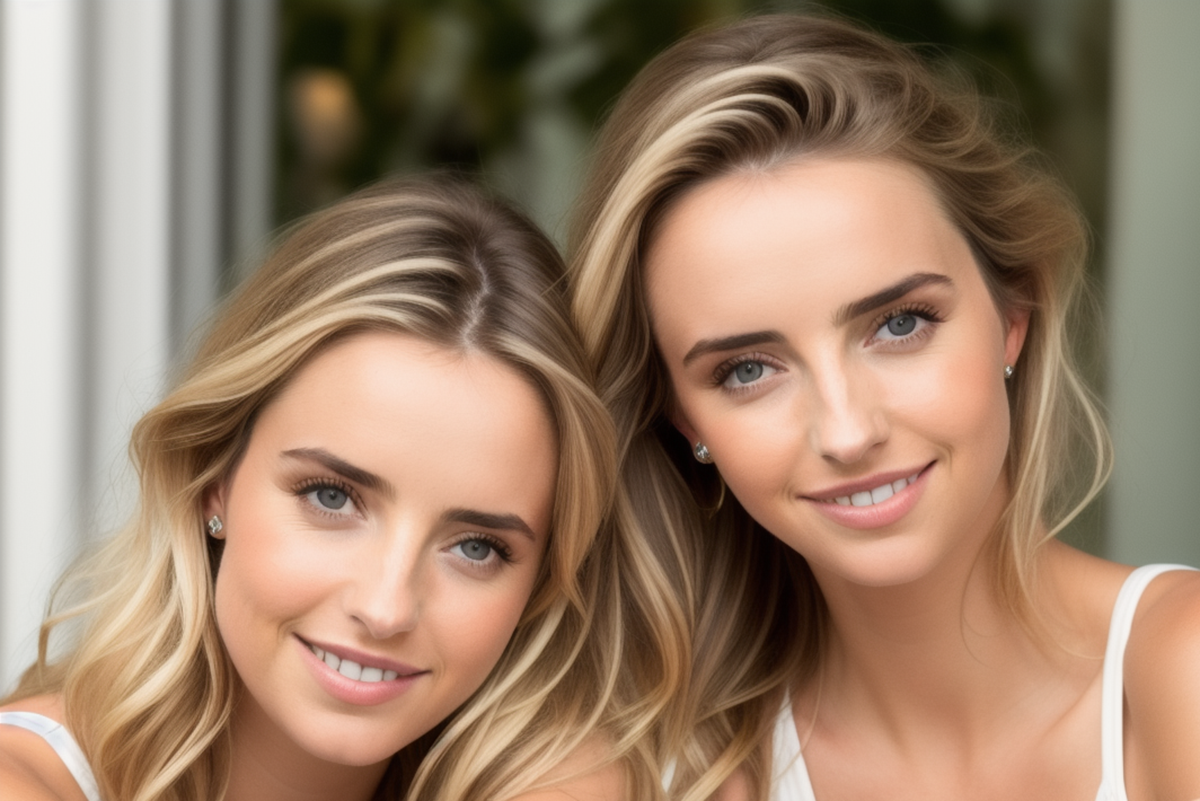
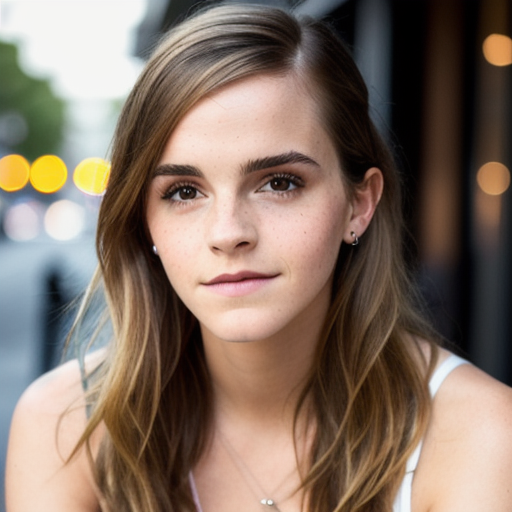
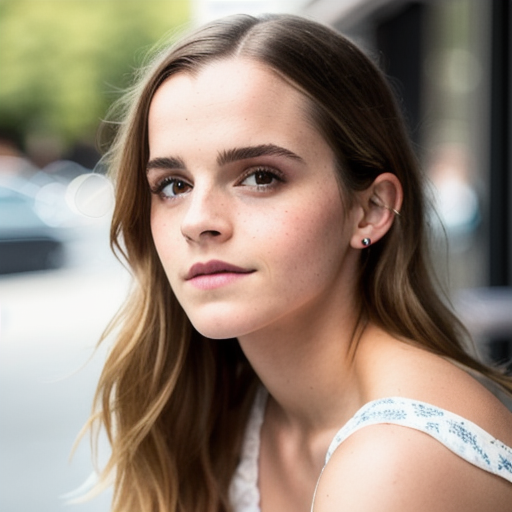
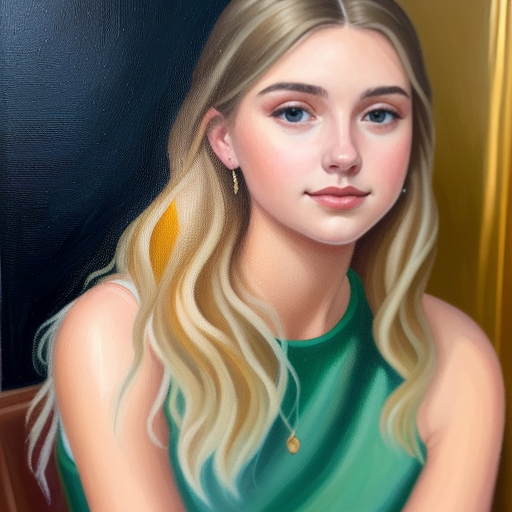
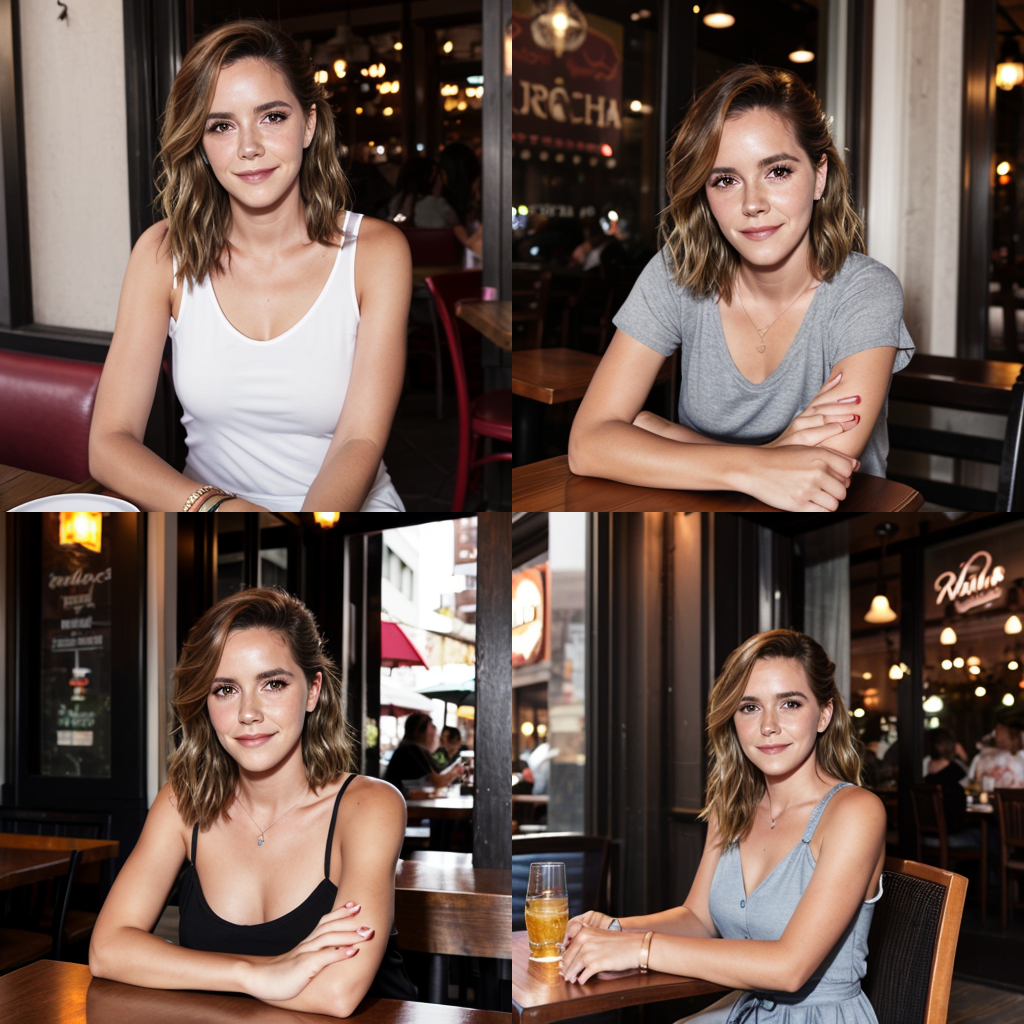
Let’s use these three names: Emma Watson, Tara Reid, and Ana de Armas. Stable Diffusion will take all 3 faces and blend them together to form a new face.
Emma Watson, Tara Reid, Ana de Armas, photo of young woman, highlight hair, sitting outside restaurant, wearing dress, rim lighting, studio lighting, looking at the camera, dslr, ultra quality, sharp focus, tack sharp, dof, film grain, Fujifilm XT3, crystal clear, 8K UHD, highly detailed glossy eyes, high detailed skin, skin pores

That’s good. The face is consistent across these images. But why do they look so… Emma? The reason is Emma Watson is a very strong keyword in Stable Diffusion. You have to dial her down using a keyword weight. In AUTOMATIC1111, you use the syntax (keyword: weight) to apply a weight to a keyword.
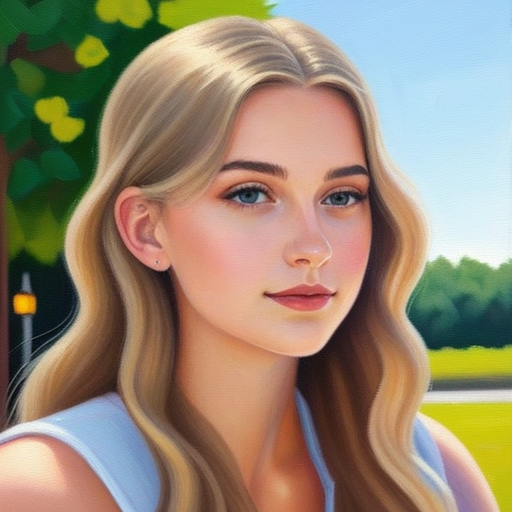
Adjusting the weights of each name allows you to dial in the facial feature. We arrive at the prompt:
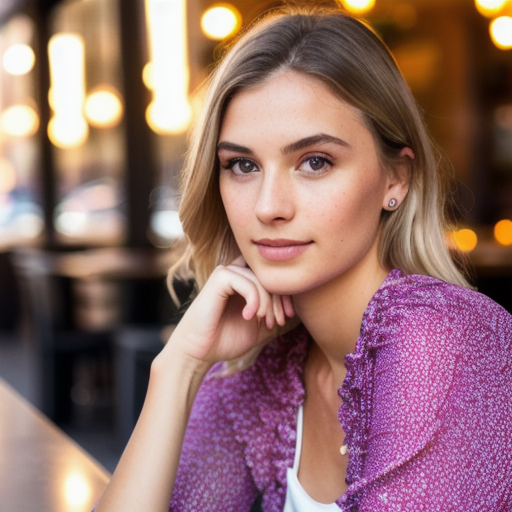
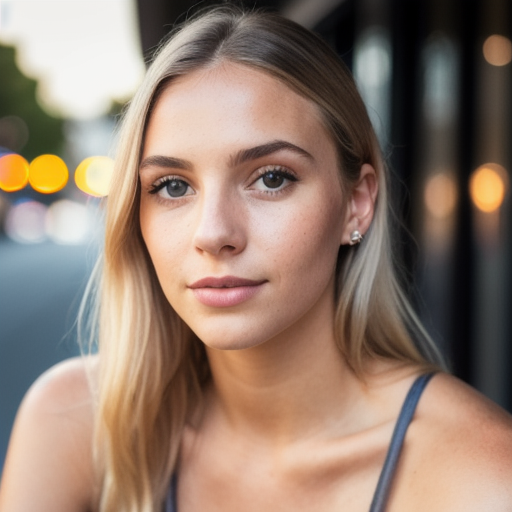
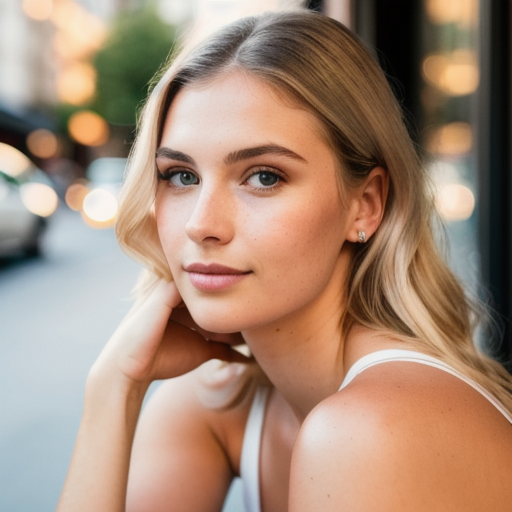
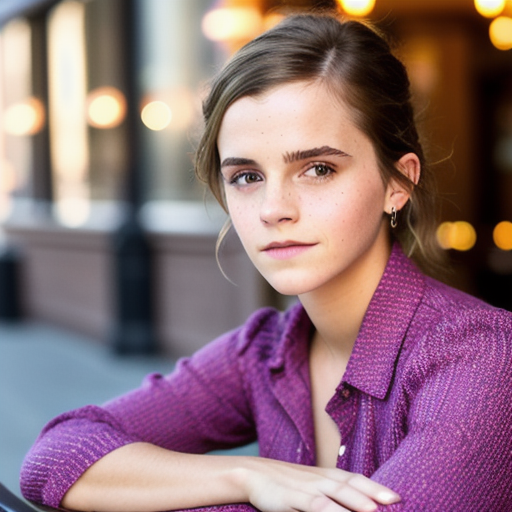
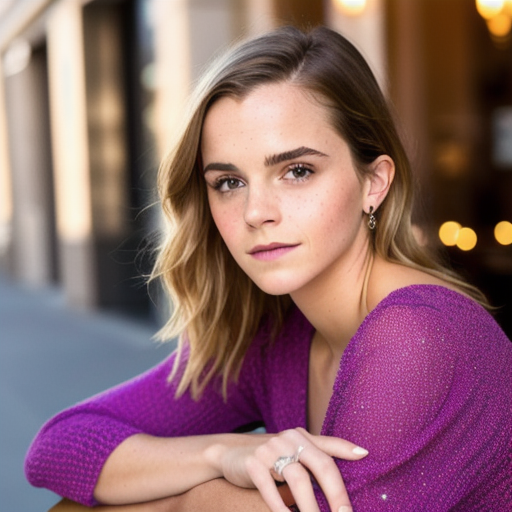
(Emma Watson:0.5), (Tara Reid:0.9), (Ana de Armas:1.2), photo of young woman, highlight hair, sitting outside restaurant, wearing dress, rim lighting, studio lighting, looking at the camera, dslr, ultra quality, sharp focus, tack sharp, dof, film grain, Fujifilm XT3, crystal clear, 8K UHD, highly detailed glossy eyes, high detailed skin, skin pores


See this face repeating across the images!
Use multiple celebrity names and keyword weights to carefully tune the facial feature you want. You can also use celebrity names in the negative prompt to avoid facial features you DON’T want.
Experiment with multiple celebrity LoRAs to achieve the same.
Method 2: Face Swap with ReActor
AUTOMATIC1111’s ReActor extension, a fork of the Roop extension, lets you copy a face from a reference photo to images generated with Stable Diffusion.
Installing the ReActor extension
Google Colab
Installing the ReActor extension on our Stable Diffusion Colab notebook is easy. All you need to do is to select the Reactor extension.

Windows or Mac
Follow these steps to install the ReActor extension in AUTOMATIC1111.
- Start AUTOMATIC1111 Web-UI normally.
2. Navigate to the Extension Page.
3. Click the Install from URL tab.
4. Enter the following URL in the URL for extension’s git repository field.
https://github.com/Gourieff/sd-webui-reactor5. Wait for the confirmation message that the installation is complete.
6. Restart AUTOMATIC1111.
Generating new images with ReActor
We will use text-to-image to generate new images.
photo of a 25 year old woman, new york city standing, skirt, looking at the camera, dslr, ultra quality, sharp focus, tack sharp, dof, film grain, Fujifilm XT3, crystal clear, 8K UHD, highly detailed glossy eyes, high detailed skin, skin pores
disfigured, ugly, bad, immature, cartoon, anime, 3d, painting, b&w
Model: dreamshaperXL_turboDpmppSDE
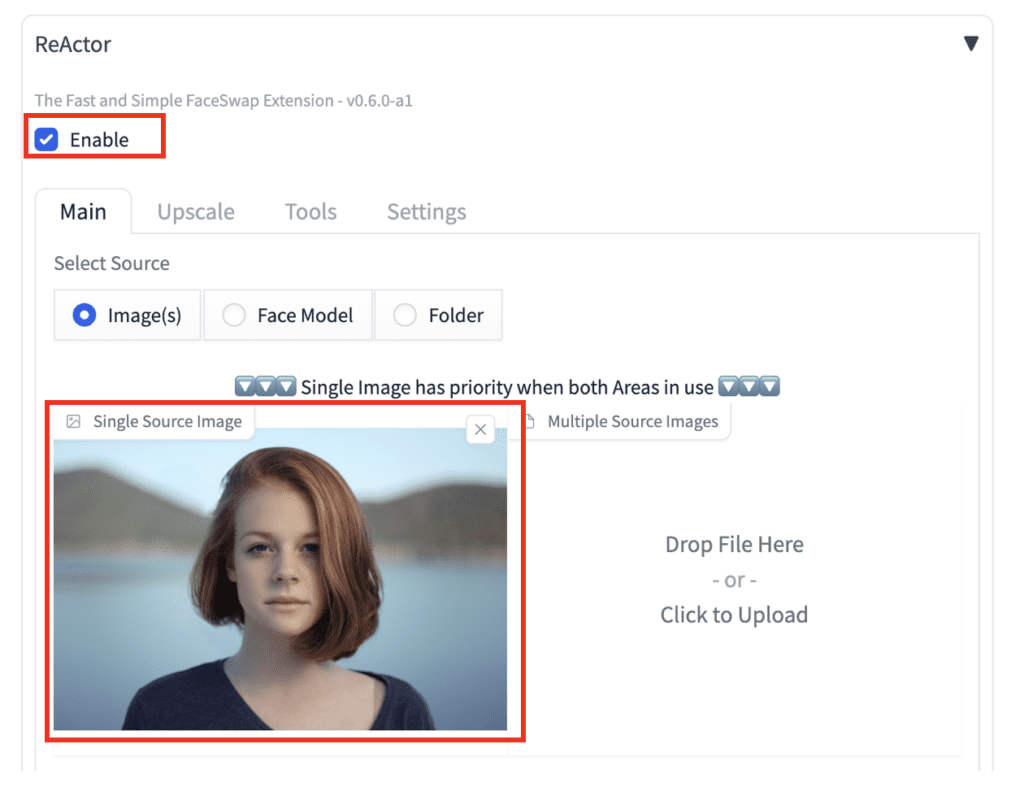
To enable face swap with ReActor, scroll down to the ReActor section.
Enable: Yes
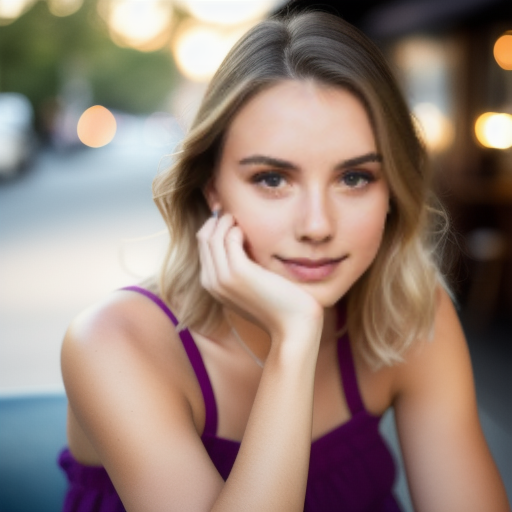
Upload an image with the face you want to the Single Source Image.
Here are the results. The faces are swapped. Now you get the same face from all images!
Tips for using ReActor
Use a clear, high-resolution image for the reference face.
Method 3: Dreambooth
Perhaps the most reliable way to generate the same face is to use Dreambooth to create your own Stable Diffusion model.
Dreambooth is a technique to create a new Stable Diffusion checkpoint model with your own subject or style. In this case, the subject would be the person with your desired face.
Follow this link to find a step-by-step tutorial. You will need a few images of the person.
Gathering the training images could be a challenge. Here are a few options.
- Ask someone you know for permission to use his/her photos.
- Take some selfies.
- Use the multiple celebrity name method above to generate training images.
- Use the ReActor method above to generate training images.
We will use ReActor to generate the training images.
Step 1: Generate training images with ReActor
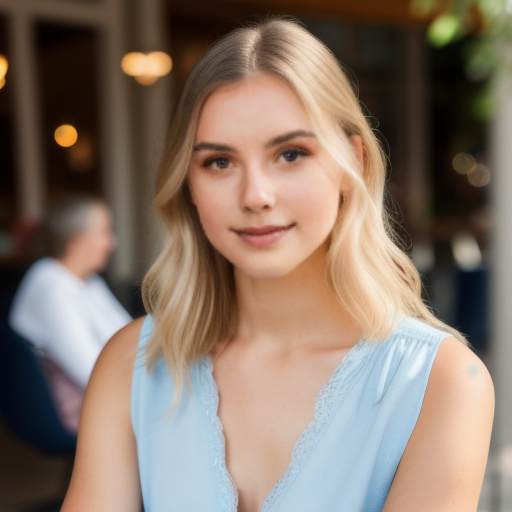
Follow the instructions from the previous section to generate 8 to 15 images with the same face using ReActor. Below are two examples of the training images. It’s fine to use blurry images.
Step 2: Train a new checkpoint model with Dreambooth
Follow the Dreambooth tutorial and download the Dreambooth training Colab notebook.
Since we want to train a model with a realistic style, we will use Realistic Vision v2.
MODEL_NAME:
SG161222/Realistic_Vision_V2.0BRANCH:
main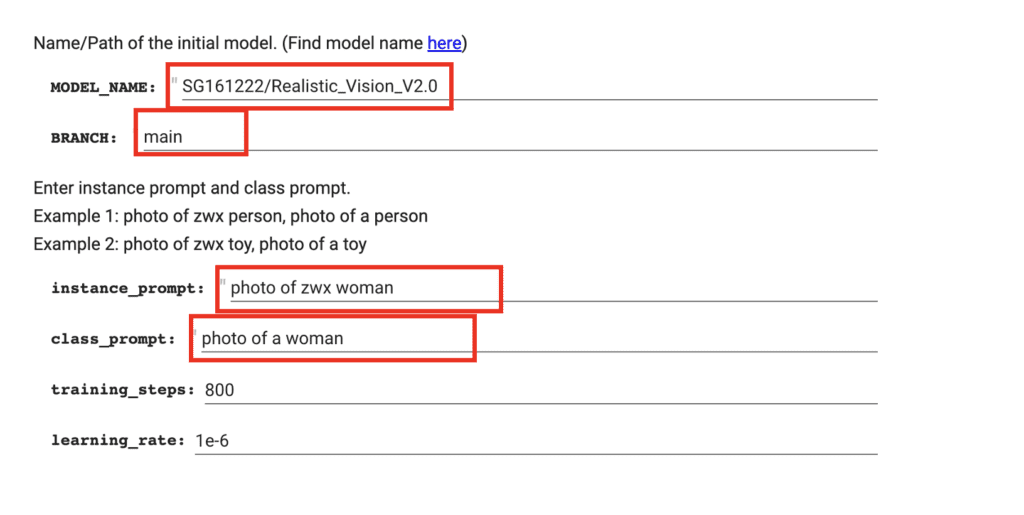
Your new girl will be called zwx, a rare but existing token in Stable Diffusion. Since zwx is a woman, the instance prompt is
photo of zwx woman
The class is the category zwx belongs to, which is woman. So the class prompt is
photo of woman
By defining the class prompt correctly, you take advantage of all the prior attributes of women in the model and apply them to your girl.
Press the Play button to start training.
Upload the training image when prompted.
It would take some time. If everything goes well, the new model file will be saved to the designated output file name.
Step 3: Using the model
You can conveniently test your new model using the AUTOMATIC1111 Colab notebook. The dreambooth model is available to load if you don’t change the default paths of both notebooks.
Select your new dreambooth model in AUTOMATIC1111’s checkpoint dropdown menu.

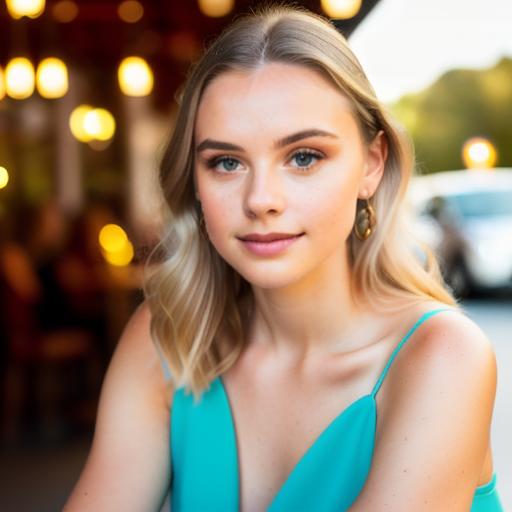
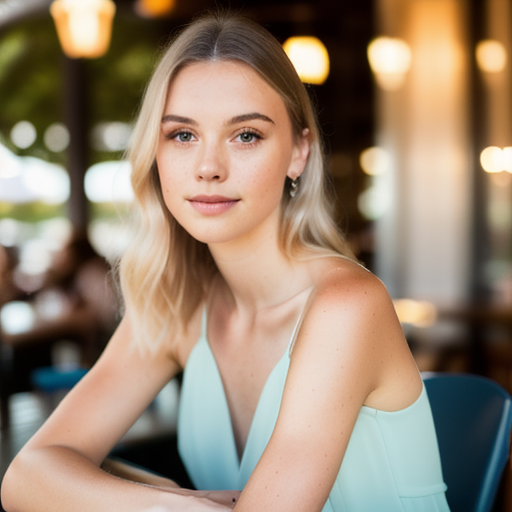
Now test with a prompt with your girl’s name zwx:
photo of young zwx woman, highlight hair, sitting outside restaurant, wearing dress, rim lighting, studio lighting, looking at the camera, dslr, ultra quality, sharp focus, tack sharp, dof, film grain, Fujifilm XT3, crystal clear, 8K UHD, highly detailed glossy eyes, high detailed skin, skin pores
Now you get a consistent and sharp face every time you use the keyword zwx!

You can also generate this person in a different style.
oil painting of zwx young woman, highlight hair
disfigured, ugly, bad, immature, b&w, frame
Method 4: LoRA
A LoRA model is a small patch file for modifying a checkpoint model. You can train a LoRA model in a way similar to Dreambooth. See this tutorial for a step-by-step guide and the Colab notebook.
Method 5: ControlNet IP-adapter face
ControlNet is a neural network model designed to use with a Stable Diffusion model to influence image generation. Users typically use ControlNet to copy the composition or a human pose from a reference image. But do you know there’s a ControlNet for copying faces? It’s called the IP-adapter plus face model.
Installing the IP-adapter plus face model
- Make sure your A1111 WebUI and the ControlNet extension are up-to-date.
2. Download the ip-adapter-plus-face_sd15.bin and put it in stable-diffusion-webui > models > ControlNet.
3. Rename the file’s extension from .bin to .pth. (i.e., The file name should be ip-adapter-plus-face_sd15.pth)
Using the IP-adapter plus face model
To use the IP adapter face model to copy a face, go to the ControlNet section and upload a headshot image.
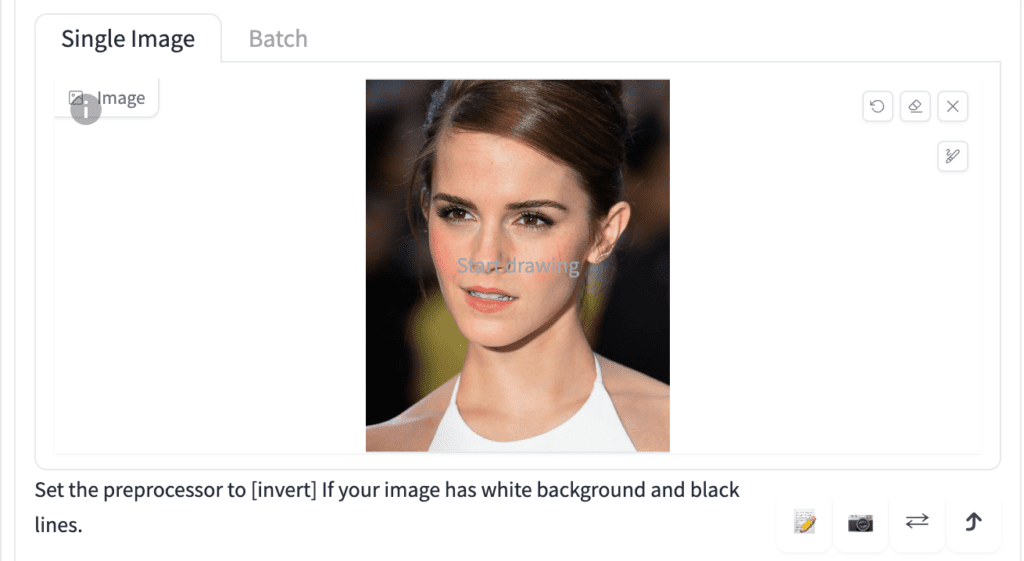
Important ControlNet Settings:
- Enable: Yes
- Preprocessor: ip-adapter_clip-auto
- Model: ip-adapter-plus-face_sd15
The control weight should be around 1. You can use multiple IP-adapter face ControlNets. Make sure to adjust the control weights accordingly so that they sum up to 1.
With the prompt:
A woman sitting outside of a restaurant in casual dress
Negative prompt:
ugly, deformed, nsfw, disfigured
You get:
For one of my projects, I try to produce new photos through a person who is not famous. My friend, whose photo I will use, has permission and is currently 2. I produce visuals with ReActor, which is the method, but every time I get the same face looking at the same angle. Which method would you recommend for more natural and different variations? I’m using SDv1.8.0 with A1111
You can try the ip adapter face id: https://stable-diffusion-art.com/instantid/
Hi.
Do you know if Reacto has some problem with SD Forge?
I follow all the steps, and I alredy tried Reactor in A1111 with good results.
But in SD Forge seems that Reactor has no effect at all.
Thx
SD Forge changed the backend so some extensions won’t work.
Thx
What if I wanted to mix couple celebrity images (method 1) PLUS my own pic, to get a mixed result? Possible?
What would be the easiest way.
easiest way is inpainting
Thanks for reply!
But doesn’t impainting mean replacing image or part of it?
I do not want to just replace but rather mix created image with my pic, or create a mixed image from the beginning
Andrew, your comprehensive guide on generating consistent faces with Stable Diffusion is invaluable. The blend of techniques like multiple celebrity names, ReActor, and Dreambooth, offers versatile options. Do you think incorporating facial expression consistency across different images poses a significant challenge in this process? Your insights on this aspect would be fascinating. Great work!
Sincerely,
Suri Freeman at We Fly With Drones
You can try using prompt and lora for facial expressions.
Great tut Andrew, thanks!
How about consistent wardrobes and backgrounds? What tools, techniques would you use to have the same model, using the same outfit in the same room but different poses?
Consistent clothing is challenging. Not sure if you can achieve by prompt alone. Try training your own dreambooth or lora.
In my experience, poses is best kept using ControlNet (open pose, or the new Depth Anything, is amazing), while using prompt or LoRA for clothing. Part of the reason why I commend this, is that poses and face uses sort of a vector (this comes next to this) to make a likeness, but clothing requires more info. Additionally, making two LoRA play well with each other is a challenge.
For that reason,
Person face – ReActor or ControlNet
Clothing – LoRA
Pose – ControlNet (Open Pose or Depth, Canny)
This will minimise conflict between each of the controling elements trying to get in the way of each other.
great suggestions. thanks!
Any advice on getting Roop to run. Have added the extension but getting errors relating to failures building insightface, Package ‘insightface.thirdparty.face3d.mesh.cython’ is absent from the `packages` configuration etc.
No worries! I just made a quick video about naming characters for consistency with examples, if of interest. I linked to this post in the description, since it was what prompted me to share the technique 🙂
https://youtu.be/B_nTai-WdKs
Dunno if you’ve tried this, but I thought it was an interesting find that I’ve been using a fair bit;
For the prompt method, you use completely fictional names and generate consistent faces. Of course, it’s a bit hit and miss til you find one you like, but it works! Similarly, you can use numbers…. so you can put a ‘seed’ and a parameter value in brackets, or you can use the blend method to blend two seeds for a consistent face. Again, somewhat hit and miss until you find a combination you like – but the advantage of both is that they don’t have to look like some known celebrity. You can obviously further guide the age and look, but I find it works consistently enough to be useful!
So, for example, I use prompts like: “40 year old woman, [99576:12345:0.5]”, and get the same pretty brunette fairly consistently. If I’m using a fictional name, I’ll often use a middle name to make it more distinct. e.g, “40 year old woman, (Michelle Alice Bullock:1.3)” gives me the same dark skinned woman nearly every time. You can put the same formula in Adetailer prompt, too.
Very interesting technique. Thanks for sharing!
@Whiteyeguy, I’ve tried your method on a commercial site, and found initial success, but then it started straying. My next move was to parenthesise the Subject and, again, it worked well, but would eventually stray. I then dropped the last Seed digit and inserted a Hash-mark and an external call-out to, Hashmark equals Random, and from my understanding of MidJourney, set the parameter range from zed to nine. Lastly, I added a lengthy ‘back-end’ prompt of formalised structure (an install command process for PyTorch), to see if the structuralism it leant would help the Natural Language module of the AI model to retain focus, and after several iterations, it appears to had.
So, thanks! It has, so far, been a big help in ‘herding’ random content which constellates around the Subject, while still keeping open the output (all female-ish, not always human or complete), so, a move towards ‘variable uniformity’ — heh.
Wow, right on time mate!
thank you.
Is there any way to use Roop and ADetailer together?
Yes but Adetailer is applied BEFORE roop in txt2img. You will need to use roop in txt2img, followed by adetailer in img2img.
Sufyan
No more wastage of time n energy!
Thanks ? it has come up at right time!?❤️?
Wow, that was the answer I was struggling with for a long time. Thanks so much. Not so convinced by the blurry Roop output though…