Stable Cascade is a new text-to-image model released by Stability AI, the creator of Stable Diffusion. It features higher image quality and better text generation. It is a model that rivals the SDXL model.
In this article, you will learn
- Benefits of Stable Cascade
- Model architecture
- Best model settings
- How to install and use Stable Cascade
- ComfyUI workflow example files.
Table of Contents
Benefits of Stable Cascade
Stable Cascade is not a Stable Diffusion model. It is based on an entirely different Wurstchen architecture. (You will learn what it is in this article.)
It is released under a non-commerical use license.
Stable Cascade has the same native image size (1024 x 1024) as the SDXL model. Why do we need another text-to-image model? Let’s find out.
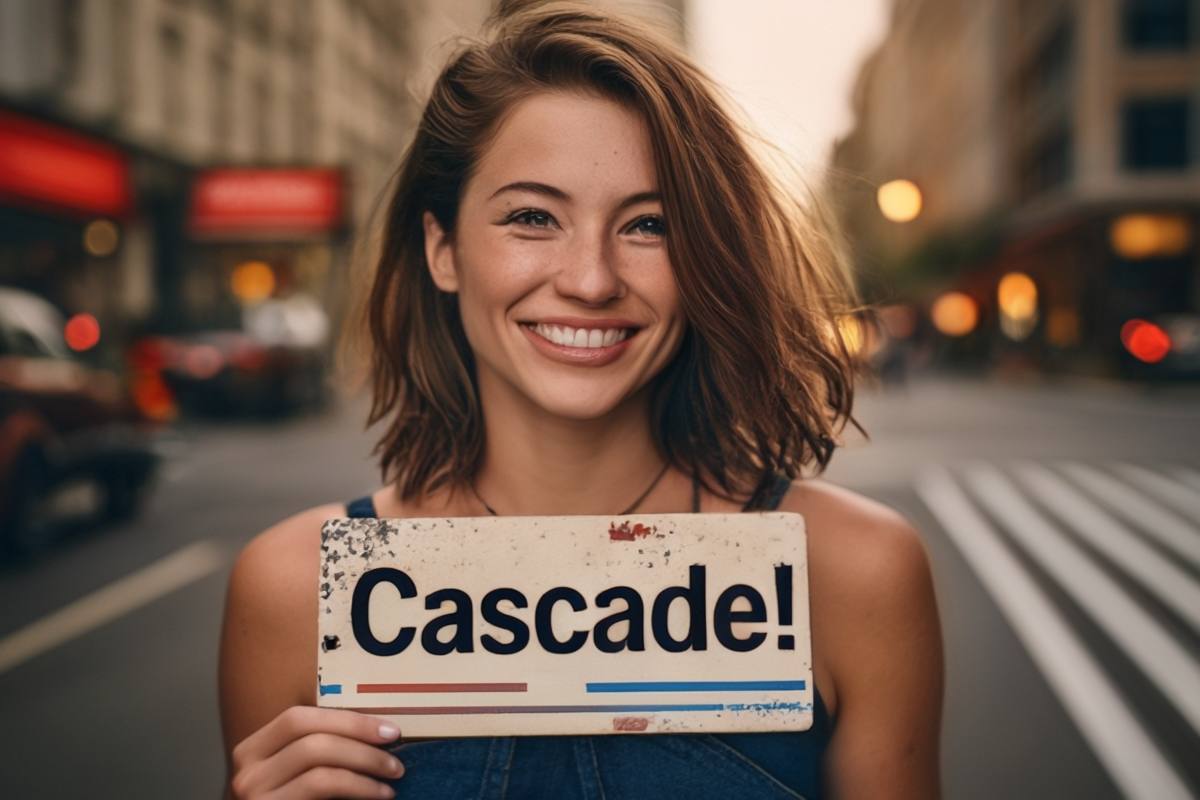
Legible text
Like the SDXL model, Stable Cascade is doing reasonably well in generating legible text. I would rate Stable Cascade better in rendering text.

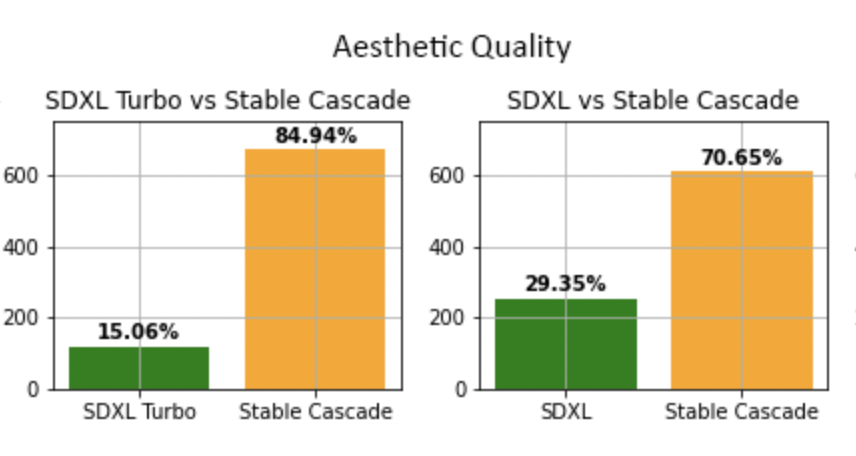
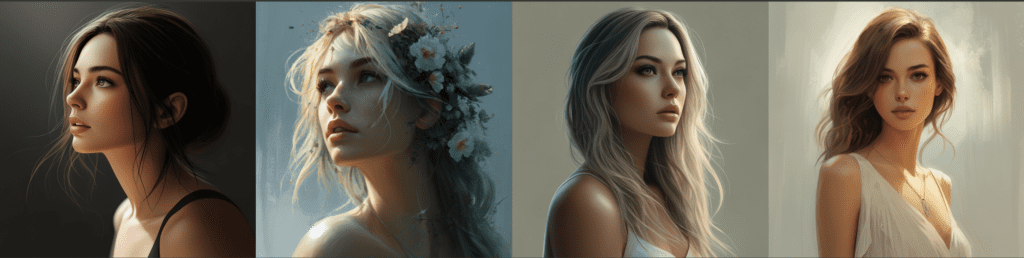
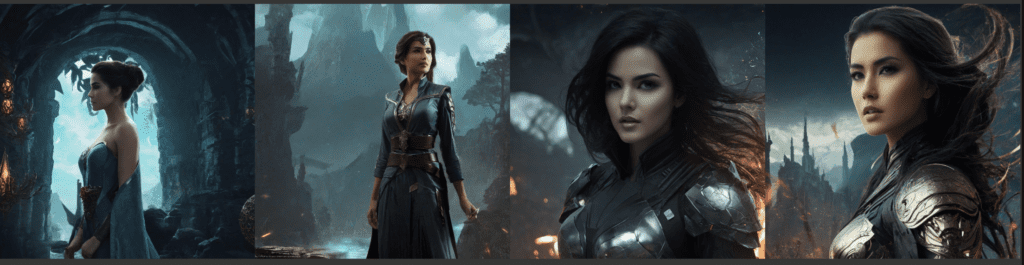
Higher image quality
The official user study deems Stable Cascade’s images better than SDXL. They all look pretty decent in my test.
Better prompt following
Again, quoting Stability’s study. Stable Cascade is slightly better at following the prompt than SDXL.
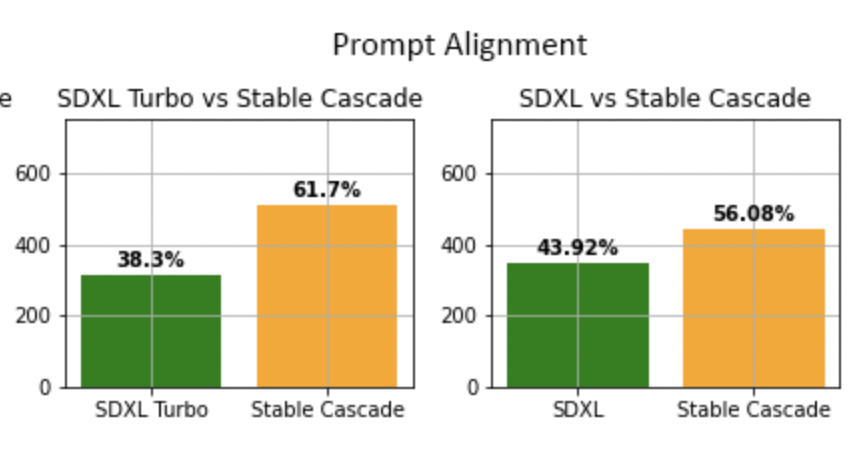
It is about the same in my unscientific test.
Faster image generation?
The press release claims that Stable Cascade is faster than SDXL. I do not see it when tested in ComfyUI. Their speeds are about the same.
Easier to finetune and add ControlNet
This area remains to be proven, but the argument sounds compelling.
Because of the model design, we only need to finetune the Stage C model to achieve a custom style or ControlNet. SDXL is notoriously difficult to train. Stable Cascade has to potential to change that.
What is Stable Cascade?
The Stable Cascade model is based on the Wurstchen architecture. The image generation goes through a 3-stage process: Stage C, Stage B, and Stage A.
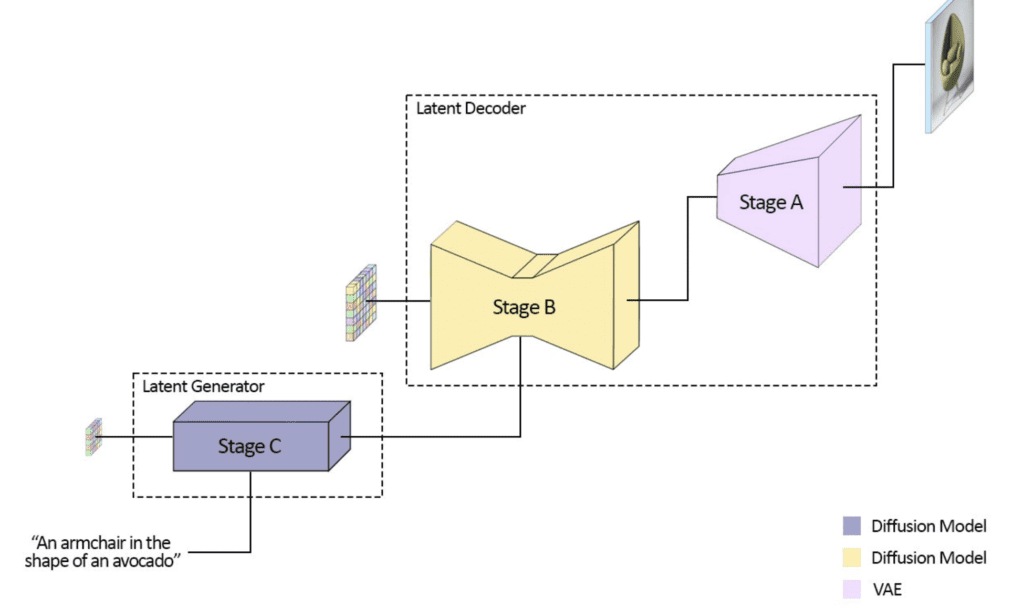
Stage C
Stage C is a sampling process. This stage sets the global composition of the image.
It is like Stable Diffusion’s denoising steps in the latent space. A noise predictor denoises a random latent image conditioned by the text prompt. It stays as a latent. No VAE decoder is applied.
The output of Stage C is a latent capturing the global composition of the image.
Unlike Stable Diffusion, this latent won’t be decoded to a pixel image but instead used as a conditioning at Stage B.
Stage B
Stage B is again a sampling process. So, we have two sampling modules in Stable Cascade.
Stage B is responsible for filling in fine details in the latent space. It is like the refiner model in the SDXL pipeline.
It uses Stage C’s output and the text prompt as the conditioning in the denoising process.
Stage A
Stage A applies the VAE Decoder to convert the latent image into a pixel image. This process is similar to Stable Diffusion’s VAE Decoder.
Finetuning and ControlNet
All finetuning, ControlNet conditioning and LoRA should work by finetuning or applying to the Stage C model alone.
The stages B and A models do not need to be updated.
Settings for Stable Cascade
Seed value
There are two seed values (Stages B and C) in Stable Cascade.
You should change Stage C’s seed value for a new image! Changing Stage B’s seed value has almost no effect.
This is because Stage C sets the global composition. Stage B is only responsible for filling in details.


CFG Scale – Stage C
The CFG Scale determines how closely the prompt is followed. It adjusts the balance between accuracy (high CFG) and diversity (low CFG).
Again, you should change the CFG Scale in Stage C, not Stage B.
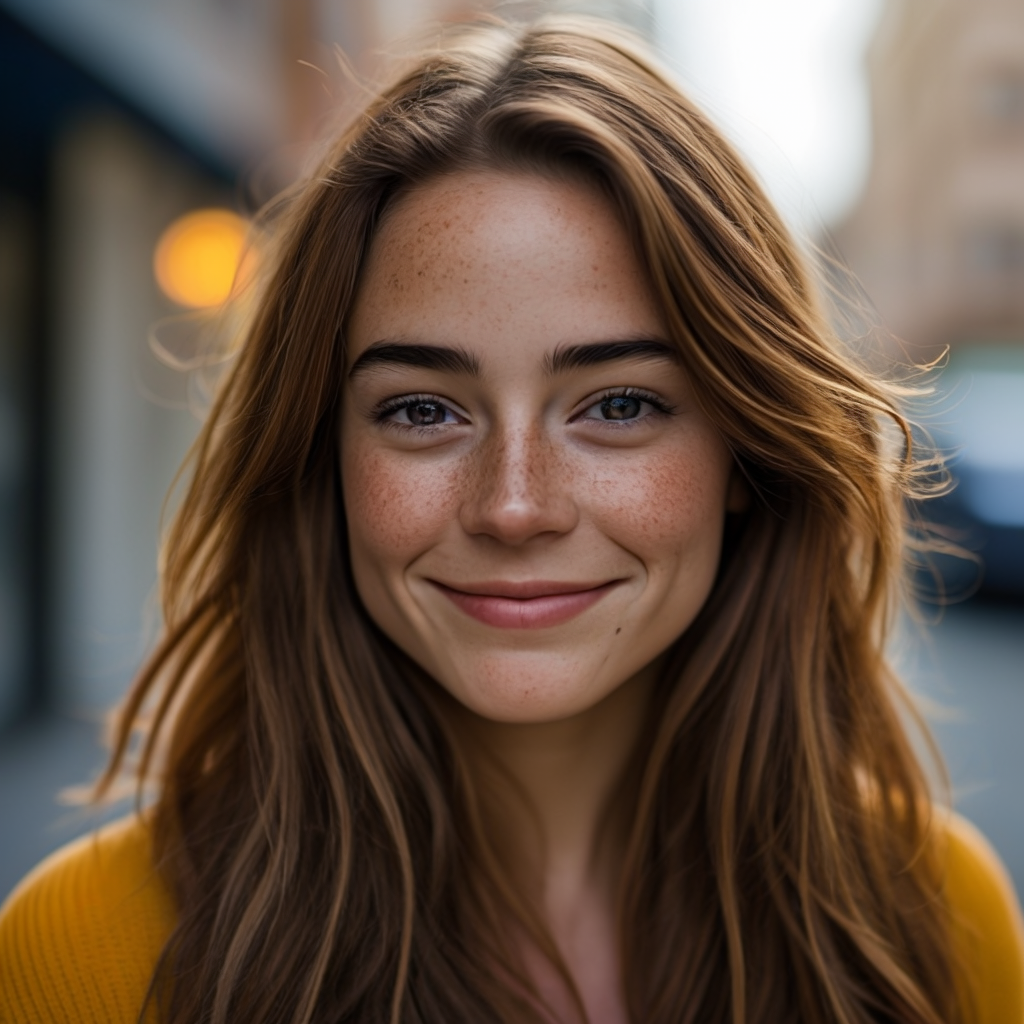
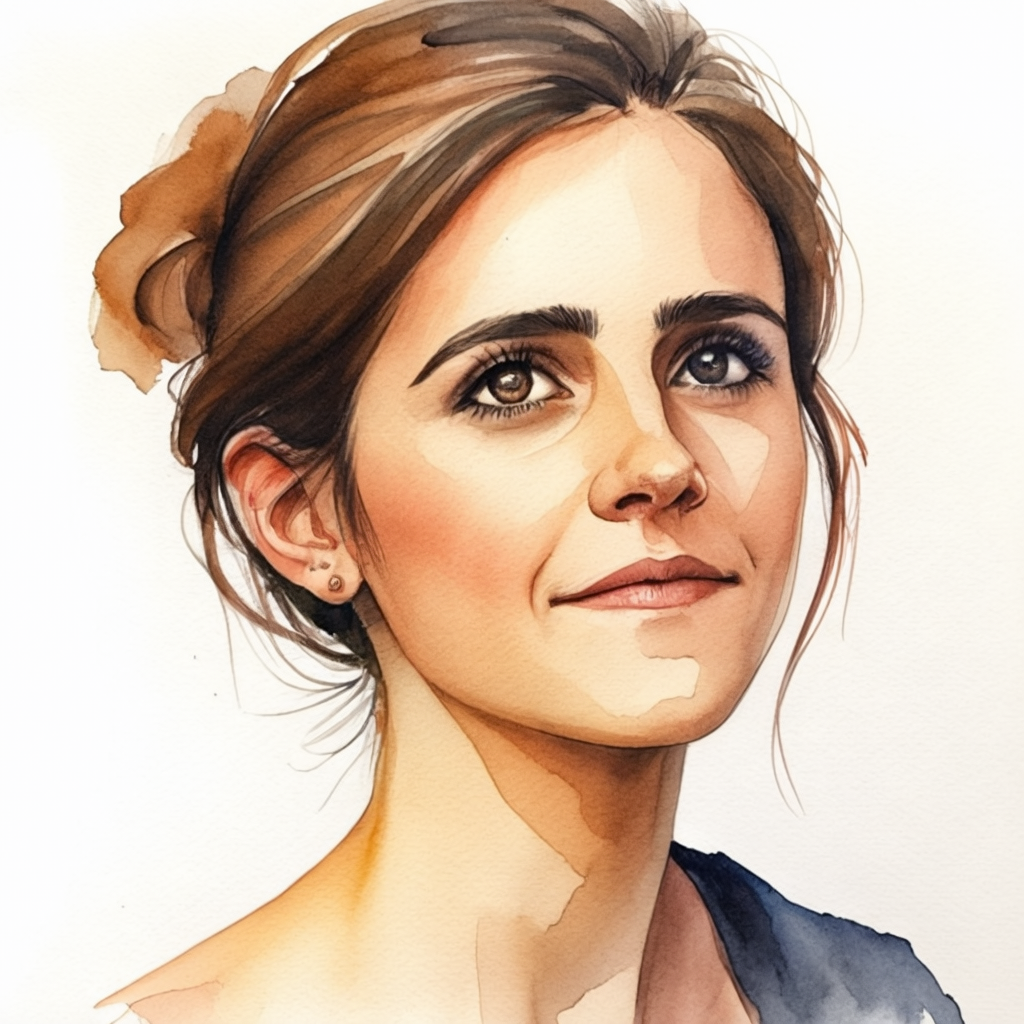
A telltale sign of CFG value too high is over-saturated images. A good range of the CFG scale is between 1 and 4.
As you can see below, setting a high CFG value of 4 or higher tends to generate the same face.
a portrait photo of a 25-year old beautiful woman, busy street street, smiling, (freckles:0.8)
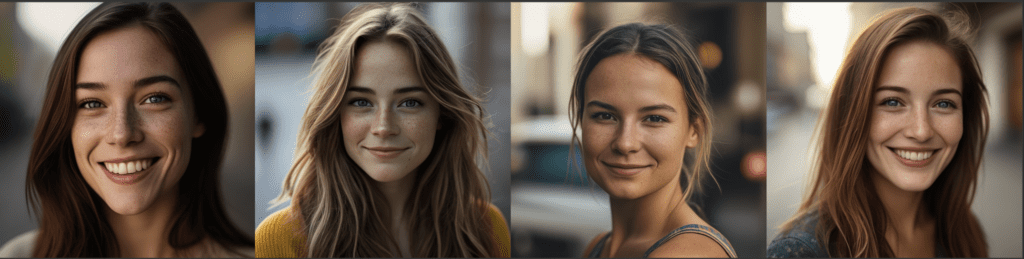
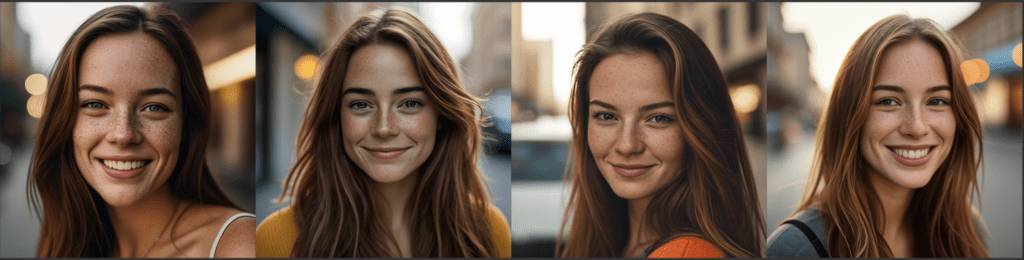
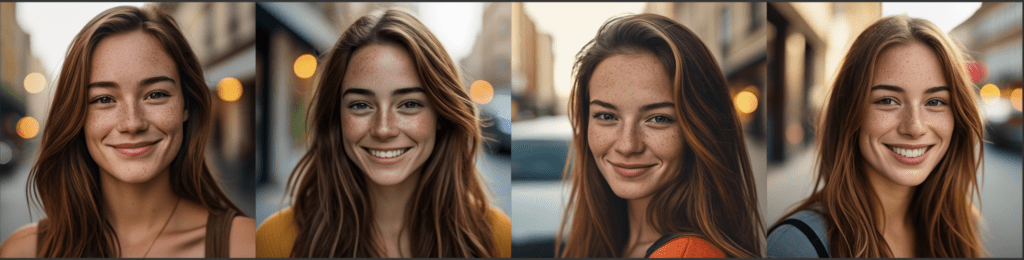
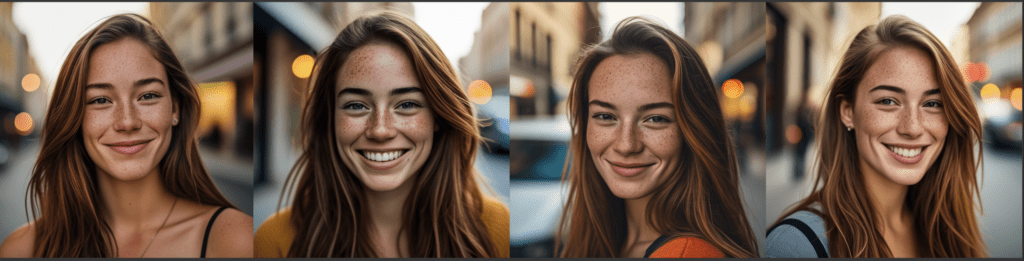
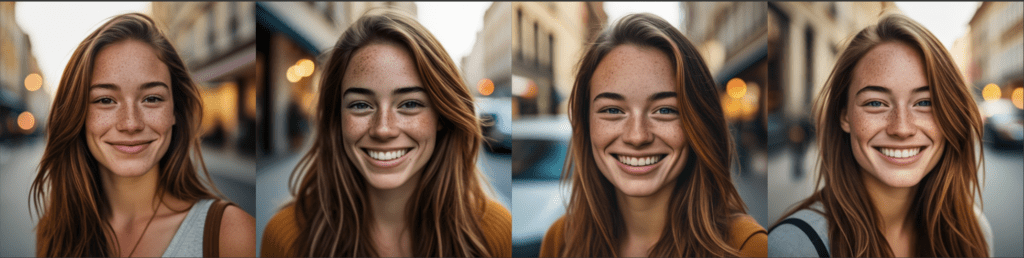
Recommendation: Starts with a CFG value of 2 for Stage C.
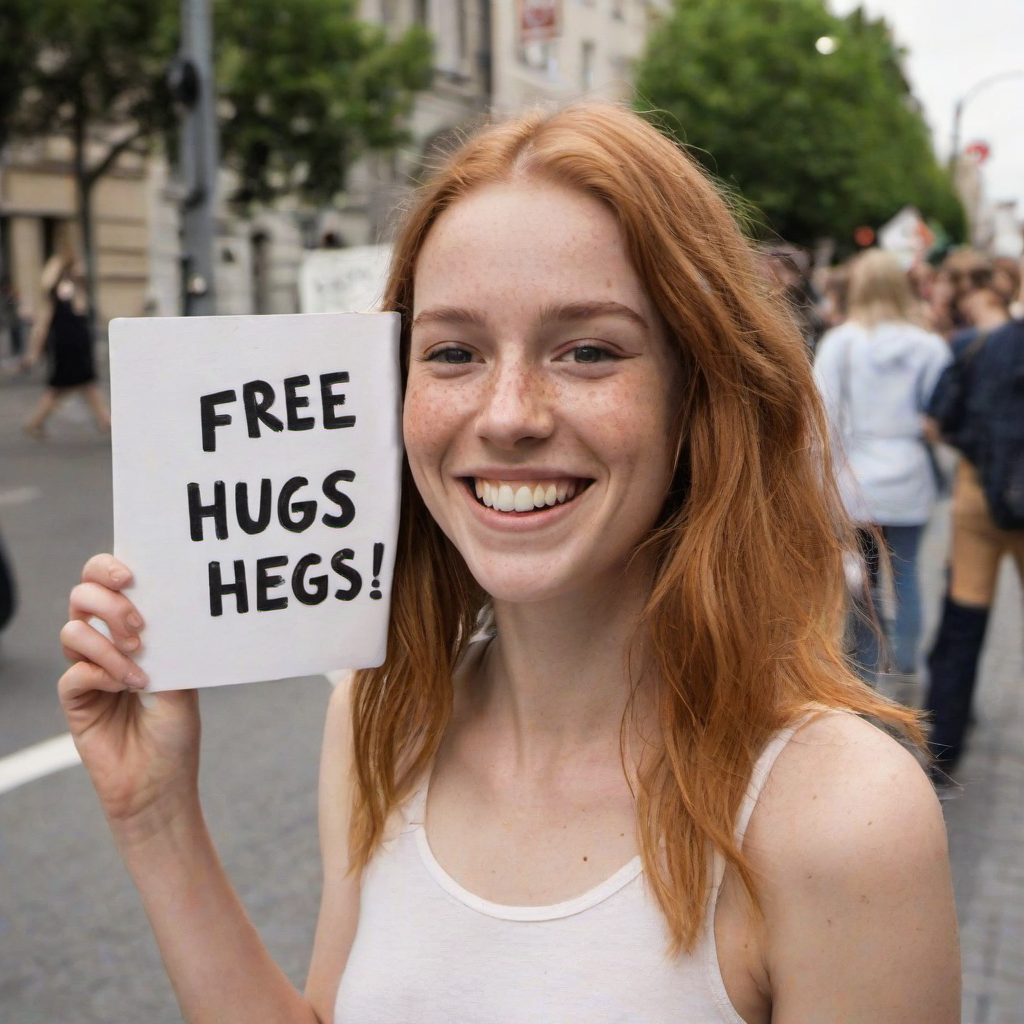
Sampling steps – Stage C
The default is 20 steps but things still work as low as 10.
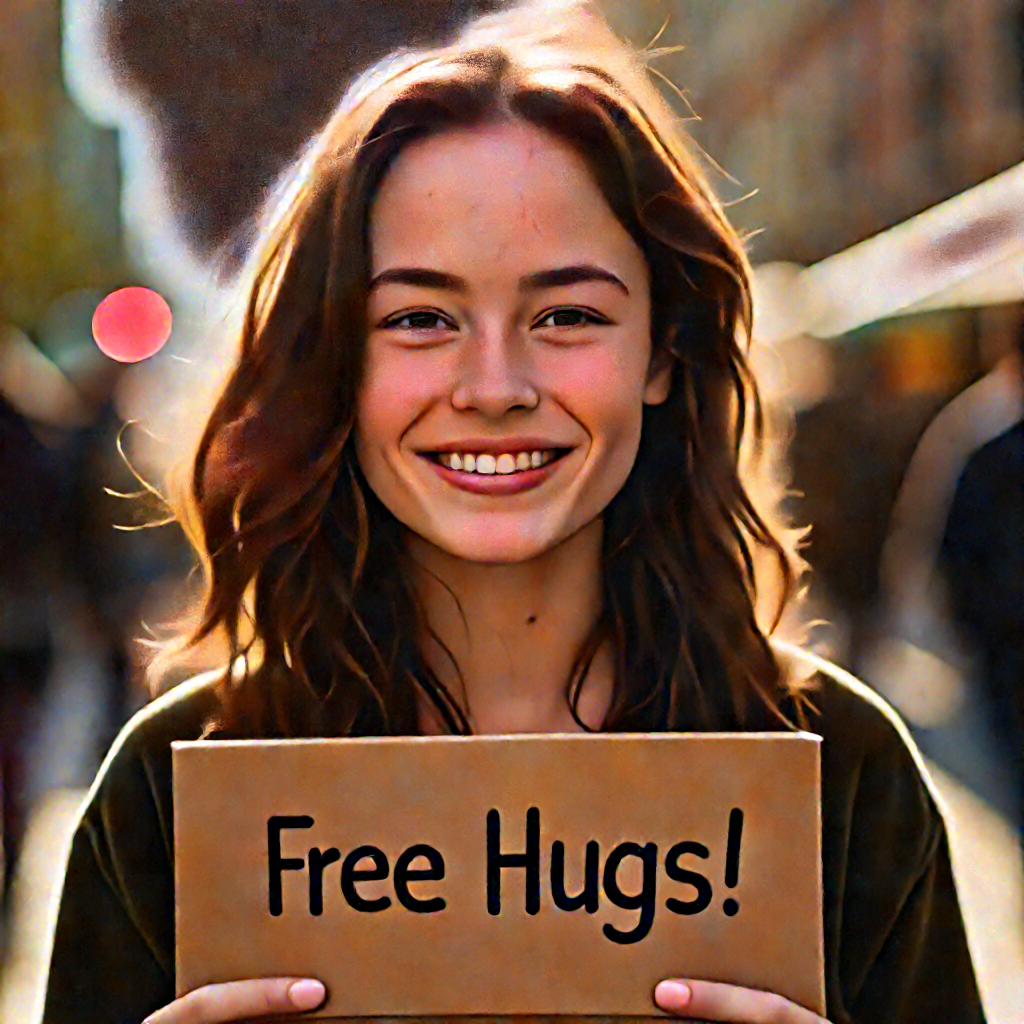
10 to 40 steps all seems to work. Higher steps produce slightly crispier images.
a portrait photo of a 25-year old beautiful woman, busy street street, smiling, (freckles:0.8), holding a sign “Free Hugs!”


Recommendation: 20 steps.
Sampling steps – Stage B
Stage B is part of the decoder so changing this part would not change the image too much.
The default number of steps is 10 but as few as 3 steps generates nearly identical results.


Recommendation: Stay with 10 steps if you are not in a hurry. Lower it to 5 for speed.
Stable Cascade on AUTOMATIC1111
AUTOMATIC1111 is a popular and free Stable Diffusion software. You can use this GUI on Windows, Mac, or Google Colab.
As of writing, AUTOMATIC1111 has no native support for Stable Cascade. (Ticket)
Stable Cascade on ComfyUI
ComfyUI has native support for Stable Cascade. You can find workflow examples they released here. Below is a walkthrough on basic usage.
We will use ComfyUI, a node-based Stable Diffusion GUI. You can use ComfyUI on Window/Mac or Google Colab.
Check out Think Diffusion for a fully managed ComfyUI/A1111/Forge online service. They offer 20% extra credits to our readers. (and a small commission to support this site if you sign up)
See the beginner’s guide for ComfyUI if you haven’t used it.
Update ComfyUI
Every time you try to run a new workflow, you may need to do some or all of the following steps.
- Install ComfyUI Manager
- Install missing nodes
- Update everything
Install ComfyUI Manager
Install ComfyUI manager if you haven’t done so already. It provides an easy way to update ComfyUI and install missing nodes.
To install this custom node, go to the custom nodes folder in the PowerShell (Windows) or Terminal (Mac) App:
cd ComfyUI/custom_nodesInstall ComfyUI by cloning the repository under the custom_nodes folder.
git clone https://github.com/ltdrdata/ComfyUI-ManagerRestart ComfyUI completely. You should see a new Manager button appearing on the menu.
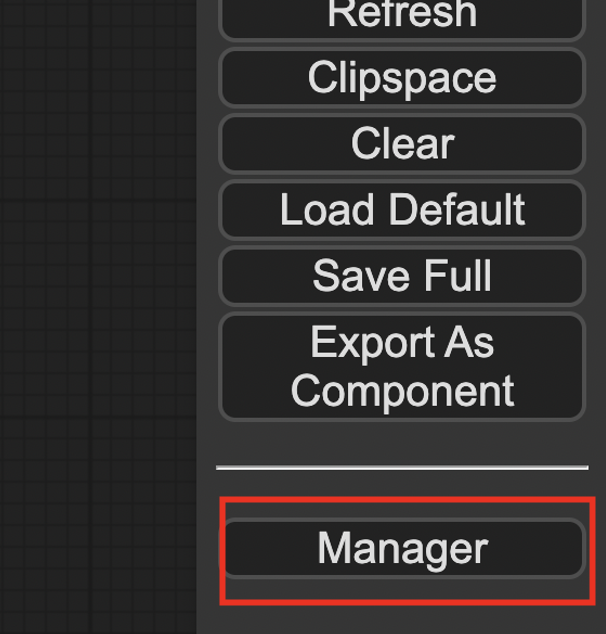
If you don’t see the Manager button, check the terminal for error messages. One common issue is GIT not installed. Installing it and repeat the steps should resolve the issue.
Install missing custom nodes
To install the custom nodes that are used by the workflow but you don’t have:
- Click Manager in the Menu.
- Click Install Missing custom Nodes.
- Restart ComfyUI completely.
Update everything
You can use ComfyUI manager to update custom nodes and ComfyUI itself.
- Click Manager in the Menu.
- Click Updates All. It may take a while to be done.
- Restart the ComfyUI and refresh the ComfyUI page.
Download Stable Cascade models
You need to download the Stage B and C models separately. Stage A is the VAE and is packaged in the Stage B model.
Download the Stable Cascade Stage B and Stage C models. Put them in ComfyUI > models > checkpoints.
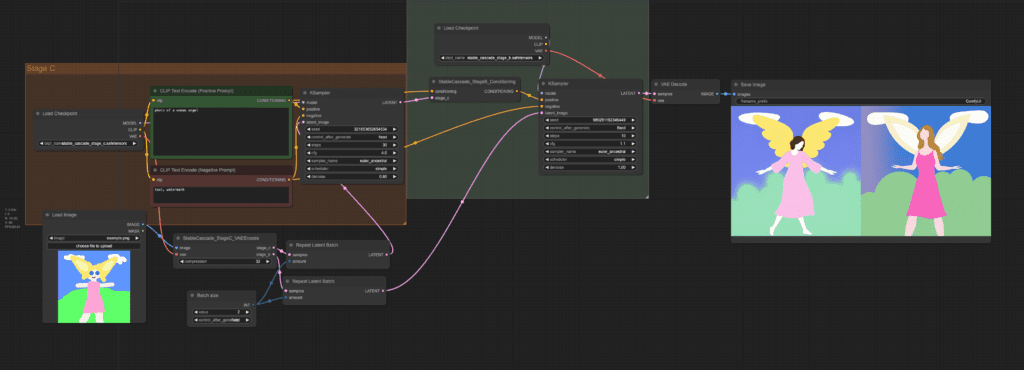
Text-to-image workflow
Below is a workflow for simple text-to-image. Download the following workflow and drop it to ComfyUI.
You may need to fix the Load Checkpoint nodes in Stages B and C to select the correct models.
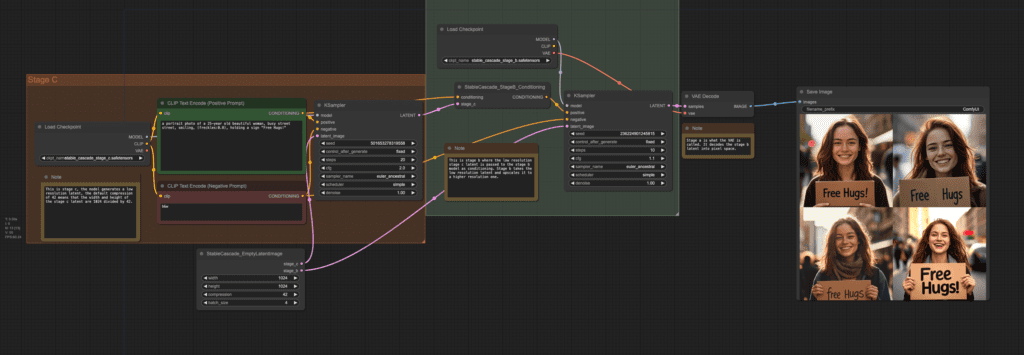
Click Queue Prompt to generate images.
The workflow starts with sampling in Stage C, and is followed by Stage B with another sampling. Finally the latent is converted into a pixel image by an VAE Decoder. (Stage A).
The VAE Decoder is packaged in the Stage B model.
Image-to-image
You can also start with an image and generate another image using Stable Cascade. Here’s the image-to-image workflow.
Change the input image to change the image that the generations based on.
Change the denoising strength to change the input image more.
Change the batch size to change the number of images generated.
Image Prompt
You can use an image prompt in Stable Cascade like the IP-adapter in Stable Diffusion.

You can download the workflow below.
Hate to temper the enthousiasm. All very well for portraits but faces get ruined if the subject is rendered at a greater distance under the same settings.
Common issue with SD. You will need to use inpainting to fix small faces. (with an SD model)
Really interesting! I am trying to figure out how to prompt it for a series of exercise ball movement where you are bouncing on the it. The ball needs to be compress and the person sitting on the exercise ball is compressing to the point of bursting the ball by the bounce and their legs are up. When the call pushes back and comes back to it’s original shape, the model has their legs on the ground like they are sitting on a chair. All Core work! This is a bit more accurate, but I find it never shows the compression, but otherwise, good! Suggestions How I would do this? Or do I need another checkpoint? Thanks, V
This is quite difficult to generate so I’m surprised it worked quite well. You can try DALLE3 (OpenAI).
I found this model to be not so good with text. Legible letters but hard to get exactly the text in the prompt.
Let’s hope SD3 gets really better.
Yeah, still need quite some cherry picking
Good one ! Are we leaving the world of A1111 … haha
Yeah, its more work to make it work on A1111