Have you seen an AI image you really liked and wondered what the prompt was? We will go through a few ways to get prompts from images. You will also learn additional techniques to increase your chances of recreating the image.
In this article, you will learn how to
- Read PNG metadata information, where sometimes the prompt is written.
- Use CLIP interrogator to guess the prompt.
- Tips for reproducing an image.
Table of Contents
Software setup
We will use AUTOMATIC1111 Stable Diffusion WebUI in this tutorial. It is popular and free. You can use this software on Windows, Mac, or Google Colab.
Check out the Quick Start Guide if you are new to Stable Diffusion. Check out the AUTOMATIC1111 Guide if you are new to AUTOMATIC1111.
Method 1: Get prompts from images by reading PNG Info
If the AI image is in PNG format, you can try to see if the prompt and other setting information were written in the PNG metadata field.
First, save the image to your local storage.
Open AUTOMATIC1111 WebUI. Navigate to the PNG Info page.
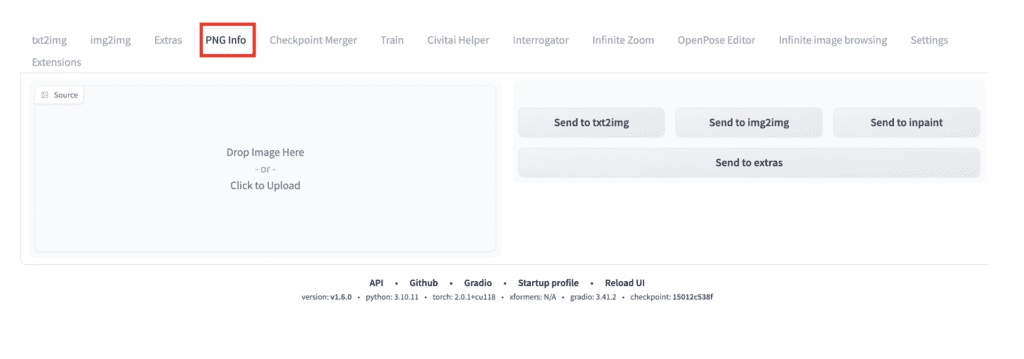
Drag and drop the image to the Source canvas on the left.
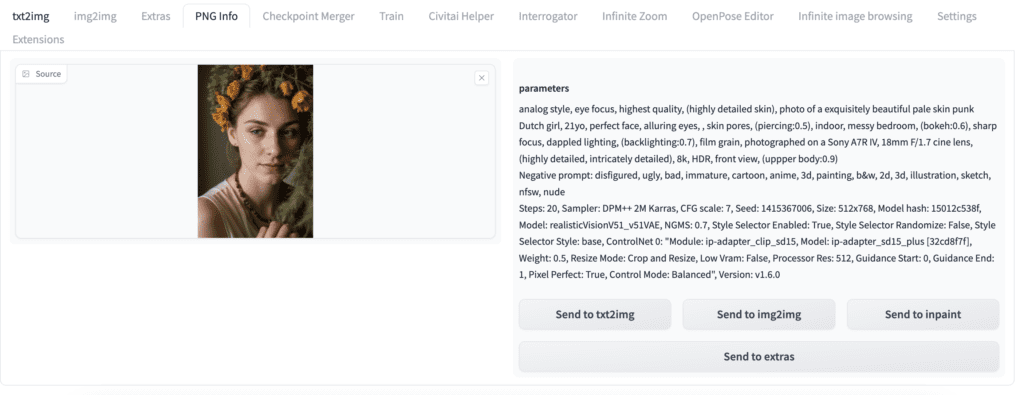
You will see the prompt, the negative prompt, and other generation parameters on the right if it is in the image file. You can optionally send the prompt and settings to the txt2img, img2img, inpainting, or the Extras page for upscaling.
Alternatively, you can use this free site to view the PNG metadata without using AUTOMATIC1111.
Method 2: Guess prompts from images with CLIP interrogator
More often than not, the first method does not work. The generation information may not have been written in the first place. It may have been there, but the web server stripped it during image optimization. Or it was not generated by Stable Diffusion.
In this case, your next option is to use a CLIP interrogator. It is a class of AI models that guess the captions of images. It works on any images, not just AI images.
What is CLIP?
CLIP (Contrastive Language–Image Pre-training) is a neural network that maps visual concepts to natural languages. A CLIP model is trained with a massive number of image and caption pairs.
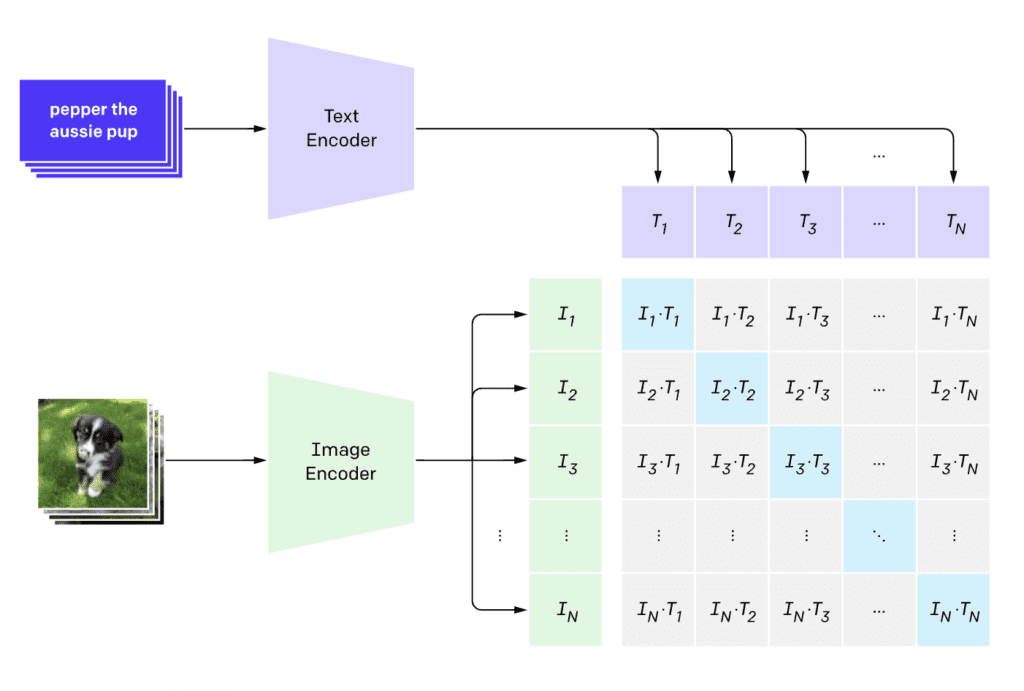
Given an image, a CLIP model can infer the caption that describes the image. You use the caption as the prompt in our use case.
WebUI’s native CLIP interrogator
If you don’t want to install any extension, you can use AUTOMATIC1111’s native CLIP interrogator on the img2img page. It uses BLIP, a CLIP model described in the article “BLIP: Bootstrapping Language-Image Pre-training for Unified Vision-Language Understanding and Generation” by Junnan Li and coworkers.
To use the native CLIP interrogator:
- Open AUTOMATIC11111.
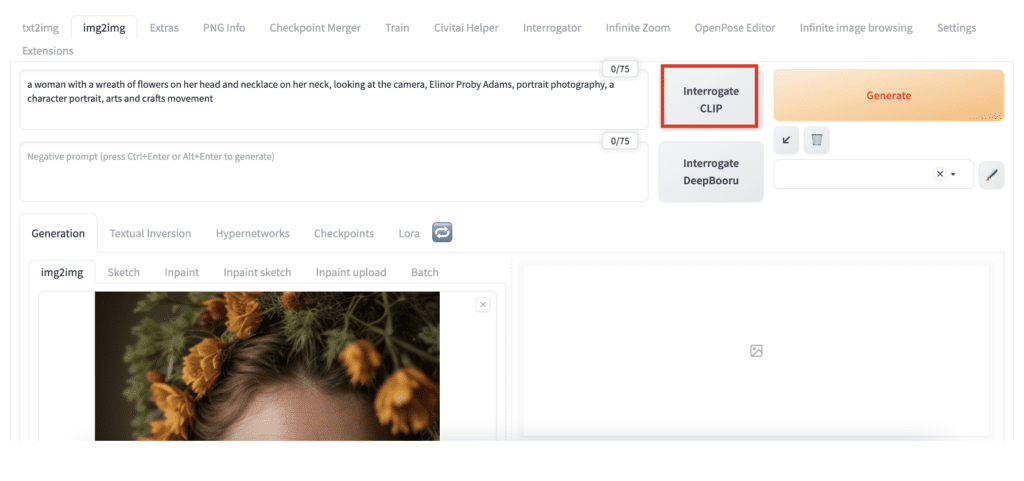
2. Navigate to the img2img page.
3. Upload the image to the img2img canvas.
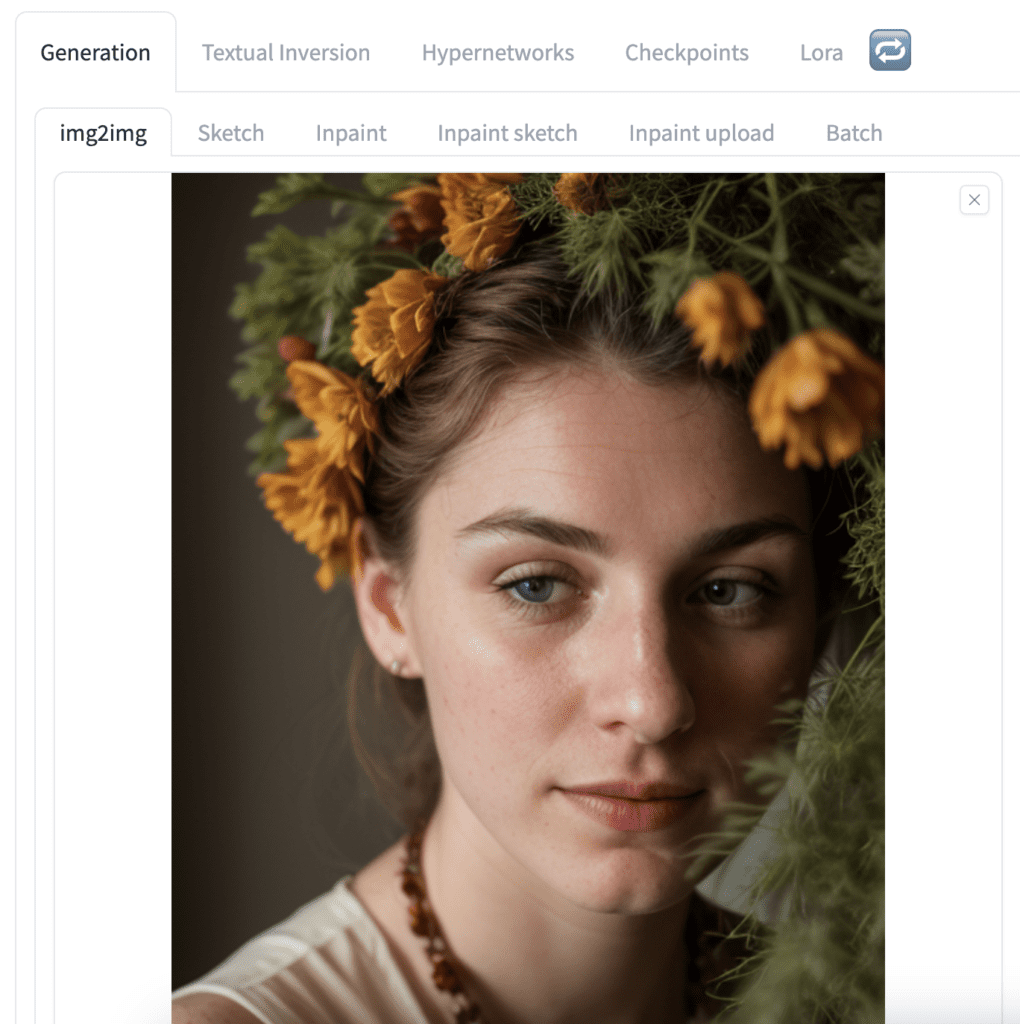
4. Click Interrogate CLIP to get the prompt.
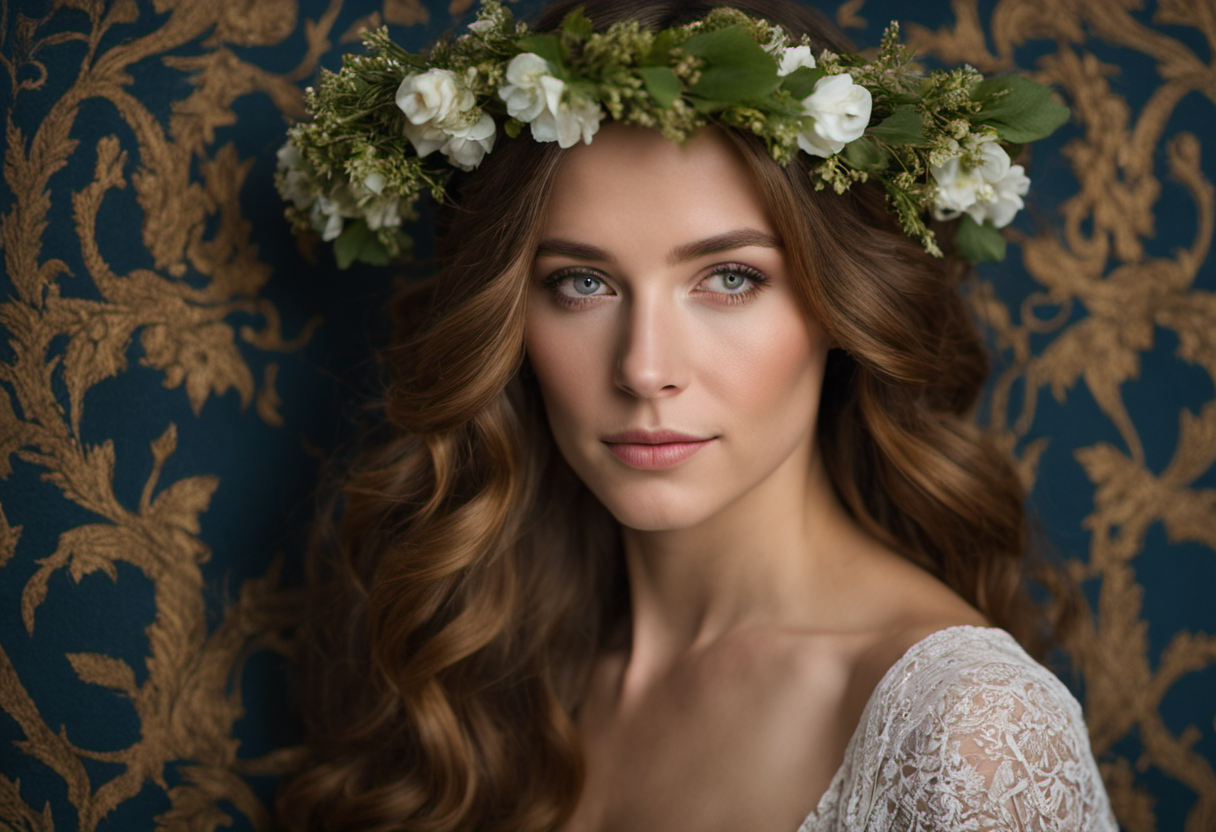
a woman with a wreath of flowers on her head and necklace on her neck, looking at the camera, Elinor Proby Adams, portrait photography, a character portrait, arts and crafts movement
Testing this prompt with the Realistic Vision model and a negative prompt for realistic people, we get the following images.

We get a woman wearing a a wreath with a necklace, although the composition is different.
CLIP interrogator extension
The native CLIP interrogator of AUTOMATIC1111 does not allow you to use a different CLIP model. You must use the CLIP interrogator extension if you want the extra functionalities.
Follow the instructions on the recommended extensions page to install. Here’s the extension’s URL.
https://github.com/pharmapsychotic/clip-interrogator-extTo use the CLIP interrogator extension.
- Open AUTOMATIC1111 WebUI.
2. Navigate to the Interrogator page.
3. Upload the image to the Image canvas.
4. Select ViT-L-14-336/openai under the CLIP Model dropdown menu. This is the language embedding model used in Stable Diffusion v1.5.
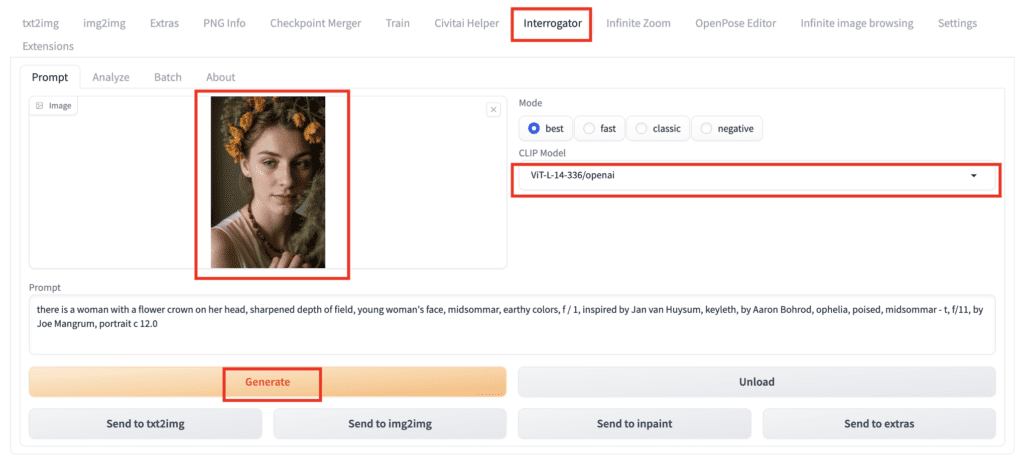
5. Click Generate to produce the prompt.
This is what we got.
there is a woman with a flower crown on her head, with depth of field, earthy tones, marigold, portrait of a cute woman, dryad, subject centered in frame, of a young woman, midsommar, portrait face, 65mm 1.5x anamorphic lens, inspired by Elsa Beskow, art : : professional photograph, druid portrait
We get the following images using the same image settings as in the previous section.
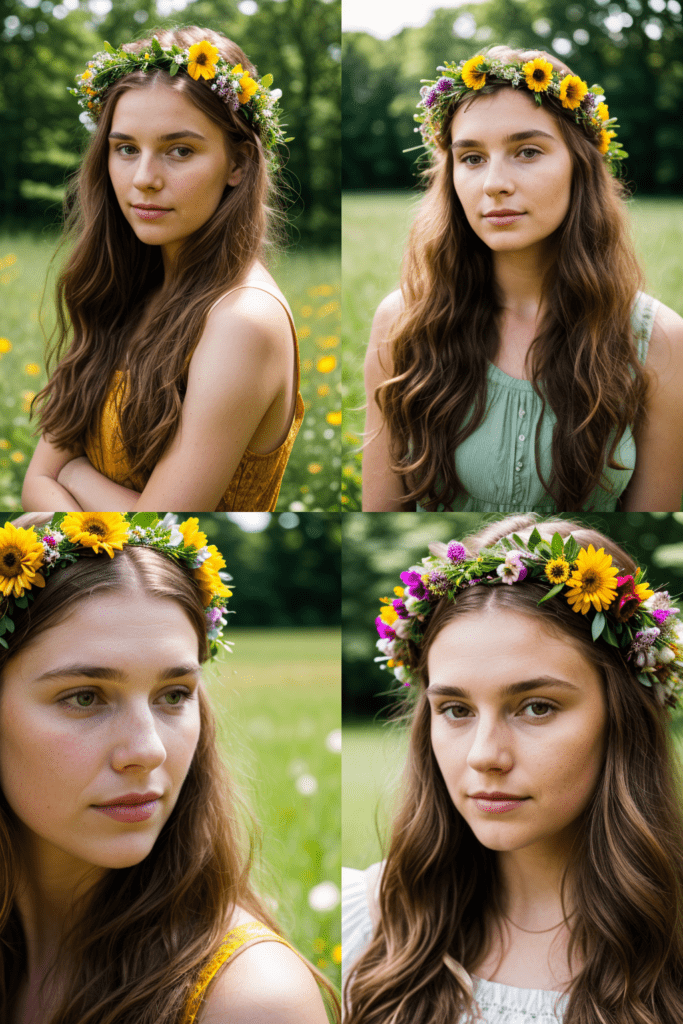
Again, it is close but not quite the same. Her necklace is missing in the prompt and hence in the image. Since the outcome of a CLIP interrogator is quite variable, I won’t say the ViT-L-14-336/openai model is worse than BLIP.
Interrogate CLIP for SDXL model
If the prompt is intended to be used with the Stable Diffusion XL (SDXL) model, you can select ViT-g-14/laion2b_s34b_b88k in the CLIP model dropdown menu on the Interrogate page.
This gives the following prompt.
there is a woman with a flower crown on her head, medium portrait top light, f / 1, extra – details, 1 8 yo, national geographic photo shoot, movie scene portrait closeup, inspired by William Morris, center frame portrait, lut, warm glow, bio-inspired, at home, f / 2 0, by Jane Kelly
These are the images generated with the SDXL 1.0 base + refiner model.
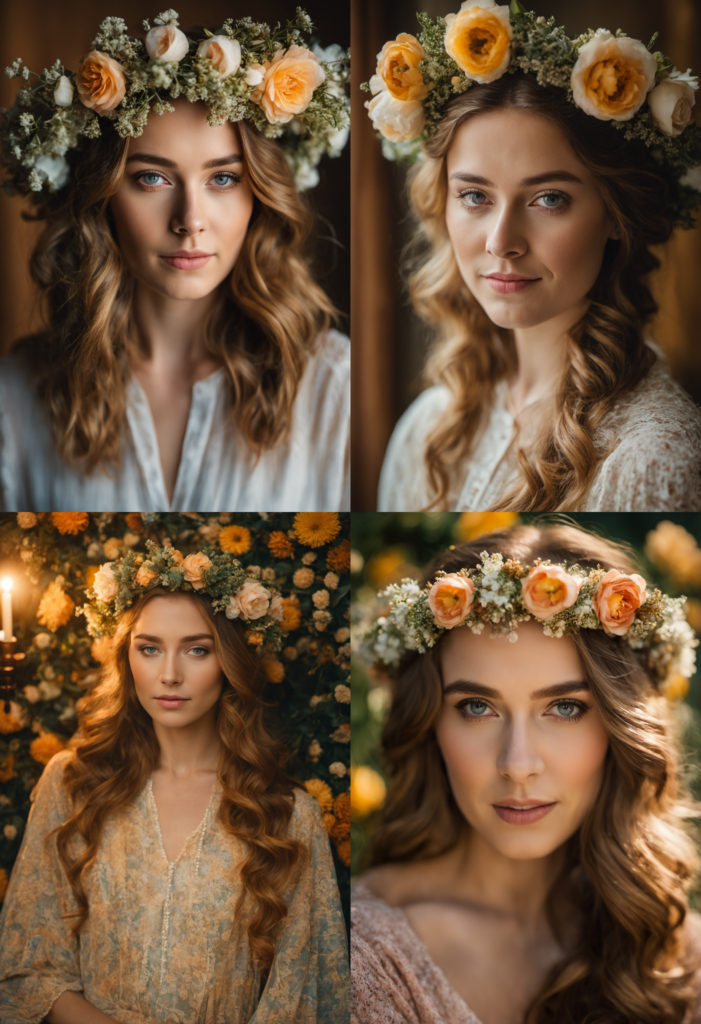
The prompt and model did produce images closer to the original composition.
Tips for reproducing an AI image with Stable Diffusion
You should always try the PNG info method (Method 1) first to get prompts from images because, if you are lucky, it gives you the complete information to recreate the image. This includes the prompt, model, sampling method, sampling steps, etc.
You can experiment with BLIP and the CLIP models for Stable Diffusion v1.5 and XL models. ViT-g-14/laion2b_s34b_b88k could work quite well with an v1.5 model, not just the SDXL.
Don’t hesitate to revise the prompt. As the examples above show, the prompt can be incorrect or missing some objects. Edit the prompt accordingly to describe the image correctly.
Choosing an appropriate checkpoint model is important. The prompt won’t necessarily include the correct style. For example, choose a realistic model if you want to generate realistic people.
Finally, the nuclear option is to use an image prompt. The SD v1.5 Plus model can reproduce an image faithfully with an appropriate prompt.
Great tutorial, Andrew! Trying to figure out the prompt behind an amazing AI image is a common challenge, and you’ve laid out the key methods really clearly.
Method 1, checking the PNG Info, is definitely the most straightforward approach if you’re lucky enough that the creator included the metadata. It’s a lifesaver when it works! You mentioned using an external site if someone isn’t running AUTOMATIC1111 locally. For that specific task – quickly viewing image metadata online to see if prompt/parameters are embedded – I’ve also found exifdata.org(https://exifdata.org/) to be a really solid, free option. It supports multiple languages and gives a comprehensive view without needing any installation.
The CLIP interrogator methods are crucial backups when the metadata isn’t available, and thanks for detailing the different models for v1.5 and SDXL.
Appreciate you sharing these techniques!
Another Option for Checking PNG Info?
Excellent guide, Andrew! Really appreciate how you covered both the direct PNG Info method and the CLIP interrogator approaches for figuring out prompts. Super comprehensive and practical for anyone trying to reverse-engineer AI images.
Regarding Method 1 (reading the metadata from the PNG file), you mentioned using an external site like jimpl.com as an alternative to the AUTOMATIC1111 tab. In the spirit of sharing useful tools for that specific step, another dedicated option focused purely on reading image metadata/EXIF is exifreader.org (https://exifreader.org/). It’s also completely free, supports multiple languages, and is designed for quickly checking that embedded info without needing other software.
Just thought I’d mention it as another resource people might find handy when trying to pull generation data directly from image files.
Thanks again for the super detailed and helpful tutorial!
Hello Andrew!
Your site has been my go-to resource for teaching myself A1111. As someone who doesn’t jive with Video tutorials (I need to read words, dangit!), your tutorials are exactly what I need. I’m looking to evolve my own model to produce illustration fanart, for audiobooks of fanfiction. Maybe real audiobooks, one day, too! Thank you so very, very much! ~Alaiya, One Paw Productions
Thank you for reading my articles!
Hi Andrew!
Thanks for your amazing tutorials I’m learning a lot with you, so thanks for that. I’m trying to achieve to make realistic headshot photos without training (only using 1 image as a prompt). I’m close to get what I need using txt2img + OpenPose + IP Adapter, but even using ip_adapter_plus_face the input face image is getting more information that needed like background or clothes (and I just need the head). As an expert, how would you achieve this? I’ve also tried with img2img with the input subject also affects to the result, if it’s bald, white/black, age.
Many thanks!
Hi! You can try
– Use multiple IP adapter face
– Using IP adapter face only when inpainting the face.
– Roop
– Training a Lora.