FreeU is a Stable Diffusion addon that improves image quality by modifying the model’s denoiser. In this post, you will learn how it works and how to use it in AUTOMATIC1111 and ComfyUI.
Table of Contents
What is FreeU?
FreeU is a method that modifies the U-Net noise predictor in Stable Diffusion to enhance the image generation process. It is described in FreeU: Free Lunch in Diffusion U-Net by Chenyang Si and coworkers.
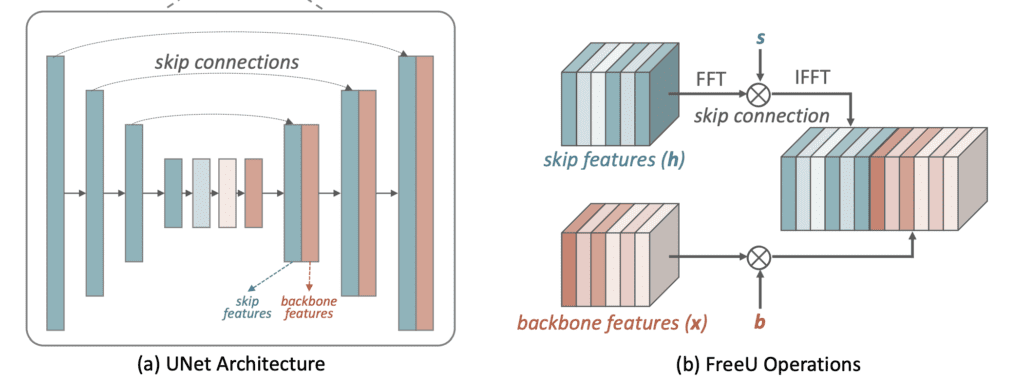
They found that the effect of the noise predictor can be broken into two parts:
- The signal propagation through the backbone layer by layer controls the global composition of the image.
- The signal propagation through the skip connections adds fine details to the image.

Enhancing the signal by a scaling factor b improved image quality but could over-smooth the image. So, an additional scaling factor s is introduced to control the signal propagation of the skip connections. It suppresses the skip connection’s low-frequency contribution (in Fourier space) to reduce its influence on the global composition.
The default parameters of FreeU enhance the backbone features ( s > 1) and suppress the skip low-frequency component of the skip connection features (b < 1).
Effect of FreeU
You can expect the images to be a bit more coherent with FreeU.
The images are slightly sharper and higher contrast with Anime models.


It produces more saturated images with realistic models.


Using FreeU with a SDXL model similarly produce a more saturated image.


The above comparisons are generated with these ComfyUI workflows. Feel free to use them to generate more comparisons on your own.
In my tests, I have better luck with FreeU for Anime or realistic painting style models. Using it in realistic models often increases the contrast too much to my taste.
Use FreeU in AUTOMATIC1111
AUTOMATIC1111 is a popular and free Stable Diffusion software. You can use this GUI on Windows, Mac, or Google Colab.
Check out the Quick Start Guide if you are new to Stable Diffusion. Check out the AUTOMATIC1111 Guide if you are new to AUTOMATIC1111.
Installing the FreeU extension
Install the FreeU extension to use FreeU on AUTOMATIC1111.
- Start AUTOMATIC1111 Web-UI normally.
2. Navigate to the Extension Page.
3. Click the Install from URL tab.
4. Enter the extension’s URL in the URL for extension’s git repository field.
https://github.com/ljleb/sd-webui-freeu5. Click the Install button.
6. Wait for the confirmation message that the installation is complete.
7. Restart AUTOMATIC1111.
Use FreeU in AUTOMATIC1111
Step 1: Enter a prompt
To use FreeU in AUTOMATIC1111, go to the txt2img page.
Enter a prompt and other image settings as usual.
a 25 year old mage, dress, full body, magic, lightning, rim light, moon, night
disfigured, deformed, ugly, nsfw
Model: Anything v5.
Step 2: Enable FreeU
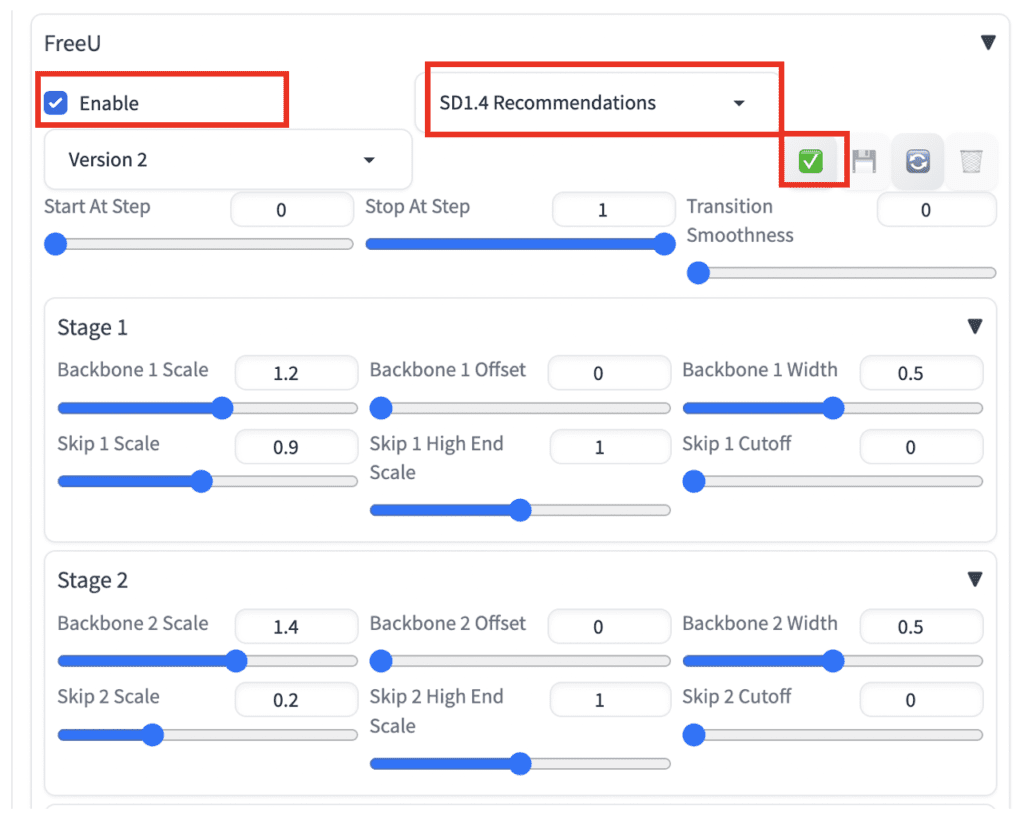
Scroll down to the FreeU section.
Enable: Yes
In the next dropdown menu, select the presets.
- v1.5 models: SD1.4 Recommendations
- v2.1 models: SD2.1 Recommendations
- SDXL models: SDXL Recommendations
Click the Check button to apply the settings.

Step 3: Generate images
Click Generate.
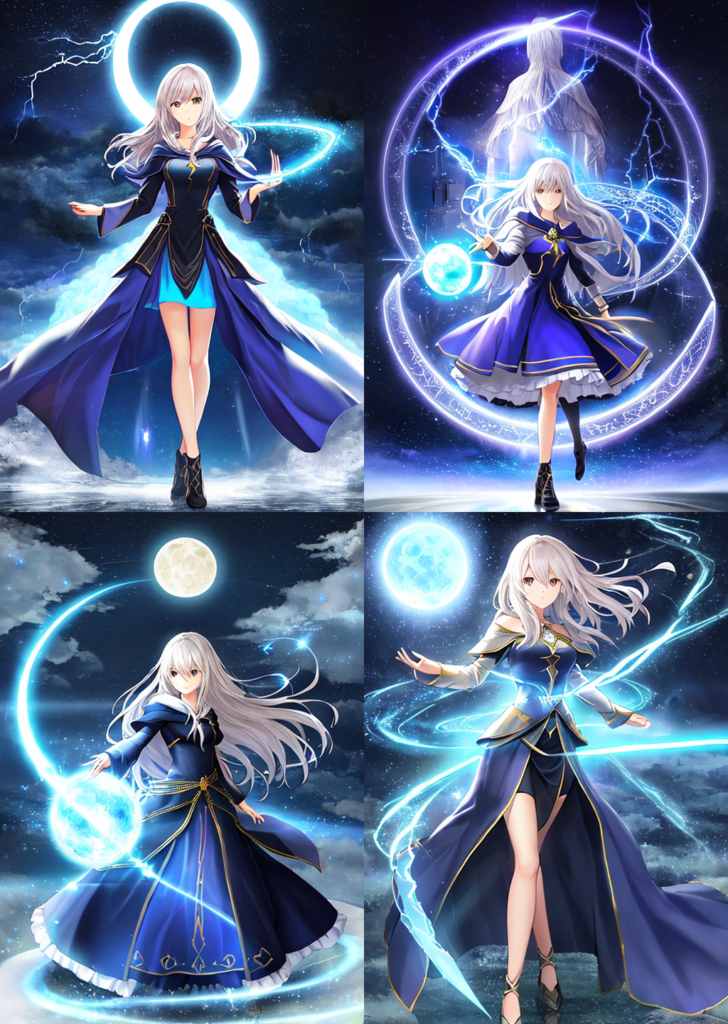
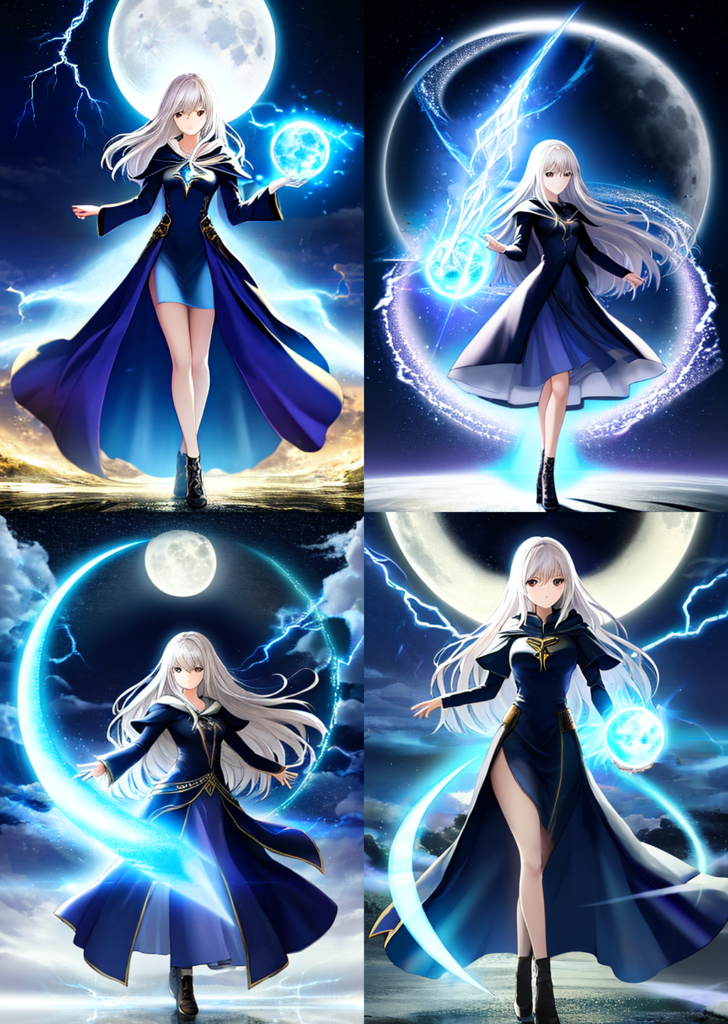
Here are the images with and without FreeU for comparison.


The global anatomy is more correct when enabling FreeU.
Use FreeU in ComfyUI
ComfyUI is another excellent and free option to use FreeU. It is a bit harder to learn but extremely flexible. Once you master it, you can construct your reproducible workflows without developers’ help.
Read the ComfyUI installation guide and ComfyUI beginner’s guide if you are new to ComfyUI.
Using FreeU in ComfyUI is simple. All you need to do is to insert the FreeU or FreeU_v2 custom node between the Load Checkpoint and the KSampler node.

Step 1: Load the FreeU workflow
Download the freeU workflow JSON below.
Drag and drop it to ComfyUI to load it.
You may need to go through the drill: Update ComfyUI, install missing custom nodes, and update all the custom nodes.
Step 2: Select a checkpoint model
Select an SDXL checkpoint model in the Load Checkpoint node.

Step 3: Generate image
Click Queue Prompt to generate an image with FreeU.
Stable Diffusion v1.5 workflow
It is easy to modify the above workflow for Stable Diffusion v1.5 models. You need to change the parameters in the FreeU node.
Here are the recommended parameters.
Stable Diffusion v1.4
b1: 1.3, b2: 1.4, s1: 0.9, s2: 0.2
Stable Diffusion v1.5
b1: 1.5, b2: 1.6, s1: 0.9, s2: 0.2
Stable Diffusion v2.1
b1: 1.4, b2: 1.6, s1: 0.9, s2: 0.2
SDXL
b1: 1.3, b2: 1.4, s1: 0.9, s2: 0.2
Difference between FreeU v1 and FreeU v2
The two versions of FreeU refer to the original and the updated FreeU algorithm. They are described in
Specifically, the formula for calculating the backbone scaling factor is updated in FreeU v2. It accounts for the range of values in backbone feature layers. Compare Equations 3 and 4 in the FreeU v2 paper and Equation 3 in the FreeU v1 paper.
How do you choose? These two ComfyUI can do a 3-way comparison between no FreeU, FreeU v1 and FreeU v2.
Useful links
ChenyangSi/FreeU: FreeU: Free Lunch in Diffusion U-Net – FreeU’s GitHub page
FreeU: Free Lunch in Diffusion U-Net – Research article

I used FreeU in Comfy, and did not notice any benefit from it. Although I know they are even in Fooocus.
They are all much better without. Not every extension is worth using.
I settled with v2, stop at 0.5 and transition smoothness 0.5 on some 1.5 anime models I’ve tested. Seems better on small details before highres. Image coloration can be changed by prompt or external editor, but on complex scenes FreeU gives much more “correct” details. This is just too good.
Also worth mentioning that it is implemented in fooocus v2 under advanced -> debug options
I’m not entirely sure it’s better it gives it a lot more saturated dalle kinda of look
Atleast pictures with free u got hands and legs those little details right
To be honest, looking at the comparison images “Effect of FreeU” its highly questionable for me the FreeU are the better ones.
Especially when looking on the image of the night highway – The image without FreeU has more details:
Without:
The orange car, has the both wheels clearly visible, the white license plate and two back lights.
The buildings are quite sharp and detailed.
With:
The orange car is blurry, it has a dark smear on the back somewhere where front wheel should be. no back wheel. Also the back is just a blurry two lines. The buildings are kind of blurry, especially the central one.
In case of realistic vision example – they seem pretty similar in details though as noted the FreeU seems oversaturated.
And the XL version again – looks like a gaussian blur was applied to the face and skin.
Only the first pair of images seems sharper with FreeU – the glass and the bench
I was a bit disappointed with the results too, though there are people who swear FreeU is really better.
The contrast effect can be reduced by custom parameters. I’m going to test using it in videos, where multiple controlnets often make the images flat. Perhaps freeu is a fix for that…