After Detailer (adetailer) is a Stable Diffusion Automatic11111 web-UI extension that automates inpainting and more. It saves you time and is great for quickly fixing common issues like garbled faces. In this post, you will learn how it works, how to use it, and some common use cases.
Table of Contents
Software
We will use AUTOMATIC1111 Stable Diffusion GUI. You can use this GUI on Windows, Mac, or Google Colab.
Check out the Quick Start Guide if you are new to Stable Diffusion.
Installing After Detailer extension
Google Colab
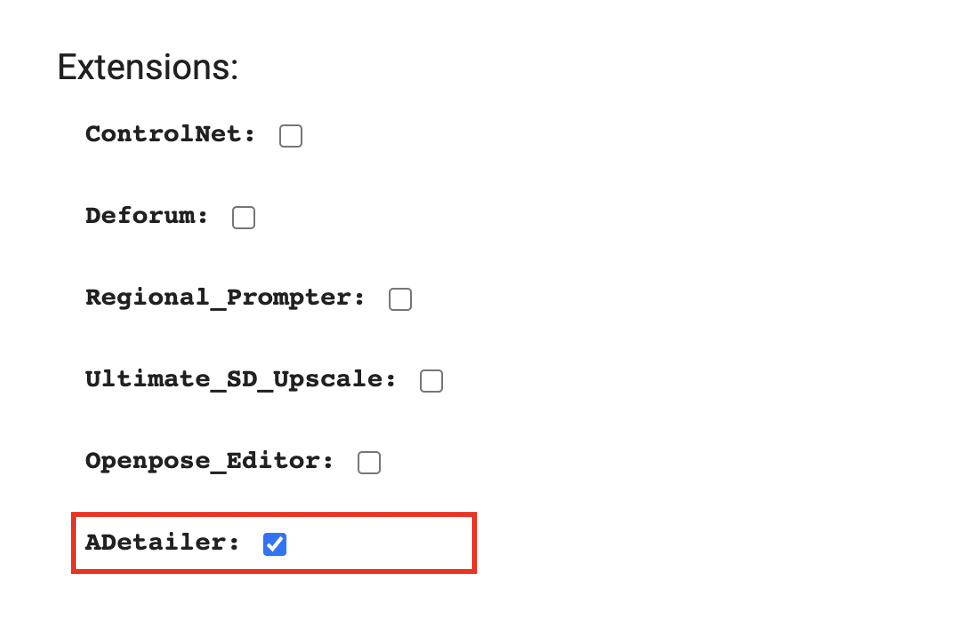
Using After Detailer in our Google Colab notebook is easy. All you need to do is select the ADetailer option in the Extensions section.
Windows or Mac
Follow these steps to install the Regional Prompter extension in AUTOMATIC1111.
- Start AUTOMATIC1111 Web-UI normally.
2. Navigate to the Extension Page.
3. Click the Install from URL tab.
4. Enter the following URL in the URL for extension’s git repository field.
https://github.com/Bing-su/adetailer5. Wait for the confirmation message that the installation is complete.
6. Restart Web-UI.
Inpaint to fix faces
Before learning how to use After Detailer, it is helpful to go through what you would do without it.
Problems with generating small faces
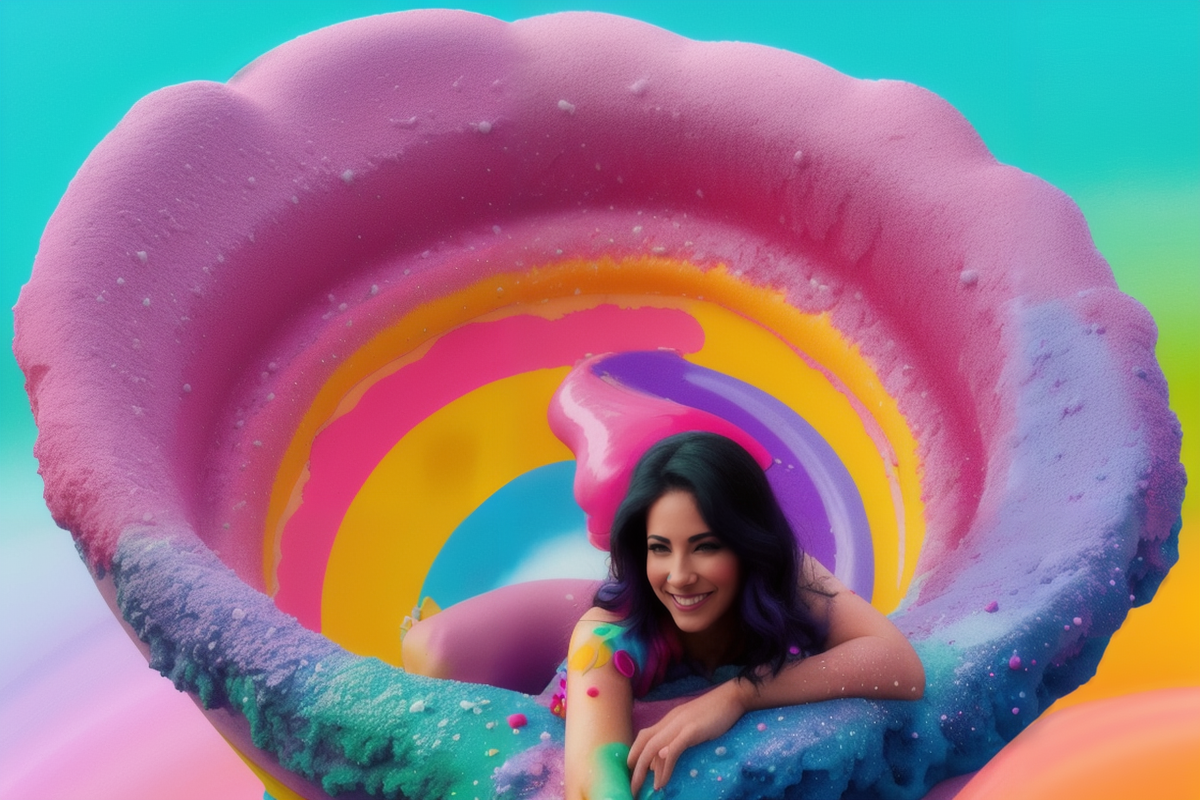
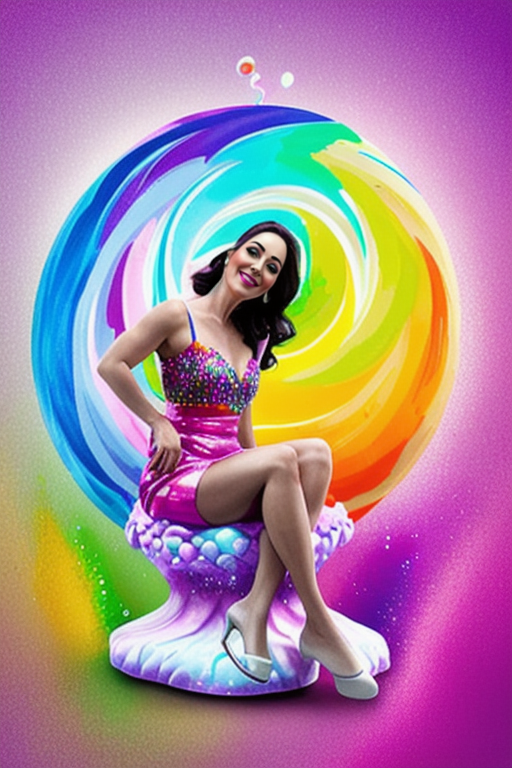
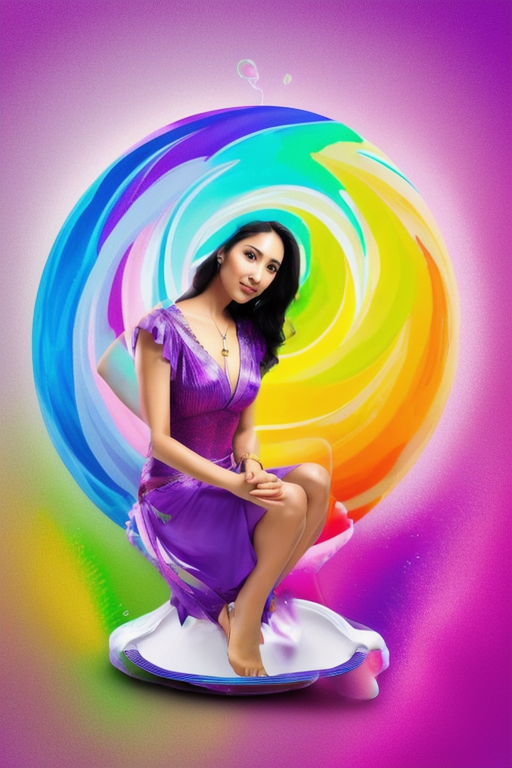
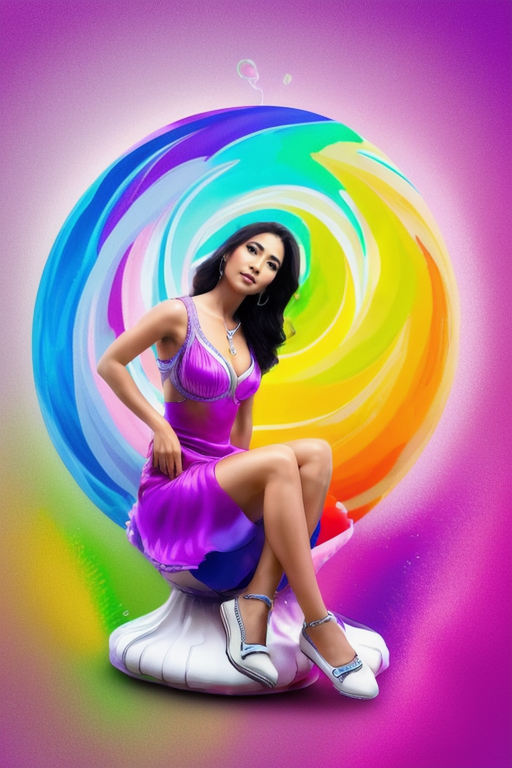
Let’s say you generate a full-body image of a person. Because you are using a v1 model, you should not set the resolution too high (too much larger than 512 pixels). Otherwise, you will have duplicate persons.
Model: Realistic Vision v2
Prompt:
A woman sitting on a giant ice cream, which is adorned with vibrant colors, delightful, and rainbow sprinkles. sweetness and joy, happiness, enchanting fusion, imagination and a fantastical world,fantasy, high contrast, ink strokes, explosions, over exposure, purple and red tone impression , abstract, negative space
Negative prompt:
underage, immature, disfigured, deformed, ugly
Size: 512×768

Because the face is small and the resolution is low, there are not many pixels covering the face. The VAE does not have enough pixels to generate a good face. So the face is garbled.
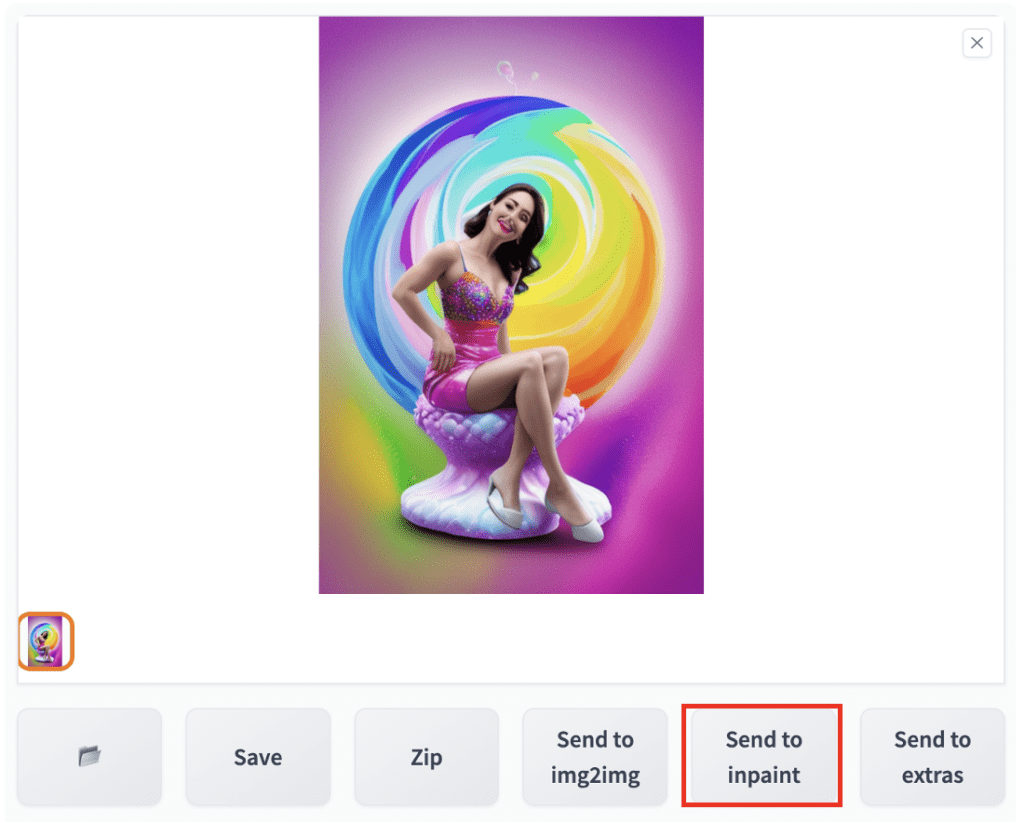
What you would normally do is send the image to Inpainting using the Send to inpaint button.
In the Inpaint tab, draw a mask around the garbled face.
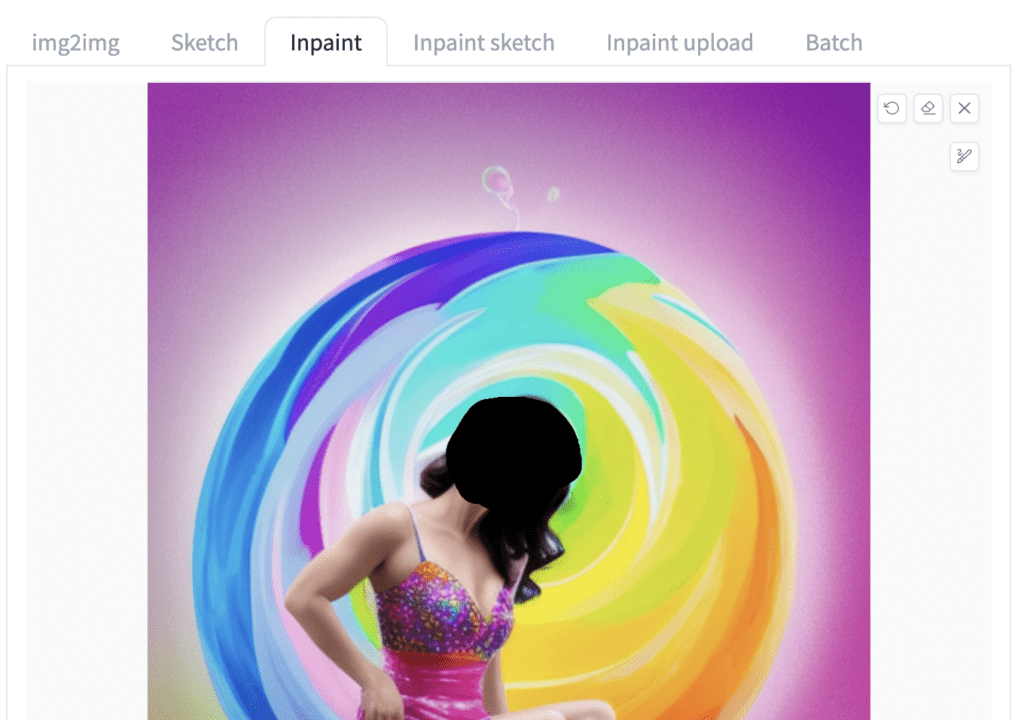
Use the following settings:
- Mask mode: Inpaint masked
- Masked content: Original
- Inpaint area: Only masked
- Denoising strength: 0.5
Press Generate.

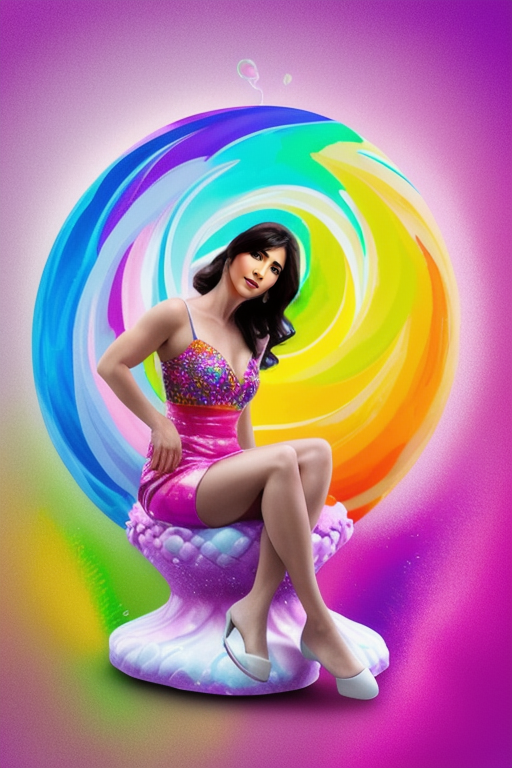
You will see the face fixed nicely. The inpaint only masked option is especially important because it uses the whole resolution (512×768) to regenerate the masked area. Effectively, it regenerates the face at a much higher resolution and then scales it back down to the original resolution. That’s why the face now looks much better.
Automatic inpainting with After Detailer
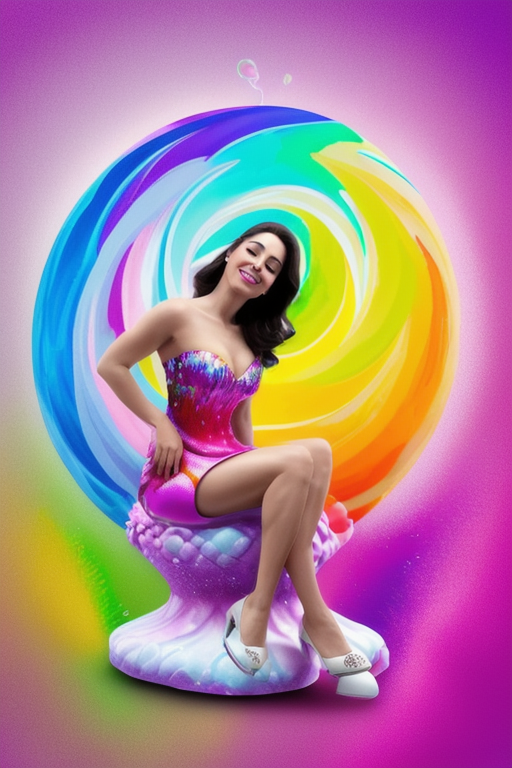
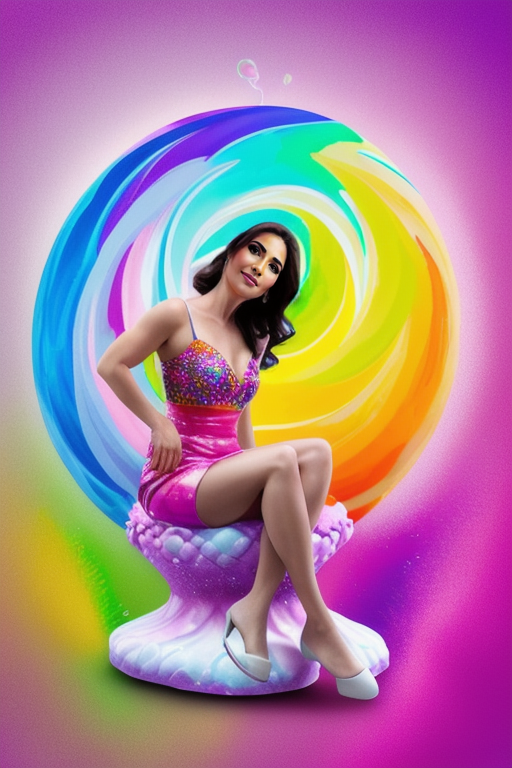
After Detailer automates this process and more. What it does is use a face recognition model to detect the face and create the inpaint mask automatically.

The extension then performs inpainting with only the masked area, like what was done in the last section. The result is:

So it is essentially a time saver extension.
Using After Detailer
Use in Txt2img
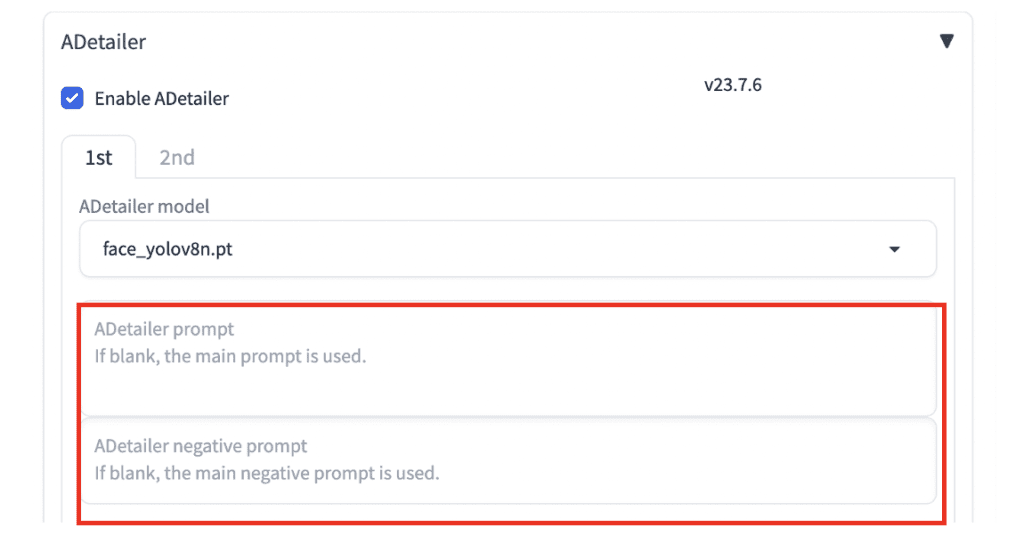
To use After Detailer in txt2img, expand the ADetailer.
Select Enable ADetailer.
Select the face_yolo8n.pt model in the ADetailer model dropdown menu.
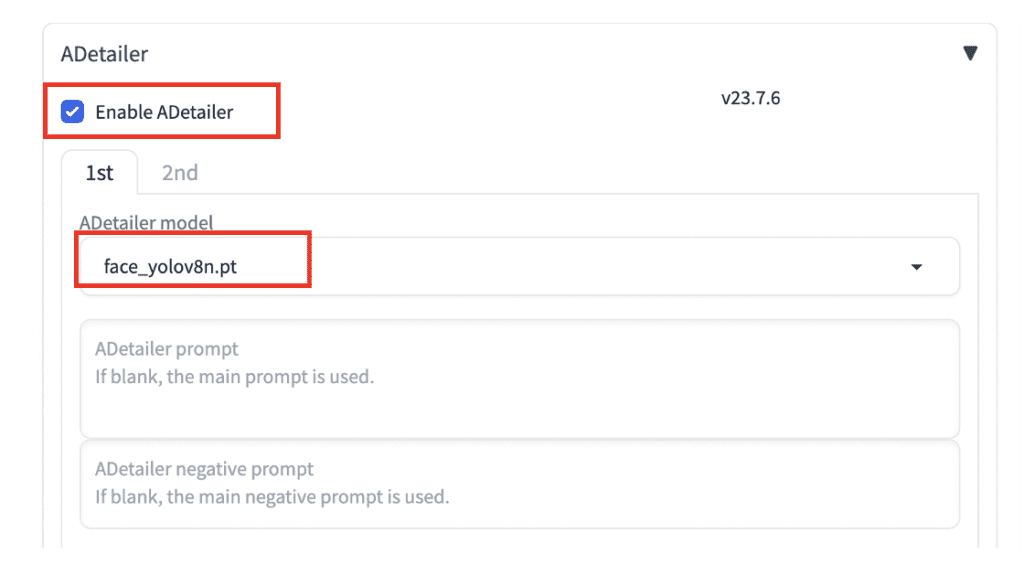
That’s all you need to do to use the basic function of restoring the face.
Press Generate. You get the following image. The reason you don’t get exactly the same face as manual inpainting is that the inpainting masks are drawn differently.

Use in img2img
You can also use After Detailer with image-to-image. The benefit is you can restore faces and add details to the whole image at the same time.
In the txt2img page, send an image to the img2img page using the Send to img2img button. The generation parameters, such as the prompt and the negative prompt, should be automatically populated.
Set denoising strength (of img2img, not ADetailer) to a low value, e.g. 0.1.
Enable After Detailer in the ADetailer section.
Hit Generate. More details are added to the image!
Adjust denoising strength to control the level of details added.

You can also use ADetailer in the inpaint tab. If the masked area is changed.
ADetailer parameters explained
Now you know the basic function, let’s learn some extra parameters to fine-tune its function.
Detection model
Select the detection model in the ADetailer model dropdown menu. The models are divided into a few different groups:
- Face_xxxx: Detect and redraw faces
- Hand_xxxx: Detect and redraw hands
- Person_xxxx: Detect and redraw a whole person
- Mediapipe_face_xxxxx: Detect and redraw faces
The most useful ones are the face_yolo and person_yolo models. The YOLO (You Only Look Once) models are good at detecting faces and objects, and inpainting works well.
However, because more pixels are needed for inpainting the whole person, the face was not inpainted as much detail as when using the face model. It is usually not a good idea to inpaint a large area. If you have an image like this, you are better off inpainting the foot, the skirt,… etc, manually one at a time.
Mediapipe_face is hit or miss. They don’t do too well when the faces are garbled, which is why we need them in the first place…
The hand models are for redrawing hands. But don’t put too much hope on this one because Stable Diffusion is still not good at drawing hands, no matter how many times it redraws them.
Finally, you may wonder about the difference between the YOLO 8n and 8s models. The 8n model is faster but is about 3 times smaller than the 8s model (hence less powerful). I find the 8n model does a good job. Switch to the 8s model if After Detailer has difficulty detecting faces.
Finally, you can use up to two detection models each time. Just switch to the 2nd tab and select an additional model.
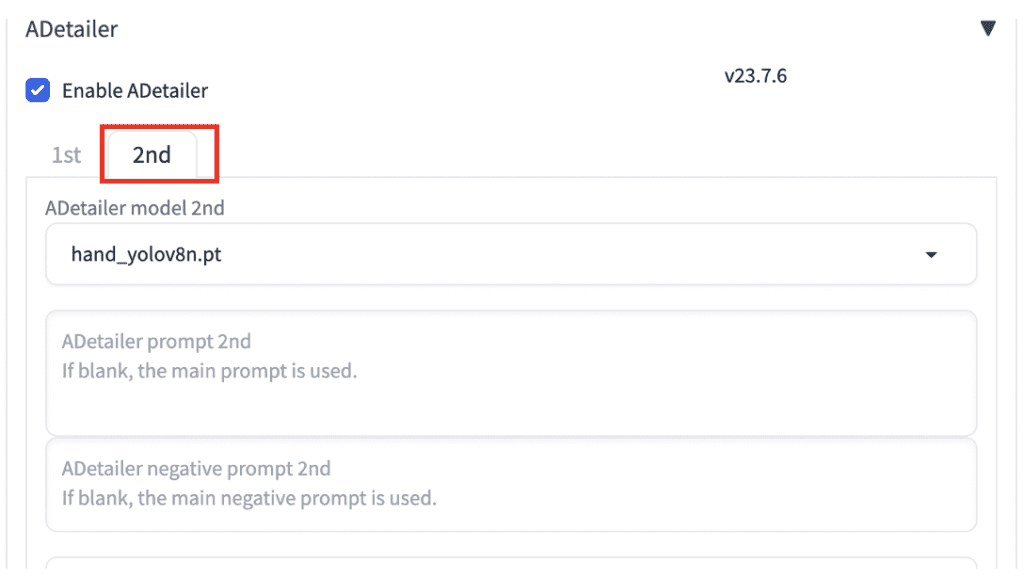
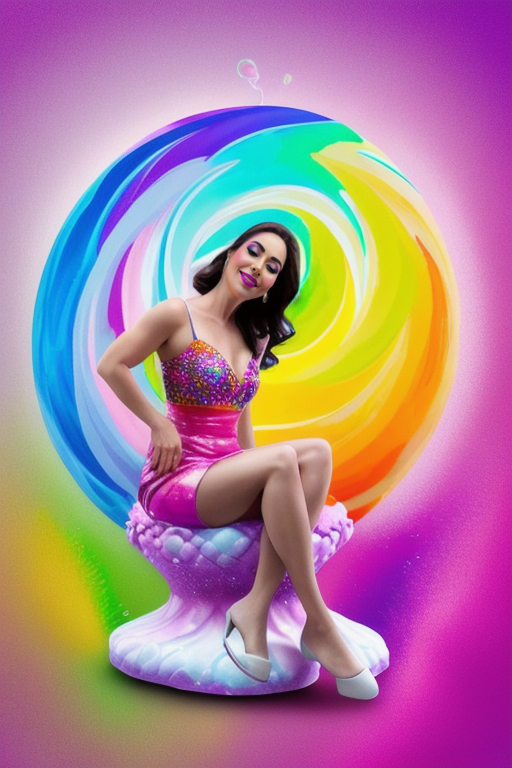
Now it detects the face followed by the hand. It then inpaints to fix both one at a time.
Using a different prompt in inpainting
Using a different prompt allows you to, for example, change the face after inpainting. Put in the prompts and negatives for inpainting in the ADetailer section below.
One common trick is to use multiple celebrity names to dial in the look you want. For example, I want the face to be a blend of two actresses.
(Emma Watson:0.8), Ana de Armas
Keyword weight was used to reduce the effect of Emma Watson, who is usually more powerful.
Adjust the inpainting denoising strength (The one in ADetailer, NOT txt2img) to dial in the effect. Now you get the new blended look!

If you see an inconsistent style on the face, use the celebrity names AND the original prompt instead of using the names alone.
You may wonder why couldn’t you use the celebrity names in the original prompt. You surely can, but because of the association effect, you will inadvertently get objects and styles associated with these powerful names.
Finally, you can use LoRA in the prompt too. Below is the face inpainted with Tifa Lockhart LoRA.
<lora:tifa-nvwls-v1:1>

Detection
The default values work well, but here is what they meant.
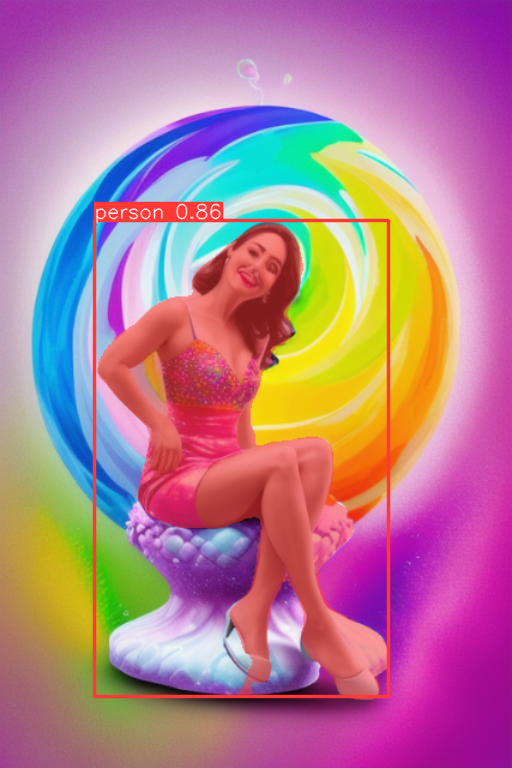
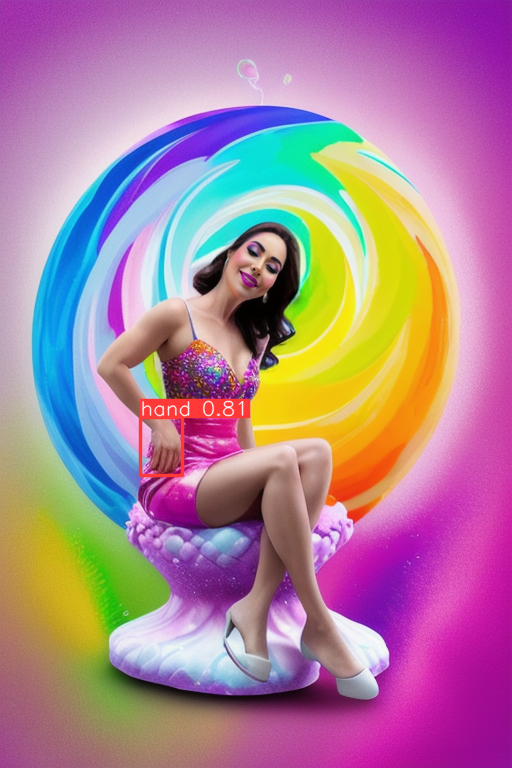
Detection model confidence threshold: Remember the box around the face with a number on top? The number is called the confidence score. 0.8 means the model is 80% confident that this is a face. The threshold is the minimum confidence score needed. If you set it to 0.9, a face with a confidence score 0.8 would not be considered. Keep it low at 0.3. Lower it if you have issues detecting the face. Increase it if you detect too many.
Mask min/max area ratio: The minimum and the maximum area of the detected mask allowed. For example, if you set the min area ratio to 0.1, the extension will reject the detections with masks smaller than 10% of the size of the image. Increase the min if you detect unwanted small objects.
Mask Preprocessing
You usually don’t need to change them.
These are for moving and resizing the mask before inpainting. For best results, enable “Save mask previews” in Settings > ADetailer to understand how the masks are changed. A mask preview image will be saved for each detection.
Mask x/y offset: Move the mask in the x/y direction, in pixels.
Mask erosion (-) / dilation (+): Reduce/Enlarge the mask.
Mask Merge mode:
- None: Inpaint each mask.
- Merge: Merge the masks and then inpaint.
- Merge and invert: Inpaint the unmasked area.
Inpainting
The most important setting in the Inpainting section is the Inpaint denoising strength. It controls the denoising strength used in automatic inpainting. Increase to make more changes. Decrease to change less.
You almost always want to use Inpaint only masked for inpainting faces.
You can optimally define image width, height, CFG scale, and number of sampling steps used in inpainting. But the defaults are ok.
Using ADetailer with ControlNet
ControlNet is an indispensable tool to precisely control image generation. Check out the ControlNet article if you are unfamiliar with it. To use ADetailer with ControlNet, you must have ControlNet installed on your AUTOMATIC1111.
You can select the ControlNet model in the last section.
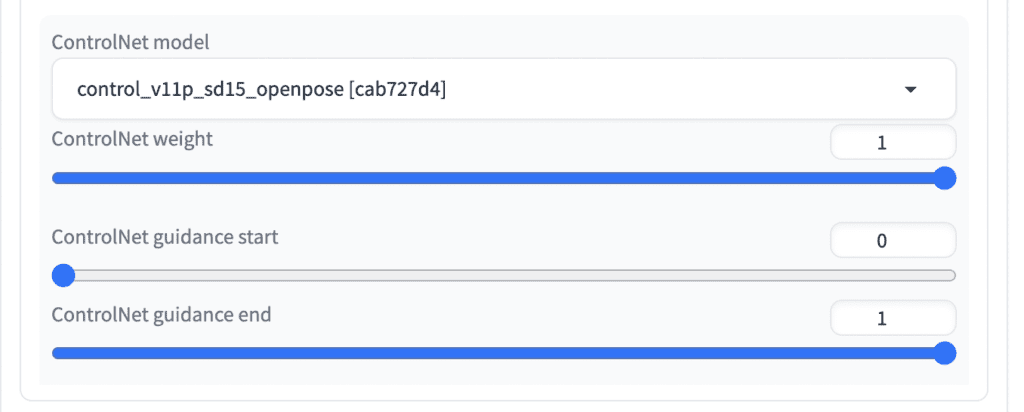
ControlNet Openpose
Use the ControlNet Oopenpose model to inpaint the person with the same pose. Use the openpose model with the person_yolo detection model.
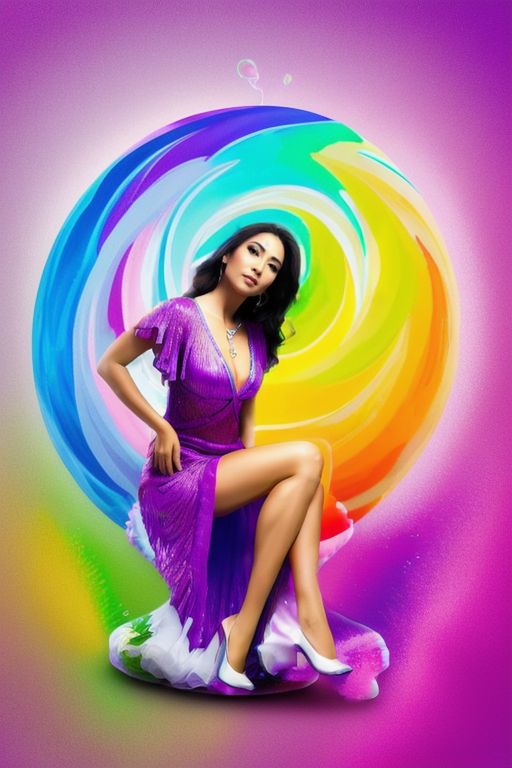
For example, without any ControlNet enabled and with high denoising strength (0.74), the pose is likely to change in a way that is inconsistent with the global image. See the example below.
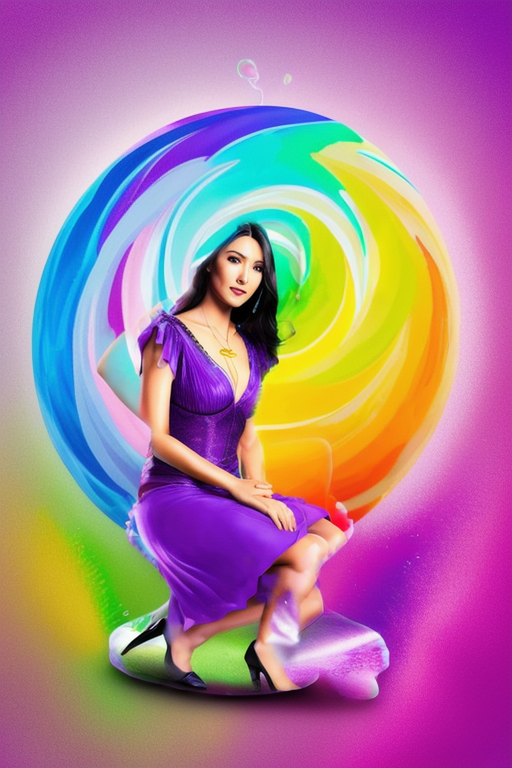
With ControlNet Openpose enabled, the girl’s pose is kept the same after inpainting.
ControlNet Tile
Enable ControlNet Tile to have inpainting better follows the original image.
Below is the result without and with ControlNet Tile.
Enable ControlNet Tile if you want inpainting to be guided by the original content.
ControlNet inpaint
ControlNet inpaint model (control_xxxx_inpaint) with global_inpaint_harmonious preprocessor improves the consistency between the inpainted area and the rest of the image.
For example, it is disastrous to set the inpainting denoising strength to 1 (the maximum) in After Detailer.

The inpainting process has too much freedom to change the masked area and has messed up.
This problem can be resolved by turning on the ControlNet inpainting model and the global_inpaint_harmonious preprocessor.
Use global_inpaint_harmonious when you want to set the inpainting denoising strength high. Adjust the value slightly or change the seed to get a different generation.
ControlNet Line art
ControlNet line art lets the inpainting process follows the general outline of the original image.
Use ControlNet line art if you want the inpainted image to follow the outline of the original content.
ADetailer vs face restoration
Both ADetialer and the face restoration option can be used to fix garbled faces. After Detailer uses inpainting at a higher resolution and scales it back down to fix a face. Face restoration uses another AI model, such as CodeFormer and GFGAN, to restore the face.
Using inpainting (such as using ADetailer) is preferred because
- The face restoration model could produce a style that is inconsistent with your Stable Diffusion model.
- You can further direct the inpainting by modifying the prompt and ControlNet.
When to use ADetailer
There’s nothing you can do in ADetailer that you can’t do manually. ADetailer automates the following process.
- Send the image to inpainting
- Create inpaint mask
- Setup ControlNet (Optional)
- Generate inpaint
The most valuable aspect of using this extension is automation so that you can use create multiple images with the same settings (batch size larger than 1). This is tedious to do with a manual workflow.
So that’s it. I hope you’ve enjoyed this tutorial. Let me know if you have any comments or feedback in the comments below.
Tips
When using ADetailer with img2img, there are two denoising strengths to set. The denoising strength of img2img sets the value for the whole image. The inpaint denoising strength in ADetailer sets the denoising strength for inpainting.
You can optionally turn on saving the result of the detection model in Settings > ADetailer. It will save an additional image with the detected area and the confidence scores.
Reference
Bing-su/adetailer: Auto detecting, masking and inpainting with detection model. – Official GitHub page.
BTW. If you use adetailer via Inpaint and get some results, then decide to change to img2img and do some upscaling, or some other purpose. The Inpaint adetailer subtab controls are still active, even though you switched from Inpaint to img2img. One solution is to reboot the session. Erf. Or, go back to Inpaint/adetailer and turn everything off there. Then img2img won’t be adetailer fixing things when it wasn’t asked. I do not know what happens if you have adetailer turned on under both Inpaint & img2img, probably nothing good.
I forgot one of the important rules. If your image doesn’t come out, consider changing a parameter, like sample steps or de-noising. I couldn’t figure out why upscaling had face & body mods appearing on legs or the torso of my human figure render. My issue/s may not be adetailer at all. Buried in the render image must be “shadows” that can resemble a human figure and upscaler brings them to the front. I decreased denoising and that made my weird extra faces go away.
Hey Andrew, I have a question that I am unable to find in most platforms. If I wish to switch to a desired face of a portrait that I own, how do I use with ADetailer? Currently am using ControlNet – Insight IP adapter which couldn’t give me consistent face of the original photo.
You can manually do what Adetailer does. Send the image to inpainting. Inpainting the face with low denoising strengths (<0.5) with ip-adapter enabled the same way as txt2img.
Thanks for another great guide. Simply enough and well explained. Solved most of my doubts about the Adetailer/Controlnet relation. This one could deserve an update, all those type of YOLO models confused me, and specially now that Youlo9 is public, . Or maybe one specific article around SDXL?
All yolo models are doing the same thing but slightly different accuracy and run time. You can keep using the default one if you are happy with the automatic detection. Switch to a bigger model for better detection. See model names below.
https://github.com/ultralytics/ultralytics?tab=readme-ov-file#models
Basically x (extra large) > l (large) > m (medium) > s (small) > n (nano)
Higher version is usually better.
They act on the final pixel images and should work the same for SD 1.5 and XL.
Thanks so much! This one was the game-changer I was looking for. AD seems built around the idea that the main determinant of composition in SD is aspect and resolution and works around that admirably, while allowing the subsection prompt-editing necessary to make that work. I just wish I could use it for other masks (coat? hair?) and not have to manually remove my face-related prompts from my hand-related prompts– to not have to witness a 50-sample war between “Must have ‘huge radiant eyes’ in any image calculated!” and “I don’t think eyes go on hands….”
Great post, thanks for sharing! I use EraseID for fixing the face as it gives much more freedom and quality, but ADetailer looks like an handy fix in the same workflow.
Best tutorial I’ve ever read. No confusion in the verbiage,
everything explained well……simple and painless. Please do more!
Thanks! 🙂
Can you make a tutorial on manual hires fix. In imgtoimg. I saw post on Reddit to describe the process but I can’t get good results
let me look into it.
This has been so helpful for me in improving faces in realistic images. Thank you!
It’s not so great at hands, and hands in general as we know are REAL challenge! I’ve heard that using an embedding in the negative prompt can help but haven’t had much success so far. Does anyone else do this and if so what embeddings have you found to work best?
There is a “Good Hands” lora model available on civitai which seems relatively popular based on how often I’ve seen it in random prompts. I seen some people who use it by default when generating txt2img, but I think the most common way it’s used is for fixing bad hands in otherwise good images where they occur. I’ve mostly had success with it when using it this way: https://civitai.com/models/47085/envybetterhands-locon
Other than that, I’ve also used ControlNet successfully for fixing hands while inpainting, either using openpose or sometimes using one of the soft lines / sketch / line art preprocessors to create a simplified doodle of the bad hands, which I then fix in an image editor before bringing it back to ControlNet.
There is also an extension available for AUTOMATIC1111 which comes with a library of hand depthmaps in various positions. You can take the hand depthmap and then take the depth map for the image your trying to fix and erase the messed up hand in the image depthmap. Then you superimpose the depthmap for the good hand on top of your image’s depthmap before feeding that back into ControlNet to guide inpainting. I’ve had a bit of success with this, but not as much as I would like given the amount of work it takes to match up a proper hand depth map in the giant collection that comes w/ the extension and then the work to match it up with the image’s depthmap, etc.
This is INCREDIBLE. I saw people post about ADetailer and there would be zillions of numbers, and I just thought “I can’t do this.” Your tutorial comes. Clickety click.
…
THANK YOU.
Also, this works with SDXL. I set the resolution to 1024×1024. I mostly work with photorealism and low light. This is stunning and I can’t even tell how much time it saves me. And I didn’t even get to the advanced options, just face fix (I set two passes, v8n with 0.7 first, v8s with 0.3 second.) Suddenly it’s no longer a melted wax figure! What is this sorcery?!
Good point on SDXL. Didn’t occur to me to try!
Are you a mind-reader as well? I looked for !ADetalier tutorials here just last week and was going to post a request for one!
haha, just trying to write things that are useful.
Works great! Would be fantastic if we had the same for hands!
Hands are incredibly difficult. Once I get to it, i.e. probably never, I intend to write a blog post about it. SDXL 0.9 is… less bad. Photon does a… not bad either job.
I rendered one image of a warrior holding a sword CORRECTLY with THE RIGHT NUMBER OF FINGERS and I will treasure it forever.
That’s mighty insensitive to people born with non-standard numbers of fingers, lmao
I’m putting you on the DEI committee LOL
excellent ! thanks !!!
Available for Mac and Windows? Most of this stuff is developed on Linux and runs better on Linux.
Yes. Works better on Windows with nvidia card than Mac. Little difference between Linux and Windows as it runs on Nvidia gpu.
first decent explanation of adetailer that I’ve read
Thanks a lot for this comprehensive explanation. Helps a lot!