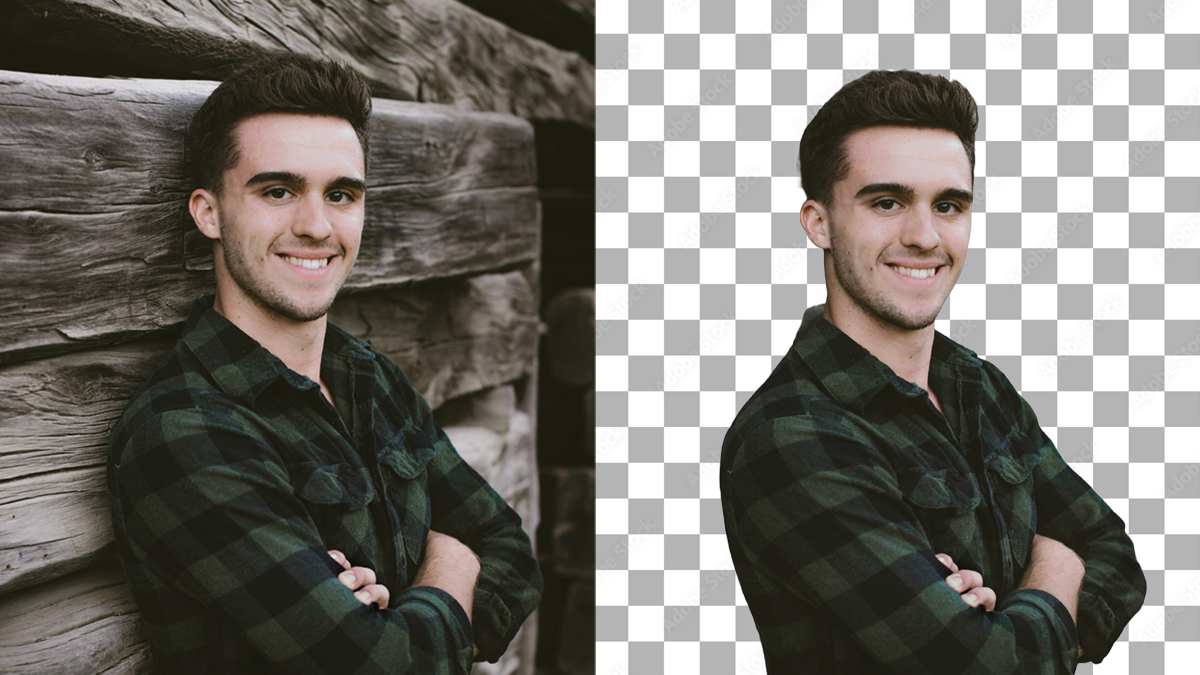
Background removal is an essential tool for digital artists and graphic designers. It cuts clutter and enhances focus. You can reuse the image in a different context.
In this tutorial, I will show you how to remove the background of an image in ComfyUI.
Table of Contents
Software
We will use ComfyUI, a free AI image and video generator. You can use it on Windows, Mac, or Google Colab.
Think Diffusion provides an online ComfyUI service. They offer an extra 20% credit to our readers.
Read the ComfyUI beginner’s guide if you are new to ComfyUI. See the Quick Start Guide if you are new to AI images and videos.
Take the ComfyUI course to learn how to use ComfyUI step by step.
Alternatives
Many online tools remove background but may require sign up or payment to download the processed image in the original resolution. Also, it may not be a good idea to use them if you have privacy or confidentiality concerns.
Instead of ComfyUI, you can also use AUTOMATIC1111 for background removal.
Step-by-step guide
You will need the ComfyUI manager to follow this tutorial.
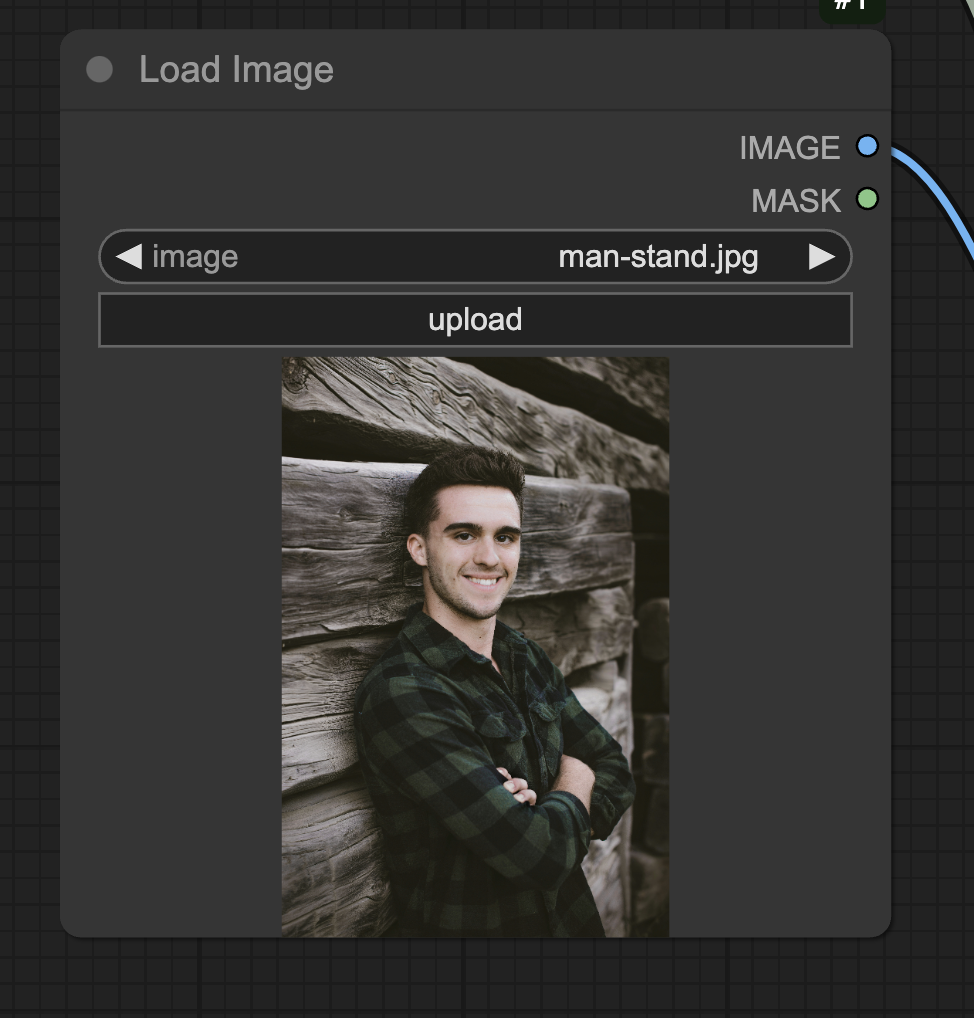
Step 1: Load workflow
Download the JSON workflow below and drop it to ComfyUI.
Step 2: Install missing nodes
If you see red nodes, you don’t have the custom node that this workflow uses.
Click Manager > Install missing custom nodes and install the missing nodes.
Restart ComfyUI.
Step 3: Install background removal model
Download the BRIA background removal model. Put it in ComfyUI > custom_nodes > ComfyUI-BRIA_AI-RMBG > RMBG-1.4
Step 4: Run the workflow
Drop an image load image node.
Click Queue to run the workflow.


hello , how i could change backround, and put on a real back round, with automatic1111 or comfluy , what it is better ?
Both works. comfyui is for canned workflow. A1111 is more iterative.
A new version of this model has been released and is claimed to be better than v1.4: “RMBG v2.0 is our new state-of-the-art background removal model significantly improves RMBG v1.4.” You might wanna check this out.
https://huggingface.co/briaai/RMBG-2.0
RMBG-1.4 as subscribed by Andrew works well (also without registration), I tried to install RMBG-2.0, this is a horror. For the workflow you need 3 different tokens. I gave up. And you can only use it for non-commercial images, as the model is released under a CC BY-NC 4.0 license for non-commercial use.
Thanks for this! It works very very well as far as i can tell after a few test runs.
I am commenting because I had troubles with the installation though and this might help other people who run into the same problem…
The installation of the model is confusing or unclear. The correct way can be found on their github page:
Change into the custom_nodes folder in your ComfyUI folder and from there run
git clone https://github.com/ZHO-ZHO-ZHO/ComfyUI-BRIA_AI-RMBG.git
Thanks again for the fantastic How-to!
Happy removing! 😉
And after that one can continue with Step 3…
Thanks! The instructions are for installing with the ComfyUI Manager. It is an essential custom nodes if you use ComfyUI regularly.
I have the manager installed. And followed the instructions step by step. But it didn’t work. Until I found that additional step using the git clone command.
Well… if somebody else has the same problem they find the solution here. If nobody has it I wasted 2 minutes of my life… not the first and probably not the last 😉
Thanks, Andrew, for all the great tutorials and workflows!