ComfyUI is the leading local AI image and video generator. But it can be daunting for new users because many are unfamiliar with the node-based interface. Many just don’t know where to start!
If you feel overwhelmed by the nodes, you can hide the nodes and connections by using subgraphs.
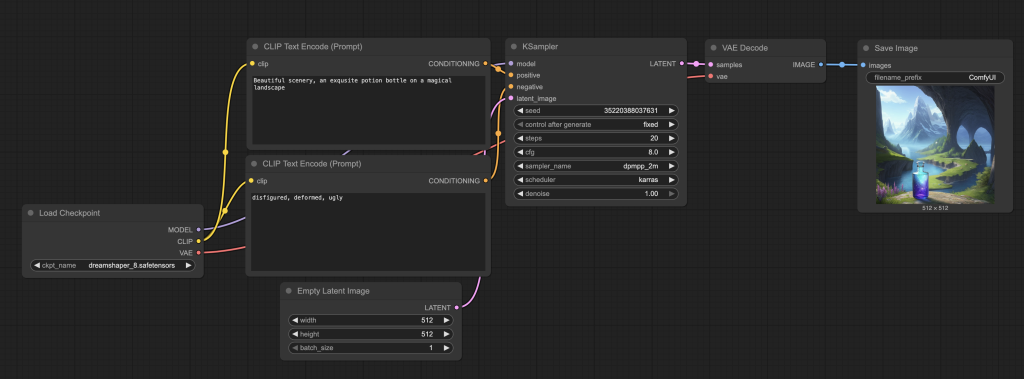
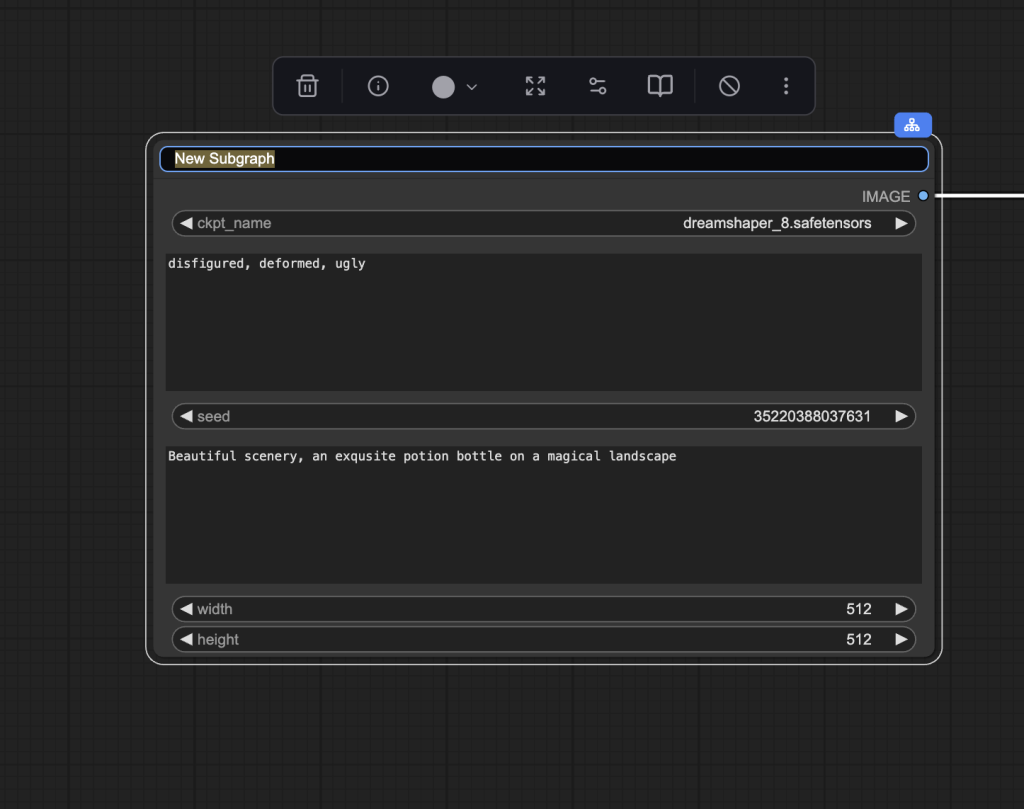
What does a subgraph do? It simplifies a workflow from this:
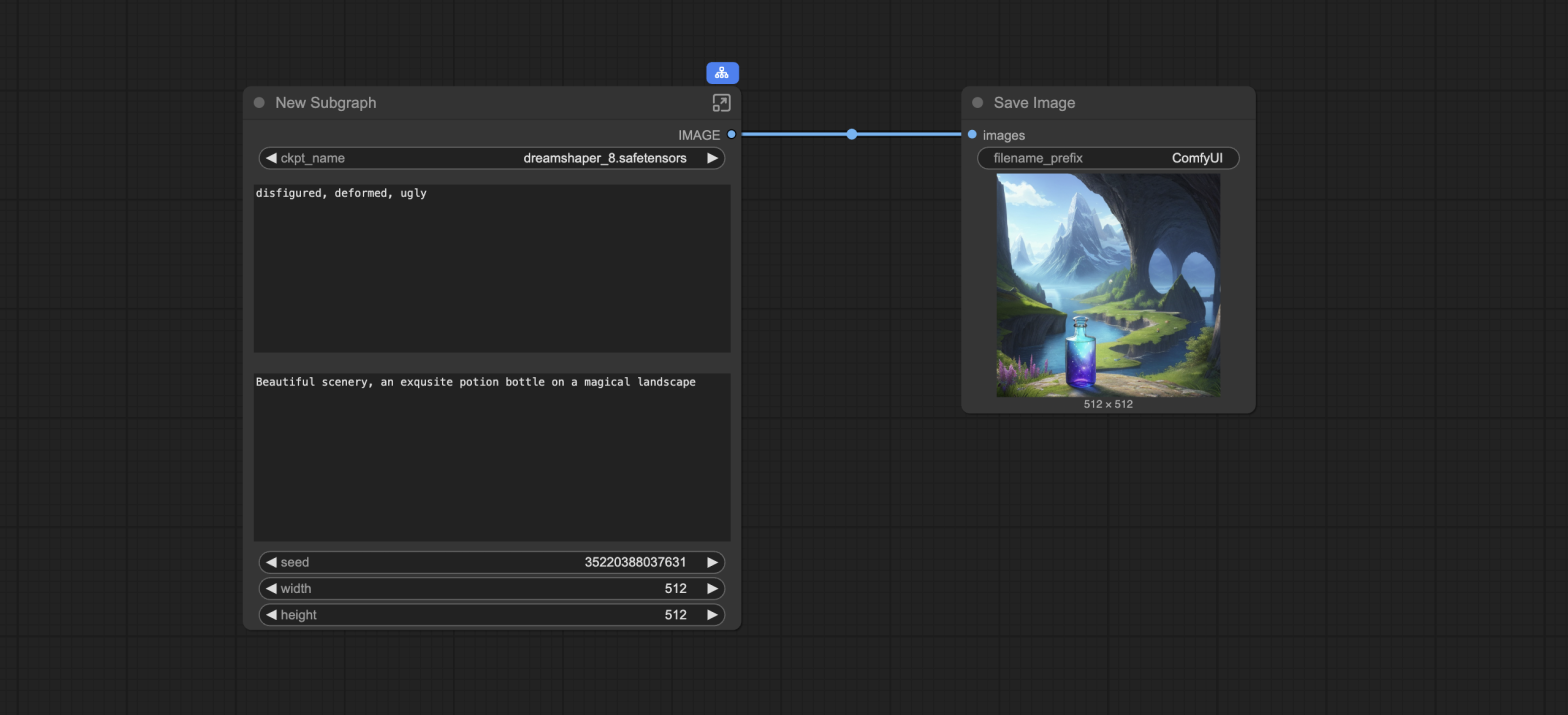
To this:

In this article, you will find:
- A step-by-step guide to creating a subgraph in ComfyUI
- My take on its current state
Table of Contents
Software
We will use ComfyUI, a free AI image and video generator. You can use it on Windows, Mac, or Google Colab.
Think Diffusion provides an online ComfyUI service. They offer an extra 20% credit to our readers.
Read the ComfyUI beginner’s guide if you are new to ComfyUI. See the Quick Start Guide if you are new to AI images and videos.
Take the ComfyUI course to learn how to use ComfyUI step by step.
Using subgraphs
Here’s the step-by-step guide on using subgraphs.
Step 1: Load a workflow
You can use any workflow with more than one node. We will use the following text-to-image workflow as an example.
Download the workflow JSON file below.
Drag and drop it to ComfyUI to load.
Step 2: Select some nodes
Select a group of nodes that you want to turn into a subgraph.
We will select all nodes except the Save Image node.
Hold down the Ctrl key and the left button of your mouse at the same time.
Move the mouse to select all nodes except the Save Image node.

You should see the nodes highlighted.
Step 3: Create a subgraph
Click the subgraph button on the floating toolbar.
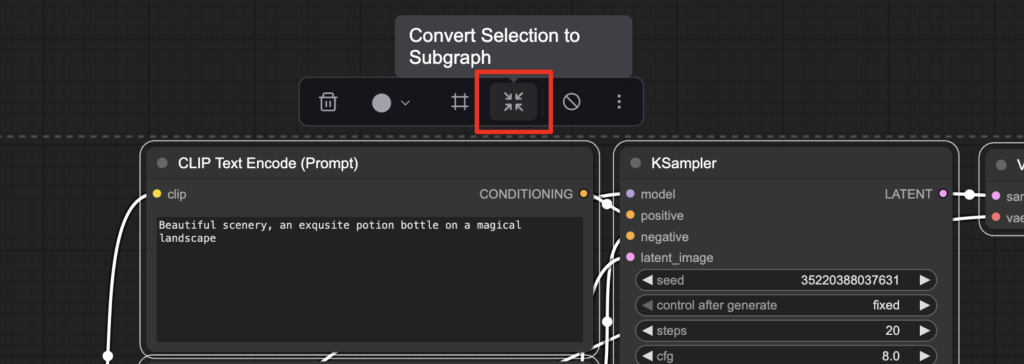
You should see the selected nodes collapsed to a subgraph.
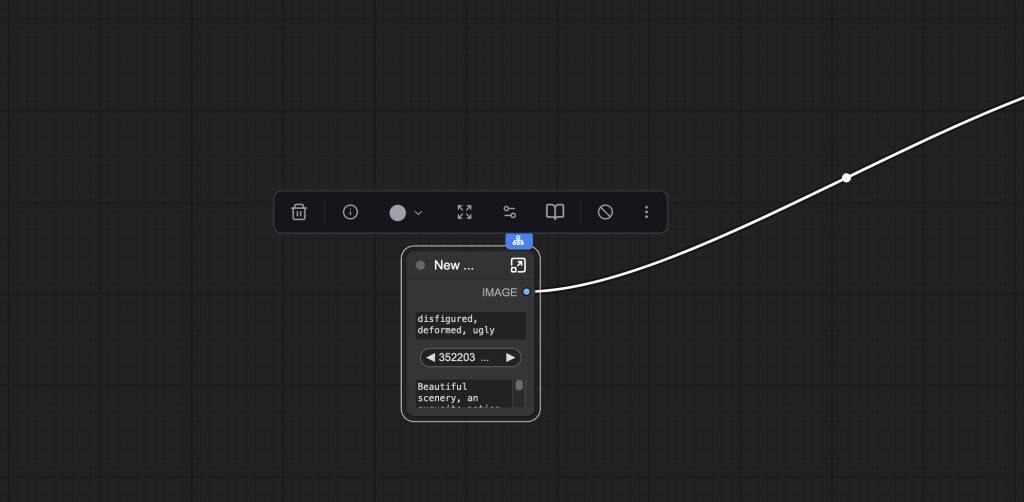
Drag the corner of the subgraph to enlarge it.
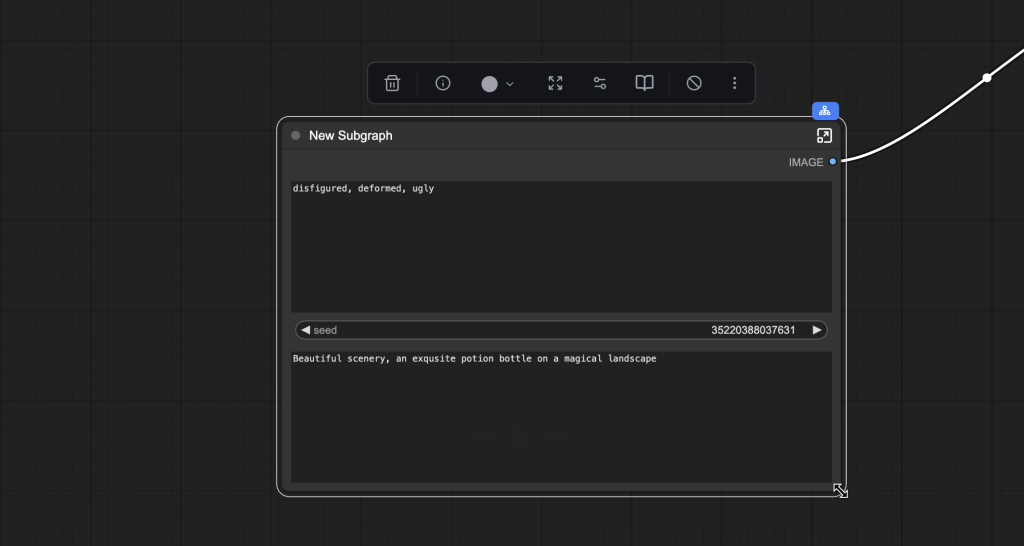
Step 4: Select the visible settings
You see some settings, such as prompts and seed, visible on the subgraph. You can show or hide any settings.
Click the Edit Subgraph Widgets button on the floating menu.
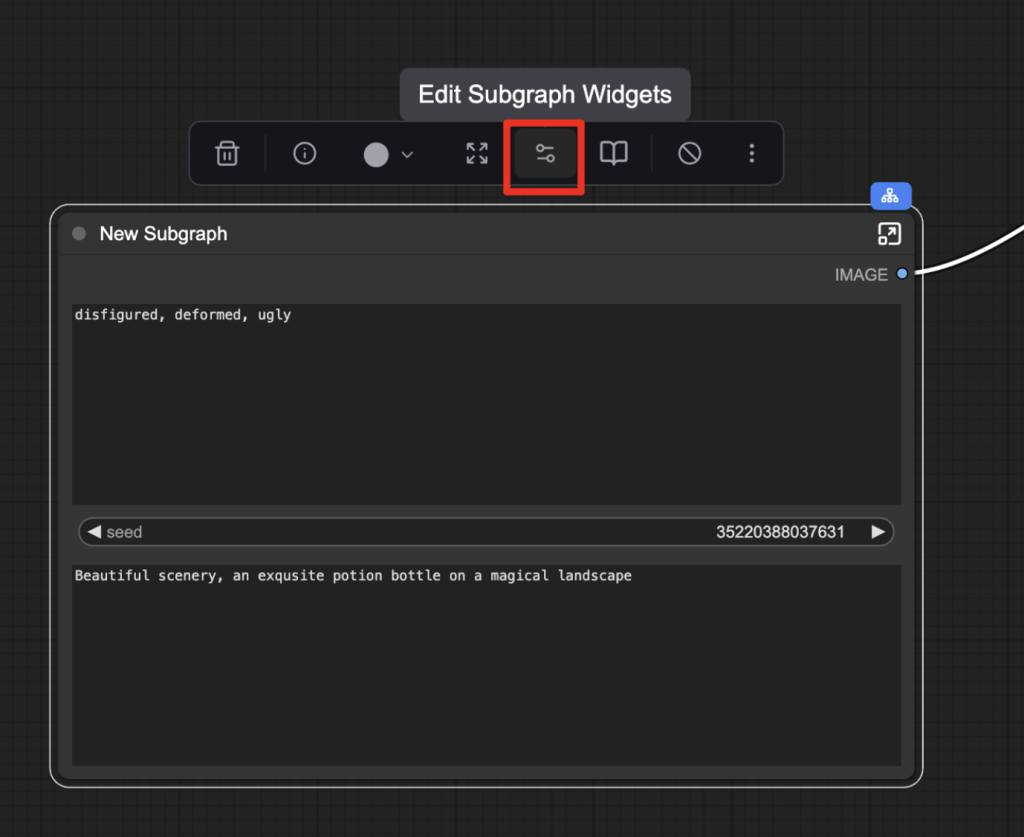
A parameters menu appears. Click the eyes icon to show or hide any settings.
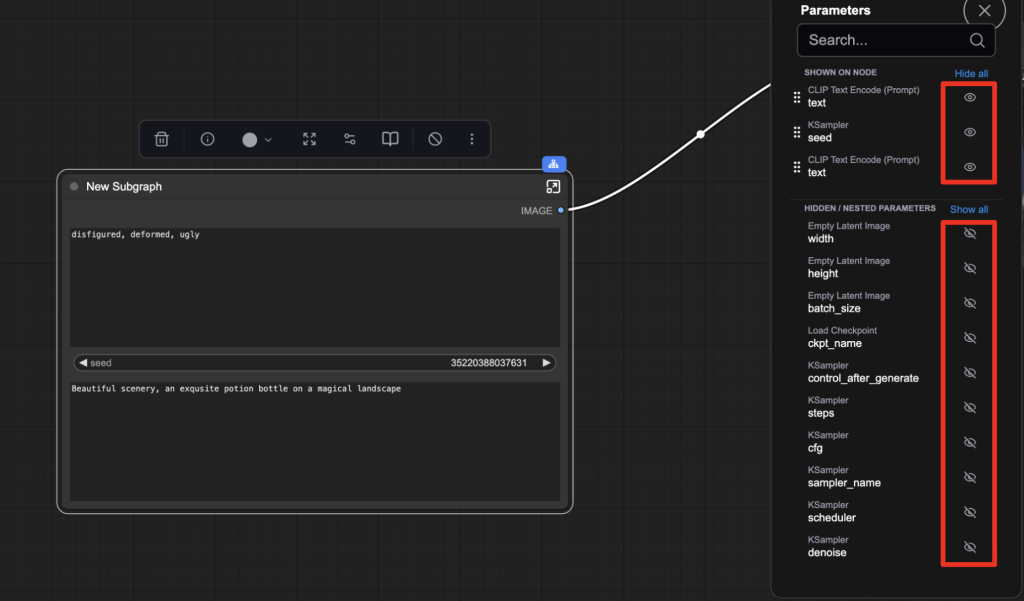
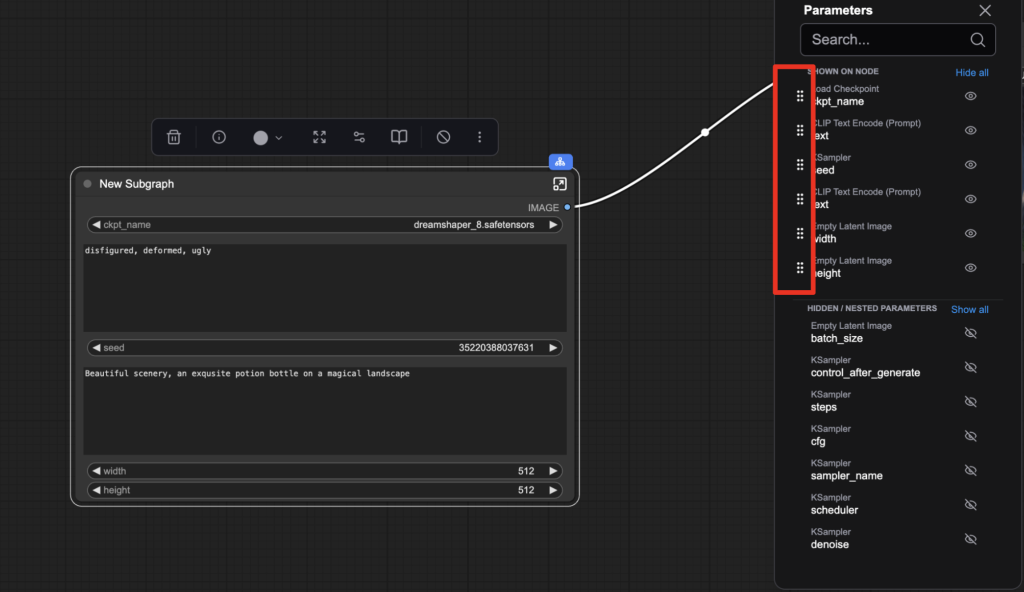
Rearrange the order by dragging a setting tag.
Edit the title of the subgraph by double-clicking the title.
You can download the final subgraphed workflow below.
My take on ComfyUI subgraphs
ComfyUI subgraphs aim to address a major problem: the interface intimidates new users. Beginners often describe ComfyUI as having a steep learning curve.
In reality, most people are content to run premade workflows (such as the workflow JSON files on this site).
Subgraph serves two purposes:
- Hide nodes and lines to make the workflow look simpler.
- Expose only necessary input fields.
Subgraphs make the local workflow functions more like those on Replicate and fal: You don’t need to know how it works, and you can only change specific vital parameters. (e.g. prompt)
What needs to be improved
I think subgraph is a step in the right direction. Here are a few things I wish would come true.
- Widget labels: Take my Graffiti generator as an example. It uses a third-party Multiline Textbox node that didn’t display any label.
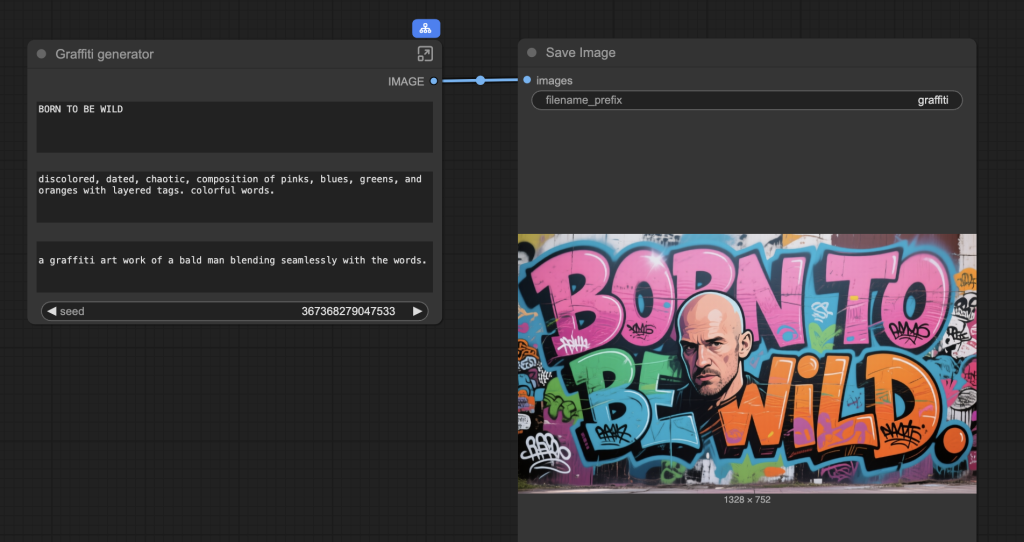
I want users to know that the first text box is for the graffiti text, the second is for the style, and so on. It would be great if I could assign a label to a widget, or if ComfyUI has a label node.
2. Widget placement. Currently, you can only place them linearly from top to bottom. More freedom would be great.
3. Restricting input range: The input ranges in the nodes themselves are often meant to be generic. Some values may not work for this workflow. For example, you don’t want to set the denoising strength to 1 in some inpainting workflows.
Okay, that’s all of my rant… do you use subgraphs? Do you like them? Let me know in the comments!
Nice to know about this feature. I also use setnode/getnode all over the workflow to separate parts visually. Very useful are pipes connected to those nodes.
Sure, but why are Prompts and Seed always the first to appear as visible settings after ‘convert’?
I don’t care much for them. I like to have everything in view. Maybe my workflows are not complicated enough to warrant it.
What about the models being located in different places? You have to open each graph and reselect them.
You can expose the model dropdown menu to subgraph.
Hi, Andrew, I agree with your comments on some of the issues with subgraphs.
I find them useful to tidy up otherwise messy workflows but I’ve also found there are some nodes that don’t work as one would hope. For example the rgthree power load lora node where turning on/off or changing the loras or strengths doesn’t always work when the node is within a subgraph. Also, there are some nodes that don’t make sense to have within a subgraph, for example ones that you might want to bypass for some runs. So it takes a bit of experimentation to get best use out of them. A good idea, though, and hopefully future versions will have the improvements you’ve suggested and they will fix the bugs.