You can easily create some stunning and unique text effect images using Stable Diffusion and ControlNet. Here are some cool text effects you will learn how to make in this tutorial.


You will learn 3 methods to dial in the effect.
Table of Contents
Software
We will use AUTOMATIC1111 Stable Diffusion GUI to create text effect images. You can use this GUI on Windows, Mac, or Google Colab.
You will also need to have the ControlNet extension installed. See the ControlNet tutorial for installation instructions.
Method 1: Txt2img with ControlNet
Step-by-step guide
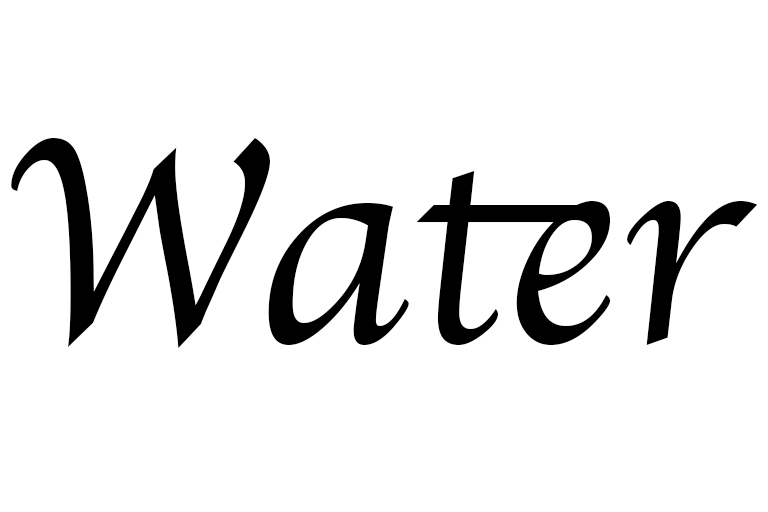
- Create an image with black text and white background. You can use this website or any photo editing tool. Set the image size to 768 x 512 pixels. Save as a PNG file.
Below is an example.
2. Open AUTOMATIC1111 WebUI and navigate to the txt2img page.
3. In the ControlNet section, upload the text image to the image canvas.
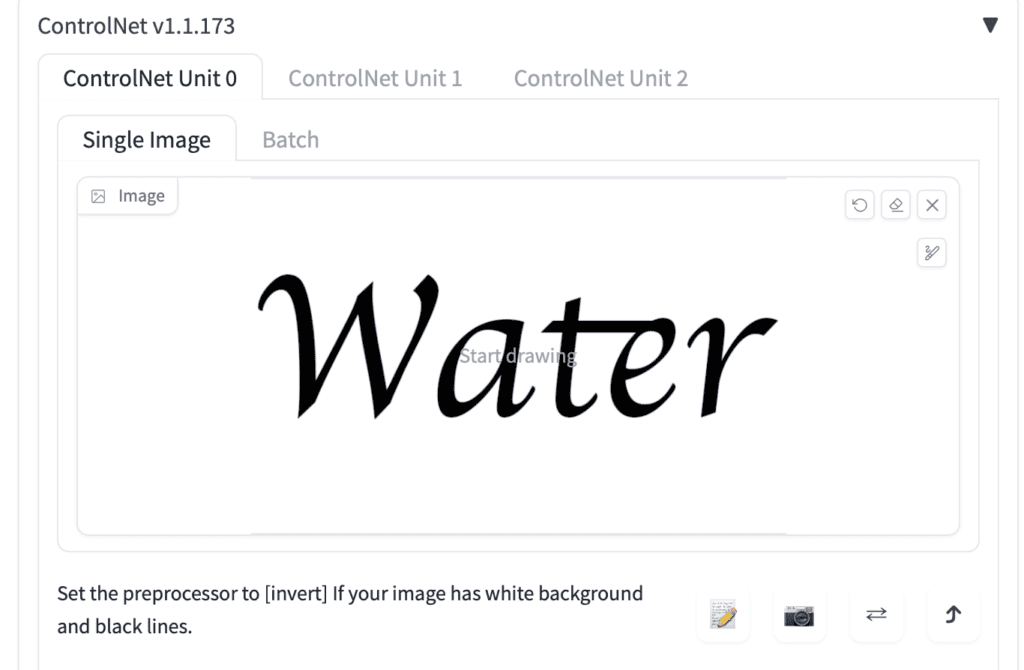
We will use this reference image as the depth map.
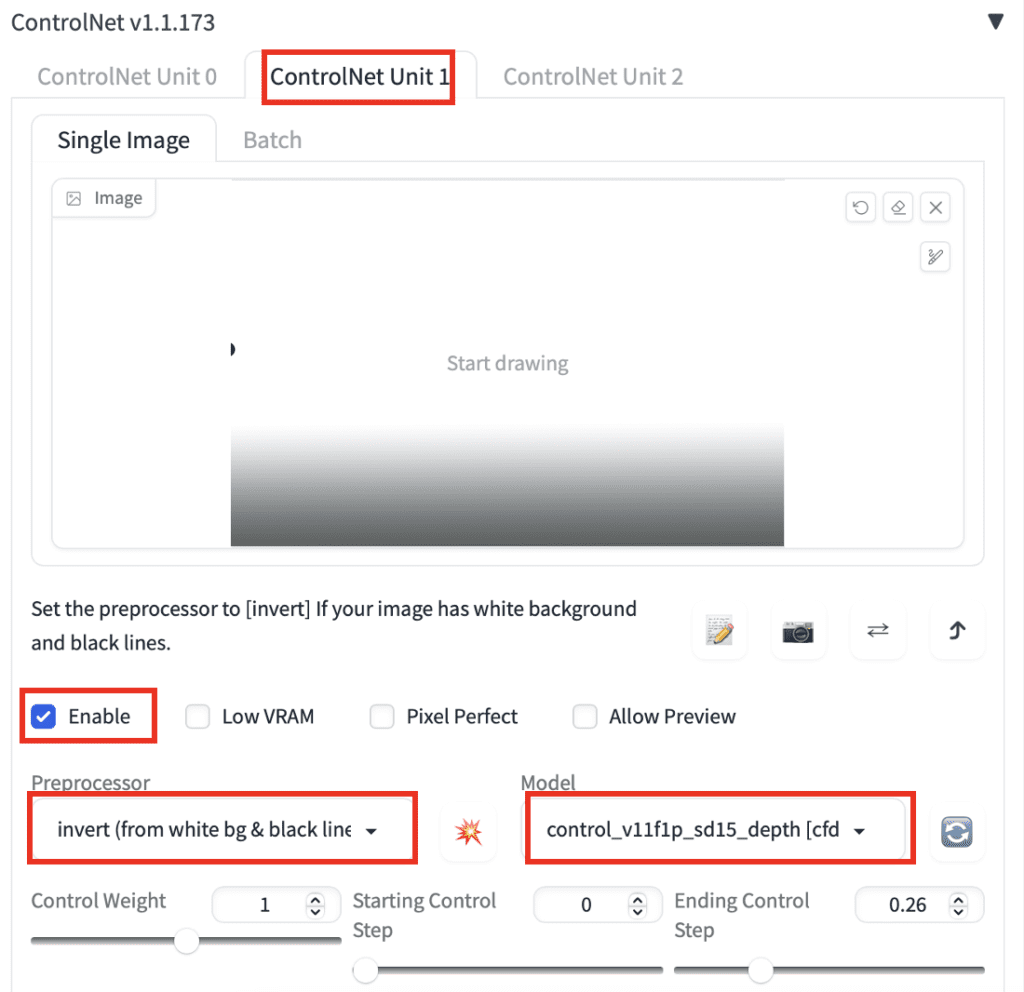
4. In the ControlNet section, select the following:
- Enable: Yes
- Pixel Perfect: Yes
- Preprocessor: invert
- Model: control_xxxxx_depth
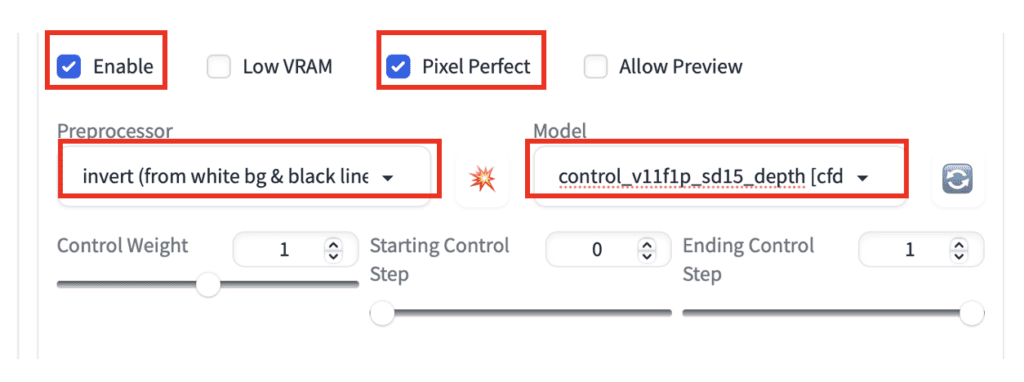
The invert preprocessor is necessary because more white in the depth map means nearer. We want the text in the foreground.
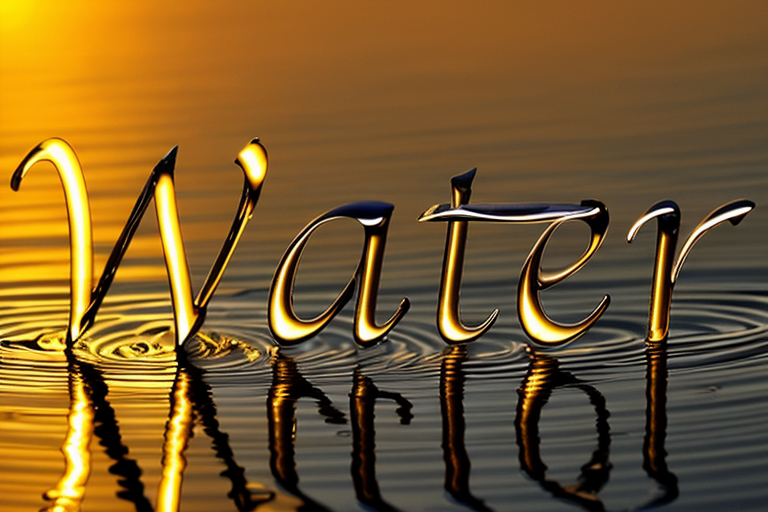
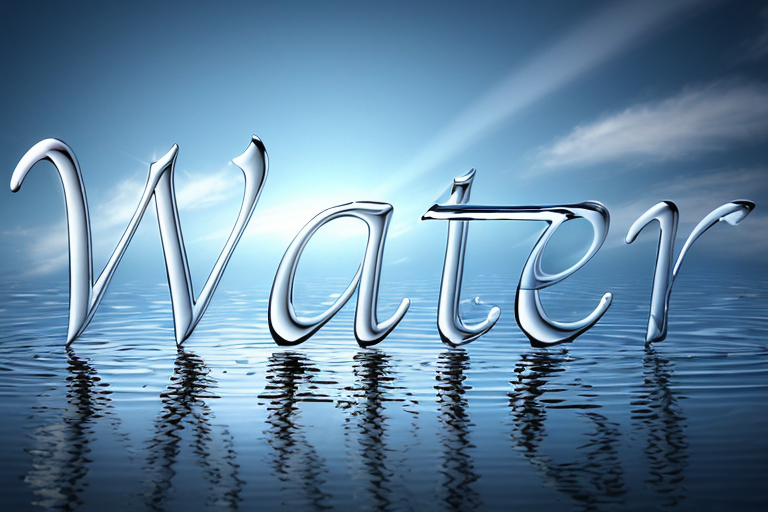
5. Enter a prompt to describe the visual effect.
Example prompt:
water, water droplet, shadow, rim lighting, reflection, sunset
6. Set the image size so that the aspect ratio is the same as the text image. In this example, it is
- Width: 768
- Height: 512
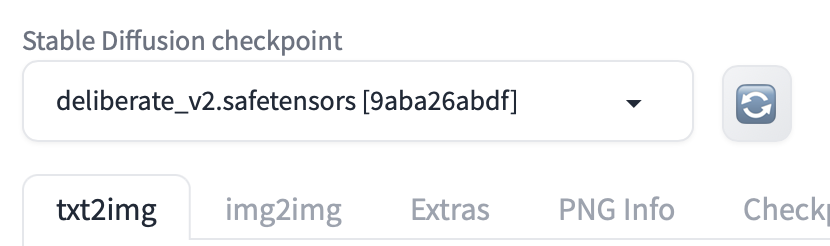
7. Select a Stable Diffusion checkpoint at the top of the page. This example uses Deliberate v2.
8. Click Generate. Here are a few results.

Play with the prompt to achieve a different effect.
water, water droplet, rim lighting, reflection, sky
water, water droplet, rim lighting,, ripple, splash, wave

Variations
Change these settings to adjust the effect.
Prompt: The prompt has a large effect on how the images look. (This is text-to-image, after all.) Try some lighting and style terms. See the prompt guide.
Model: Not all models produce good effects. Don’t hesitate to experiment with different models.
Control Weight: Reduce the weight to allow more change to the text area.
Ending Control Step: Reduce the weight to allow more change to the text area.
More examples
Honey
honey, honey pot, honey dripping, bokeh, bees, drop shadow, rim lighting
Model: Deliberate v2
Control Weight: 0.8
Starting Control Step: 0
Ending Control Step: 1

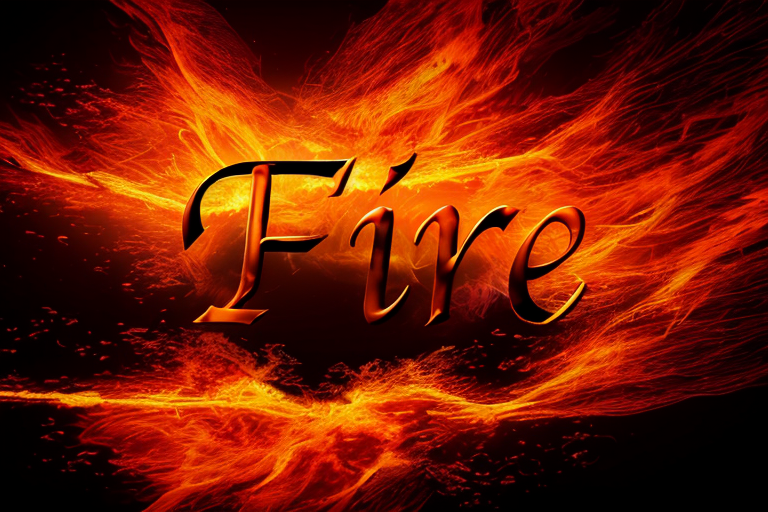
Fire
Prompt:
fire,melting, drop shadow, rim lighting, burning words
Model: Deliberate v2
Prompt:
fire, words melting, drop shadow, rim lighting, burning words, bokeh
Model: Realistic Vision v2

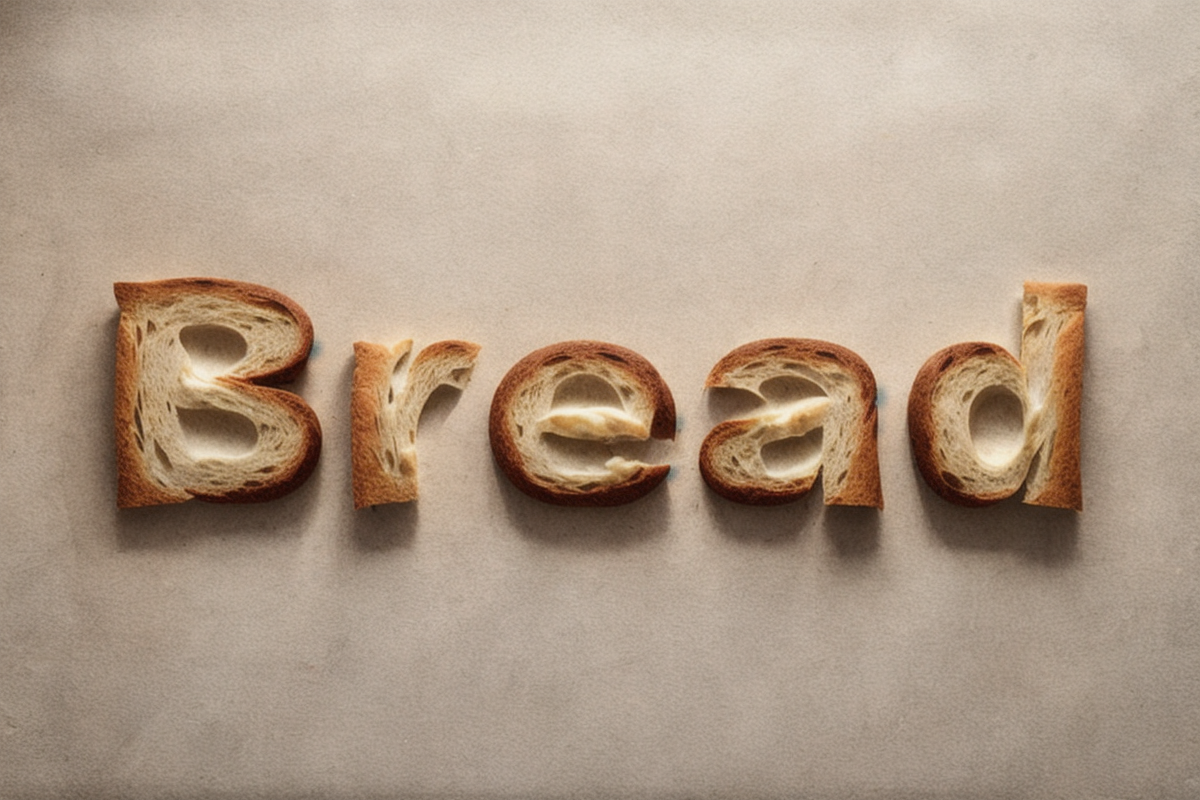
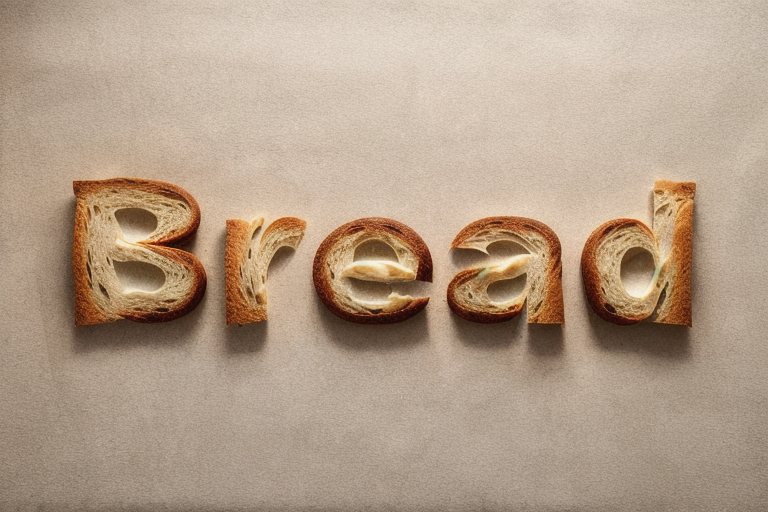
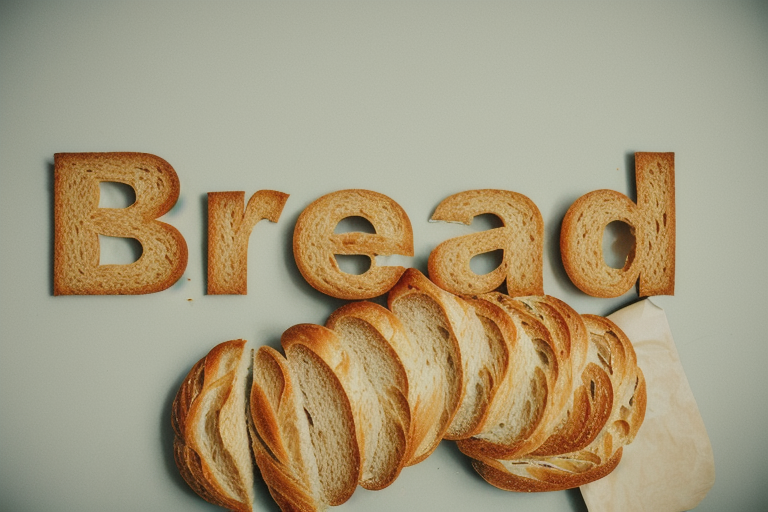
Bread
Prompt:
bread on kitchen table
Model: Realistic Vision v5.1
Ending Control Step: 0.6
Tips: This one works better with heavy fonts.

Method 2: Mutliple ControlNet
This method lets you control the background of the text with a second ControlNet.
Step-by-step guide
- Do everything in Method 1 to set up the first ControlNet (Unit 0)…
2. Create a background image for the second ControlNet (Unit 1). The sample black-and-white image below creates a surface effect.

3. Upload this image to ControlNet Unit 1.
(If you don’t see multiple ControlNet tabs, go to Settings > ControlNet. Set Multi ControlNet to 3)
4. Basically, the same setting as the first ControlNet:
- Enable: Yes
- Preprocessor: Invert
- Model: control_xxxx_depth
- ControlWeight: 0.5
Optionally reduce the Ending Control Step for more variations.
5. Click Generate.
We have added a surface below the text.

Method 3: Use a stock image as background
- Do everything in Method 1 to set up the first ControlNet (Unit 0)…
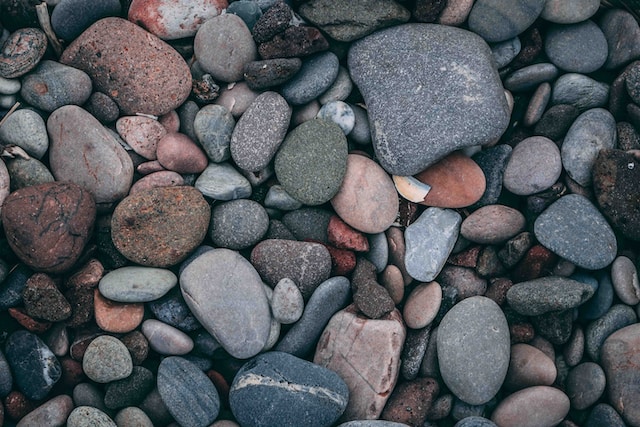
2. Find a background image with patterns you like. We will be extracting the depth map from it. You can use royalty-free stock image sites like Unsplash or Pixabay.
For example:
3. Upload the background image to the second ControlNet (Unit 1)
- Enable: Yes
- Preprocessor: depth_zoe
- Model: control_xxxx_depth
- ControlWeight 0.5
Optionally reduce the Ending Control Step for more variations.
4. Click Generate.
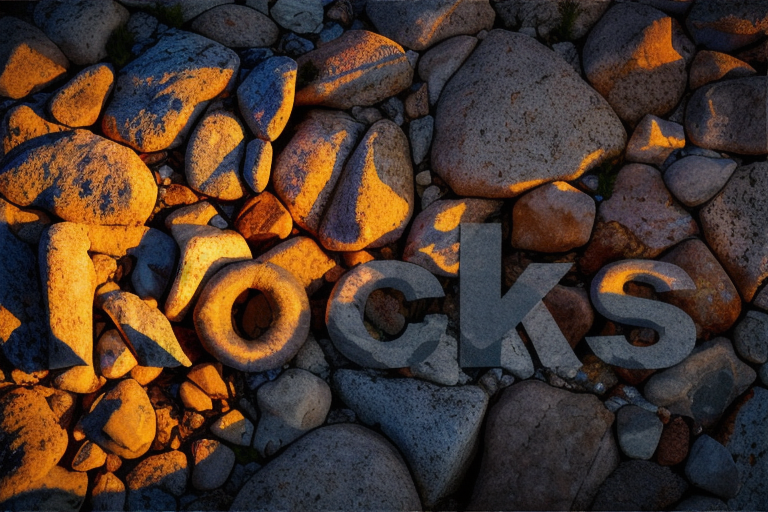
This is the text image used:

Prompt:
rocks, sunset, shadow
Model: Realistic Vision v2
Generated text effect image:
Adding a few pieces of bread using this workflow.
Tips
- Heavier fonts work better if you want to transform the text into objects like bread and rocks.
- When using multiple ControlNet, you may need to adjust the Control Weight to make both effects show.
- Reduce the Ending Control Step to blend text and background more naturally.
- Not all models work with your prompt. Switch to a different one and observe the effect.
Any chance you can do a tutorial on this using ComfyUI. I’m not able to reproduce the latter two methods. Also, I notice that the SDXL controlnets and T2I really dont work very well, only the SD 1.5 versions. Are there any special tricks to get SDXL working better for this?
adding to my list. You can use QR pattern or canny for sdxl.
For Method 3: Is there a way to just add the text to the second image? What I mean: is it possible to generate the text into the the second pic without changing the second pic?
Yes, you can use inpainting. Here’s a step-by-step guide (members-ony)
This seems close to what I’m looking for.
Im looking for a way to fill my art (template made from Illustrator in black) with sharp patterns that I’ll convert to a vector and then laser engrave onto objects. The detail of the bread example has me excited to try. Is there another checkpoint that might be better for creating vector-like patterns? I’m not looking for realism, just sharp vector-type results.
Hi, you can try using a model that trained for producing a vector art style.
Thanks for all the fantastic info.
I have an issue trying to do this.
I don’t have a model called control_v11flp_sd15_depth and google came back to two Chinese sites with that file. That’s it.
So if I am using a Control type = Lineart and a Preprocessor = Invert (from white bg & black line) all I get model wise is (control_canny_fp16) or (control_openpose_fp16)
Any ideas on where I could get that model?
Tried lots of tricks and yet to get text from a black and white photoshop output.
Is this what I should be getting?
https://huggingface.co/webui/ControlNet-modules-safetensors/tree/main
Please help and Cheers
Hi, please follow the installation guide for controlnet.
https://stable-diffusion-art.com/controlnet/
Make sure you have ControlNet v1.1
Specifically, the models are here: https://huggingface.co/lllyasviel/ControlNet-v1-1/tree/main
I’ve tried following the step exactly, but I never get any text to show up. What could I be doing wrong?
It’s a bit hard to help without details. Check if you have enabled the ControlNet and select the preprocessor/model. Preview the preprocessor to make sure text comes up. It is rare to have no text show up.
On step 7. – choose model (Deliberate V2) that means YOu change model in ControlNet from Control_XXX_Depth to Deliberate V2? Seems not to be working. Our You change Stable Diffusion Checkpoint or Stable Diffusion Model (from Euler a)? Thanks for clarify on thos
Correct, select deliberate v2 on Stable Diffusion checkpoint dropdown menu at top of the page.
Using CN v1.1.189 and there’s no provision for more than one CN (CN0, CN1, CN2) only single image and batch
You need to go to settings and in the controlnet section move the slider to enable more than one controlnet