Stable Video Diffusion is the first Stable Diffusion model designed to generate video. You can use it to animate images generated by Stable Diffusion, creating stunning visual effects.
Here are a few sample videos.
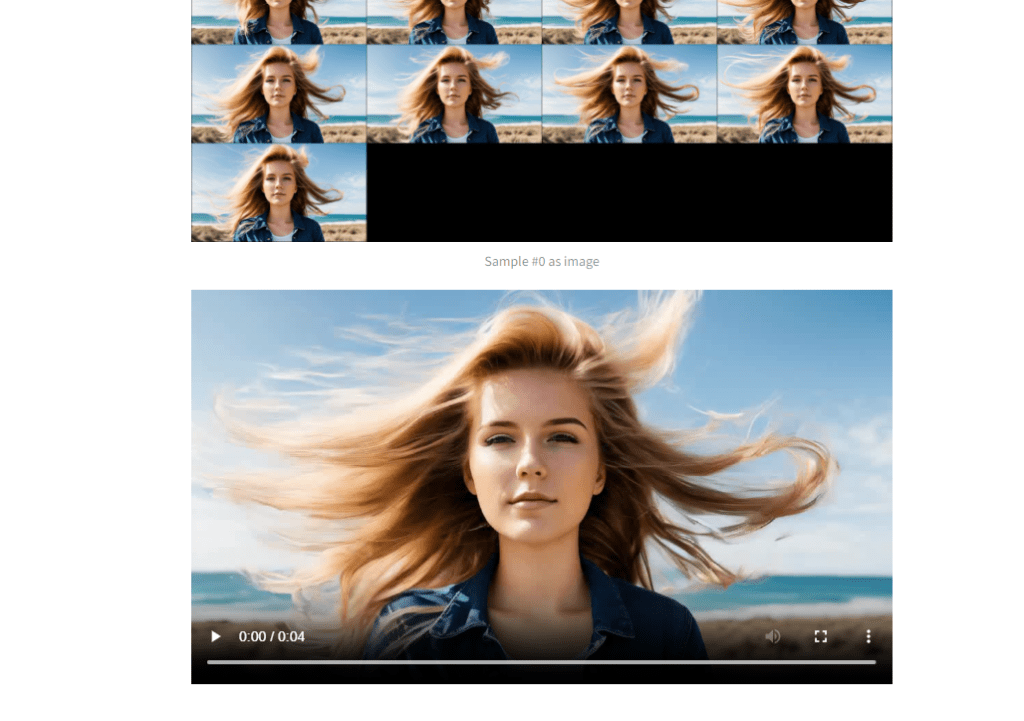
From the Realistic Egyptian Princess workflow.
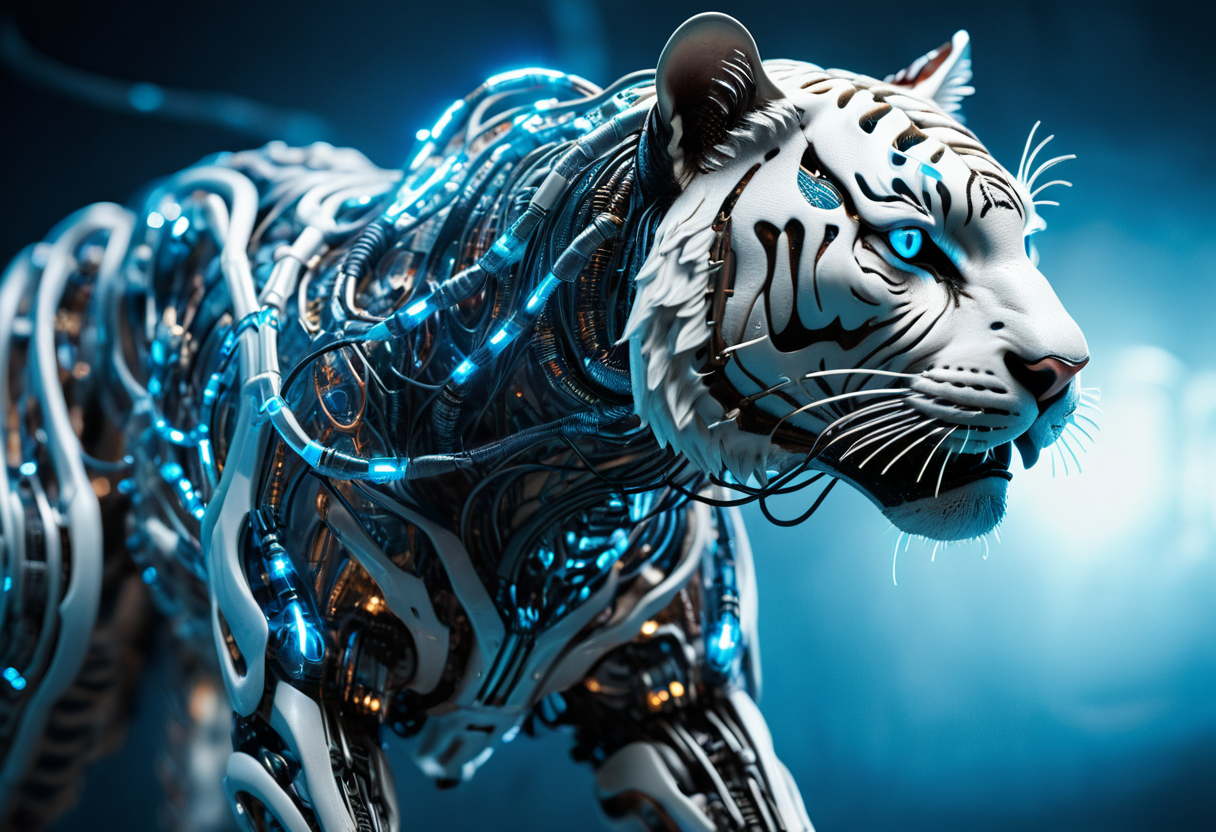
From the Biomechanical animal workflow:
From the Castle in Fall workflow:
In this article, you will learn about
- What Stable Video Diffusion is.
- How to use it on Google Colab online.
- How to use the txt-to-video workflow in ComfyUI.
- How to install and use it locally on Windows.
Table of Contents
What is Stable Video Diffusion
Stable Video Diffusion (SVD) is the first foundational video model released by Stability AI, the creator of Stable Diffusion. It is an open-source model, with code and model weights freely available.
What it does
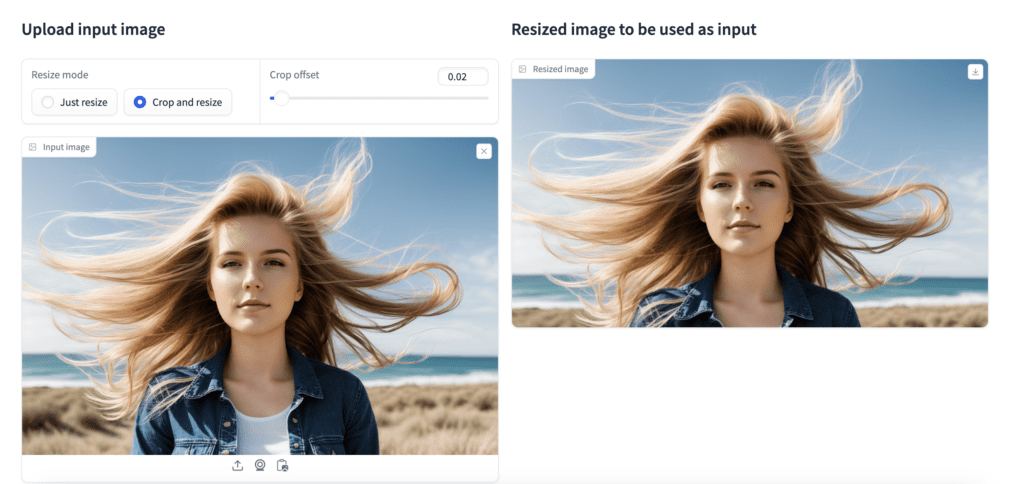
SVD is an image-to-video (img2vid) model. You supply the first frame, and the model will generate a short video clip. Below is an example of the input and output of the model.
Model and training
The model and training are described in the article Stable Video Diffusion: Scaling Latent Video Diffusion Models to Large Dataset (2023) by Andreas Blattmann and coworkers.
The SVD model has gone through 3 stages of training.
- Train an image model.
- Extend the image model to a video model, which is then pretrained with a large dataset of videos.
- Finetune the video model with a smaller dataset of high-quality videos.
The curation and improvement of the dataset are key to the success of the video model.
The image model is Stable Diffusion 2.1, the forgotten predecessor of the SDXL model. The pretrained image model forms the image backbone of the video model.
Temporal convolution and attention layers are added to the U-Net noise estimator to create the video model. Now, the latent tensor represents a video instead of an image. All frames are denoised with reverse diffusion at the same time. This temporal diffusion model is the same as the VideoLDM model.
The video model has 1.5B parameters and is trained with a large video dataset. Finally, the video model is fine-tuned with a smaller but higher-quality dataset.
Stable Stable Video Models weights
Two SVD model weights are publicly available.
- SVD – trained to generate 14 frames at resolution 576×1024.
- SVD XT – trained to generate 25 frames at resolution 576×1024.
We will focus on using the SVD XT model in this article.
Model parameters
Below is a list of important parameters that control the video output.
Motion bucket id
The motion bucket id controls how much motion is in the video. A higher value means more motion. Accepts a value between 0 and 255.
FPS
The frames per second (fps) parameter controls the number of frames the model generates. Stay between 5 and 30 for optimal performance.
Augmentation level
The augmentation level is the amount of noise added to the initial image. Use it to change the initial image more or when generating videos that deviate from the default size.
Use Stable Video Diffusion on Colab
You need a high VRAM NVidia GPU card to run Stable Video Diffusion locally. If you don’t have one, the best option is Google Colab online. The notebook works with the free account.
Step 1: Open the Colab Notebook
Go to the GitHub page of the Colab notebook. Give me a star (Okay, this is optional…). Click the Open in Colab icon to open the notebook.
Here’s the direct link to the notebook.
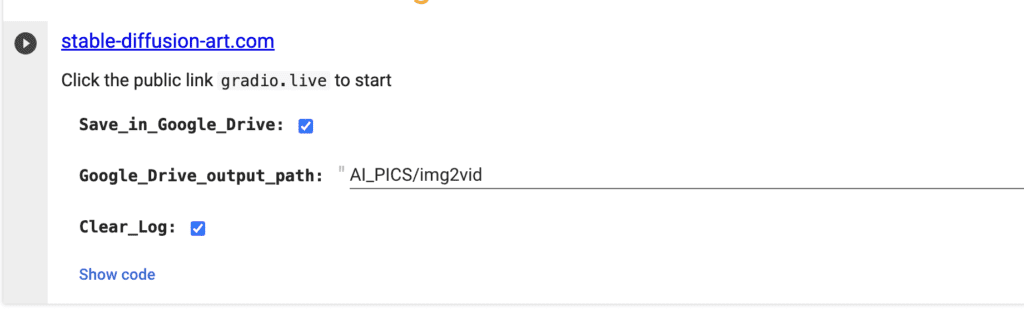
Step 2: Review the notebook option
The default setting is good to go. But you can optionally not save the final video in your Google Drive.
Step 3: Run the notebook
Click the run button to start running the notebook.
Step 4: Start the GUI
After it is done loading, you should see a gradio.live link. Click the link to start the GUI.
Step 5: Upload an initial image
Drop an image you wish to use as the first frame of the video.
Adjust the crop offset to adjust the position of the crop.
Step 6: Start video generation
Click Run to start the video generation. The video will appear on the GUI when it is done.
It takes about 9 minutes on a T4 GPU (free account) and 2 minutes on a V100 GPU.
Customize your video
You can increase the Motion Bucket ID parameter in the advanced settings to increase the motion in the video.
Use a fixed integer for the seed parameter to generate the same video.
Use Stable Video Diffusion with ComfyUI
ComfyUI now supports the Stable Video Diffusion SVD models. Follow the steps below to install and use the text-to-video (txt2vid) workflow. It generates the initial image using the Stable Diffusion XL model and a video clip using the SVD XT model.
Read the ComfyUI installation guide and ComfyUI beginner’s guide if you are new to ComfyUI.
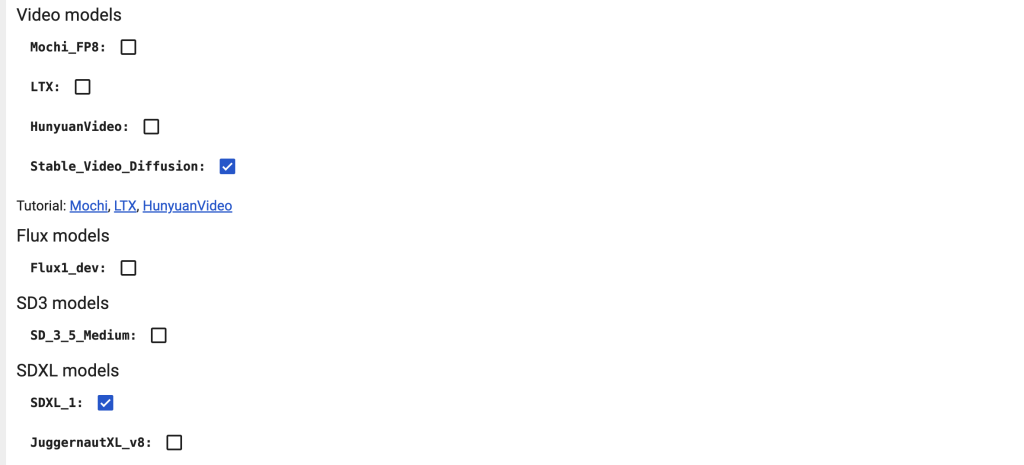
If you use my ComfyUI Colab notebook, select the Stable_Video_Diffusion and SDXL_1 models before running the notebook.
Step 1: Load the text-to-video workflow
Download the ComfyUI workflow below.
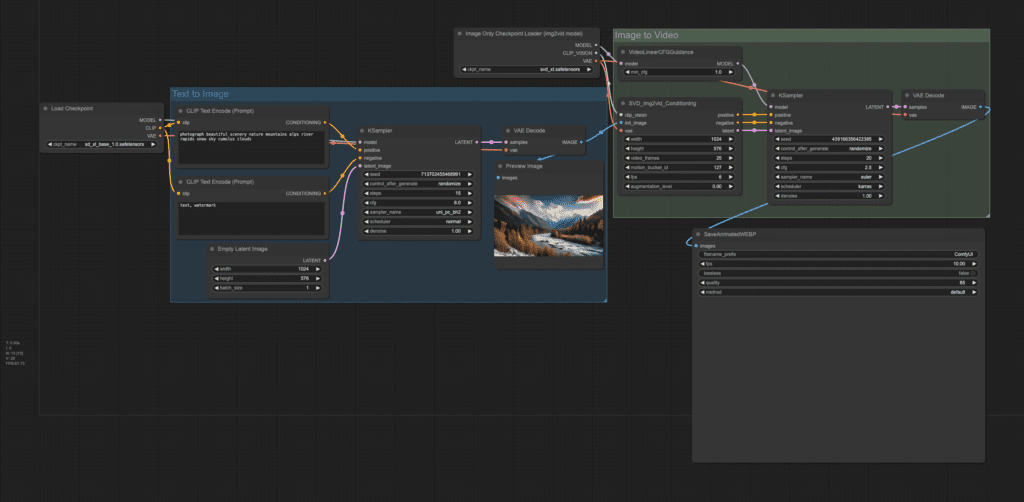
Drag and drop it to ComfyUI.
Step 2: Update ComfyUI
Update ComfyUI, install missing custom nodes, and update all custom nodes. Using the ComfyUI manager will make this step easier.
Restart ComfyUI completely and load the text-to-video workflow again. ComfyUI should have no complaints if everything is updated correctly.
Step 3: Download models
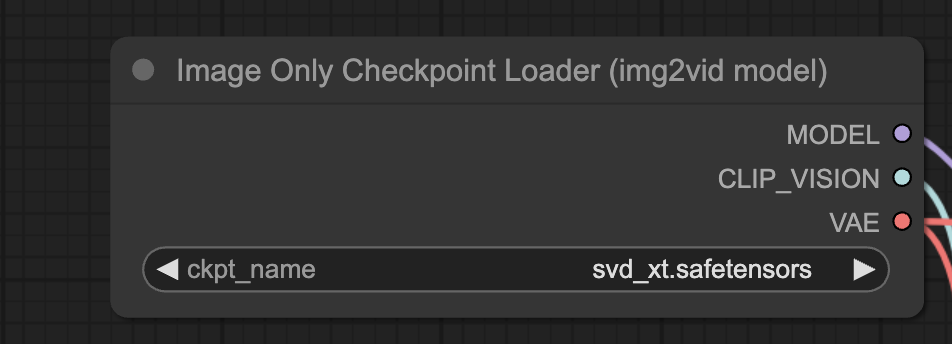
Download the SVD XT model. Put it in the ComfyUI > models > checkpoints folder.
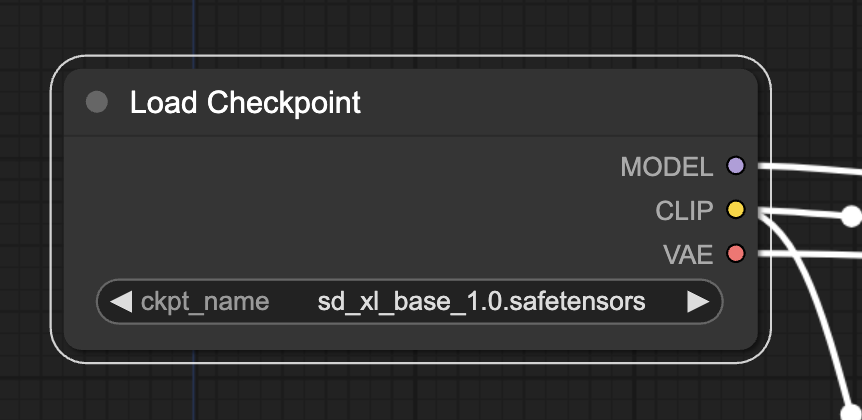
Refresh the ComfyUI page and select the SVD_XT model in the Image Only Checkpoint Loader node.
The workflow uses the SDXL 1.0 model. Download the model if you have not already. Put it in the ComfyUI > models > checkpoints folder.
Refresh the ComfyUI page and select the SDXL model in the Load Checkpoint node.
Step 4: Run the workflow
Click Queue Prompt to run the workflow. A video should be generated.
Parameters
video_frame: Number of frames. Keep it at 25 since this is what the model is trained.
motion_bucket_id: Controls how much motion is in the video. A higher value means more motion.
fps: Frames per second.
Augmentation_level: The amount of noise added to the initial image. The higher it is, the more different the video is from the initial frame. Increase it when you use a video size different from the default.
min_cfg: Sets the CFG scale at the beginning of the video. The CFG scale changes linearly to the cfg value defined in the KSampler node at the end of the video. In this example, min_cfg is set to 1.0, and cfg is set to 2.5. The CFG scale is 1.0 for the first frame, 2.5 for the last frame, and varies linearly in between. The more further away from the first frame, the higher CFG scale it gets.
Install Stable Video Diffusion on Windows
You can run Stable Video Difusion locally if you have a high-RAM GPU card. The following installation process is tested with a 24GB RTX4090 card.
It is difficult to install this software locally. You may encounter issues not described in this section. So proceed only if you are tech-savvy, or want to be…
You will need git and Python 3.10 to install and use the software. See the installation guide for Stable Diffusion for steps to install them.
Step 1: Clone the repository
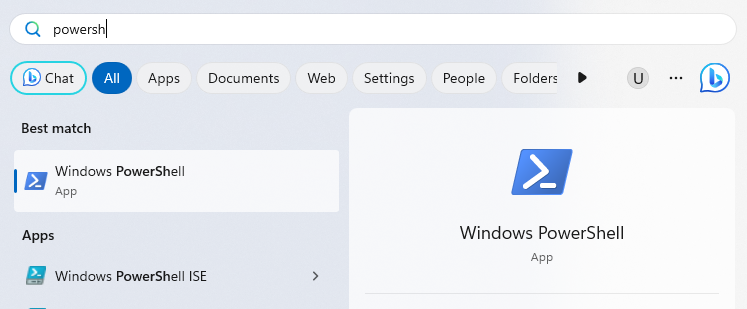
Open the PowerShell App. DON’T use the Command Prompt (cmd). It won’t work with these instructions.
To Open the PowerShell App, press the Windows key and search for “PowerShell”. Click the Windows PowerShell App to start.
Before you start, confirm you have Python 3.10 by running the following command.
python --versionYou are good to proceed if it says “Python 3.10.x”.
You can change the directory to the one in which you want to install the software.
git clone https://github.com/Stability-AI/generative-modelsStep 2: Create a virtual environment
Go into the newly cloned folder.
cd generative-modelsCreate a virtual environment.
python -m venv venvYou should see a folder called venv created.
Activate the virtual environment.
.\venv\Scripts\Activate.ps1If this command is successful, you should see (venv) in front of your command prompt. This indicates you are now in the virtual environment.
You must be in the virtual environment when installing or running the software.
If you don’t see the (venv) label in a later step, run the activate.ps1 script to enter the virtual environment.
Step 3: Remove the triton package in requirements
In the File Explorer App, navigate to the folder generative-models > requirements.
Open the requirement file pt2.txt with the Notepad App.
Remove the line “triton==2.0.0”. This is not strictly needed and will cause errors in Windows.
Save and close the file.
Step 4: Install the required libraries
Go back to the PowerShell App. Make sure you still see the (venv) label.
Run the following command to install PyTorch.
pip3 install torch==2.0.1 torchvision torchaudio --index-url https://download.pytorch.org/whl/cu118Run the following command to install the required libraries.
pip3 install -r .\requirements\pt2.txtRun the following command to install the generative model software.
pip3 install .Run the following command to install a required library.
pip3 install -e git+https://github.com/Stability-AI/datapipelines.git@main#egg=sdataStep 5: Download the video model
In the File Explorer App, navigate to the generative-models folder and create a folder called “checkpoints”.
Navigate to the folder generative-models > checkpoints.
Download the safetensors model (svd_xt.safetensors) and put it in the checkpoints model directory.
Step 6: Run the GUI
Go back to the PowerShell App. You should be in the generative-models folder and in the virtual environment.
Run the following command to set the Python path.
$ENV:PYTHONPATH=$PWDRun the following command to start the GUI.
streamlit run scripts/demo/video_sampling.pyA new webpage should be opened. If it didn’t, see the printout of the PowerApp terminal. Go to the Local URL. It should be something like:
http://localhost:8501Step 7: Generate a video
In the Model Version dropdown menu, select svd_xt.
Click the Load Model checkbox.

Watch the PowerShell terminal for errors.
It may show an error message in the GUI. But it is okay as long as the new Input section appears.
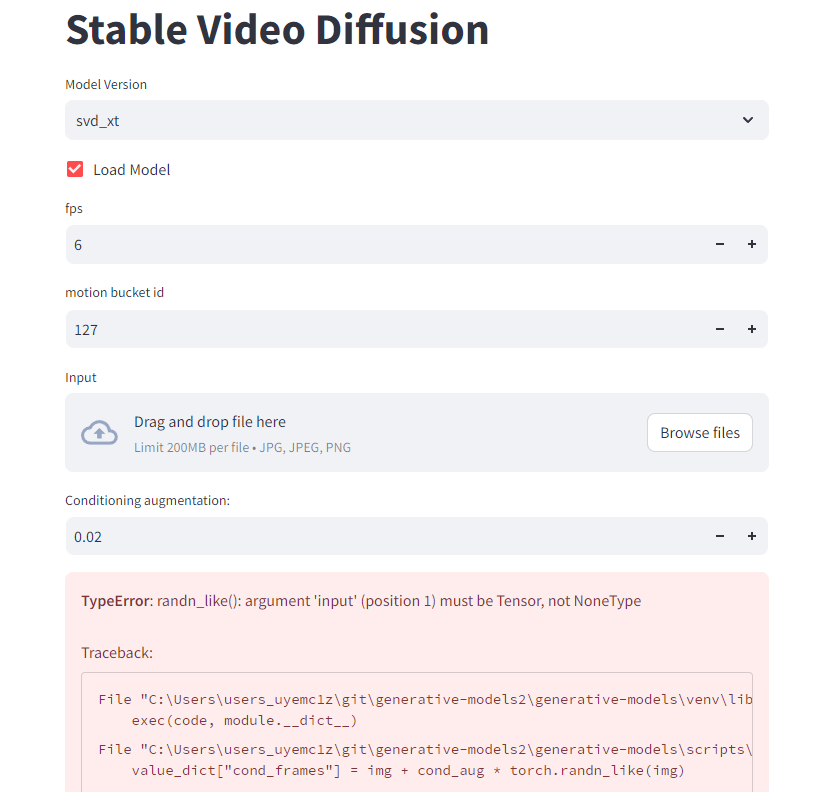
Drop an image as the initial frame to the Input box.
Scroll down and find the Decode t frames at a time field. Set it to 1.
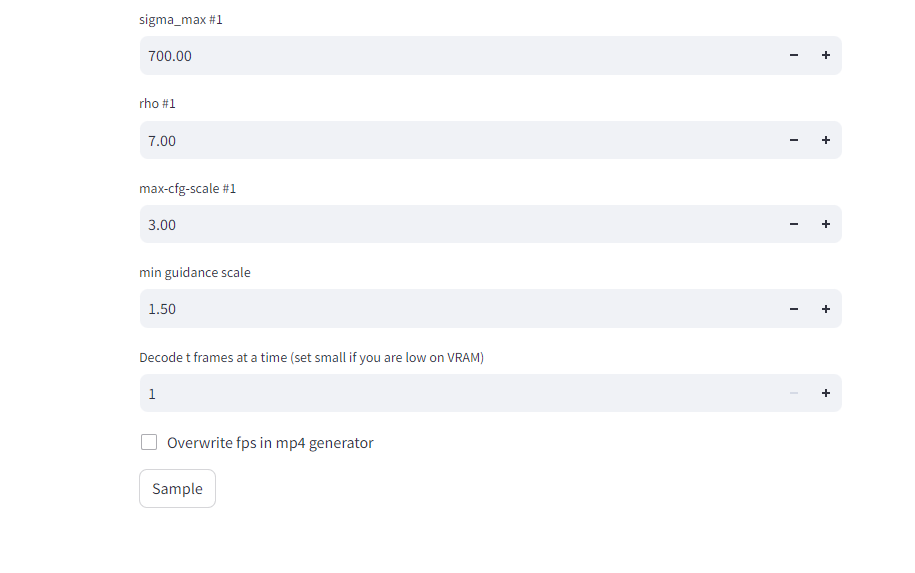
Click Sample to start the video generation.
Watch the PowerShell terminal for progress.
When it is done, the video will show up on the GUI.
Close the PowerShell App when you are done.
Starting the GUI again
To start the GUI again, open the PowerShell App.
Navigate to the generative-models folder.
cd generative-modelsActivate the virtual environment.
.\venv\Scripts\Activate.ps1Run the following command to set the Python path.
$ENV:PYTHONPATH=$PWDRun the following command to start the GUI.
streamlit run scripts/demo/video_sampling.pyResources
Stable Video Diffusion Colab notebook
Introducing Stable Video Diffusion – Official press release of SVD.
Stable Video Diffusion: Scaling Latent Video Diffusion Models to Large Datasets – The research paper.
Stability-AI/generative-models: Generative Models by Stability AI – code on GitHub page.
stabilityai/stable-video-diffusion-img2vid-xt – Model weights on Hugging Face.
is there an option to input text to adjust the video direction like an ai prompt?
Hi Andrew. First of all, a great thanks for all your devotion in helping others.
I tried installing SVD locally but I keep getting this error:
ImportError: numpy.core.multiarray failed to import.
Any idea how to fix this?
the repos is likely out of shape now. Use ComfyUI for SVD.
In the provided colab notebook some requirements are missing and it doesn’t work I tried to install them separately but it doesn’t work anyway…
i am yet to fix it. Use comfyui in the meantime.
Hello,
I’m still encountering the same error on the Google Colab notebook and haven’t been able to find a solution.
Is anyone else experiencing the same issue?
ModuleNotFoundError: No module named ‘omegaconf’
I’ve also tried installing the module manually, but it doesn’t work and keeps leading to errors indicating the absence of other modules.
Thank you in advance for your help!
I may not to able to get to it any time soon. please use comfyui.
ok, thanks for your answer.
Hello, I would like to use a workflow img2video on ComfyUI like the one you did on Google Colab (but which doesn´t work lately). Do you have a workflow for this? Thanks a lot
Hello! I am back to work with Stable video diffusion on Google Colab, and it isn´t working anymore.
I always have this error:
ModuleNotFoundError: No module named ‘omegaconf’
Do you know what is happening?
Thank you,
All the best,
Anais
When starting the web session (streamlit …) I get the following error:
A module that was compiled using NumPy 1.x cannot be run in
NumPy 2.1.2 as it may crash. To support both 1.x and 2.x
versions of NumPy, modules must be compiled with NumPy 2.0.
Some module may need to rebuild instead e.g. with ‘pybind11>=2.12’.
Any idea how to fix this?
Installing Numpy v1.x seems to solve this:
pip install numpy==1.26.4
it keeps getting an typeerror websocket handler… browser opens up nothing more happens
I keep running into this issue when I try to create a video on my computer.
RuntimeError: CUDA error: the launch timed out and was terminated CUDA kernel errors might be asynchronously reported at some other API call, so the stacktrace below might be incorrect. For debugging consider passing CUDA_LAUNCH_BLOCKING=1. Compile with `TORCH_USE_CUDA_DSA` to enable device-side assertions.
You can check if you are a compatible version of pytorch and python.
Hello!
Somehow the google collab notebook isn´t working anymore. I used to work with it few month ago and it was perfect and now the resized image doesn´t show up and when I try to run the programm to make the video, it takes ages and nothing comes up..
I got this error:
AttributeError: __pydantic_core_schema__
ok I upgraded Gradio and now it works 😉
Great! Do you have a fix you can share?
pip install –upgrade gradio
This is an amazing walk through! Thank you.
I am having one issue. I tried to install on windows and I get the following error:
ModuleNotFoundError: No module named ‘pytorch_lightning’
When I pip list I get the following: pytorch-lightning 2.4.0
Can you suggest a fix please?
Have you activated the virtual env before runnning pip list?
.\venv\Scripts\Activate.ps1You can also run
which pipand see if it is pointing to the one in the venv folder.Hi Andrew!
It says (venv) on the left with PS, so I think the virtual env is activated.
When i type ‘which pip’ the PowerShell does not recognize the name of the cmdlet.
Sorry I am a newbie. Am I doing somthing wrong?
Ok I was about to get the pytorch-lightning working but now its missing cv2. I will keep looking for a solution. Thank you!
I got it working!
👏👏
I get this error message
What can I do?
CUDA out of memory. Tried to allocate 288.00 MiB (GPU 0; 11.99 GiB total capacity; 10.18 GiB already allocated; 0 bytes free; 10.94 GiB reserved in total by PyTorch) If reserved memory is >> allocated memory try setting max_split_size_mb to avoid fragmentation. See documentation for Memory Management and PYTORCH_CUDA_ALLOC_CONF
The video model does use a lot of memory. You can try restarting you PC and run this working only.
I tried..does not work..any other ideas?
I use the ComfyUI version. If it doesn’t work, you can use the colab version.
Hello, thank you for the tutorial.
Is there a solution to get a longer clip? on google Colab or on comfiuy?
You can join them together like this workflow
https://stable-diffusion-art.com/cyborg-future/
I am actually looking for an image to video workflow.
I have some really nice results with Stable diffusion video on google Colab, but I would like to extend the clip, not just adding one after another.
Do you think there is a way to do this? I just began to work with Comfuy, I thought it would be easier with it.
When I try “Use Stable Video Diffusion with ComfyUI” and click on “Queue Prompt” and it gen a video photo, but how can I save this video? thanks(I can only find a webp photo at output folder)
That webp file is a video. If you don’t to save as gif/mp4 instead, you can use this one: https://stable-diffusion-art.com/wp-content/uploads/2024/02/SDV-text-to-video-GIF.json
Installed locally and constantly ran out of memory on a 16GB nvdidia 3080.
Hi Andrew
Firstly just to say you are a total champ helping the community as much as you do! Thank you!
Do you know or have you heard if it’s possible to get the Stable Video Diffusion (that’s possible to run on Windows as per above) running on MacOS? I have A1111 running fine on MacOS.
Thanks!
There’s a comfyui workflow for SVD. That’s probably your best bet.
Uncaught app exception
Traceback (most recent call last):
File “C:\Users\admin\venv\lib\site-packages\streamlit\runtime\scriptrunner\script_runner.py”, line 534, in _run_script
exec(code, module.__dict__)
File “C:\Users\admin\sv\generative-models\scripts\demo\video_sampling.py”, line 142, in
value_dict[“cond_frames”] = img + cond_aug * torch.randn_like(img)
TypeError: randn_like(): argument ‘input’ (position 1) must be Tensor, not NoneType
I’m running your colab with pro, using a high-ram v100, I tried to adjust the number of steps and frames, and either it does no different (still shows running 31 steps, if left at 25 frames, & steps are increased to like 60). Or, if both increased in a ratio so the two are still balanced, it says I’m out of memory. Is there any point in even adjusting the advanced settings then?
I added an option to change the motion bucket id. Increase to get more movements.
Thanks for this tutorial, everything works as expected, except at the end with compiling video:
OpenCV: FFMPEG: tag 0x5634504d/’MP4V’ is not supported with codec id 12 and format ‘mp4 / MP4 (MPEG-4 Part 14)’
OpenCV: FFMPEG: fallback to use tag 0x7634706d/’mp4v’
‘ffmpeg’ n’est pas reconnu en tant que commande interne
ou externe, un programme exécutable ou un fichier de commandes.
2023-12-01 17:46:42.178 Uncaught app exception
Traceback (most recent call last):
File “E:\svd\generative-models\venv\lib\site-packages\streamlit\runtime\scriptrunner\script_runner.py”, line 534, in _run_script
exec(code, module.__dict__)
File “E:\SVD\generative-models\scripts\demo\video_sampling.py”, line 200, in
save_video_as_grid_and_mp4(samples, save_path, T, fps=saving_fps)
File “E:\svd\generative-models\scripts\demo\streamlit_helpers.py”, line 883, in save_video_as_grid_and_mp4
with open(video_path_h264, “rb”) as f:
FileNotFoundError: [Errno 2] No such file or directory: ‘outputs/demo/vid/svd_xt\\samples\\000001_h264.mp4’
Would you have any idea about this issue ?
Got this error in colab:
Error while processing rearrange-reduction pattern “(b t) … -> b t …”. Input tensor shape: torch.Size([6, 4, 72, 128]). Additional info: {‘t’: 25}. Shape mismatch, can’t divide axis of length 6 in chunks of 25
My input image 1024×576. What is wrong?
I used a png image with 1024×576 and cannot reproduce the error. Would help if you can share an image that causes error.
I want to know how can I disable network runing? I just want to run it local only, thanks
the comfyui and windows installation are local. it works without internet.
Thank you, but I want to disable it(I dont want someone try to hack me because it open port for that)
You can prevent the port from outside access with your firewall setting.
Thanks, hope next version we can have a setting to disable it or enable, like : online = 1 or online =0;
Google Colab method failing consistently, not recognizing the uploaded image (a .jpg).
fixed the issue with jpg. Can you try? It’s the weirdest bug I fixed…
I was able to run it only once. Subsequent attempts errored out.
Likely because you are using free Colab. It has some memory leak. Enabling high RAM in colab pro resolves it.
I installed this within ComfyUI following other tutorials, but I had a couple of questions that I haven’t seen clearly answered online as of yet:
1. How does one achieve something like a more consistent face across a video segment? Lower CFG?
2. What are the decoders used for and how do we implement them?
3. With ComfyUI, is there any way of exporting something other than WebP directly within the interface?
1. The face should be pretty consistent with default setting. But technically you should increase the CFG.
2. From what they said it is more for academic purpose. I haven’t looked into it.
3. You can try stealing some nodes from one of those animatediff workflow. SVD generates frame images and comfyui stitches them together. Those workflow can save as gif or mp4.
Two of the popular JSON SVD workflows I’ve seen recently produced numerous OOM errors (I have a 3090 with 24 GB in one machine.) However, two of the other JSONs (I think the one with the shuttle examples including a variation of your text to image) worked flawlessly.
With one of the Image to Video JSONs, I used a picture of a family member as an experiment with default settings and it disfigured their face pretty dramatically. I’ll have to experiment later.
I’m relatively new to ComfyUI (I’m not a big fan of Node editors in general) so I’m somewhat unfamiliar with how extensions differ from A1111. In the past I would use something like ADetailer to fix faces.
I would say everyone is new to comfyui…
I get this error:
error: `cargo rustc –lib –message-format=json-render-diagnostics –manifest-path Cargo.toml –release -v –features pyo3/extension-module –crate-type cdylib –` failed with code 101
[end of output]
note: This error originates from a subprocess, and is likely not a problem with pip.
ERROR: Failed building wheel for tokenizers
Failed to build tokenizers
ERROR: Could not build wheels for tokenizers, which is required to install pyproject.toml-based projects
And of course the app doesn’t work.
are you using python 3.10?
Python 3.11.2…
solved, that was the issue. Thank you!
$ENV:PYTHONPATH=$PWD
The filename, directory name, or volume label syntax is incorrect
This tutorial is a mess
This command sets an environment variable in the PowerShell. It has nothing to do with filename or directories.
If this command doesn’t work, you are likely using the wrong shell. Use PowerShell, not command prompt.
My bad I’m an idiot, the Streamlit method works
Thanks for the tuto
wrong command, it’s not
.\venv\Scripts\Activate.ps1
but :
.\venv\Scripts\Activate.bat
The ps1 script is for PowerShell and the bat script is for commmand prompt.
As stated in the tutorial, you should use PowerShell. The later steps won’t work for command prompt.
Alway auto disconnected from streamlit when loading model from checkpoints, no clue.
Seems like you have installed the software correctly and that’s all I am trying to cover. Go to their github page to report the issue.
I fixed it. I have a question, should I leave the other parameters as default? I don’t know what’s those mean, such as “Sampler #1”, “num cols #1”, “sigma_min #1”, etc. Seems like I can’t set a random seed, the default value is “23”.
I would leave other parameters as default. The options you may want to change are motion bucket id (see the tutorial for a description) and seed. I was able to change the seed by pressing the + button.
Thank you, nice tutorial.👍
How did you fix your disconnect issue?
Great results! Very nice. But it takes a lot of time to generate. Animatediff is faster, but the quality is not as good as yours.
The motion prior is simply better in SVD. AnimateDiff hijacks the SD model but SVD is taking a fundamentally correct approach.
Do not follow this tutorial.
This tutorial does not work as written and requires a lot of reworking to get going. So much rework that it is not worth your time to go through these steps. Save yourself sometime, go elsewhere.
what doesn’t work for you?
Stable Diffusion Automatic 1111 is working perfectly fine locally on my PC so will Stable Video Diffusion work on my PC?
I have HPZ800
Nvidia Quadro P2000 (Dedicated GPU Memory 5GB + Shared GPU Memory 15GB = 20GB)
RAM 32 GB
its not for automatic, i waiting for this extension for automatic, if anyone have info about this please text)
I am not sure. There’s only one way to find out…
And what is that way?