Soft inpainting seamlessly blends the original and the inpainted content. You can avoid hard boundaries in a complex scene by enabling software inpainting while keeping the denoising strength high.
See an example of inpainting with and without soft inpainting below.
In this article, I will cover:
- Basic usage of soft inpainting.
- How soft inpainting works.
- Explanation of soft inpainting settings.
Table of Contents
Software
We will use AUTOMATIC1111 , a popular and free Stable Diffusion software. Check out the installation guides on Windows, Mac, or Google Colab.
If you are new to Stable Diffusion, check out the Quick Start Guide.
Take the Stable Diffusion course if you want to build solid skills and understanding.
Check out the AUTOMATIC1111 Guide if you are new to AUTOMATIC1111.
Soft Inpainting is a new feature in AUTOMATIC1111 v1.8.0. Make sure you have updated it to follow this tutorial!
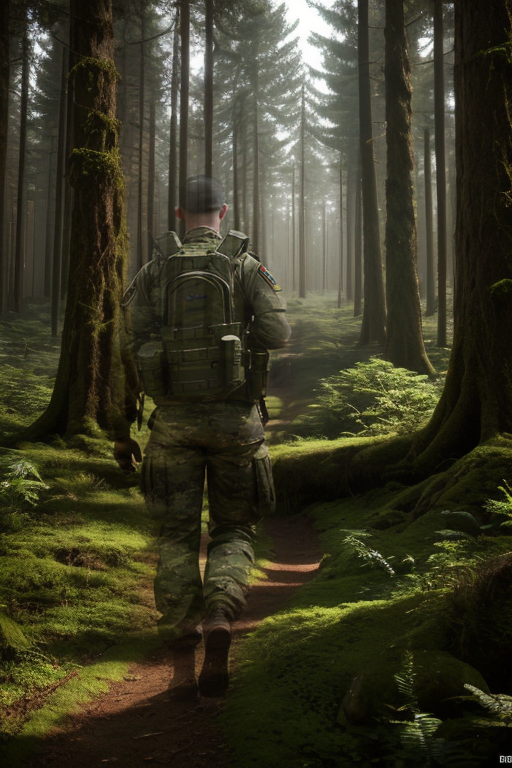
A simple example of soft inpainting
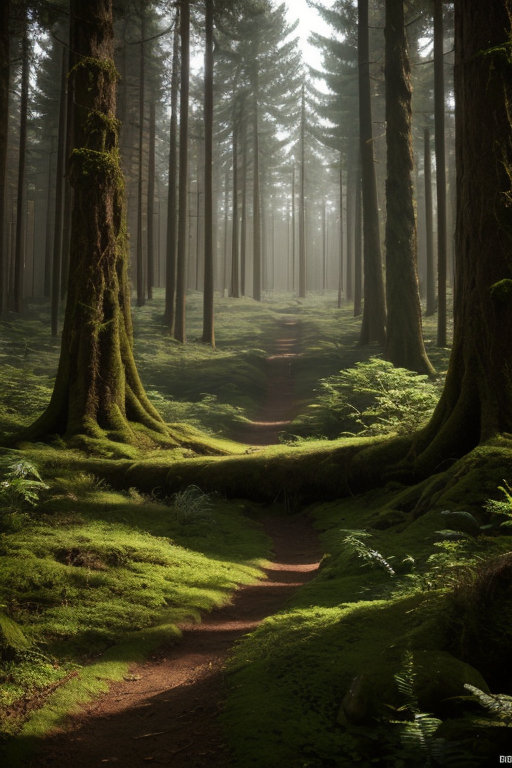
Generate background image
Let’s first generate a background image. On the txt2img page of AUTOMATIC1111, enter the image settings.
Checkpoint model: Dreamshaper 8
Prompt:
A forest, highly detailed
natural, colorful, deformed, sketch, low contrast, watercolor
- Sampling method: DPM++ 2M Karras
- Sampling Steps: 20
- CFG scale: 7
- Seed: -1
- Size: 512×768
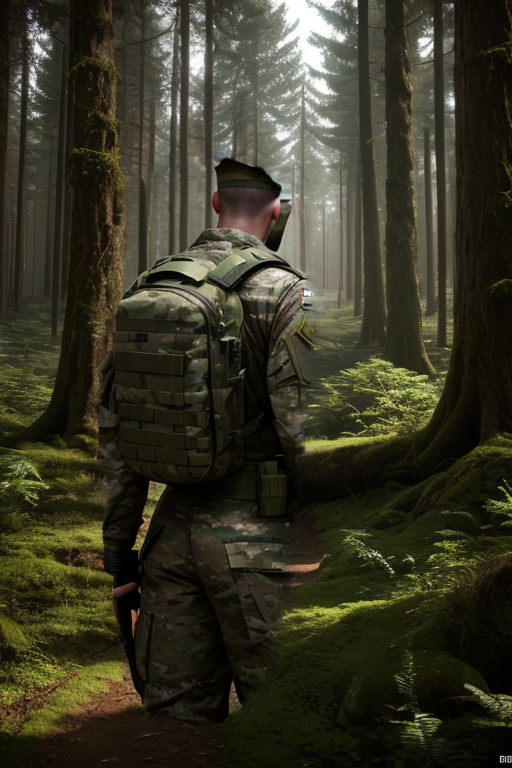
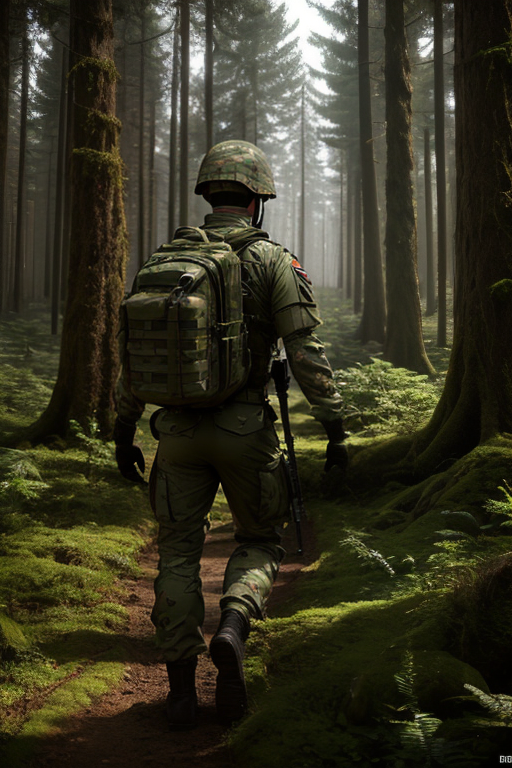
Standard inpainting
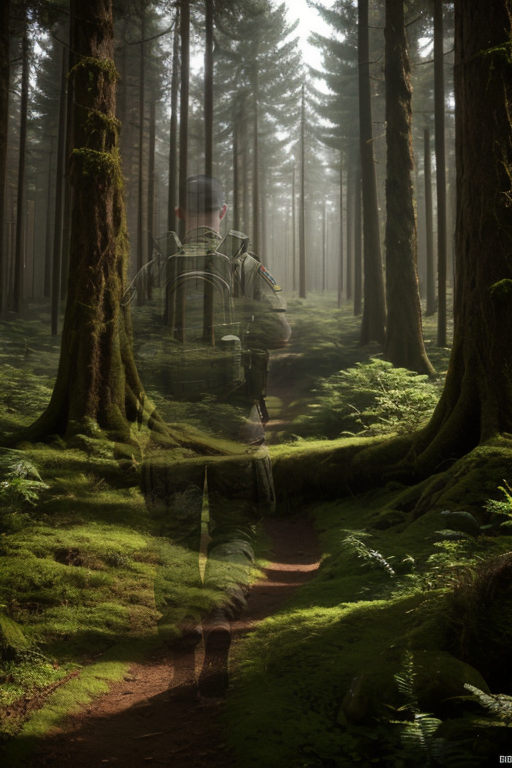
Let’s use inpainting to add a soldier to the image.
Click the Send to Inpaint button under the image.

Mask over the area you want to add a soldier.
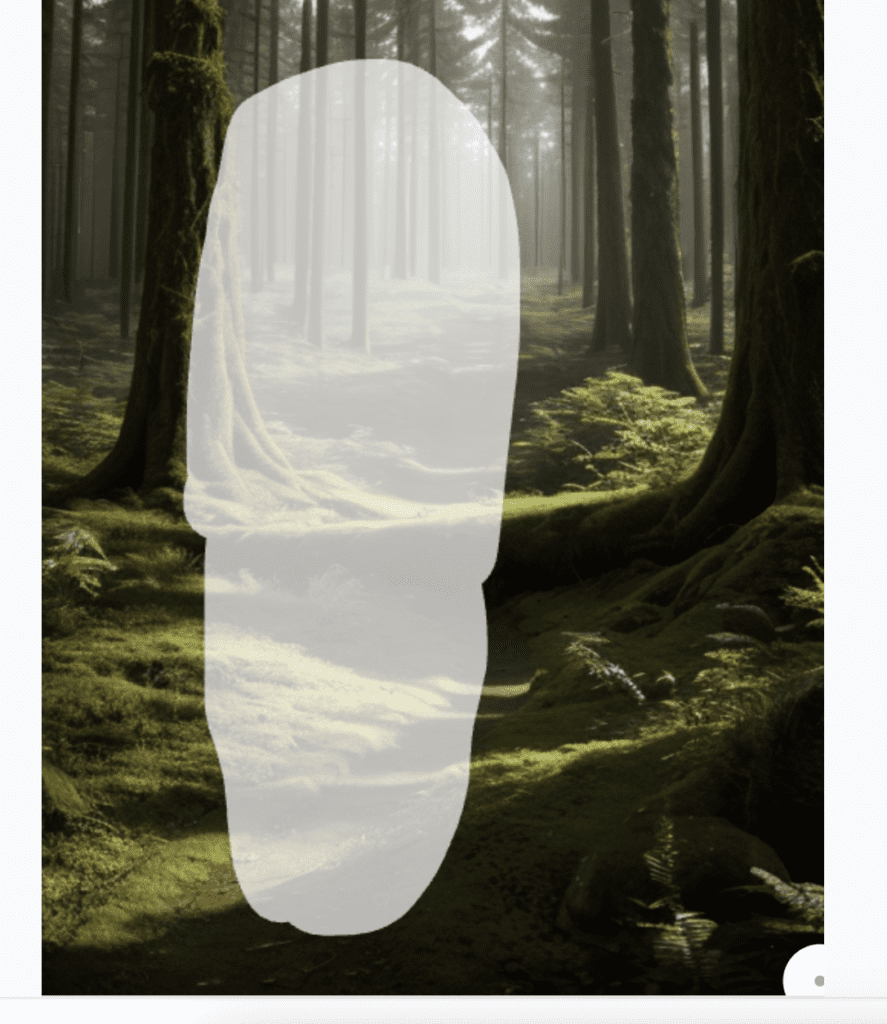
Change the prompt to include a soldier.
back of soldier in a forest, highly detailed
Use the following settings
- Inpaint Area: Whole Picture
- Denoising strength: 1
Click Generate.
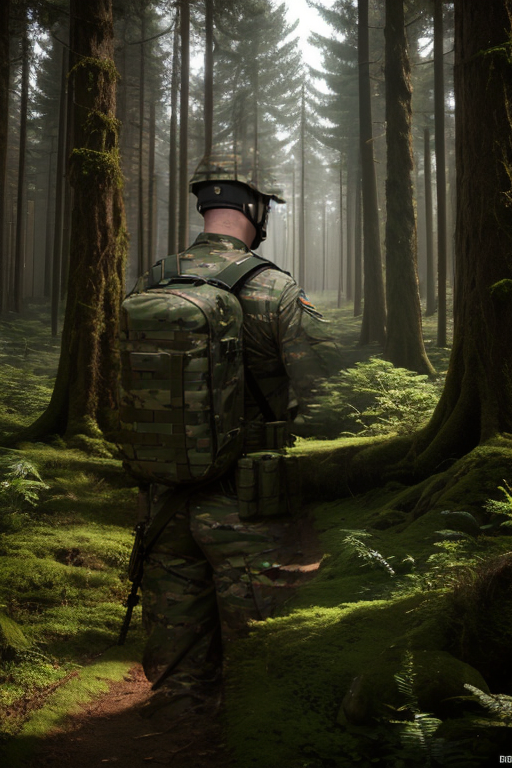
You have a good chance of seeing the issue of the inpainted area showing a hard boundary. The inpainted area is inconsistent with the rest of the image.
You can correct it by lowering the denoising strength or using ControlNet inpainting.
Now, you have another option in your toolbox: Soft inpainting.
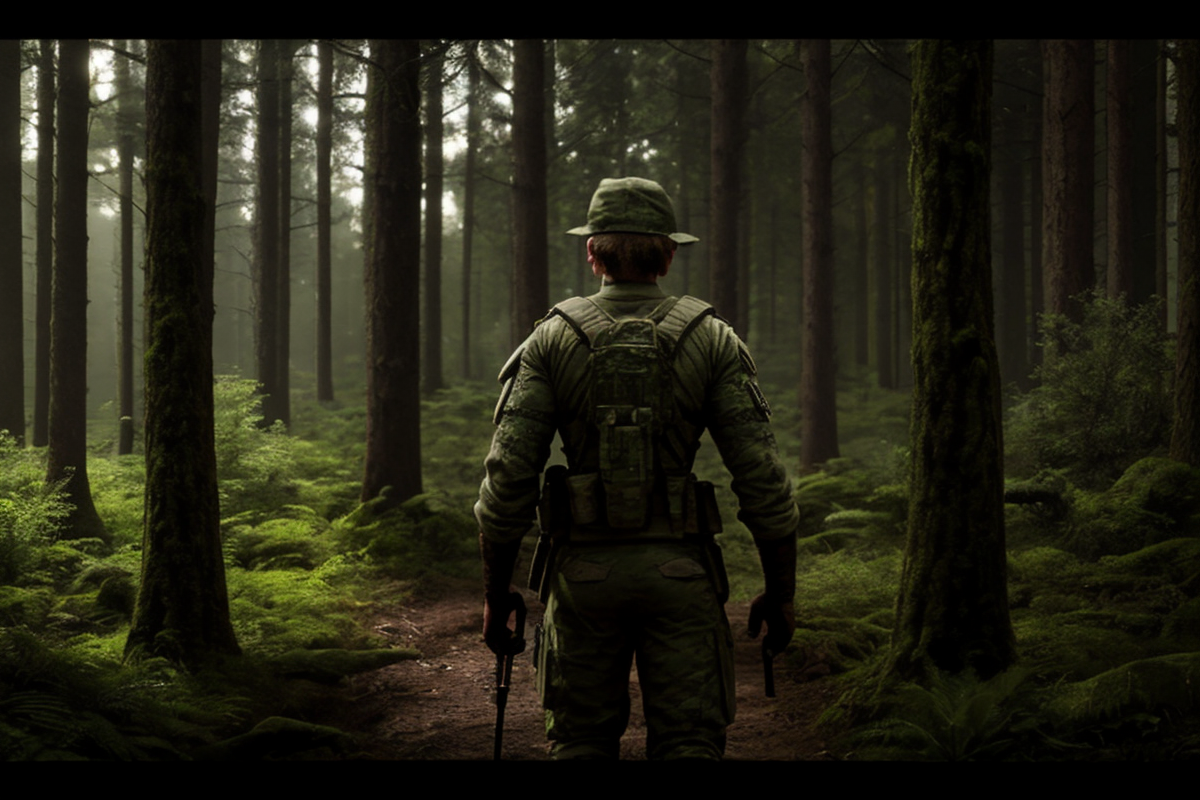
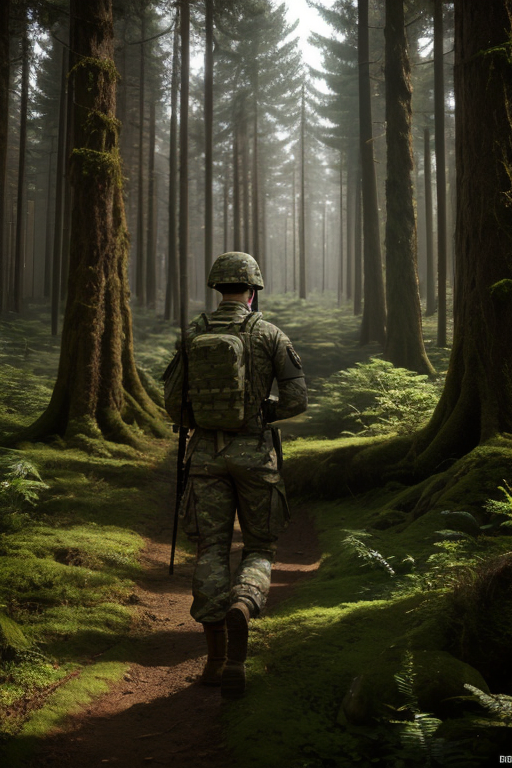
Soft Inpainting
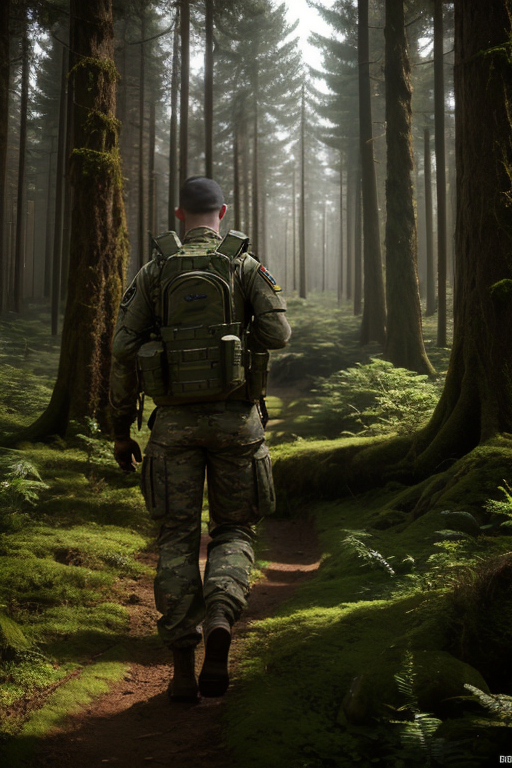
Soft inpainting seamlessly adds new content that blends with the original image.
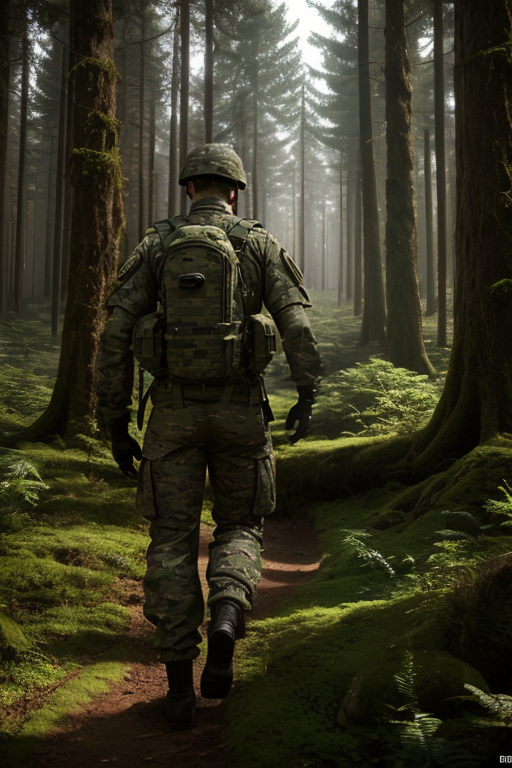
Turn on Soft Inpainting by checking the check box next to it. We will go with the default setting.
(If you don’t see this option, you need to update your A1111.)
Set the Mask Blur to 40.
Keep the denoising strength at 1.
Generate an image. You get a very good global consistency even at the maximum denoising strength. This is something you cannot get with the standard inpainting.
How does soft inpainting work?
Soft inpainting uses a soft (grayscale) mask for a smooth transition between the masked and the unmasked area. This is different from the standard inpainting, which uses a black-or-white binary mask.
In the transition region where the mask is between black and white, the latent images of the inpainted and the original content blend during sampling to achieve a seamless transition.
The soft mask is automatically created by comparing the original and the inpainted content. But you can influence it by changing the settings.
Alternative to soft inpainting
Soft inpainting is not the only technique that generates seamless inpainting in Stable Diffusion.
Inpainting models are special checkpoint models trained to produce seamless inpainting. It works even with a high denoising strength.
ControlNet inpainting adds an extra conditioning to achieve global consistency.
However, none of these methods can generate soft boundaries that blend the original and inpainted content seamlessly like Soft Inpainting.
Soft inpainting settings
I will explain the settings of soft inpainting in this section.
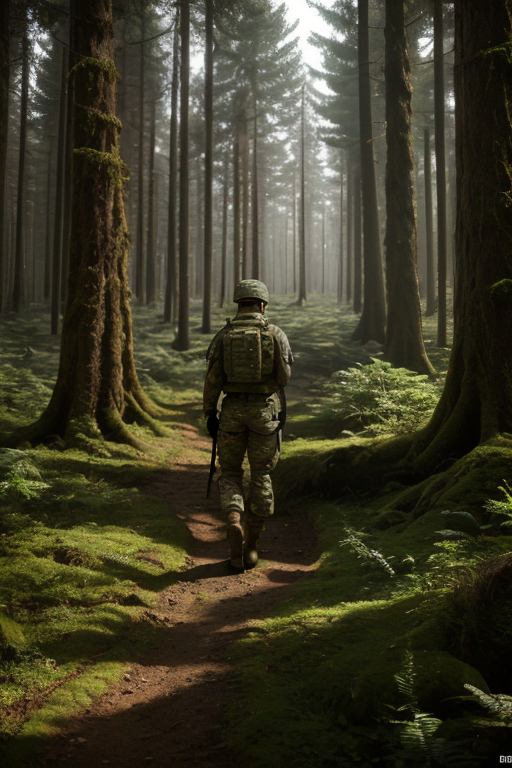
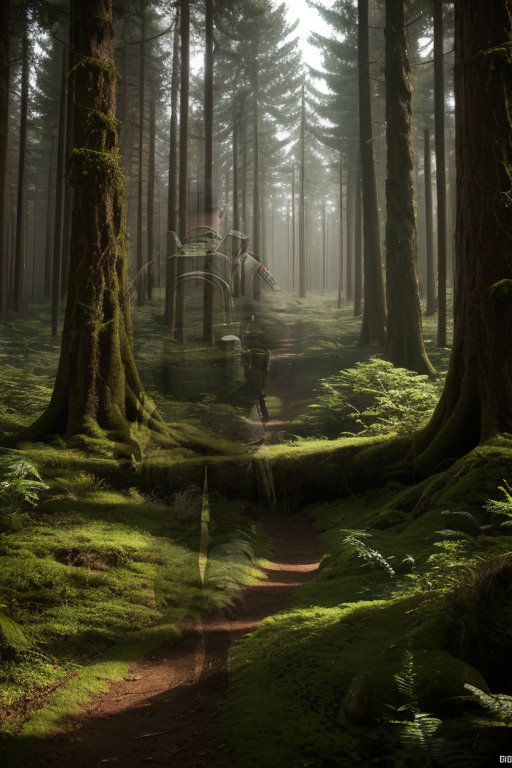
Schedule bias
The Schedule bias adjusts the preservation of original content at each step. At the default value of 1, the preservation strength is proportional to the expected noise level at each step. (The noise schedule)
Increase (> 1) to preserve original content more in the beginning.
Decrease (< 1) to preserve original content more at the end.
The images below demonstrate the effect of changing the schedule bias.
A high value shows the original content more (a smaller soldier).
A low value shows more of the inpainted content. It doesn’t blend well because the original content is not preserved well in the beginning when the global composition was set.
The schedule bias changes the preservation exponentially. You should go easy on it.
Preservation strength
The preservation strength controls the amount of original content preserved. It is similar to the schedule bias, but the effect is linear.
Set a high preservation strength to show more original content. Set it to 1 for a balanced value.

Transition contrast boost
The transition contrast boost controls how sharply the original and the inpaint content blend.
A Low value creates soft blending. The transition to the inpainted area is smooth. In the image below, a value of 1 effectively squeezes the soldier smaller in exchange for a smoother transition.
A high value creates a strong contrast. It allows a sharp transition to the original content.

Mask Influence
The soft blending mask is created by comparing the difference between the original and the inpainted content.
Mask Influence controls how much the inpaint mask should influence this process.
- 0: Ignore the mask. Only consider differences in image content.
- 1: Follow the mask closely.
I don’t see a difference in my test.

Difference threshold
The Difference threshold controls how much change is allowed without showing the inpaint content.
Increasing the difference threshold shows the original content more until the whole picture is unchanged.
Increasing the value can create a fade-out effect.
Difference contrast
The difference contrast controls how sharp the transition between the original and the new content.
It effectively creates a fading effect similar to changing the difference threshold.

I spent a few hours tweaking each setting a bit each gen and it was difficult to understand what exactly was going on. Glad to have a good explanation here, even if some of the settings don’t actually do much, if anything at all. Interesting that Mask Influence seemingly does nothing, while the Difference Contrast and Threshold are basically inversions of each other….
With soft inpainting, should “Only masked padding, pixels” be zero? Given that, the Mask blur would be set much higher already.
Sorry, where is this “Turn on Soft Inpainting by checking the check box next to it. “..could not locate this check box
I should have mentioned that you need to update your A1111. It is a new feature in v1.8.0
Thanks for reviewing/showing off Soft Inpainting!
Really good comparison images, too.