Wan 2.2 is one of the best local video models. Generating high-quality videos is what it is known for. But if you set the video frame to 1, you get an image! It is a competent image model, thanks to training with diverse sets of videos, but only if you set up the parameters correctly.
In this article, I will share:
- Sample images from Wan 2.2 image mode
- Wan 2.2 Text-to-image workflow (ComfyUI)
- Settings for high-quality images
- Goods and bads of Wan 2.2 image generation
Table of Contents
Software
We will use ComfyUI, a free AI image and video generator. You can use it on Windows, Mac, or Google Colab.
Think Diffusion provides an online ComfyUI service. They offer an extra 20% credit to our readers.
Read the ComfyUI beginner’s guide if you are new to ComfyUI. See the Quick Start Guide if you are new to AI images and videos.
Take the ComfyUI course to learn how to use ComfyUI step by step.
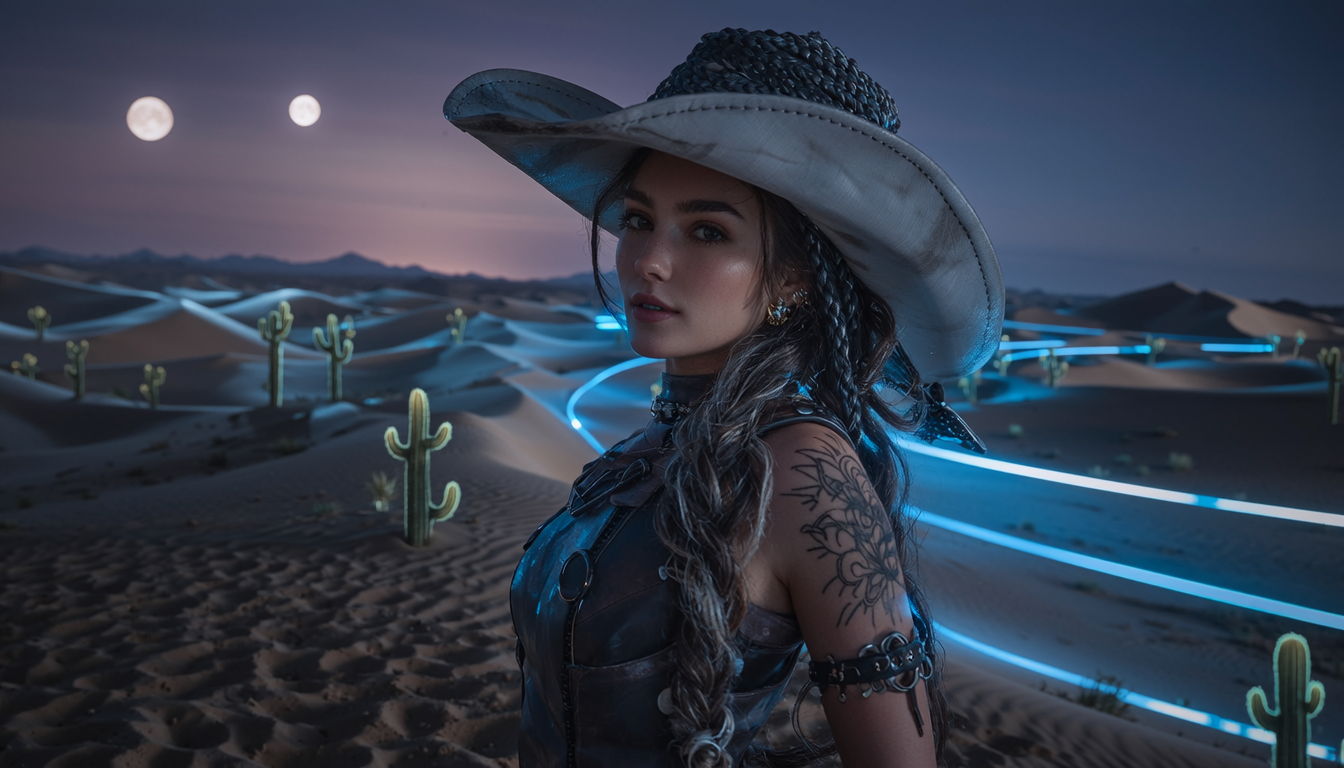
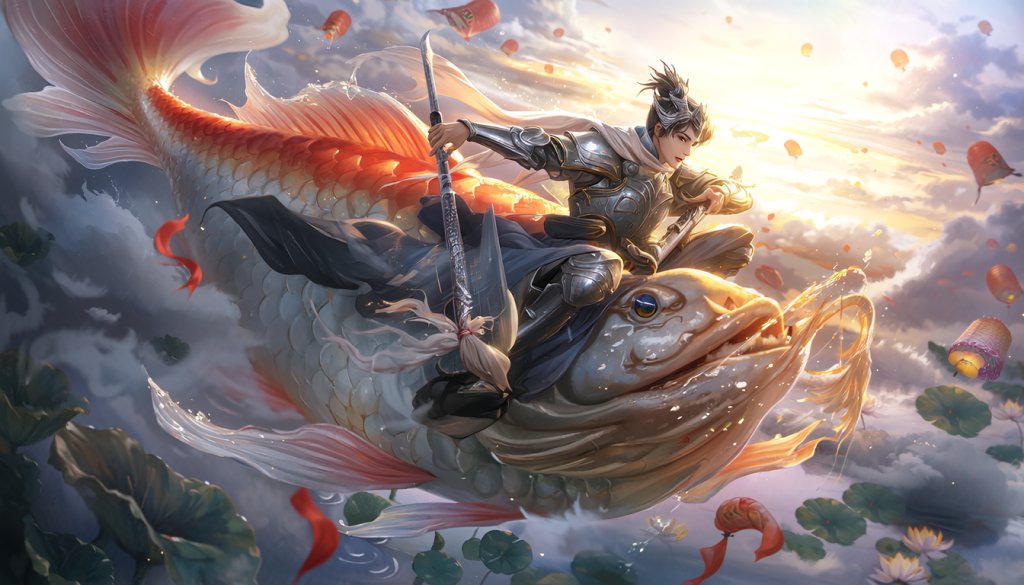
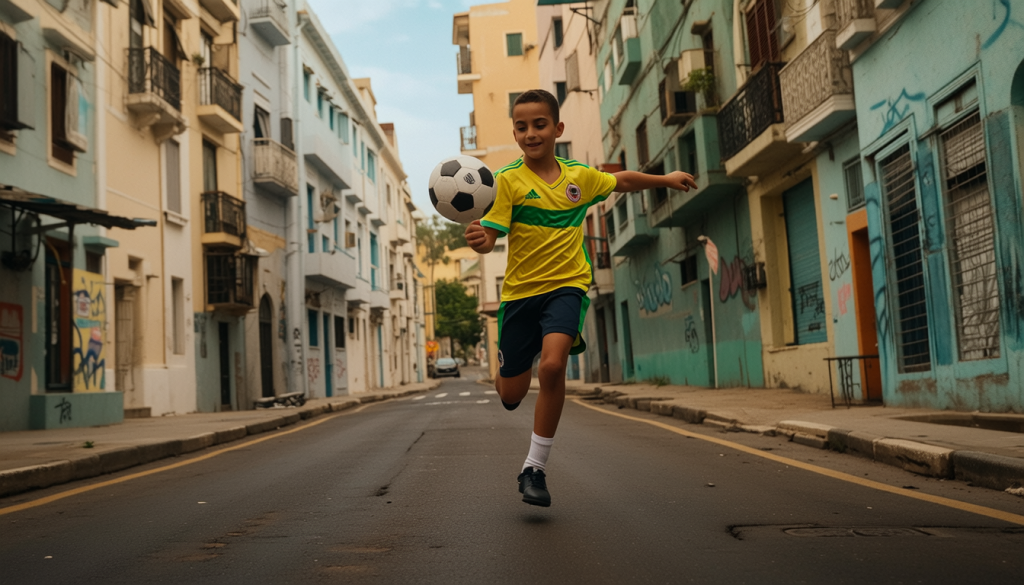
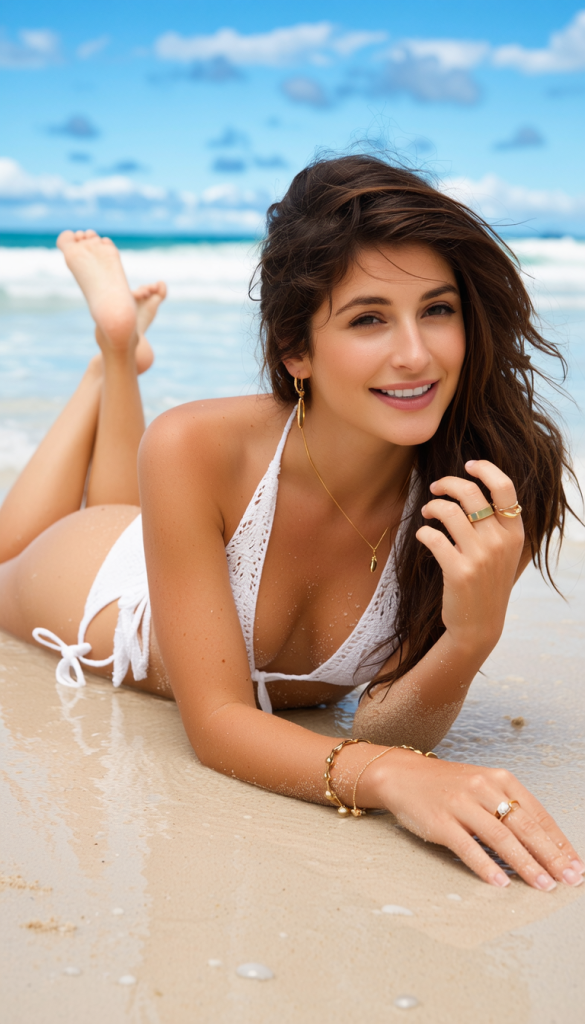
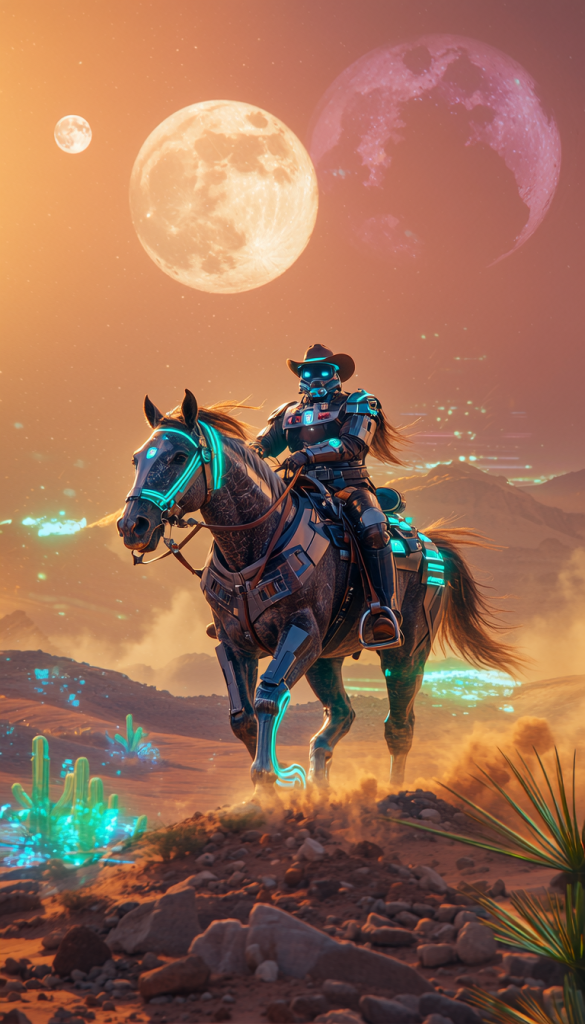
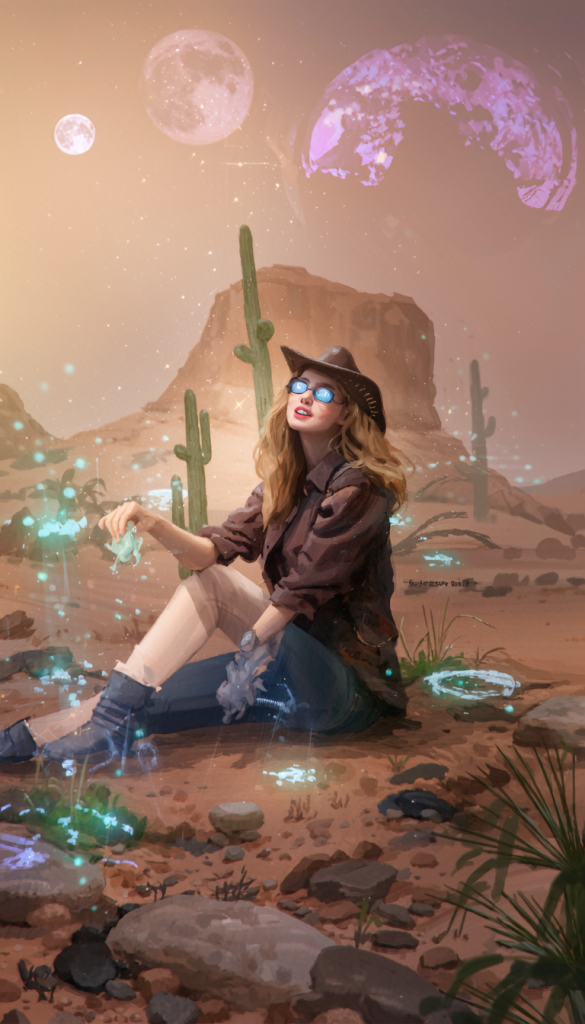
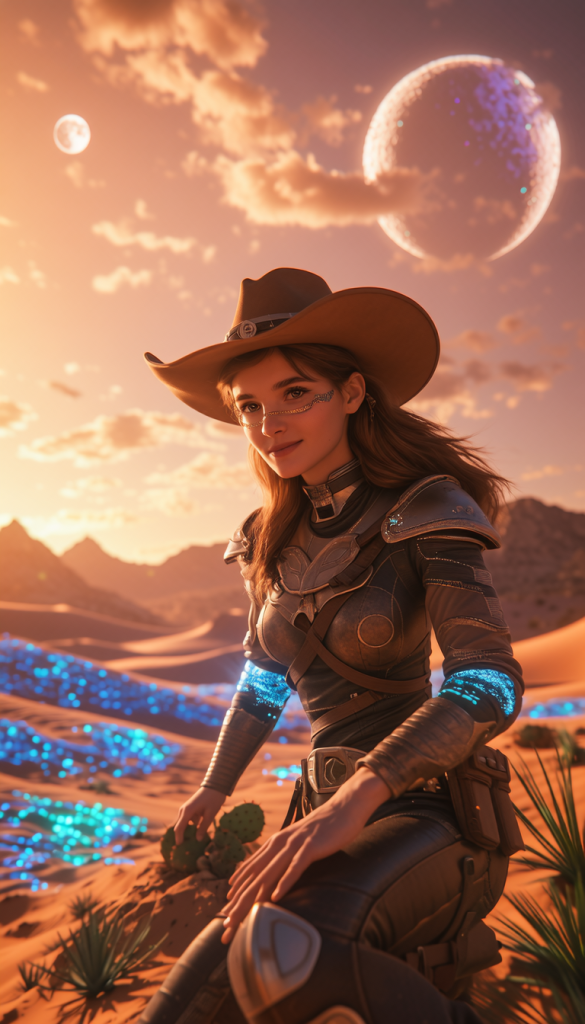
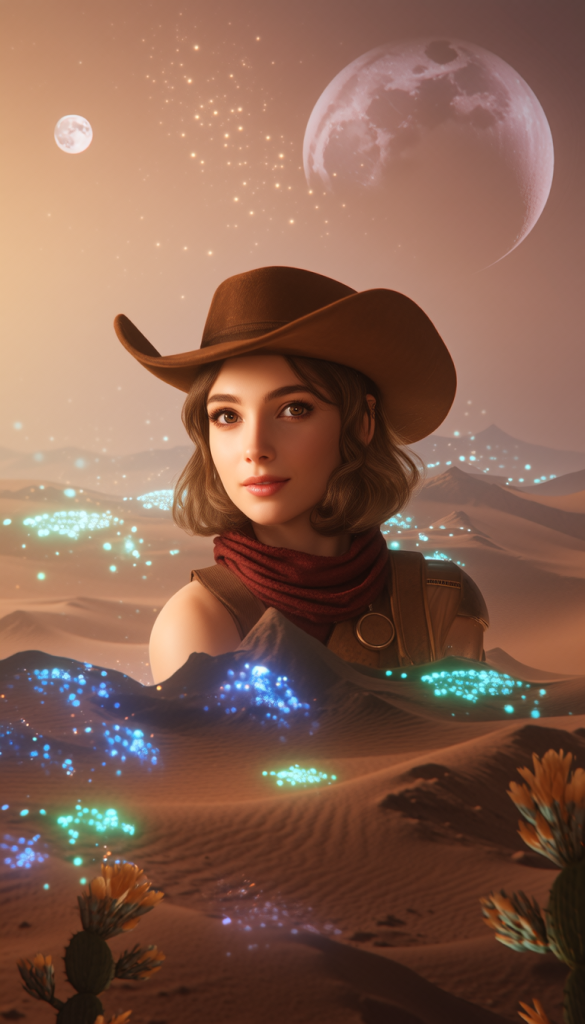
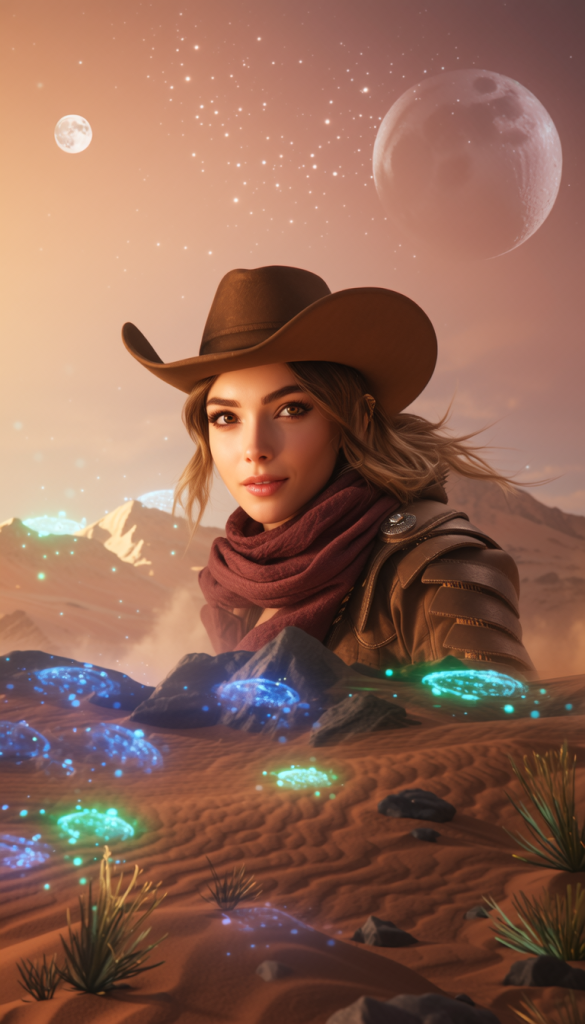
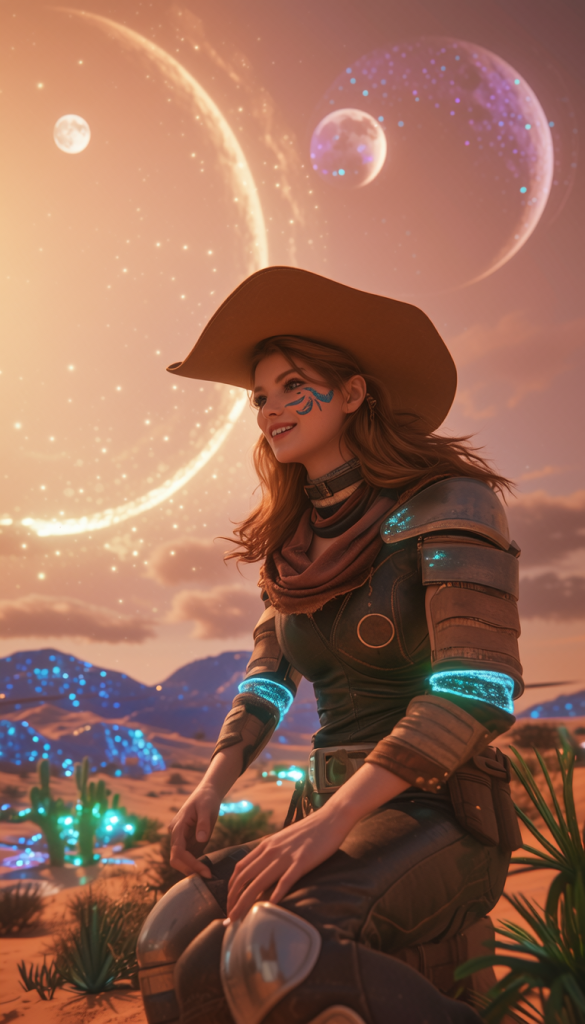
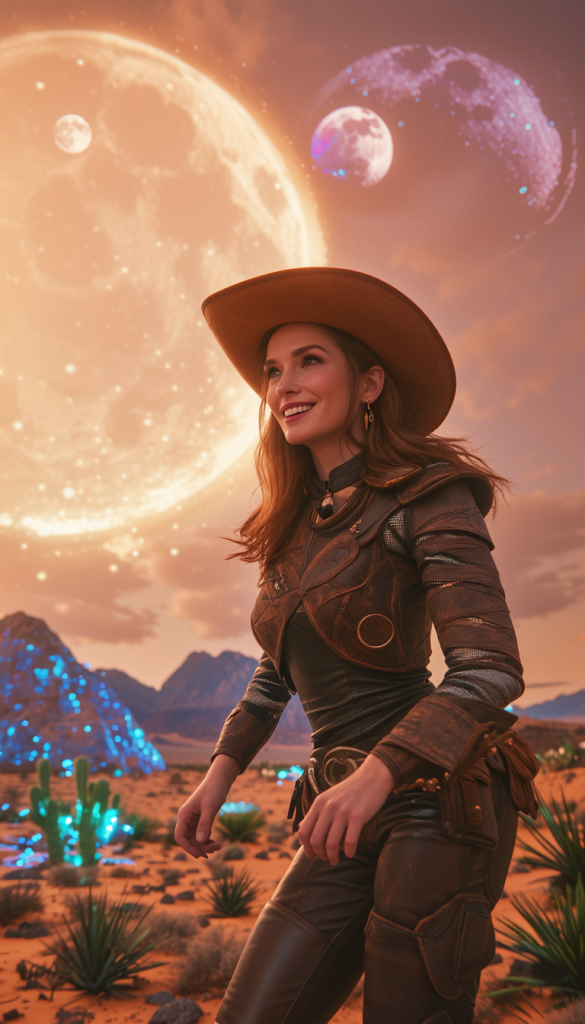
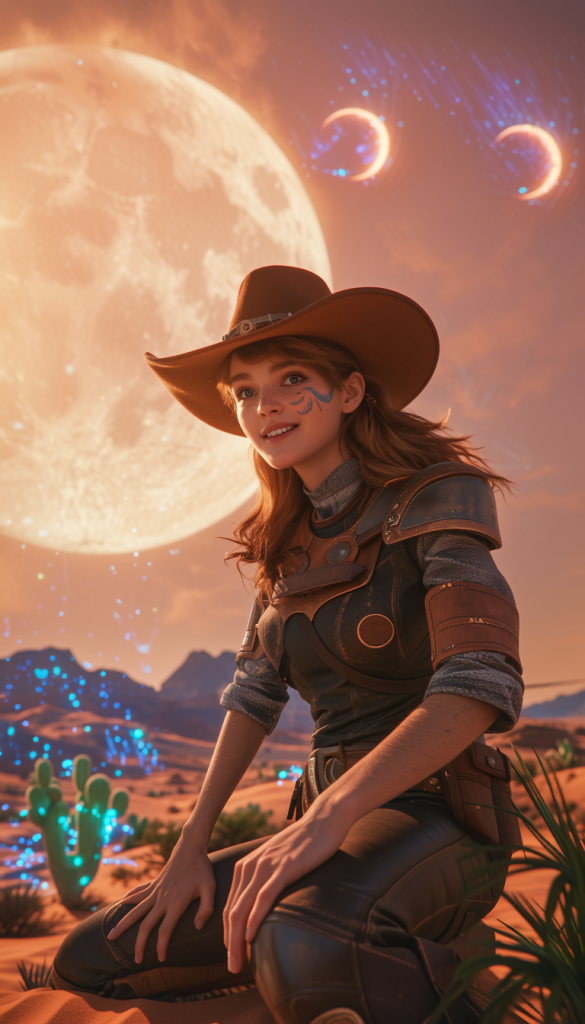
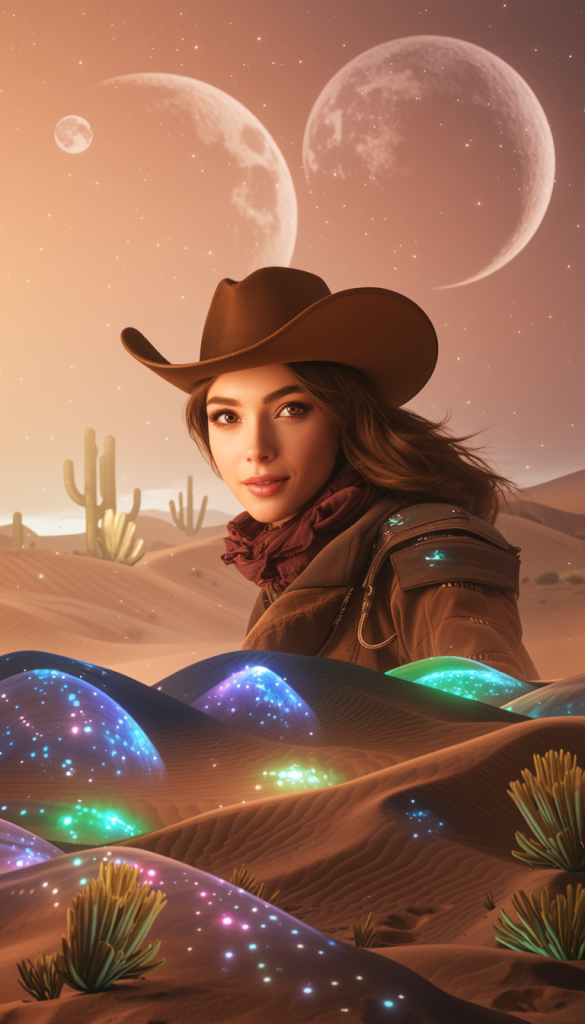
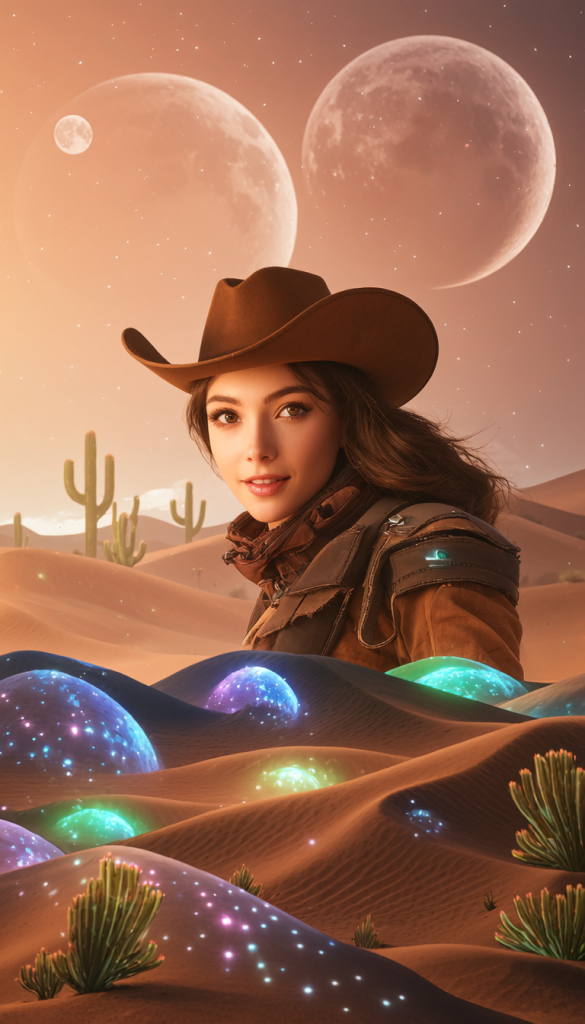
Sample images
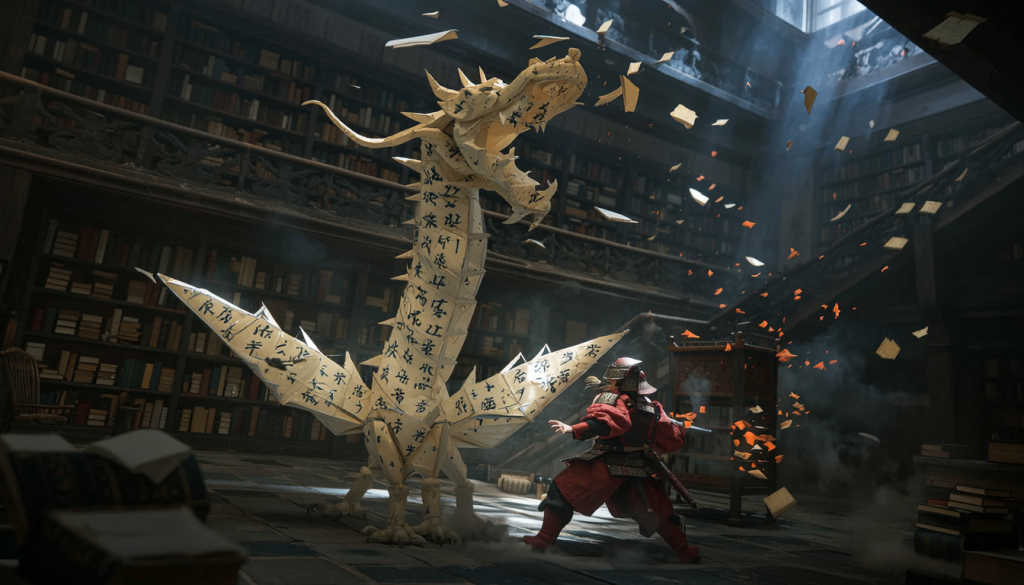
Here are some samples. The images are surprisingly diverse and detailed, showcasing the advantage of using a video model.
Related workflows
Workflows from the WAN model family:
- Turn an image into a video with Wan 2.2 local model
- Video from text with Wan 2.2 local model
- How to run Wan VACE video-to-video in ComfyUI
- Wan VACE ComfyUI reference-to-video
- Flux-Wan 2.1 four-clip movie (ComfyUI)
- How to run Wan 2.1 Video on ComfyUI
ComfyUI Colab Notebook
If you use my ComfyUI Colab notebook, you don’t need to download the model as instructed below. Select the Wan_2_2 model before running the notebook.
Wan 2.2 text-to-image workflow
Step 0: Update ComfyUI
Before loading the workflow, make sure your ComfyUI is up to date. The easiest way to do this is to use ComfyUI Manager.
Click the Manager button on the top toolbar.

Select Update ComfyUI.
Restart ComfyUI.
Step 1: Install models
The models are identical to Wan 2.2 Image-to-Video 14B. You don’t need to install any new models if you have them already.
After loading the workflow JSON file, ComfyUI should prompt you to download the missing model files.
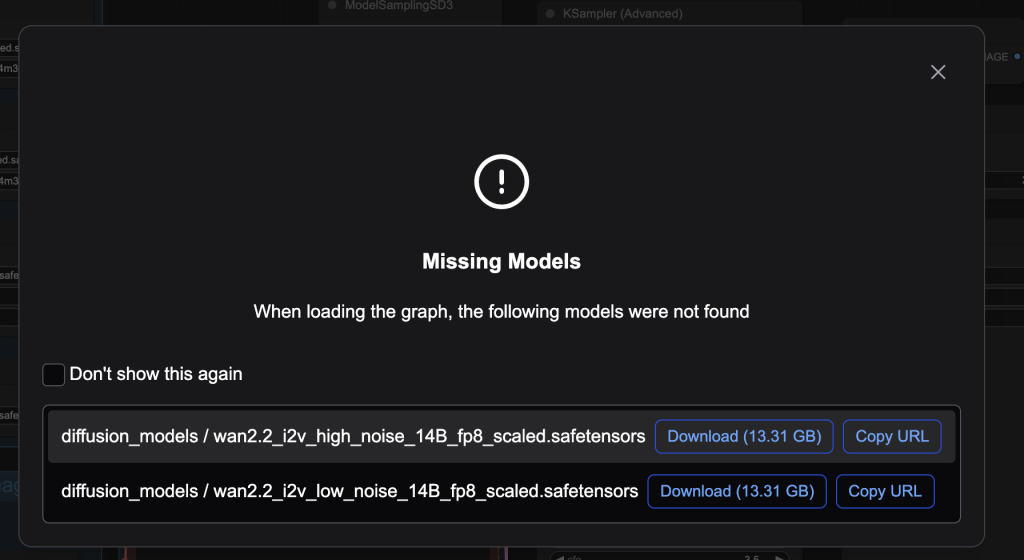
Here are what you need to download:
- Download wan2.2_i2v_high_noise_14B_fp8_scaled.safetensors and put it in ComfyUI > models > diffusion_models.
- Download wan2.2_i2v_low_noise_14B_fp8_scaled.safetensors and put it in ComfyUI > models > diffusion_models.
- Download umt5_xxl_fp8_e4m3fn_scaled.safetensors and put it in ComfyUI > models > text_encoders.
- Download wan_2.1_vae.safetensors and put it in ComfyUI > models > vae.
Step 2: Load the workflow
Download the workflow below. Drop it into ComfyUI to load.
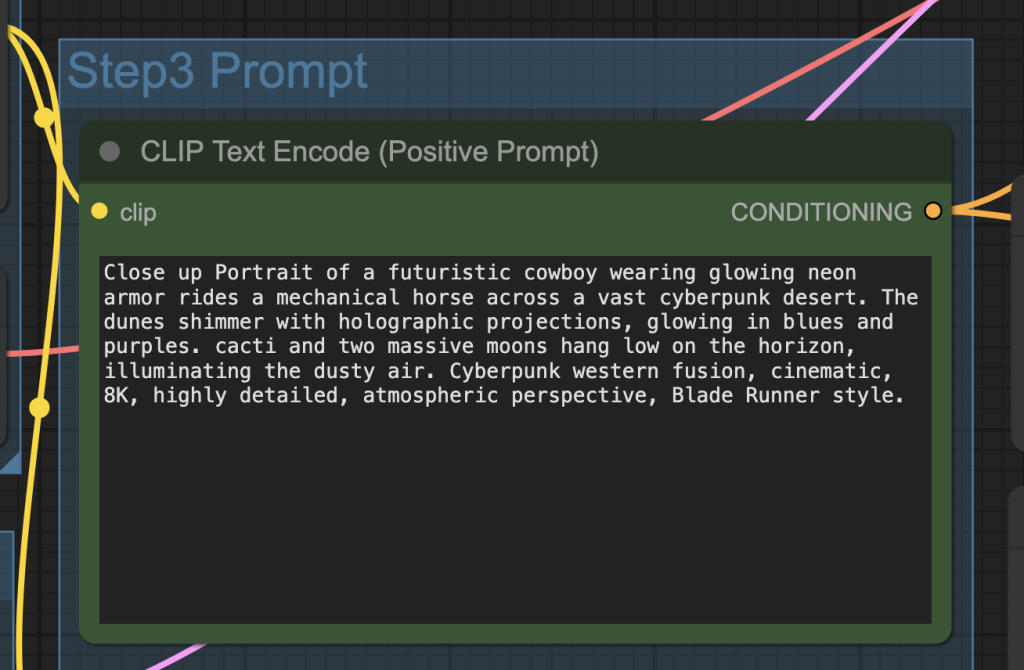
Step 3: Revise the prompt
Revise the prompt to match what you want to generate.
Step 4: Generate an image
Click the Run button to run the workflow.

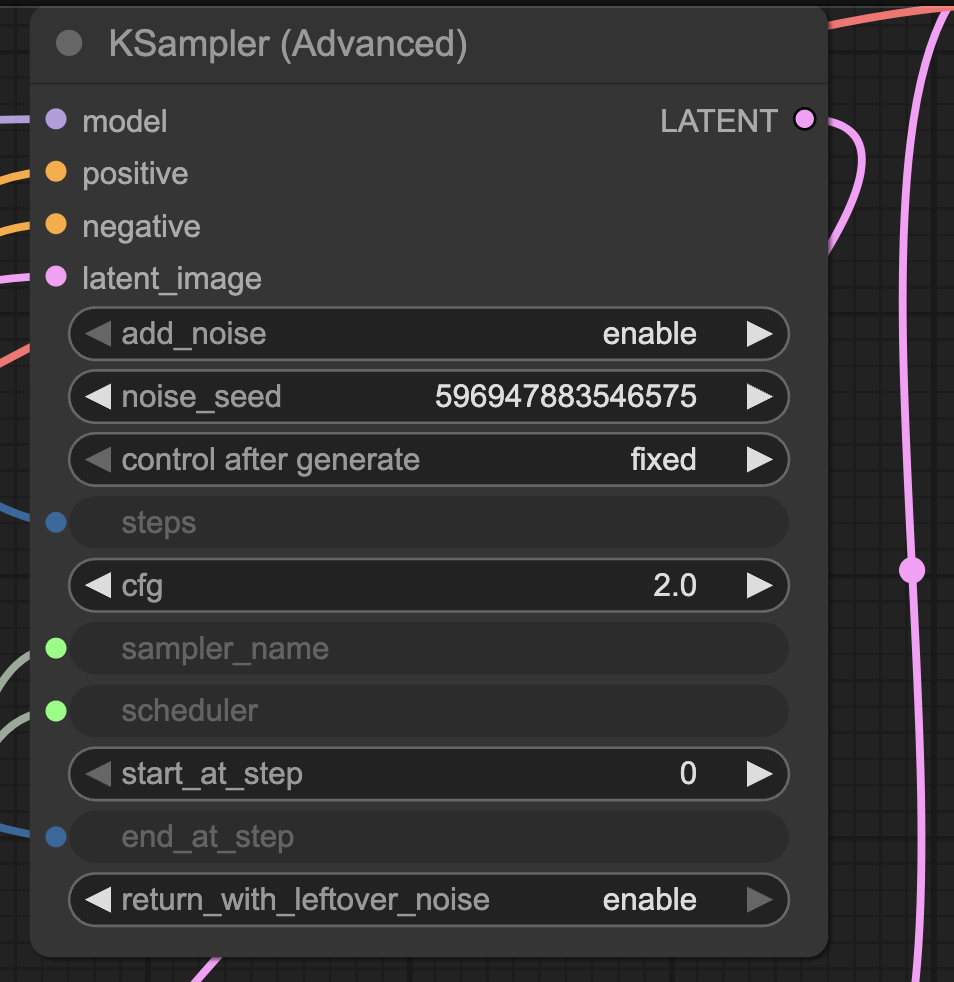
Change the noise_seed value of the KSampler node to generate a new image.
Settings for high-quality images
The Wan 2.2 Video model is a bit finicky. It has a narrow range of settings for generating high-quality images.
Model Shift
Setting the shift values in the ModelSamplingSD3 of both high and low noise models to 1 improves image quality and complexity of the scene.
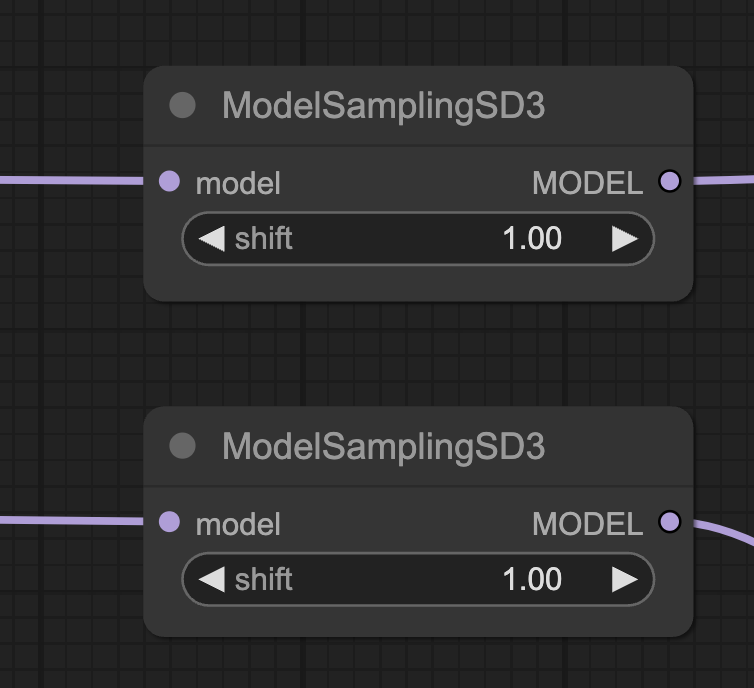
Image size
Stick with SDXL-like image size.
- 1:1 – 1024 x 1024
- 5:4 – 1152 x 896
- 3:2 – 1216 x 832
- 16:9 – 1344 x 768
The model loses coherence quickly for image size > 1,344 pixels. You will see deformed bodies like those in the SD 1.5 days…
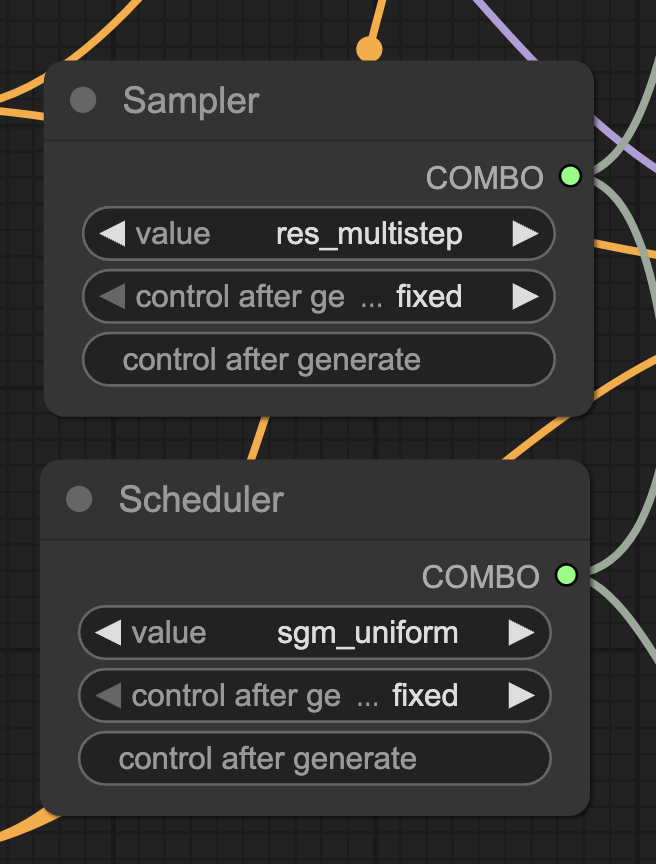
Sampler and scheduler
Unlike image models, the choice of the sampler and scheduler can make or break the image in Wan 2.2 Image model. The default Euler/Simple setting underperforms.
res_multistep/sgm_uniform performs quite well. The selection is purely by trial and error.
CFG
Similar to Stable Diffusion, the CFG value in the Wan 2.2 model controls how closely the prompt should be followed.
When the effect on the prompt is maxed out, the CFG value controls the saturation of the image.
The preset of the workflow is in the latter regime. Move CFG up and down to control the sautration.

Sampling steps

The Wan 2.2 14B model is actually two models — a high-noise model used in the initial steps and a low-noise model used in the final steps.
In the workflow, you can control the total number of steps and the step you want to switch to the low-noise model.
Increasing the sampling steps makes the image more complex and coherent.
The images from 5 and 10 steps above don’t really make sense.
My experience is that you need at least 20 steps to get decent images, but the more the better.
Switch step
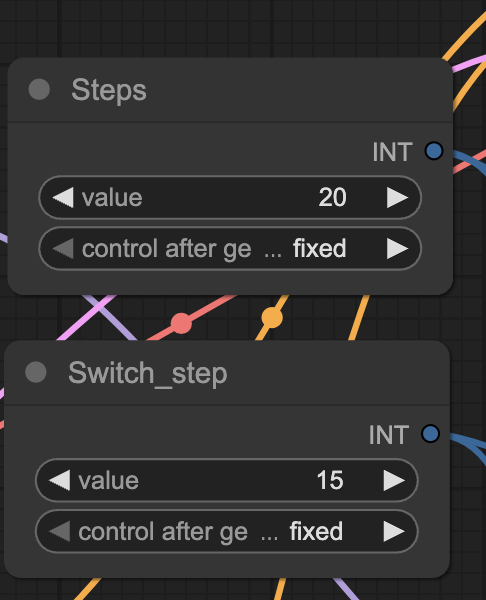
The switch step controls the sampling step at which the sampling is switched from the high to the low noise model.
My experience is that you should spend most of the time in the low-noise model. That is, using a low switch step.
The goods and the bads
Here are my takes after playing with the Wan 2.2 14B Video model in text-to-image mode.
The goods:
- The image style is diverse and creative.
- Good human pose composition.
The bads:
- The image quality is very sensitive to the workflow settings.
- Body parts, especially feet and toes, may not render correctly.
- Long image generation time.
- The model defaults to generating non-realistic images.
Other users’ experience
Wan2.2 Text-to-Image is Insane! Instantly Create High-Quality Images in ComfyUI : r/StableDiffusion
Pleasantly surprised with Wan2.2 Text-To-Image quality (WF in comments) : r/StableDiffusion
For me I am using SwarmUI (comfy backend)…. just with the low-noise model only, at 75 steps with Karras + DPM2++2m. Works very well. Not sure what gain there is from using the high-noise model. RTX4090. I didn’t change any other settings from their defaults.
Thanks for sharing this with us, Andrew and for the tips on settings. I agree it’s a very good model for making images. I compared your prompts between Wan2.2, Flux Pro and Flux Kontext Pro and the images were comparable in quality. In fact, the woman lying on the beach was better in Wan2.2 as it was the only model that accurately modelled her feet – all the others made a complete mess of them!
As you said generation was a bit slow, I loaded up A100 on Colab and it made an image in less than a minute so I suspect it will be comparable to Flux generation times on L4. I’ll add it to my priority list of i2i models.
PS I think there might be some text missing at the end of the CFG section above?
That’s right. Completed!