A killer application of Stable Diffusion is training your own model. Being an open-source software, the community has developed easy-to-use tools for that.
Training LoRA models is a smart alternative to checkpoint models. Although it is less powerful than whole-model training methods like Dreambooth or finetuning, LoRA models have the benefit of being small. You can store many of them without filling up your local storage.
Why train your own model? You may have an art style you want to put in Stable Diffusion. Or you want to generate a consistent face in multiple images. Or it’s just fun to learn something new!
In this post, you will learn how to train your own LoRA models using a Google Colab notebook. So, you don’t need to own a GPU to do it.
This tutorial is for training a LoRA for Stable Diffusion v1.5 models. See training instructions for SDXL LoRA models.
Table of Contents
Train a Stable Diffuson v1.5 LoRA
Software
The training notebook has recently been updated to be easier to use. If you use the legacy notebook, the instructions are here.
You will use a Google Colab notebook to train the Stable Diffusion v1.5 LoRA model. No GPU hardware is required from you.
If you are a member of this site, access the training notebook and images below.
Alternatively, you can purchase the notebook using the link below.
You will need Stable Diffusion software to use the LoRA model. I recommend using AUTOMATIC1111 Stable Diffusion WebUI.
Get the Quick Start Guide to learn how to use Stable Diffusion.
Step 1: Collect training images
The first step is to collect training images.
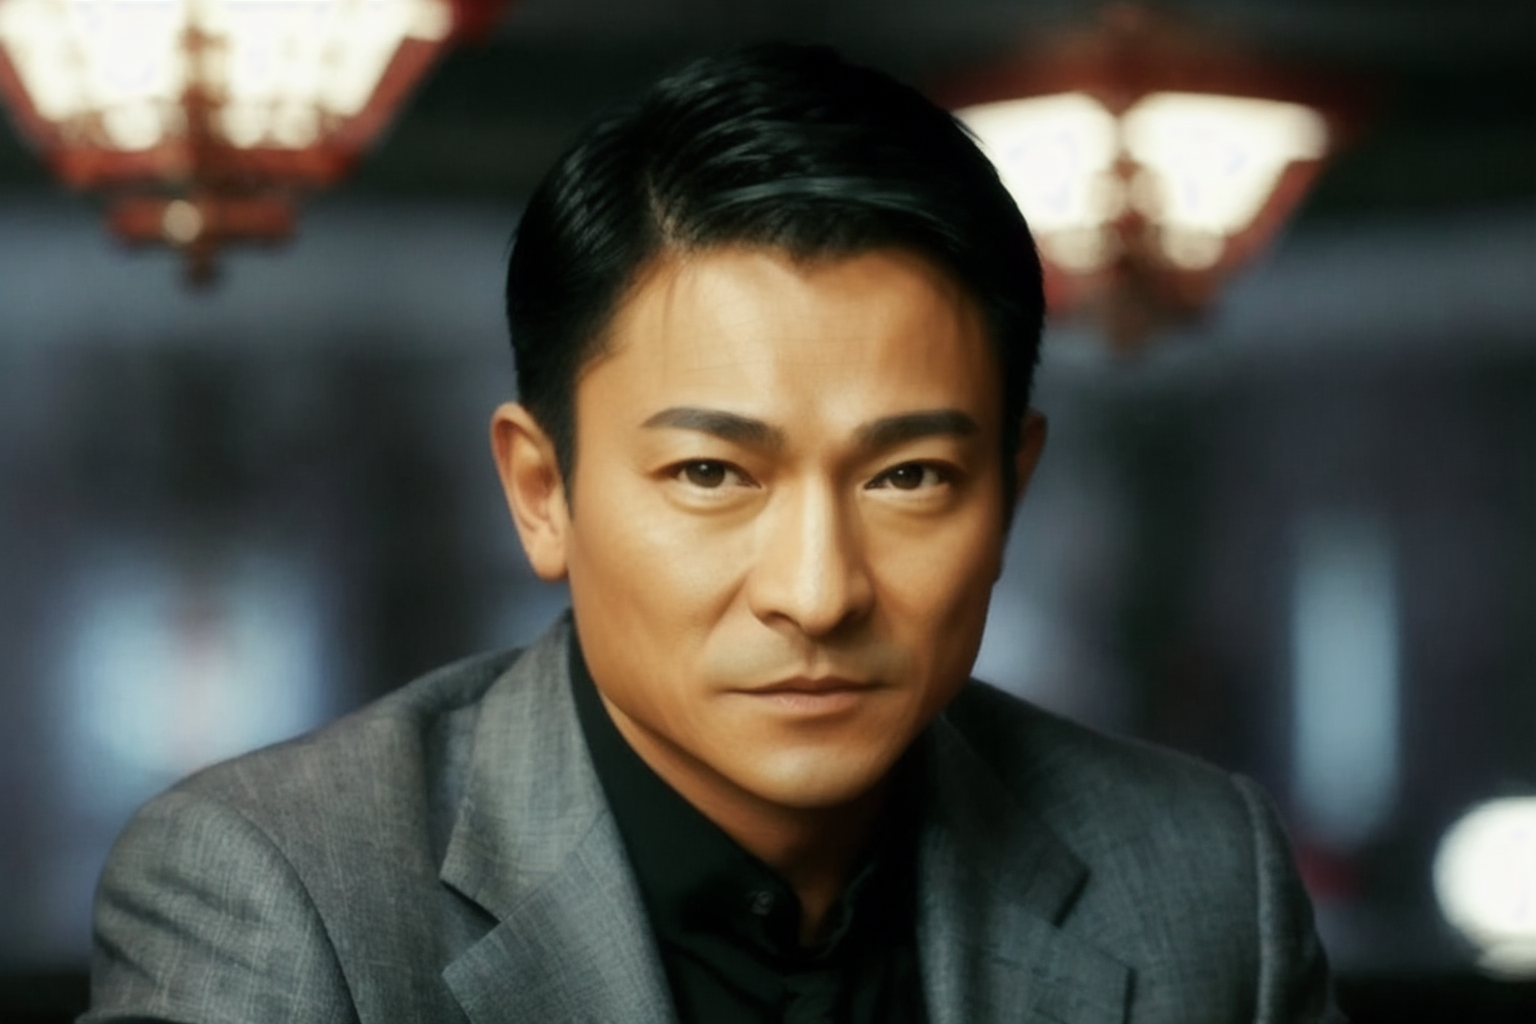
Let’s pay tribute to Andy Lau, one of the four Heavenly Kings of Cantopop in Hong Kong, and immortalize him in a Lora…
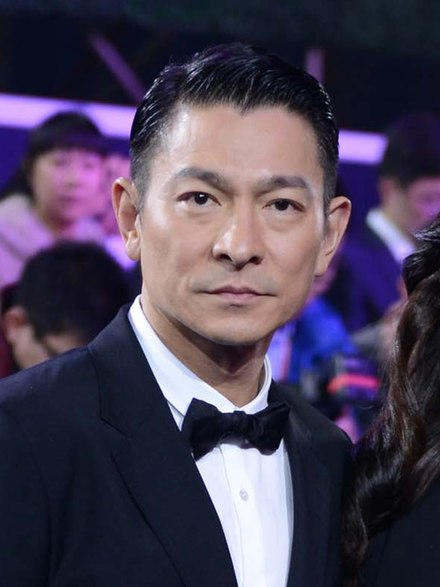
Google Image Search is a good way to collect images.

Let’s collect at least 15 training images.
Pick images that are at least 512×512 pixels for v1 models.
Make sure the images are either PNG or JPEG formats.
I collected 16 images for training. You can download them to follow this tutorial on the training notebook’s product page OR below if you are a member (login required).
Step 2: Review the training settings
Open the Easy LoRA Trainer SD 1.5 notebook.
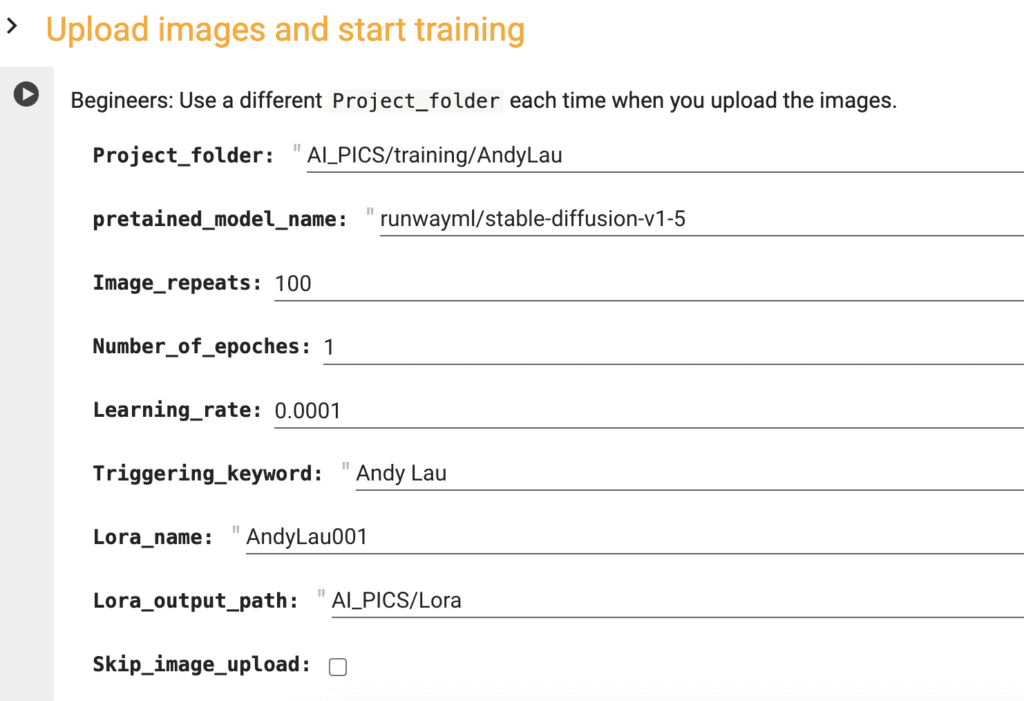
Here is some input to review before running the cell.
Project folder
A folder in Google Drive containing all training images and captions. Use a folder name that doesn’t exist yet.
Pretrained model name
The Hugging Face name of the checkpoint model. Here are a few options.
The Stable Diffusion v1.5 model is the official v1 model. Note: The official repository on runwayml is deprecated. Use the following.
stable-diffusion-v1-5/stable-diffusion-v1-5Realistic Vision v2 is good for training photo-style images.
SG161222/Realistic_Vision_V2.0Anything v3 is good for training anime-style images.
admruul/anything-v3.0You can find other models on Hugging Face using this link or this link. They have to be diffusers models. You can tell by a similar folder structure to the models above.
Image repeats
How many times the training images are repeated in each training epoch.
Number of epochs
The number of training rounds. Increase this number to increase training cycles.
Learning rate
How big a step is it to update the model.
Trigger keyword
The token associated with your subject.
Lora name
The name of your LoRA file. In AUTOMATIC1111, It looks like <lora:AndyLau001:1> when you use the LoRA.
Lora output path
A folder in Google Drive where the Lora file will be saved. The default path lets you use the LoRA with our AUTOMATIC1111 Google Colab notebook without moving.
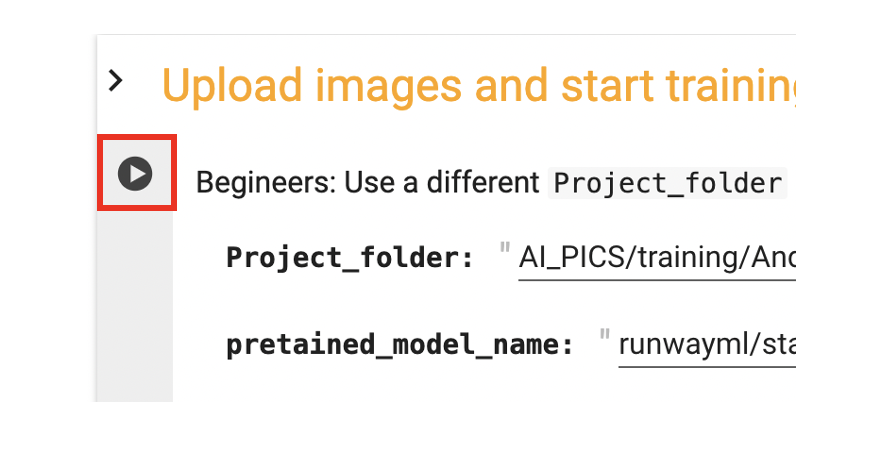
Step 3: Run the notebook
Run the notebook by clicking the Play button on the left.
It will ask you to connect to your Google Drive.
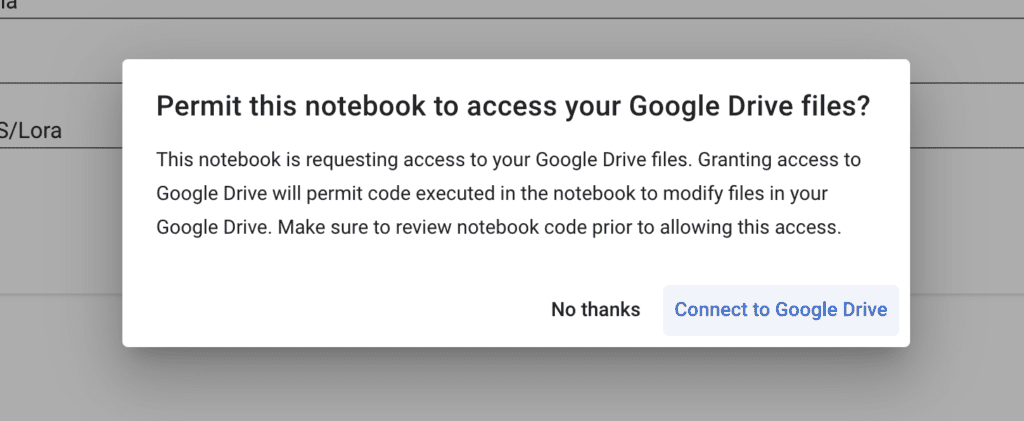
You must accept because there’s no easy way to download the final LoRA model from Google Colab.
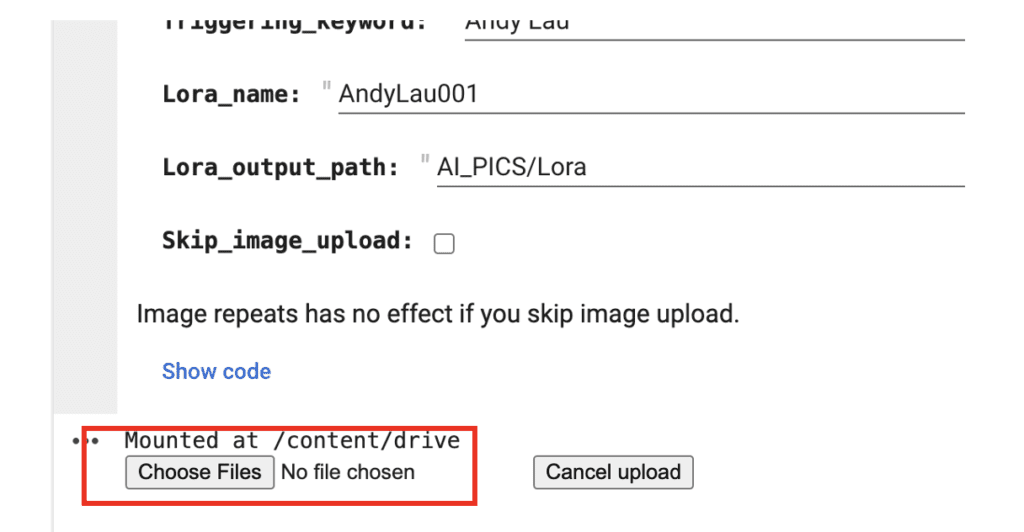
Click Choose Files and select your training images. (The images, not the zip file.)
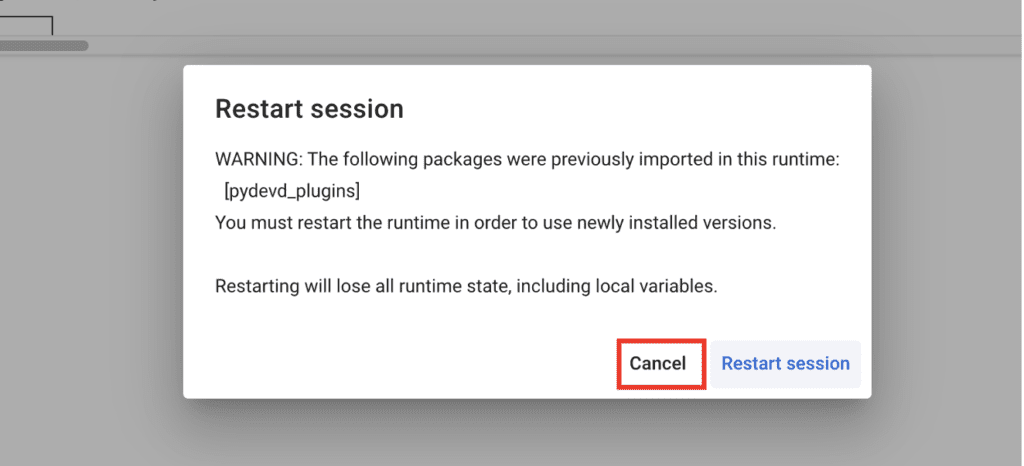
It may prompt for restarting the runtime. Click Cancel.
It will take a while to complete running. It will
- Set up the training software
- Generate captions for your images. You can find them in the project folder in your Google Drive. They are the
.txtfiles with the same name as your images. - Train the LoRA model.
The LoRA model is saved in your Google Drive folder: AI_PICS > Lora in the default setting.
Note: Google Colab may not work well with browsers other than Chrome. Try using Chrome if you experience an issue uploading the image.
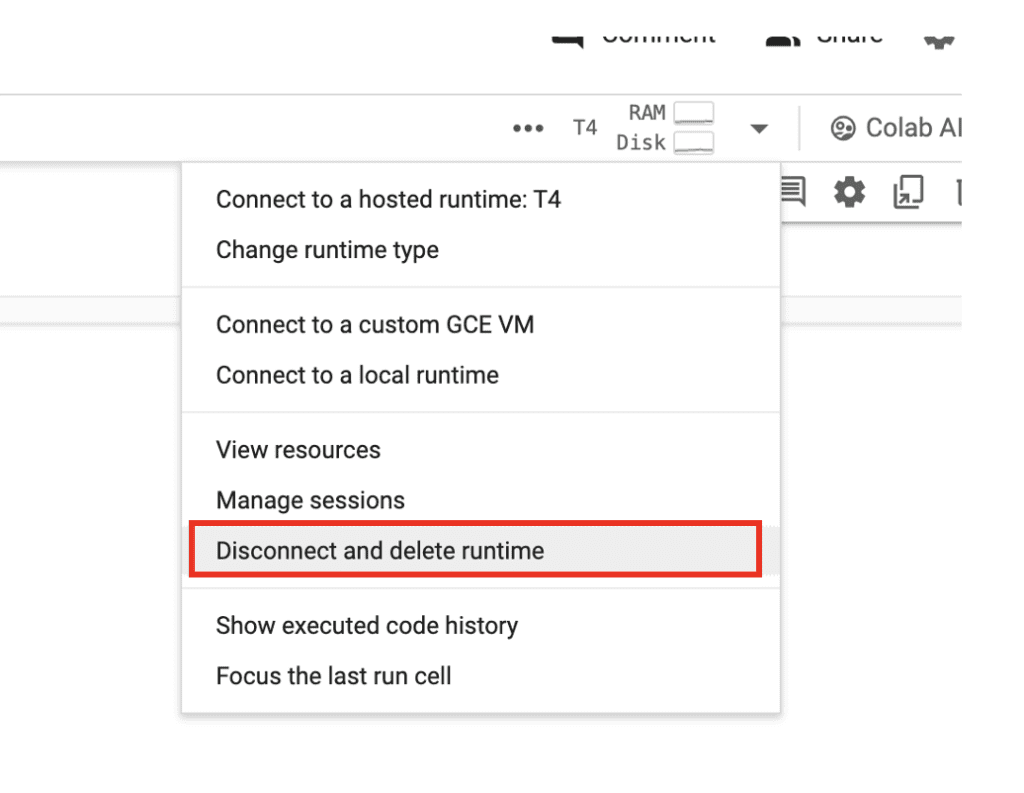
When you are done, don’t forget to click the caret on the top right, and click disconnect and delete the runtime. Otherwise it will keep consuming your compute credit.
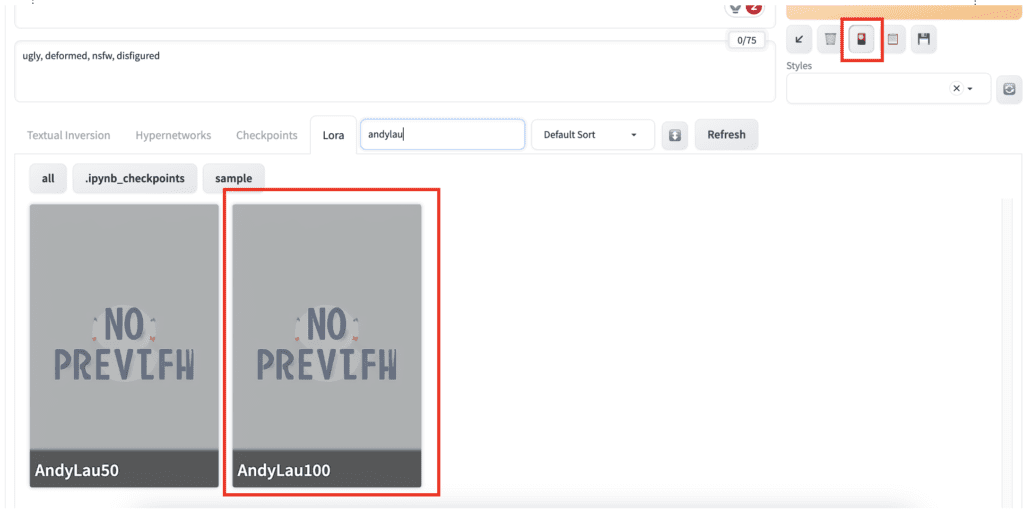
Using the LoRA
If you save the LoRA in the default output location (AI_PICS/Lora), you can easily use the Stable Diffusion Colab Notebook to load it.
Open AUTOMATIC1111 Stable Diffusion WebUI in Google Colab. Click the Select the Lora tab and click the LoRA you just created.
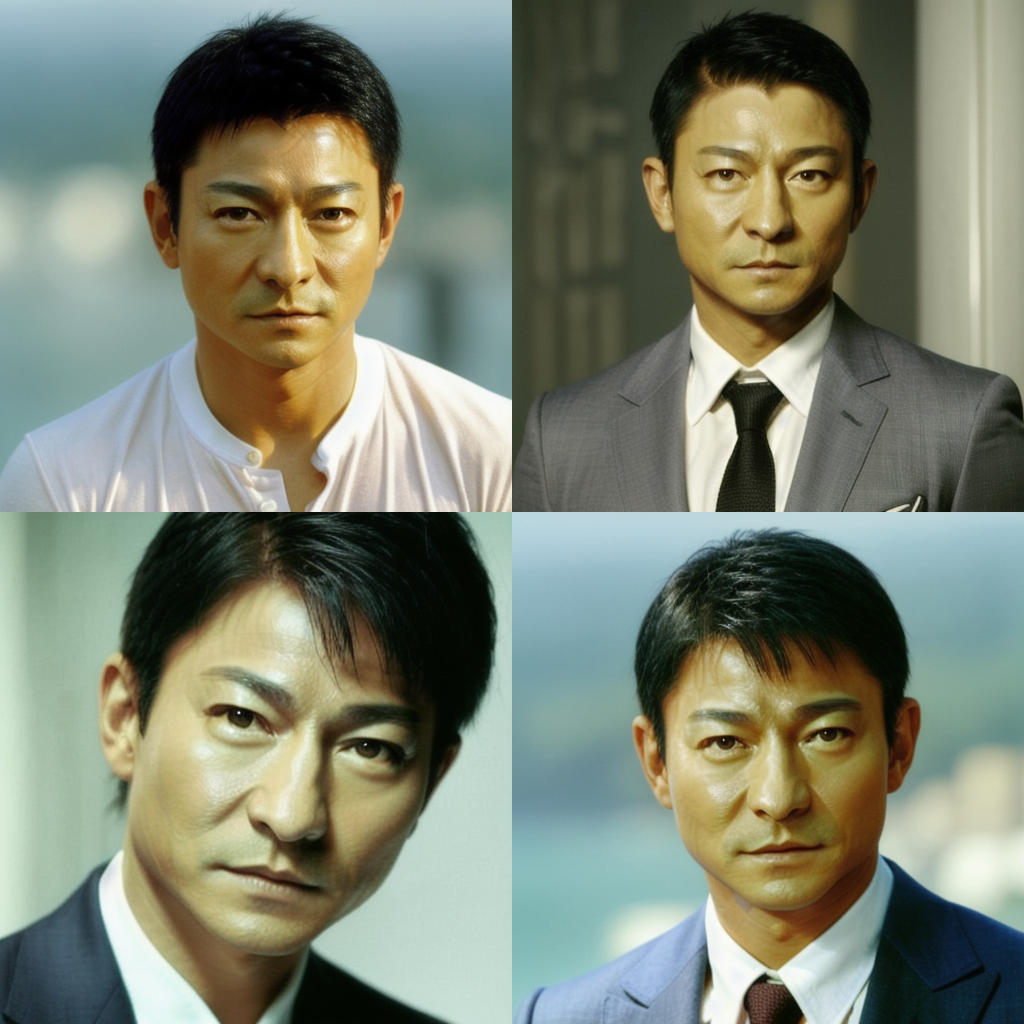
Here are the prompt and the negative prompt:
Andy Lau in a suit, full body <lora:AndyLau001:1>
ugly, deformed, nsfw, disfigured
Since we have used “Andy Lau” as the triggering keyword, you will need it in the prompt for it to take effect.
Although the LoRA is trained on the Stable Diffusion v1.5 model, it works equally well with the Realistic Vision v2 model.
Here are the results of the Andy Lau LoRA.


Revise captions
The captions are generated automatically during training. But they can be incorrect sometimes. You may want to revise them and retrain your model.
To do so, go to your Google Drive and navigate to the project folder. (AI_PICS > training > AndyLau with the default setting).
You should see a sub-folder that contains all your images and captions. They are the files ending with .txt and with the same names as the images.
Revise them to fit the image.
In the notebook, check Skip_image_upload and run the notebook to start a new training. You can optionally change the Lora_name to avoid overwriting the previous one.
You don’t need to disconnect and reconnect the notebook for new training.
General tips
Experimentation
Training a LoRA model requires patience and experimentation. You should treat the default parameters as a starting point.
Observe the result and change the settings one at a time. Observe the result with the same seeds. Generate multiple images to draw conclusion.
Just like a good old scientist would do.
A systematic approach may take longer. But in the end, the knowledge and intuition you gain will make you a better trainer.
Overcook and undercook
We say a LoRA is overcooked when your training subject shows color saturation like using a high CFG value.
On the other end, a LoRA is undercooked when your subject is not showing enough.
The images below used a LoRA that’s undercooked. This guy doesn’t look quite like Andy Lau. (50 repeats)
The LoRA is trained just right for the following images. (100 repeats)

The following images are overcooked (150 image repeats). See the backgrounds are all the same.

You can increase the image repeats or number of epochs to cook more. Likewise, reduce them to cook less.
There’s probably a setting between 100 and 150 that gives the optimal result.
If the training is too aggression that it is easy to overcook, you can lower the learning rate. This will cause a smaller update to be made to the model. You may need to increase the image repeats or the number of epochs to compensate.
Reference
LoRA training parameters – An authoritative reference of training parameters.
LEARN TO MAKE LoRA – A graphical guide to training LoRA.
kohya_ss Documentation – English translation of kohya_ss manual.
FAQ
I got ModuleNotFoundError: No module named ‘torch._custom_ops’
You likely have restarted the runtime when prompted. Click cancel when prompted to restart the runtime.
getting this error-
[Errno 2] No such file or directory: ‘/content/kohya_ss/’
/content
/content/venv/bin/python3: can’t open file ‘/content/finetune/make_captions.py’: [Errno 2] No such file or directory
/bin/bash: line 1: /content/venv/bin/accelerate: No such file or directory
Hi, the notebook should be working correctly. Use the latest one from this page.
Hello,
Thank you for this great tutorial. However I am not able to import the Lora Model I have trained on the Google Colab notebook. The notebook looks also quite because I don´t have this icon to import the Lora. Do you have maybe an idea of what is wrong in my process?
Thank you,
Best!
Which notebook did you use to import LoRA? where’s did you put your lora file?
I use this notebook:
https://colab.research.google.com/drive/1Zr4ufbEISFaOc5106zg1c-uVNec5f392?usp=sharing
And I export the Lora file in the Lora ordner from my Google Drive. Actually I did exactly like in the tutorial but with my images.
Do you put the model file in AI_PICS > models > Lora in your google drive? It should show up if you have selected a SD 1.5 checkpoint model.
Thanks for the tutorial!
For some reason it seems like the notebook can’t access my google drive. I “agree” on all the popup windows to give it access. The only things I changed were the project folder (switched to AI_PICS/training and I double checked that the images are in there), pretrained model name to SG161222/Realistic_Vision_V2.0, and the triggering keyword. Am I doing something wrong?
[Dataset 0]
loading image sizes.
0it [00:00, ?it/s]
make buckets
min_bucket_reso and max_bucket_reso are ignored if bucket_no_upscale is set, because bucket reso is defined by image size automatically / bucket_no_upscaleが指定された場合は、bucketの解像度は画像サイズから自動計算されるため、min_bucket_resoとmax_bucket_resoは無視されます
number of images (including repeats) / 各bucketの画像枚数(繰り返し回数を含む)
/content/venv/lib/python3.10/site-packages/numpy/core/fromnumeric.py:3504: RuntimeWarning: Mean of empty slice.
return _methods._mean(a, axis=axis, dtype=dtype,
/content/venv/lib/python3.10/site-packages/numpy/core/_methods.py:129: RuntimeWarning: invalid value encountered in scalar divide
ret = ret.dtype.type(ret / rcount)
mean ar error (without repeats): nan
No data found. Please verify arguments (train_data_dir must be the parent of folders with images)
Nevermind, it turns out I’m just a moron. I thought I was supposed to be giving a project folder with the images already in it. I didn’t understand that I was supposed to be giving a folder that doesn’t exist and would be prompted to upload images. Once again I’m burned by not ready the directions carefully.
Great!
Error:
Traceback (most recent call last):
File “/content/bitsandbytes/setup.py”, line 8, in
from setuptools import find_packages, setup
ModuleNotFoundError: No module named ‘setuptools’
/content
fatal: destination path ‘kohya_ss’ already exists and is not an empty directory.
/content/kohya_ss
env: PYTHONPATH=/env/python:/content/kohya_ss
Traceback (most recent call last):
File “/content/kohya_ss/finetune/make_captions.py”, line 9, in
from PIL import Image
ModuleNotFoundError: No module named ‘PIL’
/bin/bash: line 1: /content/venv/bin/accelerate: No such file or directory
this is fixed yesterday. follow the link on this page to retrieve the new notebook (updated 1/17)
Fixed by updating my link to the newest version dated 17/01/2025. Thank you for this!
Hey Andy!
I haven’t used the notebook for a few weeks but have been trying to train a LORA over the past day or so and I keep encountering this error message. Any ideas?
File “/content/venv/lib/python3.10/site-packages/accelerate/commands/launch.py”, line 703, in simple_launcher
raise subprocess.CalledProcessError(returncode=process.returncode, cmd=cmd)
subprocess.CalledProcessError: Command ‘[‘/content/venv/bin/python3’, ‘./train_network.py’, ‘–enable_bucket’, ‘–min_bucket_reso=256’, ‘–max_bucket_reso=2048’, ‘–pretrained_model_name_or_path=stable-diffusion-v1-5/stable-diffusion-v1-5’, ‘–train_data_dir=/content/drive/MyDrive/AI_PICS/training/Lexi001’, ‘–resolution=512,650’, ‘–output_dir=/content/drive/MyDrive/AI_PICS/Lora’, ‘–network_alpha=64’, ‘–save_model_as=safetensors’, ‘–network_module=networks.lora’, ‘–text_encoder_lr=5e-05’, ‘–unet_lr=0.0001’, ‘–network_dim=64’, ‘–output_name=Lexi001’, ‘–lr_scheduler_num_cycles=1’, ‘–no_half_vae’, ‘–learning_rate=0.0001’, ‘–lr_scheduler=constant’, ‘–train_batch_size=3’, ‘–max_train_steps=100000’, ‘–save_every_n_epochs=99999’, ‘–mixed_precision=fp16’, ‘–save_precision=fp16’, ‘–seed=1234’, ‘–caption_extension=.txt’, ‘–cache_latents’, ‘–optimizer_type=AdamW’, ‘–max_data_loader_n_workers=1’, ‘–clip_skip=2’, ‘–bucket_reso_steps=64’, ‘–max_train_epochs=1’, ‘–mem_eff_attn’, ‘–xformers’, ‘–bucket_no_upscale’, ‘–noise_offset=0.05′]’ returned non-zero exit status 1.
I haven’t changed any of the default settings at all.
Does using the sample images work on your side?
I’ll try it now and let you know…
It’s working at the moment, going through the steps of training the LORA which is further than it was getting with mine.
Does that suggest a problem with the pictures I was using? They were all either JPG, JPEG or PNG extensions…
Yes, it is likely from your input images. You can try making them as close to the sample images as possible, like filenames (no special characters), file extension, and sizes.
Hi, thank you for all this information. What I still don*t understand, is how I train and finetune (a Lora or full model in dreambooth) in just one detail of a picture, e,g, a hand or a natural flaccid penis for fine art photorealistic images, without changing the whole appearence (and charm) of a model?
I like to work with SDXL or Juggernaut XL, as the results are most natural in my opinion. SD1.5 usually lacks details because of the small size when its about depicting whole (posing) bodies. Although SDXL and Juggernaut are much better with fingers and hand poses, e.g. male genitals are very seldom generated anatomically correct, at least in text2img. The only workaround to correct it in an existing generated image is using 0001SoftRealistic v187 or RealDream 12 models in img2img with low strength around 40 (to not change the emotion and face in the image too much.
There are Loras on CIVITAI for each pose or body detail (faces, butts, even male genitals,…), but nearly all change the faces in an unnatural way. Is there a way to train a Lora or finetune a model with dreambooth just for a certain body-detail like a hand or is the only way to mask and inpaint the picture? And if so, would you select just pictures of a hand (without the body) or diverse whole portraits with interesting hand-poses, otherwise SDXL would just generate a hand without the body?
I think you would need pictures with good faces. alternatively, use inpainting with your new model to targetly changing only one body part.
Hi there, I ran into this error today, It was working well a month ago when I last tried though:
Traceback (most recent call last):
File “/content/kohya_ss/./train_network.py”, line 990, in
trainer.train(args)
File “/content/kohya_ss/./train_network.py”, line 178, in train
train_dataset_group = config_util.generate_dataset_group_by_blueprint(blueprint.dataset_group)
File “/content/kohya_ss/library/config_util.py”, line 494, in generate_dataset_group_by_blueprint
dataset.make_buckets()
File “/content/kohya_ss/library/train_util.py”, line 738, in make_buckets
info.image_size = self.get_image_size(info.absolute_path)
File “/content/kohya_ss/library/train_util.py”, line 971, in get_image_size
image = Image.open(image_path)
File “/content/venv/lib/python3.10/site-packages/PIL/Image.py”, line 3498, in open
raise UnidentifiedImageError(msg)
PIL.UnidentifiedImageError: cannot identify image file ‘/content/drive/MyDrive/AI_PICS/training/GudiaV1/100_GudiaV1/IMG_4848.jpeg’
Traceback (most recent call last):
File “/content/venv/bin/accelerate”, line 8, in
sys.exit(main())
File “/content/venv/lib/python3.10/site-packages/accelerate/commands/accelerate_cli.py”, line 48, in main
args.func(args)
File “/content/venv/lib/python3.10/site-packages/accelerate/commands/launch.py”, line 1097, in launch_command
simple_launcher(args)
File “/content/venv/lib/python3.10/site-packages/accelerate/commands/launch.py”, line 703, in simple_launcher
raise subprocess.CalledProcessError(returncode=process.returncode, cmd=cmd)
subprocess.CalledProcessError: Command ‘[‘/content/venv/bin/python3’, ‘./train_network.py’, ‘–enable_bucket’, ‘–min_bucket_reso=256’, ‘–max_bucket_reso=2048’, ‘–pretrained_model_name_or_path=stable-diffusion-v1-5/stable-diffusion-v1-5’, ‘–train_data_dir=/content/drive/MyDrive/AI_PICS/training/GudiaV1’, ‘–resolution=512,650’, ‘–output_dir=/content/drive/MyDrive/AI_PICS/Lora’, ‘–network_alpha=64’, ‘–save_model_as=safetensors’, ‘–network_module=networks.lora’, ‘–text_encoder_lr=5e-05’, ‘–unet_lr=0.0001’, ‘–network_dim=64’, ‘–output_name=GudiaV1’, ‘–lr_scheduler_num_cycles=1’, ‘–no_half_vae’, ‘–learning_rate=0.0001’, ‘–lr_scheduler=constant’, ‘–train_batch_size=3’, ‘–max_train_steps=100000’, ‘–save_every_n_epochs=99999’, ‘–mixed_precision=fp16’, ‘–save_precision=fp16’, ‘–seed=1234’, ‘–caption_extension=.txt’, ‘–cache_latents’, ‘–optimizer_type=AdamW’, ‘–max_data_loader_n_workers=1’, ‘–clip_skip=2’, ‘–bucket_reso_steps=64’, ‘–max_train_epochs=2’, ‘–mem_eff_attn’, ‘–xformers’, ‘–bucket_no_upscale’, ‘–noise_offset=0.05′]’ returned non-zero exit status 1.
Hi, I just ran it and it is working correctly. Yo can try following the original link to the notebook and test with the training image I supplied to ensure everything is working on your end.
// https://huggingface.co/api/models/runwayml/stable-diffusion-v1-5
{
“error”: “Invalid username or password.”
}
Could you fix it? it’s impossible to create a model with sd-1.5
Repository Not Found for url: https://huggingface.co/api/models/runwayml/stable-diffusion-v1-5.
Please make sure you specified the correct `repo_id` and `repo_type`
The original repos is deprecated. Use this legacy one:
stable-diffusion-v1-5/stable-diffusion-v1-5I also corrected the link in the article.
Hello, thanks for your services. I’ve ran into these errors today, where it had been working yesterday.
“404 Not Found [IP: 185.125.190.82 80]
Fetched 2,467 kB in 2s (1,114 kB/s)
E: Failed to fetch http://security.ubuntu.com/ubuntu/pool/universe/p/python3.10/python3.10-venv_3.10.12-1%7e22.04.3_amd64.deb 404 Not Found [IP: 185.125.190.82 80]
E: Unable to fetch some archives, maybe run apt-get update or try with –fix-missing?
/content
The virtual environment was not created successfully because ensurepip is not
available. On Debian/Ubuntu systems, you need to install the python3-venv
package using the following command.
apt install python3.10-venv
You may need to use sudo with that command. After installing the python3-venv
package, recreate your virtual environment.
Failing command: /content/venv/bin/python3″
And also:
“/content/kohya_ss
env: PYTHONPATH=/env/python:/content/kohya_ss
env: PYTHONPATH=/env/python:/content/kohya_ss
Traceback (most recent call last):
File “/content/kohya_ss/finetune/make_captions.py”, line 9, in
from PIL import Image
ModuleNotFoundError: No module named ‘PIL’
/bin/bash: line 1: /content/venv/bin/pip: No such file or directory
/bin/bash: line 1: /content/venv/bin/accelerate: No such file or directory”
Hi, I have put in a fix for this particular issue. I will test the whole network tonight but feel free to run it to see if that works for you.
Hello, I’m getting the same error too (it was working fine up until a couple days ago):
/content/kohya_ss
env: PYTHONPATH=/env/python:/content/kohya_ss
Traceback (most recent call last):
File “/content/kohya_ss/finetune/make_captions.py”, line 9, in
from PIL import Image
ModuleNotFoundError: No module named ‘PIL’
/bin/bash: line 1: /content/venv/bin/accelerate: No such file or directory
Hi, I just went the notebook and it is working correctly. Please make sure you were disconnected from colab when you start this notebook, and starting a GPU instance like T4 (check the top right corner)
just started getting the following error.
ImportError: cannot import name ‘split_torch_state_dict_into_shards’ from ‘huggingface_hub’ (/usr/local/lib/python3.10/dist-packages/huggingface_hub/__init__.py)
Hi, the issue should be fix.
I got an error trying to use Linaqruf/anything-v3.0 to train, but it worked for runwayml/stable-diffusion-v1-5.
Can you check?
Thanks for reporting. The repo appears to be down.
Please use admruul/anything-v3.0
Oh my goodness, a colab journal that FINALLY works! (I bought it on gumroad btw) the models trained by the hollowstrawberry one produces nonsense results currently, but the models trained with yours actually produce GREAT results. Thanks!!
Great to hear it works for you. I put in a lot of work to make it simple to use!
Hello,
I keep getting this error when training using SDXL notebook even though it was working just fine before,
WARNING: The following packages were previously imported in this runtime:
[pydevd_plugins]
You must restart the runtime in order to use newly installed versions.
And then the code stopped at:
File “/usr/local/lib/python3.10/dist-packages/torchvision/_meta_registrations.py”, line 4, in
import torch._custom_ops
ModuleNotFoundError: No module named ‘torch._custom_ops’
I’ve tried to load new notebook in case you updated it but still the same.
same 🙁
It should be fixed. please confirm you see the updated version on 3/15 for the SDXL notebook. If you still see error, post the error message.
Hi, the bug is fixed. Please use reload the notebook. You should see it is updated on 3/15.
I just bought this and same error:
ModuleNotFoundError: No module named ‘torch._custom_ops’
Hi, I just tested it and it is running correctly. Are you running the SD1.5 version? Please post the full error message.
You likely have restarted the runtime when prompted. Click cancel.
Pretrained_Model_Name ….runwayml/stable-diffusion-v1-5
What is this path. Am I supposed to change the Path to where checkpoint models are in my Google drive ? I do not have .runwayml/stable-diffusion-v1-5
Pretained model name is the user/model name on hugging face.
https://huggingface.co/runwayml/stable-diffusion-v1-5
See the copy icon next to the title to copy that name.
You will need to find a diffusers model on huggingface and use the name.
Or use the ones mentioned in the article.
Maybe my question was not clear.
1) What is “runwayml” in the Path?
2) Is this where model stable-diffusion-v1-5 resides in your google drive?
I changed the path to where my models are, still not able to get Lora Model show up after the colab finishes running
runwayml is a Hugging Face user name. It is the company Runway ML.
The SD 1.5 model is not in your google drive. It is on Hugging Face’s website. The path “runwayml/stable-diffusion-v1-5” refers to the location on Hugging Face.
You need to use, for example, A1111 to load the LoRA.
I just added the second cell to generate images with your LoRA.
Also, the notebook runs and stops with this error message
“ModuleNotFoundError: No module named ‘torch._custom_ops'”
More Detail =================
You are in ‘detached HEAD’ state. You can look around, make experimental
changes and commit them, and you can discard any commits you make in this
state without impacting any branches by switching back to a branch.
If you want to create a new branch to retain commits you create, you may
do so (now or later) by using -c with the switch command. Example:
git switch -c
Or undo this operation with:
git switch –
Turn off this advice by setting config variable advice.detachedHead to false
HEAD is now at ed4e3b0 Merge pull request #1476 from bmaltais/dev2
env: PYTHONPATH=/env/python:/content/kohya_ss
Traceback (most recent call last):
File “/content/kohya_ss/finetune/make_captions.py”, line 13, in
from torchvision import transforms
File “/usr/local/lib/python3.10/dist-packages/torchvision/__init__.py”, line 6, in
from torchvision import _meta_registrations, datasets, io, models, ops, transforms, utils
File “/usr/local/lib/python3.10/dist-packages/torchvision/_meta_registrations.py”, line 4, in
import torch._custom_ops
ModuleNotFoundError: No module named ‘torch._custom_ops’
same problem, can’t train a 1.5 LoRa because of the previous error.
ModuleNotFoundError: No module named ‘torch._custom_ops’
Traceback (most recent call last):
File “/usr/local/bin/accelerate”, line 5, in
from accelerate.commands.accelerate_cli import main
File “/usr/local/lib/python3.10/dist-packages/accelerate/commands/accelerate_cli.py”, line 19, in
from accelerate.commands.estimate import estimate_command_parser
File “/usr/local/lib/python3.10/dist-packages/accelerate/commands/estimate.py”, line 34, in
import timm
File “/usr/local/lib/python3.10/dist-packages/timm/__init__.py”, line 2, in
from .models import create_model, list_models, is_model, list_modules, model_entrypoint, \
File “/usr/local/lib/python3.10/dist-packages/timm/models/__init__.py”, line 1, in
from .beit import *
File “/usr/local/lib/python3.10/dist-packages/timm/models/beit.py”, line 49, in
from timm.data import IMAGENET_DEFAULT_MEAN, IMAGENET_DEFAULT_STD
File “/usr/local/lib/python3.10/dist-packages/timm/data/__init__.py”, line 5, in
from .dataset import ImageDataset, IterableImageDataset, AugMixDataset
File “/usr/local/lib/python3.10/dist-packages/timm/data/dataset.py”, line 12, in
from .parsers import create_parser
File “/usr/local/lib/python3.10/dist-packages/timm/data/parsers/__init__.py”, line 1, in
from .parser_factory import create_parser
File “/usr/local/lib/python3.10/dist-packages/timm/data/parsers/parser_factory.py”, line 3, in
from .parser_image_folder import ParserImageFolder
File “/usr/local/lib/python3.10/dist-packages/timm/data/parsers/parser_image_folder.py”, line 11, in
from timm.utils.misc import natural_key
File “/usr/local/lib/python3.10/dist-packages/timm/utils/__init__.py”, line 2, in
from .checkpoint_saver import CheckpointSaver
File “/usr/local/lib/python3.10/dist-packages/timm/utils/checkpoint_saver.py”, line 15, in
from .model import unwrap_model, get_state_dict
File “/usr/local/lib/python3.10/dist-packages/timm/utils/model.py”, line 8, in
from torchvision.ops.misc import FrozenBatchNorm2d
File “/usr/local/lib/python3.10/dist-packages/torchvision/__init__.py”, line 6, in
from torchvision import _meta_registrations, datasets, io, models, ops, transforms, utils
File “/usr/local/lib/python3.10/dist-packages/torchvision/_meta_registrations.py”, line 4, in
import torch._custom_ops
ModuleNotFoundError: No module named ‘torch._custom_ops’
Thanks for reporting issue! I can reproduce it. I will apply a fix asap. wait for the update here.
Fixed. Please load the notebook. You should see it updated on 3/15.
Thanks for the update. How do I reload the notebook. Will simply opening the notebook again will do ?
Yes, simply follow the link. You should see it is updated on 3/14 or 3/15.
Hey,
Wanted to thank you for this, it works like a charm
I’m getting this error suddenly:
#@title Upload images and start training
#@markdown Begineers: Use a different `Project_folder` each time when you upload the images.
(removed)
–mem_eff_attn –xformers –bucket_no_upscale –noise_offset=0.05
Any idea what’s causing the issue? Thanks!
Hi, you pasted the source code (removed). Can you paste the error message?
Hey,
Sorry about that. No worries, just got it fixed after browsing through the other comments.
But I tried uploading the newly produced LORA to mage.space for testing, and I’m receiving this error instead:
“Error message: ‘NoneType’ object has no attribute ‘groups'”
I’ve cross-tested with other LORA’s that I’ve produced and uploaded successfully in the past, and seem to be receiving the same error as above for some weird reason.
Any idea what might be causing the issue? Thanks!
Hi, I tested an LoRA made by this version of notebook and it is working correctly on A1111. You can contact Mage to see what they are looking for in the file and let me know.
Hi! First off, love this website! So much info, learned a lot. But i just can’t seem to make this LoRA notebook work for me. I get the following error:
Already installed.
python3: can’t open file ‘/content/finetune/make_captions.py’: [Errno 2] No such file or directory
/usr/local/lib/python3.10/dist-packages/torchvision/io/image.py:13: UserWarning: Failed to load image Python extension: ‘/usr/local/lib/python3.10/dist-packages/torchvision/image.so: undefined symbol: _ZN3c104cuda9SetDeviceEi’If you don’t plan on using image functionality from `torchvision.io`, you can ignore this warning. Otherwise, there might be something wrong with your environment. Did you have `libjpeg` or `libpng` installed before building `torchvision` from source?
warn(
The following values were not passed to `accelerate launch` and had defaults used instead:
`–num_processes` was set to a value of `1`
`–num_machines` was set to a value of `1`
`–mixed_precision` was set to a value of `’no’`
`–dynamo_backend` was set to a value of `’no’`
To avoid this warning pass in values for each of the problematic parameters or run `accelerate config`.
/usr/bin/python3: can’t open file ‘/content/./train_network.py’: [Errno 2] No such file or directory
Traceback (most recent call last):
File “/usr/local/bin/accelerate”, line 8, in
sys.exit(main())
File “/usr/local/lib/python3.10/dist-packages/accelerate/commands/accelerate_cli.py”, line 47, in main
args.func(args)
File “/usr/local/lib/python3.10/dist-packages/accelerate/commands/launch.py”, line 1023, in launch_command
simple_launcher(args)
File “/usr/local/lib/python3.10/dist-packages/accelerate/commands/launch.py”, line 643, in simple_launcher
raise subprocess.CalledProcessError(returncode=process.returncode, cmd=cmd)
subprocess.CalledProcessError: Command ‘[‘/usr/bin/python3’, ‘./train_network.py’, ‘–enable_bucket’, ‘–min_bucket_reso=256’, ‘–max_bucket_reso=2048’, ‘–pretrained_model_name_or_path=runwayml/stable-diffusion-v1-5’, ‘–train_data_dir=/content/drive/MyDrive/AI_PICS/training/BrentCorrigan6’, ‘–resolution=512,650’, ‘–output_dir=/content/drive/MyDrive/AI_PICS/Lora’, ‘–network_alpha=64’, ‘–save_model_as=safetensors’, ‘–network_module=networks.lora’, ‘–text_encoder_lr=5e-05’, ‘–unet_lr=0.0001’, ‘–network_dim=64’, ‘–output_name=BrentCorrigan001’, ‘–lr_scheduler_num_cycles=1’, ‘–no_half_vae’, ‘–learning_rate=0.0001’, ‘–lr_scheduler=constant’, ‘–train_batch_size=3’, ‘–max_train_steps=100000’, ‘–save_every_n_epochs=99999’, ‘–mixed_precision=fp16’, ‘–save_precision=fp16’, ‘–seed=1234’, ‘–caption_extension=.txt’, ‘–cache_latents’, ‘–optimizer_type=AdamW’, ‘–max_data_loader_n_workers=1’, ‘–clip_skip=2’, ‘–bucket_reso_steps=64’, ‘–max_train_epochs=1’, ‘–mem_eff_attn’, ‘–xformers’, ‘–bucket_no_upscale’, ‘–noise_offset=0.05′]’ returned non-zero exit status 2.
I saw that Kwandry had the same issue so i did what he stated, “runtime needed to get disconnected and reconnected” But now i get this error:
ERROR: pip’s dependency resolver does not currently take into account all the packages that are installed. This behaviour is the source of the following dependency conflicts.
torchaudio 2.1.0+cu121 requires torch==2.1.0, but you have torch 2.0.1 which is incompatible.
torchdata 0.7.0 requires torch==2.1.0, but you have torch 2.0.1 which is incompatible.
torchtext 0.16.0 requires torch==2.1.0, but you have torch 2.0.1 which is incompatible.
torchvision 0.16.0+cu121 requires torch==2.1.0, but you have torch 2.0.1 which is incompatible.
Successfully installed GitPython-3.1.42 antlr4-python3-runtime-4.9.3 docker-pycreds-0.4.0 gitdb-4.0.11 lit-17.0.6 mypy-extensions-1.0.0 nvidia-cublas-cu11-11.10.3.66 nvidia-cuda-cupti-cu11-11.7.101 nvidia-cuda-nvrtc-cu11-11.7.99 nvidia-cuda-runtime-cu11-11.7.99 nvidia-cudnn-cu11-8.5.0.96 nvidia-cufft-cu11-10.9.0.58 nvidia-curand-cu11-10.2.10.91 nvidia-cusolver-cu11-11.4.0.1 nvidia-cusparse-cu11-11.7.4.91 nvidia-nccl-cu11-2.14.3 nvidia-nvtx-cu11-11.7.91 omegaconf-2.3.0 pathtools-0.1.2 pyre-extensions-0.0.29 sentry-sdk-1.40.6 setproctitle-1.3.3 smmap-5.0.1 tk-0.1.0 tokenizers-0.13.3 torch-2.0.1 transformers-4.30.2 triton-2.0.0 typing-inspect-0.9.0 voluptuous-0.13.1 wandb-0.15.0 xformers-0.0.20
WARNING: The following packages were previously imported in this runtime:
[pydevd_plugins]
You must restart the runtime in order to use newly installed versions.
Also this pops up, but even if i restart the runtime it keeps popping up.
WARNING: The following packages were previously imported in this runtime:
[pydevd_plugins]
You must restart the runtime in order to use newly installed versions.
Restarting will lose all runtime state, including local variables.
Hi, I just tested the notebook and it is working correctly. You can click cancel when prompted to restart the runtime.
Hello, I am getting the following error after the image upload step is completed, both with my own images as well as the sample image. This only just started recently (I was able to use this notebook successfully as recently as a few weeks ago) so did something change or am I messing up something? Error is as follows:
Already installed.
python3: can’t open file ‘/content/finetune/make_captions.py’: [Errno 2] No such file or directory
/usr/local/lib/python3.10/dist-packages/torchvision/io/image.py:13: UserWarning: Failed to load image Python extension: ‘/usr/local/lib/python3.10/dist-packages/torchvision/image.so: undefined symbol: _ZN3c104cuda9SetDeviceEi’If you don’t plan on using image functionality from `torchvision.io`, you can ignore this warning. Otherwise, there might be something wrong with your environment. Did you have `libjpeg` or `libpng` installed before building `torchvision` from source?
warn(
The following values were not passed to `accelerate launch` and had defaults used instead:
`–num_processes` was set to a value of `1`
`–num_machines` was set to a value of `1`
`–mixed_precision` was set to a value of `’no’`
`–dynamo_backend` was set to a value of `’no’`
To avoid this warning pass in values for each of the problematic parameters or run `accelerate config`.
/usr/bin/python3: can’t open file ‘/content/./train_network.py’: [Errno 2] No such file or directory
Traceback (most recent call last):
File “/usr/local/bin/accelerate”, line 8, in
sys.exit(main())
File “/usr/local/lib/python3.10/dist-packages/accelerate/commands/accelerate_cli.py”, line 47, in main
args.func(args)
File “/usr/local/lib/python3.10/dist-packages/accelerate/commands/launch.py”, line 1023, in launch_command
simple_launcher(args)
File “/usr/local/lib/python3.10/dist-packages/accelerate/commands/launch.py”, line 643, in simple_launcher
raise subprocess.CalledProcessError(returncode=process.returncode, cmd=cmd)
subprocess.CalledProcessError: Command ‘[‘/usr/bin/python3’, ‘./train_network.py’, ‘–enable_bucket’, ‘–min_bucket_reso=256’, ‘–max_bucket_reso=2048’, ‘–pretrained_model_name_or_path=runwayml/stable-diffusion-v1-5’, ‘–train_data_dir=/content/drive/MyDrive/AI_PICS/training/AndyLau3’, ‘–resolution=512,650’, ‘–output_dir=/content/drive/MyDrive/AI_PICS/Lora’, ‘–network_alpha=64’, ‘–save_model_as=safetensors’, ‘–network_module=networks.lora’, ‘–text_encoder_lr=5e-05’, ‘–unet_lr=0.0001’, ‘–network_dim=64’, ‘–output_name=AndyLau001’, ‘–lr_scheduler_num_cycles=1’, ‘–no_half_vae’, ‘–learning_rate=0.0001’, ‘–lr_scheduler=constant’, ‘–train_batch_size=3’, ‘–max_train_steps=100000’, ‘–save_every_n_epochs=99999’, ‘–mixed_precision=fp16’, ‘–save_precision=fp16’, ‘–seed=1234’, ‘–caption_extension=.txt’, ‘–cache_latents’, ‘–optimizer_type=AdamW’, ‘–max_data_loader_n_workers=1’, ‘–clip_skip=2’, ‘–bucket_reso_steps=64’, ‘–max_train_epochs=1’, ‘–mem_eff_attn’, ‘–xformers’, ‘–bucket_no_upscale’, ‘–noise_offset=0.05′]’ returned non-zero exit status 2.
Hi, I just ran the SD 1.5 training notebook and it worked fine.
The folder names in the output looks incorrect. Perhaps your notebook was inadvertently changed. Please follow the notebook link on this site and rerun the notebook.
Let me know how it goes.
Figured it out, runtime needed to get disconnected and reconnected for it to work properly. Thanks!
Hi – I’m using your google colab notebook and when I hit run, I’m not seeing the message “Mounted at…”, instead I’m getting the message “Drive already mounted at /content/drive” and I’m unable to select “choose files” / clicking it does not do anything. How should I proceed?
Now I am seeing “Mounted at..” but am still unable to select “Choose files” to upload images.
Either messages are fine. It will show already mounted at the second time. What browser do you use? Chrome should work.
Got it working – thanks!
1. What # of epoches do you recommend? (I saw 10-100 recommended on other sites but noticed you had 1 in the tutorial)
2. Have you tested how # of training images affects results? (What # is ideal?)
3. What is the ideal value for Image_repeats?
The number of training steps is roughly number of images x Image_repeats x number of epoches.
In the SD LoRA workflow, you can leave the number of epoches as 1 and change the image repeats. The initial value on the notebook should be good for most realistic face. But it is different for each dataset, depending on the quality and the number of images. Try changing the image_repeats up and down and use the same seeds to generate sample images. The ideal value is that it just trained to show what you want without creating the overcooking artifacts mentioned in the article.
A nice update, thanks. I was tired of dealing with Gradio 🙂 I learned a lot from your website, thanks for your effort.
Too many people set up the old one incorrectly lol. Hope this one improves the success rate.
Glad that my site helped you!
There seems to be a new issue. I get the following error:
ImportError: cannot import name ‘set_documentation_group’ from ‘gradio_client.documentation’ (/usr/local/lib/python3.10/dist-packages/gradio_client/documentation.py)
Hi, fixed.
I followed the guide to train a Lora for SDXL and purchased the colab notebook.
I followed every step described in the guide exactly, but when I click on “Start training”, after some time the colab script dies with the follow message:
[Dataset 0]
loading image sizes.
100% 24/24 [00:00<00:00, 313.46it/s]
make buckets
number of images (including repeats) / 各bucketの画像枚数(繰り返し回数を含む)
bucket 0: resolution (1024, 1024), count: 24
mean ar error (without repeats): 0.0
preparing accelerator
loading model for process 0/1
load Diffusers pretrained models: stabilityai/stable-diffusion-xl-base-1.0, variant=fp16
Loading pipeline components…: 33% 2/6 [00:02<00:05, 1.43s/it]Traceback (most recent call last):
File "/usr/local/bin/accelerate", line 8, in
sys.exit(main())
File “/usr/local/lib/python3.10/dist-packages/accelerate/commands/accelerate_cli.py”, line 47, in main
args.func(args)
File “/usr/local/lib/python3.10/dist-packages/accelerate/commands/launch.py”, line 1023, in launch_command
simple_launcher(args)
File “/usr/local/lib/python3.10/dist-packages/accelerate/commands/launch.py”, line 643, in simple_launcher
raise subprocess.CalledProcessError(returncode=process.returncode, cmd=cmd)
subprocess.CalledProcessError: Command ‘[‘/usr/bin/python3’, ‘./sdxl_train_network.py’, ‘–enable_bucket’, ‘–min_bucket_reso=256’, ‘–max_bucket_reso=2048’, ‘–pretrained_model_name_or_path=stabilityai/stable-diffusion-xl-base-1.0’, ‘–train_data_dir=/content/drive/MyDrive/AI_PICS/training/elenvel’, ‘–resolution=1024,1024’, ‘–output_dir=/content/drive/MyDrive/AI_PICS/Lora’, ‘–network_alpha=32’, ‘–training_comment=3 repeats. More info: https://civitai.com/articles/1771‘, ‘–save_model_as=safetensors’, ‘–network_module=networks.lora’, ‘–text_encoder_lr=3e-05’, ‘–unet_lr=3e-05’, ‘–network_dim=32’, ‘–output_name=elenvel’, ‘–lr_scheduler_num_cycles=50’, ‘–no_half_vae’, ‘–learning_rate=3e-05’, ‘–lr_scheduler=constant’, ‘–train_batch_size=3’, ‘–max_train_steps=400’, ‘–save_every_n_epochs=1’, ‘–mixed_precision=fp16’, ‘–save_precision=fp16’, ‘–caption_extension=.txt’, ‘–cache_latents’, ‘–cache_latents_to_disk’, ‘–optimizer_type=AdamW’, ‘–max_train_epochs=50’, ‘–max_data_loader_n_workers=0’, ‘–caption_dropout_rate=0.05’, ‘–bucket_reso_steps=64’, ‘–min_snr_gamma=5’, ‘–gradient_checkpointing’, ‘–xformers’, ‘–noise_offset=0.0′]’ died with .
This is very infuriating tbh. Any idea? Any fix required?
Thanks.
SDXL training requires high RAM setting. You will need a google colab pro subscription.
Hello,
So a LoRA is a small model of a specific object? Instead of doing a huge checkpoint something more general?
It can be person or object?
And it will only create images with that specific person or object?
Can I use them with other models to make the more specific?
For instance, I have a hand made cabinet, it is different looking. Would I take picture of it to create a LoRA. The if I said cabinet – it would draw MY unique cabinet. But if I used it with I said Andy Lau standing by a cabinet, would it show that Cantopop actor with my cabinet?
Or am I missing the point here?
Thanks,
V
Sounds about right. You will need to take a few more photos to create a lora.
Creating a lora for a cabinet should work, but it is a less common use case that may need to tweak the training parameters.
Using two lora for objects should also work. But if you have a hard time making them show up at the same time, you can generate an image with andy first and use inpainting to add the cabinet.
What if you don’t have Google Drive?
It only supports google drive. you will need to sign up a free one
I keep getting an error, I tried with my own images, the images you provide, and multiple “Pretrained model name or path” options as well, but it seems to be running into the same issue every time:
subprocess.CalledProcessError: Command ‘[‘/usr/bin/python3’, ‘./sdxl_train.py’, ‘–enable_bucket’, ‘–min_bucket_reso=256’, ‘–max_bucket_reso=2048’, ‘–pretrained_model_name_or_path=stabilityai/stable-diffusion-xl-base-1.0’, ‘–train_data_dir=/content/drive/MyDrive/AI_PICS/training/emma’, ‘–resolution=512,512’, ‘–output_dir=/content/drive/MyDrive/AI_PICS/Lora’, ‘–save_model_as=safetensors’, ‘–output_name=first’, ‘–lr_scheduler_num_cycles=1’, ‘–max_data_loader_n_workers=0’, ‘–learning_rate=1e-05’, ‘–lr_scheduler=cosine’, ‘–lr_warmup_steps=1’, ‘–train_batch_size=1’, ‘–max_train_steps=13’, ‘–save_every_n_epochs=10’, ‘–mixed_precision=fp16’, ‘–save_precision=fp16’, ‘–cache_latents’, ‘–optimizer_type=AdamW8bit’, ‘–max_data_loader_n_workers=0’, ‘–bucket_reso_steps=64’, ‘–xformers’, ‘–bucket_no_upscale’, ‘–noise_offset=0.0′]’ died with .
Did you switch to the LoRA page?
If you mean this:
Step 5: Enter training settings
Source model
Go to the LoRA page > Training tab > Source model tab.
Then yeah, I did.
I tested the notebook and its working as expected. I notice from your error message that it is not calling the incorrect script sdxl_train.py. It should be sdxl_train_network.py. I think there’s something wrong in your setting. You can follow the tutorial again. If it doesn’t work, post or send me the whole log.
I have the exact same error, and I followed the SDXL guide at least 5 times, with 100% precision! Something is wrong with the colab notebook. Please fix it, thanks.
An update. I don’t think it is possible to train an SDXL LoRA on a free colab notebook with the current software. You will need to have a Google Colab subscription.
Hi. I’m learning how to make Loras using your notebook. I noticed you didn’t mention anything about regularization. Would you please also add a section that covers that please?
Also, another thought. In the dreambooth example, you mentioned that if we include the class name “woman” it leverages all the information that the model has previously learnt about women in the model, which is good. Why have we not done the same here in the Lora section? I don’t see a mention of the token “man”?
You can enable dreambooth with lora training in the data preparation tab.
Hi, the preset already uses regularization. You normally need to tweak it if you run into issues. It is out of scope for this beginner’s post.
I keep getting the same error despite following the guide perfectly.
subprocess.CalledProcessError: Command ‘[‘/usr/bin/python3’, ‘./train_network.py’, ‘–pretrained_model_name_or_path=runwayml/stable-diffusion-v1-5’, ‘–train_data_dir=/content/drive/MyDrive/AI_PICS/training/Test’, ‘–resolution=512,650’, ‘–output_dir=/content/drive/MyDrive/AI_PICS/Lora’, ‘–network_alpha=64’, ‘–save_model_as=safetensors’, ‘–network_module=networks.lora’, ‘–text_encoder_lr=5e-05’, ‘–unet_lr=0.0001’, ‘–network_dim=64’, ‘–output_name=last’, ‘–lr_scheduler_num_cycles=1’, ‘–no_half_vae’, ‘–learning_rate=0.0001’, ‘–lr_scheduler=constant’, ‘–train_batch_size=3’, ‘–max_train_steps=7750’, ‘–save_every_n_epochs=1’, ‘–mixed_precision=fp16’, ‘–save_precision=fp16’, ‘–seed=1234’, ‘–caption_extension=.txt’, ‘–cache_latents’, ‘–optimizer_type=AdamW’, ‘–max_data_loader_n_workers=1’, ‘–clip_skip=2’, ‘–bucket_reso_steps=64’, ‘–mem_eff_attn’, ‘–xformers’, ‘–bucket_no_upscale’, ‘–noise_offset=0.05′]’ returned non-zero exit status 1.
I just tested the notebook and it is working correctly using the sample images. Please do the same to test if not already.
If i want to add more images in a lora, i have to generate all captions again and edit them again?
If i add more captions in each image to detail more the image, does it better or worse?
Shouldn’t hurt if they actually describe the image.
I sometimes get it to work, with great results too, but sometimes, at the end, it returns:
steps: 100% 3600/3600 [2:13:43<00:00, 2.23s/it, loss=nan]
Which you say I should not have. What am I doing that is causing this? How can I correct it?
this is usually an issue with setting. Make sure you have followed the ones in the tutorial. You can also try to reducing the learning rate, and make sure bucketing is on.
Massive fail mate – no matter what credentials I enter I get “incorrect credentials” when logging in at the training step
The credential is one you specified in the notebook. It is a/a in the default setting.
That’s exactly what I’m doing… are there any constraints on the credentials you can pick? It’s a strong password
yeah, the problem is probably the password is too strong. Stay away from special characters.
I have the same problem. It doesn’t let you specify the credentials. The only way to login is using the a/a default setting. Is there a way to change this?
The issue was with special characters in password. I updated the notebook now it should be more flexible.
Hi! When training the Lora, the google colab gives me the following error and stops:
[Dataset 0]
loading image sizes.
100% 1000/1000 [00:01<00:00, 794.47it/s]
prepare dataset
preparing accelerator
loading model for process 0/1
load Diffusers pretrained models: kohbanye/pixel-art-style
text_encoder/model.safetensors not found
UNet2DConditionModel: 64, 8, 768, False, False
U-Net converted to original U-Net
Enable memory efficient attention for U-Net
Traceback (most recent call last):
File "/content/kohya_ss/./train_network.py", line 990, in
trainer.train(args)
File “/content/kohya_ss/./train_network.py”, line 222, in train
vae.set_use_memory_efficient_attention_xformers(args.xformers)
File “/usr/local/lib/python3.10/dist-packages/diffusers/models/modeling_utils.py”, line 235, in set_use_memory_efficient_attention_xformers
fn_recursive_set_mem_eff(module)
File “/usr/local/lib/python3.10/dist-packages/diffusers/models/modeling_utils.py”, line 231, in fn_recursive_set_mem_eff
fn_recursive_set_mem_eff(child)
File “/usr/local/lib/python3.10/dist-packages/diffusers/models/modeling_utils.py”, line 231, in fn_recursive_set_mem_eff
fn_recursive_set_mem_eff(child)
File “/usr/local/lib/python3.10/dist-packages/diffusers/models/modeling_utils.py”, line 231, in fn_recursive_set_mem_eff
fn_recursive_set_mem_eff(child)
File “/usr/local/lib/python3.10/dist-packages/diffusers/models/modeling_utils.py”, line 228, in fn_recursive_set_mem_eff
module.set_use_memory_efficient_attention_xformers(valid, attention_op)
File “/usr/local/lib/python3.10/dist-packages/diffusers/models/attention_processor.py”, line 199, in set_use_memory_efficient_attention_xformers
raise ValueError(
ValueError: torch.cuda.is_available() should be True but is False. xformers’ memory efficient attention is only available for GPU
Traceback (most recent call last):
File “/usr/local/bin/accelerate”, line 8, in
sys.exit(main())
File “/usr/local/lib/python3.10/dist-packages/accelerate/commands/accelerate_cli.py”, line 47, in main
args.func(args)
File “/usr/local/lib/python3.10/dist-packages/accelerate/commands/launch.py”, line 994, in launch_command
simple_launcher(args)
File “/usr/local/lib/python3.10/dist-packages/accelerate/commands/launch.py”, line 636, in simple_launcher
raise subprocess.CalledProcessError(returncode=process.returncode, cmd=cmd)
subprocess.CalledProcessError: Command ‘[‘/usr/bin/python3’, ‘./train_network.py’, ‘–pretrained_model_name_or_path=kohbanye/pixel-art-style’, ‘–train_data_dir=/content/drive/MyDrive/CraftpixLora/Training/Craftpix’, ‘–resolution=512,650’, ‘–output_dir=/content/drive/MyDrive/CraftpixLora/Lora’, ‘–network_alpha=64’, ‘–save_model_as=safetensors’, ‘–network_module=networks.lora’, ‘–text_encoder_lr=5e-05’, ‘–unet_lr=0.0001’, ‘–network_dim=64’, ‘–output_name=Craftpix’, ‘–lr_scheduler_num_cycles=1’, ‘–no_half_vae’, ‘–learning_rate=0.0001’, ‘–lr_scheduler=constant’, ‘–train_batch_size=3’, ‘–max_train_steps=334’, ‘–save_every_n_epochs=1’, ‘–mixed_precision=fp16’, ‘–save_precision=fp16’, ‘–seed=1234’, ‘–caption_extension=.txt’, ‘–cache_latents’, ‘–optimizer_type=AdamW’, ‘–max_data_loader_n_workers=1’, ‘–clip_skip=2’, ‘–bucket_reso_steps=64’, ‘–mem_eff_attn’, ‘–xformers’, ‘–bucket_no_upscale’, ‘–noise_offset=0.05′]’ returned non-zero exit status 1.
Hi, I just tested the notebook and it is running correctly (on Colab Pro). It appears that you have not connected to a gpu. please check your runtime.
Do you have to use Google Colan? Is there a way that you can do it on your own PC?
This comment at the very top of the page regarding enabling the bucketing option is worth repeating at the end when discussing settings on the Training/Parameters tab as it might go unnoticed or forgotten, but seems to be very important if photos are of different aspect ratios–important enough to make the entire operation fail if not enabled. Just saying.
I bought the gumroad colab notebook
running with a A100 GPU, I got this error :
The following directories listed in your path were found to be non-existent: {PosixPath(‘/usr/local/lib/python3.10/dist-packages/cv2/../../lib64’)}
/usr/local/lib/python3.10/dist-packages/bitsandbytes-0.41.0-py3.10.egg/bitsandbytes/cuda_setup/main.py:166: UserWarning: /usr/local/lib/python3.10/dist-packages/cv2/../../lib64:/usr/lib64-nvidia did not contain [‘libcudart.so’, ‘libcudart.so.11.0’, ‘libcudart.so.12.0’] as expected! Searching further paths…
warn(msg)
The following directories listed in your path were found to be non-existent: {PosixPath(‘//ipykernel.pylab.backend_inline’), PosixPath(‘module’)}
The following directories listed in your path were found to be non-existent: {PosixPath(‘–logtostderr –listen_host=172.28.0.12 –target_host=172.28.0.12 –tunnel_background_save_url=https’), PosixPath(‘//colab.research.google.com/tun/m/cc48301118ce562b961b3c22d803539adc1e0c19/gpu-a100-s-11pacqicclkc4 –tunnel_background_save_delay=10s –tunnel_periodic_background_save_frequency=30m0s –enable_output_coalescing=true –output_coalescing_required=true’)}
The following directories listed in your path were found to be non-existent: {PosixPath(‘/datalab/web/pyright/typeshed-fallback/stdlib,/usr/local/lib/python3.10/dist-packages’)}
The following directories listed in your path were found to be non-existent: {PosixPath(‘/sys/fs/cgroup/memory.events /var/colab/cgroup/jupyter-children/memory.events’)}
The following directories listed in your path were found to be non-existent: {PosixPath(‘/env/python’)}
The following directories listed in your path were found to be non-existent: {PosixPath(‘http’), PosixPath(‘8013’), PosixPath(‘//172.28.0.1’)}
CUDA_SETUP: WARNING! libcudart.so not found in any environmental path. Searching in backup paths…
/usr/local/lib/python3.10/dist-packages/bitsandbytes-0.41.0-py3.10.egg/bitsandbytes/cuda_setup/main.py:166: UserWarning: Found duplicate [‘libcudart.so’, ‘libcudart.so.11.0’, ‘libcudart.so.12.0’] files: {PosixPath(‘/usr/local/cuda/lib64/libcudart.so’), PosixPath(‘/usr/local/cuda/lib64/libcudart.so.11.0’)}.. We select the PyTorch default libcudart.so, which is {torch.version.cuda},but this might missmatch with the CUDA version that is needed for bitsandbytes.To override this behavior set the BNB_CUDA_VERSION= environmental variableFor example, if you want to use the CUDA version 122BNB_CUDA_VERSION=122 python …OR set the environmental variable in your .bashrc: export BNB_CUDA_VERSION=122In the case of a manual override, make sure you set the LD_LIBRARY_PATH, e.g.export LD_LIBRARY_PATH=$LD_LIBRARY_PATH:/usr/local/cuda-11.2
warn(msg)
DEBUG: Possible options found for libcudart.so: {PosixPath(‘/usr/local/cuda/lib64/libcudart.so’), PosixPath(‘/usr/local/cuda/lib64/libcudart.so.11.0’)}
CUDA SETUP: PyTorch settings found: CUDA_VERSION=117, Highest Compute Capability: 8.0.
CUDA SETUP: To manually override the PyTorch CUDA version please see:https://github.com/TimDettmers/bitsandbytes/blob/main/how_to_use_nonpytorch_cuda.md
CUDA SETUP: Required library version not found: libbitsandbytes_cuda117.so. Maybe you need to compile it from source?
CUDA SETUP: Defaulting to libbitsandbytes_cpu.so…
================================================ERROR=====================================
CUDA SETUP: CUDA detection failed! Possible reasons:
1. You need to manually override the PyTorch CUDA version. Please see: “https://github.com/TimDettmers/bitsandbytes/blob/main/how_to_use_nonpytorch_cuda.md
2. CUDA driver not installed
3. CUDA not installed
4. You have multiple conflicting CUDA libraries
5. Required library not pre-compiled for this bitsandbytes release!
CUDA SETUP: If you compiled from source, try again with `make CUDA_VERSION=DETECTED_CUDA_VERSION` for example, `make CUDA_VERSION=113`.
CUDA SETUP: The CUDA version for the compile might depend on your conda install. Inspect CUDA version via `conda list | grep cuda`.
================================================================================
CUDA SETUP: Something unexpected happened. Please compile from source:
git clone https://github.com/TimDettmers/bitsandbytes.git
cd bitsandbytes
CUDA_VERSION=117 make cuda11x
python setup.py install
CUDA SETUP: Setup Failed!
This should be fixed in the Oct 31 update.
How can I use different Models? So far I can only use the three model link listed on here. How do I use different one for my training?
You can find more models on here: https://huggingface.co/models?other=stable-diffusion-diffusers
How do I actually use them. What link am I supposed to copy and paste?
You will use them like the 3 I listed in the article.
E.g.
Lykon/DreamShaper
xiaolxl/GuoFeng3
hi, must the model from hugging face? I have created my own ckpt model stored in local drive and Google Drive.
Yes, the model must be on huggingface. You will need to upload it.
In the caption screen, there is a textbox that says “Prefix to add to BLIP caption”. Why not add the person name there?
Yes you can do that too.
Hey Andrew,
I just want to clear up something on the captioning. Does it matter if the thing you’re trying to train the LoRA on is split into different tags? How do you ensure it is just one phrase?
Say your example – Andy Lau in a black jacket smoking a cigarette in front of a fenced in building
When you look at the config for the LoRA in SD Web UI, the words “Andy” and “Lau” are split into single tags, as well as “black” and “jacket” – is this supposed to happen or is there a way to ensure it is one phrase when you edit the text files?
In my experience, it is ok to use multiple words to describe a subject in the caption.
Hey Andrew,
I’ll admit that I’m new at this (which is why I bought your tutorial), but I can follow simple instructions.
Your notebook isn’t working for me. I get errors just uploading the pictures from your tutorial.
Do you have any advice as to how to get this to work?
—————————————————————————
MessageError Traceback (most recent call last)
in ()
24 else:
25 get_ipython().system(‘mkdir -p {imagePath}’)
—> 26 uploaded = files.upload()
27 for filename in uploaded.keys():
28 dst_path = imagePath + ‘/’ + filename
3 frames
/usr/local/lib/python3.10/dist-packages/google/colab/_message.py in read_reply_from_input(message_id, timeout_sec)
101 ):
102 if ‘error’ in reply:
–> 103 raise MessageError(reply[‘error’])
104 return reply.get(‘data’, None)
105
MessageError: RangeError: Maximum call stack size exceeded.
Hi, I just tested uploading the sample images from the tutorial and it is working correctly. You should see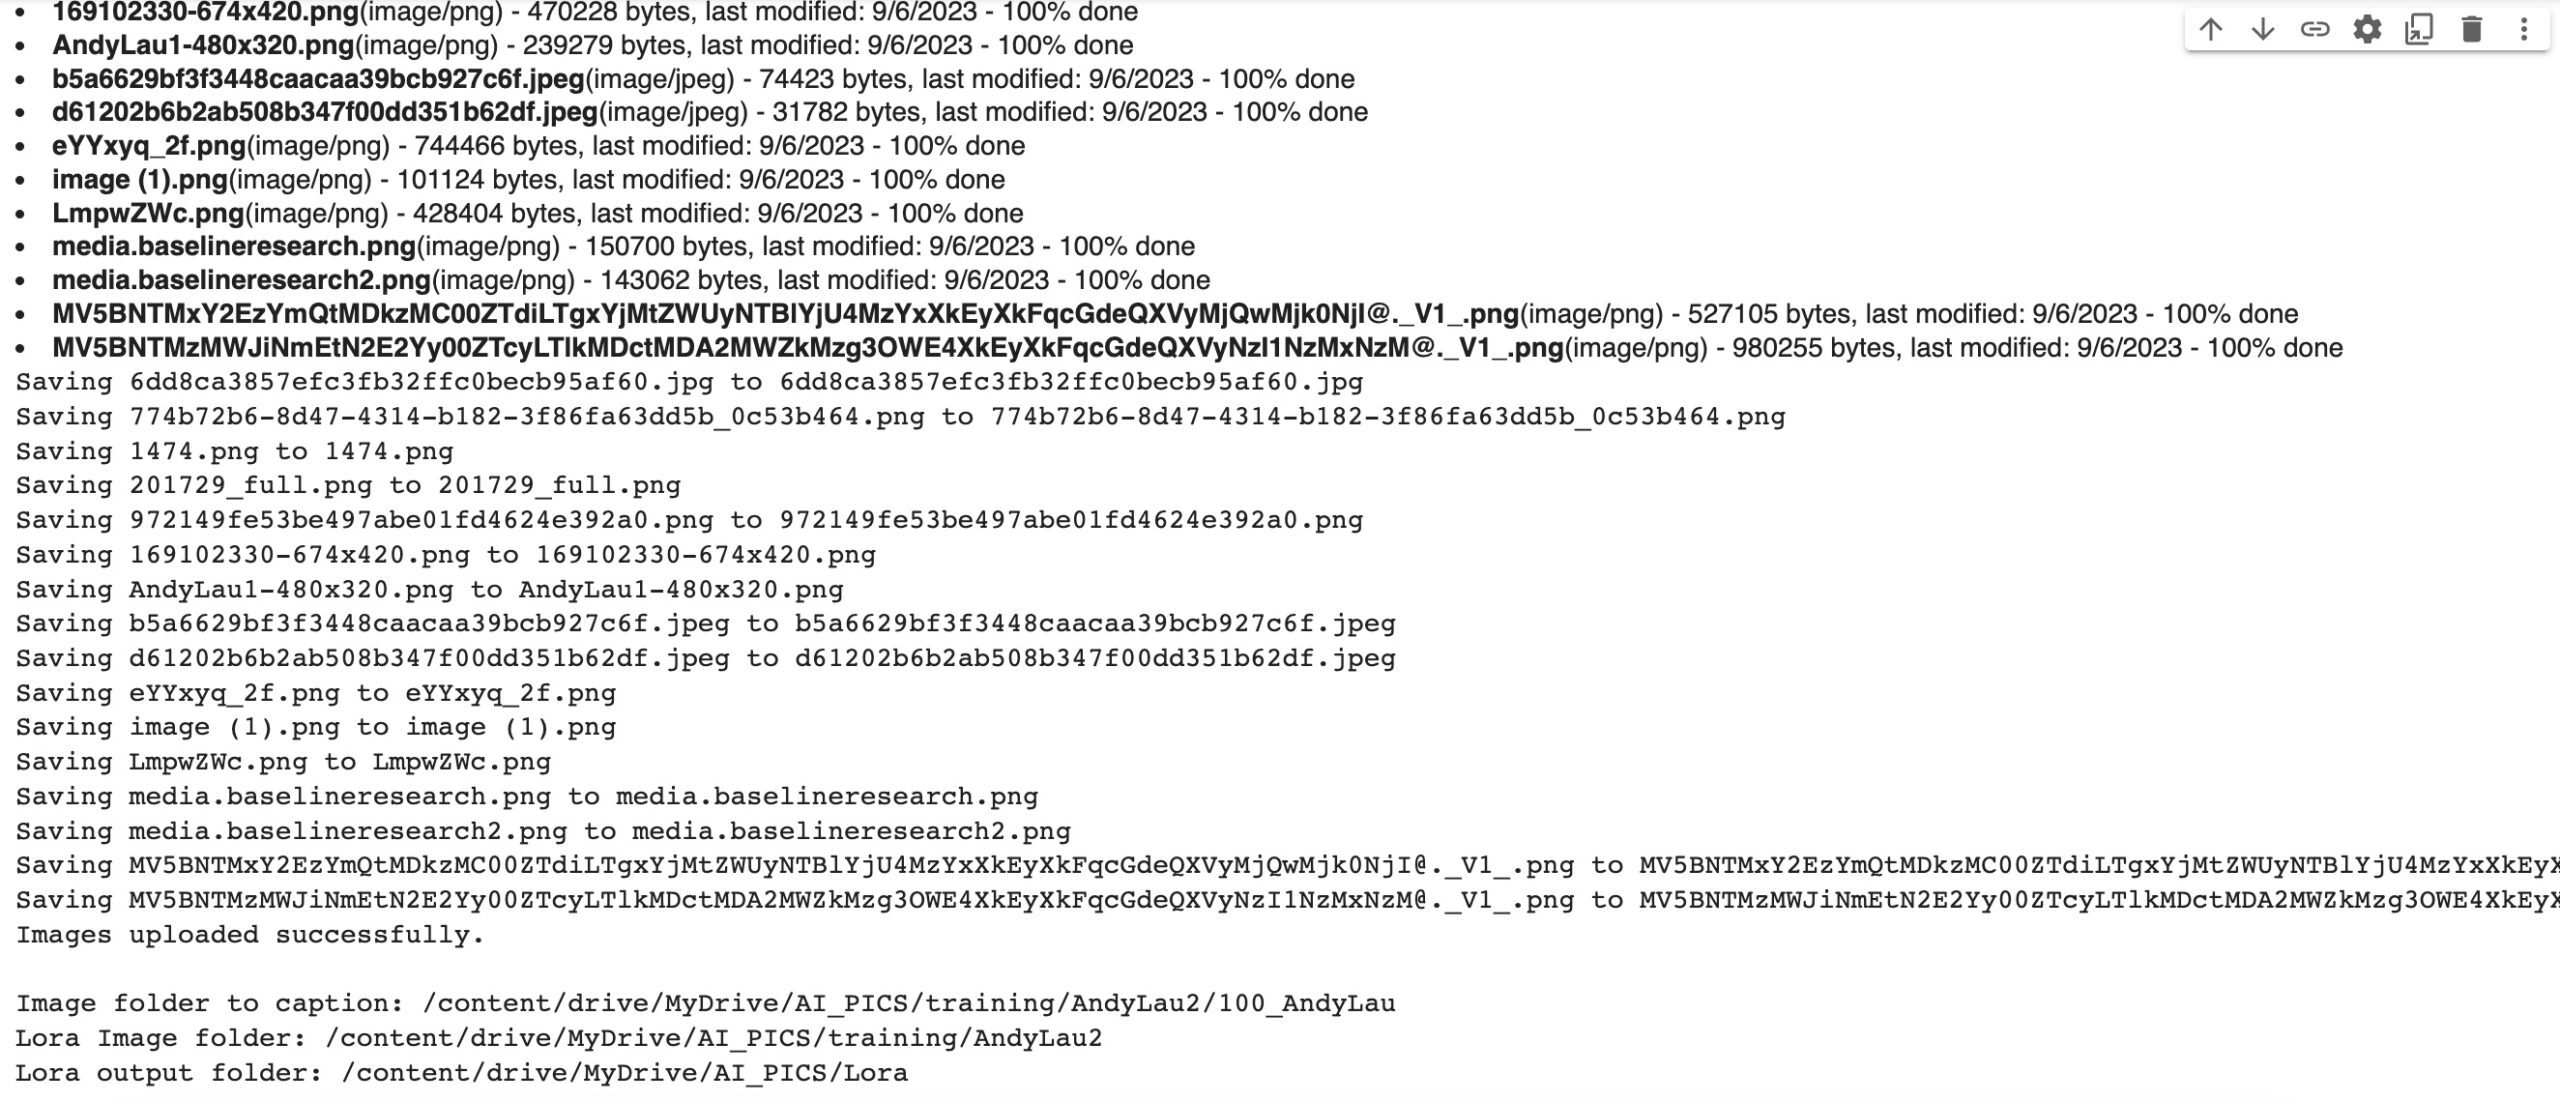
Did you:
– Connect to your Google Drive?
– Upload the 16 images of Andy Lau in the tutorial or your own?
Thanks for the reply Andrew,
I got it working. The drive was mounting, and I still had the same problem on 3 different Macs…. then I tried it in a different browser.
Seems Safari was the problem. It worked perfectly fine in Chrome.
Thanks for the great tutorial and support!
A quick note for people having an issue with the following fatal error
mportError: cannot import name ‘StableDiffusionPipeline’ from ‘diffusers’ (E:\Py\env\lib\site-packages\diffusers_init_.py)
open the command option in google collab (at the bottom left)
run these two commands
pip uninstall diffusers
pip install diffusers
this fixed it for me
source:
https://stackoverflow.com/questions/73992681/importerror-cannot-import-name-stablediffusionpipeline-from-diffusers
There does seem to be another issue
having an issue fixing this one.
Downloading (…)del.fp16.safetensors: 100% 1.72G/1.72G [01:28<00:00, 19.5MB/s]
Fetching 11 files: 100% 11/11 [01:30<00:00, 8.24s/it]
Loading pipeline components…: 100% 4/4 [00:01<00:00, 2.04it/s]
Traceback (most recent call last):
File "/content/kohya_ss/./sdxl_train_network.py", line 176, in
trainer.train(args)
File “/content/kohya_ss/train_network.py”, line 214, in train
model_version, text_encoder, vae, unet = self.load_target_model(args, weight_dtype, accelerator)
File “/content/kohya_ss/./sdxl_train_network.py”, line 37, in load_target_model
) = sdxl_train_util.load_target_model(args, accelerator, sdxl_model_util.MODEL_VERSION_SDXL_BASE_V1_0, weight_dtype)
File “/content/kohya_ss/library/sdxl_train_util.py”, line 34, in load_target_model
) = _load_target_model(
File “/content/kohya_ss/library/sdxl_train_util.py”, line 84, in _load_target_model
pipe = StableDiffusionXLPipeline.from_pretrained(
File “/usr/local/lib/python3.10/dist-packages/diffusers/pipelines/pipeline_utils.py”, line 1191, in from_pretrained
raise ValueError(
ValueError: Pipeline expected {‘vae’, ‘text_encoder’, ‘unet’, ‘tokenizer’, ‘scheduler’, ‘text_encoder_2’, ‘tokenizer_2’}, but only {‘vae’, ‘text_encoder’, ‘unet’, ‘tokenizer’, ‘scheduler’} were passed.
Traceback (most recent call last):
File “/usr/local/bin/accelerate”, line 8, in
sys.exit(main())
File “/usr/local/lib/python3.10/dist-packages/accelerate/commands/accelerate_cli.py”, line 47, in main
args.func(args)
File “/usr/local/lib/python3.10/dist-packages/accelerate/commands/launch.py”, line 986, in launch_command
simple_launcher(args)
File “/usr/local/lib/python3.10/dist-packages/accelerate/commands/launch.py”, line 628, in simple_launcher
raise subprocess.CalledProcessError(returncode=process.returncode, cmd=cmd)
subprocess.CalledProcessError: Command ‘[‘/usr/bin/python3’, ‘./sdxl_train_network.py’, ‘–enable_bucket’, ‘–min_bucket_reso=256’, ‘–max_bucket_reso=2048’, ‘–pretrained_model_name_or_path=runwayml/stable-diffusion-v1-5’, ‘–train_data_dir=/content/drive/MyDrive/AI_PICS/training/ChrisAllen’, ‘–resolution=512,650’, ‘–output_dir=/content/drive/MyDrive/AI_PICS/Lora’, ‘–network_alpha=64’, ‘–save_model_as=safetensors’, ‘–network_module=networks.lora’, ‘–text_encoder_lr=5e-05’, ‘–unet_lr=0.0001’, ‘–network_dim=64’, ‘–output_name=blah’, ‘–lr_scheduler_num_cycles=1’, ‘–no_half_vae’, ‘–learning_rate=0.0001’, ‘–lr_scheduler=constant’, ‘–train_batch_size=3’, ‘–max_train_steps=3500’, ‘–save_every_n_epochs=1’, ‘–mixed_precision=fp16’, ‘–save_precision=fp16’, ‘–seed=1234’, ‘–caption_extension=.txt’, ‘–cache_latents’, ‘–cache_latents_to_disk’, ‘–optimizer_type=AdamW’, ‘–max_data_loader_n_workers=1’, ‘–clip_skip=2’, ‘–bucket_reso_steps=64’, ‘–mem_eff_attn’, ‘–xformers’, ‘–bucket_no_upscale’, ‘–noise_offset=0.05′]’ returned non-zero exit status 1.
03:18:00-173236 INFO There is no running process to kill.
Same here…
Hi Andrew,
I have one request
Can you please look at this article https://civitai.com/articles/2345
and try to create the same results using automatic1111?
This can be a great article, and I will be willing to pay for it.
You can create a separate extension.
Please let me know.
MessageError Traceback (most recent call last)
in ()
2 #@markdown Begineers: Use a different `Project_folder` each time when you upload the images.
3 from google.colab import drive
—-> 4 drive.mount(‘/content/drive’)
5
6 Project_folder = ‘AI_PICS/training/AndyLau’ #@param {type:”string”}
3 frames
/usr/local/lib/python3.10/dist-packages/google/colab/_message.py in read_reply_from_input(message_id, timeout_sec)
101 ):
102 if ‘error’ in reply:
–> 103 raise MessageError(reply[‘error’])
104 return reply.get(‘data’, None)
105
MessageError: Error: credential propagation was unsuccessful
Why do I see this error message pop up
It appears that you didn’t connect your google drive with the notebook. It has to be the same account as the colab.
Thank you for the amazing tutorial. I had to go back on Gumroad and give you some money. That’s the one tutorial that was easy with amazing description to follow. This make having fun with AI for the common folk possible. Gradio did give me some issues with crashing, but otherwise, this has been a smooth ride. Thank you so much!
Thank you!
any idea why I get “Unexpected token ‘<', " <!DOCTYPE "… is not valid JSON" this error in kohya when I try and caption and when I try and set folder for training?
Look like it is caused by an invalid character in the captions. Try use only english, comma and period.
is there a way to do it without the gpu ? I try few time and lose the free version with stupid mistake and nether could do my lora… now i’m out of gpu and stuck to follow this tuto :/
I’m on mac os for the record
No but you can always create a new google account.
Is there a way to resume training of a lora which went on for 100 epochs? If so where?
Thanks for answer.
1. So, should we then check option “Enable buckets” in Parameters? It is unchecked by default.
“Finally, name your LoRA in the Model output name field. AnyLau100”
Please fix to AndyLau100
good call! fixed.
By the way, two questions:
1. Why do you say that it is not necessary to crop images to 512*512px? All manuals on training LORA recommend to do this.
2. What’s the reason to change “a man” to “Andy Lau”? I didn’t change it and LORA successfully worked.
1. Those must be old guides. New trainers have a function called bucketing that can make use of images with different aspect ratios.
2. Using “a man” would make all men look like Andy Lau. (which may not be a bad thing!)
Ok, this is great, but my google drive is “My Drive” with a space between my and drive. I assuming this wont work for me because the process wont recognize the space? is there another way around this? apparently I can’t rename my google drive?
This should not matter. Have you tried?
where is the notebook link?
Work with sdxl?
thank you
nevermind, i was blind lol
But work with sdxl?
lol.
I haven’t test SDXL but it has the option to. you are welcome to try. And let me know…
Simple and to the point, colab too !
Thank you for these tutorials
hello! fantastic tutorial!
i want to make a lora of my friend (i have his permission). i have some fantastic high -res colored as well as black and white/graycale images of him.
my question is, can i include the black and white/grayscale images i have of him in the training images dataset?
looking to hear from you!