This is the training instructions of the legacy LoRA trainer that uses Kohya_ss GUI.
The notebook is no longer maintained, but you can still use it while it last.
Step 1: Collect training images
The first step is to collect training images.
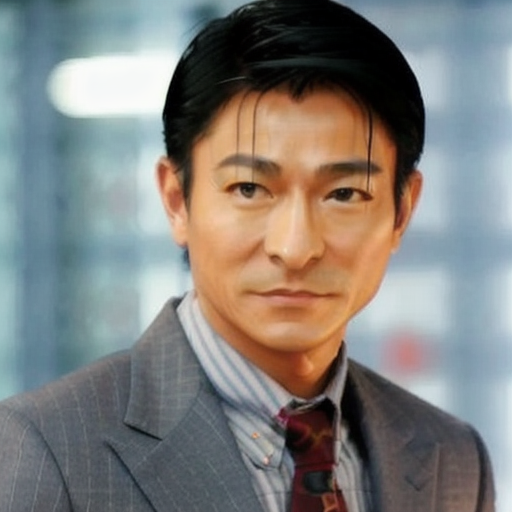
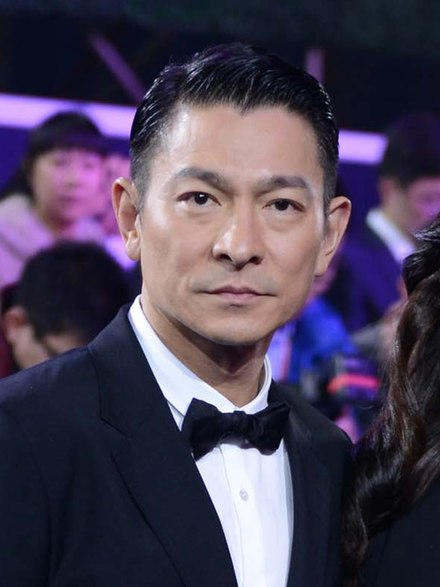
Let’s pay tribute to Andy Lau, one of the four Heavenly Kings of Cantopop in Hong Kong, and immortalize him in a Lora…
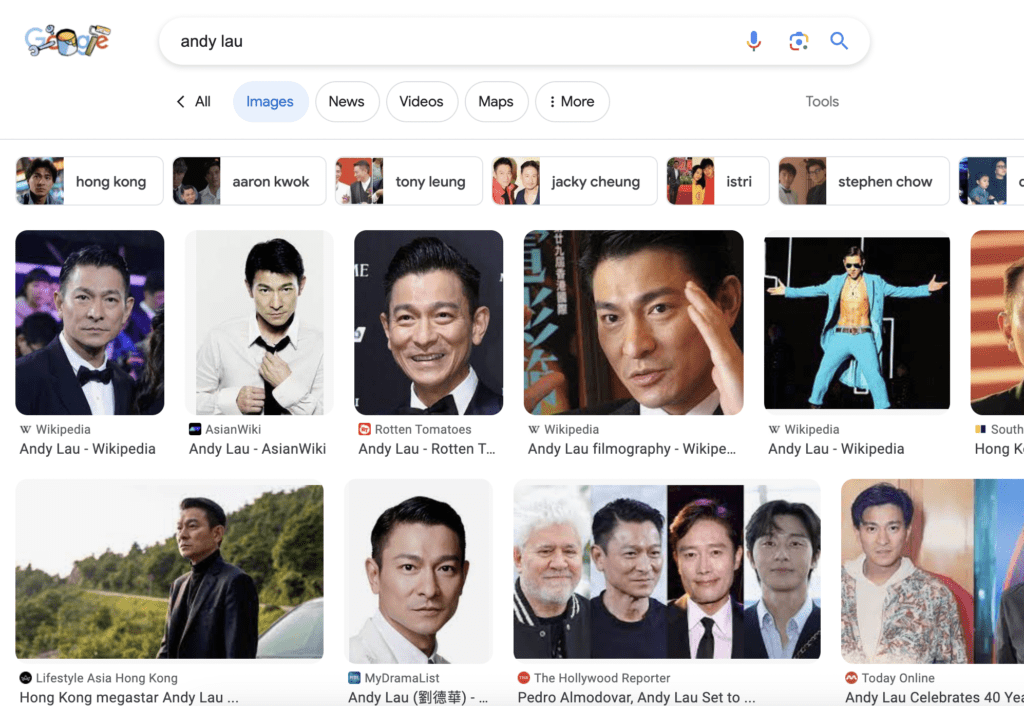
Google Image Search is a good way to collect images.
You need at least 15 training images.
It is okay to have images with different aspect ratios. Make sure to turn on the bucketing option in training, which sorts the images into different aspect ratios during training.
Pick images that are at least 512×512 pixels for v1 models.
Make sure the images are either PNG or JPEG formats.
I collected 16 images for training. You can download them to follow this tutorial on the training notebook’s product page or the member’s resources page.
Step 2: Upload images to Google Drive
Open the LoRA trainer notebook.
You will need to save the training images to your Google Drive so the LoRA trainer can access them. Use the LoRA training notebook to upload the training images.
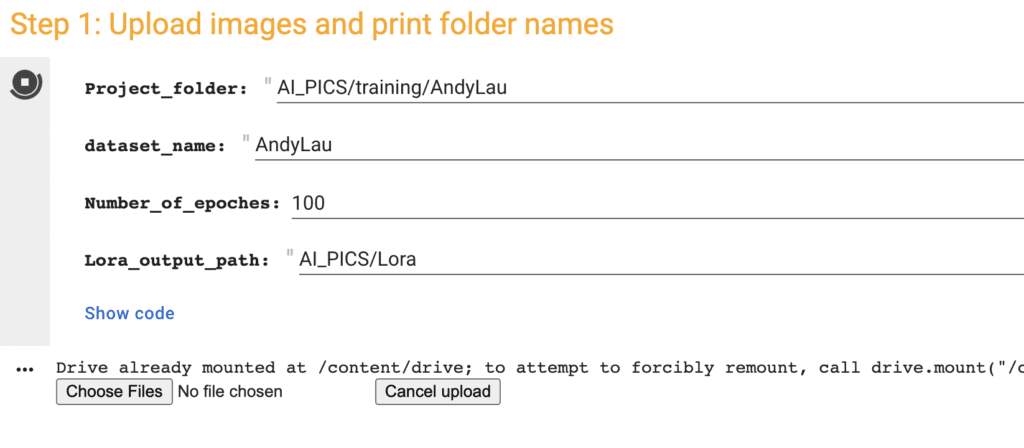
Here is some input to review before running the cell.
Project_folder: A folder in Google Drive containing all training images and captions. Use a folder name that doesn’t exist yet.
dataset_name: The name of the dataset.
Number_of_epoches: How many times each image will be used for training.
Lora_output_path: A folder in Google Drive where the Lora file will be saved.
Run this cell by clicking the Play button on the left. It will ask you to connect to your Google Drive.
Click Choose Files and select your training images.
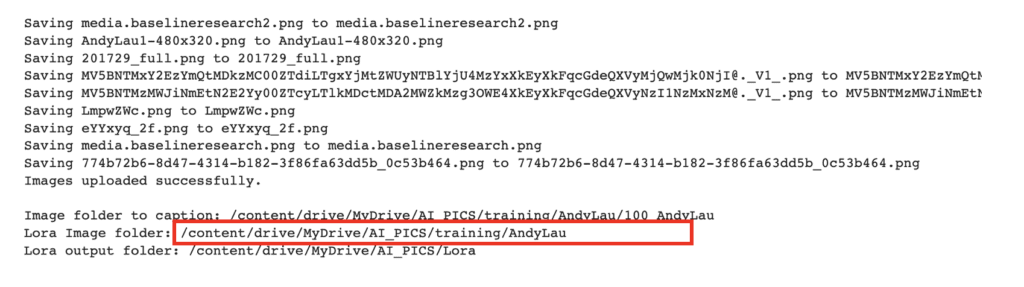
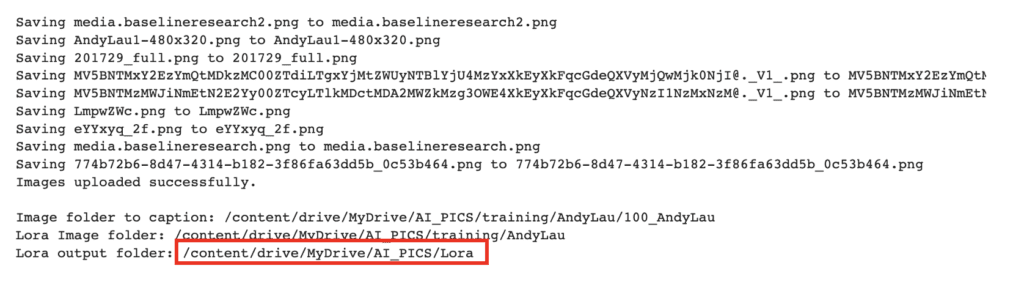
When it is done, you should see a message saying the images were uploaded successfully.
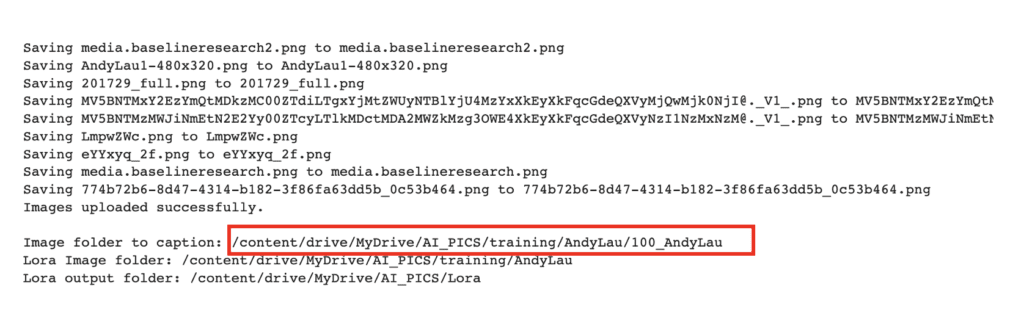
There are three folder paths listed. We will need them later.
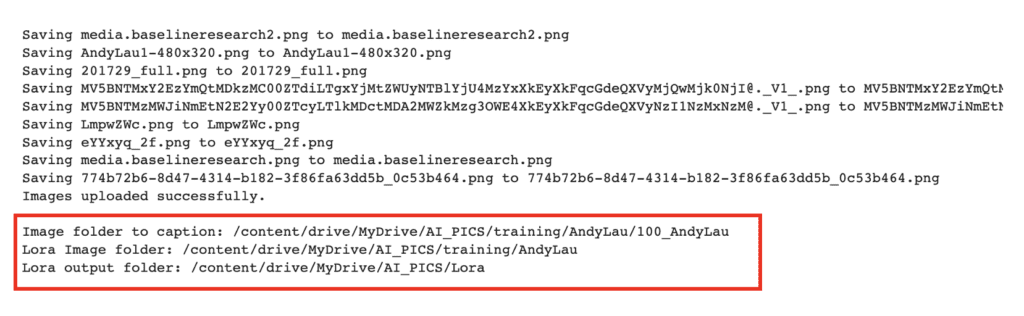
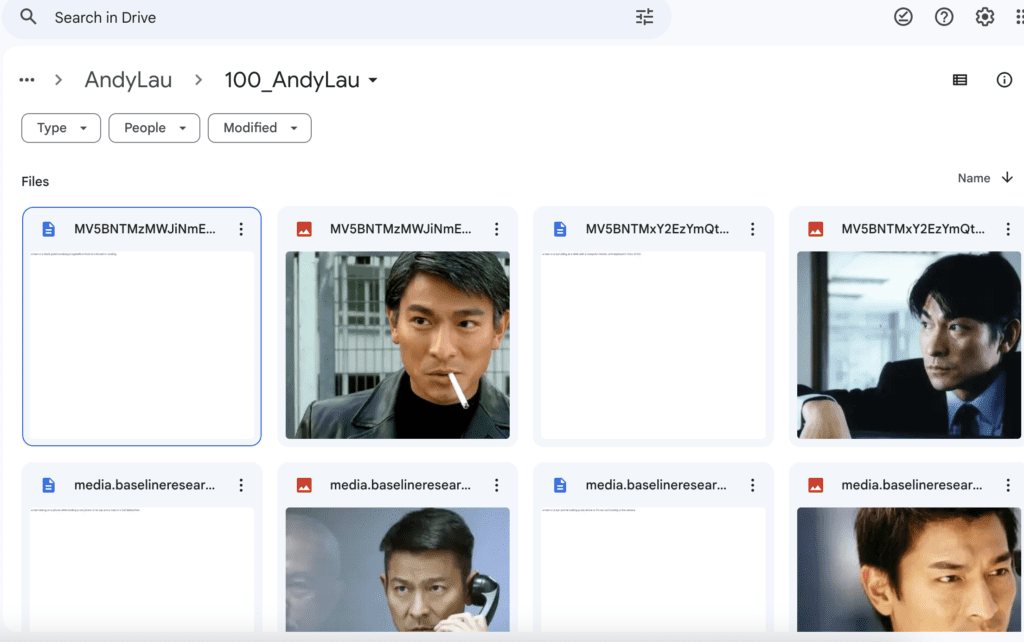
Now, go to your Google Drive. The images should be uploaded in My Drive > AI_PICS > training > AndyLau > 100_AndyLau.
It should look like the screenshot below.
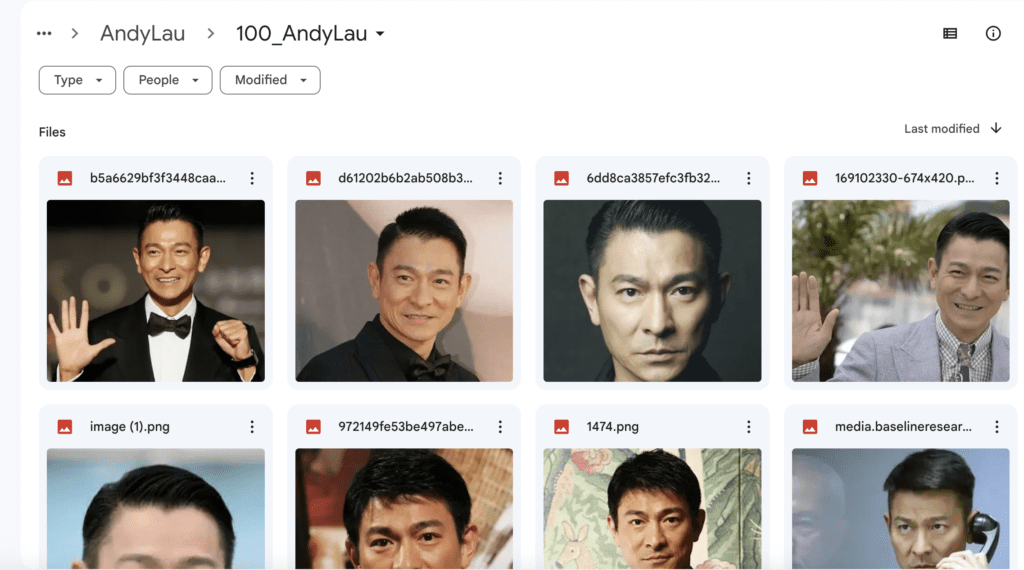
Note: All image folders inside the project folder will be used for training. You only need one folder in most cases. So, change to a different project name before uploading a new image set.
Step 3: Create captions
You need to provide a caption for each image. They must be a text file with the same name as an image containing the caption. We will generate the captions automatically using the LoRA trainer.
Running the LoRA trainer
Go to the Train Lora cell. Review the username and password. You will need them after starting the GUI.
Start the notebook by clicking the Play button in the Lora trainer cell.
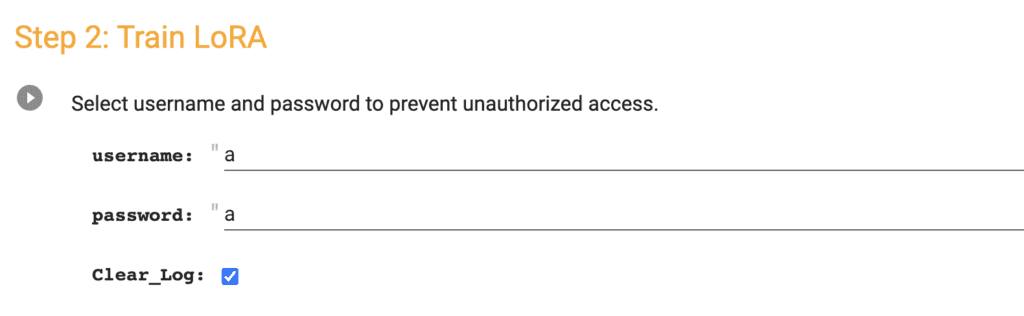
It will take a while to load. It is ready when you see the Gradio.live link.

A new tab showing the Kohya_ss GUI should have opened.
Go to the Utilities page. Select the Captioning tab, and then BLIP Captioning sub-tab.
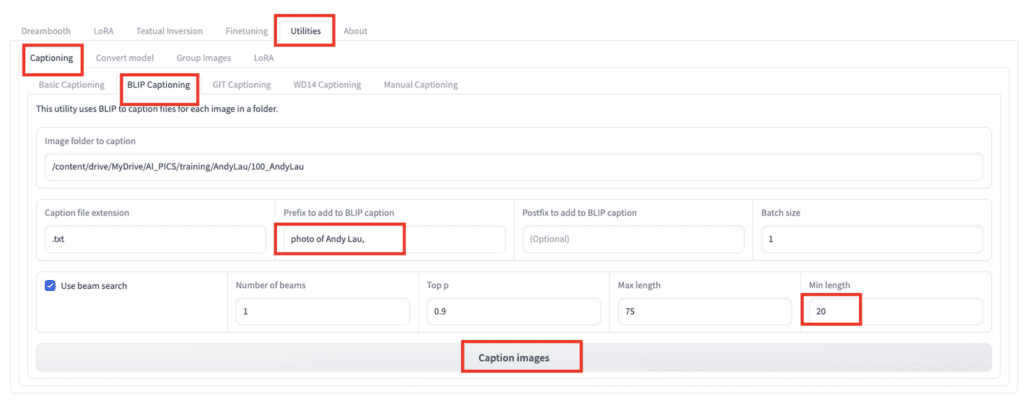
Image path
You can find the image folder to caption in the printout of the first cell, after uploading the images.
/content/drive/MyDrive/AI_PICS/training/AndyLau/100_AndyLauOther settings
The auto caption could sometimes be too short. Set the Min length to 20.
Add a phrase to all captions by entering your subject keyword in Prefix to add to BLIP caption:
Photo of Andy Lau,
Start auto-captioning
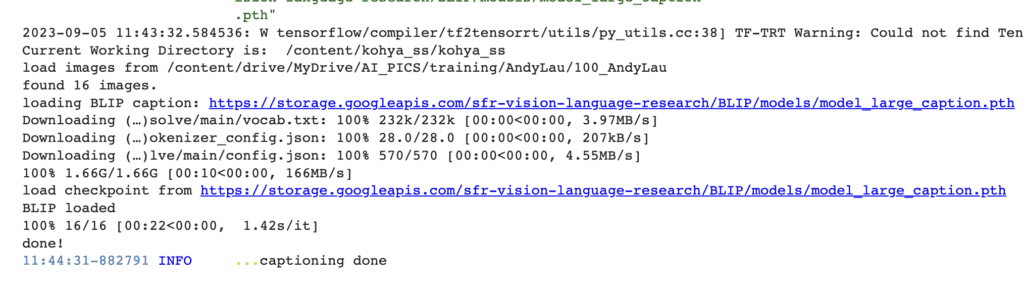
Press the Caption Images button to generate a caption for each image automatically.
Check the Google Colab Notebook for status. It should be running the captioning model. You will see the message “captioning done” when the captioning is completed.
Revising the captions (Optional)
The BLIP caption may not be all correct. You can optionally read and revise each caption to match the images. You must also add the phrase “Andy Lau” to each caption.
This is better done on your Google Drive page. You should see a text file with the same name generated for each image.
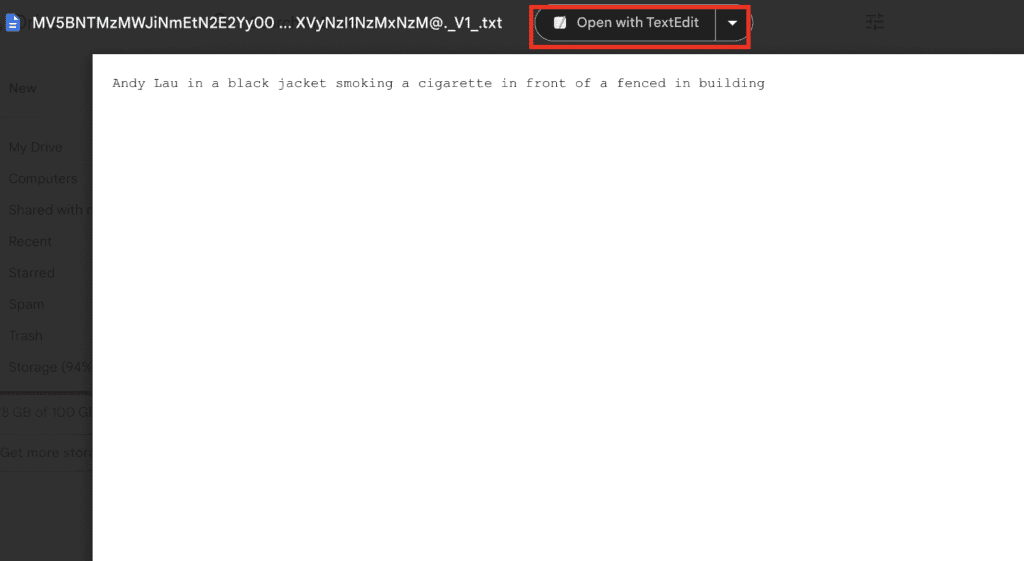
For example, the auto-generated caption of the first image is
A man in a black jacket smoking a cigarette in front of a fenced in building
We want to include the keyword Andy Lau. The revised prompt is
Andy Lau in a black jacket smoking a cigarette in front of a fenced in building
Use the Open with… function to use your favorite editor to make the change. The default one should work, even if it launches locally on your PC. Save the changes. You may need to refresh the Google Drive page to see changes.
Revise the captions for all images.
When you are done, go through the text files one more time to make sure all have included “Andy Lau” in it. This is important for training a specific person.
You can download the captions I created to follow the tutorial if you wish. You can download the revised captions on the training notebook’s product page or the member’s resources page.
Step 4: LoRA training
We now have images and captions. We are ready to start the LoRA training!
Source model
In Kohya_ss GUI, go to the LoRA page. Select the Training tab. Select the Source model sub-tab. Review the model in Model Quick Pick.
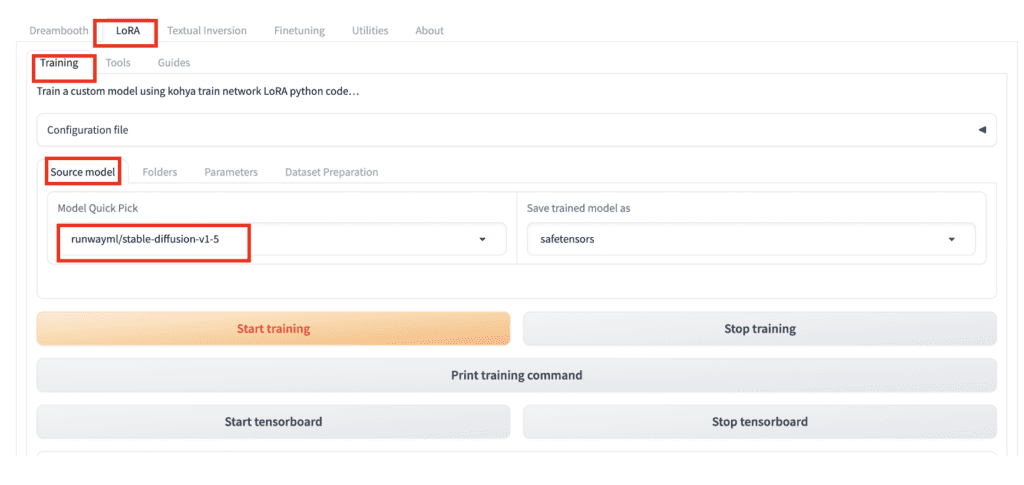
Some popular models you can start training on are:
Stable Diffusion v1.5
runwayml/stable-diffusion-v1-5The Stable Diffusion v1.5 model is the latest version of the official v1 model.
Realistic Vision v2
SG161222/Realistic_Vision_V2.0Realistic Vision v2 is good for training photo-style images.
Anything v3
Linaqruf/anything-v3.0Anything v3 is good for training anime-style images.
You can find other models on Hugging Face using this link or this link. They have to be diffusers models. You can tell by a similar folder structure to the models above.
Folders
Now, switch to the Folders sub-tab.
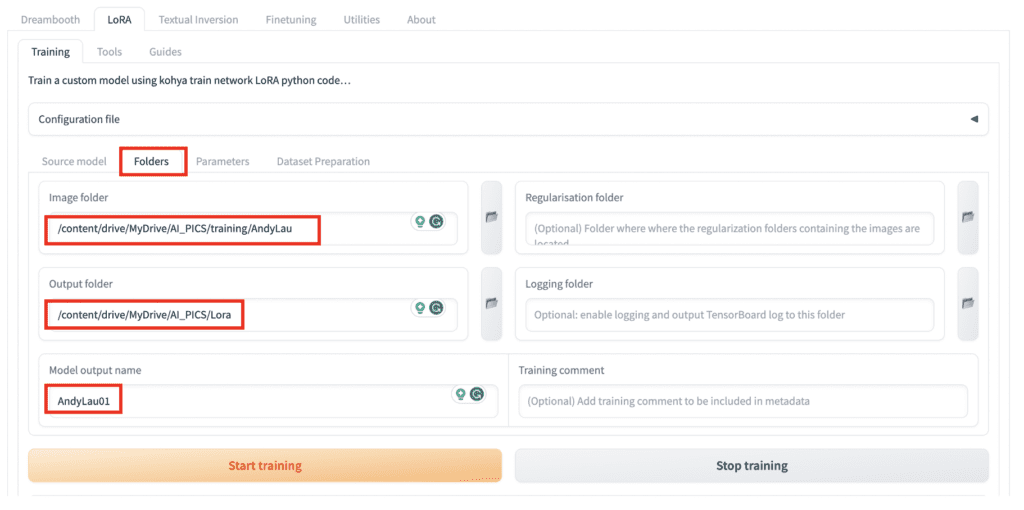
In the Image folder field, enter the folder CONTAINING the image folder. You can copy the path from Lora Image folder in the printout after uploading the images.
/content/drive/MyDrive/AI_PICS/training/AndyLauIn the Ouput folder field, enter the location where you want the LoRA file to be saved. You can copy the path from Lora output folder in the printout after uploading the images.
The default location is the Lora folder of the Stable Diffusion notebook so that it can be directly used in the WebUI.
/content/drive/MyDrive/AI_PICS/LoraFinally, name your LoRA in the Model output name field.
AndyLau100Parameters
Now, switch to the Parameters sub-tab. If you have just started out in training LoRA models, using a Preset is the way to go. Select sd15-EDG_LoraOptiSettings for training a Standard LoRA.
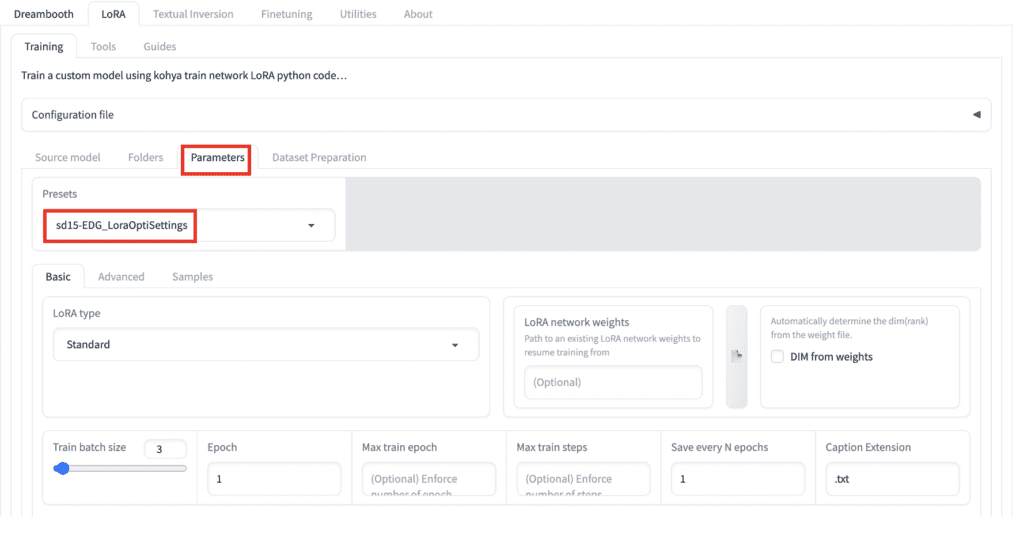
There are presets for different types of LyCORIS, which are more powerful versions of LoRA. See the LyCORIS tutorial for a primer.
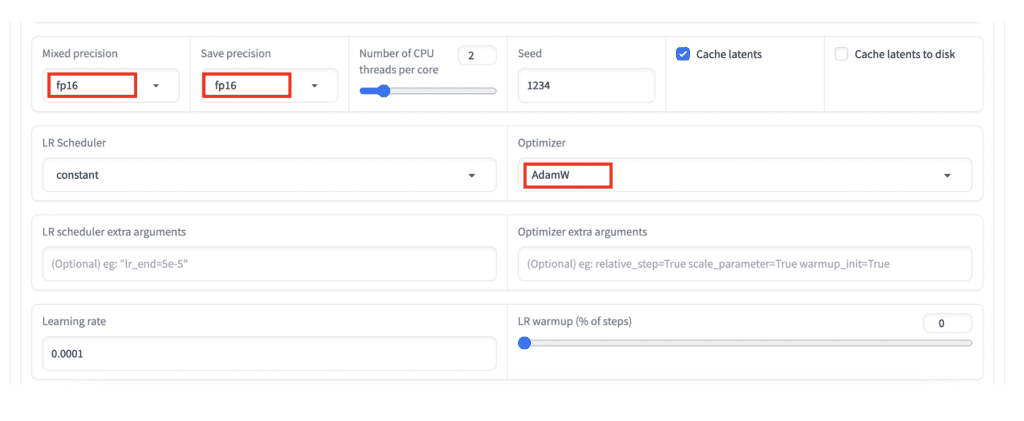
Finally, the T4 GPU on Colab doesn’t support bp16 mix precision. You MUST
- Change Mixed precision and Save precision to fp16.
- Change Optimizer to AdamW.
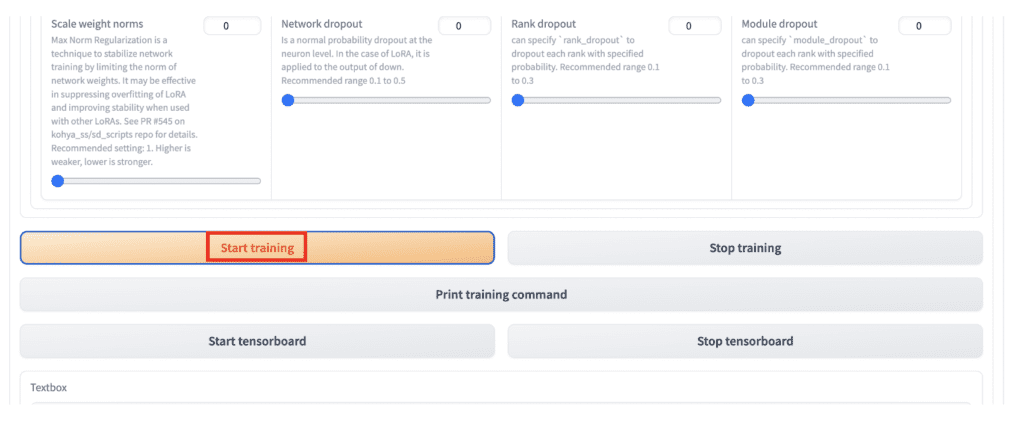
Start training!
Now everything is in place. Scroll down and click Start training to start the training process.
Check the progress on the Colab Notebook page. It will take a while.
It is okay to show some warnings. The training fails when it encounters an error.
When it is completed successfully, you should see the progress is at 100%. The loss value should be a number, not nan.

Using the LoRA
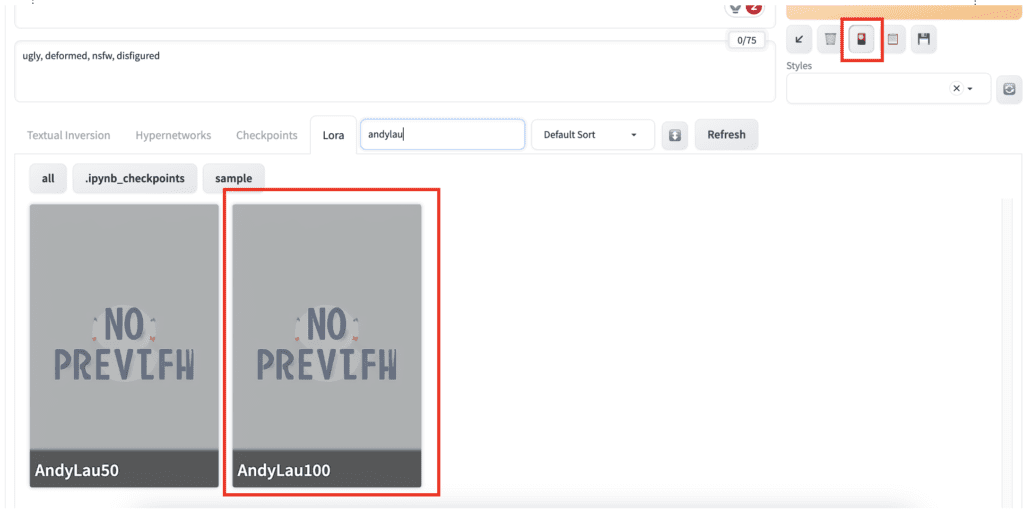
If you save the LoRA in the default output location (AI_PICS/Lora), you can easily use the Stable Diffusion Colab Notebook to load it.
Open AUTOMATIC1111 Stable Diffusion WebUI in Google Colab. Click the Select the Lora tab and click the LoRA you just created.
Here are the prompt and the negative prompt:
Andy Lau in a suit, full body <lora:AndyLau100:1>
ugly, deformed, nsfw, disfigured
Since we have used the phrase “Andy Lau” in the training caption, you will need it in the prompt to take effect.
Although the LoRA is trained on the Stable Diffusion v1.5 model, it works equally well with the Realistic Vision v2 model.
Here are the results of the Andy Lau LoRA.