SD.Next is a Stable diffusion WebUI for advanced users. It is very similar to AUTOMATIC1111 Stable Diffusion WebUI. In fact, they share the same code base. Many extensions for AUTOMATIC1111 can also be installed on SD.Next.
Table of Contents
Why use SD.Next?
The reasons to use SD.Next are
- Better out-of-the-box function: SD.Next includes many “essential” extensions in the installation. E.g. Image Viewer and ControlNet.
- Better curated functions: It has removed some options in AUTOMATIC1111 that are not meaningful choices, e.g. a simplified sampler list.
- Better software engineering: The software appears to be more well-written and tested than A1111. It is better suited for users who don’t like tinkering.
Hardware requirement
You should have a discrete Nvidia graphic card (GPU) and a Windows machine.
Install SD.Next on Windows
You don’t need to perform steps 1 and 2 below if you already have AUTOMATIC1111 running on your machine.
Step 1: Install Python
You will need Python 3.10. Installing from the Microsoft store is the easiest option.
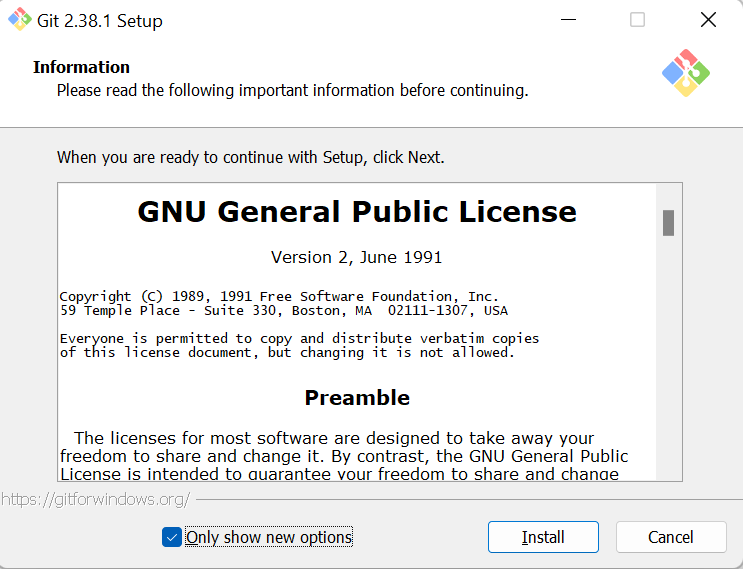
Step 2: Install git
Git is a code repository management system. You will need it to install and update AUTOMATIC1111.
Go to this page to download the Windows version.
Open the installer. Click Install to accept the license and install the software.
Step 3: Clone SD.Next
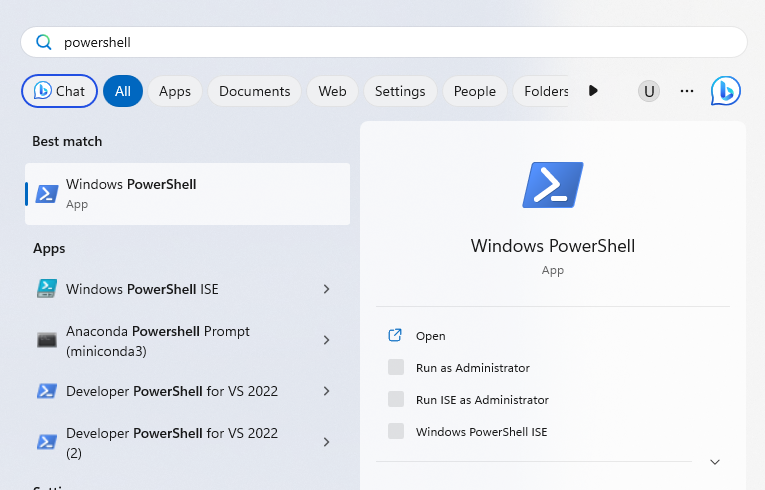
Press the Window key (It should be on the left of the space bar on your keyboard). A search window should pop up. Type powershell. Click the Windows PowerShell Icon to launch the PowerShell App.
Type the following command and press Enter to clone SD.Next to your computer.
git clone https://github.com/vladmandic/automatic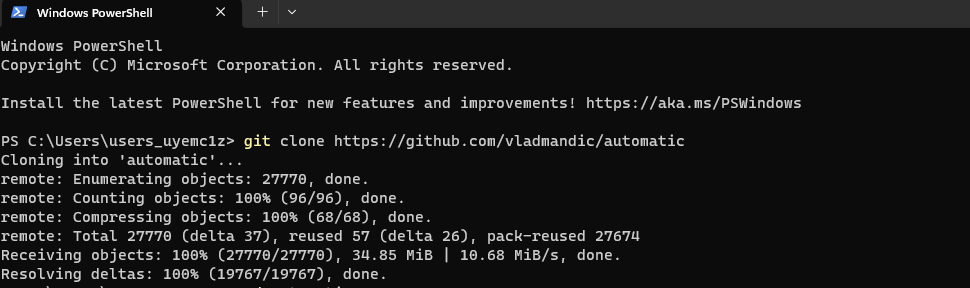
Step 4: Run SD.Next
Open the File Explorer App.
In the address bar, go to the following location
%userprofile%automaticFind a file called webui.bat. If you don’t see the extension .bat, look for the webui file with the type Windows Batch File.
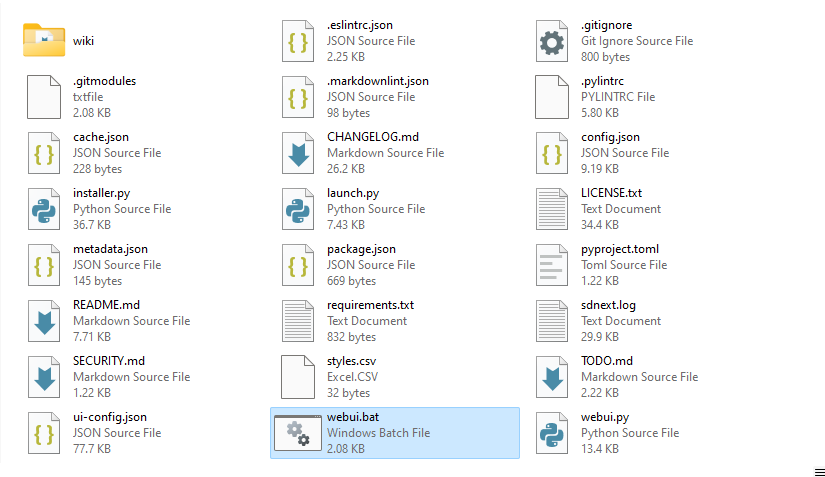
Double-click the webui.bat file to start SD.Next.
Double-click the webui.bat file to rerun it if you encounter the following error.
ImportError: cannot import name ‘deprecated’ from ‘typing_extensions’
It should correct itself the 2nd time.
Type y and press Enter when asked if you want to download the default model.

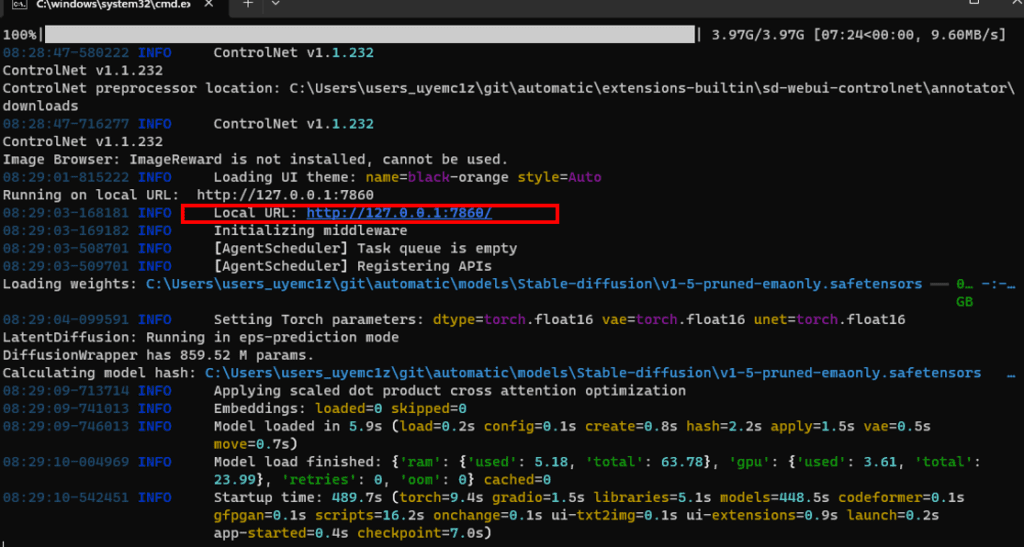
The installation is complete when you see the Local URL message, which is http://127.0.0.1:7860/ by default.
Step 5: Access the webui on a browser
Go to the local URL on the browser to start SD.Next.
http://127.0.0.1:7860/You should see a user interface very similar to the AUTOMATIC1111 Web-UI.
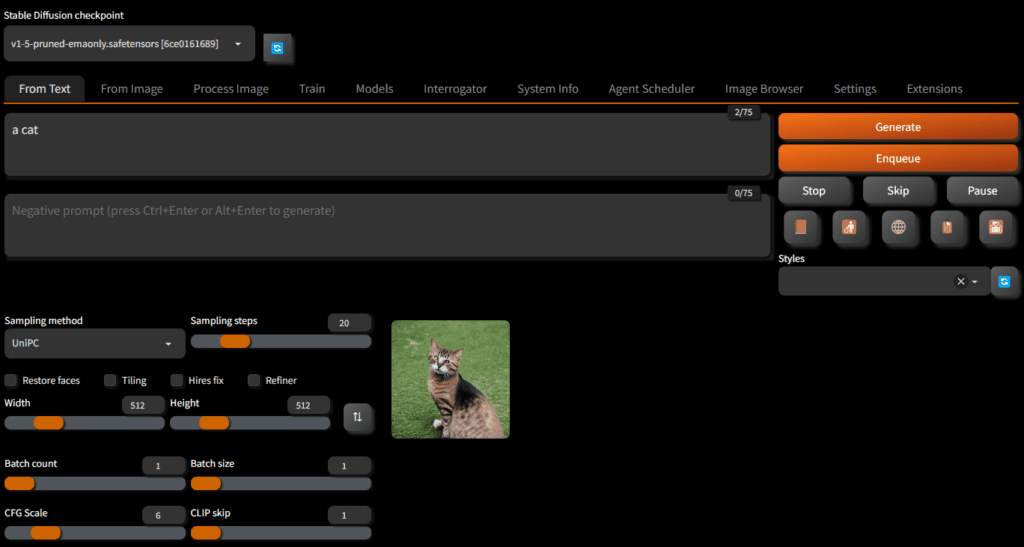
Test generating an image with a simple prompt (e.g. a cat) and Press Generate to make sure it is working correctly.
Using Stable Diffusion XL model
Download the SDXL 1.0 models
You will need to download the SDXL model to use with SD.Next. Note that there’s a malicious copy of SDXL out there, so you should download it from the official repository.
In SD.Next Web-UI, navigate to the Models page and the Huggingface tab.
In the Select model field, enter the following.
stabilityai/stable-diffusion-xl-base-1.0Press Download Model.
Verify the download is in progress in the console window.
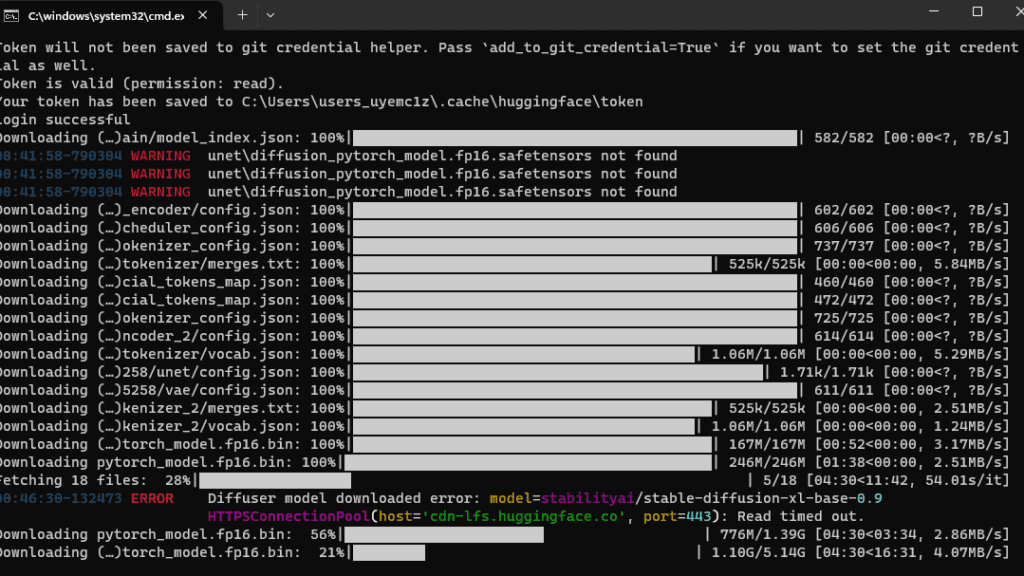
Wait for it to complete.
Press the Download button again if you receive a read time-out error.
Repeat the download with the following in the Select model field.
stabilityai/stable-diffusion-xl-refiner-1.0Now you have completed downloading both the base and the refiner model.
Setting up SD.Next to use SDXL
SD.Next has two Stable Diffusion backends: (1) original and (2) diffusers. You must switch to the diffuers backend to use the SDXL model.
Switching to the diffusers backend
PowerShell method
You will need to start SD.Next’s webui.bat with the extra argument --backend diffuers to use the diffusers backend. You can switch back and forth between the original and the diffusers backend after you start through the GUI.
If you use the PowerShell app for the web-UI, use the following command.
cd automatic; .webui.bat --backend diffusersFile Explorer method
You can also create a new shortcut to add the extra argument for convenience.
In File Explorer, right-click the file webui.bat. Click Show more options. Click create shortcut.
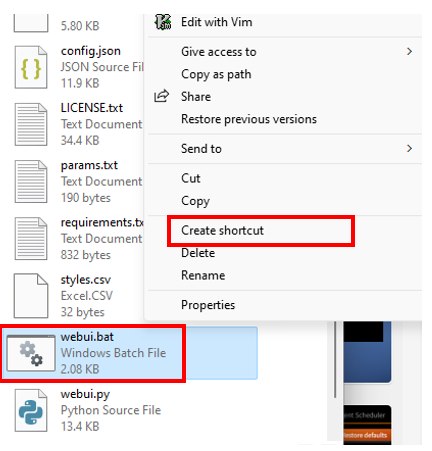
A new Shortcut file is created. Rename it to webui.bat - diffusers.
Right-click on the file, select Properties. At the end of the Target field, add
--backend diffusersThere should be a space between webui.bat and --backend diffusers.
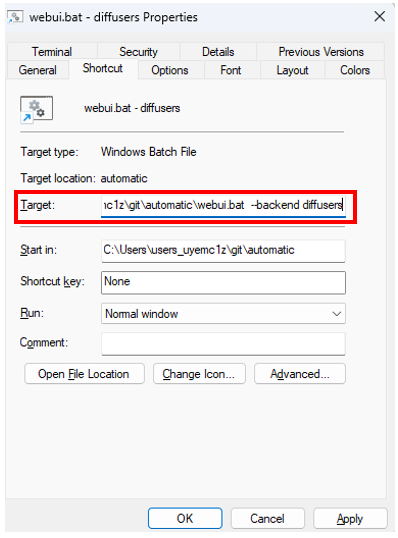
Click Apply and then OK.
From now on, you can double click the Shortcut file webui.bat - diffusers to launch SD.Next with the diffuser backend.
Adding the refiner model selection menu
For convenience, you should add the refiner model dropdown menu.
Go to the Settings page, in the QuickSettings list (search quick to find it), add sd_model_refiner.
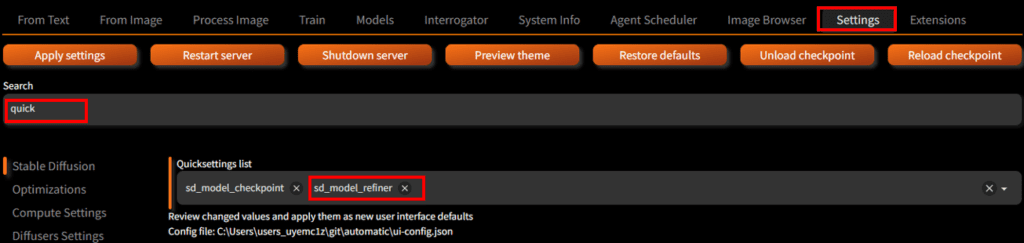
Click Apply settings and then Restart server.
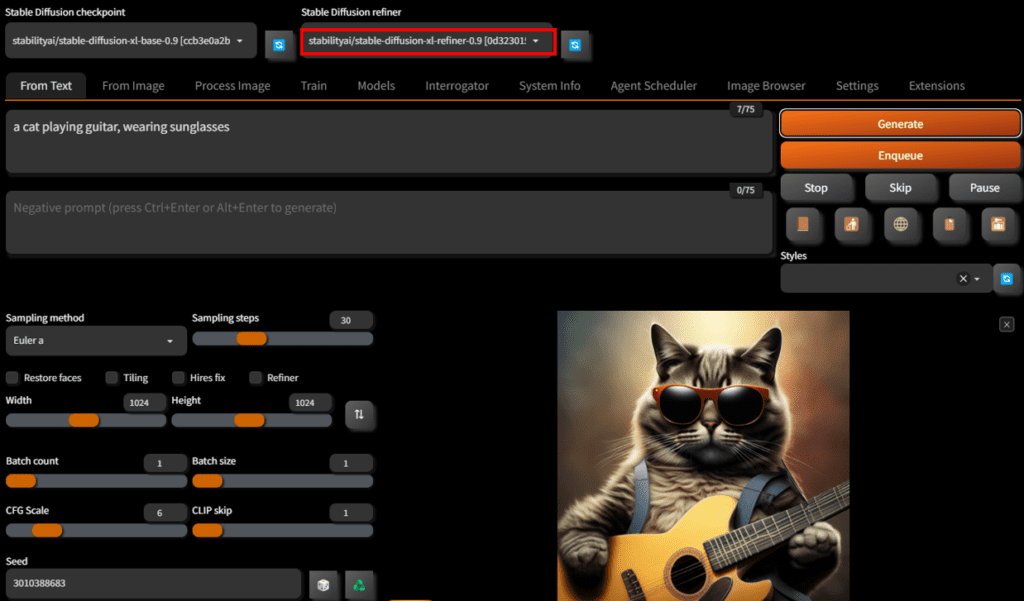
After restarting, you should see the Stable Diffusion refiner dropdown menu next to the Stable Diffusion checkpoint.

Using the SDXL model
You are now ready to generate images with the SDXL model. There are two modes to generate images
- Base model alone
- Base model followed by the refiner
Base model only
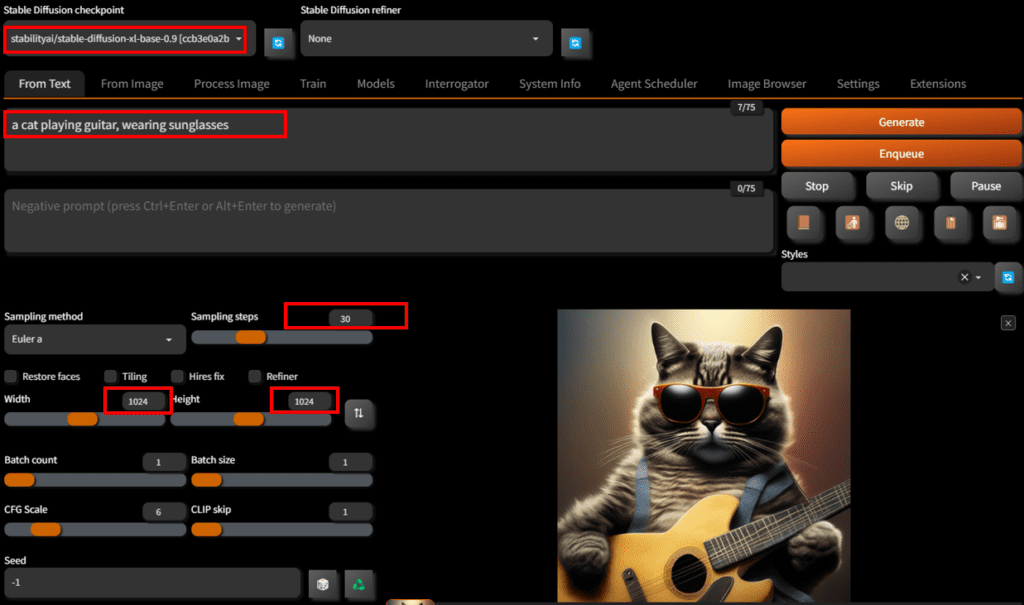
Navigate to the From Text tab.
Select the SDXL base model in the Stable Diffusion checkpoint dropdown menu.
Select None in the Stable Diffuson refiner dropdown menu.
Enter a prompt.
a cat playing guitar, wearing sunglassesSet sampling steps to 30.
Set both the width and the height to 1024. This is important because the SDXL model was trained to generate 1024×1024 images.
The rest of the options are pretty standard. See the AUTOMATIC1111 guide and this article for details.
Base model + refiner
Use the base model followed by the refiner to get the best result. You will get images similar to the base model but with more fine details.
This option takes up a lot of VRAMs. Not all graphic cards can handle it.
To use the base model with the refiner, do everything in the last section except select the SDXL refiner model in the Stable Diffusion refiner dropdown menu.
Switching between original and diffusers backends
You can switch between the original and the diffusers backend on the Settings page.
Switch back to the original backend to use v1 and v2 models. Select original in Stable Diffusion backend.
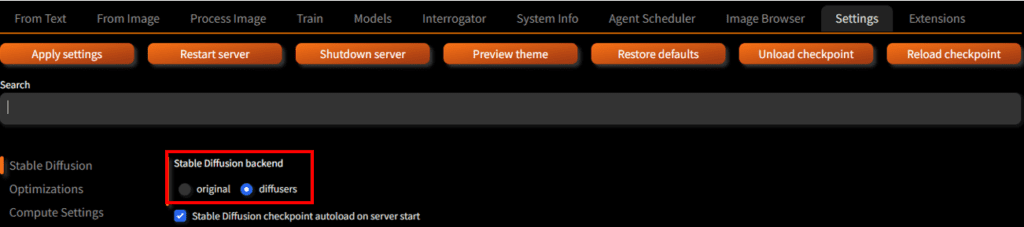
Click Apply settings and Restart server.
Does SDNext support Inpainting and Reactor/FaceSwap?
Mac’lerde kurulabiliyor mu?
It should work but I didn’t try.
Recommendations on extensions?
Should I get rid of A1111?
Thanks!
I haven’t used SD.Next for a while. I am with A1111.
I’m using A1111 portable.
How I can use SDNext portable? Is portable version fo SDNext for it ?
I see that SD.Next supports “Stable Video Diffusion”, how do we install and use that within SD.Next?
Thanks, has SD-Next all important functions (Control Net etc.) like Automatic1111?
If it should be easier and better, why do you call it suitable for “advanced users”?
I consider both A1111 and sd.next suitable for advanced users. SD.Next has a few out-of-the-box extensions working, but some extensions made for A1111 can be incompatible with it. So you need to find some workarounds.
Hi, thanks for the article. Could you describe a little bit more the hardware requirements for SD.Next? 8 GB of RAM and a card with 6 GB VRAM are enough? What about the disk space required?
Thank you!
You should be able to run with min 4GB VRAM. I don’t have experience with low RAM machines. You can ask in their github page.
A checkpoint model is 2 to 6 GB. The installation itself also take GBs. I would say min 10GB storage.
Maybe I should do an upgrade first. Thanks for the reply.