
Stable Diffusion WebUI Forge (SD Forge) is an alternative version of Stable Diffusion WebUI that features faster image generation for low-VRAM GPUs, among other improvements.
This tutorial is for installing SD Forge, an advanced GUI for Stable Diffusion. Check out the Quick Start Guide and consider taking the Stable Diffusion Courses if you are new to Stable Diffusion.
This tutorial covers
- Installing SD Forge on Windows
- Installing SD Forge on Mac
- Sharing model files with AUTOMATIC11111
Table of Contents
What is SD Forge?
SD Forge is a modified version of AUTOMATIC1111. It features faster image generation, preinstalled extensions, and a modified backend that makes certain features possible.
Benefits of using SD Forge
Faster image generation
According to the development team, SD Forge runs faster than AUTOMATIC1111. The less VRAM GPU cards you have, the more speed-up you will experience.
You can expect up to 75% faster for 6 GB VRAM, up to 45% faster for 8 GB, and up to 6% faster for 24 GB.
Better backend
The U-Net backend is reworked so that extensions can modify it easily. It is not uncommon to see conflicts in extensions in AUTOMATIC1111 because many of them modify the U-Net.
Preinstalled features
Many features that modify the U-Net are preinstalled. The list includes ControlNet and FreeU. There’s also native support for Stable Video Diffusion (SVD) and the Zero123 image-to-3D object generation.
How to Install SD Forge on Windows
The easiest way to install SD Forge on a Windows system is to use the one-click installation package.
Step 1: Download 7-zip
You need the 7-zip software to uncompress installation files.
Download 7-zip on this page or use this direct download link.
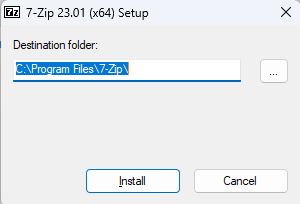
Double-click to run the downloaded exe file. Click Install to install 7-zip on your PC.
Step 2: Download the installation file
Go to SD Forge’s repository, and download the one-click package.

Step 3: Unzip the files
Right-click the downloaded file and select Extract All….
A new folder called with the same name as the file should appear. You can move the folder to a location you want.
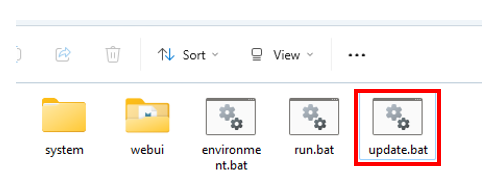
Step 4: Update SD Forge
You need to update the software before running it. This ensures that you are running the latest version.
Click update.bat (Yours may not have .bat) to update SD Forge.
Depending on your Window’s security setting, a warning dialog box may show up. You need to click More Info > Run Anyway.
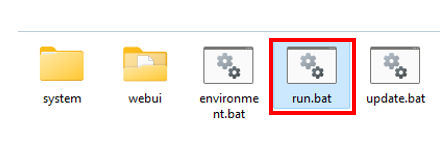
Step 5: Start SD Forge
Click run.bat to start SD Forge.
Sharing models with AUTOMATIC1111
If you have AUTOMATIC1111 WebUI installed on your local machine, you can share the model files with it. This will save you disk space and the trouble of managing two sets of models.
In the SD Forge directory, edit the file webui > webui-user.bat with a text editor. (e.g. Right-click the file and select Edit in Notepad.)
Change the following line:
set COMMANDLINE_ARGS=To:
set COMMANDLINE_ARGS=--forge-ref-a1111-home "C:\path\to\stable-diffusion-webui"The last part is the path of your AUTOMATIC1111 home folder.
On Windows 11, you can copy the path by right-clicking the stable-diffusion-webui folder and selecting Copy as path.
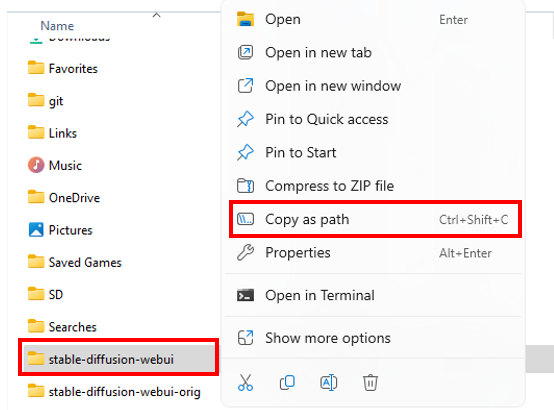
The path should end with stable-diffusion-webui.
How to Install SD Forge on Mac
You will need Apple Silicon (M1/M2/M3 etc) to run Stable Diffusion WebUI Forge.
Step 1: Install Homebrew
You will need Homebrew, a package manager for Mac.
Open the Terminal app, type the following command, and press return.
/bin/bash -c "$(curl -fsSL https://raw.githubusercontent.com/Homebrew/install/HEAD/install.sh)"Step 2: Install Python 3.10 and Git
Open a new terminal and run the following command.
brew install [email protected] git wgetStep 3: Clone SD Forge
In the terminal, run the following command to copy SD Forge to your local storage.
git clone https://github.com/lllyasviel/stable-diffusion-webui-forgeStep 4: Run SD Forge
In the terminal, enter the newly cloned directory.
cd stable-diffusion-webui-forgeStart SD Forge:
./webui.shSharing model with AUTOMATIC1111
You may already have AUTOMATIC1111 installed and want to test out SD Forge. You can share models with AUTOMATIC1111 by starting SD Forge with the following command.
./webui.sh --forge-ref-a1111-home path/to/A1111path/to/A1111 is the path to the home directory of AUTOMATIC11111.
You can copy the path name to the Clipboard by navigating to the stable-diffusion-webui folder in the Finder App. Right-click the folder name of the path bar at the bottom of the Finder App. Select Copy “stable-diffusion-webui” as Pathname.

If you don’t see the path bar, click View > Show Path Bar in the Finder App.
I have installed forge using stabilitymatrix.exe. The web window comes up fine. I have even installed and tested some models. I’m not happy with the results. What lesson do I start with?
You can start with the Stable Diffusion 1-4 lessons.
Hello, can you make a version of Forge Neo Google Colab, please?
I want to run Z Image model but it’s only support on Forge Neo version, I’m noob so I’m tired of comfyUI, they give me headache :< Thank you very much~
Hi Andrew,
Can forge installed it with google colab?
https://stable-diffusion-art.com/forge-colab/
I am getting the following error :
TypeError: Trying to convert Float8_e4m3fn to the MPS backend but it does not have support for that dtype.
Trying to convert Float8_e4m3fn to the MPS backend but it does not have support for that dtype.
The checkpoint model is in fp8 format and is not supported on mac. you need to use a model in fp16 format.
I am using f16 model now. But I see the following error
RuntimeError: Creating a Parameter from an instance of type ParameterGGUF requires that detach() returns an instance of the same type, but return type Tensor was found instead. To use the type as a Parameter, please correct the detach() semantics defined by its __torch_dispatch__() implementation.
Creating a Parameter from an instance of type ParameterGGUF requires that detach() returns an instance of the same type, but return type Tensor was found instead. To use the type as a Parameter, please correct the detach() semantics defined by its __torch_dispatch__() implementation.
seems something wrong with the code. Mac is not well-supported on forge. Follow this to run flux on mac https://stable-diffusion-art.com/flux-mac/
Hello, I run Forge on Mac and when I try to generate an image, I have that error message: “TypeError: MPS BFloat16 is only supported on MacOS 14 or newer”.
i’m on Ventura MacOS (13.4.1) and I Wouldn’t upgrade now. Forge doesn’t work on Ventura MacOS?
Thank you, Lorenzo
I believe you will have to upgrade to use Forge. Use an online service if you don’t want to.
Thank you very much
After having installed and run Automatic1111 on my MacBook Pro M4, I was able to install SD Forge and give it a try using the XL model A1111 was using. But after doing an initial image, the output was completely ‘avant-garde’-like. This was with the CFG Scale at ‘1’. If I increased the value at all, the image came out blank (black). I restarted the session but that didn’t change anything.
I’m a very beginner with SD running locally so I’m not sure what I’m doing wrong, or perhaps I have a setting wrong.
Make sure you select the XL radio button on the top. The results would be bad if you have selected flux or others.
After choosing the XL radio button, still not getting an image, during the generative process and when complete. It remains just black. Should I reinstall forge and/or A1111 at this point? I read somewhere there’s some setting to disable or enable an ‘explicit filter’ but I didn’t see such a setting.
You can try redownloading the checkpoint model. It may do that if the file is corrupted. Reinstall if it still doesn’t work.
There are no explicit filters in A1111/forge.
Hi, I’m getting the error AssertionError: Torch not compiled with CUDA enabled
On Mac after running the webui command. How do I get around this? Thanks!
You really should not get this error. you can type “python3 –version” to see if you are running 3.10.
You can also delete the venv folder and run ./webui.sh again.
I’m apparently not running 3.10, what’s the best way to update?
follow step 2 in the mac installation section.
I deleted venv like you recommended, and it downloaded a bunch of extra requirements and packages. However, I’m still getting the AssertionError: Torch not compiled with CUDA enabled. What could be the reasoning for this? Should I try updating Python?
Python is up to date, however I am still getting this error unfortunately
After updating python and confirming it is 3.10, you should delete the venv folder to install everything again.
If it still doesn’t work, you can try to run the following.
./webui.sh --skip-torch-cuda-test --upcast-sampling --no-half-vae --use-cpu interrogateTHamks a lot Andrew for the tutorial. I could setup on Ubuntu Desktop with Mac Installation instructions.
after installing it on mac mini m2 pro the VAE / Text Encoder field is empty by default. is this normal?
it= sd forge
yes
Can NPU use Forge? If not, how to use Forge on a computer with only NPU?
No, and it can be used with cpu only. it is very slow. Add arguments
--no-half --use-cpu all --skip-torch-cuda-testThanks for the guide.
Just to want to report that if you put the SD Forge folder on an exFat drive and run the “update.bat”, you will get the “dubious ownership” error.
Move the SD Forge folder to a NTFS drive solves the problem.
Your explanation made sharing directories really easy. Thank you again for an amazing tutorial.
Hi Andrew, thanks for another great tutorial.
Do you know if a GPU is absolutely mandatory for stable-diffusion-webui-forge (unlike A1111)?
I wanted to try out SD Forge to see if I could get round the problem of Loras crashing my A1111 server* when used with any SDXL model.
I installed stable-diffusion-webui-forge as an A1111 extension.
I started it from its installation directory with:
webui.sh –skip-torch-cuda-test –precision full –no-half –forge-ref-a1111-home ../..
It ultimately barfed with: RuntimeError: No HIP GPUs are available.
(I seem to remember A1111 doing this until I added the –skip-torch-cuda-test, but this time, not so lucky.)
Thanks for any thoughts.
*Ubuntu box, NO GPU CARD – just integrated AMD graphics – A1111 works well enough for me though.
Forge can use CPU only by starting with the parameter:
--always-cpuThank you! After linking Forge’s Lora directory to that of A1111 it runs well, and I have now run a Lora successfully with an SDXL model. I’m hoping that linking the extensions directory will be similarly successful.
Great! I didn’t have much success installing A1111 extensions on Forge.
Thanks for that comment Andrew. I don’t feel so alone! Not a single A1111 extension that I tried worked correctly; in fact some affected the UI badly. I backed out quickly!
What can I do if Forge doesn’t find any ControlNet preprocessors though I’ve got them downloaded in A1111 folder? I did set set COMMANDLINE_ARGS=–forge-ref-a1111-home “…my path\stable-diffusion-webui”.
I’ve tried to copy and paste them to …forge-webui\webui\models\ControlNetPreprocessor and to …forge-webui\webui\models\ControlNet . Didn’t work. And Forge doesn’t automatically download ANY of the preprocessors, always showing ‘none’.
Oh. I mistyped. Forge doesn’t show or download any ControlNet models, not preprocessors.
A small update. I have looked through launching web ui code and made Forge find basic models by moving them
from “…stable-diffusion-webui\extensions\sd-webui-controlnet\models” original folder
to:”…stable-diffusion-webui\models\ControlNet” folder.
But it still doesn’t find any downloaded models though the path is set properly:
–controlnet-preprocessor-models-dir …my path….\stable-diffusion-webui\extensions\sd-webui-controlnet\annotator\downloads
I deleted one downloaded model (Zoe depth) and after web ui restart Forge downloaded it again to the A1111 folder (….annotator\downloads). But it doesn’t show up in the list of models.
I’m not experienced enough to find out what the problem is (((
I would appreciate any advice.
Hi, try not use –controlnet-preprocessor-models-dir
Great work! I can see my models from A1111 but the LORAs don’t appear. I used the start command ./webui.sh –forge-ref-a1111-home path/to/A1111 to my A1111 Installation. What could be the problem here? Thanks for any tips.
I am not sure. Could it be filtered by the checkpoint model type you selected? Try switching between sdxl and sd 1.5
If I install forge can I still run a1111?
Yes.
The bat file cannot locate requirements.txt although the path is correct and the file exists. Running this through Gemini and still cannot find a solution.. thoughts?
I get a RunetimeError: Torch is not able to use GPU; add –skip-torch-cuda-test to COMMANDLINE_ARGS variable to disable this check error, I do that and it eventually throws at AssertionError: Torch not compiled with CUDA enabled error. The strange part is A1111 works perfectly fine on my computer, but SD Forge does not so it can’t be a hardware compatibility issue.
try reinstalling with the one-click installer.
Hi! I have a problem in my macbook installation. After install homebrew, I do this:
brew install [email protected] git wget
But… zsh: command not found: brew
Thanks!
you can try restarting the terminal.
you can also try installing with the .pkg file https://github.com/Homebrew/brew/releases/tag/4.2.17
Hey Ricardo, take a look at the message at the end of the Hombrew install:
– Run these two commands in your terminal to add Homebrew to your PATH:
(echo; echo ‘eval “$(/opt/homebrew/bin/brew shellenv)”‘) >> /Users/YOURUSERNAME/.zprofile
eval “$(/opt/homebrew/bin/brew shellenv)”
If you don’t do those two commands, Homebrew is installed, but your shell doesn’t know what to do with a “brew” command.
(Don’t ask why I know.)
Hi, Im new to all this, but i’ve been trying to move form A11 to forge (so that i can try SDV) and everytime I run teh webui.sh through terminal, it ends up cloning the fold and opening, A11.
Is that a workaround this? (I have deleted the stable-diffusion-webui numerous times, and leaving only the stable-diffusion-webui-forge folder, but it keeps creating the older one.
can someone pls help?
this is not expected. they are two different repos so your setup seems to be messed up.
You can try deleting forge and reclone it.
Okay, I have a few bugs about Foger,
1: In the Foger panel, the embedding file is not displayed. But I do have files in the directory (this is my code: — embeddings dir “H: \ AI 2020 \ table differentiation webui master \ embeddings” ^).
2: Can you share the code about the directory path for sharing ESRGAN model files? Or change my error, which is my code (– esrgan models “H: \ AI 2020 \ table differentiation webui master \ embeddings” ^), but in the command line panel, it displays an error that prevents running the program.
3: Compared to SDXL, Foger generates approximately 40% faster on some models, but many models on Fogers are very slow, so slow that they cannot be generated.
seems to be good bugs to report to the github repos.
Hi Andrew,
I was wondering does SD Forge support diffusers models? (Automatic1111 seems not support diffusers. But there is a “diffusers” folder under the “stable-diffusion-webui-forge/models” after I installed SD Forge.)
Hi, I don’t think so.
good
I’m no expert, and Andrew can correct me if I’m wrong here, but anyone having issues with sharing of the directories with A1111, I recommend sharing everything except venv.
If you leave VENV_DIR commented out, Forge will create its own venv folder.
“`bat
@echo off
set PYTHON=
set GIT=
set VENV_DIR=
set COMMANDLINE_ARGS=
@REM Uncomment following code to reference an existing A1111 checkout.
set A1111_HOME=C:/Users/ttrpg/sd/stable-diffusion-webui
@REM
@REM set VENV_DIR=%A1111_HOME%/venv
set COMMANDLINE_ARGS=%COMMANDLINE_ARGS% ^
–ckpt-dir %A1111_HOME%/models/Stable-diffusion ^
–hypernetwork-dir %A1111_HOME%/models/hypernetworks ^
–embeddings-dir %A1111_HOME%/embeddings ^
–lora-dir %A1111_HOME%/models/Lora
call webui.bat
“`
When you run Forge for the first time, it inspects your hardware and makes recommendations on whether to pass additional flags via COMMANDLINE_ARGS. For example, Forge ‘told’ me to run:
“`bat
set COMMANDLINE_ARGS= –pin-shared-memory –cuda-malloc –cuda-stream
“`
For you it may be different.
Anyway, I hope this helps.
do i need a dedicated GPU for windows installation like automatic1111 beed?
i ran into the error:
RuntimeError: Torch is not able to use GPU; add –skip-torch-cuda-test to COMMANDLINE_ARGS variable to disable this check
hmmm 🙂
?
Yes
How about Colab?
You should be able to modify the A1111 notebook to run it as it closely follows it. I am not going to release one as I don’t want to support it…
Hi! I am sharing my A1111 library using the instructions, but I did have to uncomment the code suggested (and made sure the path was correct). It shows me the icons for all of checkpoints and Loras, but when I looked at the tree view the tree only shows 1 checkpoint and a few loras. When I look at the checkpoint, the only one it has is realisticVisionV51_v51VAE. When I click on the icon to copy the path of anything (Checkpoints, Loras, TIs), this is the kind of path it gives: “H:AISD ForgewebuimodelsStable-diffusionrealisticVisionV51_v51VAE.safetensors” I don’t know why it is leaving all the slashes out.
The trick to share models between automatic and forge throws an error, I had to follows the instructions comented on the same webui-user.bat file
I updated Forge and did a quick test. It still works.
It didnt worked for me either bro, had to move whole library from A1111 to Forge.
To me worked the ol’ fashioned A1111’s
–ckpt-dir ‘X:\…\…\…’
–vae-dir etc
Hello, dear friend,
when downloading the installation file SD Forge for Windows, the site github.com/lllyasviel/stable-diffusion-webui-forge?tab=readme-ov-file#installing-forge , asks for username and password. Please tell me which group or site I should join
Of course, I am a member github.com
Thank you for your guidance
It is hosted on github. I didn’t need to login to download. But if it asks for login credentials, it should be github’s.
I was able to install Forge on Mac M1, but didn’t see any difference in case of speed compared to A1111. So, mac users, don’t waste your time on it.
Forge is currently broken on AMD so I’m good thanks.
Can’t run it on Mac M1. Anybody knows how to fix it?
/Users/noisesensei/stable-diffusion-webui-forge/venv/lib/python3.9/site-packages/urllib3/__init__.py:35: NotOpenSSLWarning: urllib3 v2 only supports OpenSSL 1.1.1+, currently the ‘ssl’ module is compiled with ‘LibreSSL 2.8.3’. See: https://github.com/urllib3/urllib3/issues/3020
warnings.warn(
Traceback (most recent call last):
File “/Users/noisesensei/stable-diffusion-webui-forge/launch.py”, line 51, in
main()
File “/Users/noisesensei/stable-diffusion-webui-forge/launch.py”, line 47, in main
start()
File “/Users/noisesensei/stable-diffusion-webui-forge/modules/launch_utils.py”, line 541, in start
import webui
File “/Users/noisesensei/stable-diffusion-webui-forge/webui.py”, line 19, in
initialize.imports()
File “/Users/noisesensei/stable-diffusion-webui-forge/modules/initialize.py”, line 50, in imports
shared_init.initialize()
File “/Users/noisesensei/stable-diffusion-webui-forge/modules/shared_init.py”, line 33, in initialize
from modules import styles
File “/Users/noisesensei/stable-diffusion-webui-forge/modules/styles.py”, line 9, in
class PromptStyle(typing.NamedTuple):
File “/Users/noisesensei/stable-diffusion-webui-forge/modules/styles.py”, line 11, in PromptStyle
prompt: str | None
TypeError: unsupported operand type(s) for |: ‘type’ and ‘NoneType’
noisesensei@graviton stable-diffusion-webui-forge %
You should use python 3.10
Yeah, thanks. There were problems installing python via terminal, but after I installed Homebrew via .pkg instead of terminal, the process went successful.
I have the same error how to use python 3.10 to run it
Forget about this method just use StabilityMatrix
Forge isn’t on Stability Matrix. Lol…
Forge is on last updat of Stability Matrix.
Hi Andrew,
Do you use Forge? Any preference vs Comfyui?
And can I use the same extensions?
Thanks for sharing this!
I like Forge supporting SVD and Zero123 out of the box. Forge is still easy to use like A1111. ComfyUI is for advanced users and making reproducible workflows. The use case is a bit different.
I think some extensions would not work on Forge.
SD Forge, I am not going to touch – leave is as is, an wait for your tutorial on Zero123. Now I have to go back and read about SVD!
Thanks!
Stay tuned!
thanks for explaining this!