Instruct Pix2Pix is a Stable Diffusion model that edits images with the user’s text instruction alone. We will go through how it works, what it can do, how to run it on the web and AUTOMATIC1111, and how to use it.
Table of Contents
What can Instruct pix2pix do?
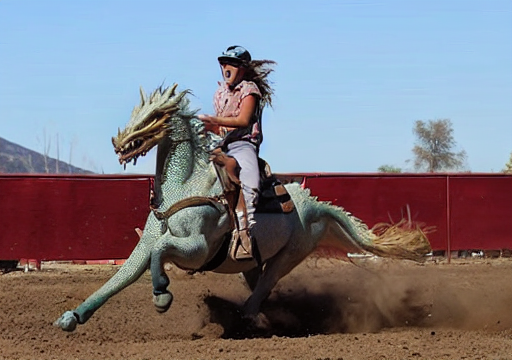
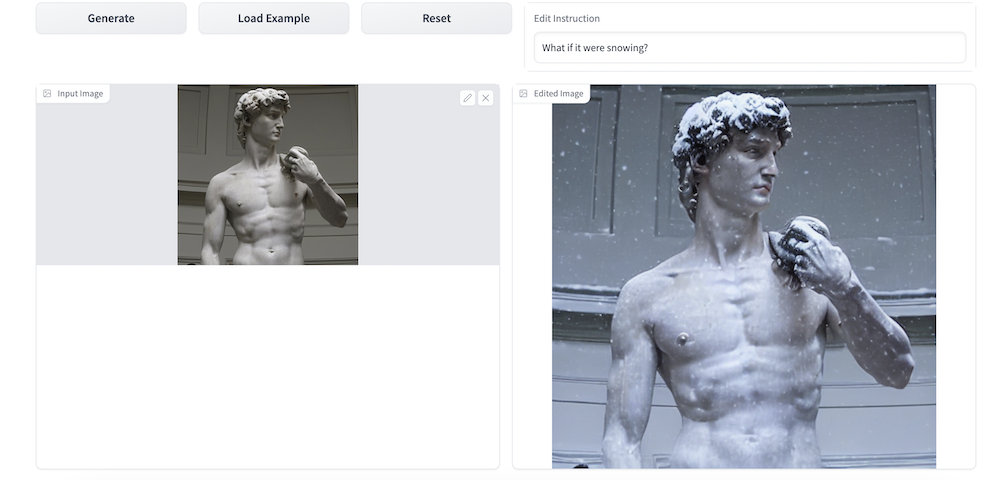
It’s an innovative way of editing photos just by telling it what you want to change. For example, let’s say we want to turn the horse into a dragon in the following image.
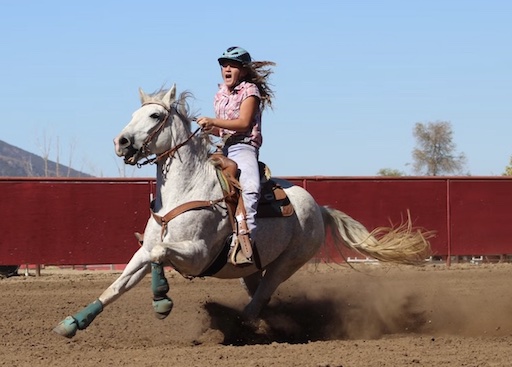
We can give this image to the model and say, “Turn the horse into a dragon.” The model will surgically change the horse into a dragon while keeping the rest of the image intact.
How does Instruct pix2pix work?
There are two parts to understanding how the model works: (1) model architecture and (2) training data.
Model Architecture
The Instruct pix2pix model is a Stable Diffusion model. Much like image-to-image, It first encodes the input image into the latent space.
The diffusion process was conditioned. Recall that Image-to-image has one conditioning, the text prompt, to steer the image generation. Instruct pix2pix has two conditionings: the text prompt and the input image. (Read the article “How does Stable Diffusion work?” if you need a refresher on the model architecture of Stable Diffusion.)
The diffusion is guided by the usual classifier-free guidance (CFG) mechanism. But since Instruct pix2pix model has two conditionings (prompt and image), it has two CFG parameters, one for the prompt and the other for the image. So you will see text CFG and Image CFG in AUTOMATIC1111 GUI, which I will show you how to use.
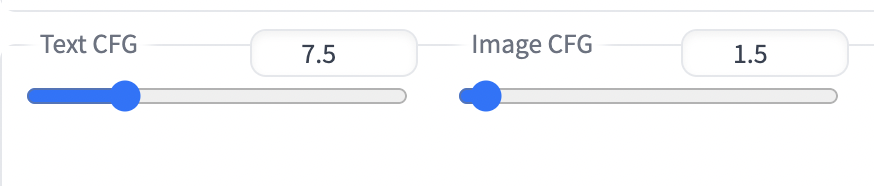
The meanings of these two knots are the same as in the vanilla Stable Diffusion: When the CFG value is low, the prompt or Image is largely ignored. When CFG values are high, the prompt or the image is closely followed.
Note that the effect is the opposite when you increase text CFG and image CFG: Increasing text CFG changes the image more; Increasing the image CFG changes the image less. These two values often need to be adjusted to dial in the effect.
Training
Now we’ve seen the model itself is a simple extension of the Stable Diffusion model with two conditionings (text prompt and image); how did they teach the model to understand editing instructions? I would say the real innovation in this work is the way they synthesized the training data.
The following diagram from the research paper summarizes it well.
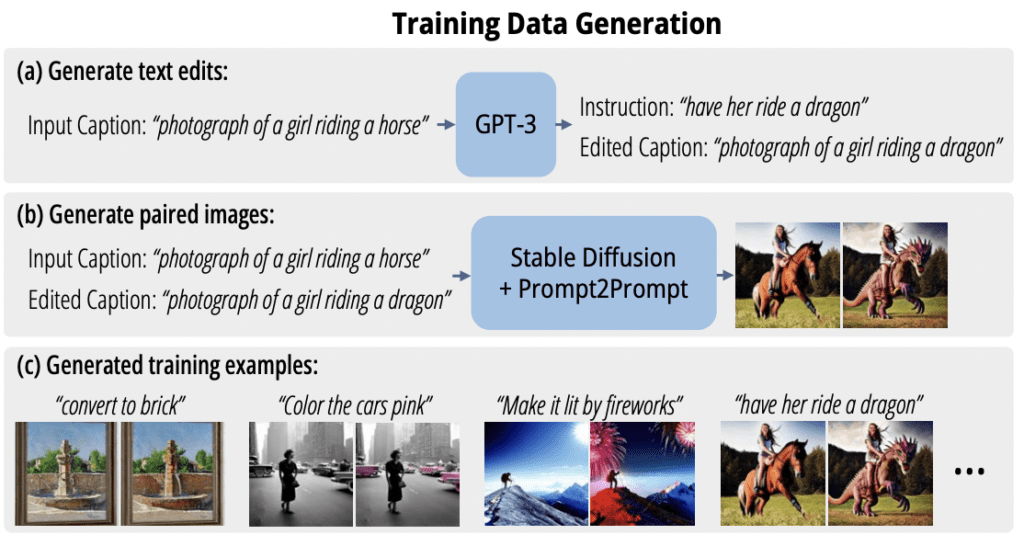
They first teach a specialized GPT-3 language model to produce an editing instruction and an edited caption from an input caption. Being a large language model behind technologies like ChatGPT, this task is a piece of cake. In the diagram, when you tell GPT-3 the caption “photograph of a girl riding a horse”, you get two messages back (1) instruction: “have her ride a dragon” and (2) edited caption: “photograph of a girl riding a dragon”.
The caption and edited caption pair are still just plain text. (They are the input and output of a language model, after all) We need to turn them into images. You might think you can use them as prompts for Stable Diffusion to get two images, but the problem is that they would not be very similar to photos before and after editing. The images on the left-hand side below (also from the research paper) illustrate this point.
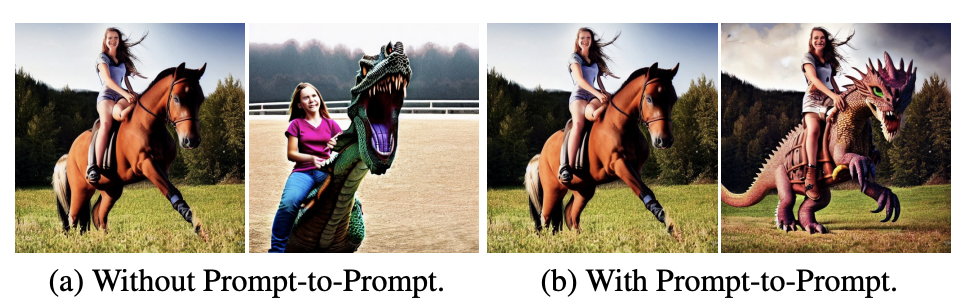
Instead, they used the Prompt-to-prompt model, a diffusion model for synthesizing similar images, to generate the images before and after the “edit.” Now they have the before picture (input), the editing instruction (input), and the after picture (output). They can feed them into the model as training examples.
Since this method of generating training data is totally synthetic, they can run it again and again to generate hundreds of thousands of training examples. This was precisely what they did. That’s why the model is so well-trained.
Difference from other methods
Prompt-to-prompt can generate similar images with specific edits, but all images are generated from text prompts. Unlike instruct pix2pix, it cannot edit a non-generated image.
Image-to-image (aka SDEdit) can use a non-generated image as the input, and you can edit the image using a different prompt. However, making a precise edit without changing other parts of the image is difficult.
Now you know how it works. Let’s learn how to run it.
Running Instruct pix2pix on web
Instruct pix2pix runs pretty fast (it is a Stable Diffusion model after all). There are several web options available if you don’t use AUTOMATIC1111.
HuggingFace
HuggingFace hosts a nice demo page for Instruct pix2pix. You can try out Instruct pix2pix for free. It is basically a simple version of the AUTOMATIC1111 interface. Many parameters we will talk about are available in this webpage.
Replicate
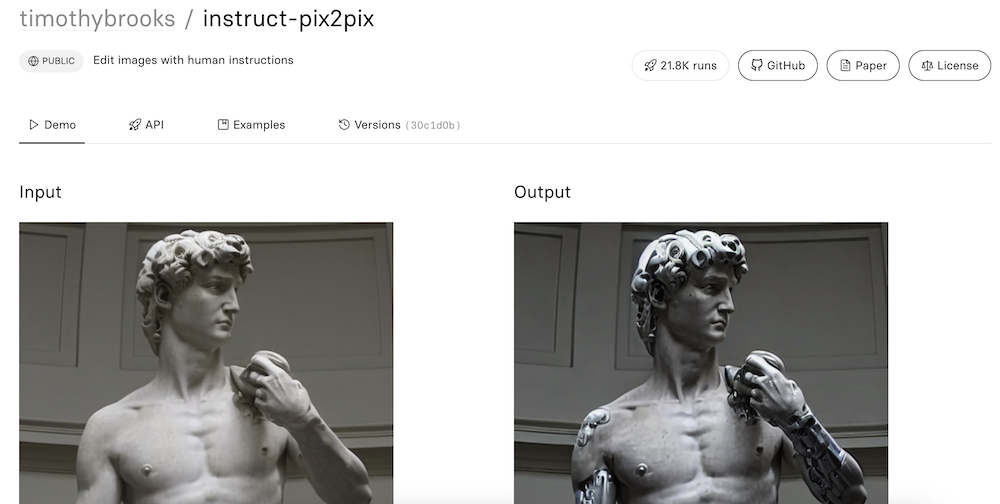
Replicate has a demo page for Instruct pix2pix. Quite an extensive list of parameters are available. Speed is pretty good too. Allow to generate up to 4 images at a time.
Install Instruct pix2pix in AUTOMATIC1111
We will go through how to install Instruct pix2pix in AUTOMATIC1111. The instructions are applicable to running on Google Colab, Windows and Mac.
If you use the 1-click Google Colab Notebook in the Quick Start Guide to launch AUTOMATIC1111, simply select instruct_pix2pix_model at startup.
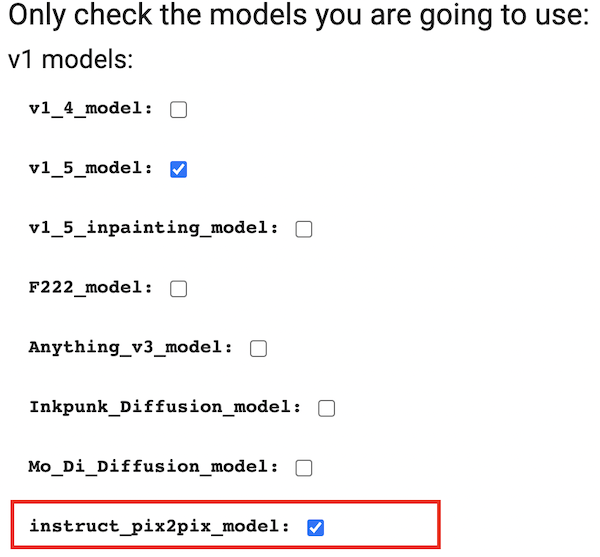
If you are running AUTOMATIC1111 on your own computer, the model can be downloaded from the Instruct pix2pix’s Hugging Face page. Use the following link to download Instruct pix2pix model directly.
Put the checkpoint file (7GB!!) in the following folder
stable-diffusion-webui/models/Stable-diffusionYou should see the new checkpoint file after refreshing the checkpoint dropdown menu.
Using Instruct-pix2pix in AUTOMATIC1111
To use Instruct Pix2Pix:
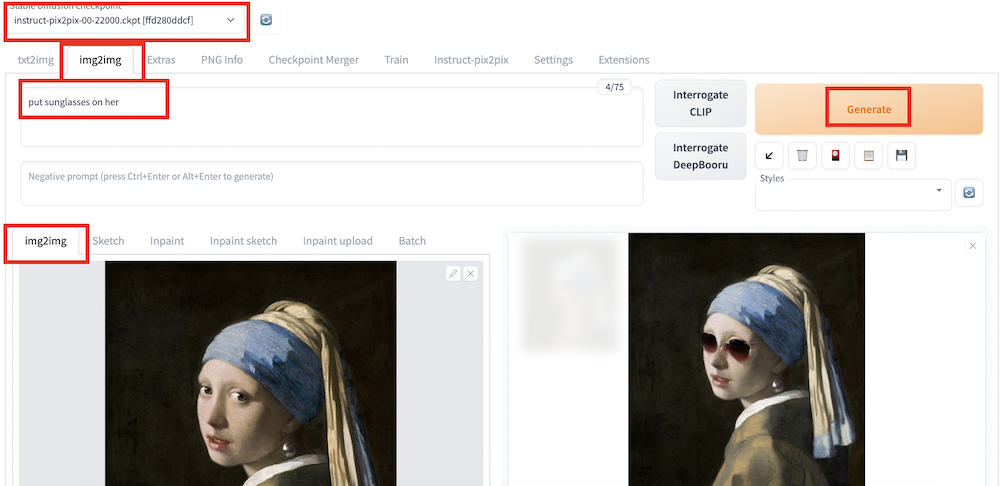
- Select the Instruct Pix2Pix model:
instruct-pix2pix-.....ckpt.
2. Switch to img2img tab.
3. Drag and drop an image to the Input Canvas of the img2img sub-tab. Use an image in PNG or JPG format. You can download a test image using the button below.
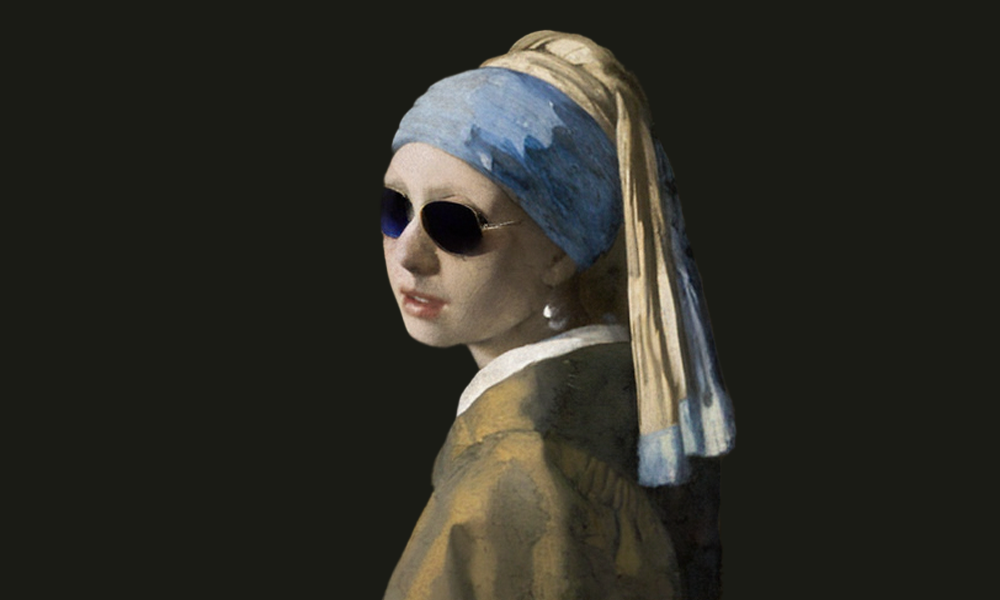
4. Type in the instructions in the prompt box. E.g.,
Put a sunglasses on her
5. Press Generate.
Parameters for Instruct pix2pix
Here are some important parameters you may need to change.
Output Batch: 4 – Edits could be very different each time. Make sure to generate at least a few at a time and pick the one that works.
Sampling steps: Works great between 20 to 30.
Seed: The edit will change with the seed value. Use -1 when you want to generate different edits. Use fix seed when dialing in the parameters (prompt, text CFG, and image CFG).
Text CFG: Same as CFG scale in text-to-image. Increase if you want the edit to adhere to the prompt. Decrease if you want it to follow less.
Image CFG: The image counterpart of text CFG. Increase if you reduce the amount of edit. Decrease if you want it to be edited more.
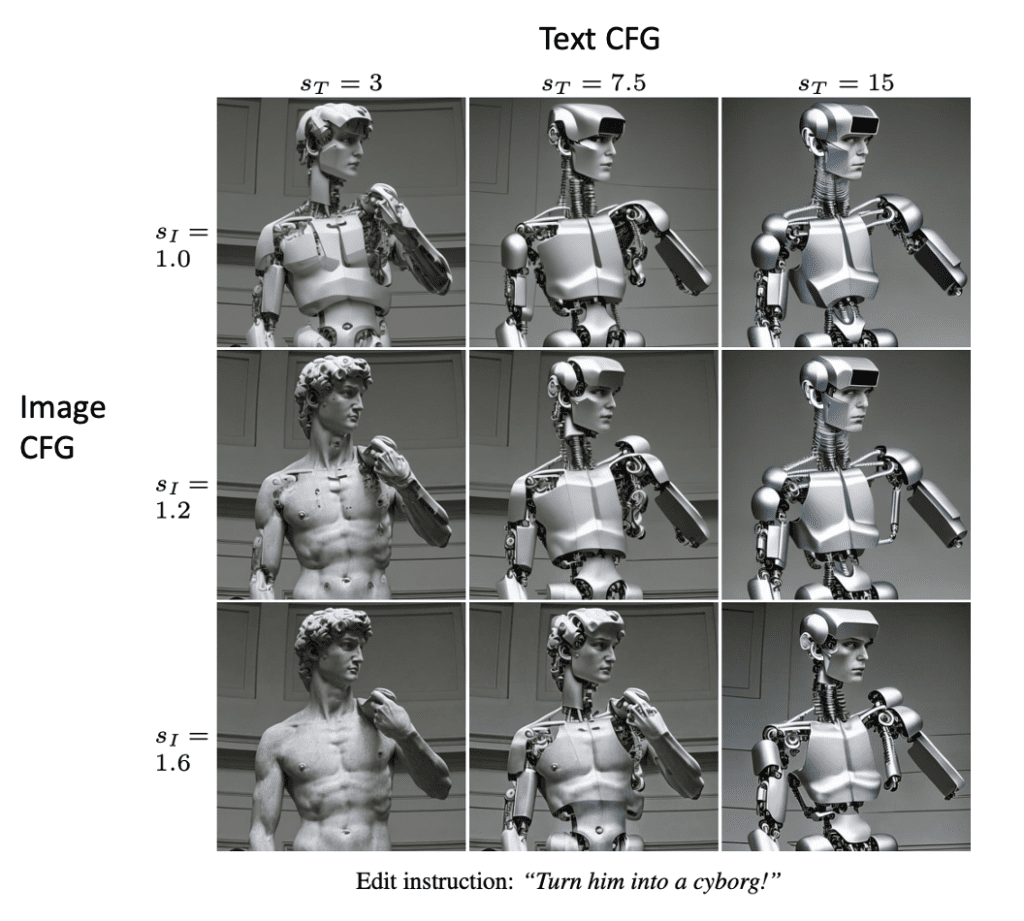
Below is an image matrix (from the research paper) showing the effect of changing Text CFG and Image CFG. Look at the last column: High text CFG value makes the model follow the instruction. Now look at the last row: High image CFG value recovers the original image or reduce the edit.
The GUI also allows you to process a batch of images. But from my experience, you really want to tweak the parameters one image at a time.
Some ideas to use instruct pix2pix
Photo Editing
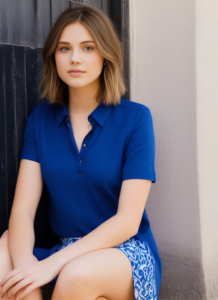
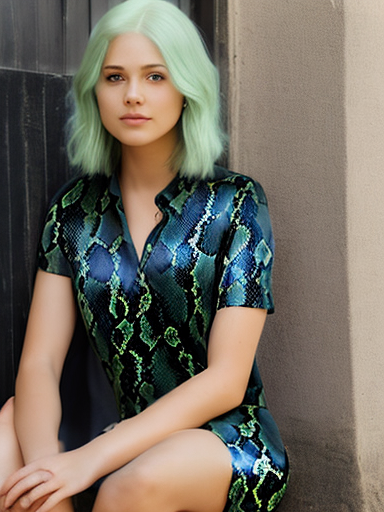
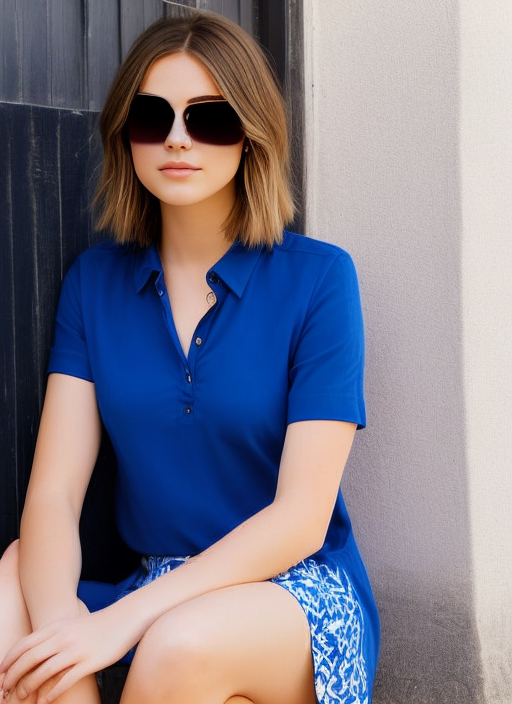
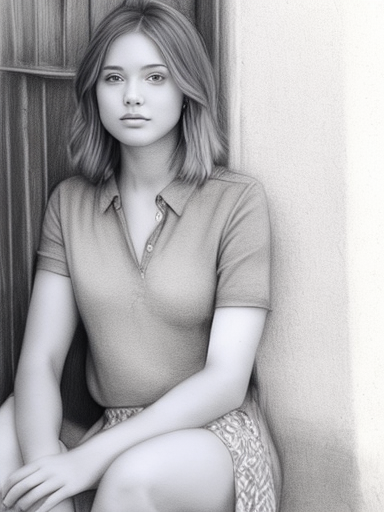
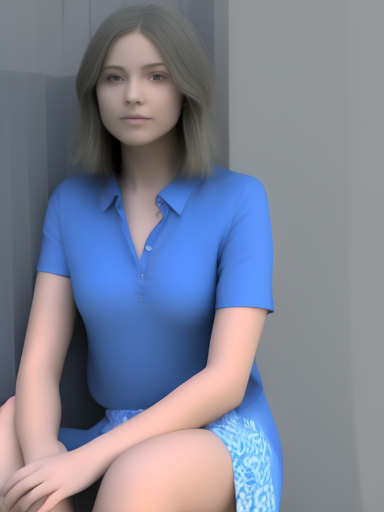
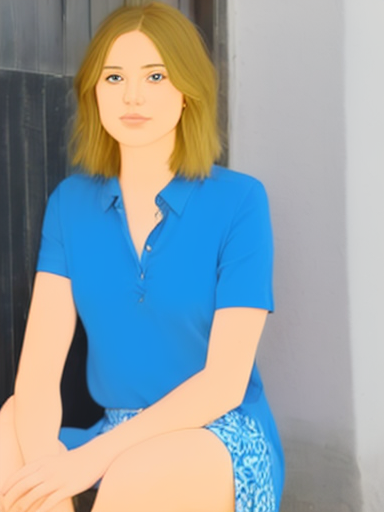
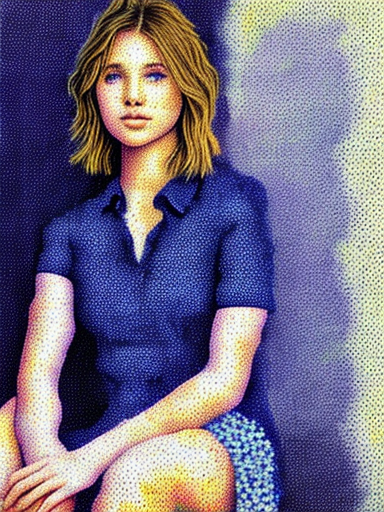
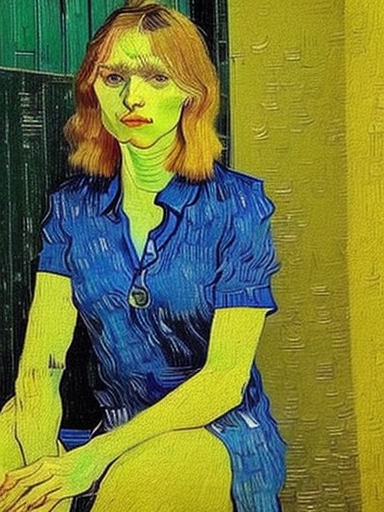
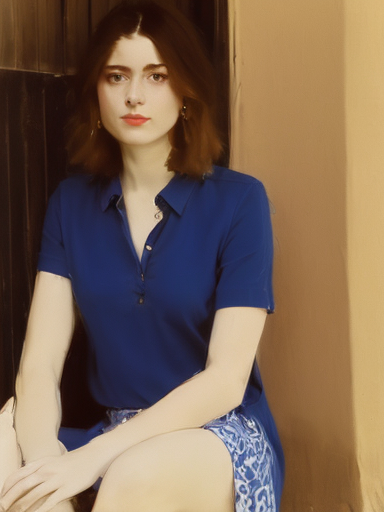
Instruct pix2pix was trained to edit photos, and it performs pretty well. I will use a photo of a friend I met in the latent space.
Here are a few examples of photo editing.
Unintended changes
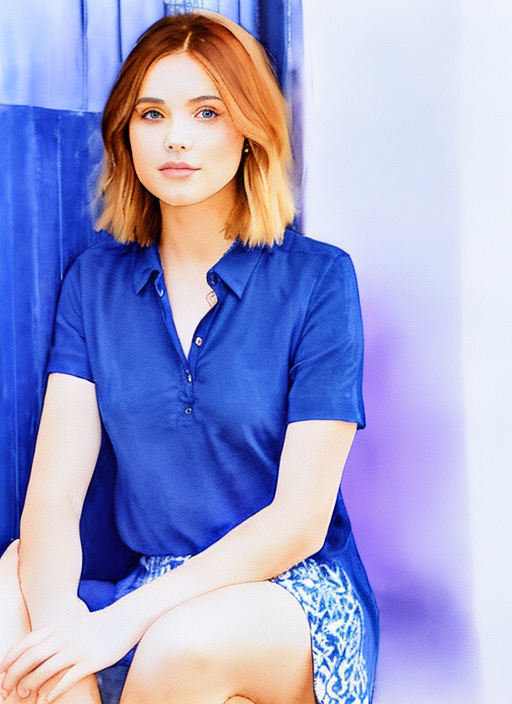
Some edits, especially those related to colors could have a bleeding effect. For example, changing the woman’s cloth to white also whiten the background.
I also see some unintended edits. When changing the woman’s cloth to snake, her hair color also changes.
Overall, the unintended changes are still aesthetically pleasing. (This is Stable Diffusion trained for afterall) In applications that these changes are unacceptable, we can always use a mask to limit the area of changes.
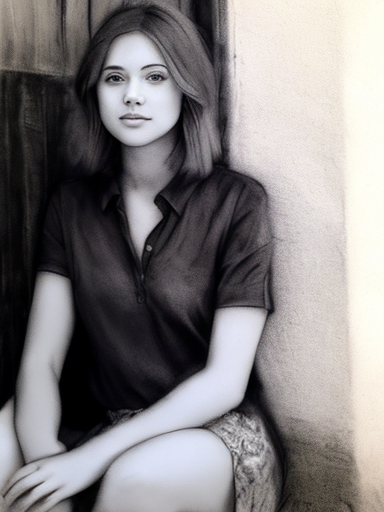
Stylize photos
Instruct pix2pix stylizes photo better than image-to-image and using models. This is because it preserve the original content very well after the edit. You will see the woman still looks like the original person after applying the style.
To stylize a photo, you can use the following prompt and fill in the style you like.
Change to _______ style
You can cite a style name. Here are some examples.
Change to [style_name] style
You can also cite an artist name.
Change to [artist_name] style.

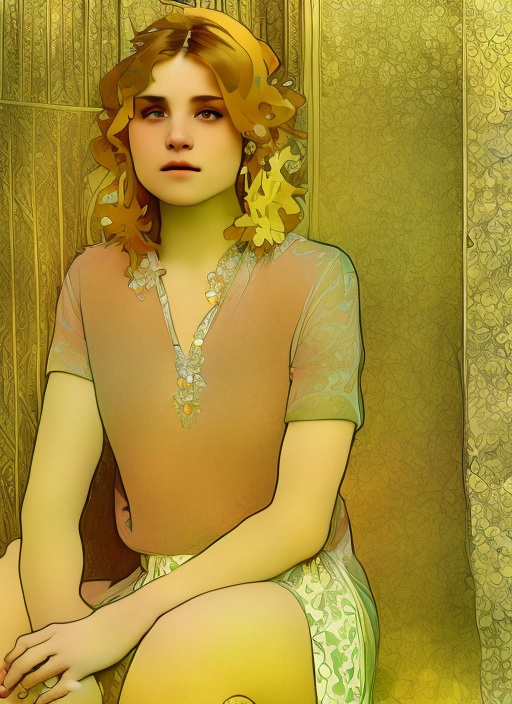
Instruct pix2pix is now my go-to-method for stylizing images.
There’s a nice catalog of examples in the model page.
Instruction templates
Below is a list of instruction templates you can use to get you started.
- Change the Style to (an artist or style name)
- Have her/him (doing something)
- Make her/him look like (an object or person)
- Turn the (something in the photo) into a (new object)
- Add a (object)
- Add a (object) on (something in the photo)
- Replace the (object) with (another object)
- Put them in (a scene or background)
- Make it (a place, background or weather)
- Apply (a emotion or something on a person)
Does this ip2p model work on comfyUI ?
I tried a few ways but couldn’t find a suitable workflow
Hi! i downloaded an image from internet of a man with sunglasses and i want to take the sunglasses off with pix2pix, however it is not working.
it generates various images with slight changes but it never removes the sunglasses.
Am i doing something wrong or its too hard for the ia to do that?
I tried and didn’t work for me either. I guess it is the limitation of the model.
Hi there, I can’t see the installation option from the load from extension tab, hai it been removed?
Hi, A1111 now has native support of instruct p2p. You don’t need to install the extension.
All you need to do is to go to img2img page and select the model.
i have also the problem, that the .ckpt is in the model-dropdown and “instruct-pix2pix” (Tue Jan 31 19:42:28 2023) is checked in the extensions, but the tab in the web-ui is not there? what can i do? everything is up2date:
git pull = Already up to Date
Pyhton 3.10.6
[+] xformers 0.0.17.dev476
[+] torch 1.13.1+cu117
[+] torchvision 0.14.1+cu117
[+] accelerate 0.18.0
[+] diffusers 0.14.0
[+] transformers 4.26.1
[+] bitsandbytes 0.35.4
You should not need to use an extension anymore. You simply need to select the model and use it on the img2img page.
Write instructions in prompt.
I ended up reinstalling the AUTOMATIC 1111 and yes it worked!
Thank youu
🙂
I have the ckpt file in models and i added the pix2pix extension but for some reason I didn’t get the new tab :/ tried to reset it, should i add something in the .bat file or something?
Hi, you may try:
(1) Restart the GUI
(2) Updating AUTOMATIC1111 GUI (Do a “git pull” in terminal )
go to web-ui dir, type cmd in path, git pull, also update python to 3.10 and torch to 1.13 for better results