Using the standard Flux checkpoint for inpainting is not ideal. You must carefully adjust the denoising strength. Setting it too high causes inconsistency, and setting it too low does not change anything. The real bummer in this intermediate denoising strength is that the new content won’t deviate too much from the original color.
In this post, I will introduce a workflow using the Flux.1 Fill model which overcomes these limitations.
Table of Contents
Software
We will use ComfyUI, a free AI image and video generator. You can use it on Windows, Mac, or Google Colab.
Think Diffusion provides an online ComfyUI service. They offer an extra 20% credit to our readers.
Read the ComfyUI beginner’s guide if you are new to ComfyUI. See the Quick Start Guide if you are new to AI images and videos.
Take the ComfyUI course to learn how to use ComfyUI step by step.
What is the Flux Fill model?
Model
The Flux.1 Fill model is an inpainting model. It is trained to fill in missing content while maintaining maximum consistency with the rest of the image.
The Flux.1 Dev Fill model is a fast version of the Flux.1 Pro Fill model. It is sped up using guidance distillation and denoises without classifier-free guidance (CFG). The result is a twofold speedup with a slight degradation in quality.
License
The Flux.1 Dev Fill model is under the same non-commercial Flux.1 Dev license. You can use the images generated by the model for commercial purposes.
VRAM requirement
This model is memory-hungry. You need an NVidia card with 24 GB VRAM to run this workflow.
Inpainting using Flux vs Flux Fill model
The benefits of using the Flux Fill model for inpainting are:
- The maximum denoising strength (1) can be used while maintaining consistency with the image outside the inpaint mask.
- The new content can be in different colors from the original content (because you use a denoising strength of 1).
Step-by-step guide
Step 0: Update ComfyUI
Before loading the workflow, make sure your ComfyUI is up to date. The easiest way to do this is to use ComfyUI Manager.
Click the Manager button on the top toolbar.

Select Update ComfyUI.
Restart ComfyUI.
Step 1: Download the fill diffusion model
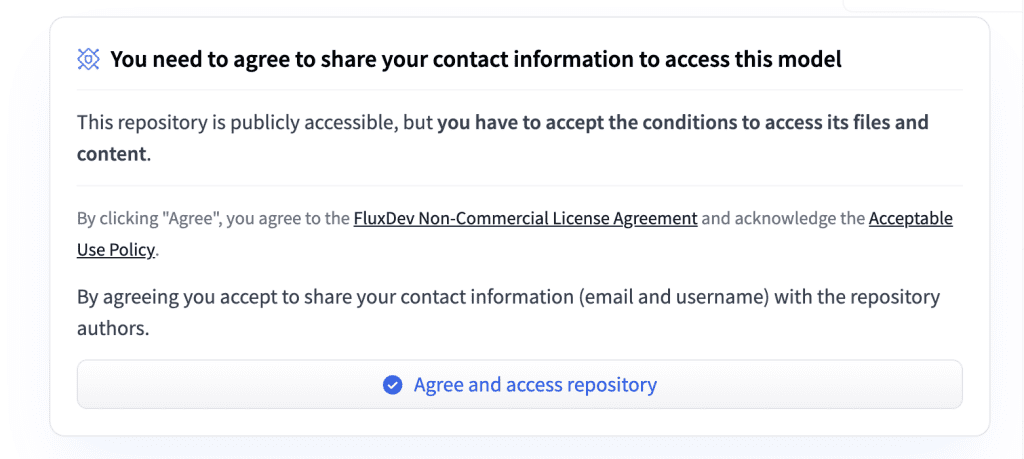
Visit the Flux.1 Fill model page and click “Agree and access repository.”
Download the Flux.1 Dev fill model and save it to the ComfyUI > models > diffusion_models folder.
(If you use Google Colab: AI_PICS > models > diffusion_models)
Step 2: Download the CLIP models
Download the following two CLIP models, and put them in ComfyUI > models > clip.
(If you use Google Colab: AI_PICS > models > clip)
Step 3: Download the Flux VAE
Download the Flux VAE model file. Put it in ComfyUI > models > vae.
Step 4: Load the workflow
Download the workflow JSON file below and drop it to ComfyUI.
Step 5: Load image
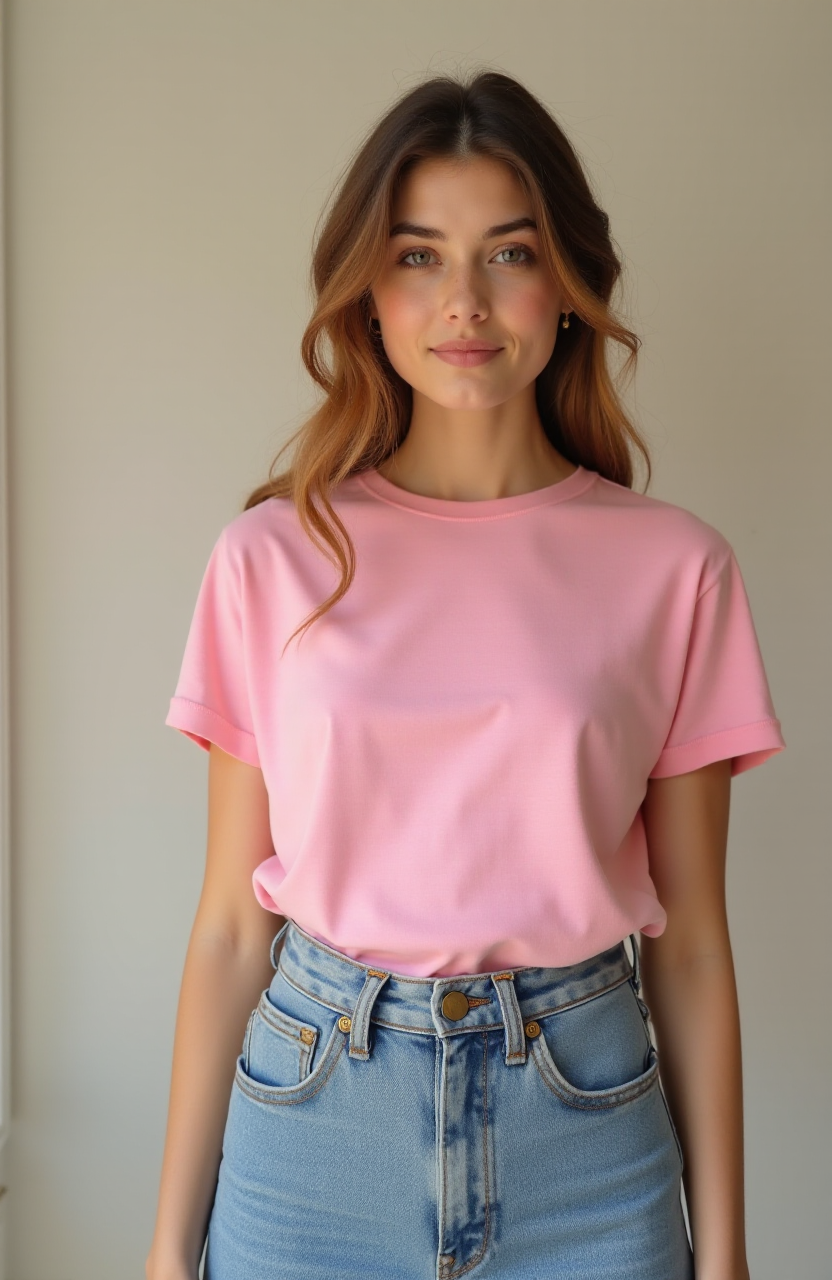
Load the image you want to inpaint in the Load Image node.

You can download the test image below.
Step 6: Create an inpaint mask
Right-click the image to show the context menu. Select Open in MaskEditor.
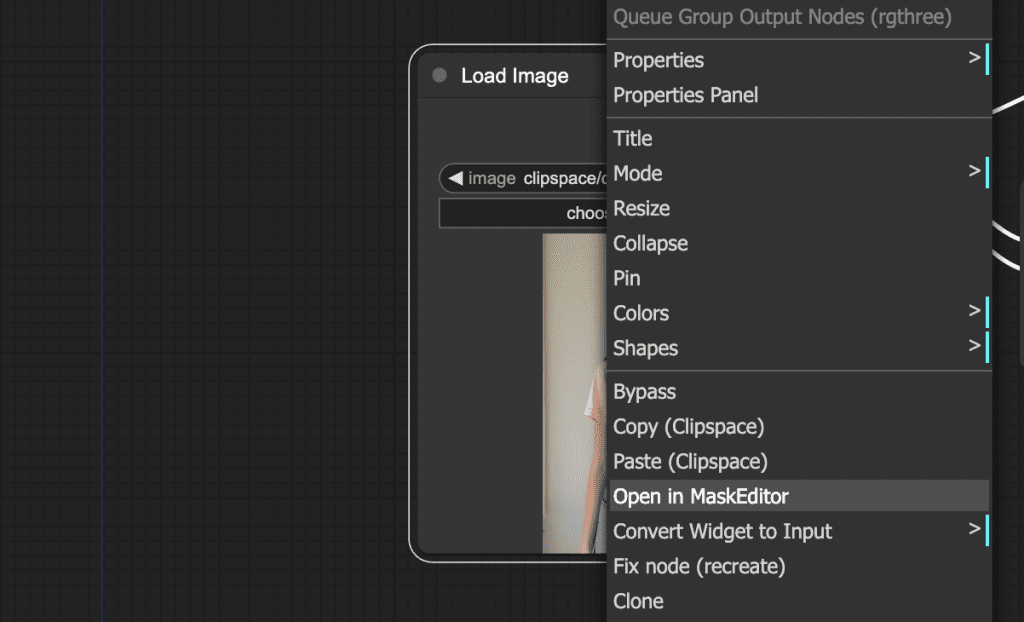
Create a mask and click Save to node.
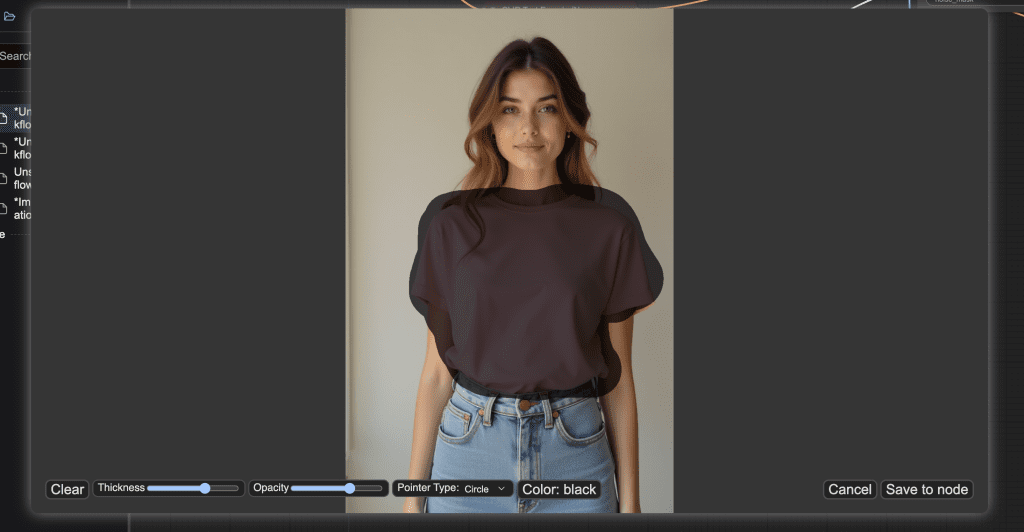
Now, you should see the mask in the node.

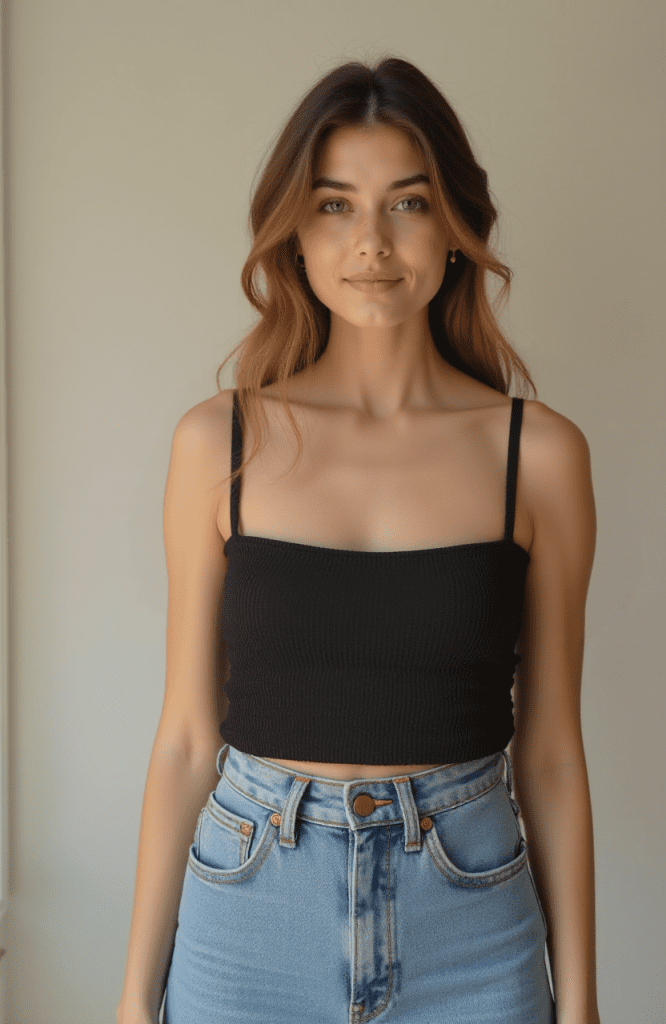
Step 7: Enter a prompt
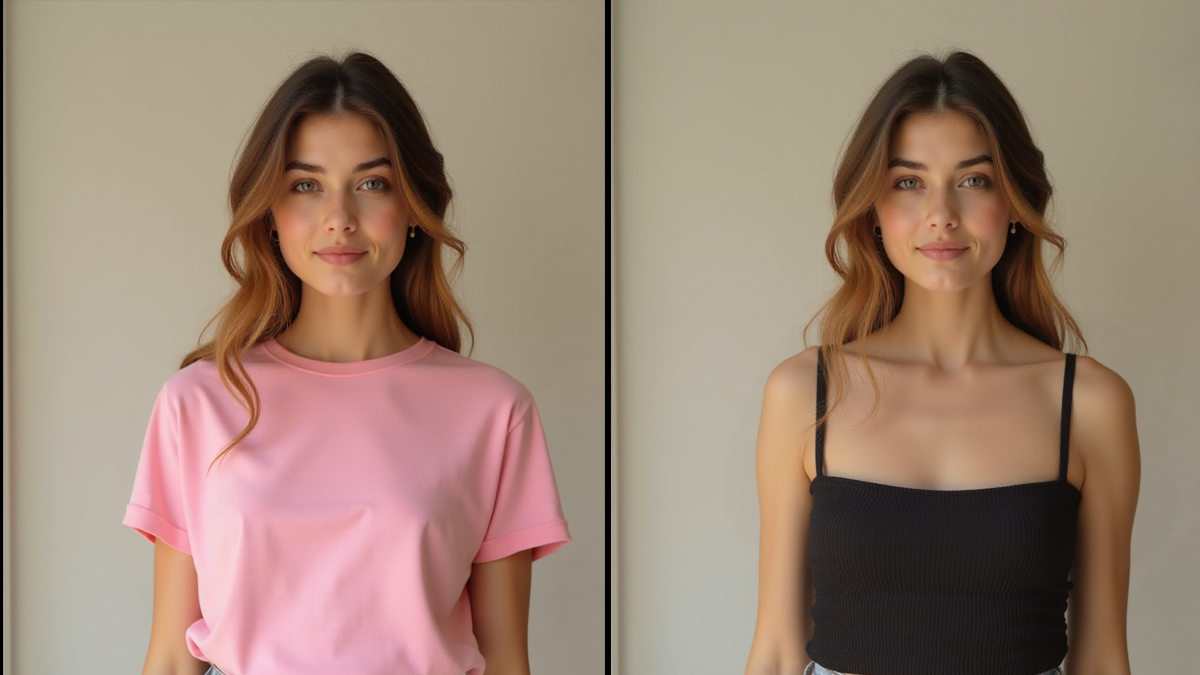
Enter a prompt to describe the changed image. I want to change her to wear a top. So I write:
photo of woamn in a black top
Step 8: Generate the new image
Click Queue to start inpainting. Now, she wears a top.
Notes
If it doesn’t generate what you describe, try changing the seed in the KSampler node.
Thanks Andrew, another tutorial that works as advertised – It works even better if the typo in the prompt says “woman” instead of “woamn” 😉
Ops! thanks for spotting it!
It technically works on my 2080 Super, but the problem is, the masked area in the output always has exaggerated colours and is really blotchy. I can tell it knows what I want it to do because it’ll turn black hair into blond hair, or a black top to a pink top, but it never actually blends in. I’ll link two screenshots of my workflow, I’m not sure if I’m doing something wrong here.
https://imgur.com/a/nJbnt3z
I meant to say 4080 Super
It was hit or miss in my experience. Sometimes using a new seed helps. Other times redrawing a more regular-shaped mask helps.
I just tried it at it works on 4060 TI 16GB ! I have a question – how we can make it proceed just with masked area but not the whole image ? Similar to Automatic1111 “Only masked” . Thanks !
The inpaint crop node should work. https://github.com/lquesada/ComfyUI-Inpaint-CropAndStitch
Can you share a working workflow for Flux with it please ?
Hello,
Does it work with Forge ?
Thanks for your work
No. At least not yet.
I am using the Q8 gguf version of flux fill. Running with clip_l and t5xxl_fp16. I am seeing quite a few artifacts around the outline of the area I masked. Any idea how to fix this? Is this normal? You can see two examples at https://aiimagecentral.com/thumbnails/Requested/L4MFR65P.jpg and https://aiimagecentral.com/thumbnails/Requested/LH2C2KR4.jpg
I’m also using the GGUF version, and I haven’t noticed the error you mentioned. I’ll share my workflow if you still need it.
Hi do you know why quality is so bad when trying with furniture. It seams like it could only handle simple objects and not like more comple composition? Btw is there a way to get in contact with you?
It’s not bad in my experience. You can contact me using the Contact Us form accessible through the link at the bottom of the page.
Hi Andrew, I have downloaded the model to diffusion_models folder on my google drive, but when I load the workflow, the Load diffusion model node doesn’t see it….. I get only “null” in the list…. any idea what I am doing wrong please?
Hi, fixed.