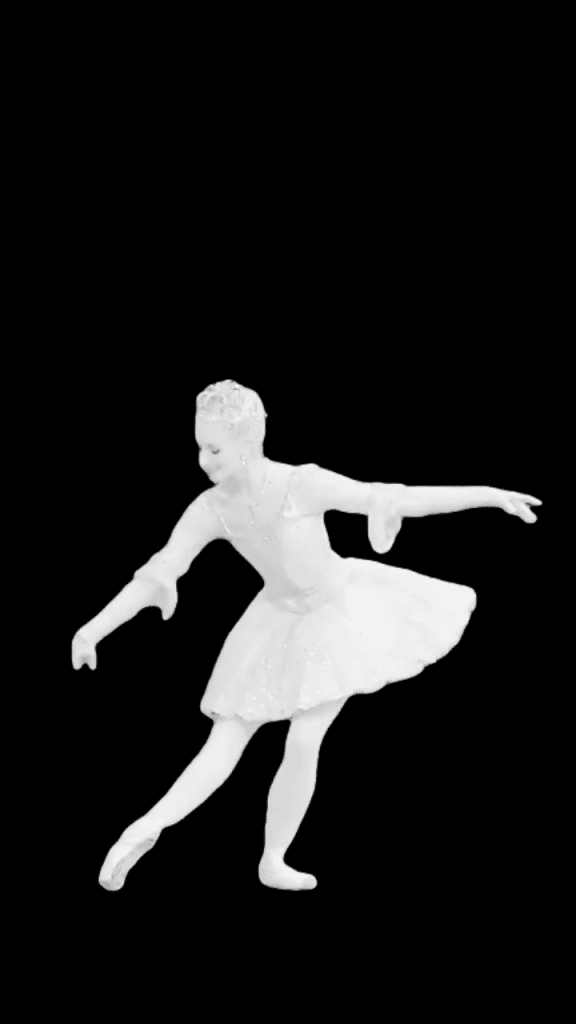
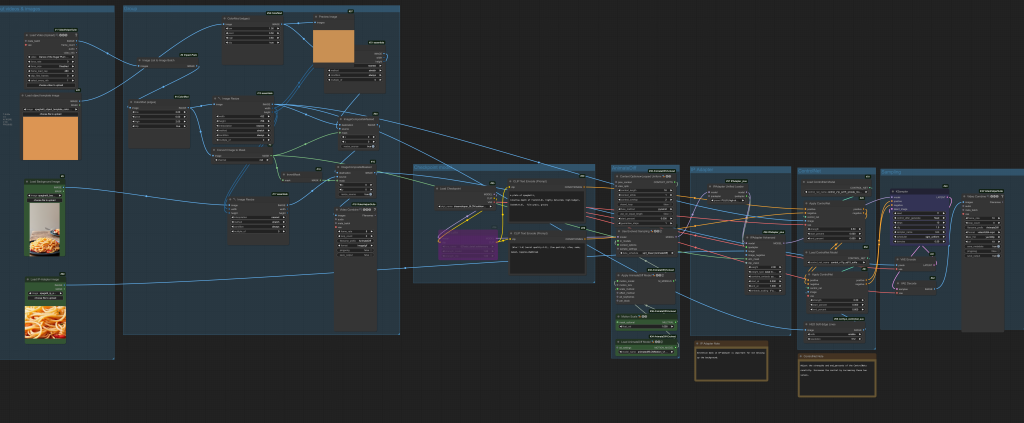
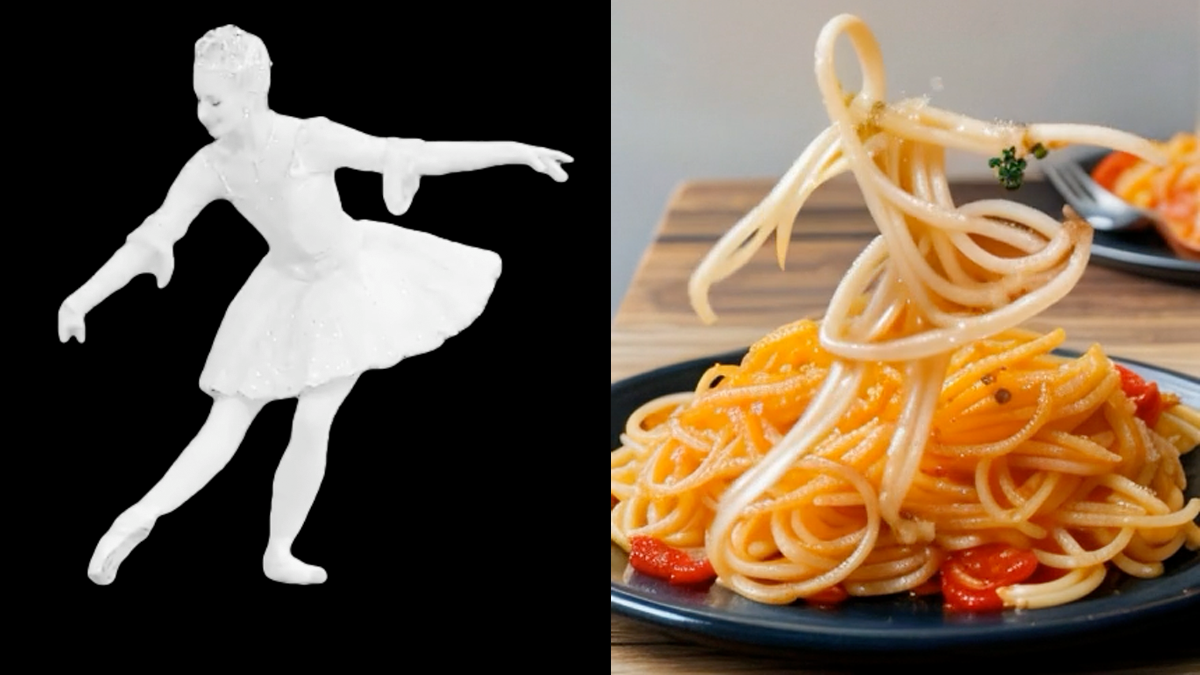
Do you have any artistic ideas for creating a dancing object? You can easily create and quickly create one using this ComfyUI workflow. This example workflow transform a dance video to a dancing spaghetti.
You must be a member of this site to download this workflow.
Table of Contents
Software
We will use ComfyUI, a free AI image and video generator. You can use it on Windows, Mac, or Google Colab.
Think Diffusion provides an online ComfyUI service. They offer an extra 20% credit to our readers.
Read the ComfyUI beginner’s guide if you are new to ComfyUI. See the Quick Start Guide if you are new to AI images and videos.
Take the ComfyUI course to learn how to use ComfyUI step by step.
How this workflow works
Similar workflows out there may use two sampling passes, which is unnecessary. I will show you how to use a single sampling pass to achieve the same result.
The input video has a white subject and a black background. You can create such a video with the Depth Preprocessor.

The next step is to superimpose the video on a static background like the preview below. This is done by using the ImageCompositeMasked node, with some gynastics in converting the video to an inverted mask. The subject needs to be filled in with a color similar to the object you will generate.

The video is generated with AnimateDiff with image-to-image. I used an LCM checkpoint model to speed up the workflow. It only takes 10 sampling steps per frame.
- IP-adapter is used to generate the dancing spaghetti using a reference image. It is only applied to the dancer with a mask.
- QR monster and soft edge ControlNets are used to maintain the shape of the dancing object.

Step-by-step guide
Step 0: Update ComfyUI
This workflow does not require any custom nodes. But before loading the workflow, make sure your ComfyUI is up-to-date. The easiest way to do this is to use ComfyUI Manager.
Click the Manager button on the top toolbar.

Select Update All to update ComfyUI and all custom nodes.
Restart ComfyUI.
Step 1: Load the ComfyUI workflow
Download the workflow JSON file below. Log in and download the workflow below.
Drag and drop it to ComfyUI to load.

Step 2: Install missing custom nodes
This workflow uses many custom nodes. If you see some red blocks after loading the workflow, you will need to install the missing custom nodes.
Click the Manager button on the top toolbar. Select Install Missing Custom Nodes.
Restart ComfyUI.
Step 3: Download models
Checkpoint model
This workflow uses the DreamShaper 8 LCM model for fast processing.
Download the DreamShaper 8 LCM model. Put it in ComfyUI > models > checkpoints.
Refresh (press r) and select the model in the Load Checkpoint node.

IP adapter
This workflow uses an image prompt to generate the dancing spaghetti.
Download the SD 1.5 IP adapter Plus model. Put it in ComfyUI > models > ipadapter.
Download the SD 1.5 CLIP vision model. Put it in ComfyUI > models > clip_vision. You may want to rename it to CLIP-ViT-H-14-laion2B-s32B-b79K.safetensors to conform to the custom node’s naming convention.
ControlNet
Download the Soft Edge ControlNet model. Put it in ComfyUI > models > controlnet.
Download the QR Monster ControlNet model. Put it in ComfyUI > models > controlnet.
Refresh (press r) and select the models in the Load Advanced ControlNet Model nodes.

AnimateDiff
Download the AnimateDiff LCM Motion model. Put it in ComfyUI > models > animatediff_models.
Refresh (press r) and select the model in the Load AnimateDiff Model node.

Step 4: Upload video
Download the video using the Download button below.
Drop it to the Load Video (Upload) node.

Step 5: Upload input images
Download the object template image below. Upload it to the Load object template image node.

Download the background image below, and upload it to the Load Background Image node.

Download the IP-adatper reference image below, and upload it to the Load IP-Adapter image node.

Step 6: Generate video
Press Queue Prompt to generate the video. This is the MP4 video:
Customization
Changing the dancing object
The dancing object is controlled by the prompt and the IP-adapter image. You will need to change both.


You will also need to change the object template image. You can use an image of a solid color similar to the dancing object.

You probably also want to background image.

You may need to adjust the following settings.
- Strength of the two ControlNets
- End_precent of the two ControlNets
- Weight of the IP-adapter
- End_at of the IP-adapter
Increase the IP-adapter values to make the object look like the IP-adapter reference image. Shoot for just enough to do a good job.
Increase the ControlNet values to have a more defined shape.
Video length
Adjust frame_load_cap value in Load Video (Upload) node to adjust the video length. Even experimenting settings, you can set it to 32 for fast iteration.

Seed
Change the seed value in the KSampler node to generate a different video. Changing the seed can sometimes remove artifacts.

Hi Andrew, Thanks for making this wonderful workflow. I’ve been experimenting with it and the creative possibilities are endless! I made a 14-second video of a horse made of birds galloping through a birch grove. I used a stock BW video of a horse galloping which I ran through After Effects and Premiere to get the movement I wanted. And I used an IPAdapter JPG made of multiple images of birds rendered in ComfyUI. Here’s the link if you want to view it: https://zafflower.com/Bird-Horse/
Zaffer
Nice!
Me too! Me Too! : )
Everything seems work perfectly, but when the stream arrive to the KSampler node, crash! The error message is: “Control type ControlNet may not support required features for sliding context window; use ControlNet nodes from Kosinkadink/ComfyUI-Advanced-ControlNet, or make sure ComfyUI-Advanced-ControlNet is updated.”
ComfyUI and all the custom nodes are updated.
Ok, found the solution (I’m stupid… If only I had read the error message, without running from the room in panic). As said here:
https://github.com/Kosinkadink/ComfyUI-AnimateDiff-Evolved/discussions/134
the “Load ControlNet Model” nodes must be replaced with the “Advanced” ones.
👍
После обновления ComfyUI другая ошибка KSampler
Control type ControlNet may not support required features for sliding context window; use ControlNet nodes from Kosinkadink/ComfyUI-Advanced-ControlNet, or make sure ComfyUI-Advanced-ControlNet is updated.
It seems that your ComfyUI is out of date. Try Manager > Update All.
It really helped. Everything works, a wonderful and original process. Thanks, Andrew!
Good evening. Unfortunately the process doesn’t work for me.
ColorModEdges
‘list’ object has no attribute ‘clone’