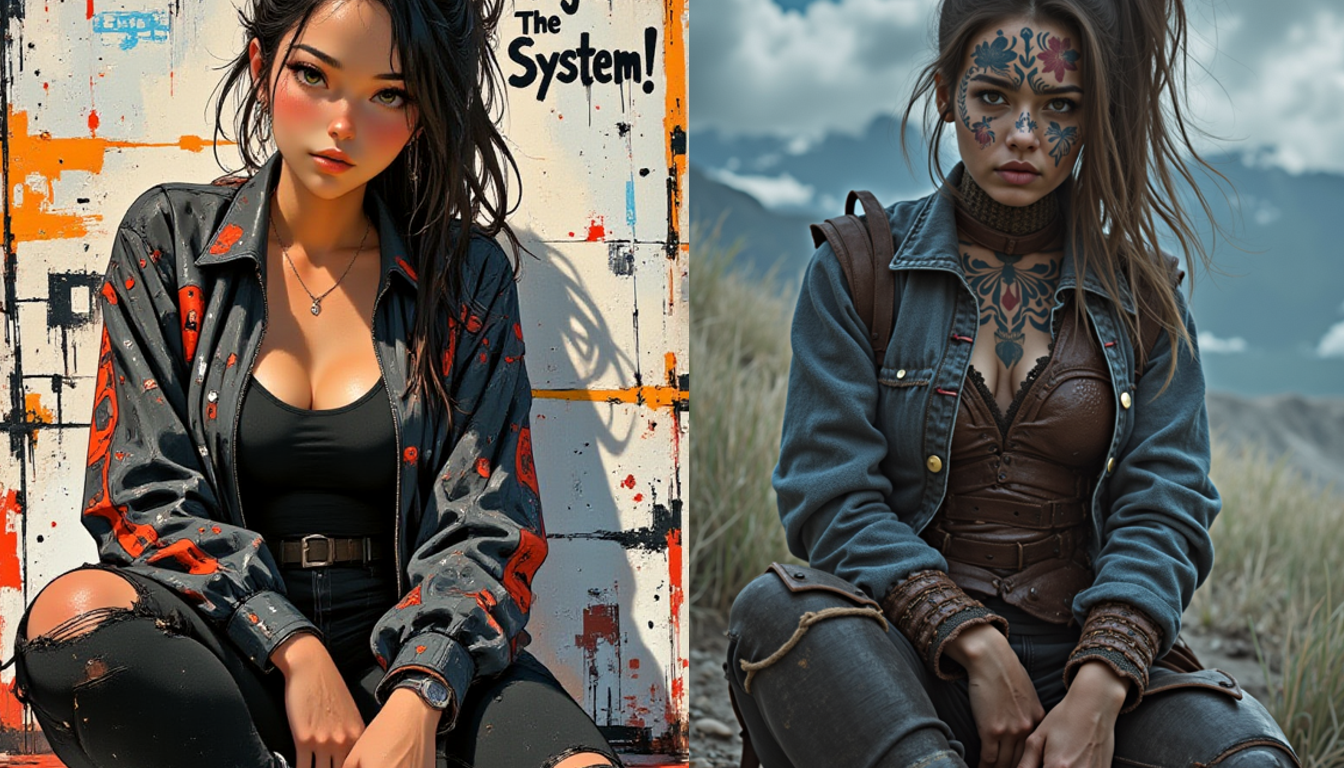
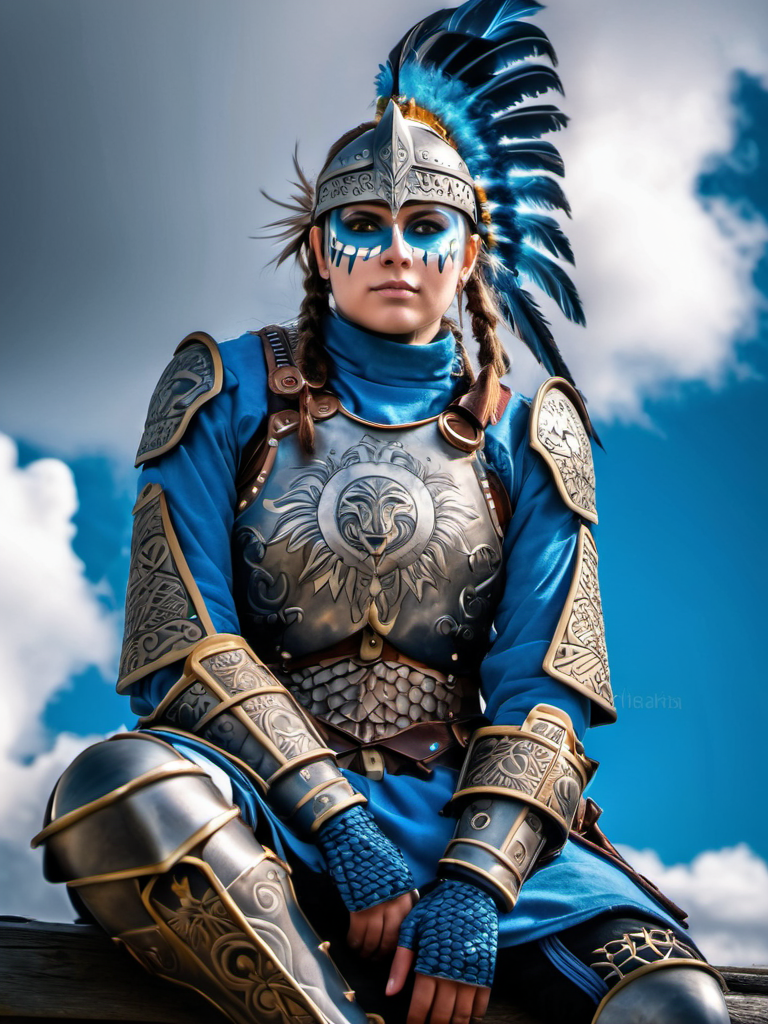
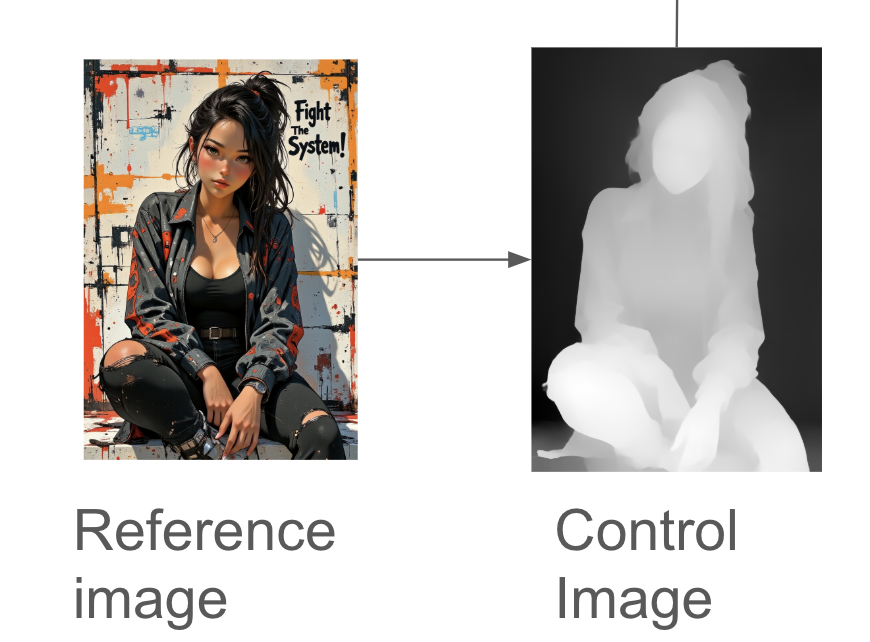
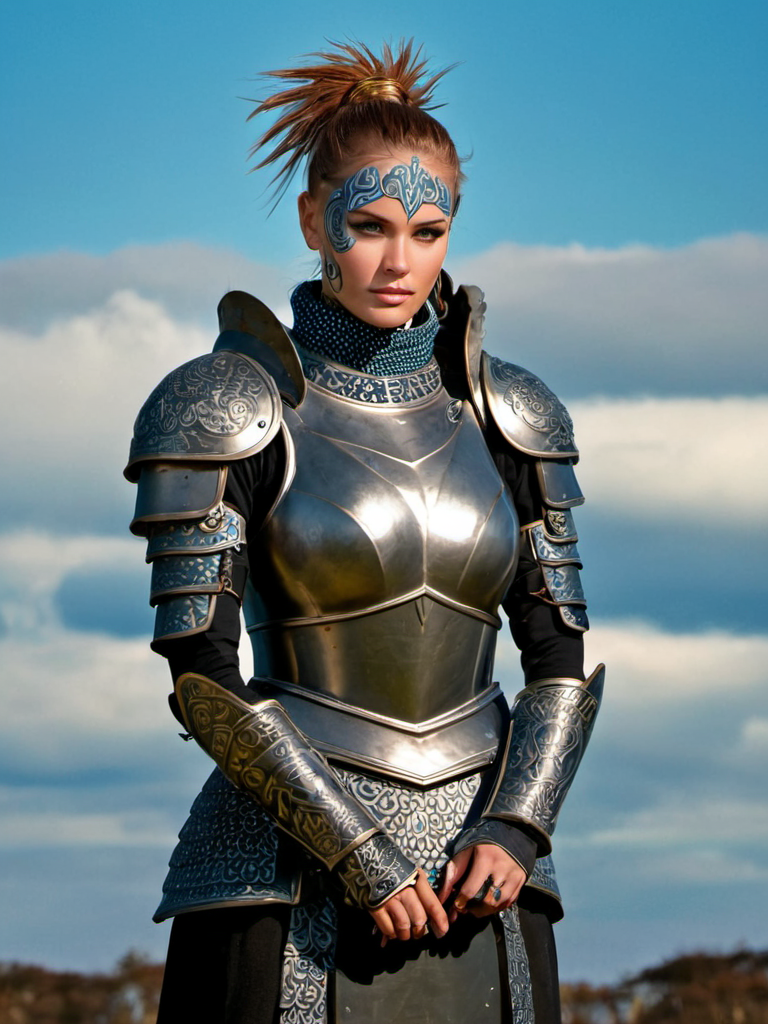
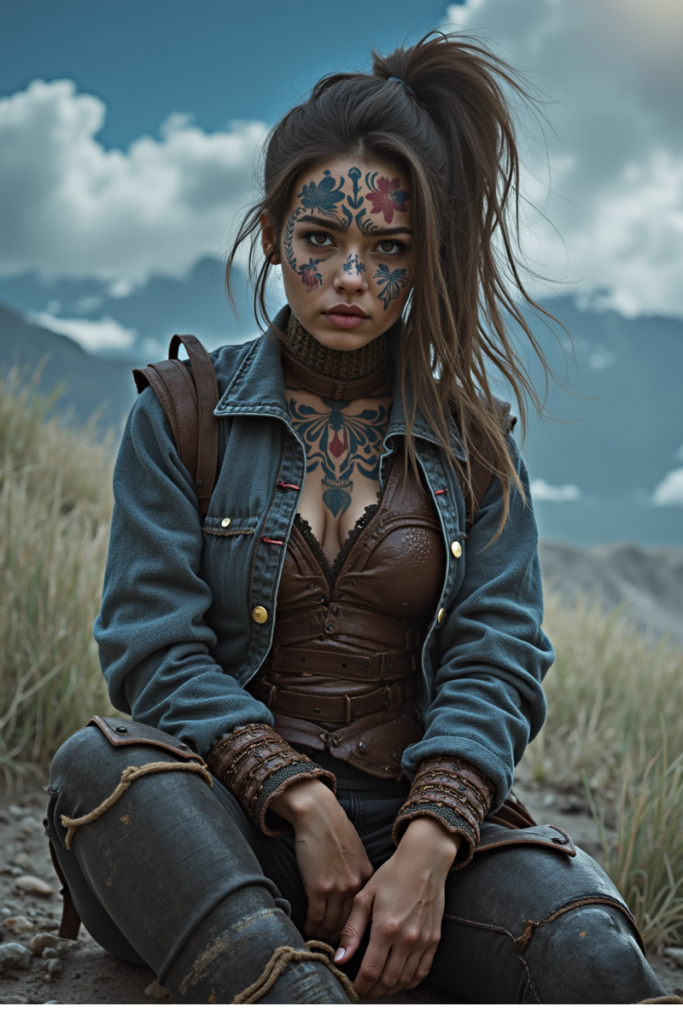
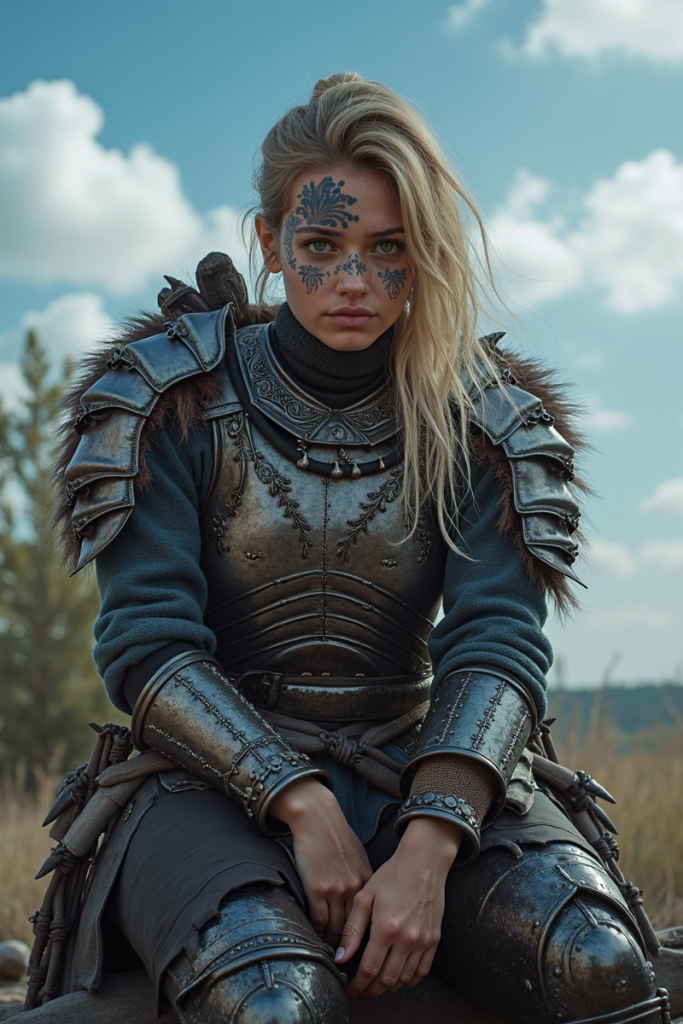
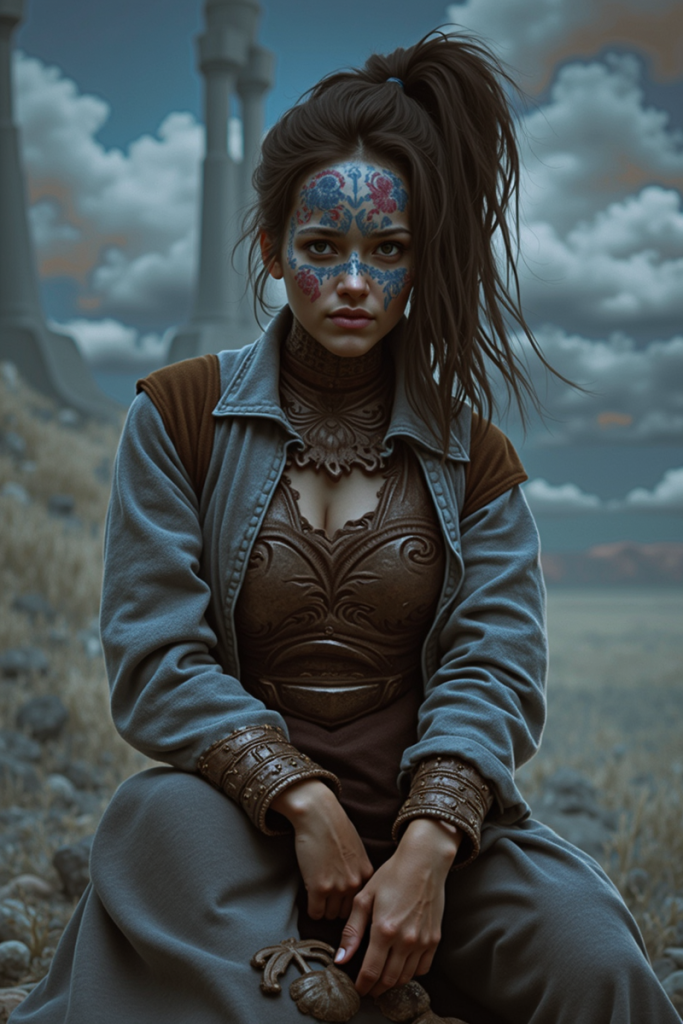
You can use a reference image to direct AI image generation using ControlNet. Below is an example of copying the pose of the girl on the left to generate a picture of a warrior on the right.
In this pose, I will go through:
- A brief overview of ControlNet
- ControlNet workflows for SD 1.5, SDXL, and Flux
- Settings for advanced controls
Table of Contents
Software
We will use ComfyUI, a free AI image and video generator. You can use it on Windows, Mac, or Google Colab.
Think Diffusion provides an online ComfyUI service. They offer an extra 20% credit to our readers.
Read the ComfyUI beginner’s guide if you are new to ComfyUI. See the Quick Start Guide if you are new to AI images and videos.
Take the ComfyUI course to learn how to use ComfyUI step by step.
What is ControlNet?
Using ControlNet in ComfyUI requires a solid understanding of how the AI models work. So I will give a brief overview here. Feel free to skip to the next section if you already know how ControlNet works.
Conditioning
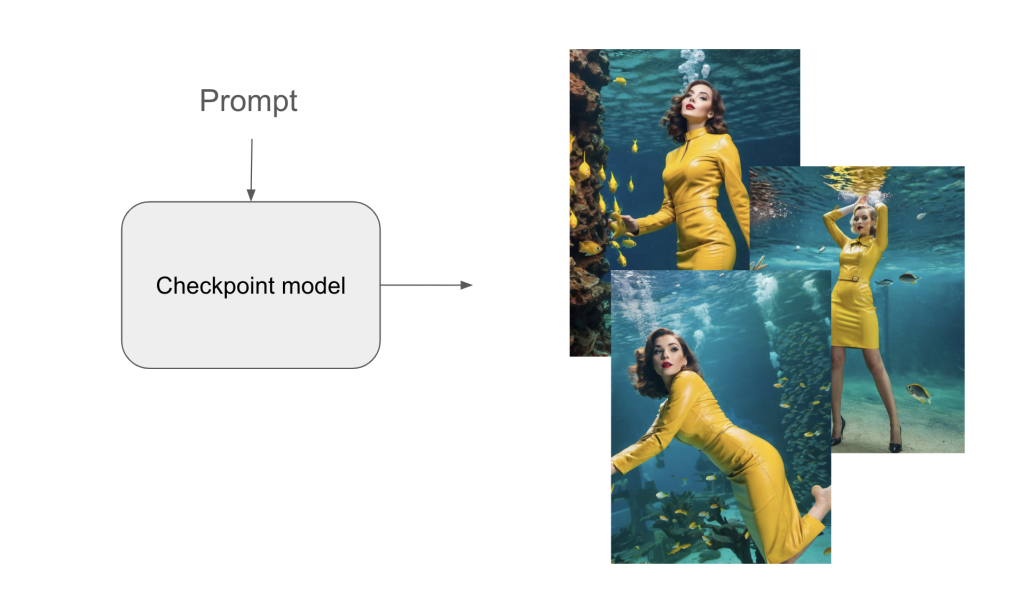
In text-to-image, the prompt conditions the checkpoint model to create images that match the prompt. In the example below, the pose is diverse because there are many options to match the prompt.
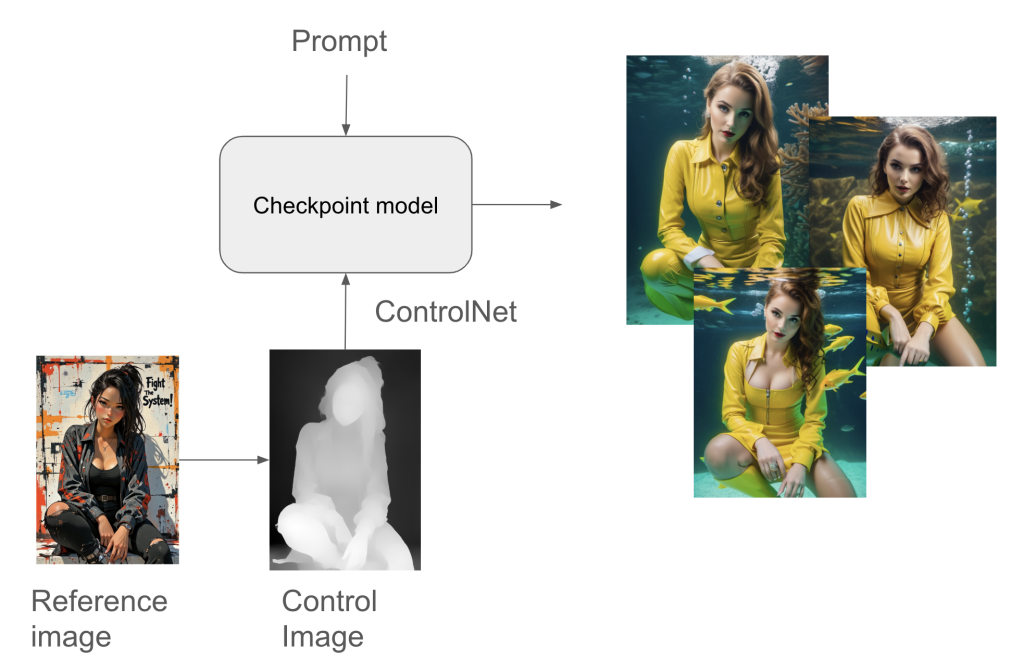
However, you may only want a specific pose. When using ControlNet, both the prompt and the control image condition the checkpoint model. All images follow the pose in the reference image.
Preprocessor
Notice the ghost image between the reference image and ControlNet?
ControlNets cannot use the reference image directly. A preprocessor converts the reference image into a control image that a ControlNet can use.
Different ControlNets require different preprocessors.
- The Openpose ControlNet requires the Openpose preprocessor.
- The Canny ControlNet requires the Canny preprocessor.
Let’s compare the depth (left) and OpenPose (right) control images below. The ControlNet models use them to steer the image generation.
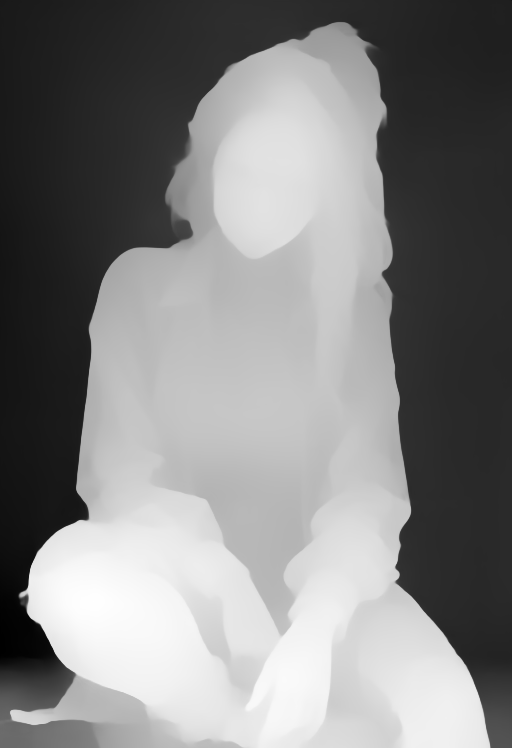
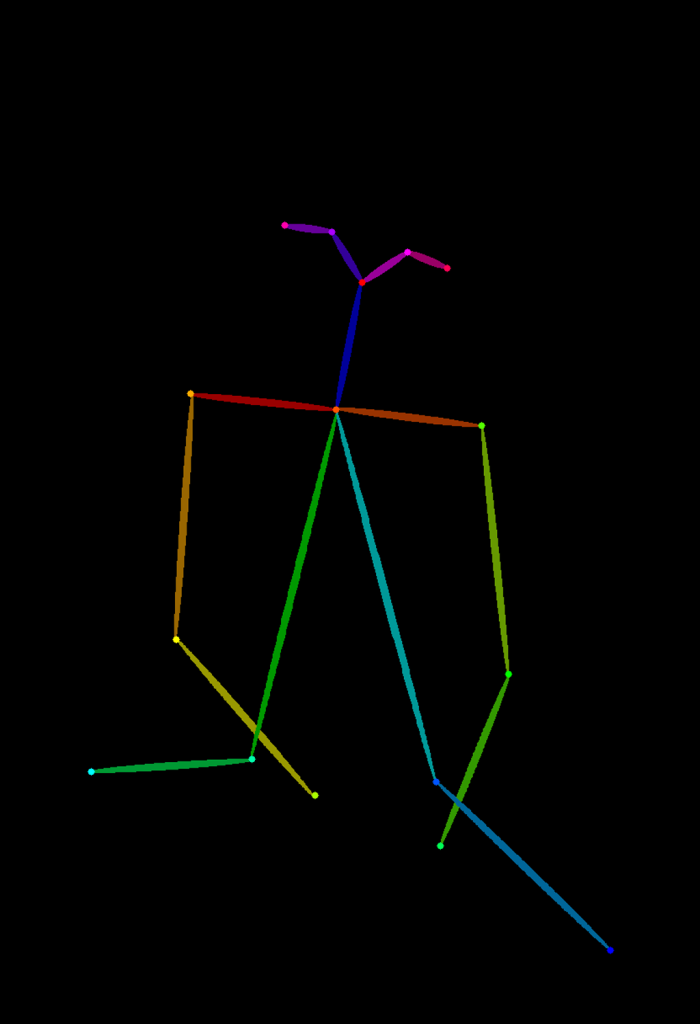
What’s the difference? Depth ControlNet imposes constraints using the Depth control image. The general outline of the girl is followed. The Openpose ControlNet only directs the human pose – How the character stands, how her limbs are placed, etc.
ComfyUI ControlNet workflows
In this section, I will share the versatile ControlNet Depth workflows for copying characters and scenes. You will need to use different workflows for SD 1.5, SDXL, and the Flux image models.
ControlNet SD 1.5
The workflow uses a Stable Diffusion 1.5 model with ControlNet.
Step 1: Load the workflow
Download the workflow below.
Drag and drop it to ComfyUI.
Step 2: Install models
- Download the Juggernaunt Reborn model. Put it in the ComfyUI > models > checkpoints folder.
- Download the ControlNet depth control_v11f1p_sd15_depth.pth model. Put it in ComfyUI > models > controlnet folder.
Step 3: Install missing nodes
If you see nodes with red borders, you don’t have the custom nodes required for this workflow. You should have ComfyUI Manager installed before performing this step.
Click Manager > Install Missing Custom Nodes.
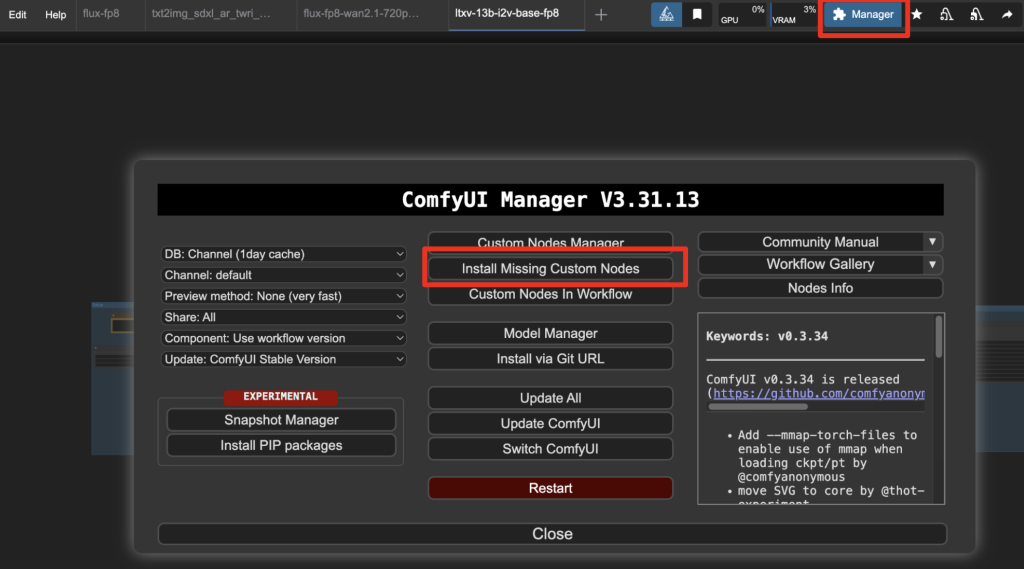
Install the nodes that are missing.
Restart ComfyUI.
Refresh the ComfyUI page.
Step 4: Upload the reference image.
Upload the reference image to the Load Image node.
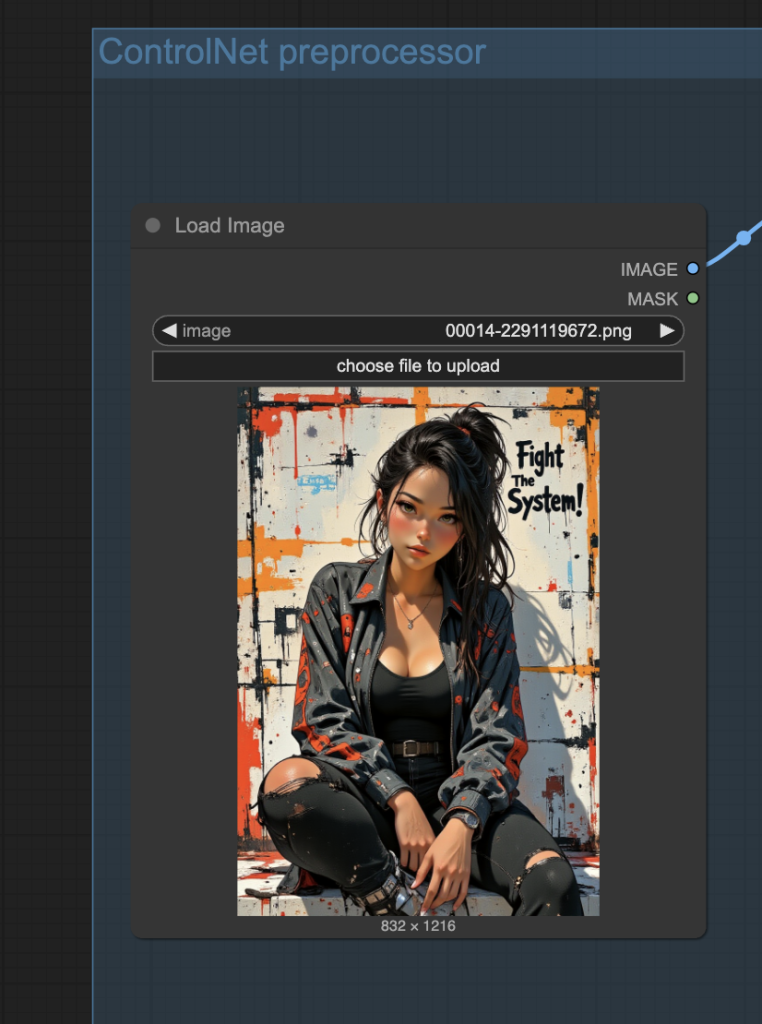
Feel free to use the test image below.
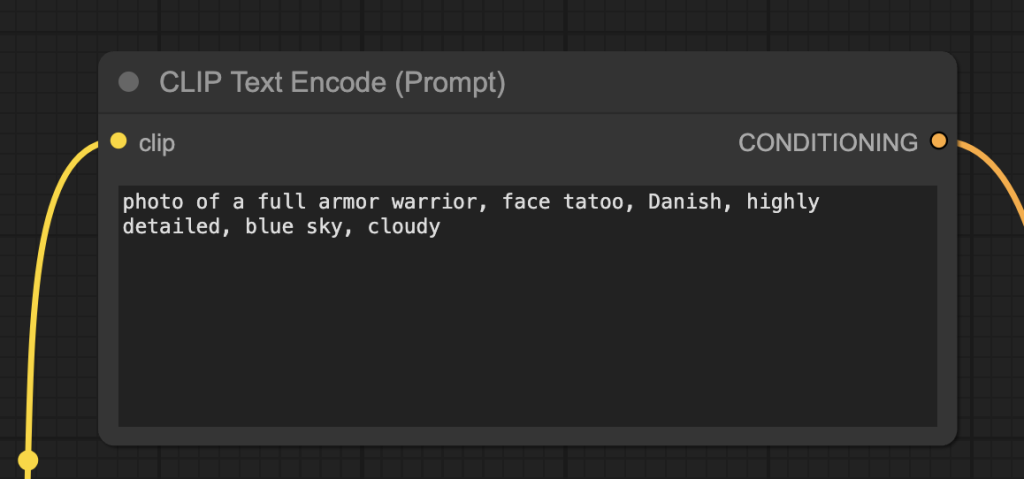
Step 5: Revise the prompt
Revise the prompt to describe what you want to generate.
Step 6: Generate an image
Click the Run button to run the workflow.


Change the seed value in the KSampler node to generate a new image.
ControlNet SDXL
The workflow uses a Stable Diffusion XL model with ControlNet. The SDXL model offers a larger image size (1024×1024 native) and higher image quality.
Step 1: Load the workflow
Download the workflow below.
Drag and drop it to ComfyUI.
Step 2: Install models
- Download the Juggernaunt XL v7 model. Put it in the ComfyUI > models > checkpoints folder.
- Download the ControlNet depth sai_xl_depth_256lora.safetensors model. Put it in ComfyUI > models > controlnet folder.
Step 3: Install missing nodes
If you see nodes with red borders, you don’t have the custom nodes required for this workflow. You should have ComfyUI Manager installed before performing this step.
Click Manager > Install Missing Custom Nodes.
Install the nodes that are missing.
Restart ComfyUI.
Refresh the ComfyUI page.
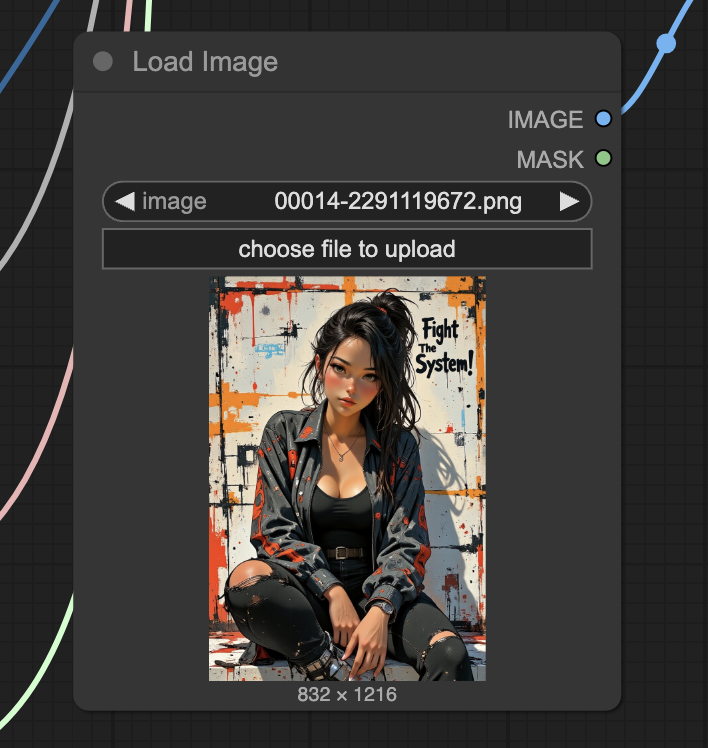
Step 4: Upload the reference image.
Upload the reference image to the Load Image node.
Feel free to use the test image below.
Step 5: Revise the prompt
Revise the prompt to describe what you want to generate.
Step 6: Generate an image
Click the Run button to run the workflow.
Change the seed value in the KSampler node to generate a new image.
ControlNet Flux
The workflow uses the Flux model, which has higher image quality than the SD 1.5 and SDXL models.
We will use the Flux ControlNet Union Pro Model for depth conditioning. However, the model can be used for other types of conditioning, such as Openpose and line art.
Step 1: Load the workflow
Download the workflow below.
Drag and drop it to ComfyUI.
Step 2: Install models
- Download the Flux.1 Dev model flux1-dev-fp8.safetensors. Put the model file in the folder ComfyUI > models > checkpoints.
- Download the FLUX.1-dev-ControlNet-Union-Pro ControlNet model.
- Rename model file to FLUX.1-dev-Controlnet-Union-Pro.safetensors
- Put it in ComfyUI > models > controlnet folder.
Step 3: Install missing nodes
If you see nodes with red borders, you don’t have the custom nodes required for this workflow. You should have ComfyUI Manager installed before performing this step.
Click Manager > Install Missing Custom Nodes.
Install the nodes that are missing.
Restart ComfyUI.
Refresh the ComfyUI page.
Step 4: Upload the reference image.
Upload the reference image to the Load Image node.
Feel free to use the test image below.
Step 5: Revise the prompt
Revise the prompt to describe what you want to generate.
Step 6: Generate an image
Click the Run button to run the workflow.
Change the seed value in the KSampler node to generate a new image.
Advanced settings
Adjust the strength parameter in the Controlnet node to adjust influence of the depth ControlNet.
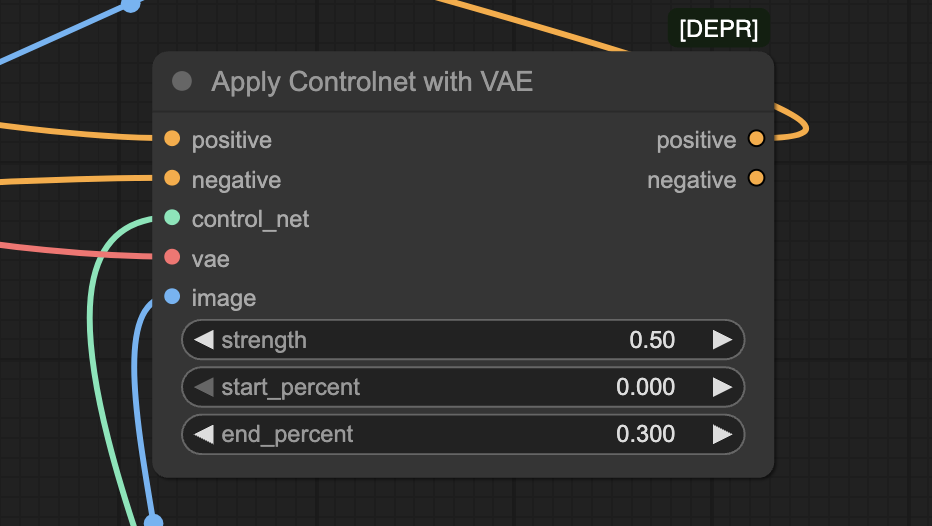
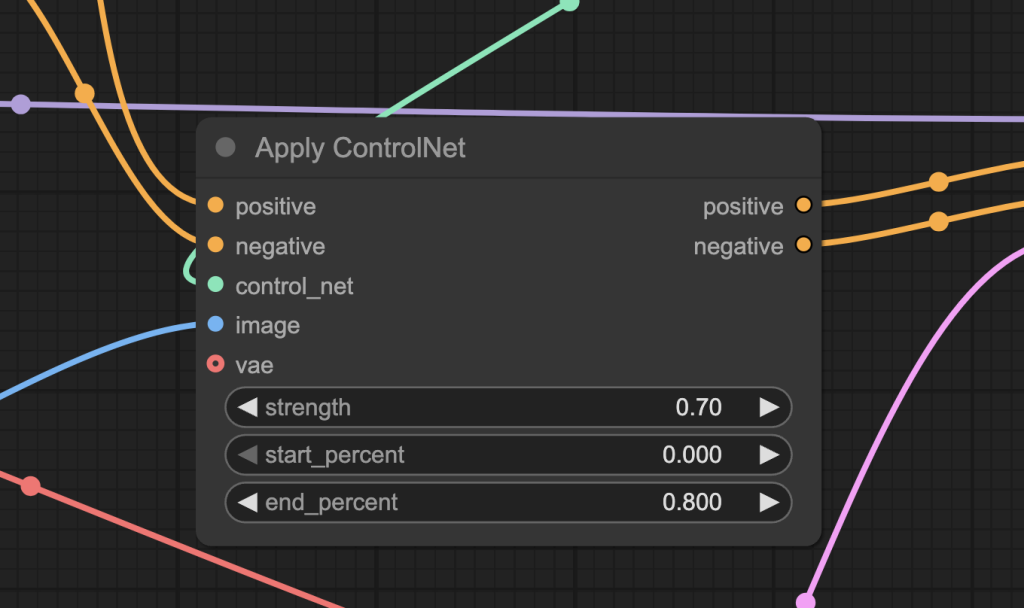
See the effect of changing the strength value below. Increases the value makes the image to follow the reference image more. (0.5 to 0.7) But you don’t want to set it too hgih (0.9). You could overcook the image and make them look unnatural.
Thanks, Andrew.
In the flux workflow, what’s the difference between the nodes Set Shakker Labs Union ControlNet Type and SetUnionControlNetType? I see you have the first of these connected and it works with the ComfyUI_ControlNet_Aux OpenPose node whereas the second one doesn’t seem to work with that node.
The Shakker labs one. The SetUnionControlNetType native node has an incorrect type setting. See https://github.com/comfyanonymous/ComfyUI/issues/4823
Thanks, Andrew