
This ComfyUI workflow generates this partially animated with animateDiff and inpainting.

See also: The same workflow using AUTOMATIC1111.
NOTE: You must be a member of this site to download the ComfyUI workflow.
Table of Contents
Software
Stable Diffusion GUI
We will use ComfyUI, a node-based Stable Diffusion GUI. You can use ComfyUI on Window/Mac or Google Colab.
Check out Think Diffusion for a fully managed ComfyUI/A1111/Forge online service. They offer 20% extra credits to our readers. (and a small commission to support this site if you sign up)
See the beginner’s guide for ComfyUI if you haven’t used it.
How the workflow works
This workflow combines the following two techniques
- AnimateDiff – A Stable Diffusion add-on that generates short video clips
- Inpainting – Regenerate part of an image
This workflow combines a simple inpainting workflow using a standard Stable Diffusion model and AnimateDiff.
We cannot use the inpainting workflow for inpainting models because they are incompatible with AnimateDiff. We may be able to do that when someone releases an AnimateDiff checkpoint that is trained with the SD 1.5 inpainting model.
So, you should not set the denoising strength too high.
Step-by-step guide
Step 0: Load the ComfyUI workflow
Download the workflow JSON file below. (Member: Log in to download the file. You must be a member of this site to download this ComfyUI workflow.)
Drag and drop it to ComfyUI to load.
Every time you try to run a new workflow, you may need to do some or all of the following steps.
- Install ComfyUI Manager
- Install missing nodes
- Update everything
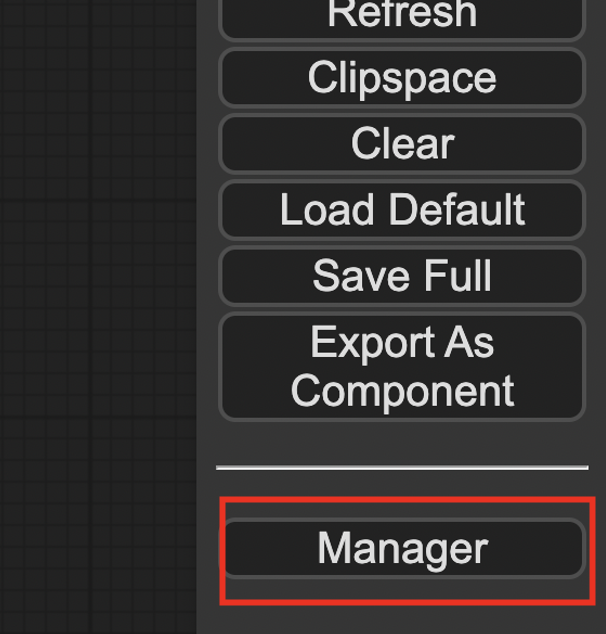
Install ComfyUI Manager
Install ComfyUI manager if you haven’t done so already. It provides an easy way to update ComfyUI and install missing nodes.
To install this custom node, go to the custom nodes folder in the PowerShell (Windows) or Terminal (Mac) App:
cd ComfyUI/custom_nodesInstall ComfyUI by cloning the repository under the custom_nodes folder.
git clone https://github.com/ltdrdata/ComfyUI-ManagerRestart ComfyUI completely. You should see a new Manager button appearing on the menu.
If you don’t see the Manager button, check the terminal for error messages. One common issue is GIT not installed. Installing it and repeat the steps should resolve the issue.
Install missing custom nodes
To install the custom nodes that are used by the workflow but you don’t have:
- Click Manager in the Menu.
- Click Install Missing custom Nodes.
- Restart ComfyUI completely.
Update everything
You can use ComfyUI manager to update custom nodes and ComfyUI itself.
- Click Manager in the Menu.
- Click Updates All. It may take a while to be done.
- Restart the ComfyUI and refresh the ComfyUI page.
Step 1: Add image and mask
Drag and drop an image to the Load Image node. The image should not be too large, ideally close to 512×512 pixels, the native resolution of Stable Diffusion v1.5.
You can use the image below to follow this tutorial.

Right-click the image > Open in Mask Editor. Mask the area you want to animate. I masked her hair.
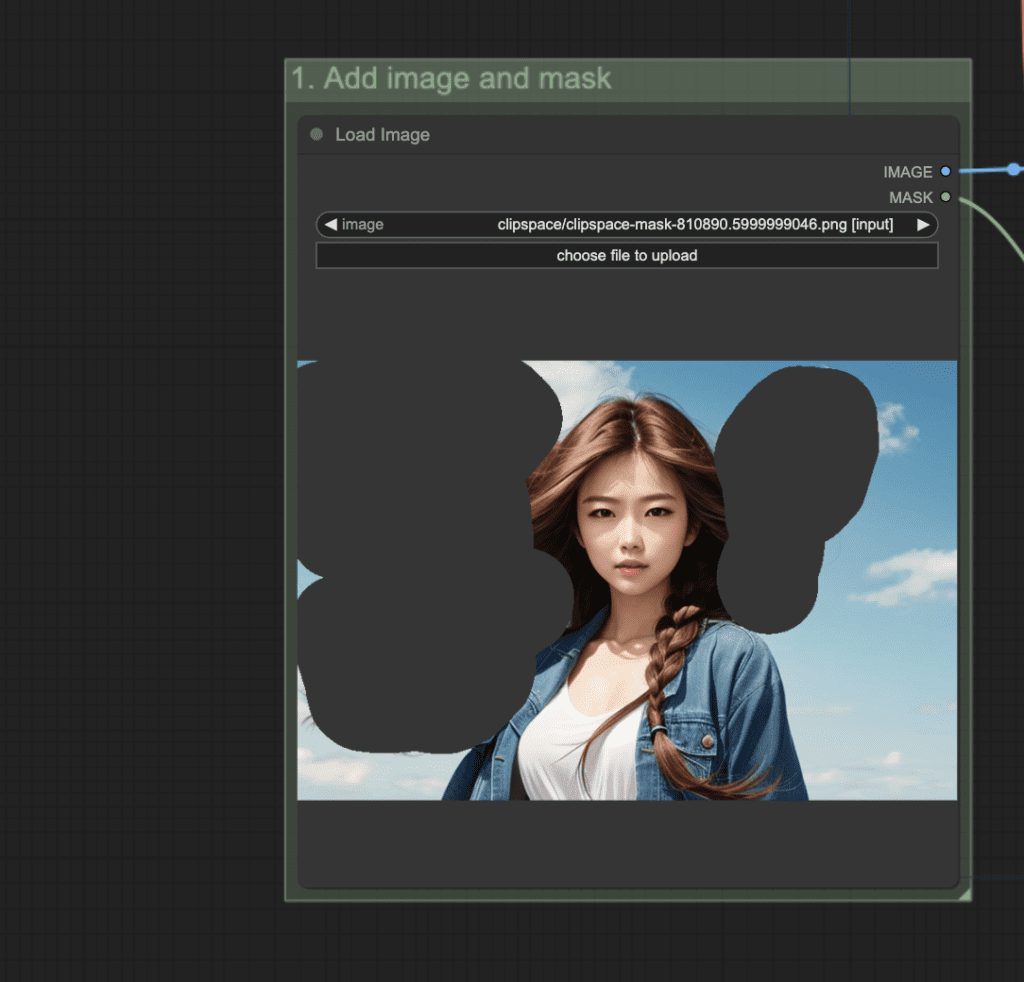
NOTE: To increase your chance of success, you should pick an image with a simple background.
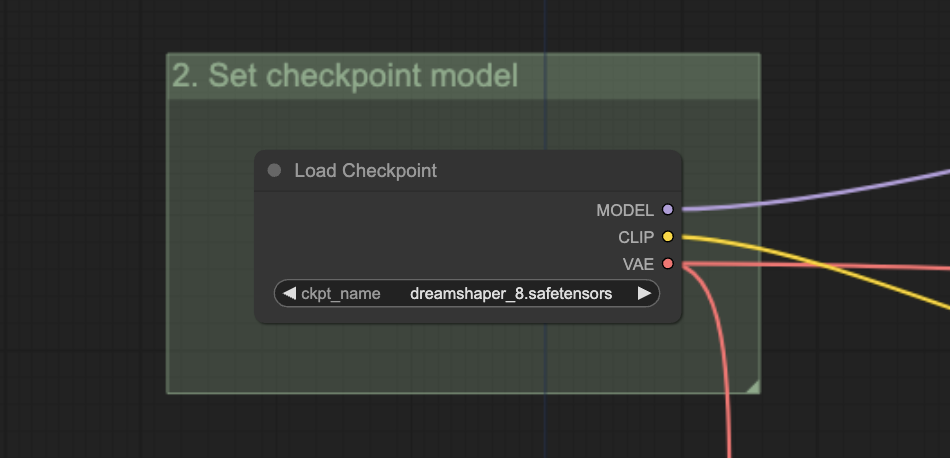
Step 2: Set checkpoint model
I used the Dreamshaper 8 model.
Download the model file and put it in ComfyUI > models > checkpoints.
Click Refresh on the side menu and select the model in the Load Checkpoint dropdown menu.
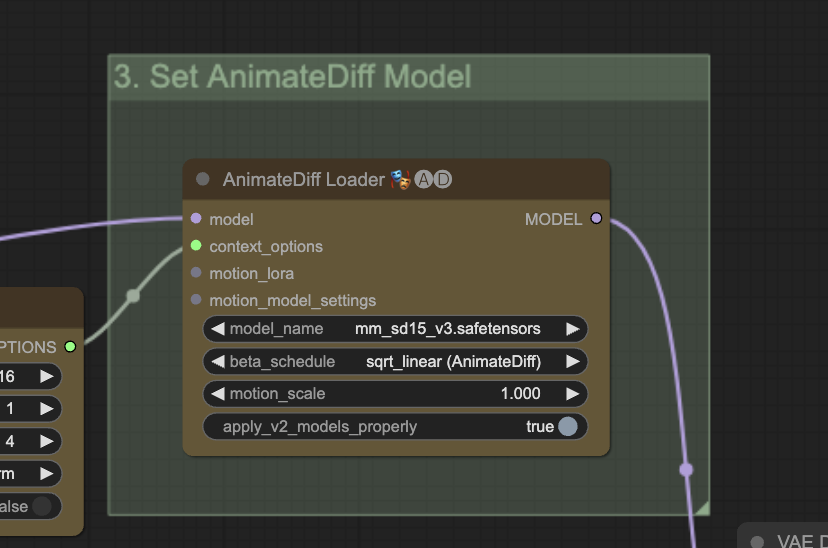
Step 3: Set AnimateDiff Model
Download the AnimateDiff v3 model. Put it in ComfyUI > custom_nodes > ComfyUI-AnimateDiff-Evolved > models.
Click Refresh on the side menu and select the model in the AnimateDiff Model node’s dropdown menu.
Step 4: Revise prompt
Revise the prompt. It should describe the image.
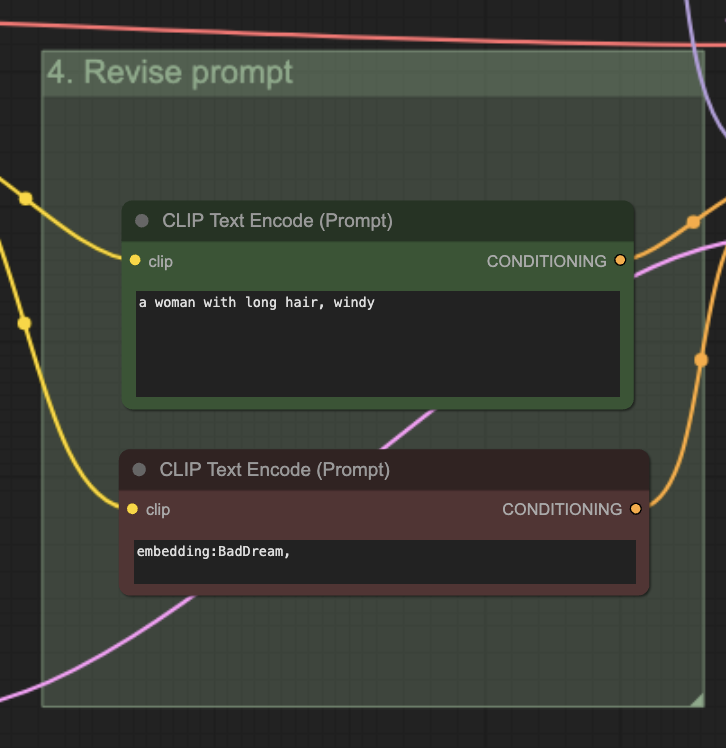
Note: The BadDream negative embedding is used to improve the image quality.
If you want to use it, download the model file and put it in ComfyUI > models > embeddings. If is ok to remove it and put some generic terms like “disfigured, deformed, low quality”. It won’t change the result much.
Step 5: Generate the animation
Click Queue Prompt to generate the video.
Customization
You may need to adjust the denoising strength of the KSampler node to control how much the animation changes the image.
You can change the Seed to get a new video.
Hi Andrew, right clicking (control + Click) on the image does not open the mask menu. (I am on a mac). I took care that every node is updated with help of the manager. Can you help me? Thank you, best
You can try two-finger tap on the touchpad.
I tried it. And it worked. Thank you for your patience. I am surprised about how long it takes to make the hair move. I am on an M3 with 16 GB Ram. Will try google colab again to see if it is faster. Cheers
Thank you. Can I have another tutorial with different prompt Settings for different areas? For example, I set prompt to night for background and hair for foreground
The steps should be the same but only the prompt is different. You can try adding night, dark to the prompt.
Excellent, able to replicate it, without any problem, I have created my own image with blowing hair. Thanks