
LoRA models are essential tools to supplement the Flux AI checkpoint models. They can enable Flux to generate content it was not trained with, for example, artistic styles or specific faces.
In this article, I will demonstrate using a LoRA model with Flux on the Stable Diffusion Forge WebUI. You will also learn how to generate a consistent face using two LoRA models.
Table of Contents
Software
The easiest way to use LoRA with Flux AI is to use SD Forge WebUI. It has good supports of Flux AI models. Forge is an interactive GUI similar to AUTOMATIC1111. As of writing, AUTOMATIC1111 does not support Flux.
See the Flux AI installation Guide on Forge if you don’t have the Flux model on Forge.
If you are new to Stable Diffusion, check out the Quick Start Guide.
Take the Stable Diffusion course to build solid skills and understanding.
Use LoRA models with Flux AI
LoRA models modify the checkpoint model slightly to achieve new styles or characters. They cannot be used alone; they must be used with a checkpoint model.
Step 1: Update or reinstall Forge
You can first try updating Forge. If the LoRA has no effect, you should reinstall Forge since it has updated the CUDA library and PyTorch versions.
Update Forge
The support for Flux is relatively new. You will need to update Forge before using it.
If you use the standalone installation package, double-click the file update.bat in the Forge installation folder webui_forge_cuXXX_torchXXX.
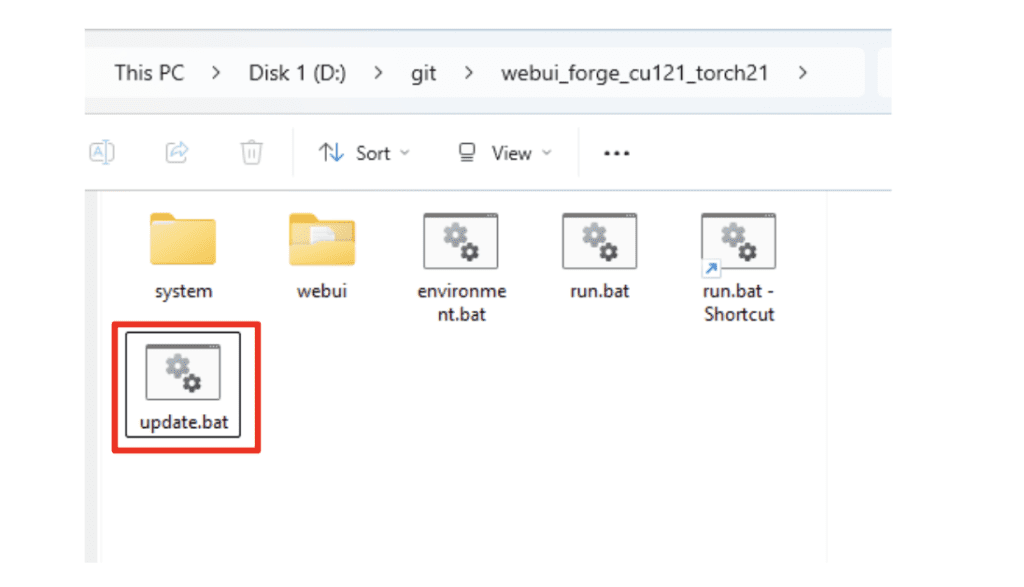
Reinstalling Forge
Only do this if updating Forge alone doesn’t work. This is what I did to make it work since my Forge was installed a long time ago!
Follow the Forge installation guide. If you don’t want to delete your existing Forge, you can unzip the folder at a different location.
I used the recommended version at the time, Forge with CUDA 12.1 + Pytorch 2.3.1.
You must also update Forge to the newest version to use LoRA with Flux. Follow the update Forge section to update your Forge.
Step 2: Download a LoRA model
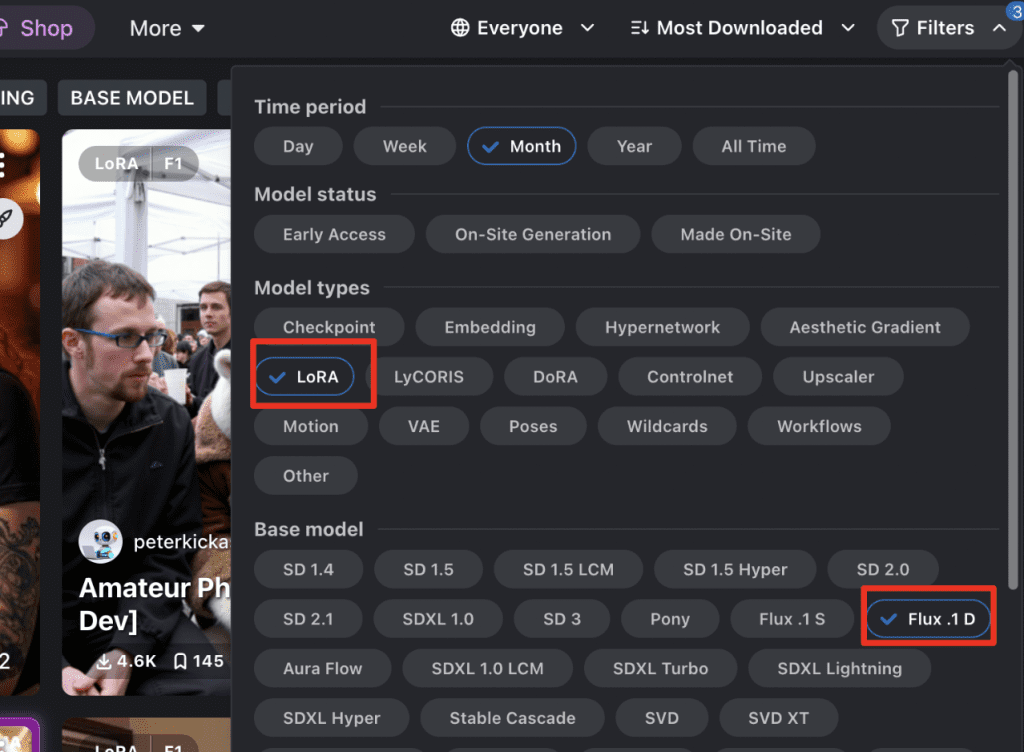
The best place to find and download LoRA models is Civitai.
Filter the models to show only the Flux LoRA models.
- Click Model on the top menu of Civitai.com to go to the Models page.
- Click the Filter icon at the top right to filter the models by:
- Model types: LoRA
- Base model: Flux.1 D (D for dev model. S for Schnell model. I only use D for the best quality!)
Select a LoRA model you like and download it. Put it in the webui > models > Lora.
Tip: You can also put it in the A1111’s LoRA folder if you set Forge to share models with A1111.
More Tip: Use the Civitai Helper extension to directly download the LoRA models in A1111. Although you cannot run Flux models on A1111, it is still useful for downloading Flux models 😂.
Extra Tip: Create a new subfolder called “Flux” in the LoRA folder to organize your LoRAs for Flux.
I will use the following two LoRAs in the rest of the tutorial. They should work on your system!
Step 3: Use the LoRA model in Forge WebUI
Image generation without LoRA
Let’s first generate an image with the Flux AI model without LoRA.
Settings:
- UI: flux
- Checkpoint: flux1-dev-bnb-nf4-v2.safetensors (You can also use flux1-dev-fp8.safetensors)
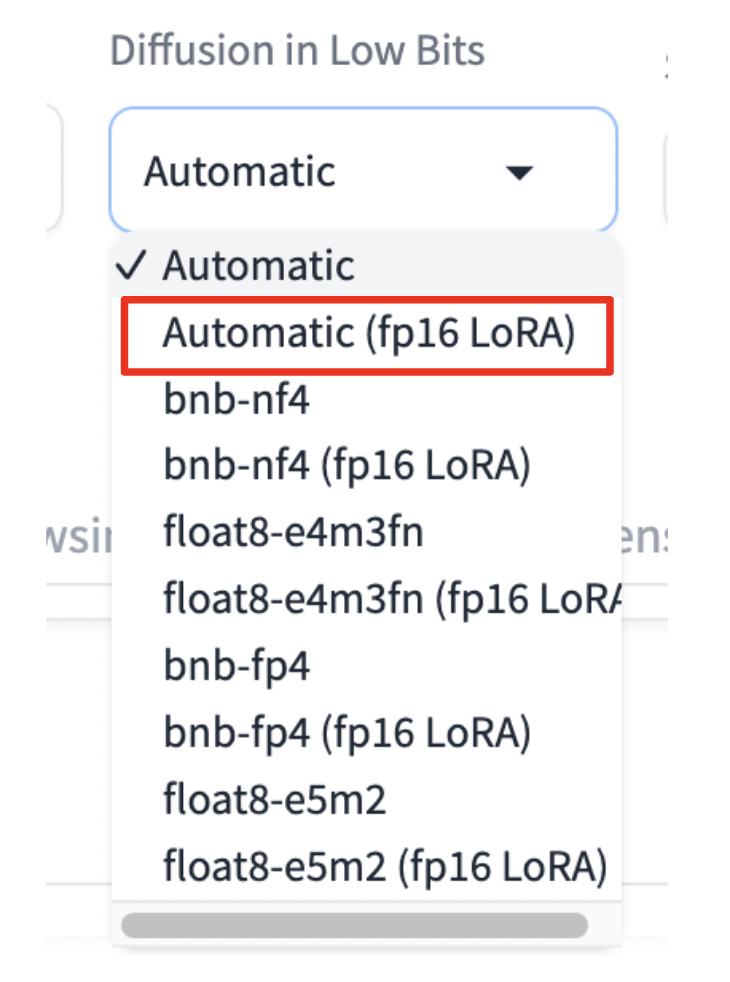
- Diffusion in Low Bits: Automatic
- Prompt:
Emma Watson walking on city street, gray suit, black short skirt, high heels
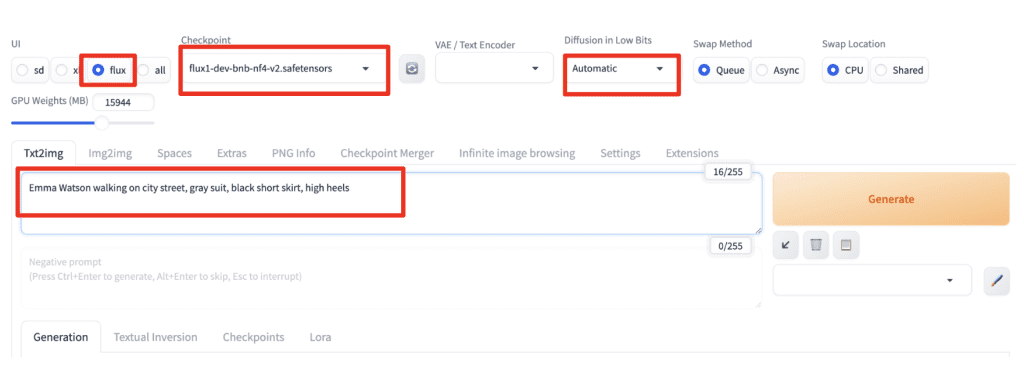
Fix the Seed to, for example, 1234 so you will always get the same image.
Click Generate.

The model has no knowledge of celebrities (e.g. Emma). Although you specified Emma Watson in the prompt, you still get a generic face.
Add a LoRA
Select the LoRA tab and click on the tile of the LoRA you want to add.
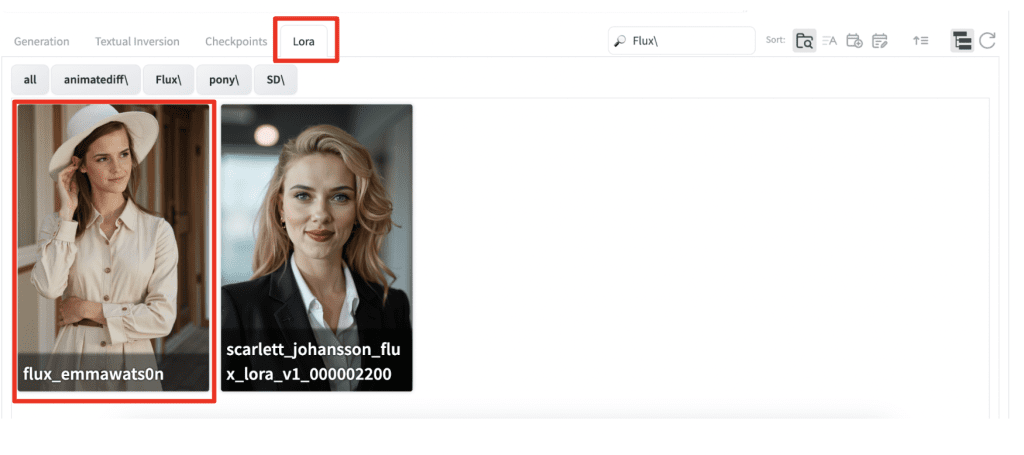
You should see the LoRA is added to the prompt.
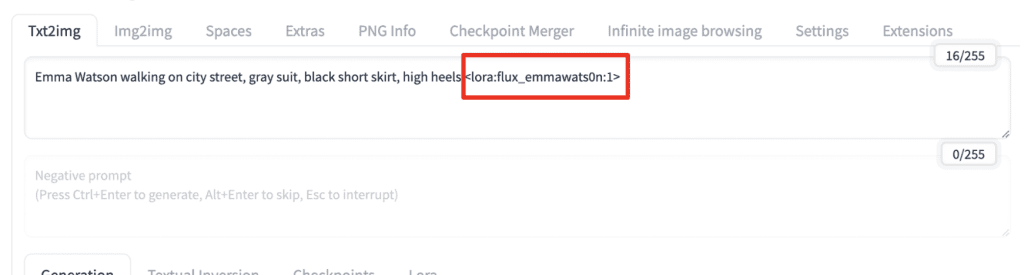
Click Generate.

Now you can see the LoRA is applied successfully to her face…
Troubleshooting
To take effect, the LoRA model needs to be added to Flux’s UNet model. If you use low-bit Flux checkpoints like NF4 and FP8, the LoRA model must be patched to low-bit before merging with the Flux model. This process could fail if your PC lacks memory or disk space.
If the LoRA doesn’t change the image, the LoRA patching may have failed, and the LoRA may not have been applied. Check the error messages in the terminal console to confirm.
If the LoRA patching fails, you can try selecting the Automatic (fp16 LoRA) option to prevent it from happening.
Consistent face with two celebrity LoRAs
In Stable Diffusion, we can generate a consistent face by blending the keywords of two celebrities. Unfortunately, Flux has no knowledge of celebrities. You can’t use this method anymore.
Instead, you do it with two LoRAs.
Now, apply both the Emma Watson and Scarlett Johansson LoRAs to blend their faces.
Emma Watson walking on city street, gray suit, black short skirt, high heels <lora:flux_emmawats0n:1> <lora:scarlett_johansson_flux_lora_v1:1.2>


Now, you get a consistent face across images. The look can be carefully adjusted by using different LoRAs and changing their weights (1 for Emma and 1.2 for Scarlett above.)
The Emma Watson and Scarlet Johannsen flux loras are no longer on Civitai.