Flux is a state-of-the-art image model. It excels in generating realistic photos and following the prompt, but some styles can be challenging to achieve. In addition to crafting the prompt, supplementing the Flux base model with LoRA models is another valuable trick in your toolbox.
In this article, you will learn how to use up to 3 LoRA models in ComfyUI.
Table of Contents
Software
We will use ComfyUI, a free AI image and video generator. You can use it on Windows, Mac, or Google Colab.
Think Diffusion provides an online ComfyUI service. They offer an extra 20% credit to our readers.
Read the ComfyUI beginner’s guide if you are new to ComfyUI. See the Quick Start Guide if you are new to AI images and videos.
Take the ComfyUI course to learn how to use ComfyUI step by step.
Using LoRA on ComfyUI
Step 0: Update ComfyUI
The easiest way to update ComfyUI is through the ComfyUI Manager. Click Manager > Update ComfyUI.

Restart ComfyUI and reload the page.
Step 1: Load the ComfyUI workflow
Download the Flux LoRA workflow JSON file below.
Drop it to your ComfyUI.
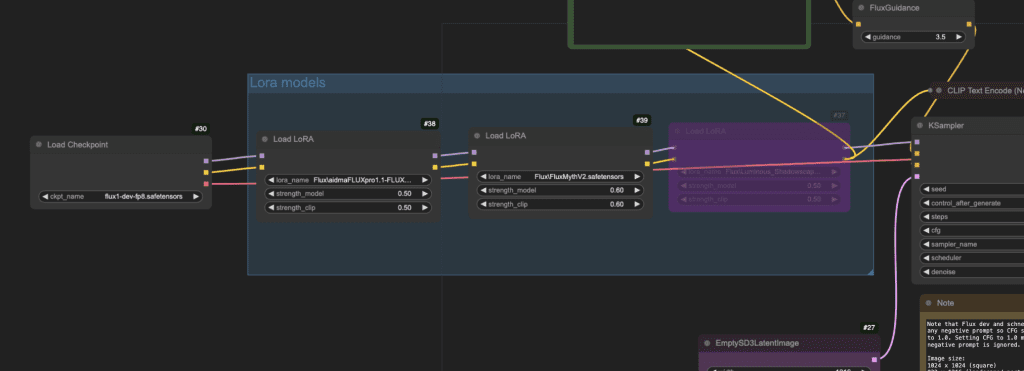
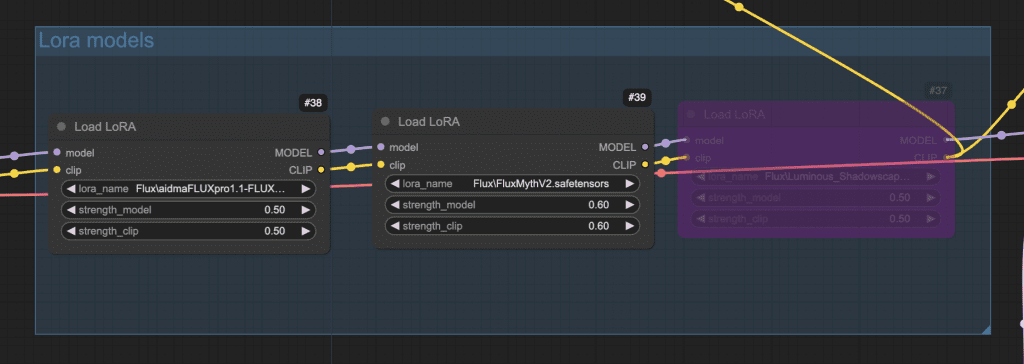
This workflow uses up to 3 LoRA models but with the third one disabled. I will show you how to enable/disable any one of them.

Step 2: Download the Flux model
Download the Flux1 dev FP8 checkpoint.
Put the model file in the folder ComfyUI > models > checkpoints.
(If you use my ComfyUI Colab notebook, simply select the Flux1_dev model.)
Refresh the ComfyUI page and select the flux model in the Load Checkpoint dropdown menu.

Step 3: Download the Flux LoRA models
Download the following LoRA models
- Extreme Detailer v0.1 – For adding details.
- Velvet’s Mythic Fantasy Styles – For adding a fantasy art style.
Put them in the folder ComfyUI > models > loras.
(If you use my ComfyUI Colab notebook, put them in your Google Drive folder AI_PICS > models > Lora. Restart the notebook to take effect.)
Select them in the dropdown menus of the Load LoRA nodes.

Step 4: Generate an image.
Press Queue Prompt to generate an image.

Enable/Disable a LoRA
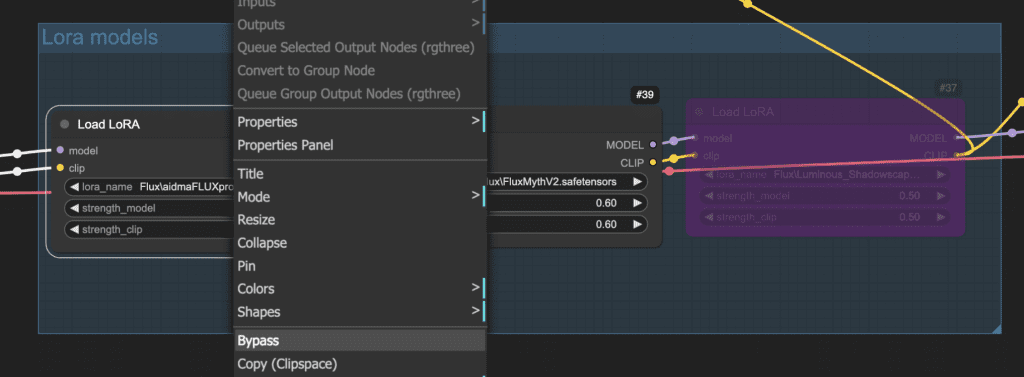
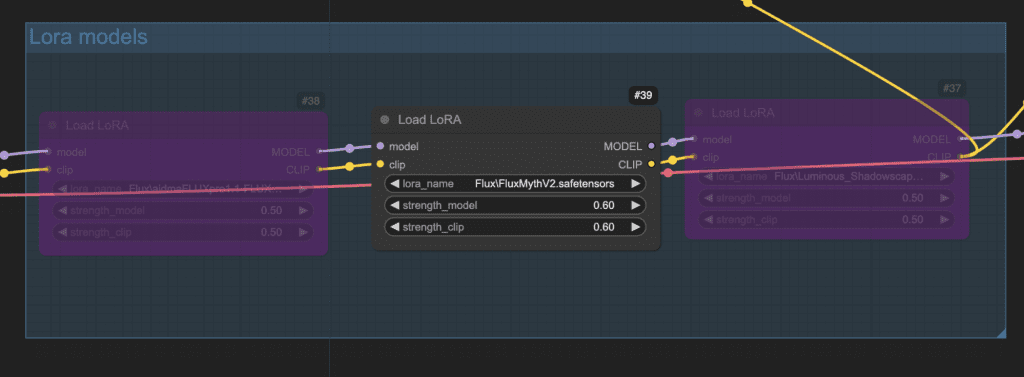
To enable or disable a LoRA model, right-click on the Load LoRA node and select Bypass.

The node will be grayed out.

Keyboard shortcut: Select the node and press Ctrl + B to enable or disable bypass.
Compare the images with and without the LoRAs:


I’m seeing below error with negative prompt Text window. Can someone help me in fixing it.. I’m new to ComfyUI world.
CLIPTextEncode
ERROR: clip input is invalid: None
If the clip is from a checkpoint loader node your checkpoint does not contain a valid clip or text encoder model.
Brilliant! Never seen anything work the first time like this. Thank you for providing this!
Hi Andrew, thx for this guide. Could you please clarify if this flow can be used with the full size flux dev 1.0 model?
This workflow only supports the single-file checkpoint version of Flux. You will need to modify the workflow to use the full size model. See https://stable-diffusion-art.com/flux-comfyui/
Hi Andrew, please could you explain the Lora node settings – the model strength is obvious but how about the clip strength? And does it have any relation to skipping clip layers?
Thanks
It is the strength applied to the clip model, which is used to process the prompt. (The Model is used in sampling) You can set both to the same value to mimic Forge/A1111.
Thanks Andrew, simple, straightforward and works first time.
Hello thank you for your tutorial. Everything is working.
Small question, since I’m quite new to AI universe, is there a version of Flux1 dev FP8 checkpoint but FP16 (I read that FP16 have better quality compared to FP8) ?
Thanks.
Yes, you can try the original flux dev model: https://stable-diffusion-art.com/flux-comfyui/#Flux_regular_full_model
The difference is minimal.
Excellent walk through.
It run really slow though, when I looked at Task Manager & resouce monitor, the CPU was 1% and two (of 24) CPUs where being used heavily.
Is there some reason its not using GPU?
It should only run on GPU. You can try restarting your computer and open only comfyui.