
ComfyUI is known for running local image and video AI models. Recently, it added support for running proprietary close models through API. As of writing, you can use popular models from Kling, Google Veo, OpenAI, RunwayML, and Pika, among others.
In this article, I will show you how to set up and use ComfyUI API to run the proprietary Kling video model.
Table of Contents
Software for this tutorial
We will use ComfyUI, a free AI image and video generator. You can use it on Windows, Mac, or Google Colab.
Think Diffusion provides an online ComfyUI service. They offer an extra 20% credit to our readers.
Read the ComfyUI beginner’s guide if you are new to ComfyUI. See the Quick Start Guide if you are new to AI images and videos.
Take the ComfyUI course to learn how to use ComfyUI step by step.
What is ComfyUI API?
The official ComfyUI API nodes let you use close-source AI models in a pay-per-use basis. You buy generation credits from ComfyUI which allows you to use with all model providers.
Each model provider has a special set of official nodes. For example, you can use Kling text-to-image, or image-to-image nodes. The nodes are maintained by the ComfyUI team so you are buying from ComfyUI directly.
Benefit of using ComfyUI API
You can as well use the Kling models on Kling. Why do you want to use them on ComfyUI? There are several advantages and use cases.
- Integration: You can mix and match with other custom nodes for pre- and post-processing, which greatly enhance the flexibility and automation of using the prioprietary models.
- Simplify accounts: You only maintain one credit account with ComfyUI, saving you from setting up multiple paid and often monthly subscription accounts with the model proivders.
- Access to high end models: You don’t have to own expensive hardware to run high quality models.
What models are available
As of writing, the following models are available. See the documentation for an updated list.
- Black Forest Labs: Flux 1.1[pro] Ultra, Flux .1[pro], Flux .1 Kontext Pro, Flux .1 Kontext Max
- Google: Veo2, Gemini 2.5 Pro, Gemini 2.5 Flash
- Ideogram: V3, V2, V1
- Kling: 2.0, 1.6, 1.5 & Various Effects
- Luma: Photon, Ray2, Ray1.6
- MiniMax: Text-to-Video, Image-to-Video
- OpenAI: o1, o1-pro, o3, gpt-4o, gpt-4.1, gpt-4.1-mini, gpt-4.1-nano, DALL·E 2, DALL·E 3, GPT-Image-1
- PixVerse: V4 & Effects
- Pika: 2.2
- Recraft: V3, V2 & Various Tools
- Rodin: 3D Generation
- Stability AI: Stable Image Ultra, Stable Diffusion 3.5 Large, Image Upscale
- Tripo: v1-4, v2.0, v2.5
Using ComfyUI API
In this section, we will set up and run ComfyUI API to generate an AI video with fixed starting and ending frames using the Kling Pro video model (propreitary paid model).
Step 0: Update ComfyUI
Before loading the workflow, make sure your ComfyUI is up to date. The easiest way to do this is to use ComfyUI Manager.
Click the Manager button on the top toolbar.

Select Update ComfyUI.
Restart ComfyUI.
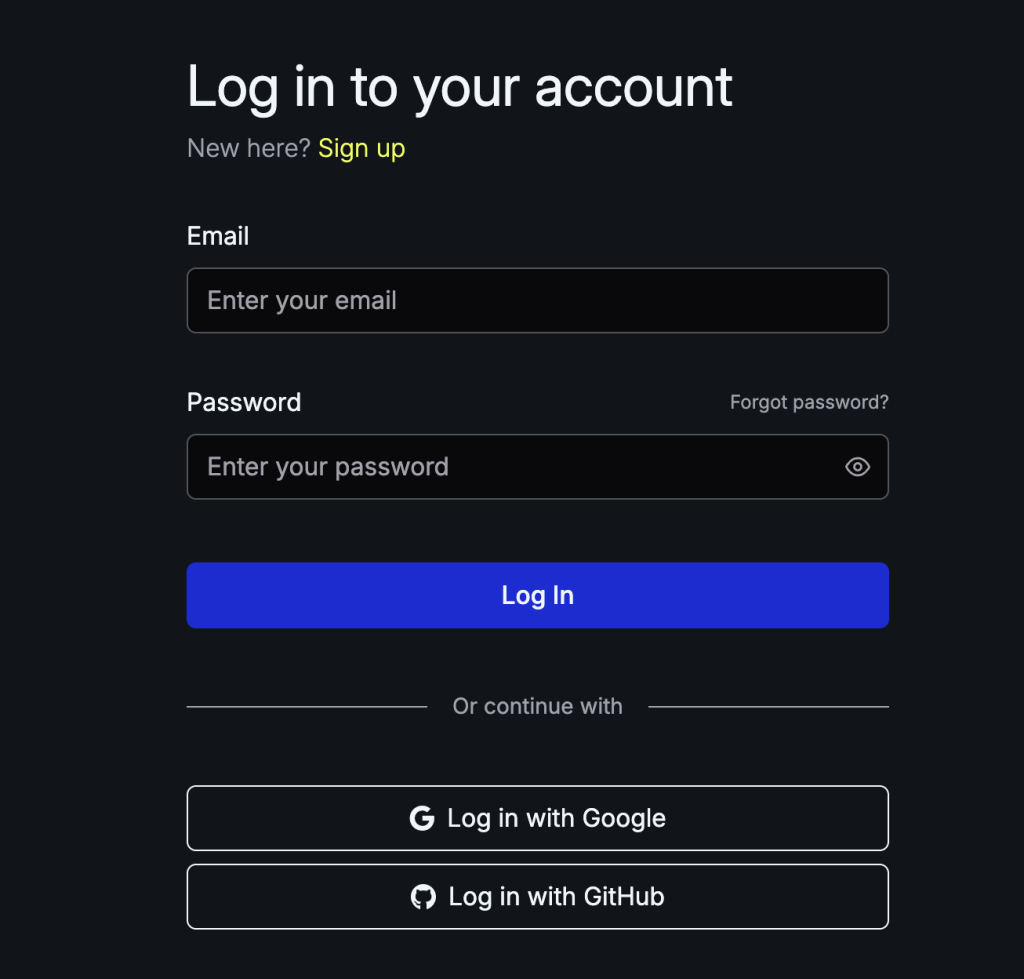
Step 1: Create a ComfyUI account
Visit https://platform.comfy.org and create an account, and verify your email address.
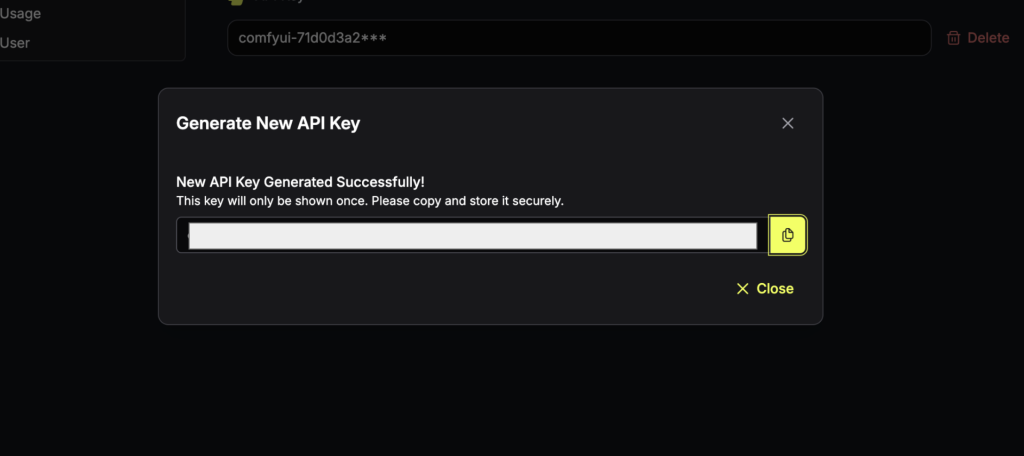
Step 2: Create an API key
Visit https://platform.comfy.org/profile/api-keys. Create an API Key.
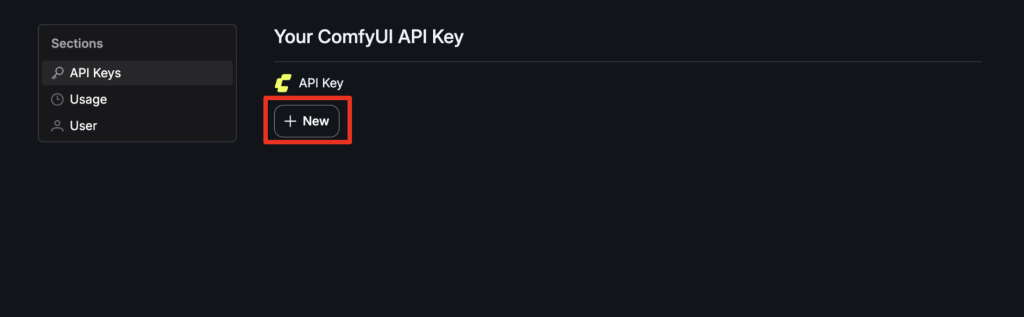
Copy the API key you generated. You will need it in the next step.
Step 3: Log in ComfyUI
In ComfyUI, select Settings > User. Click the Sign in button.
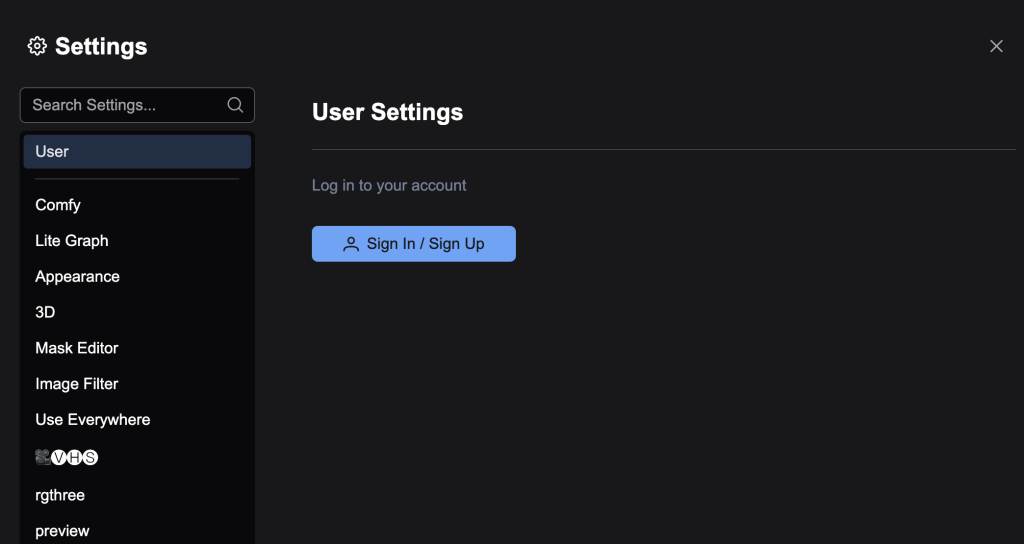
In the login dialog box, select Comfy API Key.
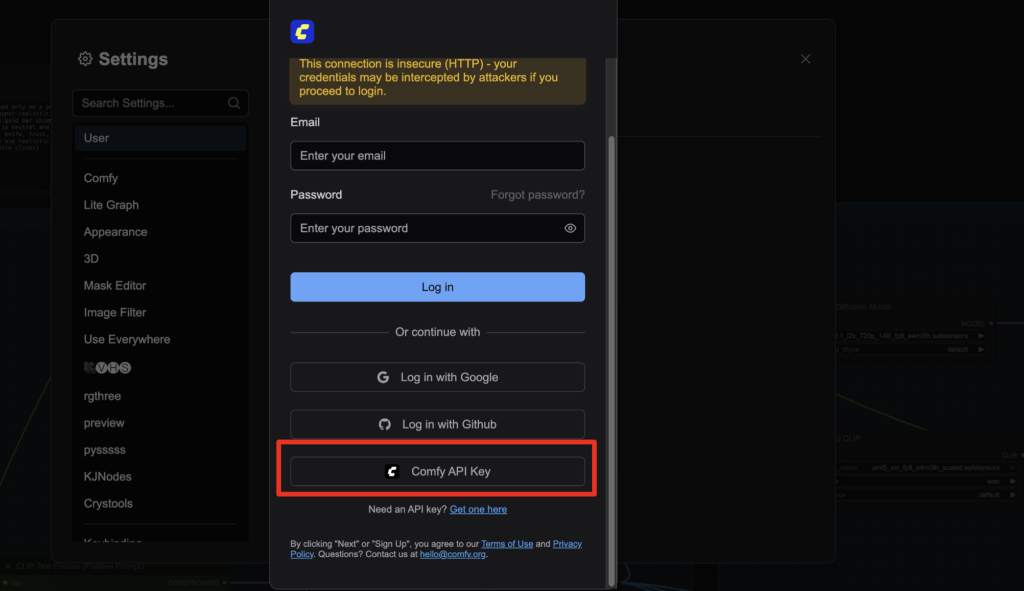
Paste the API key to log in.
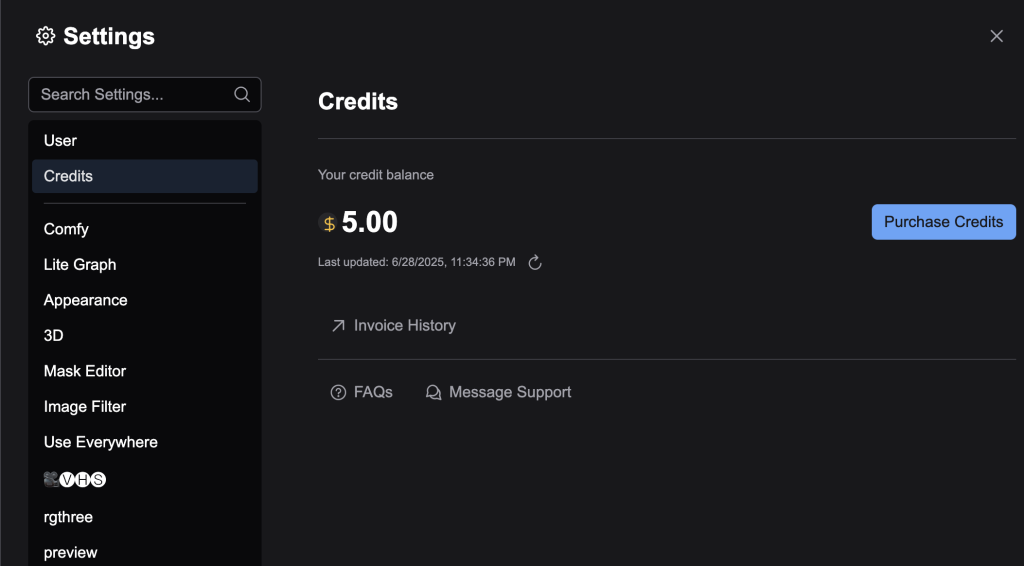
Step 4: Purchase credits
Select Credits on Setting’s sidebar. Select Purchase Credits.
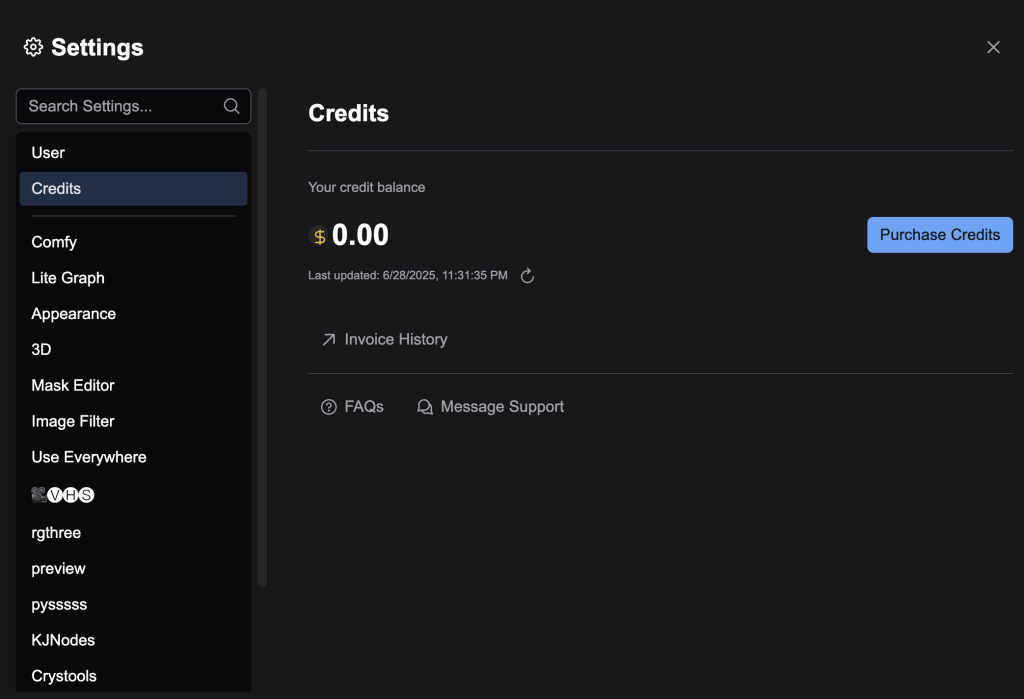
See the pricing page and decide how much credits you want to buy. $5 – $10 is a good starting point.
After you complete the purchase and click the refresh button under the credit balance, you should see your new credit balance.
Step 5: Load an API workflow
The following workflow generates a video with starting and ending frames using the Kling API.
Drop the JSON file to ComfyUI to load.
Step 6: Upload starting and ending images
Upload the starting and ending frames to the Load Image nodes.
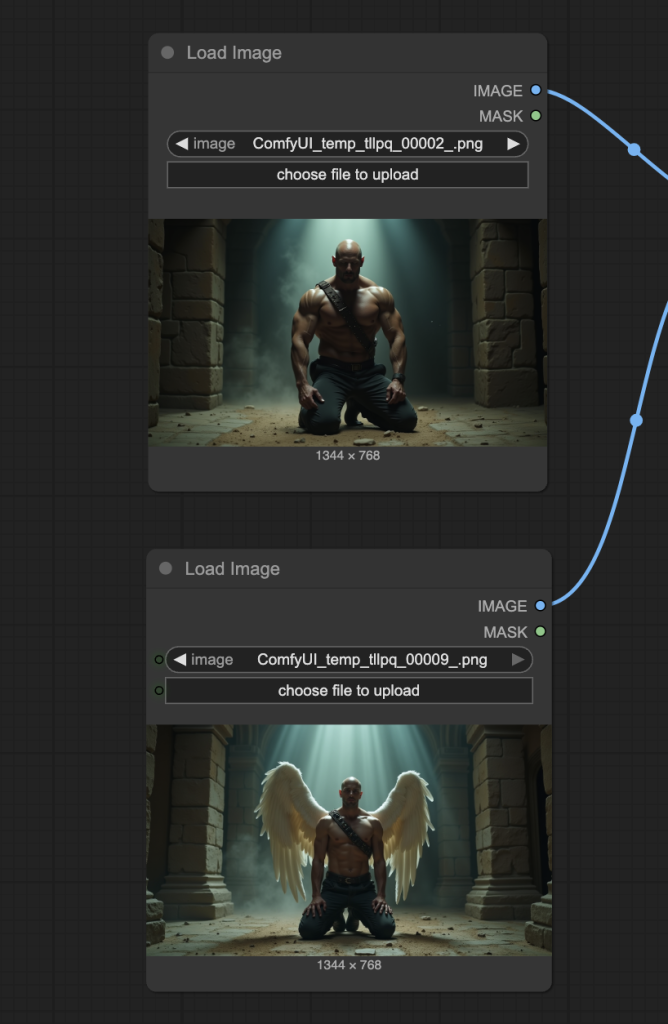
Feel free to use the test images below.


Step 7: Revise the prompt
Revise the prompt to match the video you want to create.
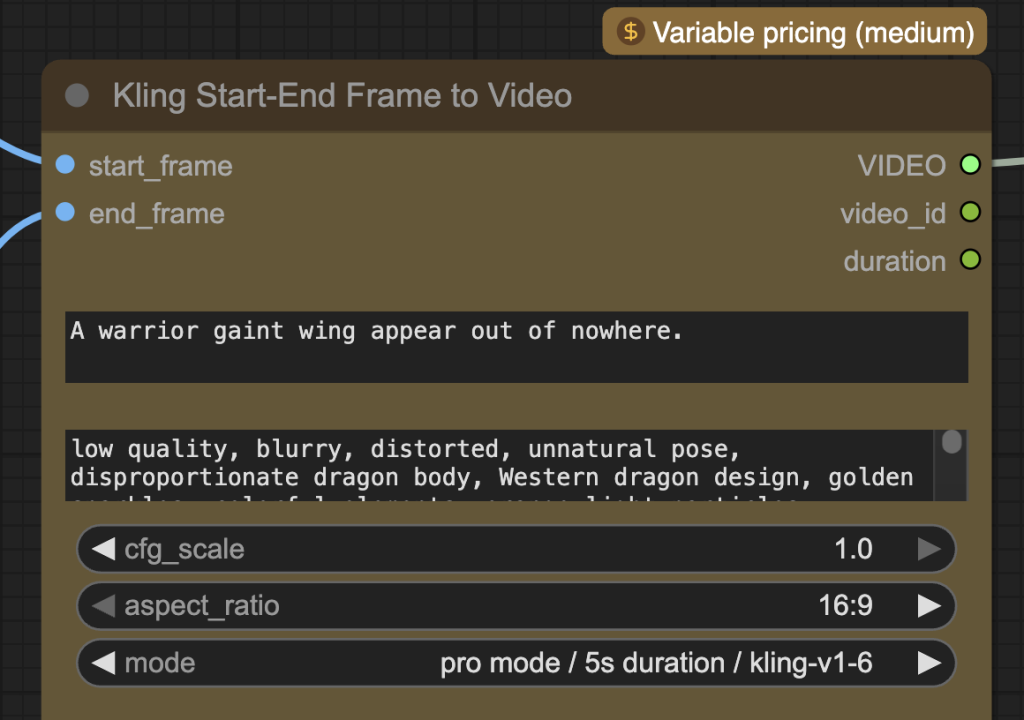
Step 8: Generate a video
Click the Run button to run the workflow.

You should see a video starting and ending with your updated images.
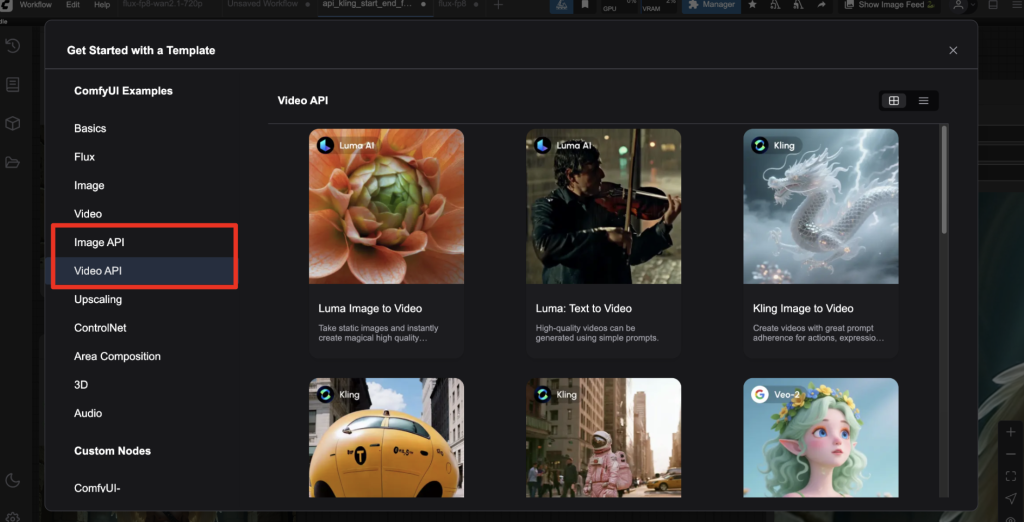
Workflow for other API models
More templates can be found on ComfyUI. Select Workflow > Browse templates.
Select Image API or Video API.
Thanks for showing us this, Andrew – it’s interesting to be able to use these models in a Comfy environment. I subscribe to the OpenArt platform which has many of these available and my impression is that Comfy is more expensive per generation and doesn’t have the latest versions of some models eg Kling is only at 1.6 on Comfy rather than 2.1 elsewhere. The same restrictions apply using a Comfy API as on the commercial platforms and there seems to be a bit less control over the way the model is applied. But if I wasn’t on OpenArt, I think this would be a useful way of accessing those models without, as you say, subscribing to each individually.