
SAM 3 (Segment Anything Model 3) from Meta is the latest frontier in prompt-based segmentation: you can provide a text prompt like “red car parked on left” or “person in red jacket” and the model will create masks for all objects or persons in an image or video.
Integrating SAM 3 into your ComfyUI workflows provides flexible nodes for targeting people or objects for further processing.
Follow this tutorial to use SAM3 on ComfyUI to create segmentation masks on images. I will cover videos in the next post.
Input image:

Prompt: Jellyfish at the center.

Table of Contents
Software
We will use ComfyUI, a free AI image and video generator. You can use it on Windows, Mac, or Google Colab.
Think Diffusion provides an online ComfyUI service. They offer an extra 20% credit to our readers.
Read the ComfyUI beginner’s guide if you are new to ComfyUI. See the Quick Start Guide if you are new to AI images and videos.
Take the ComfyUI course to learn how to use ComfyUI step by step.
The SAM 3 model
Released in November 2025, SAM 3 (Segment Anything Model 3) is Meta’s latest AI technology that can identify “cut out” (segment) in images and track objects in videos.


What’s new in SAM3?
While SAM 2 required you to click on an object to select it, SAM 3 adds a significant upgrade: you can create masks by prompt, like the Grounding DINO + SAM 2 workflow, now all in one model!
Key features:
- Prompt segmentation: create masks from prompts.
- Video tracking: It also works on videos like “The girl jumping on the bed”.
- SAM 3D: Generate a 3D model from an image of the object.
Use cases
- Create masks for downstream ComfyUI workflows: Many video workflows, like the Dancing Spaghetti workflow, require accurate video masks.
- Changing background: Create the mask for background replacement tasks.
- Video editing: This model will be great for green screening.
- Science: Cell counting and tracking.
Install the SAM3 model
Step 1: Request model access
The SAM3 model is gated. You will need to request access from the authors.
- Visit SAM3’s Hugging Face page.
- Log in to your account or create a Hugging Face account.
- Fill in and submit the request form on the SAM3 page.
- Wait for access to be granted. (Usually within 24 hours)
Step 2: Install the model
- Create the folder ComfyUI > models > sam3
- Download the SAM3 model sam3.pt.
- Put the model file in ComfyUI > models > sam3
SAM3 Image segmentation with prompt
This SAM3 workflow segments an image solely with a prompt.
Make sure you have installed the SAM3 model before performing the following steps.
Step 1: Load the workflow
Download the following workflow JSON file.
Drop it into the ComfyUI window to load.
Step 2: Install missing nodes
This workflow needs PozzettiAndrea’s ComfyUI-SAM3 custom nodes.
If you see nodes with red borders, you don’t have the custom nodes required for this workflow. You should have ComfyUI Manager installed before performing this step.
Click Manager > Install Missing Custom Nodes.
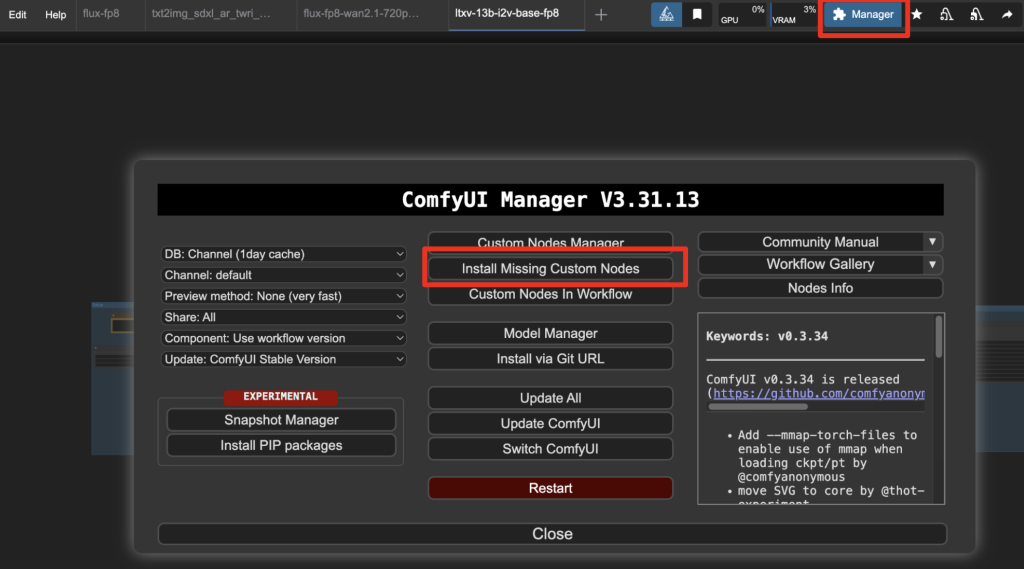
Install the nodes that are missing.
Restart ComfyUI.
Refresh the ComfyUI page.
Step 3: Set the input image
Choose the input image in the Load Image node.
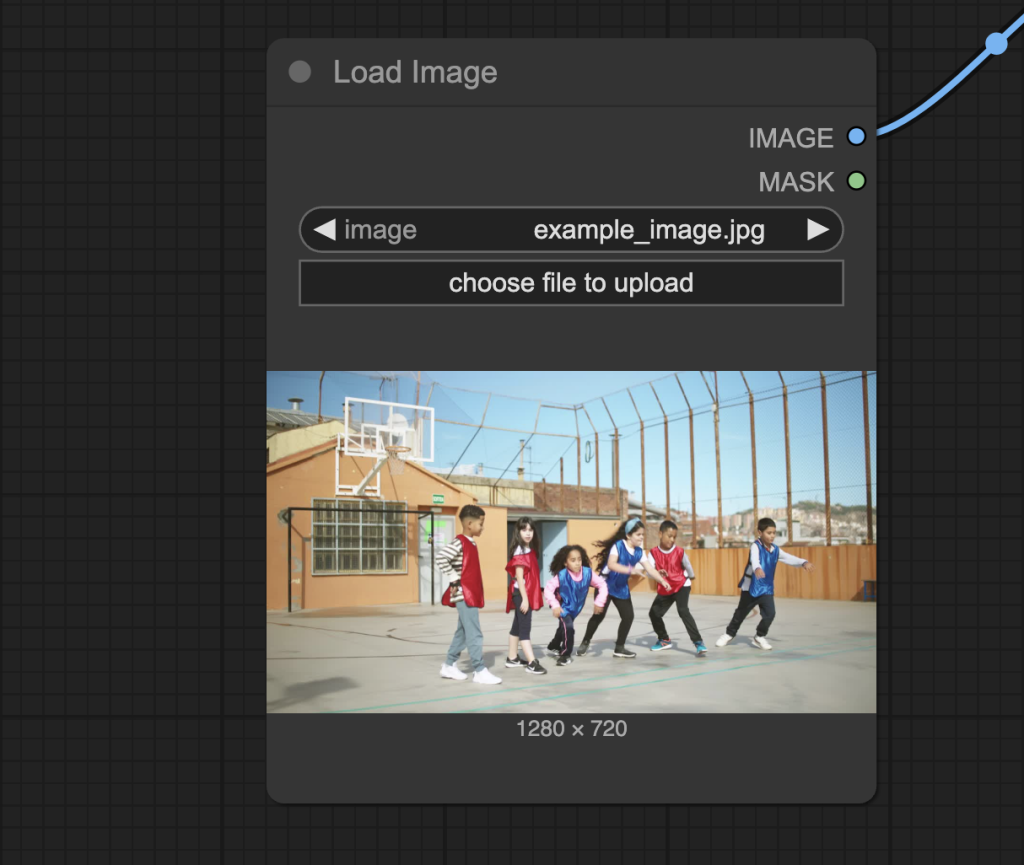
The workflow should have already been preloaded with the test image, but you can download it below for testing.

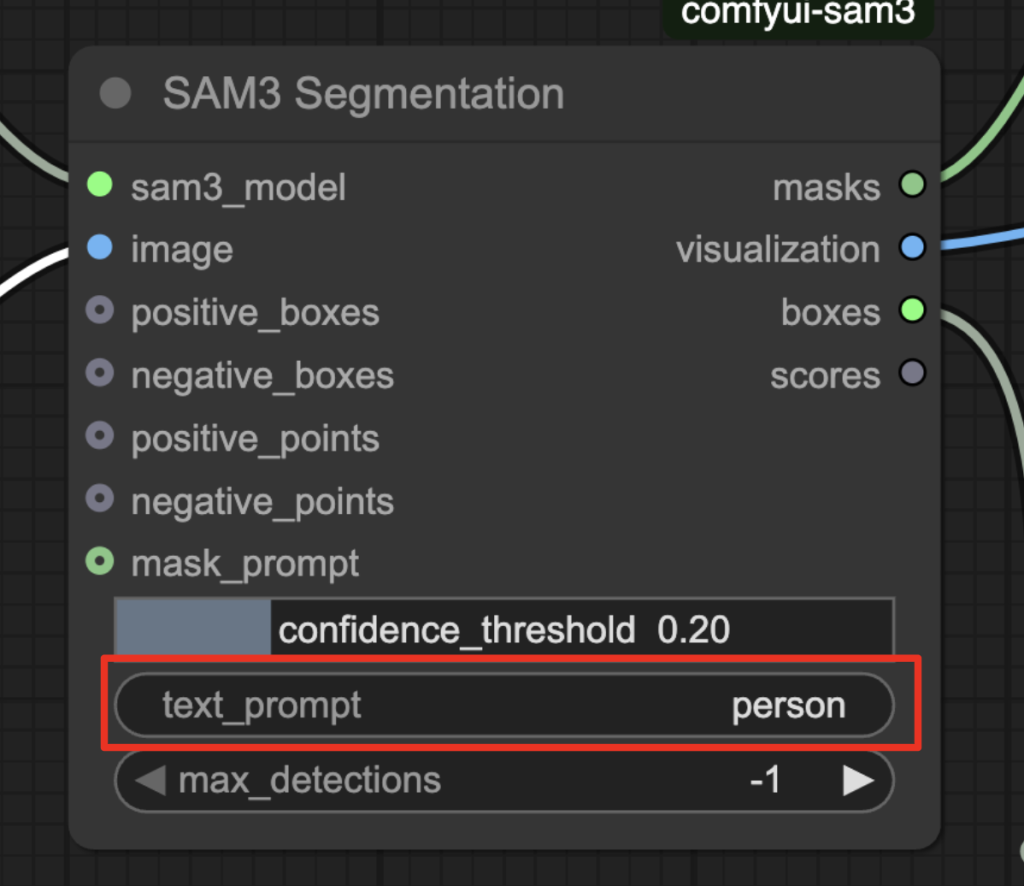
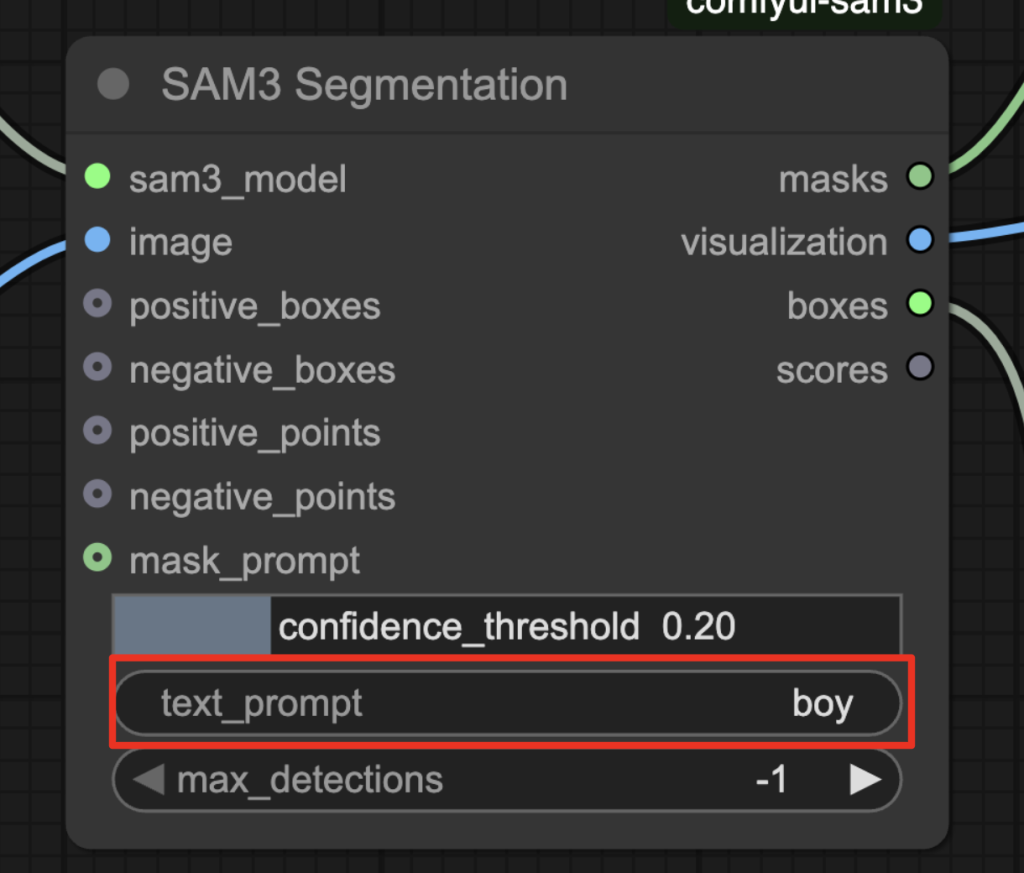
Step 4: Adjust the text prompt
Revise the text prompt to the subject you want to segment, e.g. person, house, boy, or girl.
Step 5: Run the workflow
Click the Run button to run the workflow.

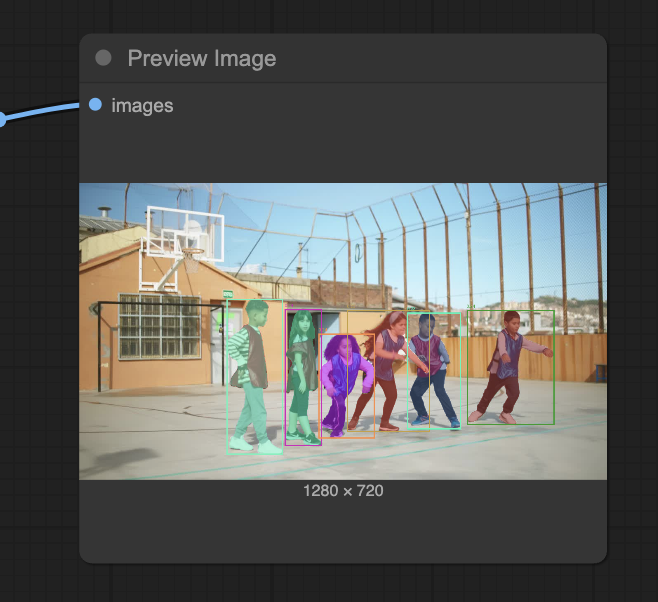
You should see the following outputs.
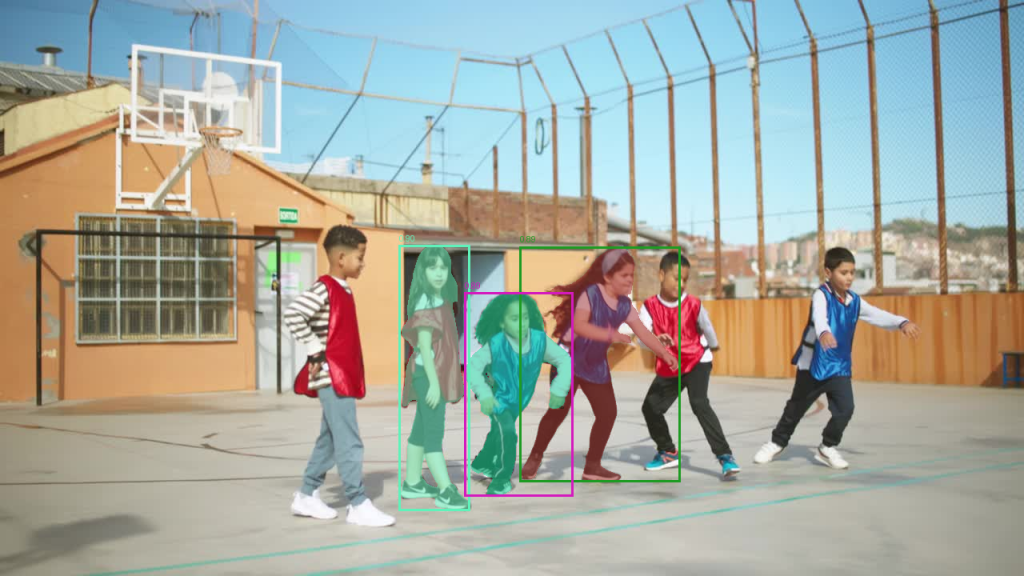
- Bounding boxes: rectangular boxes on the preview image that contain the subjects.
- Masks: The segmentation masks overlay on the preview images.
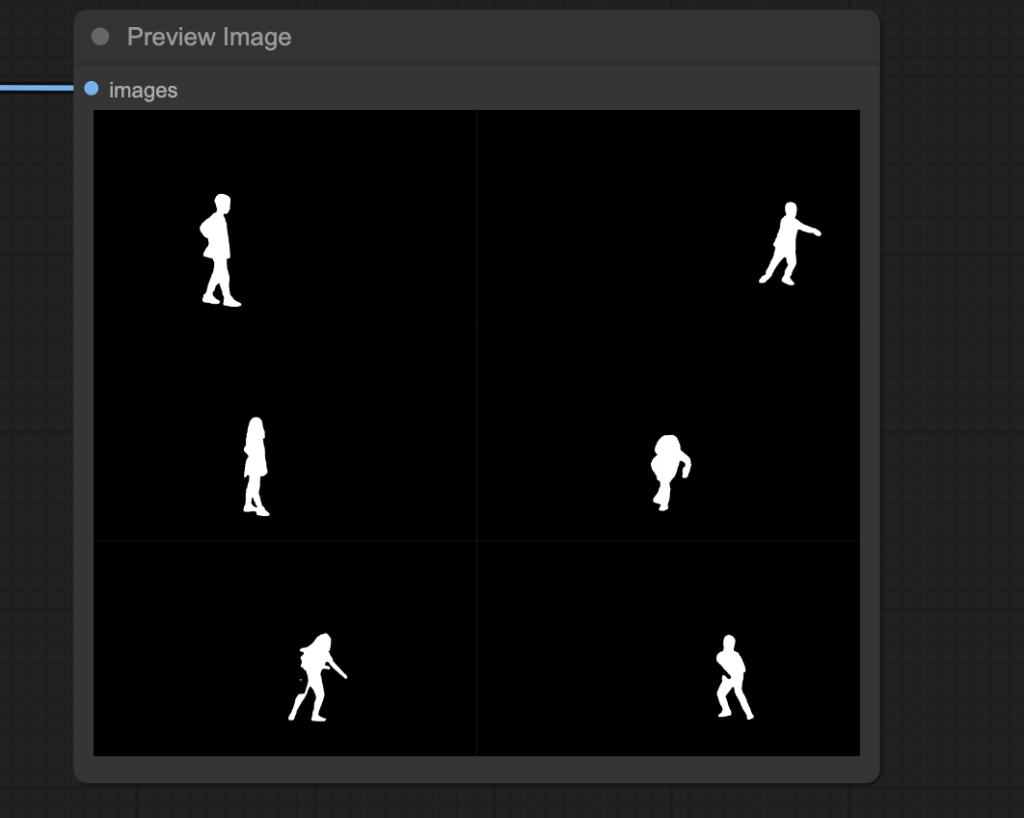
You can also download the individual masks in the node below.
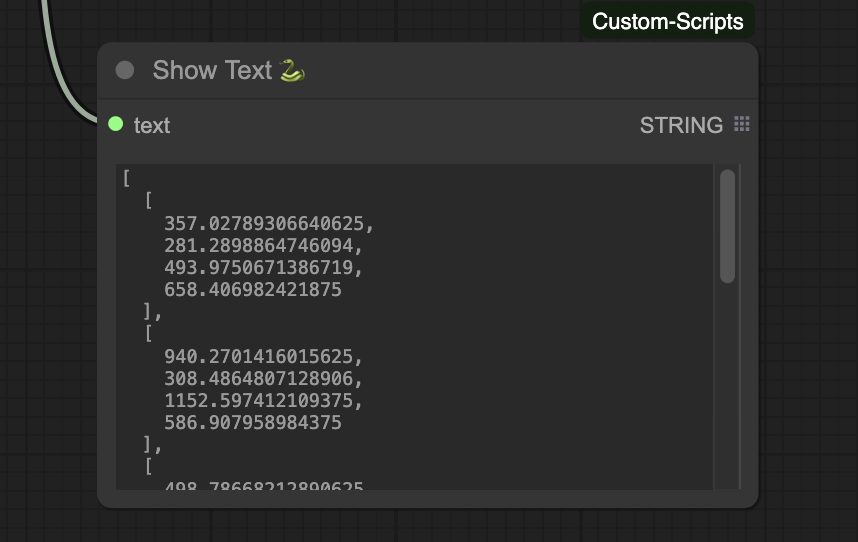
The coordinates of the bounding boxes are in the following nodes.
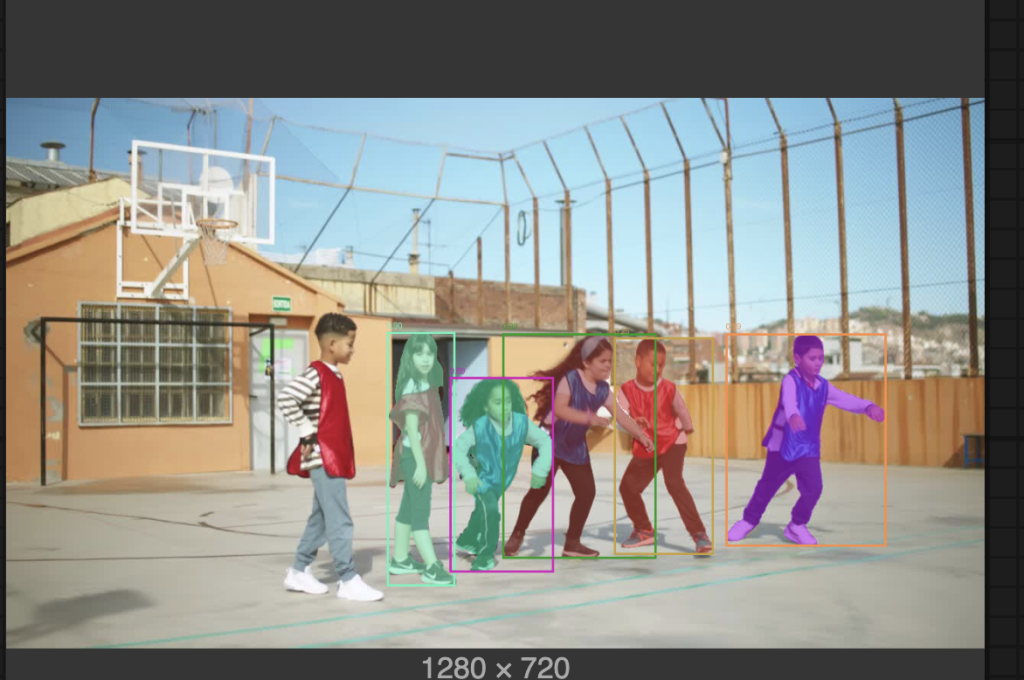
Exercise 1: Segment only the boys
Now, try to segment the boys only.
Change the text prompt to “boy”.
Run the workflow, and you should mask only the boys.
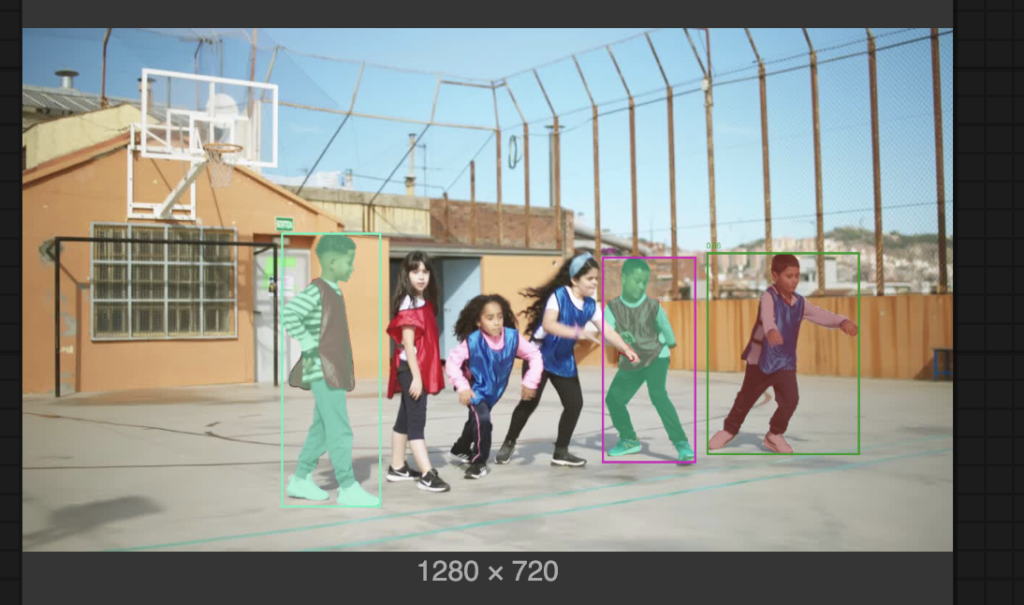
Exercise 2: Segment only the girls
Now, try to segment the girls only.
Easy, right? Changing the prompt “girl”, you will find some boys are inadvertently masked.
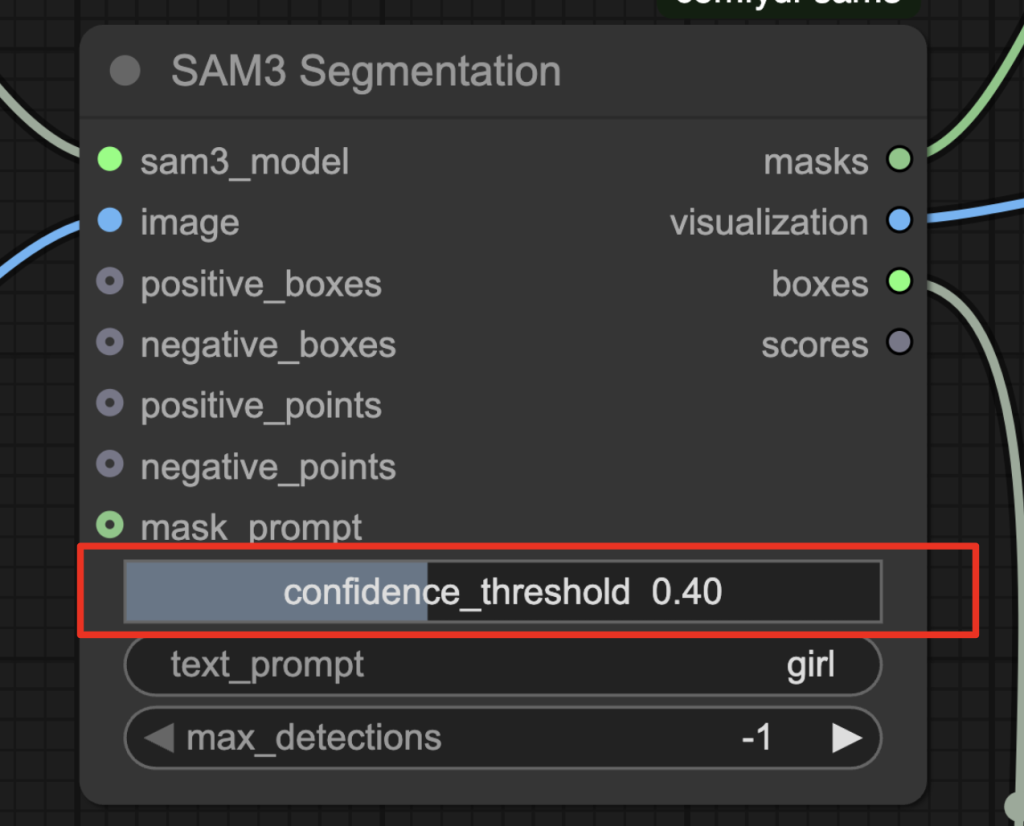
Now, the critical setting of the confidence threshold comes in handy. The model produces a confidence value for each mask, indicating how confident it is that it is correct.
Set the confidence threshold to 0.4 to return only more confident findings.
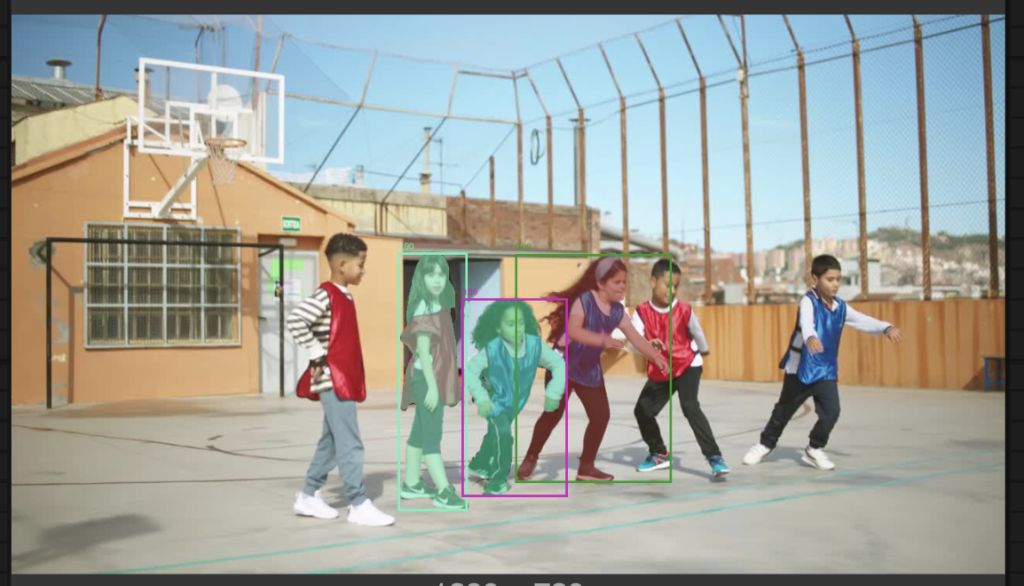
Rerun the workflow, and you will only get the girls masked.
To sum up:
- Use the prompt to tell the model what you want to segment.
- Adjust the confidence threshold to tweak the results.
SAM3 image segmentation with points
This SAM3 workflow lets you click an object to indicate what you want to segment.
For example, segmenting just one person by clicking on her.

Produced mask:

Step 1: Load the workflow
Download the following workflow JSON file.
Drop it into the ComfyUI window to load.
Step 2: Install missing nodes
This workflow needs PozzettiAndrea’s ComfyUI-SAM3 custom nodes.
If you see nodes with red borders, you don’t have the custom nodes required for this workflow. You should have ComfyUI Manager installed before performing this step.
Click Manager > Install Missing Custom Nodes.
Install the nodes that are missing.
Restart ComfyUI.
Refresh the ComfyUI page.
Step 3: Set the input image
Choose the input image in the Load Image node.
The workflow should have already been preloaded with the test image, but you can download it below for testing.
Step 4: Run the workflow
Click the Run button to run the workflow.
You should see an image show up on the SAM3 Point Collector node.
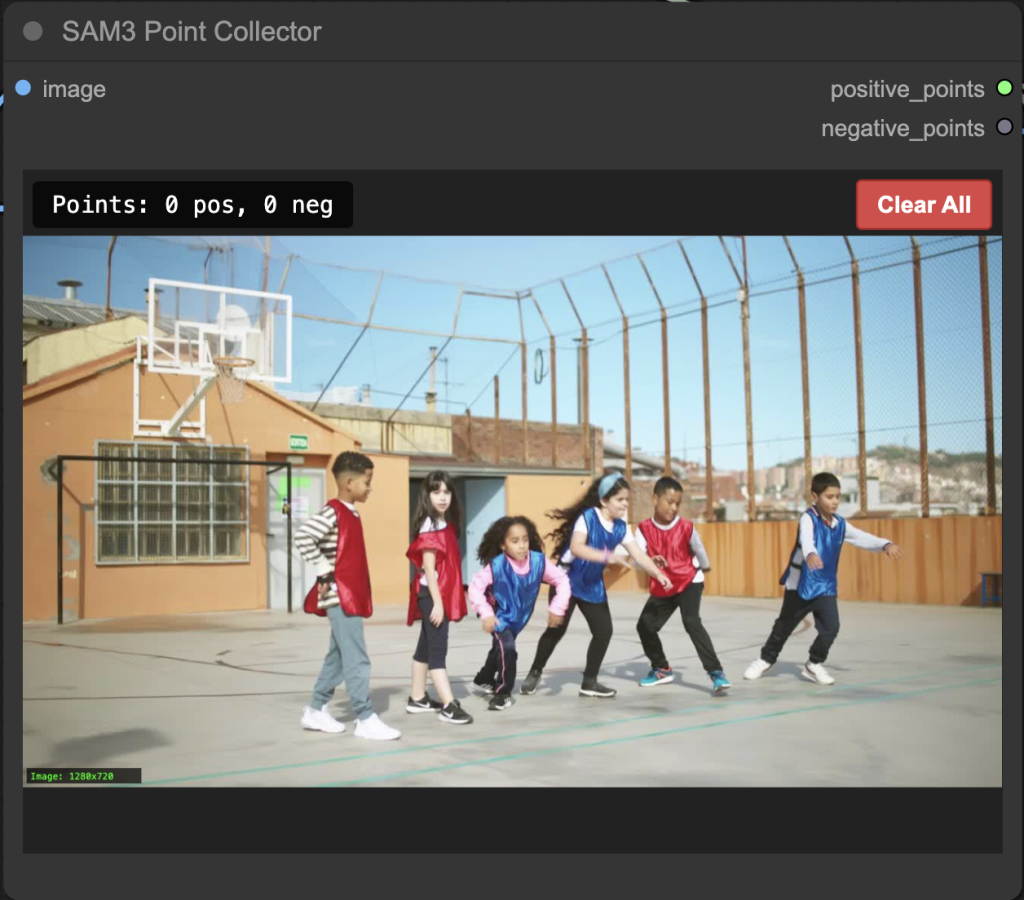
Step 5: Create mask points
Click on the subject(s) you want to segment.
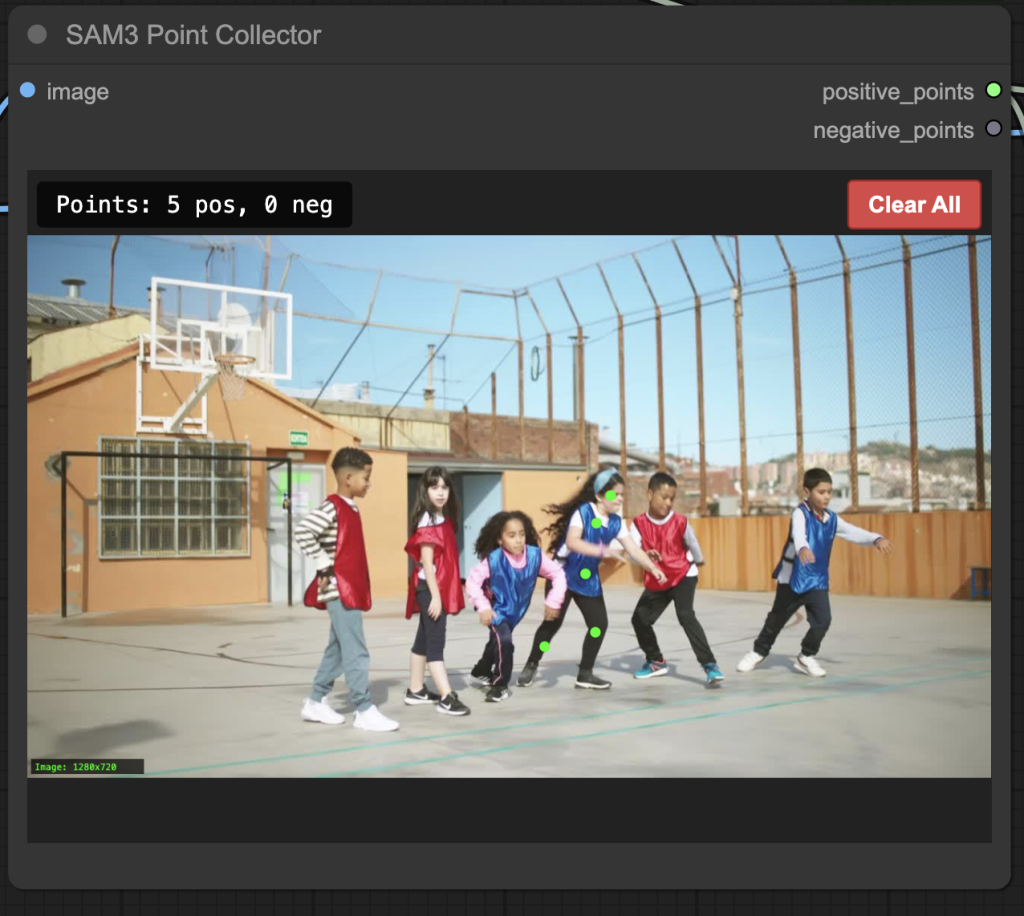
Step 6: Adjust the text prompt
Revise the text prompt to the subject you want to segment.
Step 5: Run the workflow
Click the Run button to run the workflow.
Only the girl you clicked on is segmented.
What’s next
In the next post, I will provide
Incredibly useful, thank you!
Good morning. There is a bug regarding signing up to become a member (both Plus and Scholar). Whatever you choose, the payment always ends up being “Annual” and not “Monthly”.
Hi you are right. It is now corrected.
Thank you , Andrew..Hope I will be able install it get it running