It’s never easier to turn a photo into cartoon, thanks to Stable Diffusion. In this tutorial, I will show you how to cartoonize a photo with img2img using a custom model.
(Check out another method to stylize photo without using a custom model.)
Table of Contents
Software setup
We will use AUTOMATIC1111 GUI for this tutorial.
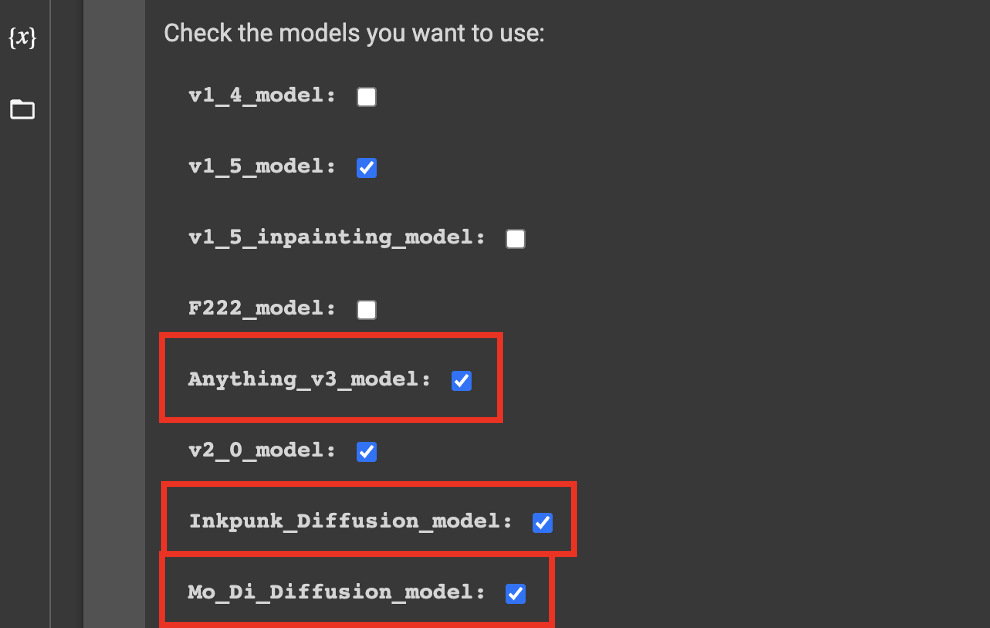
For the purpose of demonstration, we will use the following cartoon-style models. The technique will work for any custom models with unique styles. (That’s why they made custom models, right?)
Anything v3 – anime style model.
Inkpunk Diffusion – Japanese illustration style. (keyword: nvinkpunk)
Mo-Di Diffusion – Modern Disney style. (keywords: modern disney style)
Follow the model links above to download the model. Check out this article to learn how to install and use custom models.
Note for using Quick Start Guide
These 3 models are available in Colab Notebook in the Quick Start Guide.
If you are using the Colab Notebook in the Quick Start Guide, make sure those models are selected. Run the cell to start AUTOMATIC1111 GUI.
Cartoonize – step by step
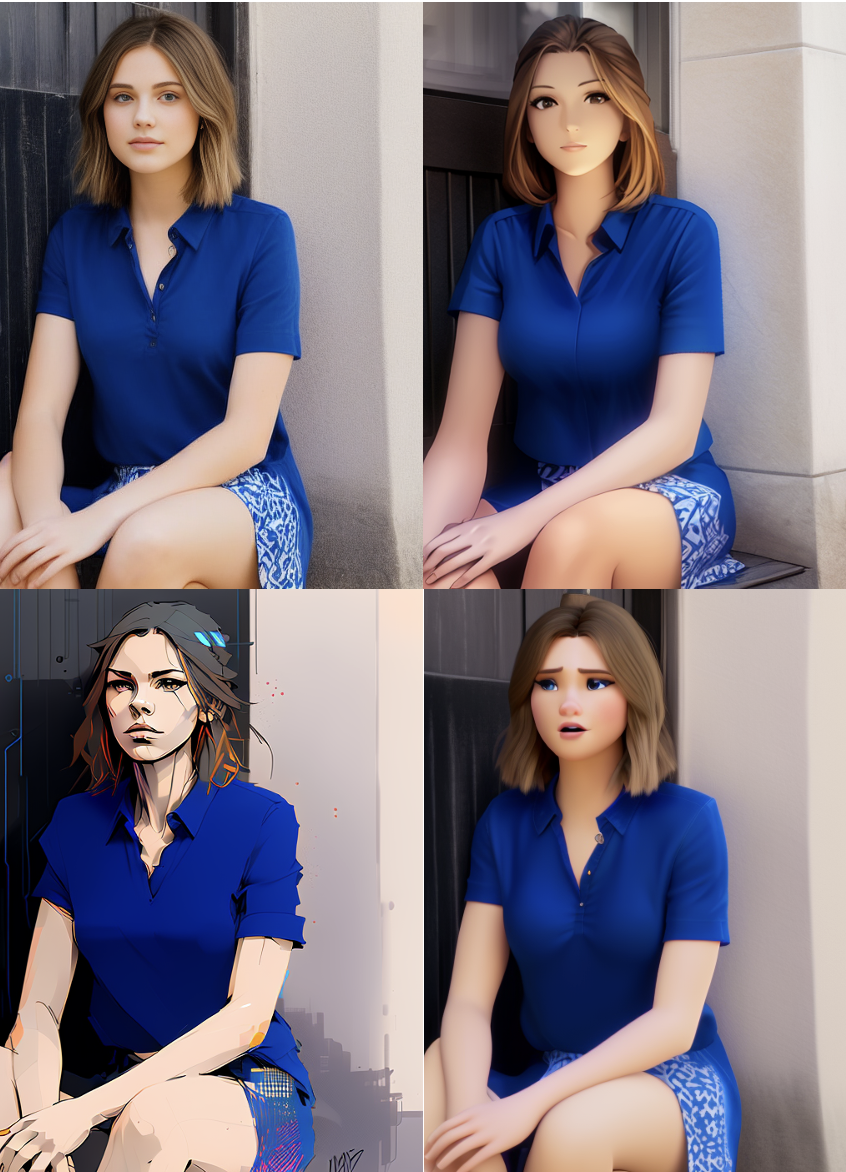
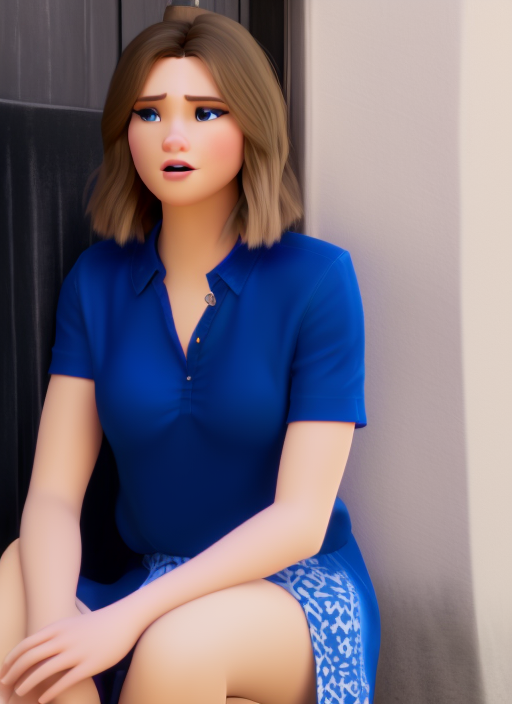
I will cartoonize a photo of my friend I met in the latent space. You can find her other realistic human friends.

We will use Inkpunk Diffusion as our cartoon model. See Software section for set up instructions.
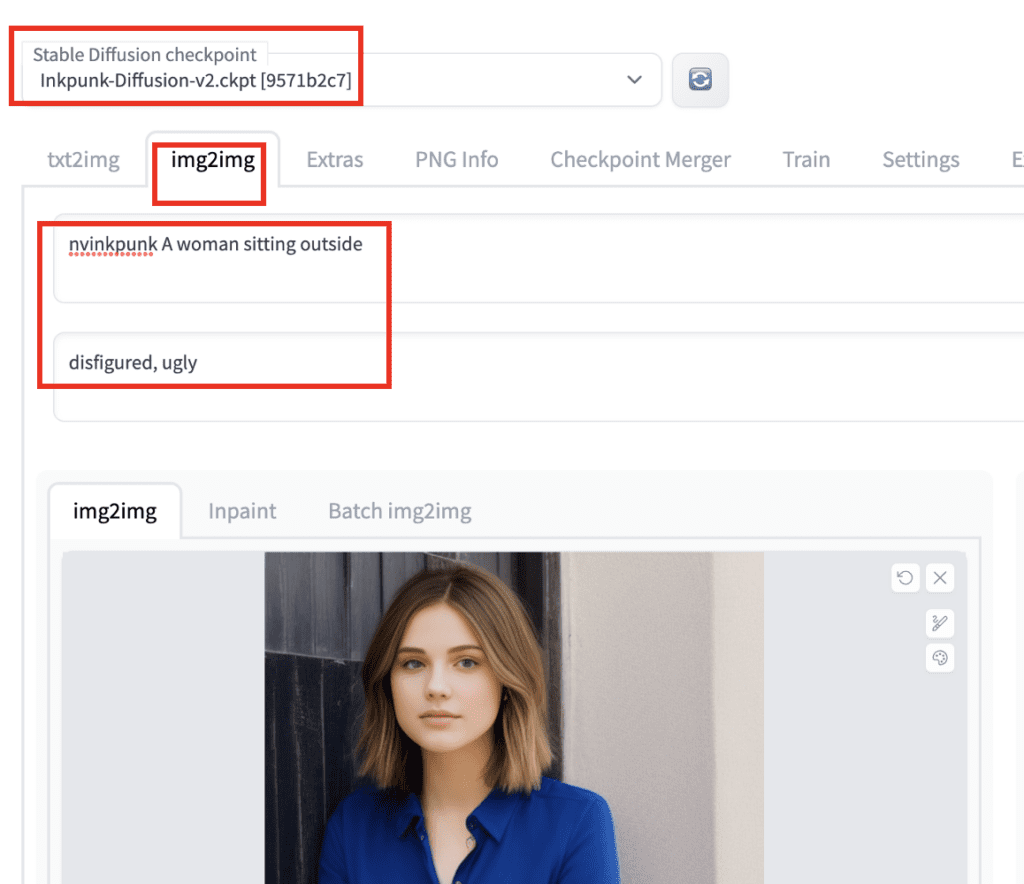
In AUTOMATIC1111 GUI, select the Inpunk Diffusion model in the Stable Diffusion checkpoint dropdown menu.
Switch to img2img tab by clicking img2img. Upload the photo you want to be cartoonized to the canvas in the img2img sub-tab.
Put in a prompt describing your photo. You also need to include the special keywords that trigger the style, if any. For Inkpunk Diffusion, it is nvinkpunk. So my prompt is
nvinkpunk A woman sitting outside
Negative prompt is optional. Out of habit (or superstition), I did use one:
disfigured, ugly
Set either width or height to 512 and adjust the other to closely match the aspect ratio of your photo. Since my photo is a portrait, I set width to 512 and height to 704. Select Crop and resize to get rid of the part that doesn’t fit.
Set sampling steps to 30 to get a good-quality image.
Set batch size to 4 so that you will have a few images to choose from. (Cherry picking is an important skill for using Stable Diffusion)
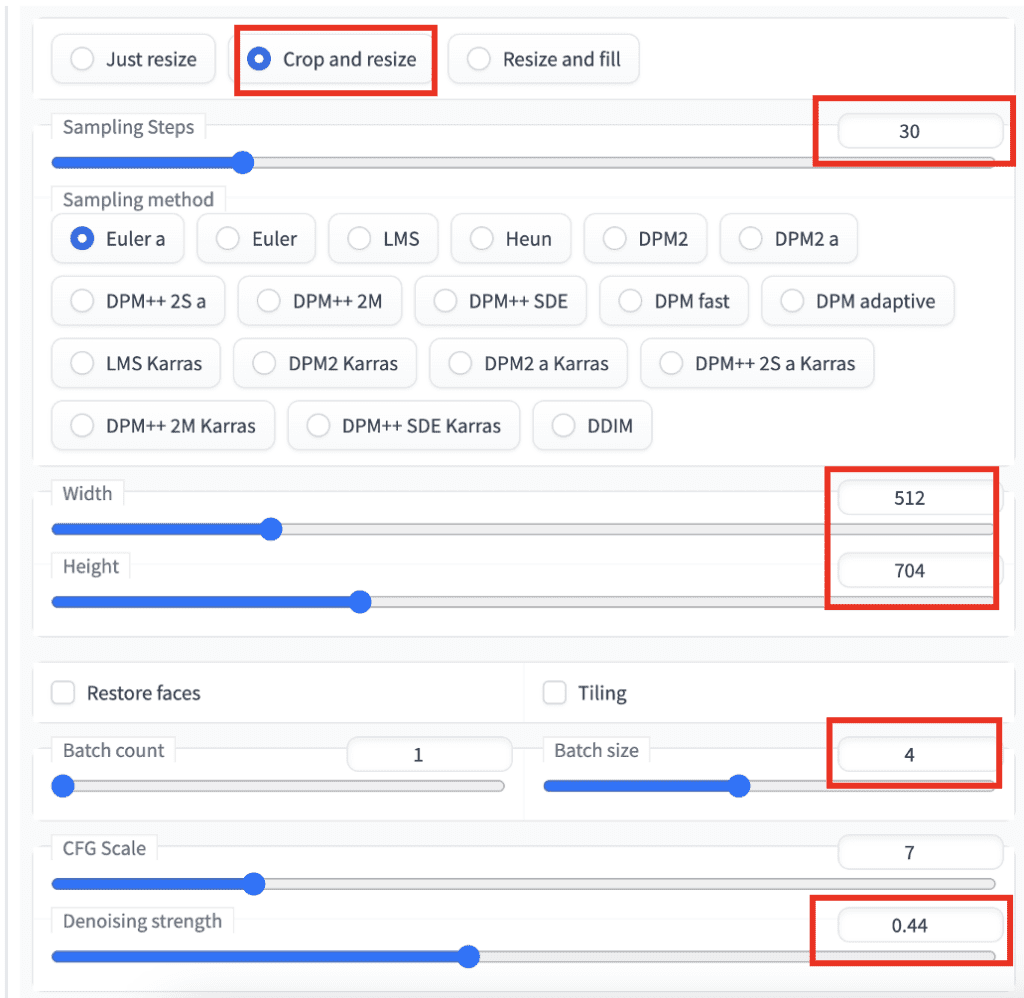
The setting you will need to play with is denoising strength. Carefully adjust this setting to get the amount of change you want. Nothing would change when it is set to 0. Your original image would be ignored when you set it to 1. Around 0.4 is a good starting point.
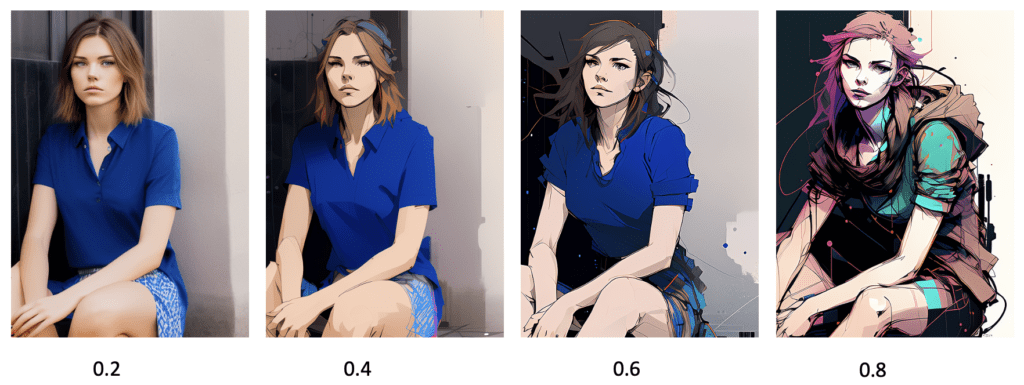
Press Generate to produce images.
You will see something like below when you use different values of denoising strength. Pick the value to get the effect you want to achieve!
Multiple img2img steps
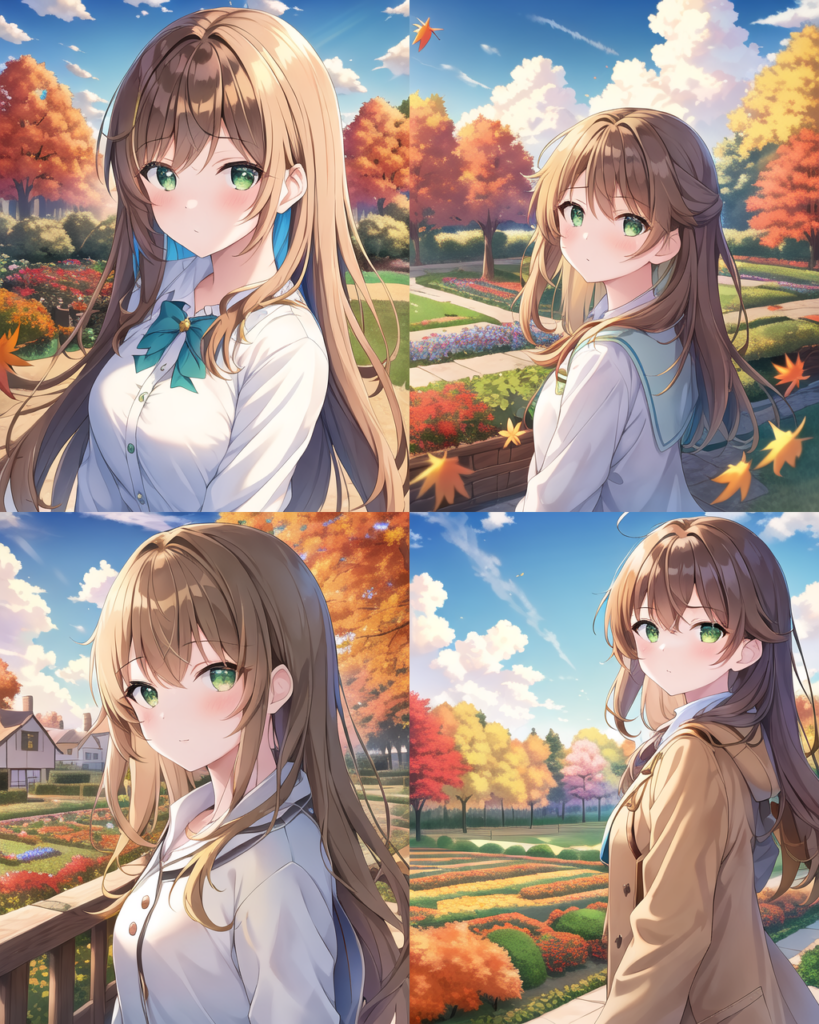
One trick I often use is doing multiple rounds of img2img to fill in finer details.
Remember low value of img2img produces small change? You can do a step of big denoising strength followed by a series of small values. Below is an example.
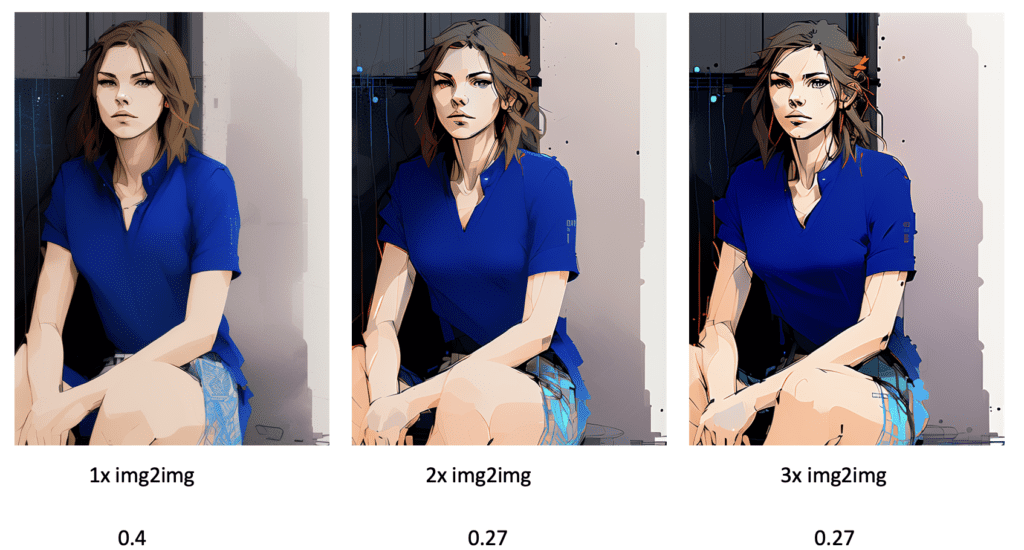
Or a series of small values:
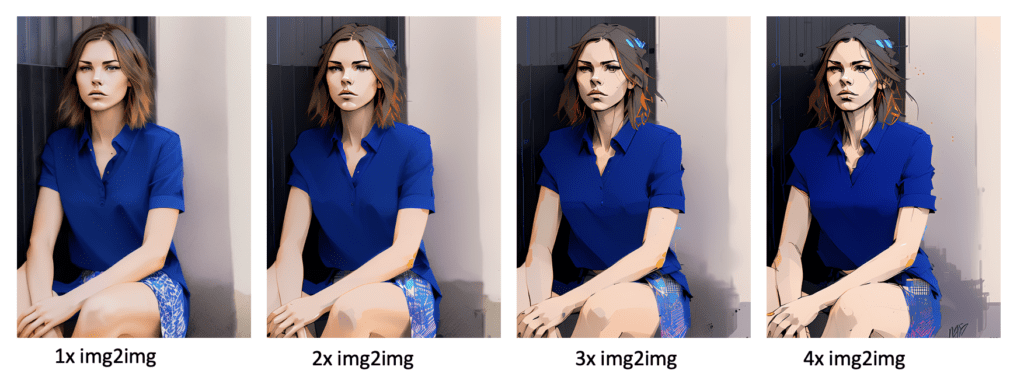
Using multiple rounds of img2img, you can stylize local areas without changing the overall composition.
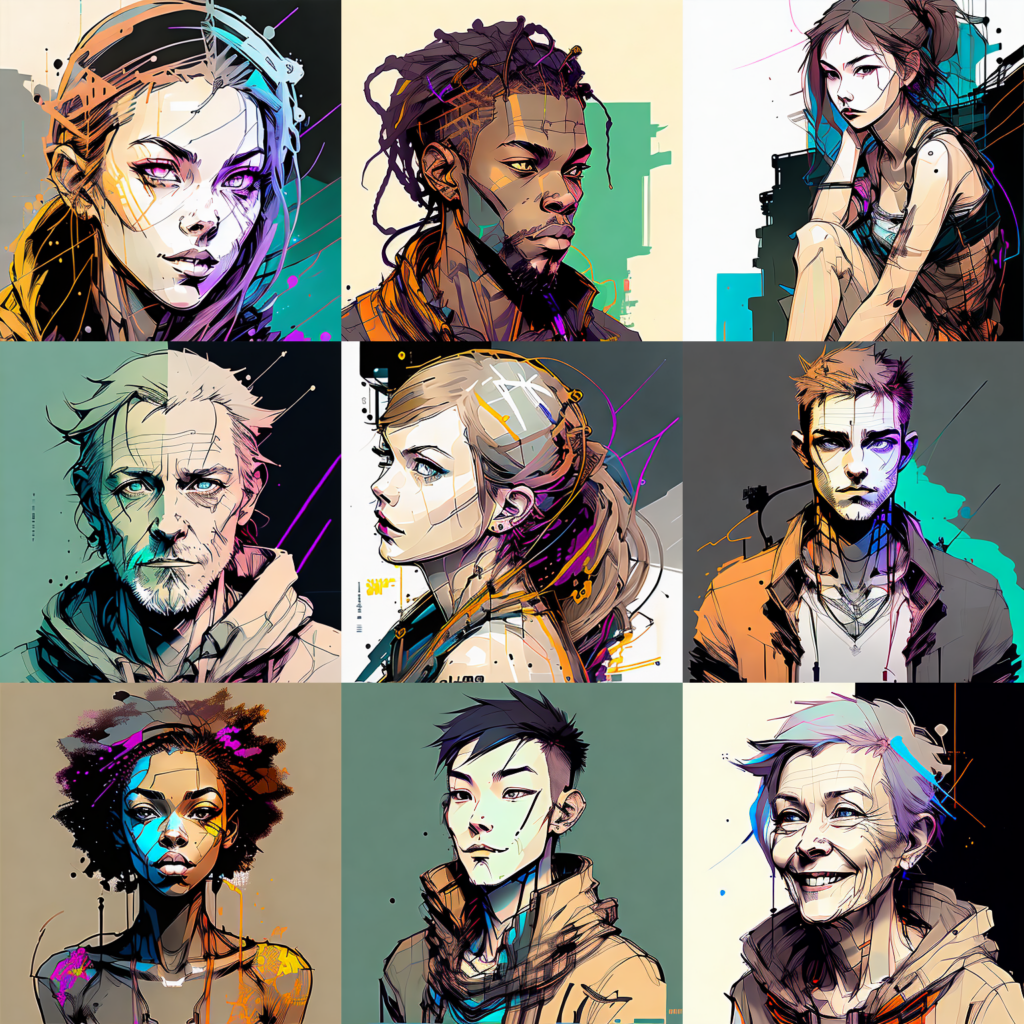
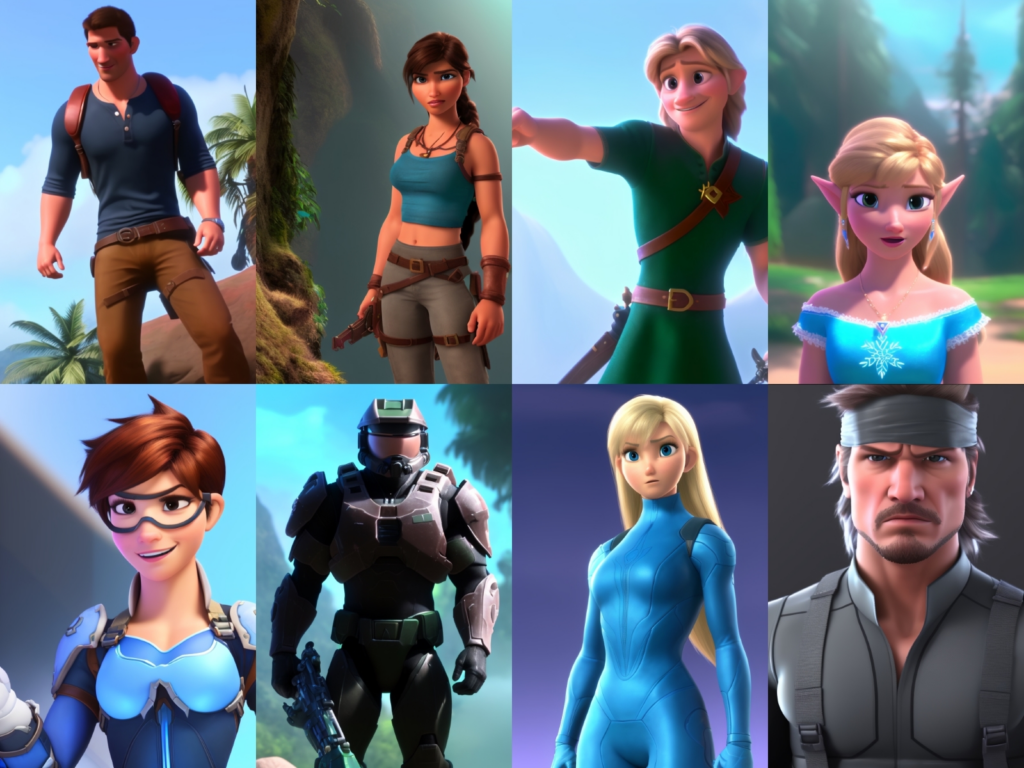
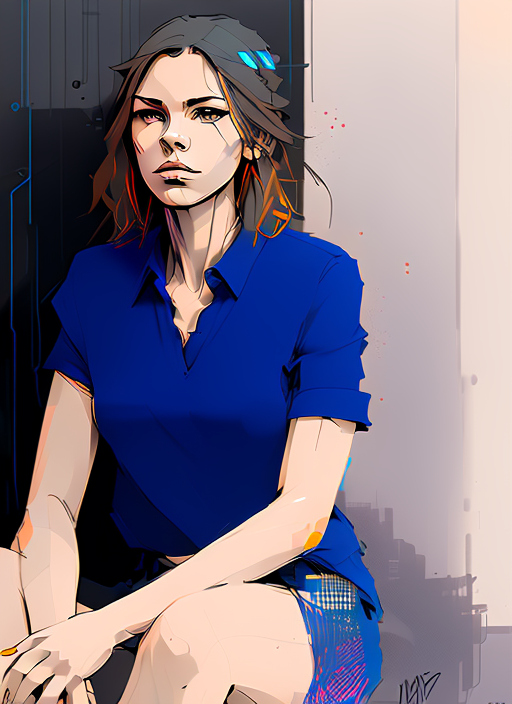
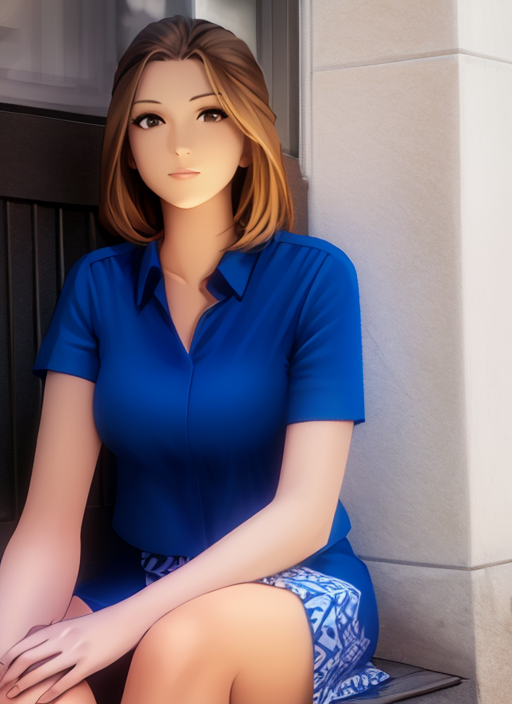
Final products
Here are the images cartoonized by the three custom models.
These are, of course, just one example from each model. You can control how strong the effect you want to your taste.
Next steps
If you want to use the cartoonized character for some other creative works, you can remove the background by using one of those AI background removal sites, e.g. remove.bg.
Perhaps you can make a comic strip by asking your friends to act out the scenes, and cartoonize them.
You can combine this technique with inpainting if you only want part of the image changed. Or different parts of images stylized with different models.
The possibility is endless here.
Tried this for fun with my own photograph and the images took 30 years off my age and about 30kg off my weight. Not complaining about that, but I’d like the images to look a little more like me.
How to I find the “special keywords that trigger the style(nvinpunk))” for any other model I try?
You will need to read the page where you download the model.
anything v3 has no trigger words,how to write the prompt
You just write prompt you normally would, and it will turn to anime style. You can go to their model page on civitai to get some examples.
here civitai.com you can search for the model and you wil find Trigger Words
ex: https://civitai.com/models/1087/inkpunk-diffusion