
Qwen Image Edit is an image-editing AI model. It can be used to edit the image with text prompts alone. The edit can change any part of the image.
What if you only want to change a certain part of the image, keeping the rest unchanged? In the AI world, you have to do inpainting — editing an image within a masked area.
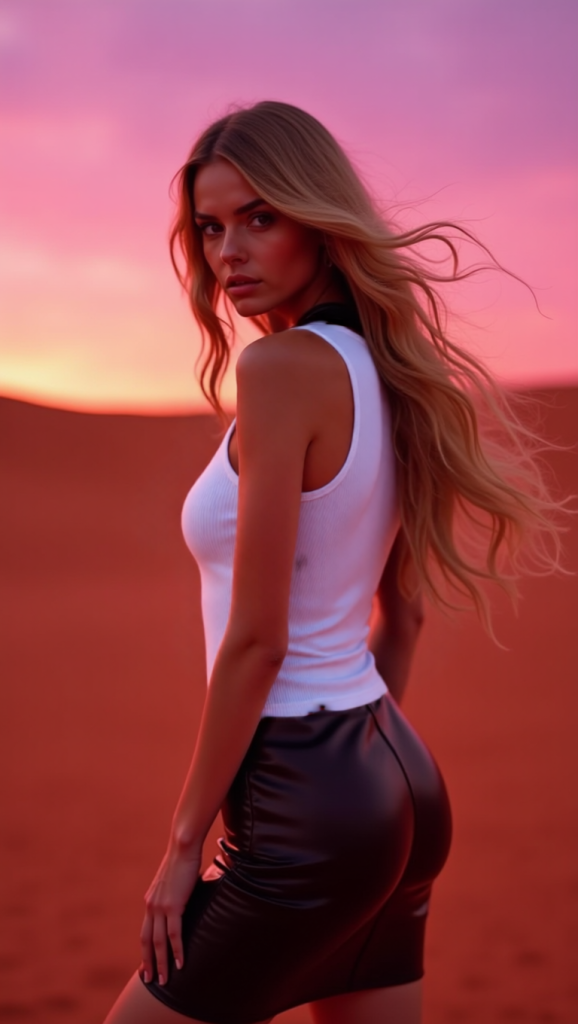
For example, you can edit only the upper body and leave the rest of the image unchanged.
In this tutorial, you will learn how to use the Qwen Image Edit Inpaint workflow.
Table of Contents
Software
We will use ComfyUI, a free AI image and video generator. You can use it on Windows, Mac, or Google Colab.
Think Diffusion provides an online ComfyUI service. They offer an extra 20% credit to our readers.
Read the ComfyUI beginner’s guide if you are new to ComfyUI. See the Quick Start Guide if you are new to AI images and videos.
Take the ComfyUI course to learn how to use ComfyUI step by step.
ComfyUI Colab Notebook
If you don’t have a powerful GPU card, you can still run the Qwen Image model on Google Colab, Google’s cloud computing platform, with my ComfyUI notebook.
You don’t need to download the model as instructed below. Select the Qwen_Image_Edit model before running the notebook.

Qwen Image Edit Inpainting
This workflow edits an image solely based on the instructions in the prompt. You will
This workflow uses Qwen Image Lightning LoRA to speed up the workflow to 4 steps.
Step 0: Update ComfyUI
Before loading the workflow, make sure your ComfyUI is up to date. The easiest way to do this is to use ComfyUI Manager.
Click the Manager button on the top toolbar.

Select Update ComfyUI.
Restart ComfyUI.
Step 1: Install models
After loading the workflow JSON file, ComfyUI should prompt you to download the missing model files. You can use the dialog box to download the models, or use the links below.
You should already have these models if you used Qwen Image Edit.
Here are the models you need to download:
- Download qwen_image_edit_fp8_e4m3fn.safetensors and put it in ComfyUI > models > diffusion_models.
- Download qwen_2.5_vl_7b_fp8_scaled.safetensors and put it in ComfyUI > models > text_encoders.
- Download qwen_image_vae.safetensors and put it in ComfyUI > models > vae.
- Download Qwen-Image-Lightning-4steps-V1.0.safetensors and put it in ComfyUI > models > loras.
Step 2: Load the workflow
Download the workflow below. Drop it into ComfyUI to load.
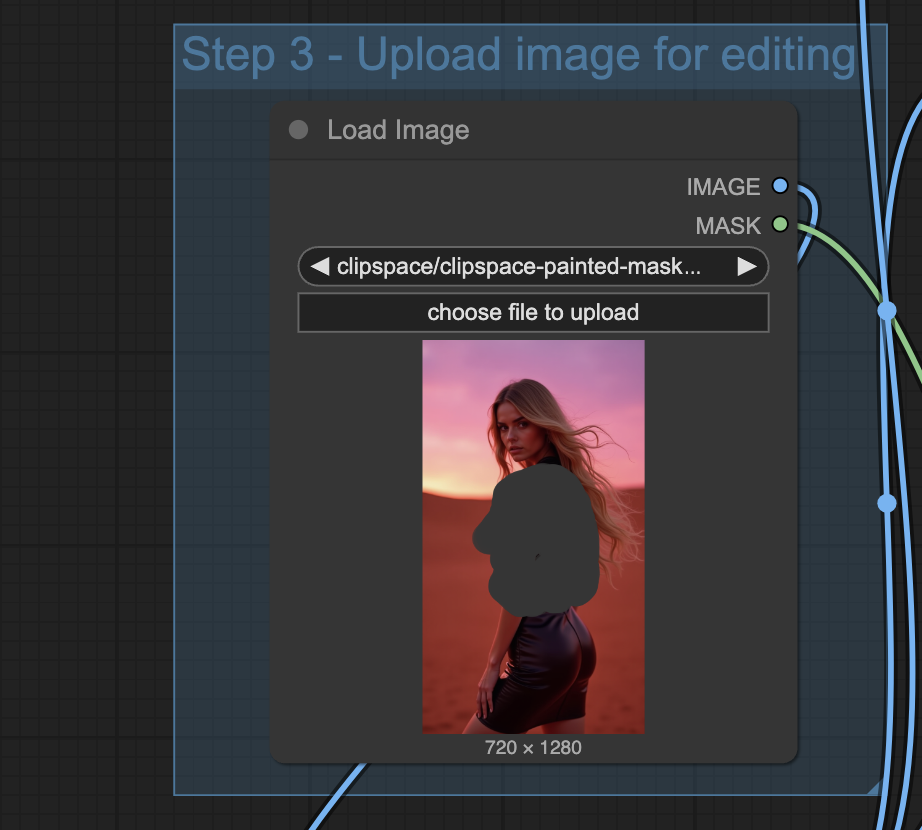
Step 3: Upload an image to edit
Upload the image you wish to edit.
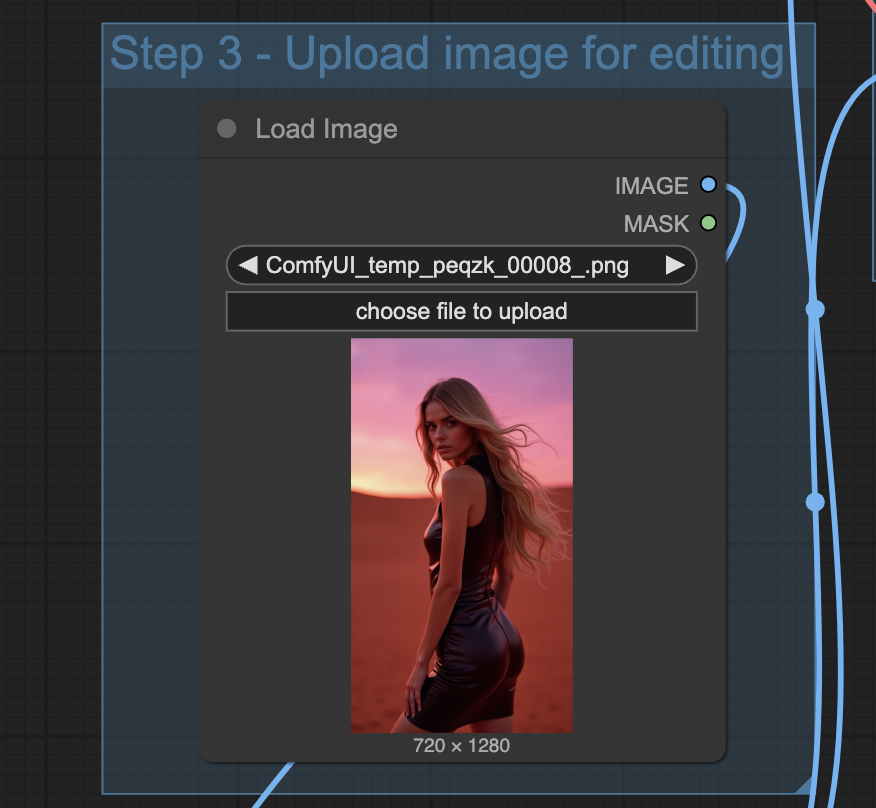
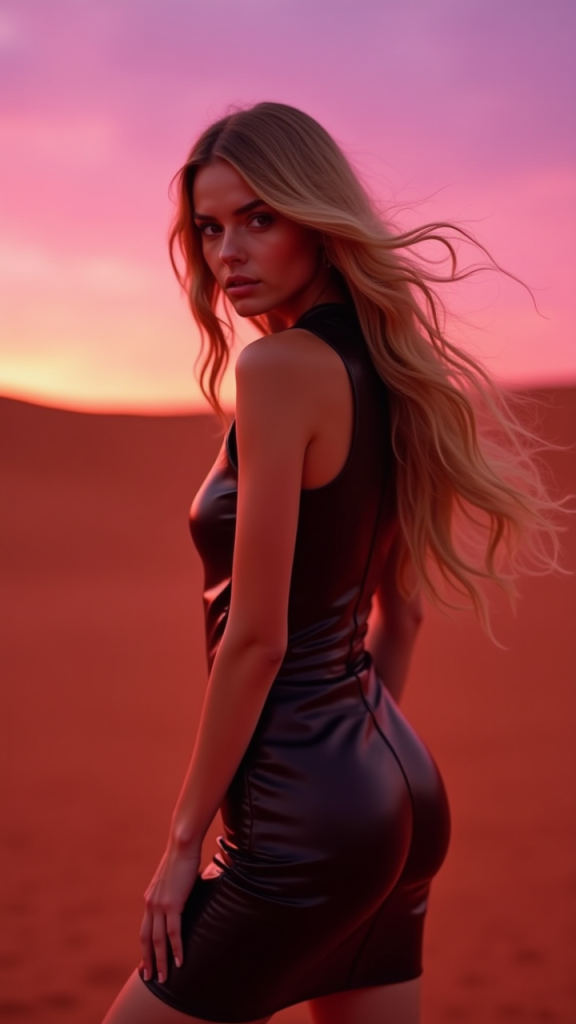
You can use the test image below.
Step 5: Create an inpaint mask
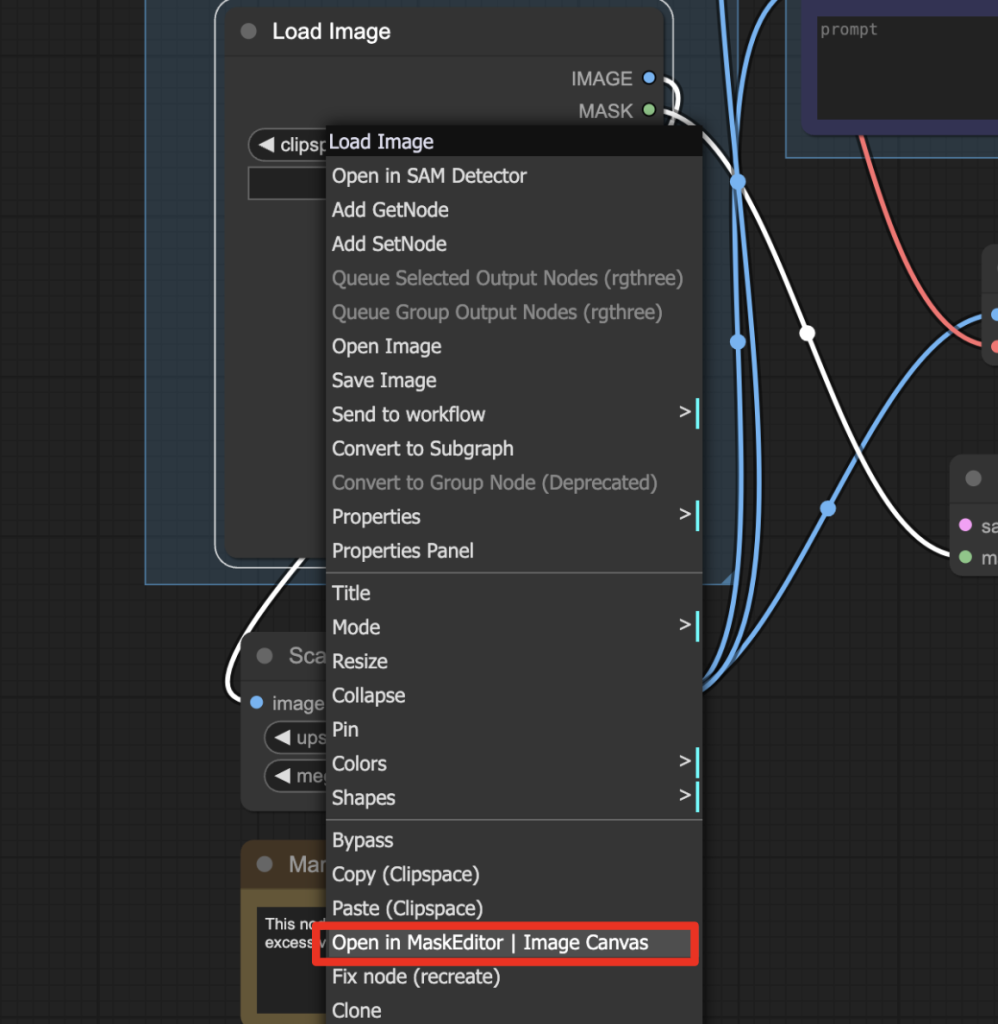
Right-click the Load Image node to bring up the context menu. Select Open in Mask Editor.
Mask over the area you want to change.
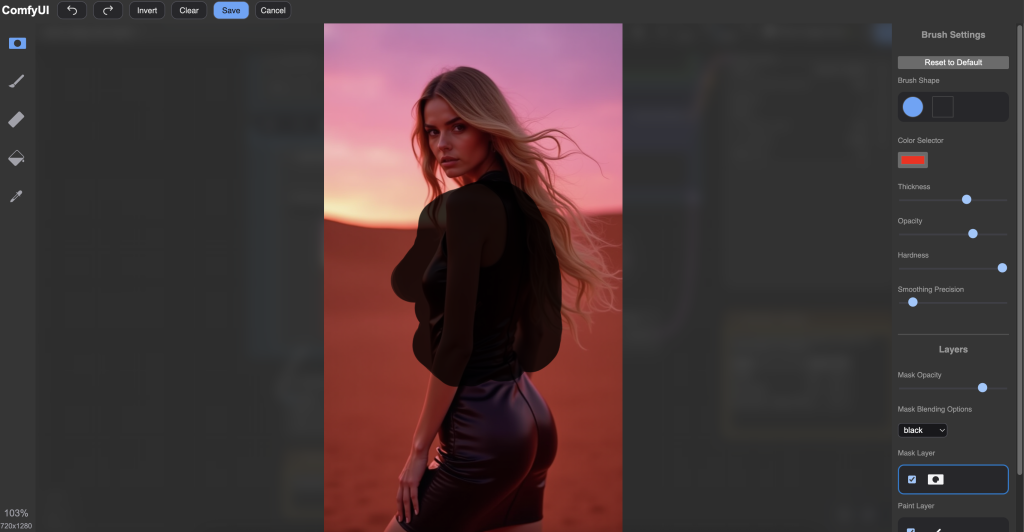
Click Save to save the mask.
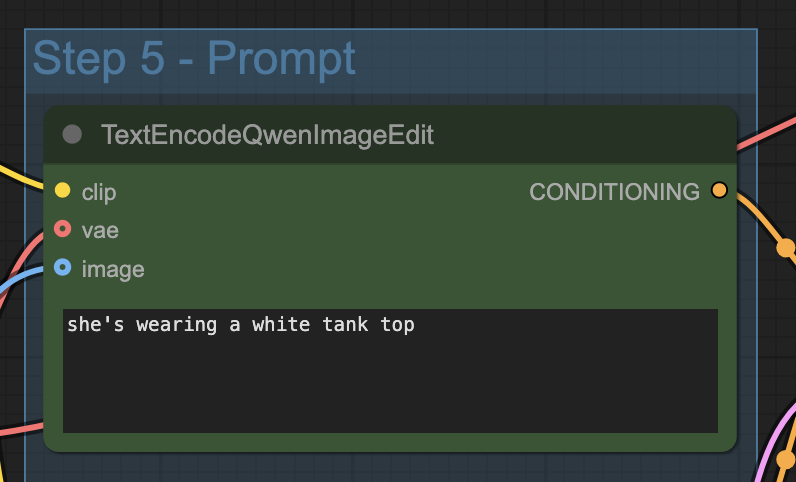
Step 5: Revise the prompt
Write the instructions for editing in the prompt. I want her to wear a white tank top, so I say it into existence.
she’s wearing a white tank top
Step 5: Generate an image
Click the Run button to run the workflow.

Now, you are in business! Repeat with a different prompt and mask.