Stable Diffusion can extend an image in any direction with outpainting. It can generate a coherent background that is outside of the view.
In this article, you will learn how to perform outpainting step-by-step.
Table of Contents
Software
We will use AUTOMATIC1111, a popular and free Stable Diffusion software. You can use it on Windows, Mac, or Google Colab.
Step-by-step guide
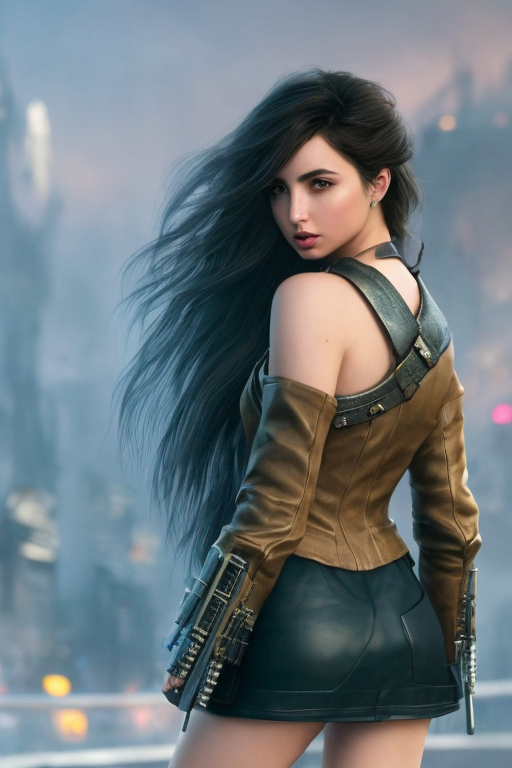
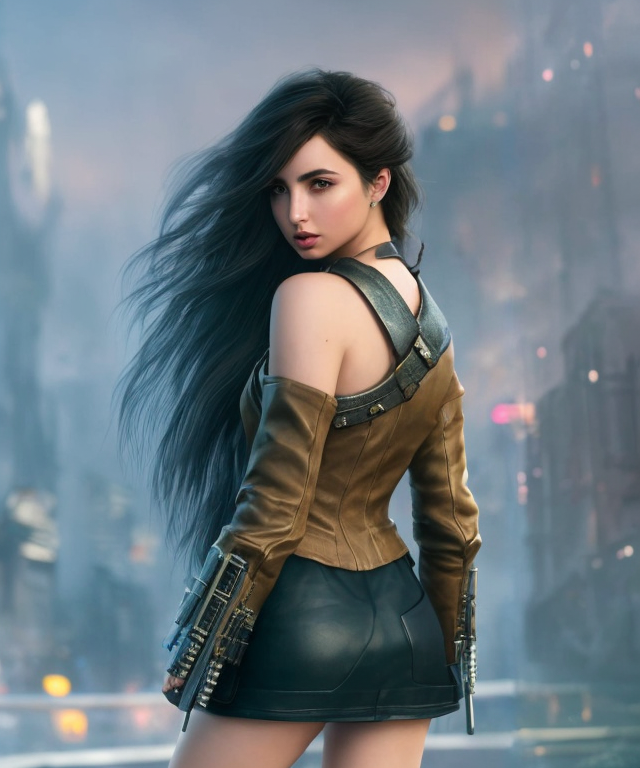
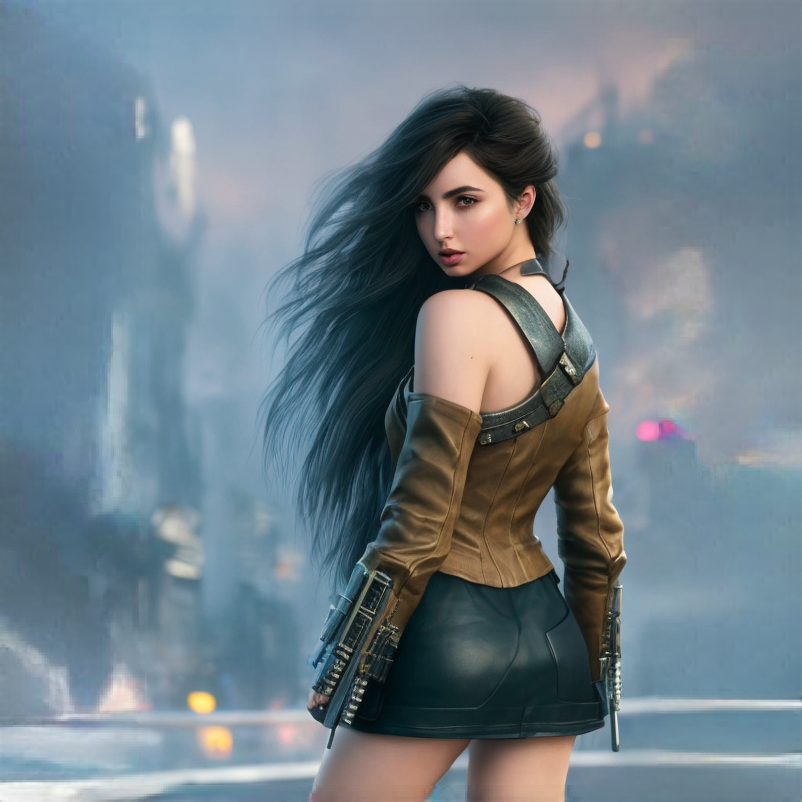
The first step is to get your image ready. We will use the following AI image generated with Stable Diffusion. Outpainting will center the image and turn it to landscape size.

You can download this image using the button below to follow the tutorial.
Step 1: Upload the image to AUTOMATIC1111
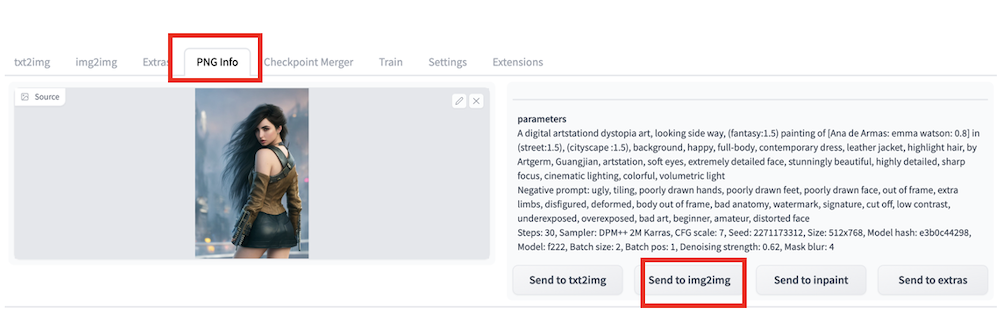
If the image was generated by AUTOMATIC1111 GUI, the prompts and other generation parameters were written into the PNG file’s metadata.
In AUTOMATIC1111 GUI, Go to the PNG Info tab. Drag and drop the image from your local storage to the canvas area. The generation parameters should appear on the right.
Press Send to img2img to send this image and parameters for outpainting. The image and prompt should appear in the img2img sub-tab of the img2img tab.
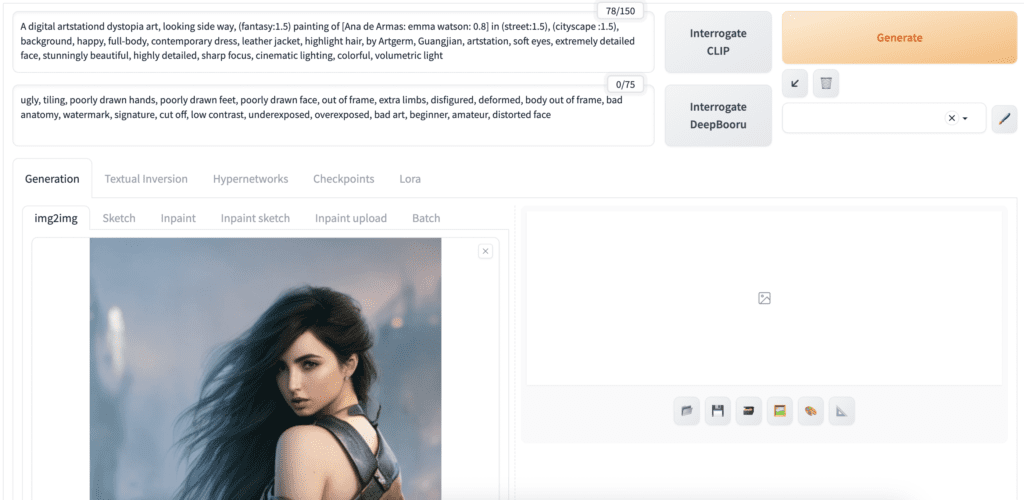
If AUTOMATIC1111 GUI does not create your starting image, proceed to the img2img tab. Upload the image to the img2img canvas. You will need to write a prompt to describe the image and style accurately.
You can also click the “Interrogate CLIP” button to automatically generate a prompt. You should revise the prompt to ensure it accurately describes the image.
You should have the prompt, image size, and other image settings populated.
Step 2: Select an inpainting model
Use an inpainting model for the best result. They are special models designed for filling in a missing content. Although they are trained to do inpainting, they work equally well for outpainting.
The following models are fine choices.
- DreamShaper inpainting — Realistic painting style
- Realistic Vision inpainting — Realistic photo style
- Deliberate inpainting — Painting style
You can always fall back to the original v1.5 inpainting model if you can’t find a model with a matching style.
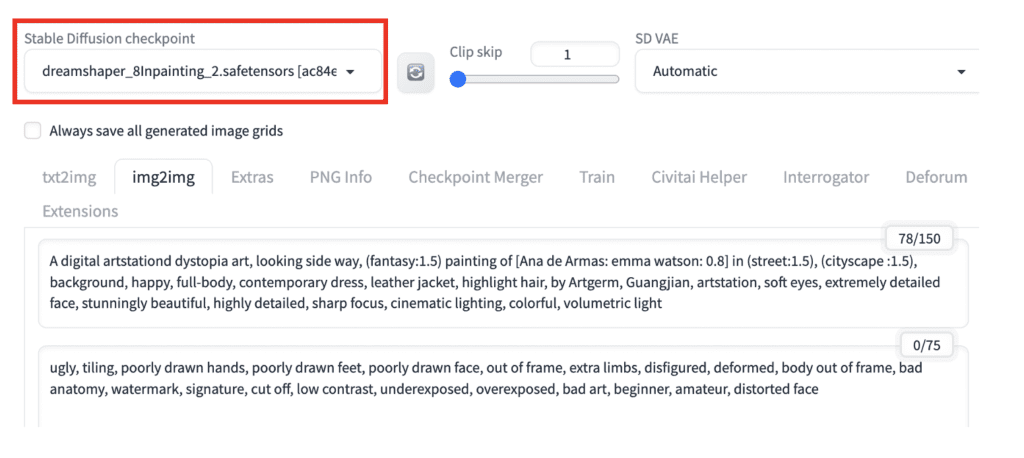
Since the test image is a realistic painting style, I will use the DreamShaper inpainting model.
Download the DreamShaper inpainting model using the link above. Put it in the folder stable-diffusion-webui > models > Stable-Diffusion.
In the Stable Diffusion checkpoint dropdown menu, select the DreamShaper inpainting model.
Step 3: Set outpainting parameters
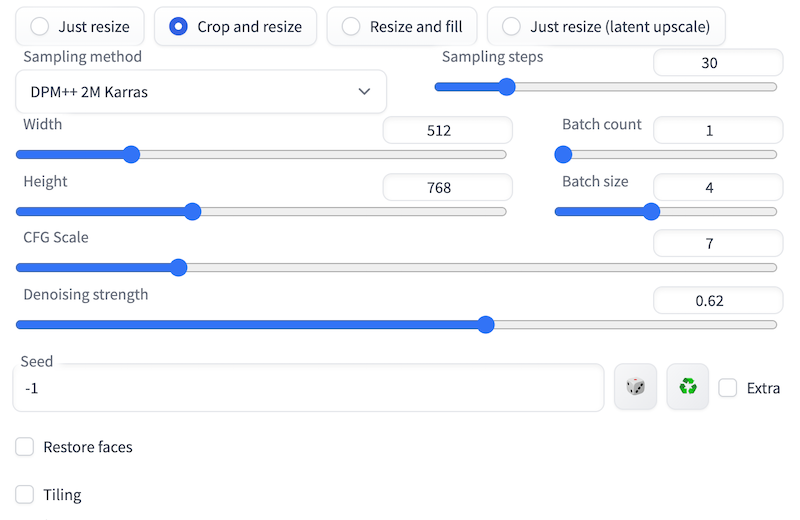
The image size should have automatically been set correctly if you used PNG Info. For a custom image, you should set the shorter side to the native resolution of the model, e.g., 512 px for v1 and 1024 for SDXL models.
The longer side should be adjusted accordingly to maintain the aspect ratio.
Set resize mode to crop and resize so that the aspect ratio won’t change.
Set the seed to -1 to get a different result each time.
Denoising strength will be the knot you will have a lot of fun playing with. For now, let’s set it to 0.6.
You can use your standard text-to-image setting for the rest. For completeness, here are what I use
- Sampling method: DPM++ 2M Karras
- Sampling Steps: 30
- Batch size: 4
This is what my setting section looks like:
Step 4: Enable the outpainting script
Scroll down to the Script dropdown menui. There are two outpainting scripts: (1) outpainting mk2 and (2) poor man’s outpainting. Choose Poor man’s outpainting.
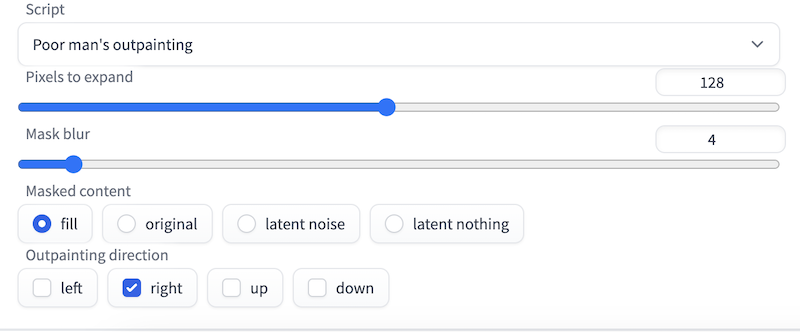
You can leave Pixels to expand at 128 pixels. Pick fill for masked content. It will use the average color of the image to fill in the expanded area before outpainting.
It is best to outpaint one direction at a time. Let’s pick the right outpaint direction.
I am reusing the original prompt.
Press Generate, and you are in business! Regenerate as many times as needed until you see an image you like.
Increase denoising strength to change more. Decrease denoising strength to change less. It is that simple.
Center an image
She is no longer on the right of the photo but is dead center. The expanded pixels are visually consistent with the rest of the image. I am pleased!
Once you are happy with one side, you can hit Send to img2img under the Result canvas to repeat the process.
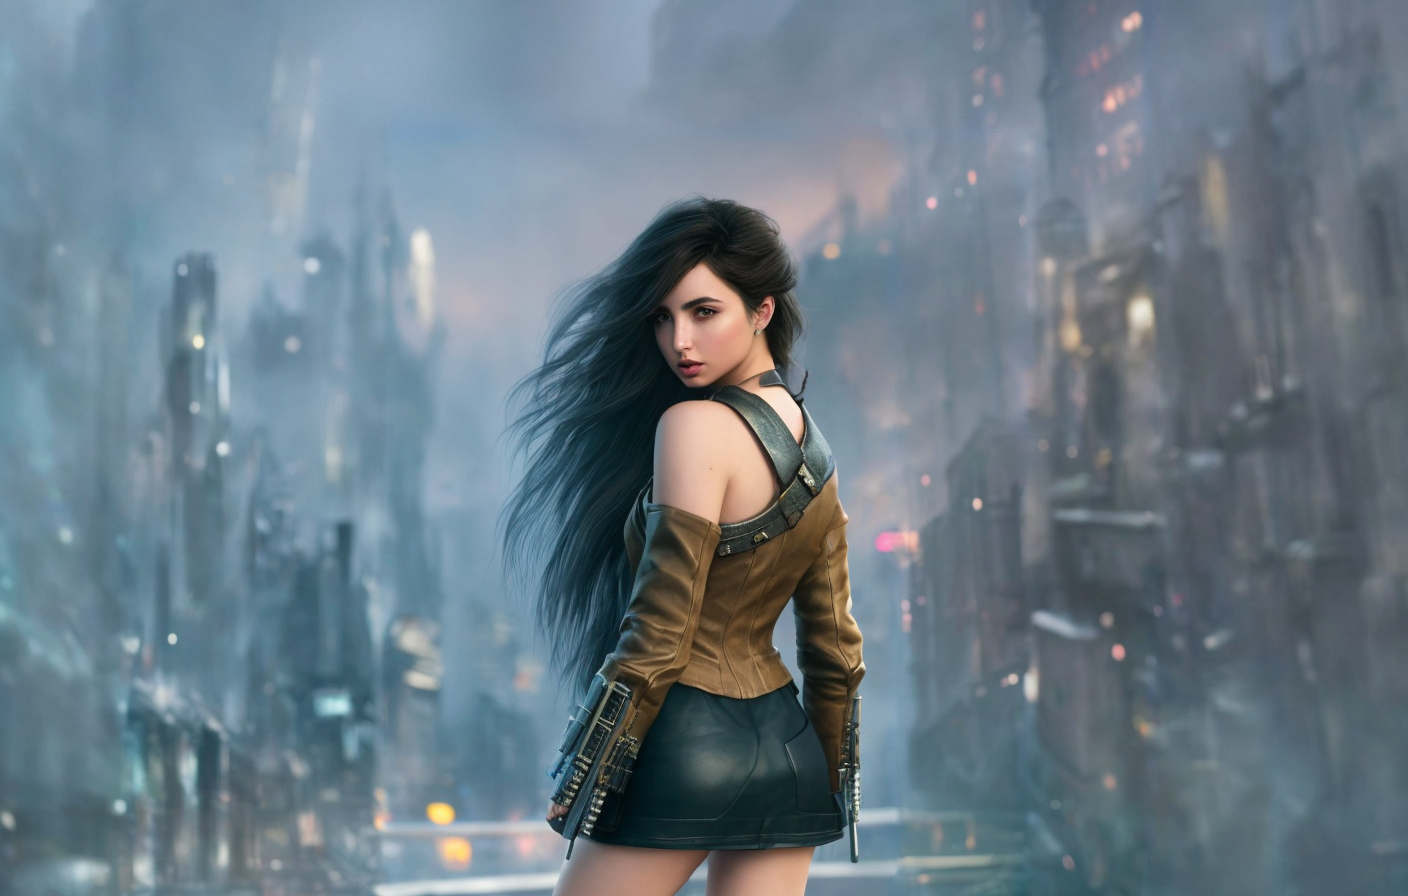
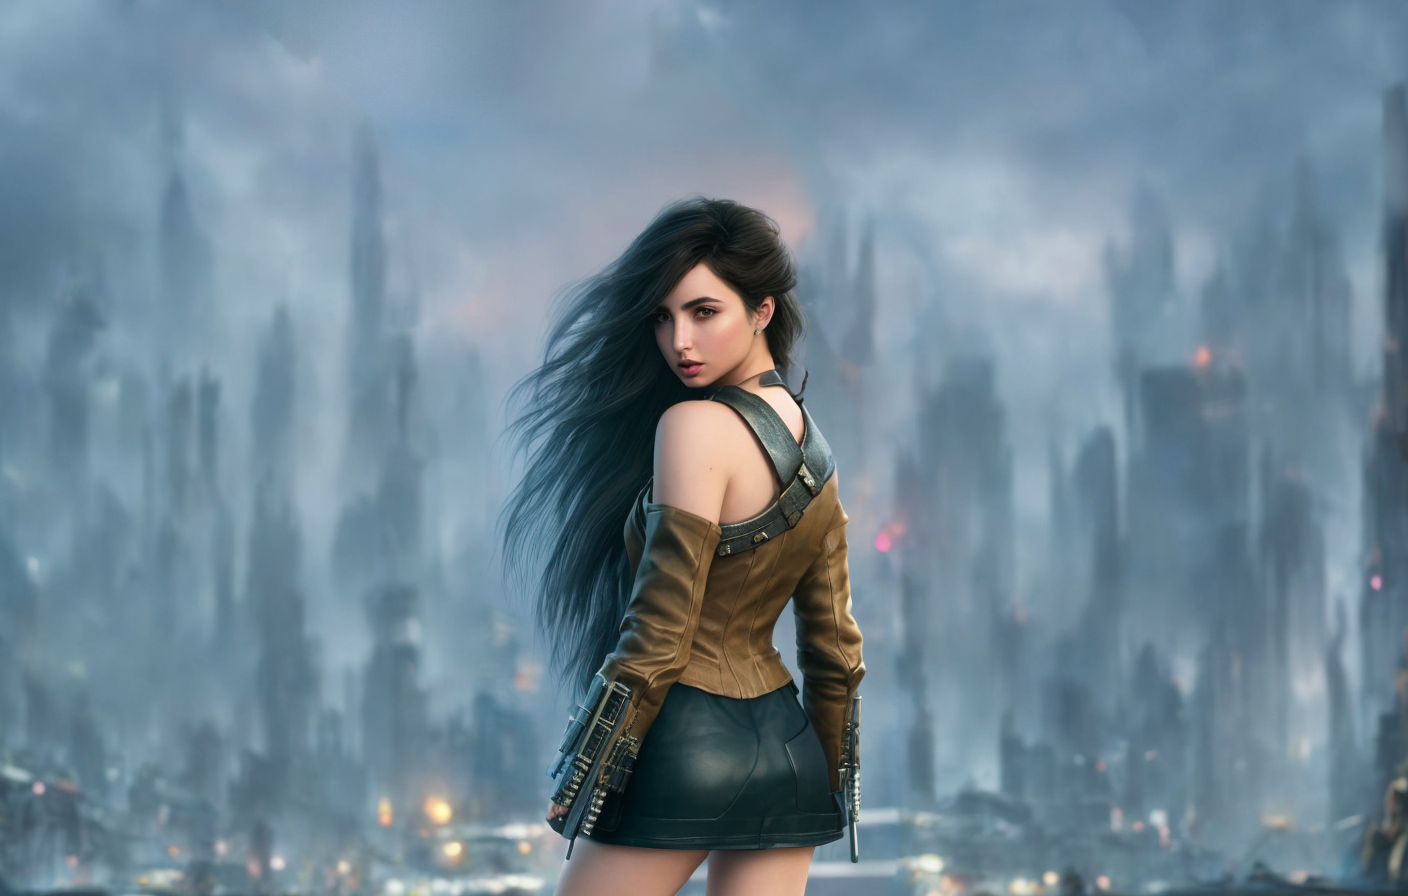
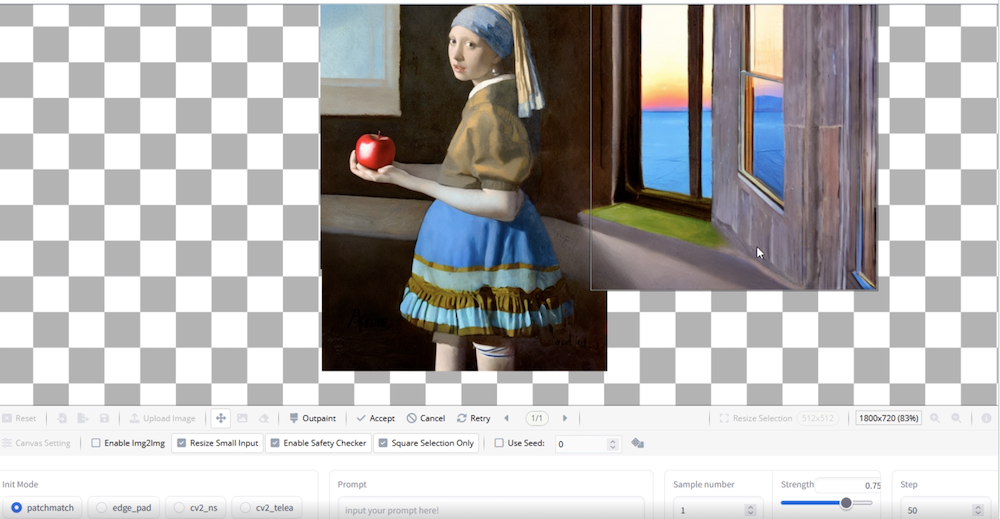
Convert to landscape size
Let’s extend the left and right sides multiple times to make the portrait-sized image landscape. This can change the perception of the image completely. Now, it is not a close-up of the subject. The expansive dystopia city background creates a great contrast and tells a good story.
Fix details with inpainting
You don’t need to be too hung up on the little details of the extended part because you can regenerate any areas later with inpainting. Below I will show you how to regenerate the whole right hand side.
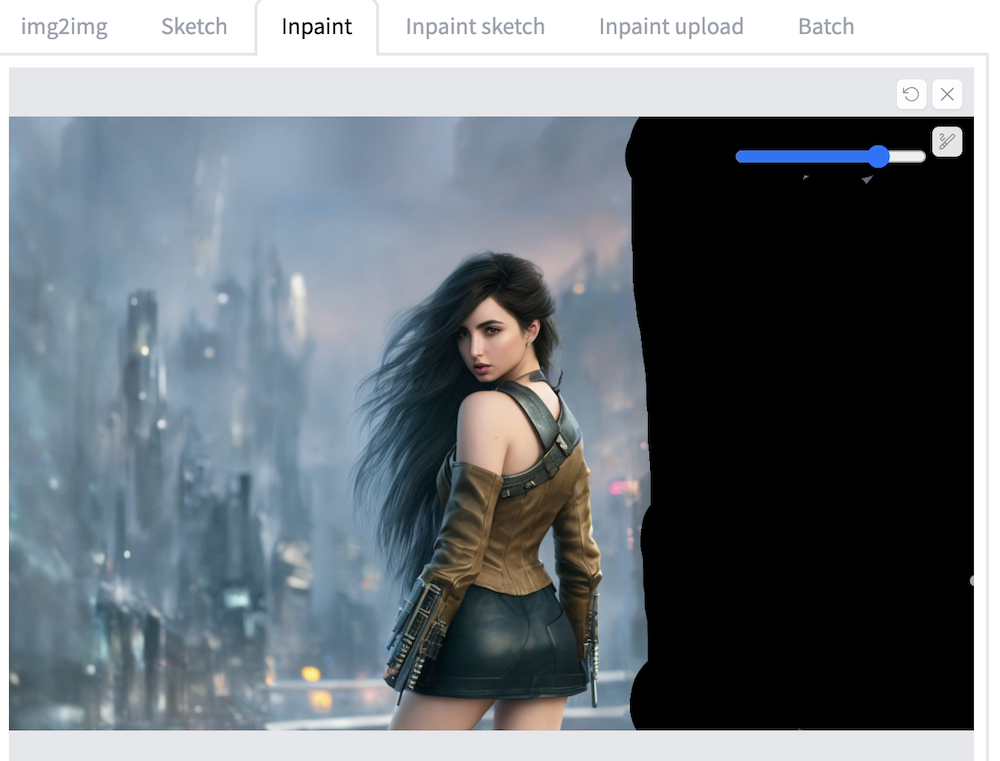
First, press Send to inpainting to send your newly generated image to the inpainting tab. Make sure to select the Inpaint tab. Use the paintbrush tool to create a mask on the area you want to regenerate.
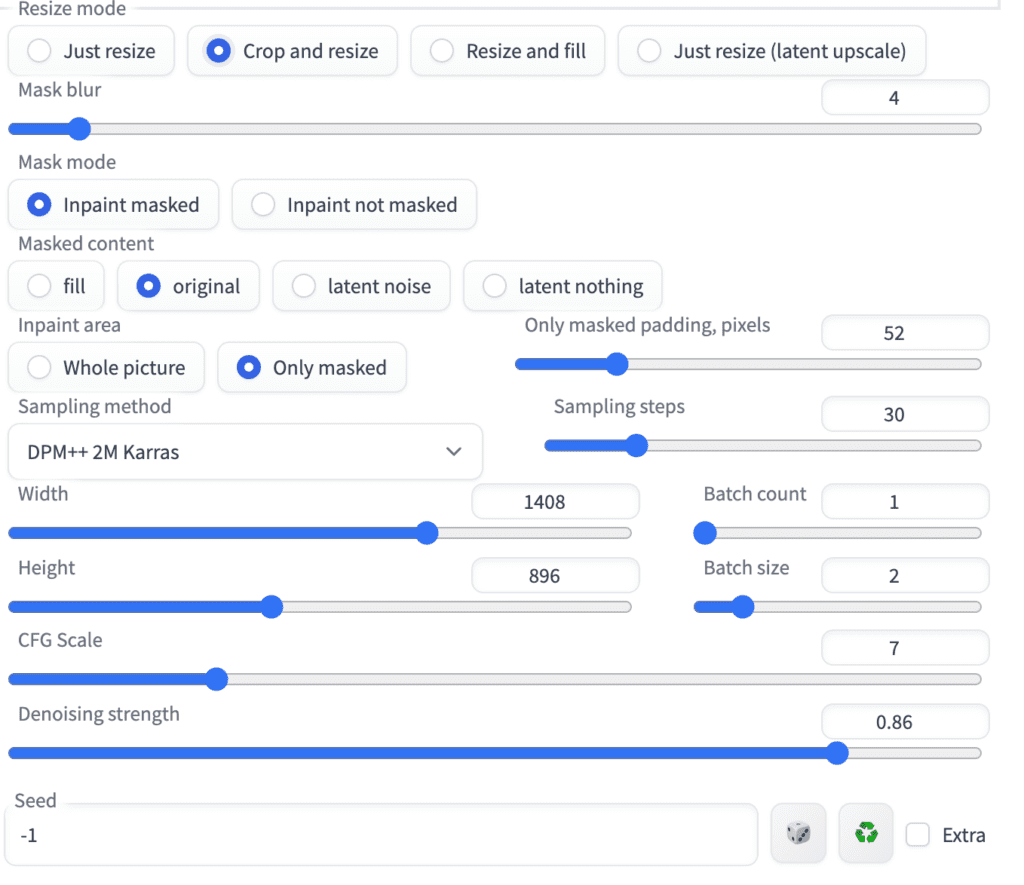
The settings I used are
- Mask mode: Inpaint masked
- Inpaint area: Only masked
- Only masked padding, pixels: 36-72 (adjust as need)
- Script: None (Don’t forget to turn off the outpainting script!)
- Denoising strength: 0.6-0.9. You will want to look at the result and adjust this. Increase to change more.
- Batch size: 2-4. Generate multiple images at a time for comparison.
- Seed: -1 (random)
- Masked content: original or fill. (Fill will use the average color under the mask as the initial value)
Below is a screenshot of my inpainting settings. See Inpainting Guide for more detailed explanations.
After a few rounds of inpainting, this is my final image in landscape size.
Outpainting complex scenes
The above Stable Diffusion method works well with a simple background. It will struggle with complex scenes. The reason is that the outpainting method only considers a small area of image adjacent to the outpainted area. To extend a complex scene, long-range information needs to be accounted for.
It is not Stable Diffusion (Sorry, Stable Diffusion purist!), but an outstanding inpainting/outpainting method is available called MAT (Mask-Aware Transformer). It is a GAN model designed to account for long-range information when making up parts of an image.
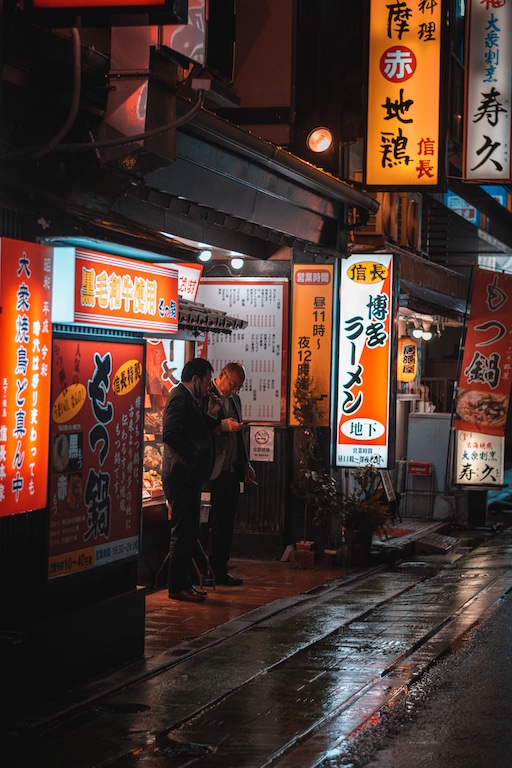
Failure example of Stable Diffusion outpainting
To illustrate the importance of modeling long-range information, let’s outpaint the following complex street scene.
Using the above method to expand the right-hand side, we get this image:
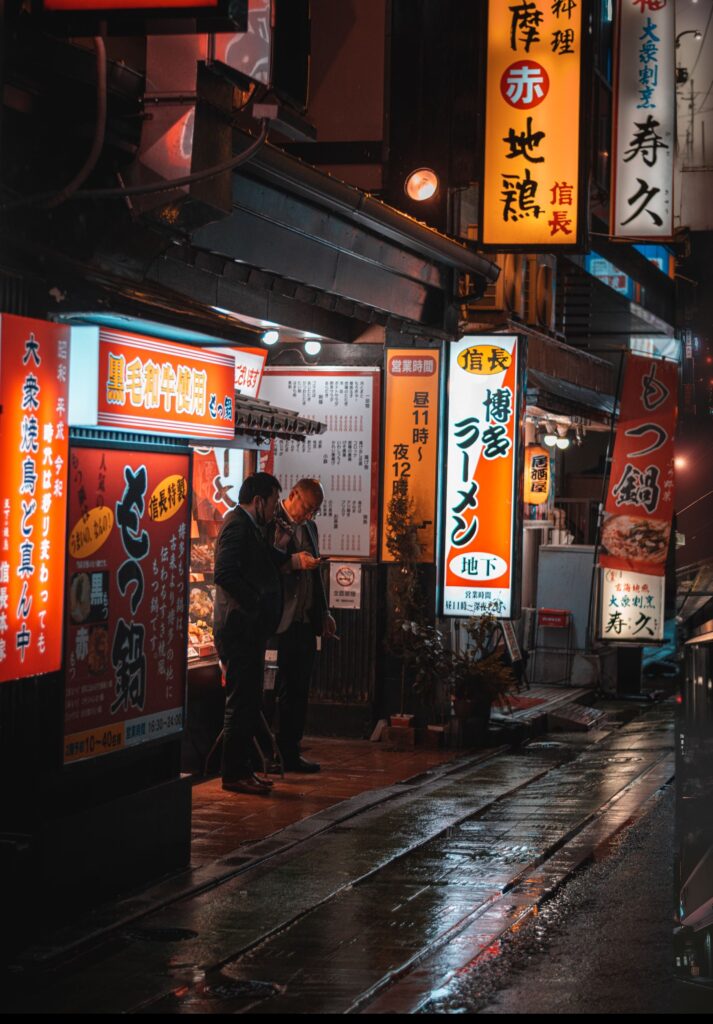
The extended part looks okay on its own but is not coherent to the rest of the image as a whole.
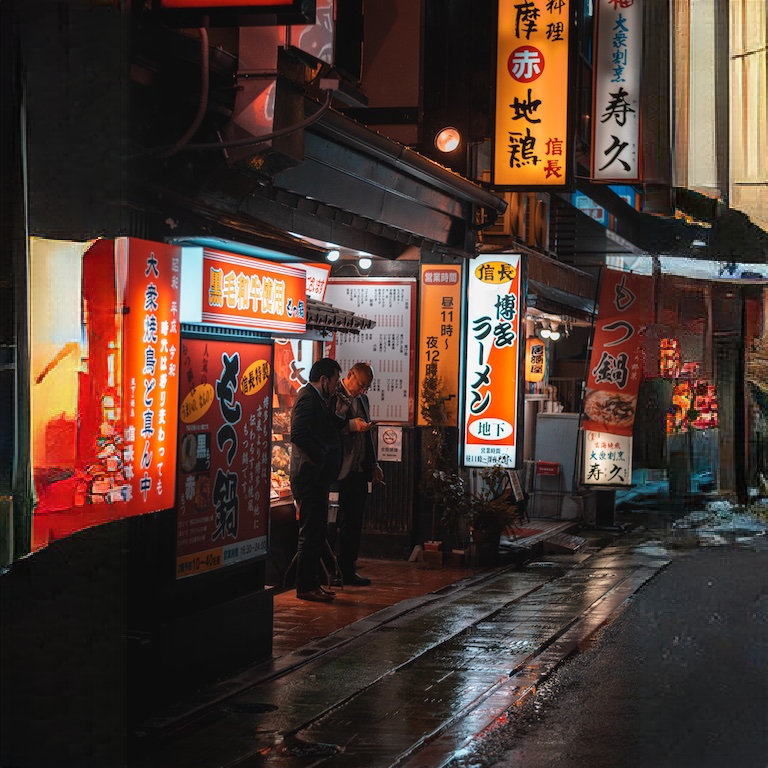
MAT outpainting
MAT outpainting is not only faster but gives better results. See the image below extended by MAT. It’s not perfect, but much better.
Go to Stable Diffusion Mat Outpainting to use MAT. The GUI only allows you to generate a square image. You can generate a larger square image and crop it to landscape size. Scale is the scaling applied on the uploaded image before outpainting. I set the scale to 1 in the above image and set the output size to 768 so that it outpaints a 512×768 image to 768×768, extending the left and right sides.
MAT also worked quite well with our example. Below is the image outpainted laterally.
Other outpainting options
If you don’t want to use AUTOMATIC1111 for whatever reason, this section is for you.
Stable Diffusion Infinity
Stable Diffusion Infinity is a nice graphical outpainting user interface. The Huggingface demo is free to use. It can run pretty fast if no one else is using it. You can also launch a Colab notebook to run your own instance.
The interface lets you outpaint one tile at a time. You will need to write a prompt for each tile. Each tile should have a small overlap with the existing image.
There’s a demo video in the Github page to show you how to use it.
Just tried getimg and it refused to do what MAT at least tried to do
Huh… no, nobody needs to extend backgrounds, you can get much better results than these by filling the wanted space with whatever (say, the content you have but mirrored so there’s some continuation) and using img2img to do the outpainting and have something different at that part.
The true use of outpainting is when you like a stable diffusion generation, but it’s cropped, specially when the eyes don’t even appear on the picture, and you need to invent half the head. I guess most people just throw it away and try again, or rely on negative prompts so it doesn’t happen. MAT outpainting is terrible at this.
But a site like getimg does a great job, giving output that really looks like what would have been generated originally, at least for 100 pics per month. I can’t believe we still don’t have a good free solution at that level yet, but here we are.
Any better options for outpainting now that we can run locally?
openOutpaint extension for A1111
I tried mk2 it generated related images for me, while poorman generates unrelated images for me. so give a try to that i used heun for it.
Interesting. My experience was the other way around. With mk2, at best I can generate something relevant but a little discontinuous. Many times it generates another character. Good to know, I will try harder…
I was hoping you’d covered pix2pix for auto1111 :(.
Yes in the queue 🙂