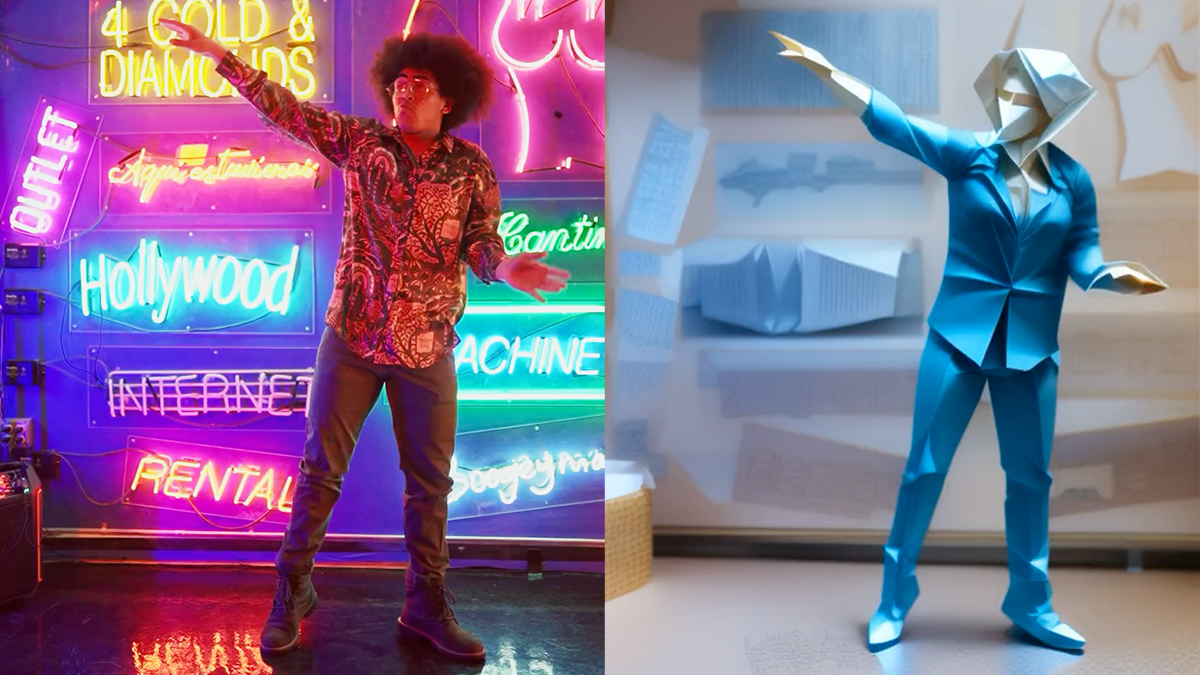
This workflow transforms any dance video into a video of dancing origami. The look and color of the origami can be customized. The background generally follows that of the input video, but you can customize it using the prompt to some extent.
You will need to be a member of this site to download the ComfyUI workflow.
Table of Contents
Software
Stable Diffusion GUI
We will use ComfyUI, a node-based Stable Diffusion GUI. You can use ComfyUI on Window/Mac or Google Colab.
Check out Think Diffusion for a fully managed ComfyUI/A1111/Forge online service. They offer 20% extra credits to our readers. (and a small commission to support this site if you sign up)
See the beginner’s guide for ComfyUI if you haven’t used it.
Use the L4 runtime type if you use my Google Colab notebook.
How this workflow works
My goal is to teach you how to create such workflow. So, let’s spend some time on understanding the mechancis.
ControlNet
Three ControlNets are used to copy the composition of the video frame-by-frame:
- ControlNet Depth: The Depth Anything preprocessor is critical extracting the correct depth field. The standard Midas preprocessor didn’t cut it.
- ControlNet QR Code: The Depth ControlNet tends to render human. Adding the QR Code ControlNet helps to bring out the origami look.
- ControlNet Soft Edge: The Depth ControlNet alone cannot render the human pose correctly. Fixing the outline with HED Soft Edge is critical in rendering the correct human figure as well as rendering the interesting background.
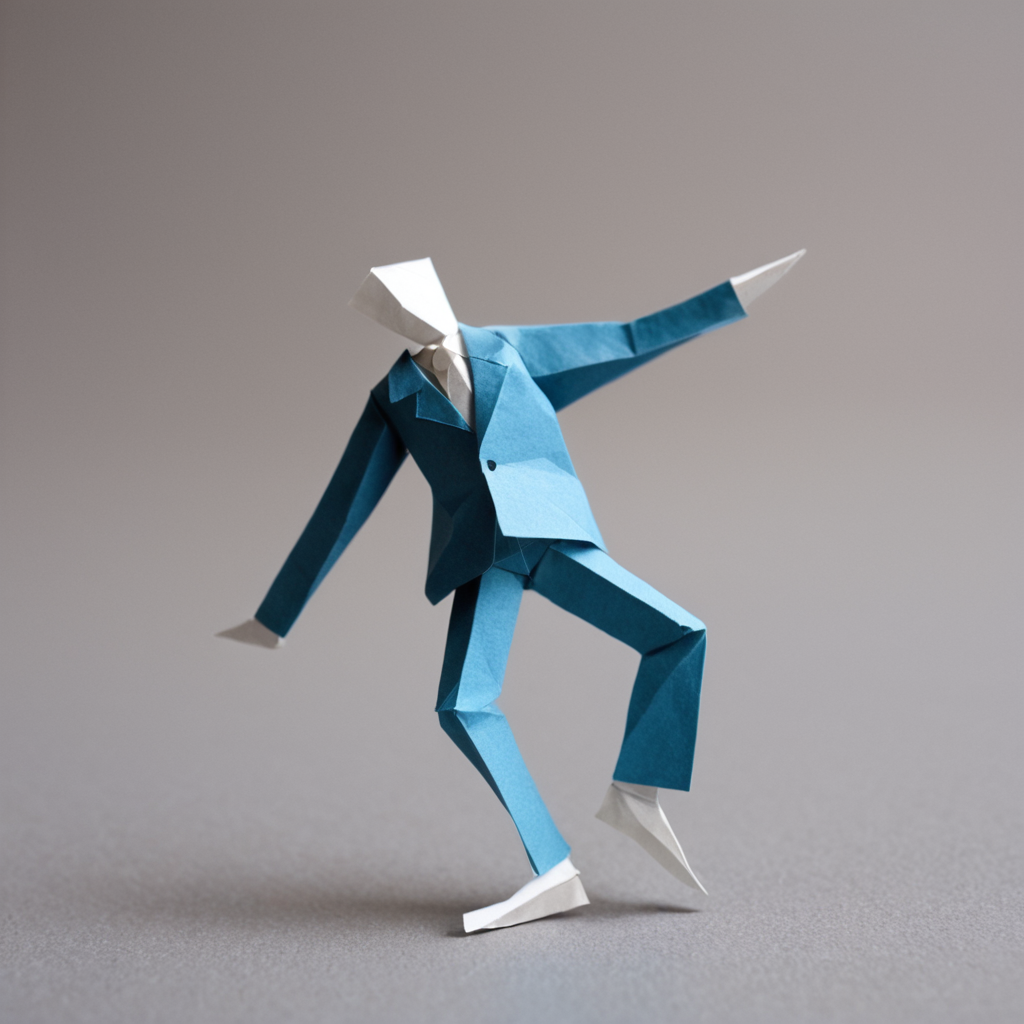
I used IP Adapter Plus to inject the origami to the image. The Plus version is IP-Adapter on steriod. I took advantage of the fact that it tend to take over the whole image by copying the reference image.
The reference image below is generated using the SDXL 1.0 model.
AnimateDiff
AnimateDiff is used to improve frame-to-frame consistency. While there are new AnimateDiff models, I found the old ones working better for this workflow. Below are my notes when testing AnimateDiff models.
- mm_stabilized_high: Produces crisp color.
- Animatediff v3: The color is a bit muted. (This model needs an additional lora.)
- Motion model v01: Easy to have the shallow as part of the leg. Showed human face sometimes.
Decision: Move forward with mm_stable_high.
Model
I normally prefer LCM models for faster rendering. (See the previous LCM video example.) It can save as much as 50% of the rendering time. But I couldn’t make LCM models to work in this workflow. It renders boring background for some reason.
That’s why I used the standard DreamShaper 8 model.
Adjusting details
The Add Detail LoRA is instrumental in adjusting the level of details I wanted. The LoRA strength can be adjusted between 0.5 and 2.0 for different level of details.
Step-by-step guide
Step 1: Load the ComfyUI workflow
Download the workflow JSON file below. You will need to be a member and log in to download the workflow.
Drag and drop it to ComfyUI to load.
Step 2: Install Missing nodes
You may see a few red nodes in the workflow. That means you are missing some custom nodes needed for this workflow.
First, install ComfyUI manager if you haven’t already.
Click the Manager button on the top bar.

In the popup menu, click Install Missing Custom Nodes. Install the missing custom nodes on the list.
Restart ComfyUI. Refresh the ComfyUI page.
If you still see red nodes, try Update All in the ComfyUI manager’s menu.
Step 3: Set the input video
Upload an input video. You can find the video I used below. (Log in to download)
Upload it in the Load Video (Upload) node.
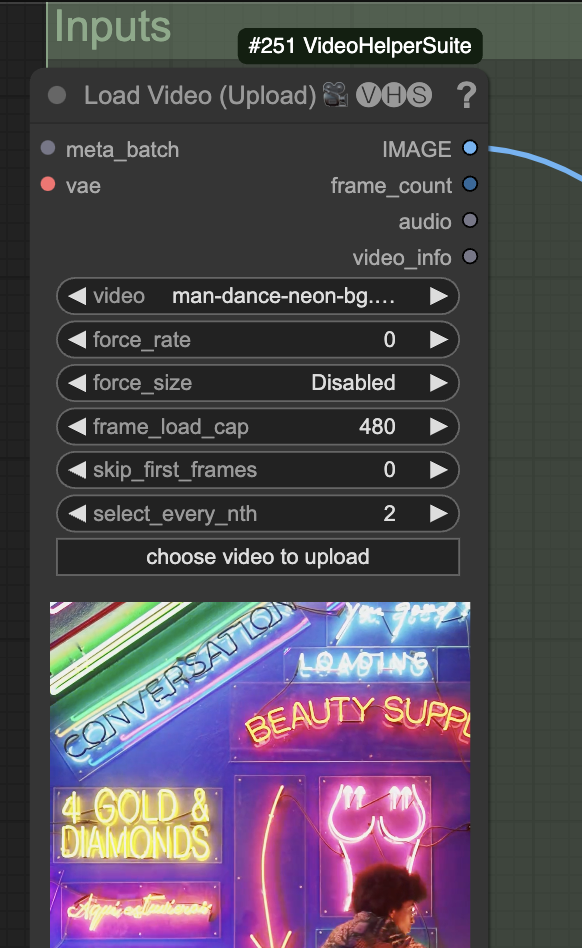
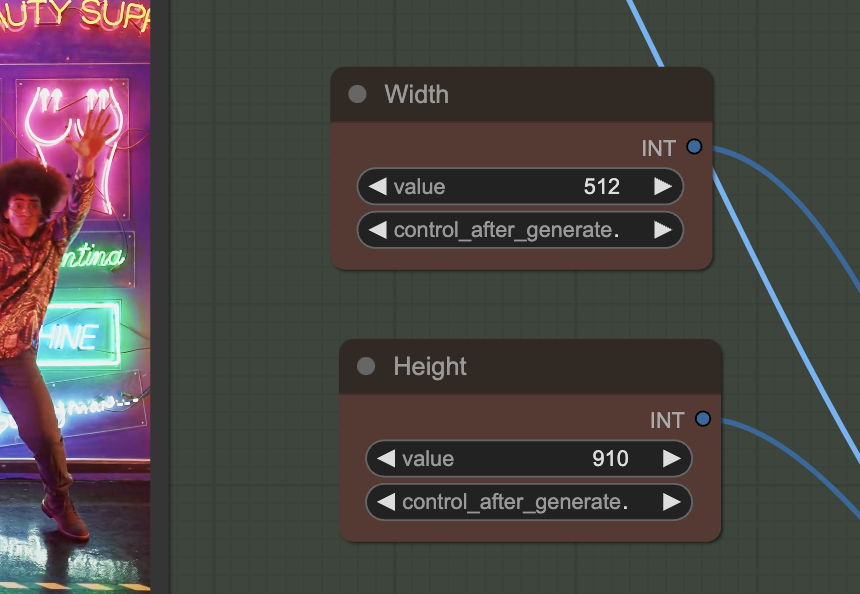
The frame_load_cap sets the maximum number of frames to be used. Set it to 16 if you are testing settings.
The width and height settings need to match the video’s aspect ratio. Keep the shorter side (Width in this portrait-size video) between 0.5 and 1.5x of the checkpoint model’s resolution (512 for the Dreamshaper model).
Step 4: Download models
Checkpoint model
This workflow uses the DreamShaper 8 model which generates a realistic painting style.
Download the DreamShaper 8 model. Put it in ComfyUI > models > checkpoints.
Refresh and select the model in Load Checkpoint.
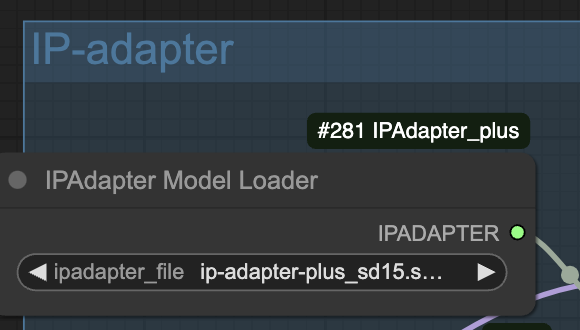
IP adapter
This workflow uses the IP-adapter to achieve a consistent face and clothing.
Download the SD 1.5 IP adapter Plus model. Put it in ComfyUI > models > ipadapter.
Refresh and select the model in Load IPAdapter Model.
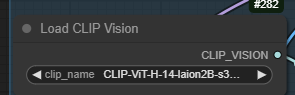
Download the SD 1.5 CLIP vision model. Put it in ComfyUI > models > clip_vision. You may want to rename it to CLIP-ViT-H-14-laion2B-s32B-b79K.safetensors to conform to the custom node’s naming convention.
Refresh and select the model in Load CLIP Vision Model.
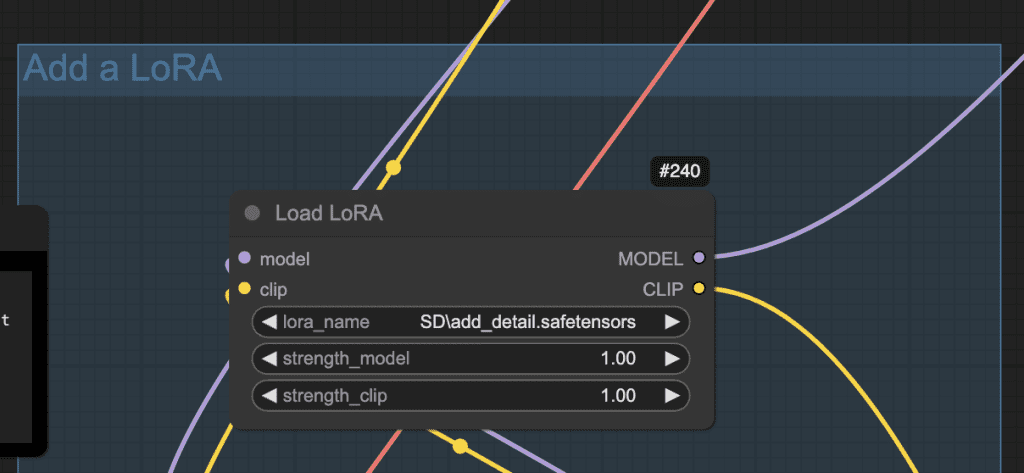
LoRA
Download the add_detail LoRA. Put it in ComfyUI > models > loras.
This LoRA helps to improve details.
ControlNet
Download the Depth ControlNet model. Put it in ComfyUI > models > controlnet.
Download the Soft Edge ControlNet model. Put it in ComfyUI > models > controlnet.
Download the QR Code v2 ControlNet model. Put it in ComfyUI > models > controlnet.
Refresh and select the models in the Load Advanced ControlNet Model nodes.
AnimateDiff
Download the AnimateDiff MM-Stabilized High model. Put it in ComfyUI > models > animatediff_models.
Refresh and select the model.
Step 5: Upload the IP-adapter reference image
Upload the reference image for the character in the Load Image (IP-adapter) node. You can download the image below.
This image is generated using the SDXL 1.0 model with the prompt:
origami of a person dancing
Step 6: Generate video
Press Queue Prompt to start generating the video.
If you see an out-of-memory error, you can add the extra argument --disable-smart-memory to run_nvidia_gpu.bat.
.python_embededpython.exe -s ComfyUImain.py --windows-standalone-build --disable-smart-memoryCustomization
Seed
Changing the seed in the Sampler node can sometimes fix an inconsistency.
Prompt
Change the prompt and the IP-adapter image to customize the look of the character. The best is to have them match each other.
The background cannot be changed too much since the HED controlnet fixes it.
Background
The outline of the background is set by the input video via the HED ControlNet. It can be customized to a limited extent through the prompt and the IP adapter image.
Increasing the weight and end_percent of the HED ControlNet improves the background rendering.
Video size
Reducing the width and the height makes the video generation faster but with less details. You can improve the quality of the video by increasing the width and the height up to 1.5x.
Video input
frame_load_cap is the maximum number of frames to be loaded. I set it to 16 when testing settings for fast iteration.
select_every_nth is set to 2 in the workflow to speed up rendering. This reduces the video from 30 to 15 FPS. Set it to 1 for highest quality conversion.
I get ‘Cannot execute because a node is missing the class_type property.’ “node ID ‘#337′”
What is this error, and how do I fix it?
Have you tried Manager > update all?
Hi, arg disable-smart-memory due to RAM or VRAM ?
VRAM. This option off-loads VRAM aggressively.