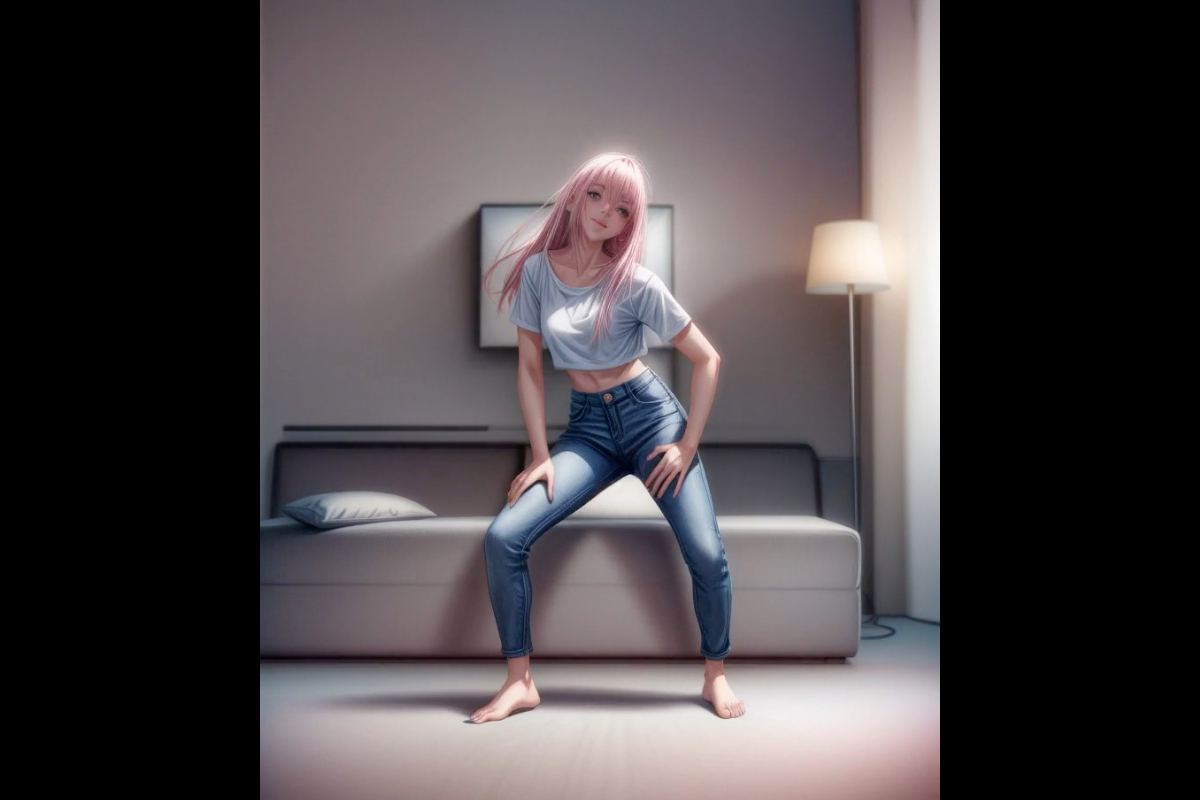
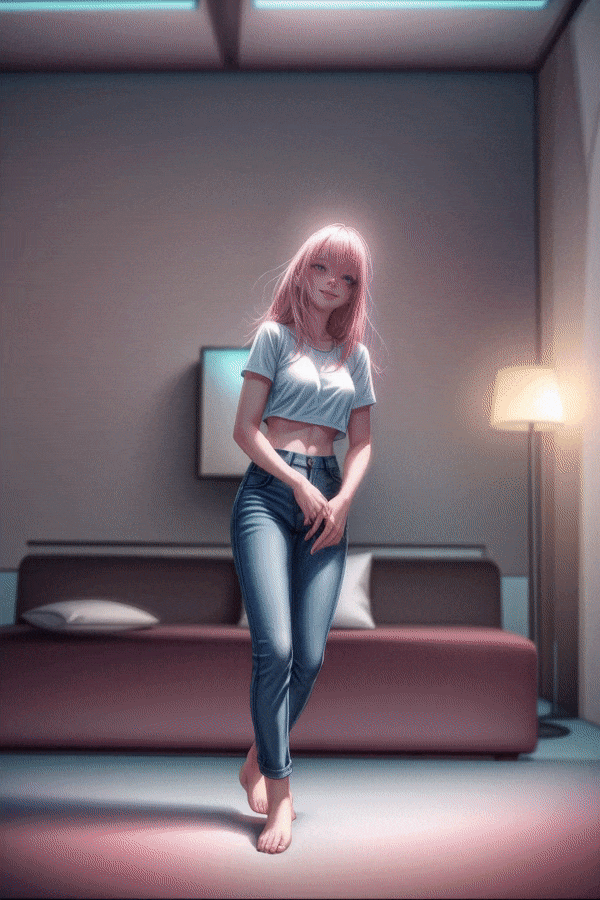
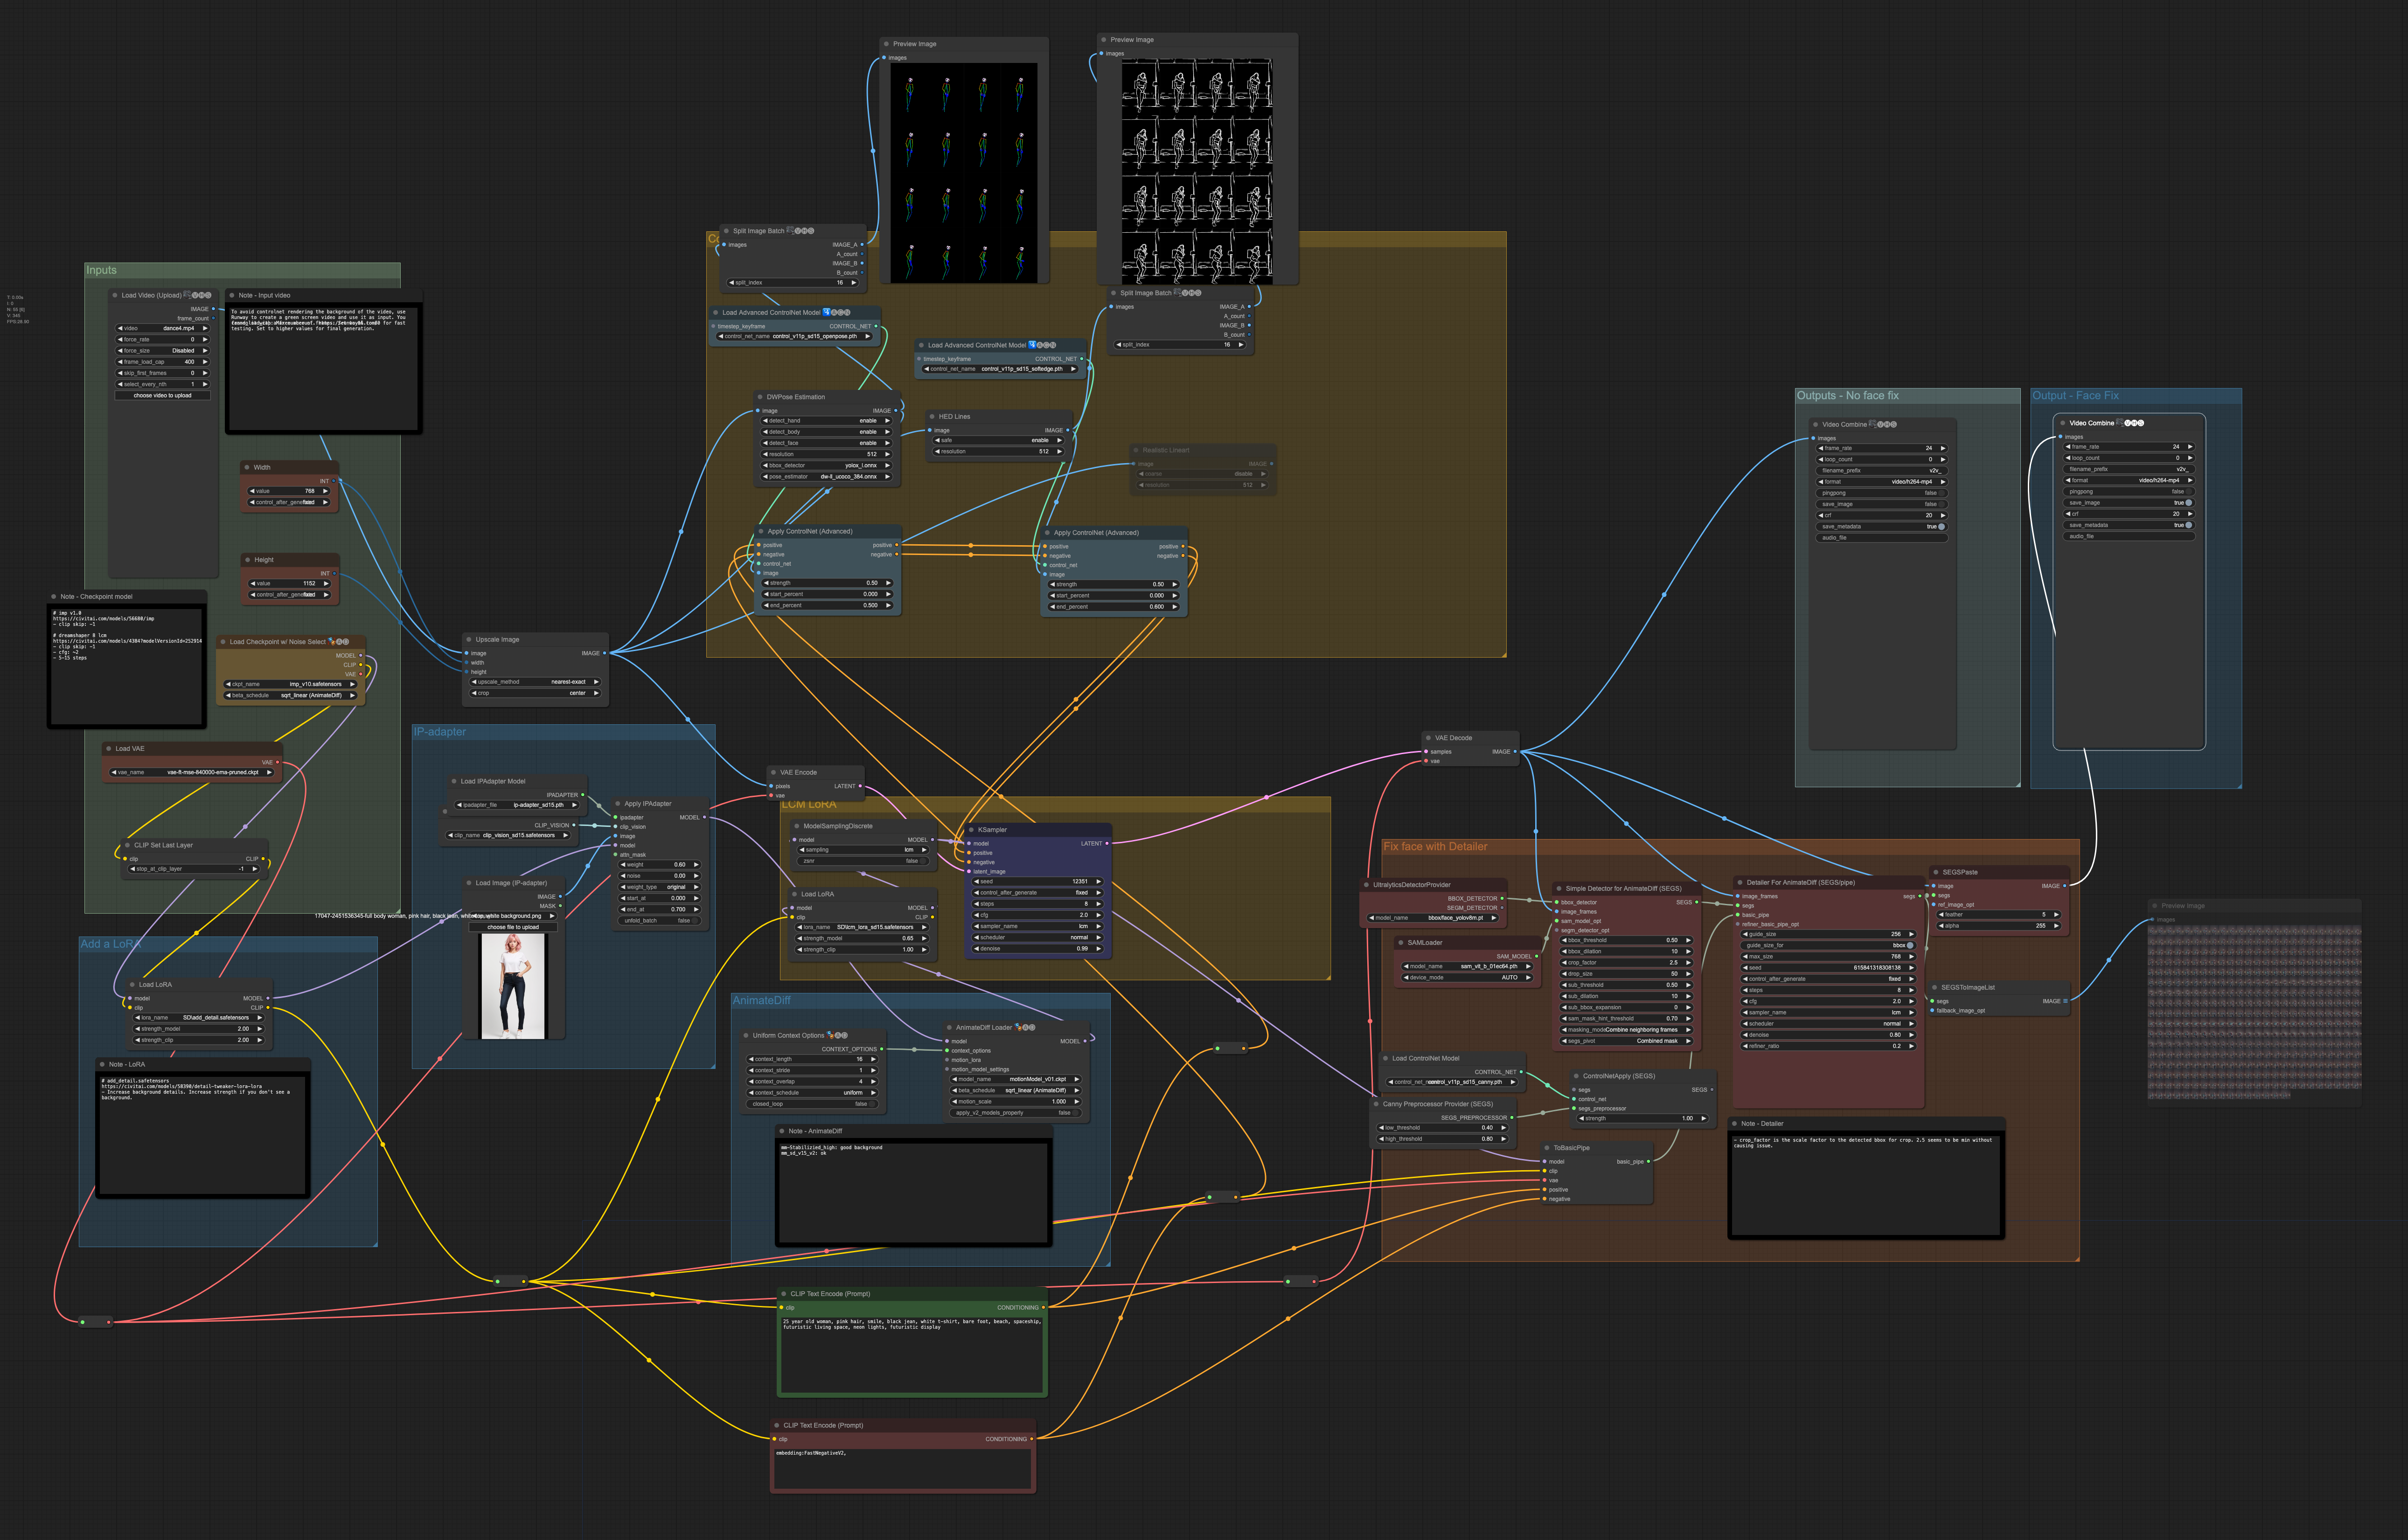
This workflow stylizes a dance video with the following techniques:
- IP-adapter for consistent character.
- Multiple ControlNets for consistent frame-to-frame motion.
- AnimateDiff for frame-to-frame consistency.
- LCM LoRA for speeding up video generation by 3 times.
- Detailer (ComfyUI’s ADetailer) to fix face (with AnimateDiff for consistency).
This is an updated version of this consistent character video-to-video workflow.
GIF version (reduced quality):
You will learn/get:
- A downloadable ComfyUI workflow that generates this video.
- Customization options.
- Notes on building this workflow.
You will need to be a member of this site to download the workflow.
Table of Contents
Software
Stable Diffusion GUI
We will use ComfyUI, a node-based Stable Diffusion GUI. You can use ComfyUI on Window/Mac or Google Colab.
Check out Think Diffusion for a fully managed ComfyUI/A1111/Forge online service. They offer 20% extra credits to our readers. (and a small commission to support this site if you sign up)
See the beginner’s guide for ComfyUI if you haven’t used it.
Step-by-step guide
Step 1: Load the ComfyUI workflow
Download the workflow JSON file below.
Drag and drop it to ComfyUI to load.
Step 2: Go through the drill…
Every time you try to run a new workflow, you may need to do some or all of the following steps.
- Install ComfyUI Manager
- Install missing nodes
- Update everything
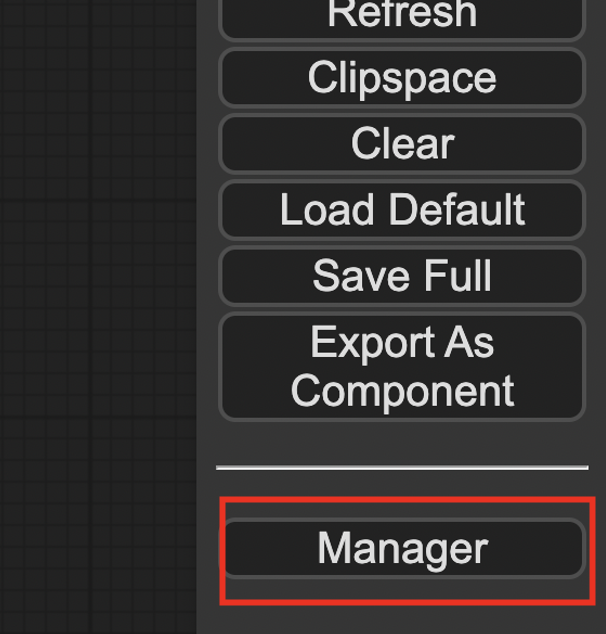
Install ComfyUI Manager
Install ComfyUI manager if you haven’t done so already. It provides an easy way to update ComfyUI and install missing nodes.
To install this custom node, go to the custom nodes folder in the PowerShell (Windows) or Terminal (Mac) App:
cd ComfyUI/custom_nodesInstall ComfyUI by cloning the repository under the custom_nodes folder.
git clone https://github.com/ltdrdata/ComfyUI-ManagerRestart ComfyUI completely. You should see a new Manager button appearing on the menu.
If you don’t see the Manager button, check the terminal for error messages. One common issue is GIT not installed. Installing it and repeat the steps should resolve the issue.
Install missing custom nodes
To install the custom nodes that are used by the workflow but you don’t have:
- Click Manager in the Menu.
- Click Install Missing custom Nodes.
- Restart ComfyUI completely.
Update everything
You can use ComfyUI manager to update custom nodes and ComfyUI itself.
- Click Manager in the Menu.
- Click Updates All. It may take a while to be done.
- Restart the ComfyUI and refresh the ComfyUI page.
Step 3: Set input video
Upload an input video. You can find the video I used below.
Upload it in the Load Video (Upload) node.
The frame_load_cap sets the maximum number of frames to be used. Set it to 16 if you are testing settings.
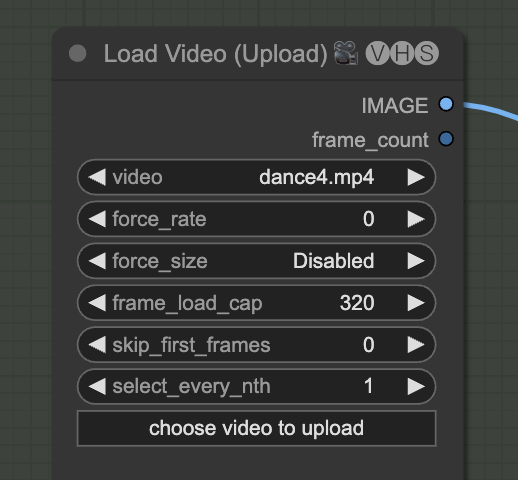
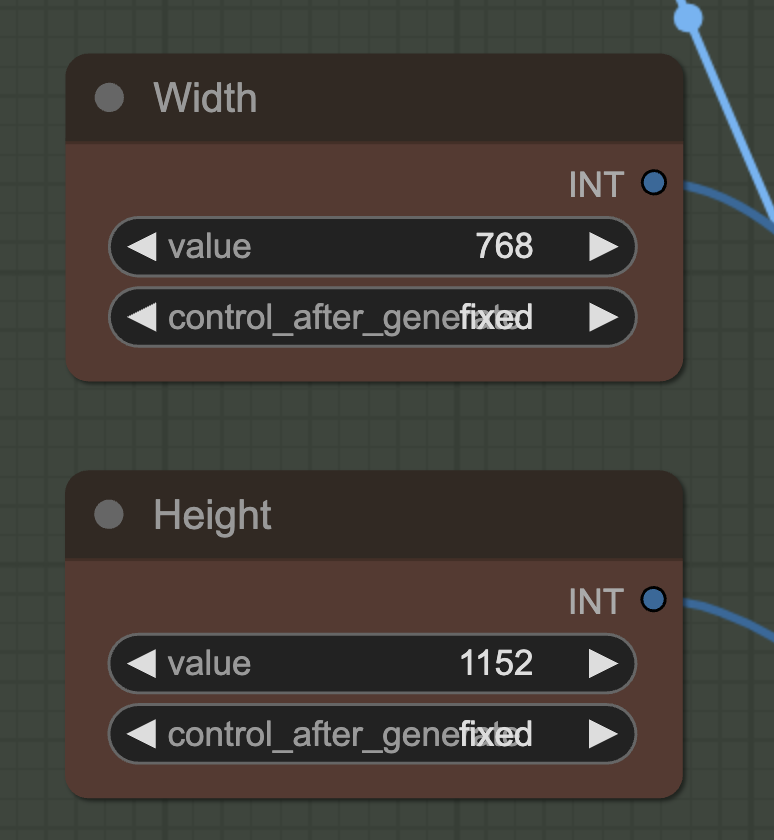
The width and height setting needs to match the size of the video.
Step 4: Download models
Checkpoint model
This workflow uses an anime model.
Download the IMP v1.0 model. Put it in ComfyUI > models > checkpoints.
Refresh and select the model in Load Checkpoint.
VAE
This workflow uses Stability’s standard VAE.
Download the FT-MSE-840000 VAE model. Put it in ComfyUI > models > vae.
Refresh and select the model in Load VAE.
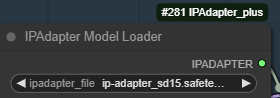
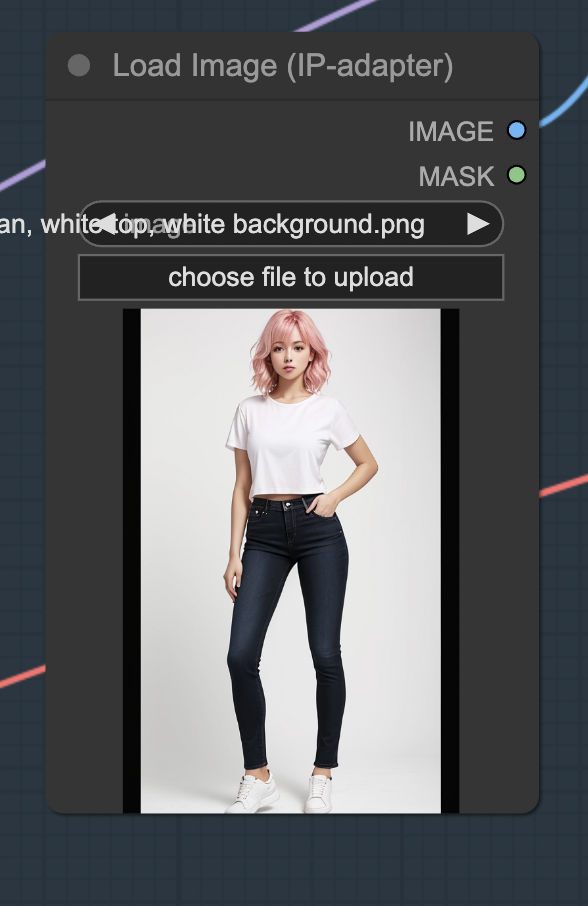
IP adapter
This workflow uses the IP-adapter to achieve a consistent face and clothing.
Download the IP adapter model. Put it in ComfyUI > models > ipadapter.
Refresh and select the model in Load IPAdapter Model.
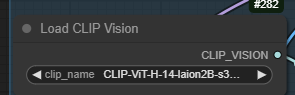
Download the SD 1.5 CLIP vision model. Put it in ComfyUI > models > clip_vision. You may want to rename it to CLIP-ViT-H-14-laion2B-s32B-b79K.safetensors to conform to the custom node’s naming convention.
Refresh and select the model in Load CLIP Vision Model.
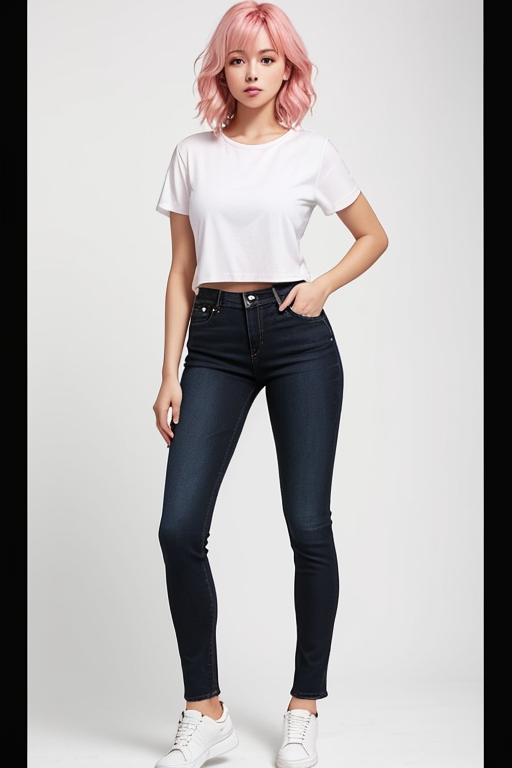
Upload the reference image for the character in the Load Image (IP-adapter) node. You can download the image below.
LoRA
Download the add_detail LoRA. Put it in ComfyUI > models > loras.
This LoRA helps to improve details.
ControlNet
Download the OpenPose ControlNet model. Put it in ComfyUI > models > controlnet.
Download the Soft Edge ControlNet model. Put it in ComfyUI > models > controlnet.
Refresh and select the models in the Load Advanced ControlNet Model nodes.
AnimateDiff
Download the Motion Model v0.1 module. Put it in custom_nodes > ComfyUI-AnimateDiff-Evolved > models.
Refresh and select the model.
LCM LoRA
This workflow uses the LCM LoRA to achieve the 3x speed up. Download the LCM LoRA. Put it in Put it in ComfyUI > models > loras. Rename it to lcm_lora_sd15.safetensors.
Step 5: Generate video
Press Queue Prompt to start generating the video.
If you see an out-of-memory error, you can add the extra argument --disable-smart-memory to run_nvidia_gpu.bat.
.\python_embeded\python.exe -s ComfyUI\main.py --windows-standalone-build --disable-smart-memoryCustomization
Seed
Changing the seed can sometimes fix an inconsistency.
Prompt
Change the prompt and the IP-adapter image to customize the look of the character. The best is to have them match each other.
The background cannot be changed too much since the HED controlnet fixes it.
Notes
Consistent character
This workflow uses these components to generate a consistent character:
- ControlNet Openpose
- ControlNet HED
- IP-adapter
OpenPose alone cannot generate consistent human pose movement. ControlNet HED creates coarse outlines which fix the content less.
IP-adapter is for fixing the style of the clothing and face. The character is changing too much without it.
Face Fix
The Detailer node in the Impact Pack is used for fixing the face. It is an inpainting node specially designed for AnimateDiff.
Checkpoint model
The checkpoint model has a big impact on the quality of the animation. Some models, especially the anime ones, do not generate clear images.
LoRA model
Two LoRAs are used:
- Add_detail: Adding fine details.
- LCM LoRA: For speed up.
IP-adapter
The IP-adapter is critical in producing a consistent character. But the weight cannot be set to high. Otherwise, the video will be blurry.
Remove the background of the control image to avoid getting the background to the video,
ControlNet
This workflow uses ControlNet HED. Compared to the line art controlnet used in the previous version, HED gives the workflow more freedom in painting the character since it is less fixed.
The weight and end percent are set to very low to avoid fixing the background too much.
Prompt
Use the prompt to fix the character further. E.g. Hair color, clothing, footwear.
Put any objects you don’t want to video to show in the negative prompt.
Я участник. Но не могу зайти в Быстрое согласованное видео персонажей с исправлением лица (ComfyUI)
Hi, huge thanks for the workflow sharing, I succeed run this workflow, but further more, I want to apply a girl’s dancing video to a minion but the output keeps show a girl, I’m thinking would this be possible of I need to change some VAE or checkpoint or LoRA ? Thanks again for sharing.
You can try adding a minion lora and changing the prompt accordingly. One challenge is the controlnet openpose is trained with human. you can experiment with different type of controlnet to see if you can render a minion.
Hi, I am having issues with installing missing custom nodes. When I use the
Manager, I still miss the following three:
(IMPORT FAILED)ComfyUI-Advanced-ControlNet
(IMPORT FAILED)AnimateDiff Evolved
(IMPORT FAILED) ComfyUI-VideoHelperSuite
Any hints? I am on Ubuntu and managed to install ComfyUI thru git and all the packages.
Best,
I managed to install those custom nodes (upgrade python to 3.9). But now I cannot load IPadapterApply node and SD1.5 clip_vision model is not loading. ???
Hi, the ip adapter node has been undergoing changes. I will update the workflow when it stabilizes.
For now, checkout a previous version should work.
git checkout 6a411dcb2c6c3b91a3aac97adfb080a77ade7d38
Thanks for the reply. As I am not that fluent with git, would you be more specific? It does not seem that 6a411dcb… is ComfyUI branch so I
‘git log’
and tracked a branch committed close to this article was written:
‘git checkout d0165d819afe76bd4e6bdd710eb5f3e571b6a804’
Now when I start this older version of ComfyUI, all the custom nodes seem to have issues. (They appear red when I install them via Manager, for example.)
Did I totally misunderstand your suggestion?
Also, is there a python code version of this article? I tried to use
‘ComfyUI-To_Python-Extension’ but it didn’t seem to work unless ComfyUI json files loads correctly.
Best,
I don’t have experience in converting a workflow to a python script. But it should be possible if you are a coder since all the comfyui codes are in python.
The commit checkout is for the IP-adapter custom node. sorry for not being clear!
Thanks Andrew! Now things load ok but somehow I don’t see any generated video. Outputed somewhere? I followed thru Step 5 and I don’t see any error messages on the terminal. Two Preview Image windows show pose detection results but the last one is blank. I set the frame_load_cap to 16-48. My apologies for newbie questions.
You should see controlnet results in both previews. One should be openpose stick figures and the other soft edges.
You can check if the two preprocessing was successful in the terminal.
Do you see the series of images generated? If so, you may need to fix your ffmpeg. You are supposed to be able to run it anywhere from terminal.
It works now. The change I had to make was to put ‘SD 1.5 CLIP vision’ model to ‘ComfyUI > models > clip_vision’ instead of
‘ComfyUI > models > ipadapter’ folder.
Thanks!
yes it should be clip_vision. thanks for pointing it out!
This is an awesome patch!
Hey all – fantastic workflow. I’m getting an output … but LOTS of errors in the process.
ERROR diffusion_model.input_blocks.4.1.transformer_blocks.0.attn2.to_k.weight shape ‘[640, 768]’ is invalid for input of size 1310720 [and more like this]
lora key not loaded lora_unet_output_blocks_0_1_transformer_blocks_6_ff_net_0_proj.lora_up.weight
[LOTS more like this]
I’ve gone through the tutorial again and can’t see anything I’ve missed. Any thoughts?
Ignore me!! I’d loaded the wrong lora into the add_detail slot. Oops!
Perfect description. Thank you also put all the downloads into.
Having an issue using Think Diffusion. It will only allow me to upload 2gb per file and suggests I use the URL submit instead. Where do I find those URLs for the models larger than 2gb?
You can right-click the download button and copy the link.