Mochi1 is one of the best video AI models you can run locally on a PC. It turns your text prompt into a 480p video.
In this tutorial, I will show you how to install and run the Mochi 1 model in ComfyUI. I will cover:
- Mochi on ComfyUI on Google Colab
- Install and run the Mochi BF16 model on ComfyUI
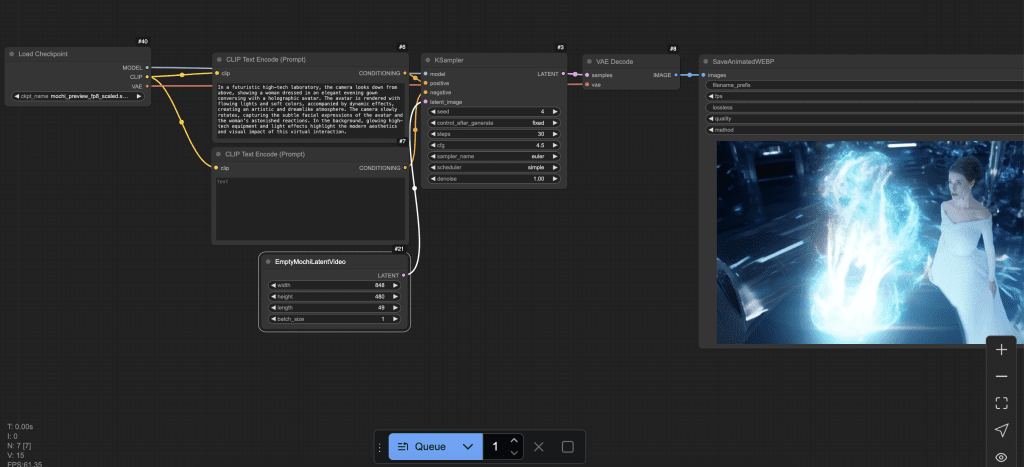
- Install and run the Mochi FP8 single-checkpoint model on ComfyUI
Table of Contents
Software
We will use ComfyUI, a free AI image and video generator. You can use it on Windows, Mac, or Google Colab.
Think Diffusion provides an online ComfyUI service. They offer an extra 20% credit to our readers.
Read the ComfyUI beginner’s guide if you are new to ComfyUI. See the Quick Start Guide if you are new to AI images and videos.
Take the ComfyUI course to learn how to use ComfyUI step by step.
Mochi AI
What is Mochi1?
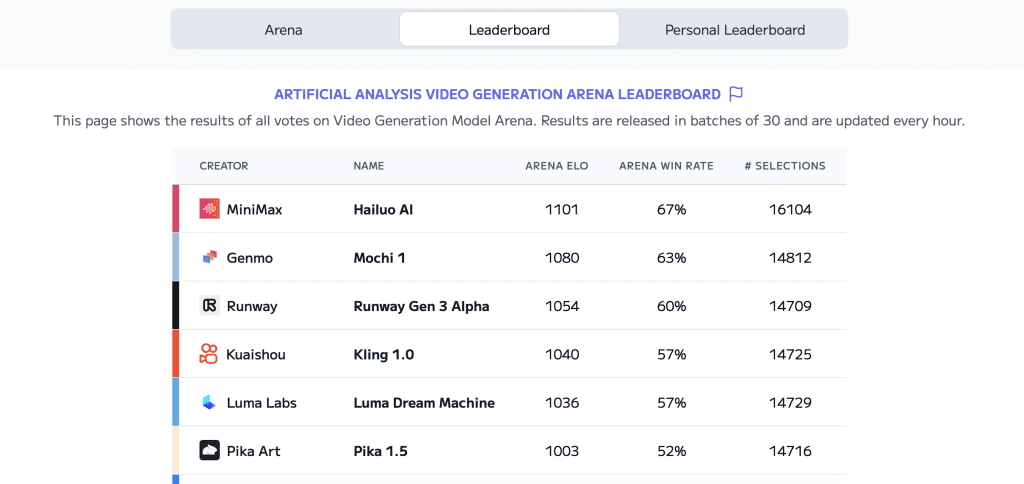
Mochi 1 is an open AI video model developed by Genmo AI. It has been doing well in the Video Generation Leadership board, taking second place on the ELO test.

License
The released version is called Mochi 1 Preview. It is released under the permissive Apache 2.0 license.
Versions
Two variants of the Mochi 1 model are available on ComfyUI.
| Version | GPU VRAM requirement | Generation time (25 frames, RTX 4090) |
|---|---|---|
| BF16 | 24 GB | 1 min 30 secs |
| FP8 Single Checkpoint | 20 GB* | 1 min 30 secs |
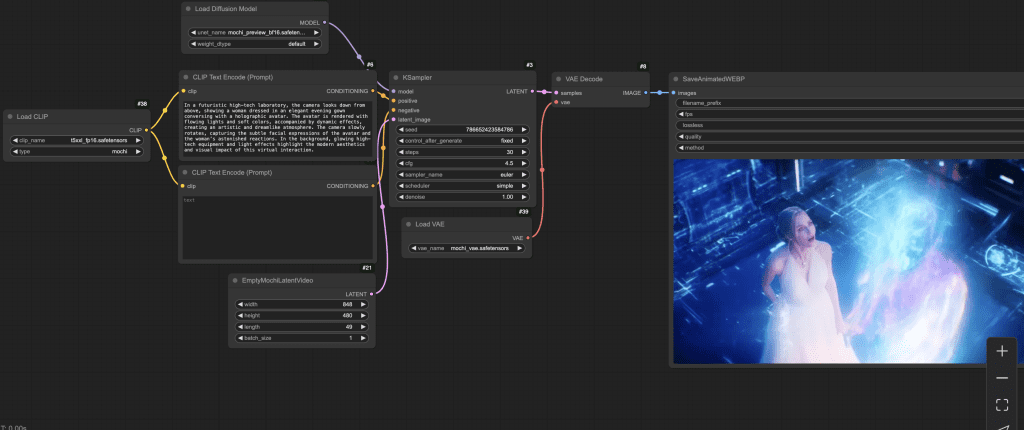
The BF16 model has higher numerical precision and requires higher VRAM and newer hardware to run. It consists of multiple model files.
The FP8 model is nicely packed in a single checkpoint file. It requires less VRAM and is easier to install.
* This is the peak VRAM I see on my 4090. You may be able to run it with lower VRAM.
Use Mochi1 on ComfyUI
Using Mochi on my ComfyUI Colab notebook is easy.
Step 1: Select the L4 runtime
The default T4 runtime is too slow to generate Mochi videos. In the top menu, select Runtime > Change runtime type > L4 GPU.
Step 2: Select the Mochi model
Select the Mochi_FP8 model.

Step 3: Load the Mochi workflow
Start ComfyUI. Download the following JSON workflow and drop it to ComfyUI.
Press the Queue button at the button (and wait) to get a video.

Mochi BF16 model on local ComfyUI
This is the standard Mochi model with BF16 precision.
Step 1: Update ComfyUI
ComfyUI has native support for the Mochi 1 model. The easiest way to update ComfyUI is to use the ComfyUI manager.
Click Manager > Update ComfyUI.
Restart ComfyUI.
Step 2: Download Mochi model files
Download the Mochi diffusion model and put it in the folder: ComfyUI > models > diffusion_models
Download the T5XXL text encoder (You may have it already) and put it in the folder: ComfyUI > models > clip
Download the Mochi VAE and put it the folder: ComfyUI > models > vae
Step 3: Load Mochi BF16 workflow
Download the Mochi BF16 JSON workflow file below and drop it to ComfyUI.
Press Queue at the bottom to generate an image.

Mochi FP8 single-checkpoint model on local ComfyUI
The FP8 single checkpoint model is easier to install and uses lower VRAM. But it is stored at a lower numerical precision which may result in lower quality.
Step 1: Update ComfyUI
ComfyUI has native support for the Mochi 1 model. The easiest way to update ComfyUI is to use the ComfyUI manager.
Click Manager > Update ComfyUI.
Restart ComfyUI.
Step 2: Download Mochi FP8 checkpoint
Download the Mochi checkpoint model and put it in the folder: ComfyUI > models > checkpoint
Step 3: Load Mochi FP8 workflow
Download the Mochi FP8 JSON workflow file below and drop it to ComfyUI.
Press Queue at the bottom to generate an image.


I can make img2vid with Mochi?
No.
When I finish rendering, this error appears,
“VAEDecode”
“Expected 3D (unbatched) or 4D (batched) input to conv2d, but got input of size: [1, 12, 9, 60, 106]”
Can you help me? Thanks
I’m running Comfyui locally and get ClipTextEncode ‘NoneType’ Object has no attribute ‘Tokenize’. How do I fix this error?
The file may be corrupted. You can try redownload.
That’s great, thank you! I ran it locally and worked well, although I noticed the following message on the command window, does that have any compromise to the final quality?
Warning: Ran out of memory when regular VAE decoding, retrying with tiled VAE decoding.
Prompt executed in 473.56 seconds
The tiled VAE breaks up the decoding of the video into several parts. It shouldn’t affect quality.