
Stable Diffusion 2.0 was released. Improvements include among other things, using a larger text encoder (which improves image quality) and increased default image size to 768×768 pixels.
Click here if you are look for install guide for Stable Diffusion 2.1
Different from 1.5, NSFW filter was applied to the training data so you can expect images generated would be sanitized. Images from celebrity and commercial artists were also suppressed.
In this article, I will cover 3 ways to run Stable diffusion 2.0: (1) Web services, (2) local install and (3) Google Colab.
In the second part, I will compare images generated with Stable Diffusion 1.5 and 2.0. I will share some thoughts on how 2.0 should be used and in which way it is better than v1.
Table of Contents
Web services
This is the easiest option. Go visit the websites below and put in your prompt.
Currently there are only limited web options available. But more should be coming in the next few weeks.
Here’s a list of websites you can run Stable Diffusion 2.0
The settings are limited to none.
Local install
Install base software
We will go through how to use Stable Diffusion 2.0 in AUTOMATIC1111 GUI. Follow the installation instruction on your respective environment.
This GUI can be installed quite easily in Windows systems. You will need a dedicated GPU card with at least 6GB VRAM to go with this option.
Download Stable diffusion 2.0 files
After installation, you will need to download two files to use Stable Diffusion 2.0.
- Download the model file (768-v-ema.ckpt)
- Download the config file, rename it to
768-v-ema.yaml
Put both of them in the model directory:
stable-diffusion-webui/models/Stable-diffusionGoogle Colab
Stable Diffusion 2.0 is also available in Colab notebook in the Quick Start Guide , among a few other popular models.
A good option if you don’t have dedicated GPU cards. You don’t need a paid account, though it helps to prevent disconnection and get a GPU instance at busy times.
Go to Google Colab and start a new notebook.
In the runtime menu, select change runtime type. In hardware accelerator field, select GPU.
First, you will need to download the AUTOMATIC1111 repository.
!git clone https://github.com/AUTOMATIC1111/stable-diffusion-webuiAnd then upgrade to python 3.10.
!sudo apt-get update -y
!sudo apt-get install python3.10
!sudo update-alternatives --install /usr/bin/python3 python3 /usr/bin/python3.7
!sudo update-alternatives --install /usr/bin/python3 python3 /usr/bin/python3.10 2
!sudo apt-get install python3.10-distutils
!wget https://bootstrap.pypa.io/get-pip.py && python get-pip.py
Download Stable Diffusion 2.0 model and config files.
!wget https://huggingface.co/stabilityai/stable-diffusion-2/resolve/main/768-v-ema.ckpt -O /content/stable-diffusion-webui/models/Stable-diffusion/768-v-ema.ckpt
!wget https://raw.githubusercontent.com/Stability-AI/stablediffusion/main/configs/stable-diffusion/v2-inference-v.yaml -O /content/stable-diffusion-webui/models/Stable-diffusion/768-v-ema.yaml
Finally, run the GUI. You should change the username and password below.
%cd stable-diffusion-webui
!python launch.py --share --gradio-auth username:password
This step is going to take a while so be patient. When it is done, you should see a message:
Running on public URL: https://xxxxx.gradio.app
Follow the link to start the GUI.
Using Stable Diffusion 2.0
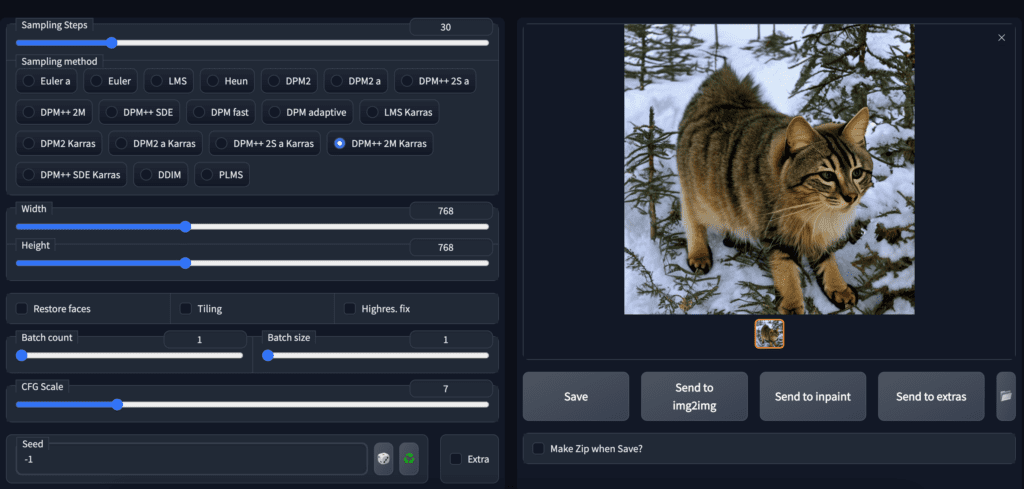
Select the Stable Diffusion 2.0 checkpoint file 768-v-ema.ckpt.

Since the model is trained on 768×768 images, make sure to set the width and height to 768. 30 steps of DPM++2M Karras sampler works well for most images.
Comparing v1 and v2 models
The first thing many people do is to compare images between v1 and v2.0.
Some care needs to be taken when doing the comparison.
Make sure to set the image size to 512×512 when using v1.4 or v1.5. It was fine tuned with images of that size and 768×768 will not do well.
Set image size to 768×768 when using v2.0.
(Note: According to the announcement, v2 is designed to generate both 512×512 and 768×768 images. Although early testing seem to suggest 512×512 is not as good, it may just be some software setting issues we need to iron out.)
Don’t reuse v1 prompts
Prompts that work for v1 models may not work the same in v2. This is expected because v2 has switched to the much larger OpenClip H/14 text encoder (nearly 6 times larger than the v1 model) and is trained from scratch.
Comparison 1: Futuristic bedroom
Here’s v2.0 generation with the same prompt. Not that far off but I like v1.4’s better.
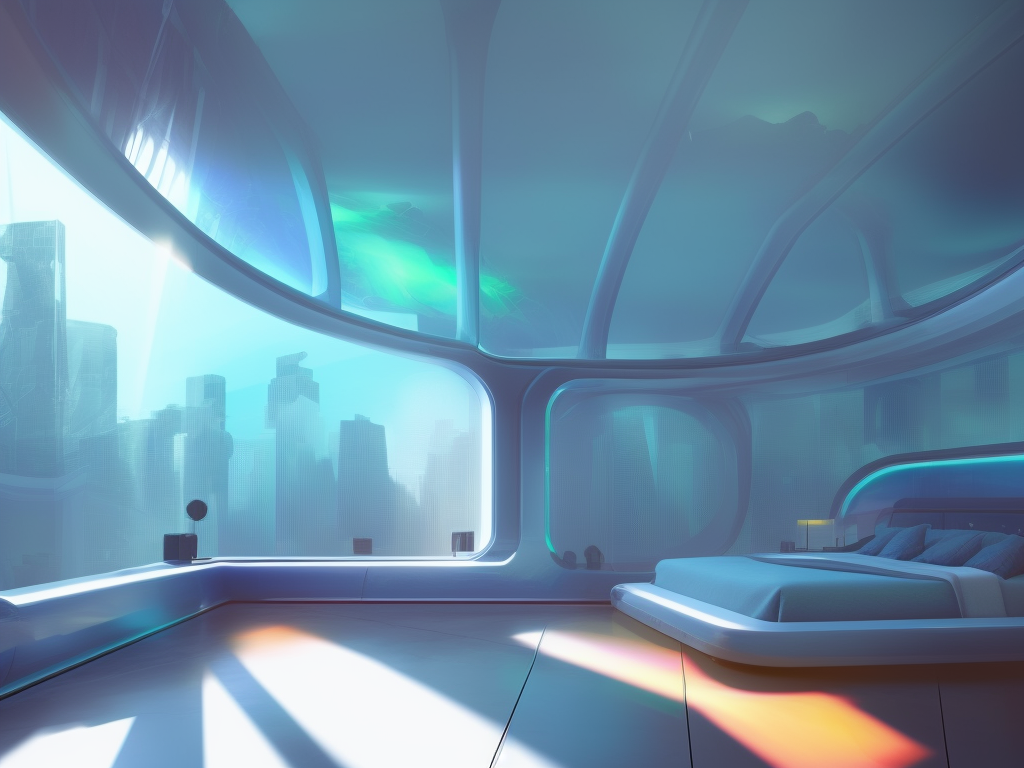
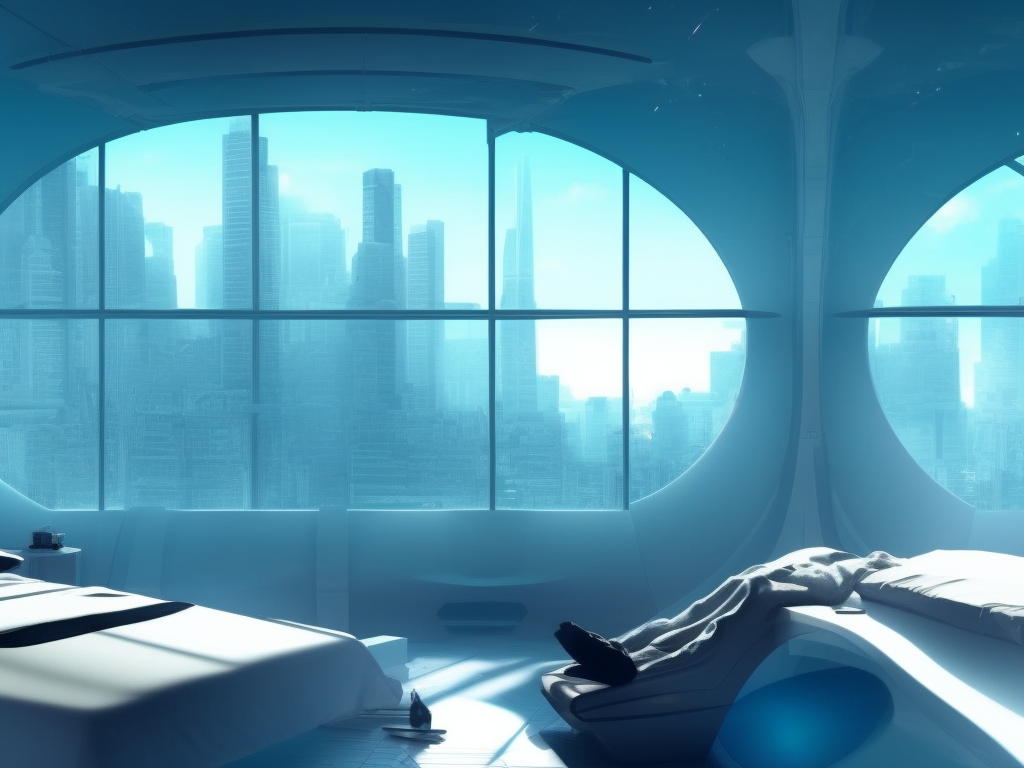
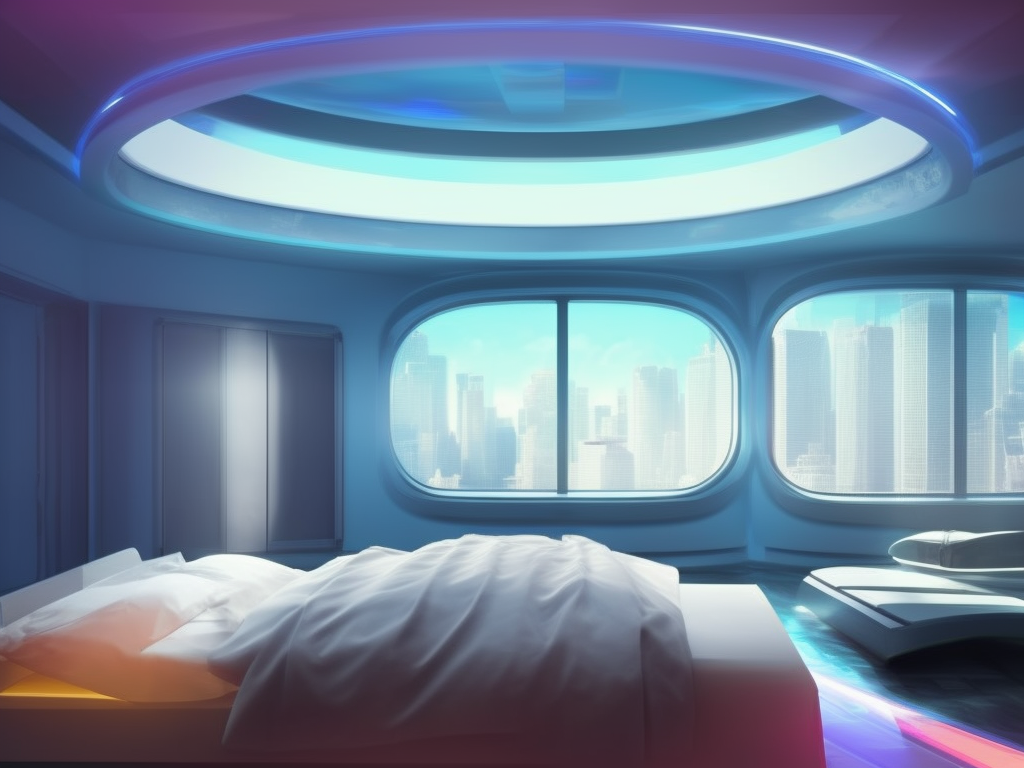
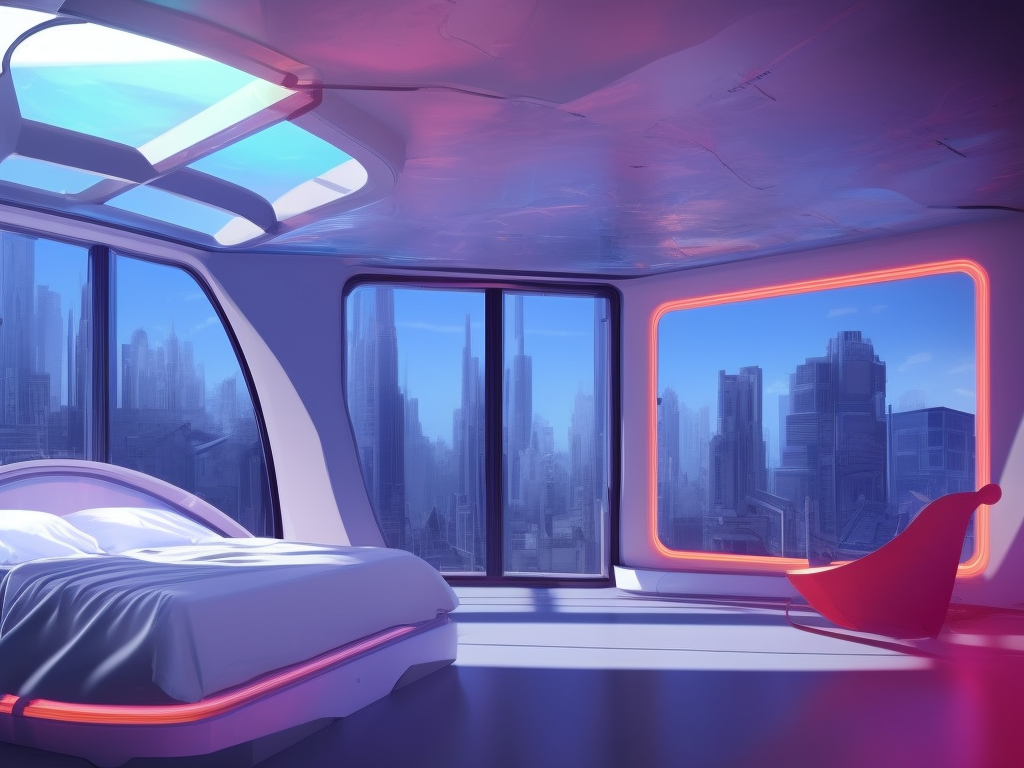
That’s not to say v2.0 is not good but the prompt is optimized for v1.4.
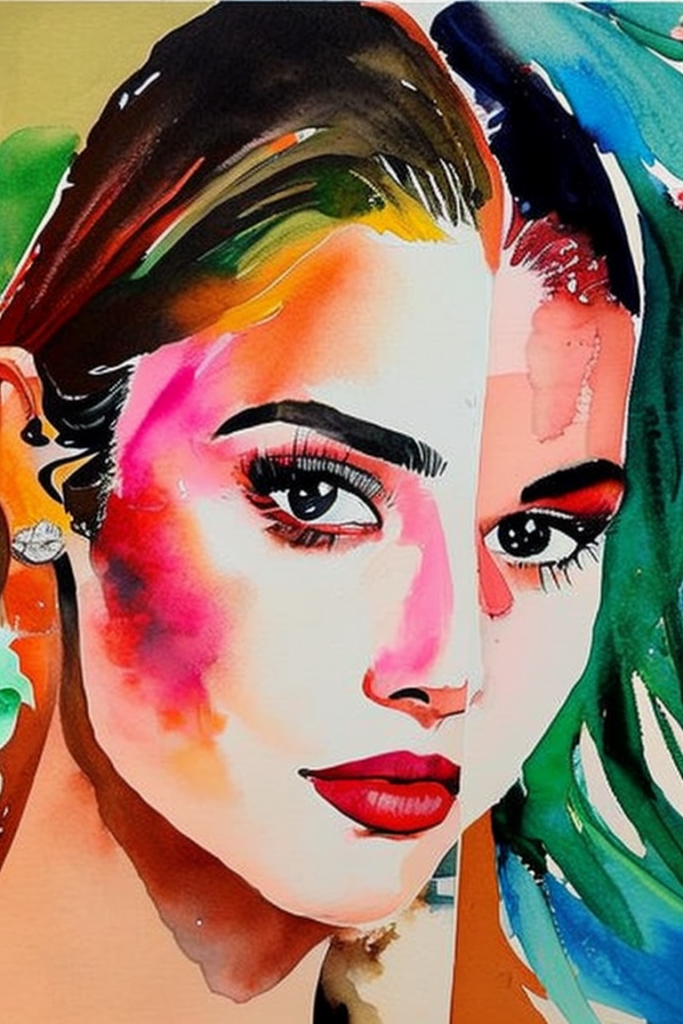
Comparison 2: Ink drips portrait
This prompt didn’t work so well for v2.0….
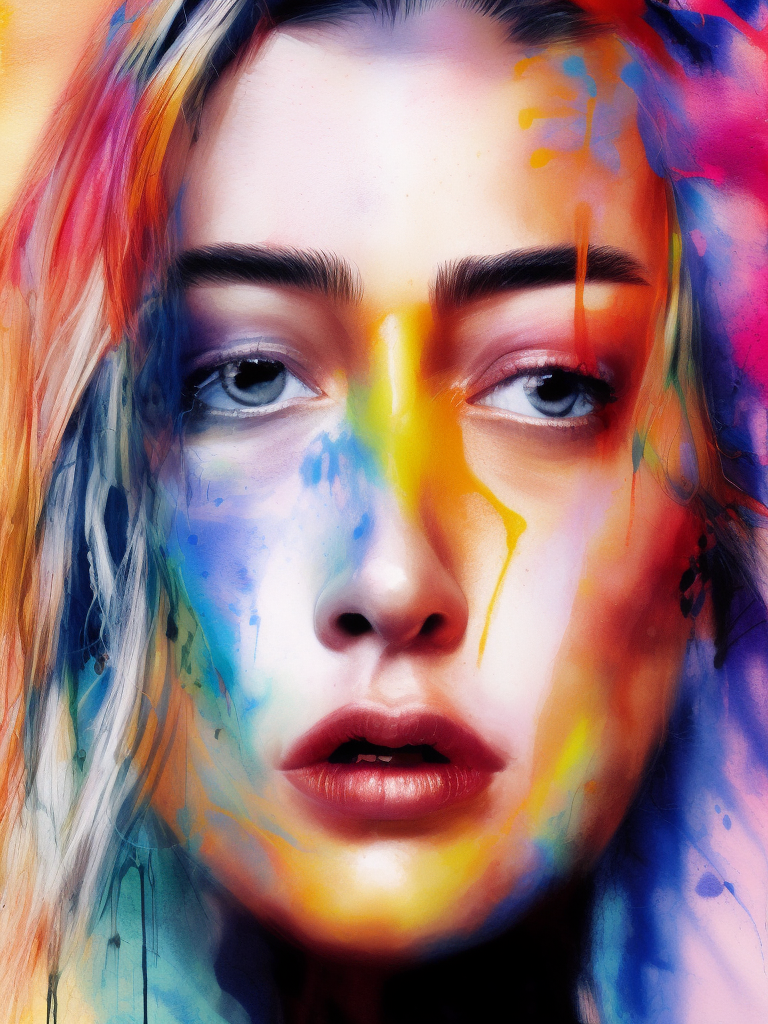
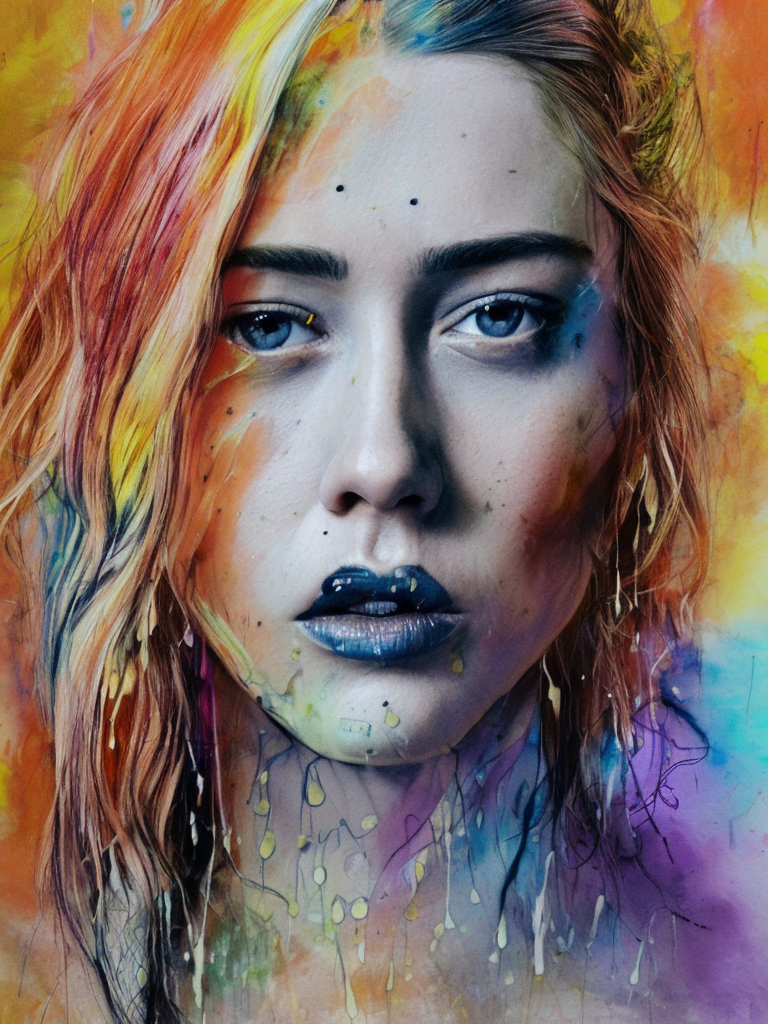
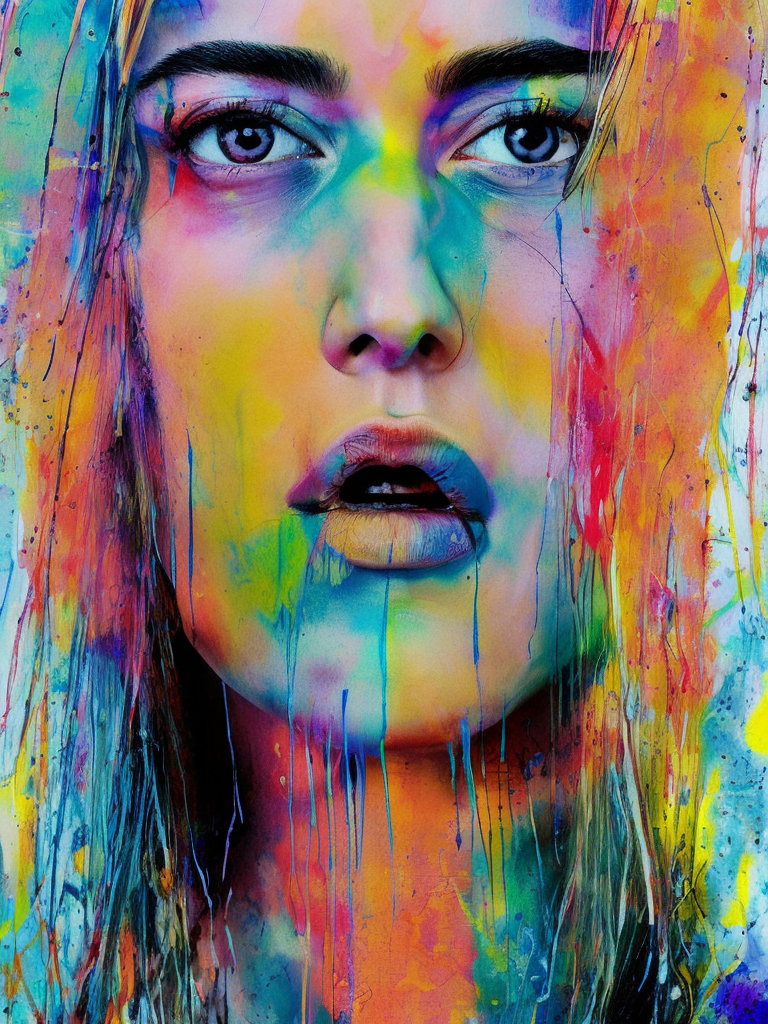
It generates more a realistic style which was not what I wanted.
I don’t think v2.0 is worse. The prompt just needs to be re-optimized.
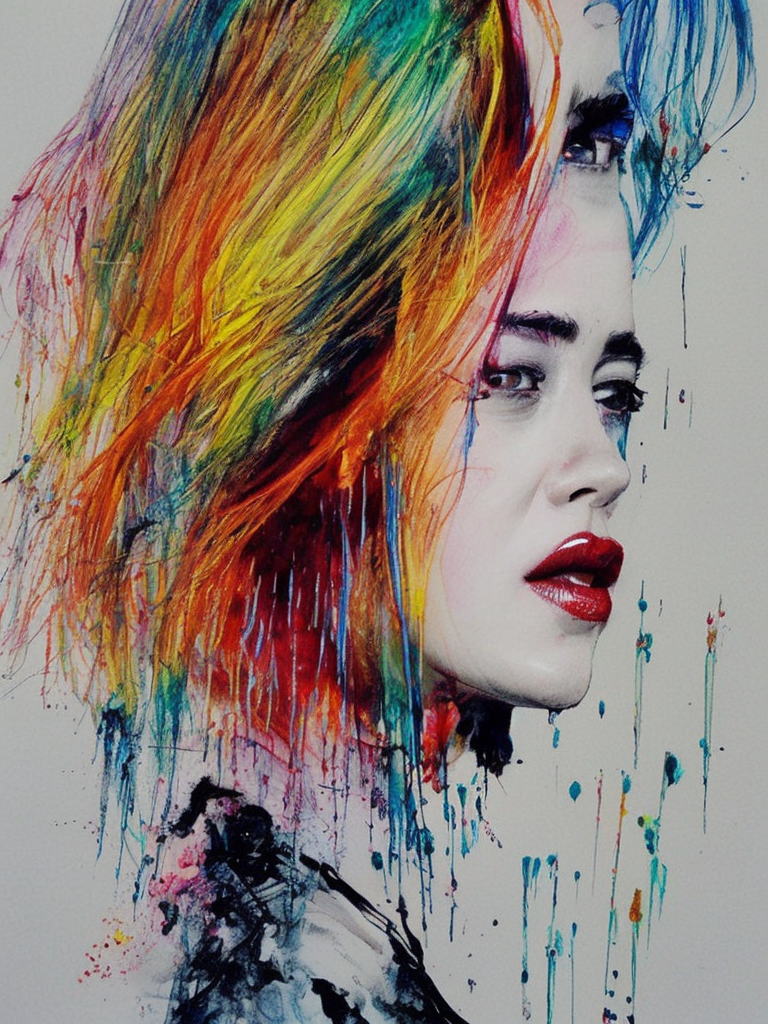
If you have to reuse v1 prompt…
You can try the prompt converter which work by first generating a image with v1 and interrogate the prompt with CLIP interrogator 2. Effectively, it gives a prompt what the language model would describe.
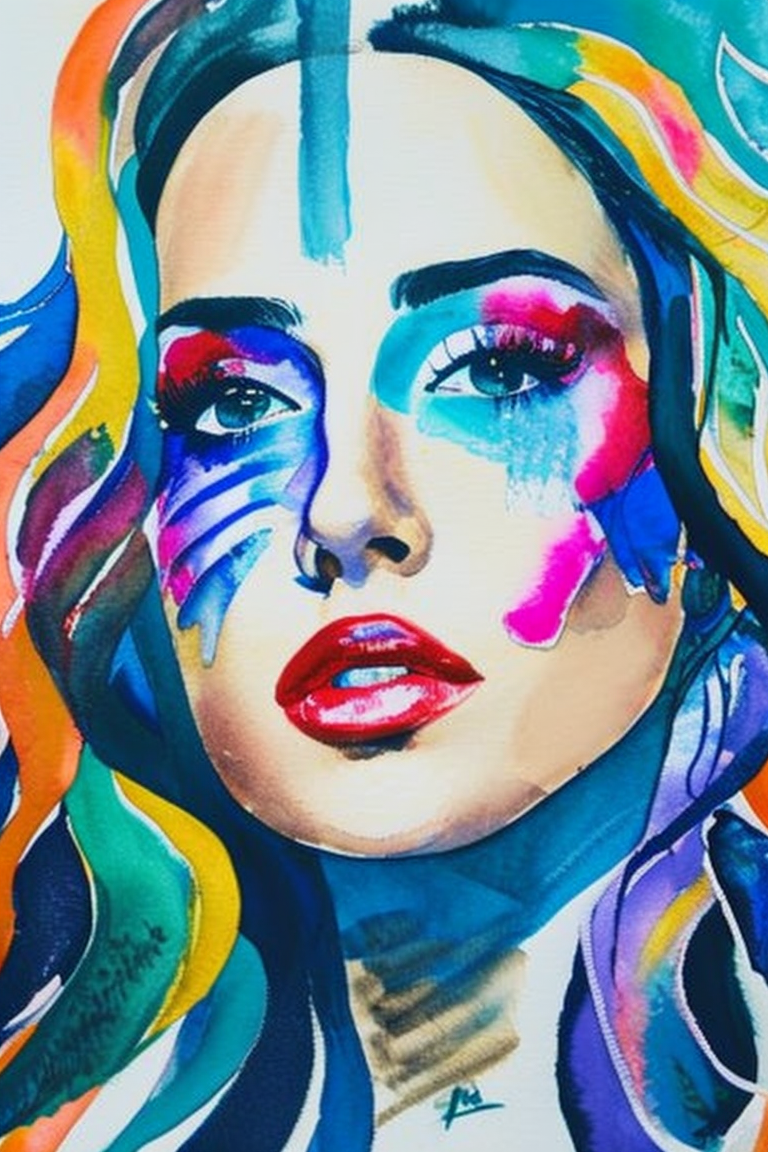
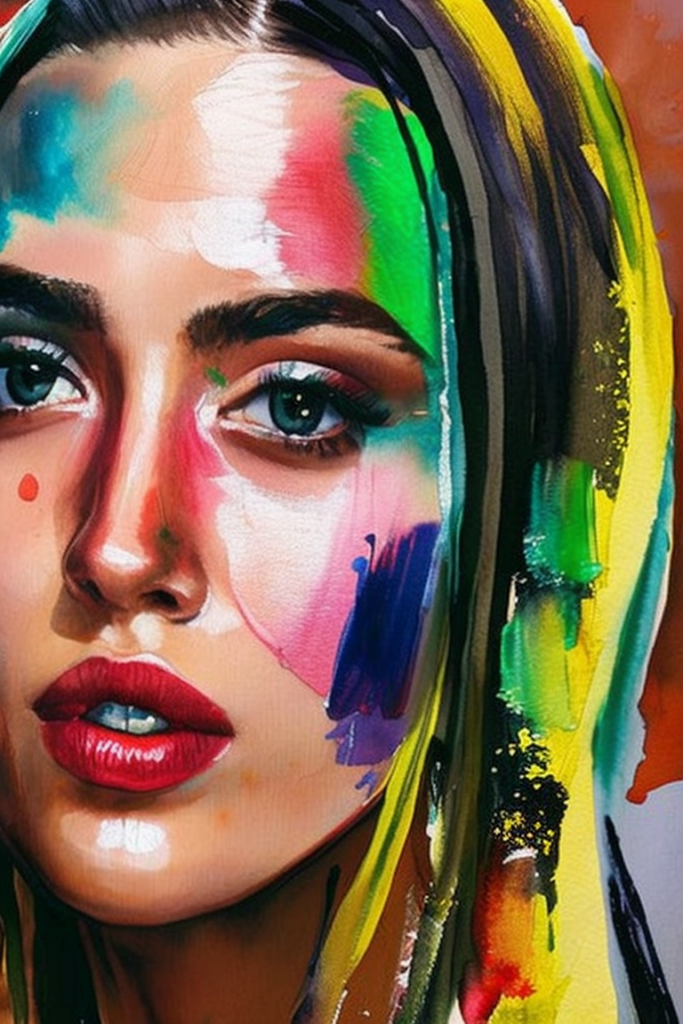
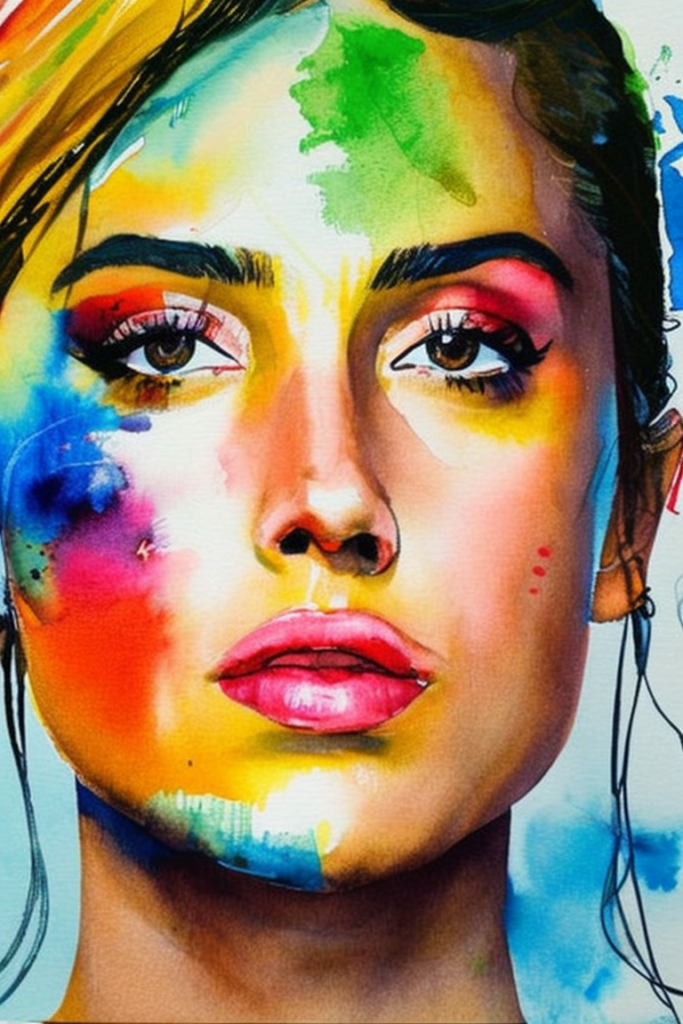
The prompt of the failed ink drips prompt is
[amber heard:Ana de Armas:0.7], (touching face:1.2), shoulder, by agnes cecile, half body portrait, extremely luminous bright design, pastel colors, (ink drips:1.3), autumn lights
which is translated to
a painting of a woman with watercolors on her face, a watercolor painting by Ignacy Witkiewicz, tumblr, process art, intense watercolor, expressive beautiful painting, painted in bright water colors
The images are not quite the same as v1 but they do look better.
v1 techniques are usable
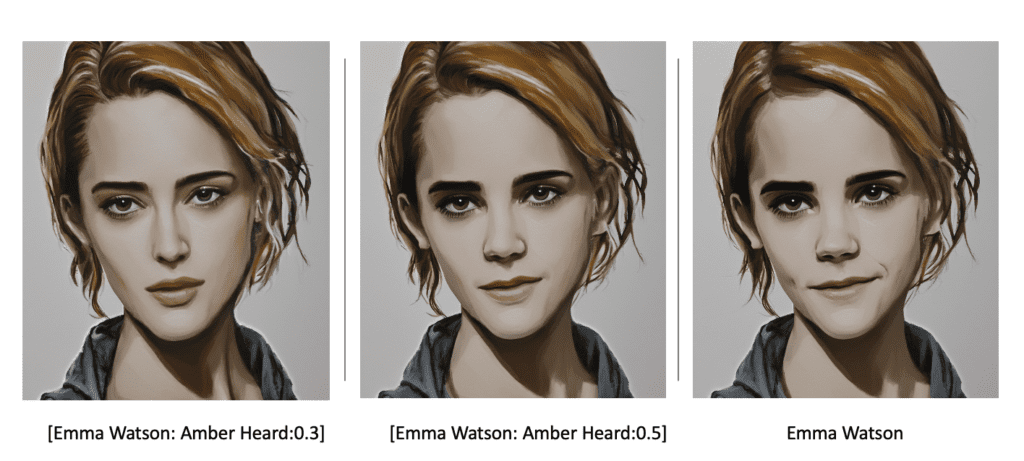
My first impression is that many of the techniques developed for v1 would still work. For example, keyword blending works quite well. The effect of using celebrity name appears to be reduced though.
Prompt building
One observation I have is Stable Diffusion 2.0 works better with longer, more specific prompts. Note that this is also true for v1 but it seems to be even more so for v2.
To illustrate this point, below are images generated using a single-word prompt “cat”.
We got expected result using v1.5:
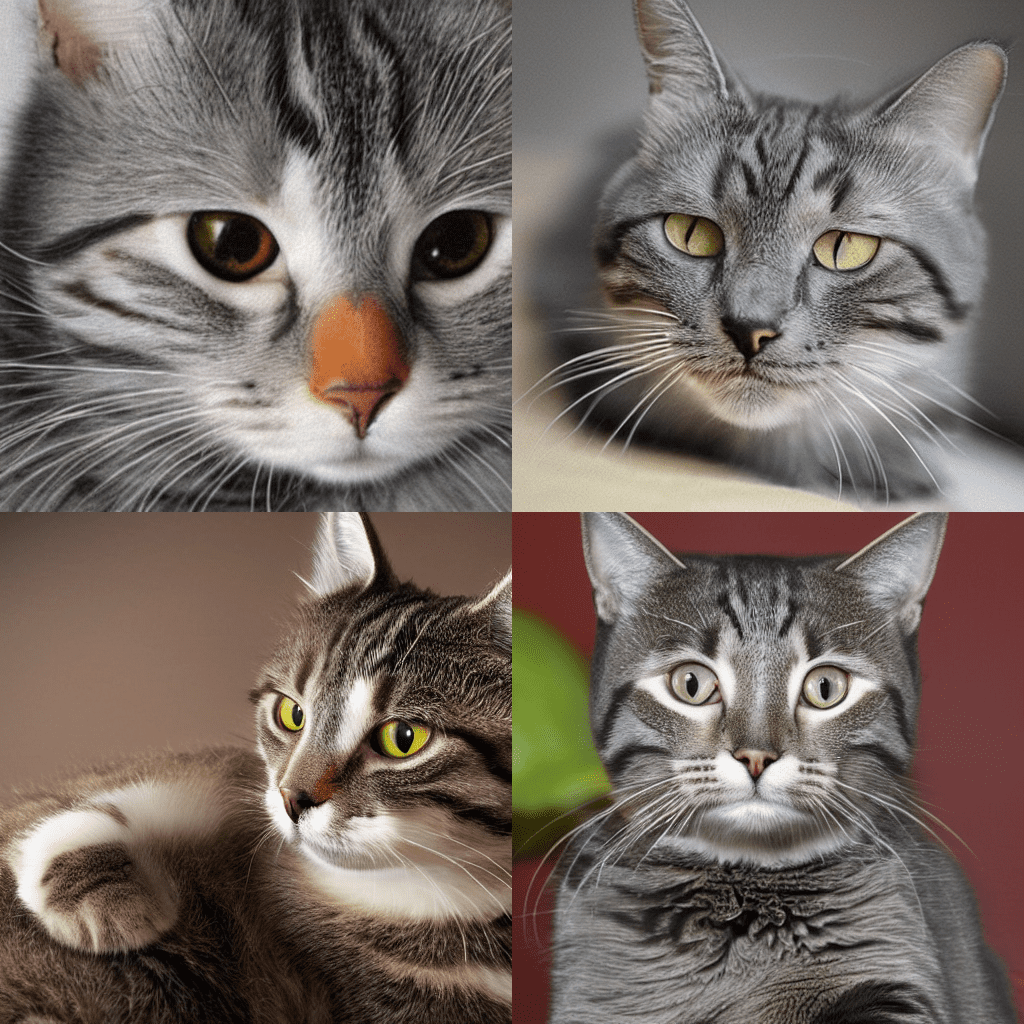
Below is what I got with the same prompt using v2.0.
They are still kind of related to cat but not quite what a user might expect.
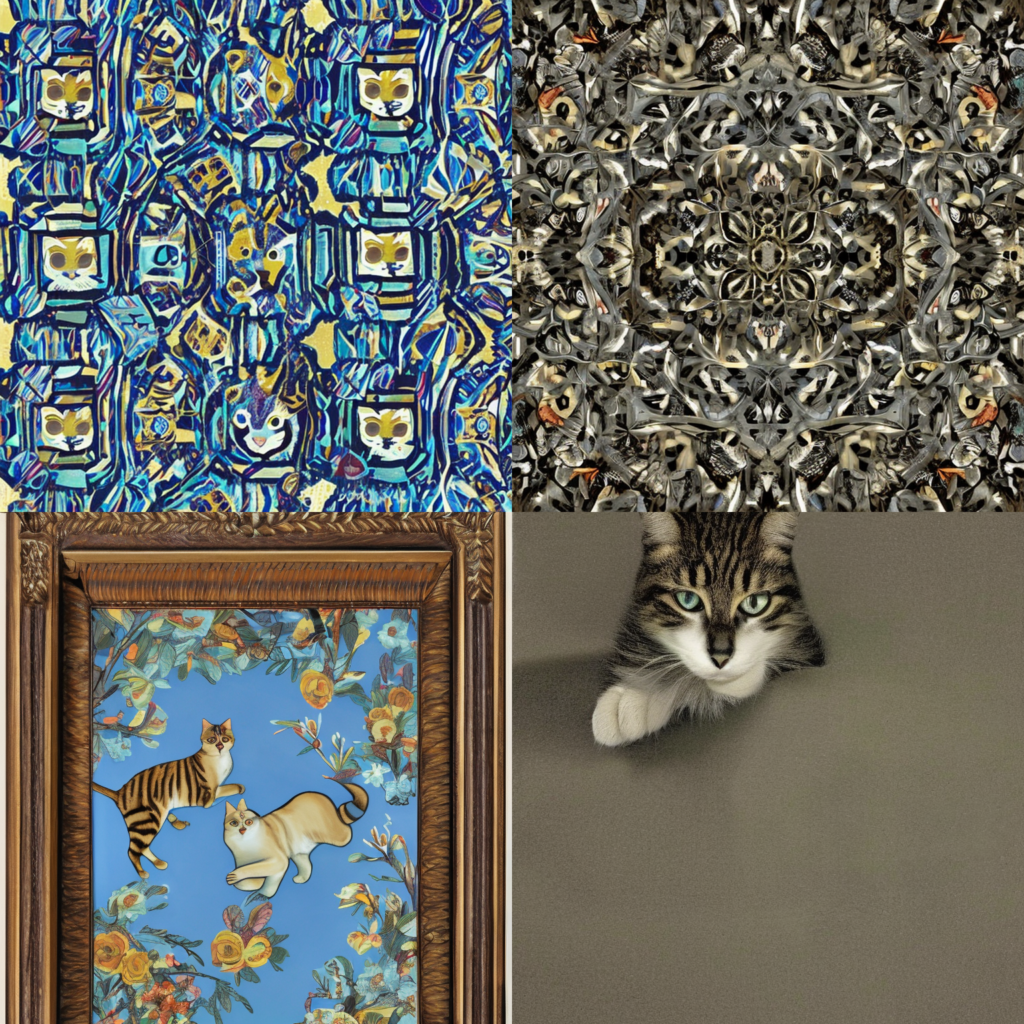
What if we use a longer, more specific prompt?
A photo of a Russian forrest cat wearing sunglasses relaxing on a beach

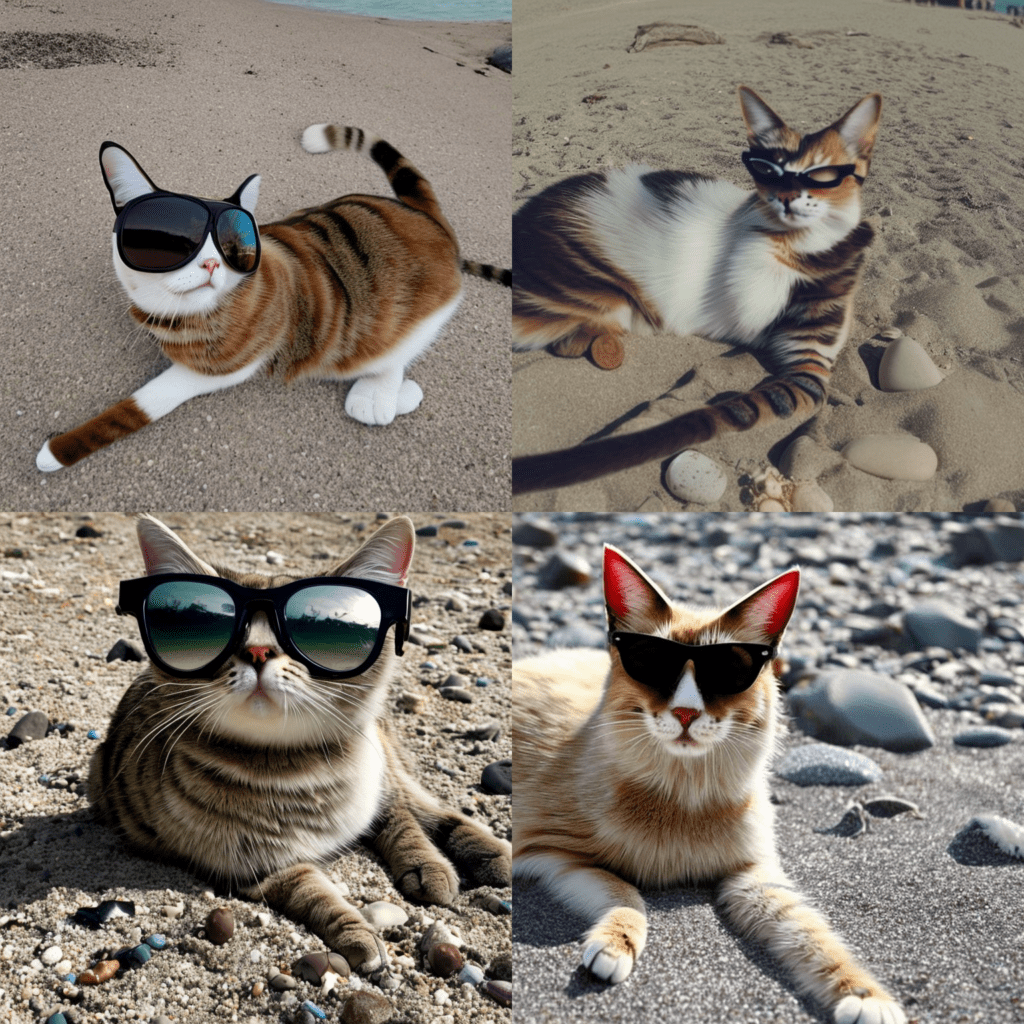
Here’s where Stable Diffusion 2.0 shines: It generates higher quality images in the sense that they matches the prompt more closely.
This is likely the benefit of the larger language model which increases the expressiveness of the network. 2.0 is able to understand text prompt a lot better than v1 models and allow you to design prompts with higher precision.
Summary
It’s still the early day of Stable Diffusion 2.0. We have just got the software running and we are actively exploring. I will write more when I find out how to use 2.0 more effectively. Stay tuned!
Hi Andrew
Thank you for the lovely tutorials. I enjoy working through them.
I wanted to check if you are the same Andrew who has written this book Stable Diffusion with Python: https://www.amazon.com/Using-Stable-Diffusion-Python-Generation-ebook/dp/B0CMQKR263/ Or is it a different author, your namesake?
Hi, its a different author.
Hi Andrew. Thanks for the clear tutorials – you’re clearly doing great work, and hopefully helping the less computer-literate into the world of SD.
I’ve tried to follow your advice here to try out SD2.0, and think I’ve followed your instructions for a local install (I’ve had SD1.5 running perfectly on Automatic1111 install on my pc). I try to switch to the SD2.0 checkpoint in the browser, though, and I get the following error:
“RuntimeError: Expected all tensors to be on the same device, but found at least two devices, cpu and cuda:0! (when checking argument for argument index in method wrapper__index_select)”
I have the 768-v-ema.ckpt file and the config file renamed 768-v-ema.yaml in theStable-Diffusion directory in the models directory.
Have I done something simple to correct?
Thanks
Hi Neil, thanks and great to hear you found this site useful!
It seems to be something related to memory management. Are you using –medvram or –lowvram options? (Check your webui-user.bat file, set COMMANDLINE_ARGS line, or the shortcut that you run it.) Try removing it to see if that resolves the issue.