There’s an old post in Reddit showcasing a daunting tasks of removing the ex wife from a family photo. I surely can’t pull it off with my amateur Photoshop skill. But that was before the time of Stable Diffusion…. Let’s find out what we can achieve with inpainting.
In this post, I am going to show you how use inpainting function of Stable Diffusion to remove object (a person in this case) and reconstruct the background.
Software for inpainting
We will use this Stable Diffusion GUI for this tutorial. See my quick start guide for setting up in Google’s cloud server.
What is inpainting?
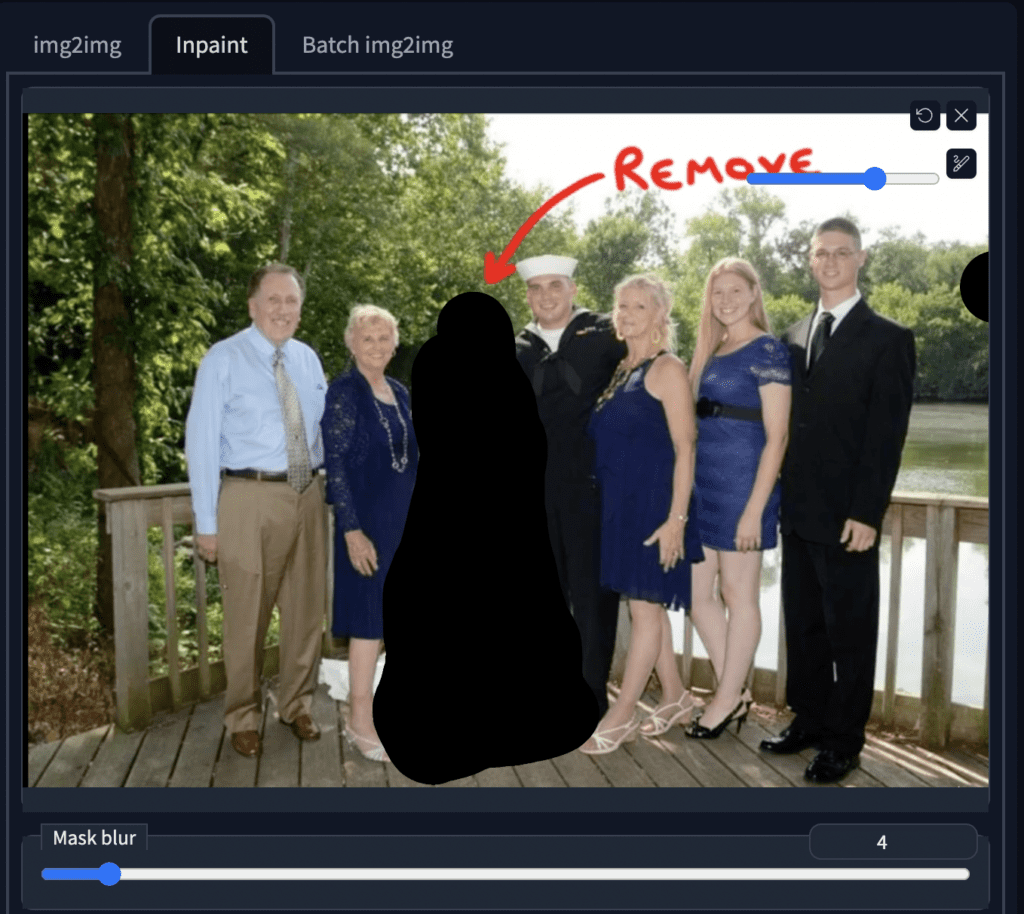
Inpainting is a technique that Stable Diffusion only redraws part of an image. Specifically, you supply an image, draw a mask to tell which area of the image you would like it to redraw and supply prompt for the redraw. Then Stable Diffusion will redraw the masked area based on your prompt.
To access the inpainting function, go to img2img tab, and then select the inpaint tab. Make sure the Draw mask option is selected. Upload the image to the canvas.
Settings
Adjust image size based on your original image. Because my image is in landscape orientation, I used size 768×512 pixels.
Select the batch size of 8 so that you can cherry pick the best image.
Let’s remove the ex…
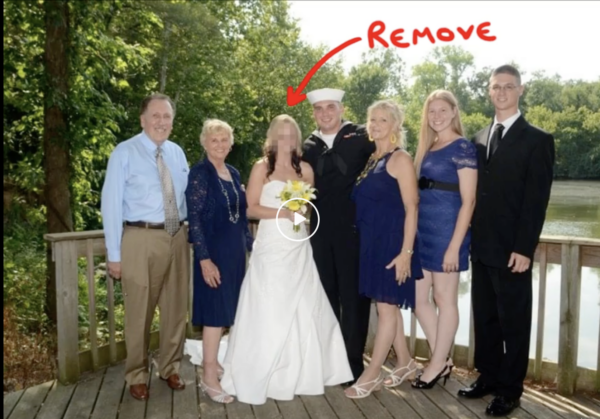
OK, let’s get started. Since I don’t have access to the original image, I took a screenshot of the video and use as the input image:
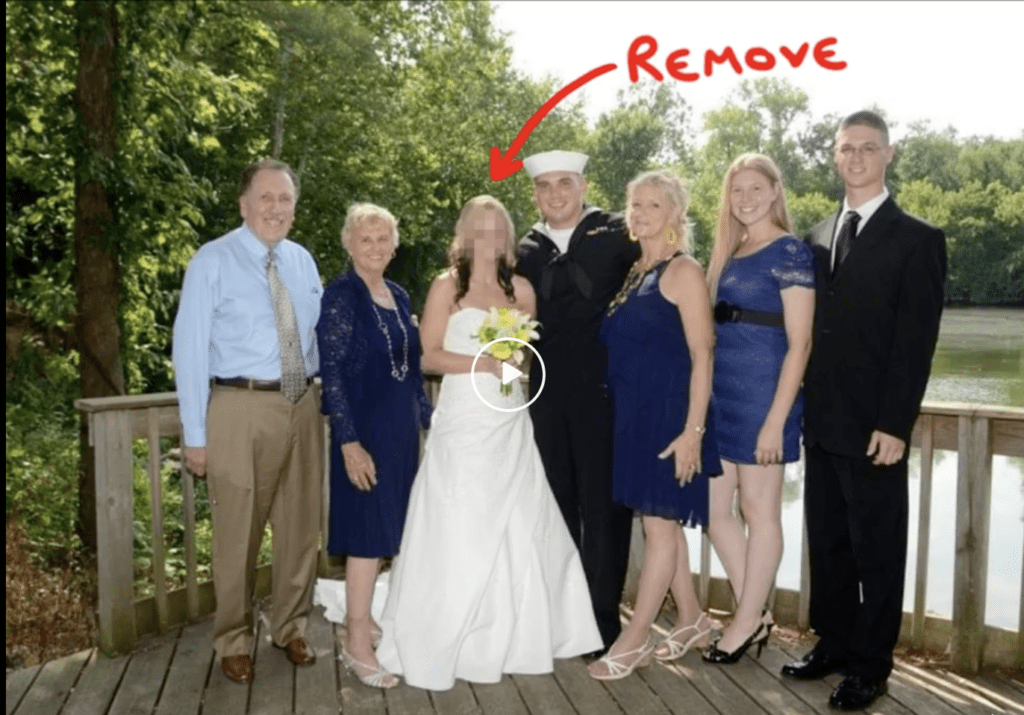
In the GUI, draw a mask covering the area you want to erase and redraw. I’m starting with the main subject. My mask looks like this:
Now supply the prompt of the background
photograph of a lake, tree, wooden deck, wooden fence
Press Generate. The inpainted image then generated:
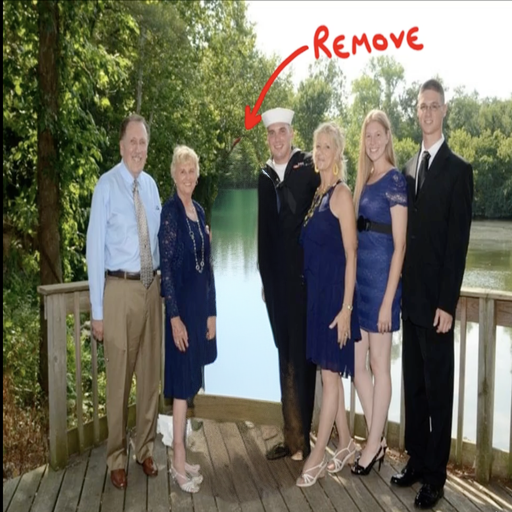
Not perfect but not too shabby! The deck floor and the legs are not quite right but we can fix them later. The deck fence is in a pretty good shape. Now let’s fix up the gentleman’s black pant and the floor.
photograph, pant, wooden deck
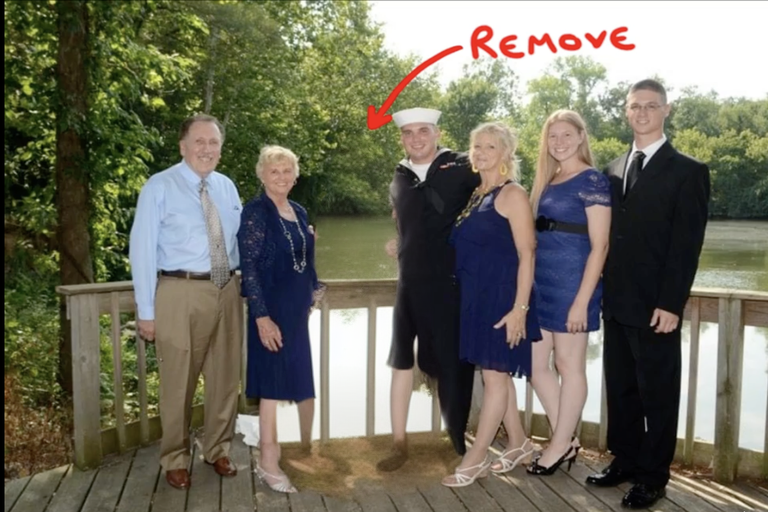
Fix the pant and floor one more time…
black pant, wooden deck
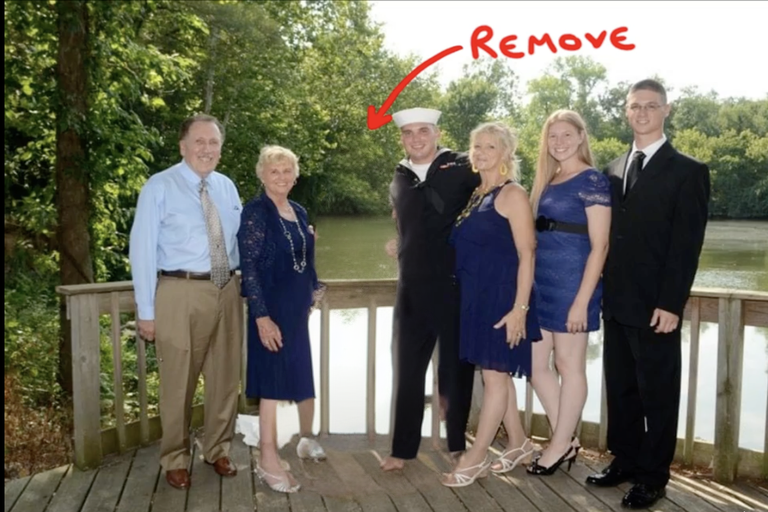
Now remove the long white dress behind the in-laws (?):
wooden deck, leg
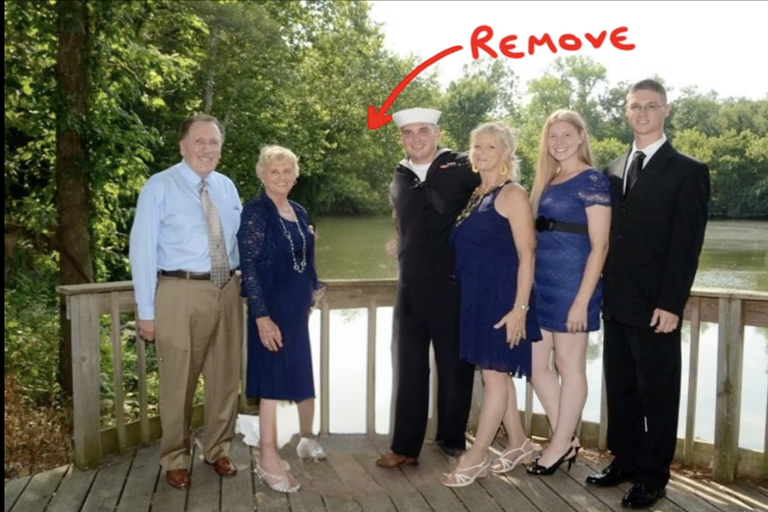
Remove the word REMOVE and the arrow in the sky…
tree, sky
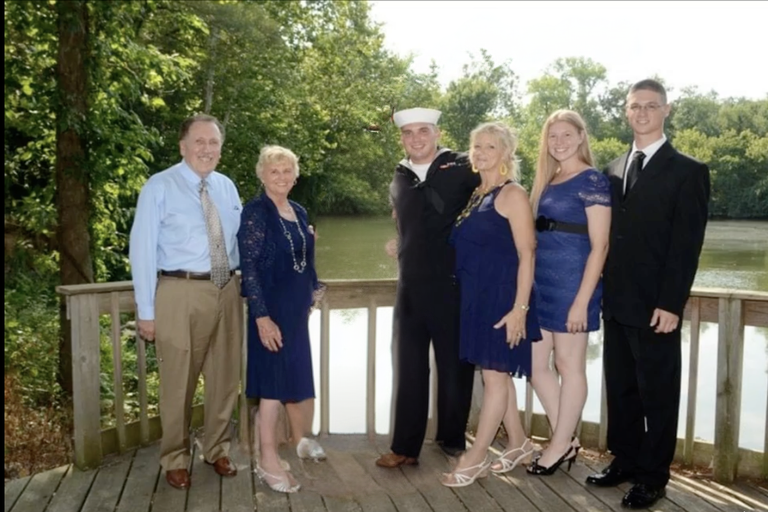
It’s missing a deck board between the deck and the fence, let’s fix it.
wooden deck, lake
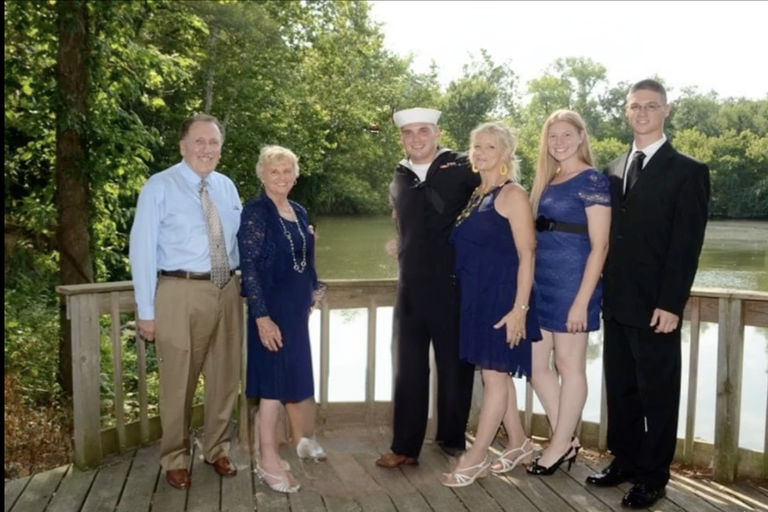
Fix the gentleman’s arm…
lake, black jacket
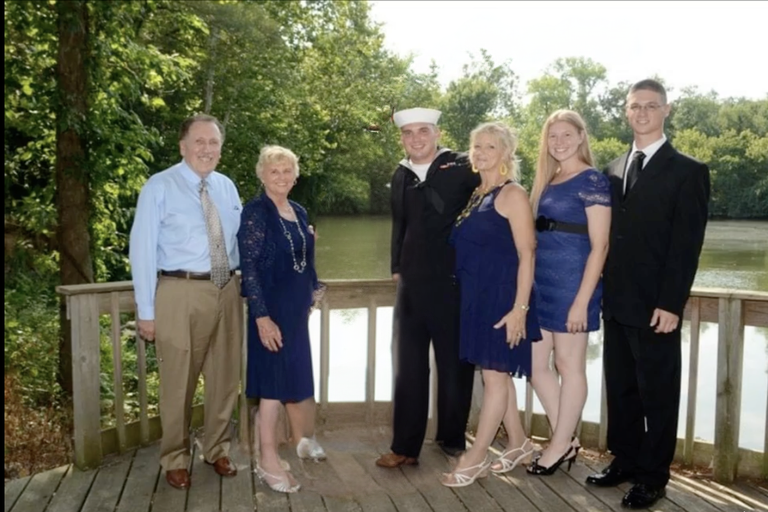
Finally, the deck floor the bride originally stood on is a bit unnatural. Let’s fix it.
wooden deck
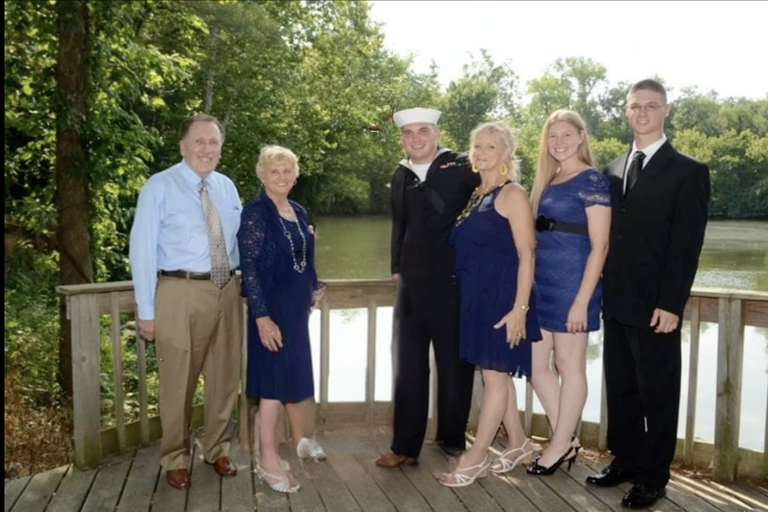
Now are done! Let’s look at the before and the after side-by-side.
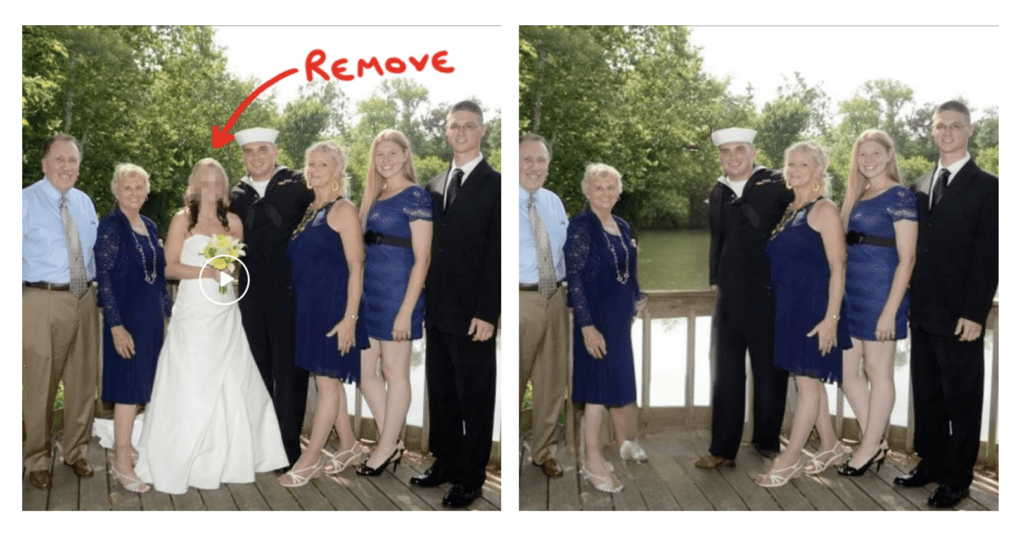
I think it’s pretty good given we made less than 10 edits!
Summary
In this post, I showed you how easy it is to use inpainting to remove unwanted objects in a photo. What would have taken a professional Photoshop user hours can be done in fewer than 10 steps using inpainting with Stable Diffusion. I hope you too can use this powerful tool to accomplish what previously think only a professional can do!
Check out this article to get more prompt ideas. Check out some advanced prompting techniques.
Creepy result but hey it’s free, will use this at my photo shop to avoid paying Adobe!
Good walkthrough, but what settings are you using for resize mode, masked content, inpaint area, resize to, denoising strength? These are the settings which make inpainting so confusing. Could you add a screenshot to show your settings for the first inpaint? Would be very helpful. Thanks.
Hi, this one may have a bit more detailed walkthrough.
https://stable-diffusion-art.com/inpainting-remove-extra-limbs/
This doesn’t make sense clearly.
Do i need to save the generated image and upload it and mask it again and change prompt and click generate button, and repeat the step until I achieve the desire output? This tutorial seems to imply that?? That is much longer and laborious than using photoshop!???
Thanks for the clarification.
Yes, that’s basically true. In AUTOMATIC1111, you can use “Send to inpaint” button to avoid upload and download.