You can use Stable Diffusion WebUI Forge to generate Stable Video Diffusion (SVD) videos. SD Forge provides an interface to create an SVD video by performing all steps within the GUI with access to all advanced settings.
In this post, I will walk you through how to set up and run SVD on Forge to generate a video like this:
Table of Contents
Software
You will first need to install SD Forge. Follow the installation guide to run Forge locally.
If you are new to Stable Diffusion, check out the Quick Start Guide.
Take the Stable Diffusion course if you want to learn Stable Diffusion step-by-step.
Alternatives
Instead of running SVD on Forge, you can also use it on
- ComfyUI
- Google Colab
- Your local machine as a standalone application
Follow the instructions in this post for these options.
Install SVD model
You must first download the SVD XT model and put it in Forge’s svd folder.
First, you need to fill out the agreement form here.
Then, download the SVD 1.1 model.
Put it in the webui_forge_cu121_torch21 > webui > models >svd folder.
If SD Forge is running, you must close the terminal and restart completely to use the model.
Use the SVD model to generate a video
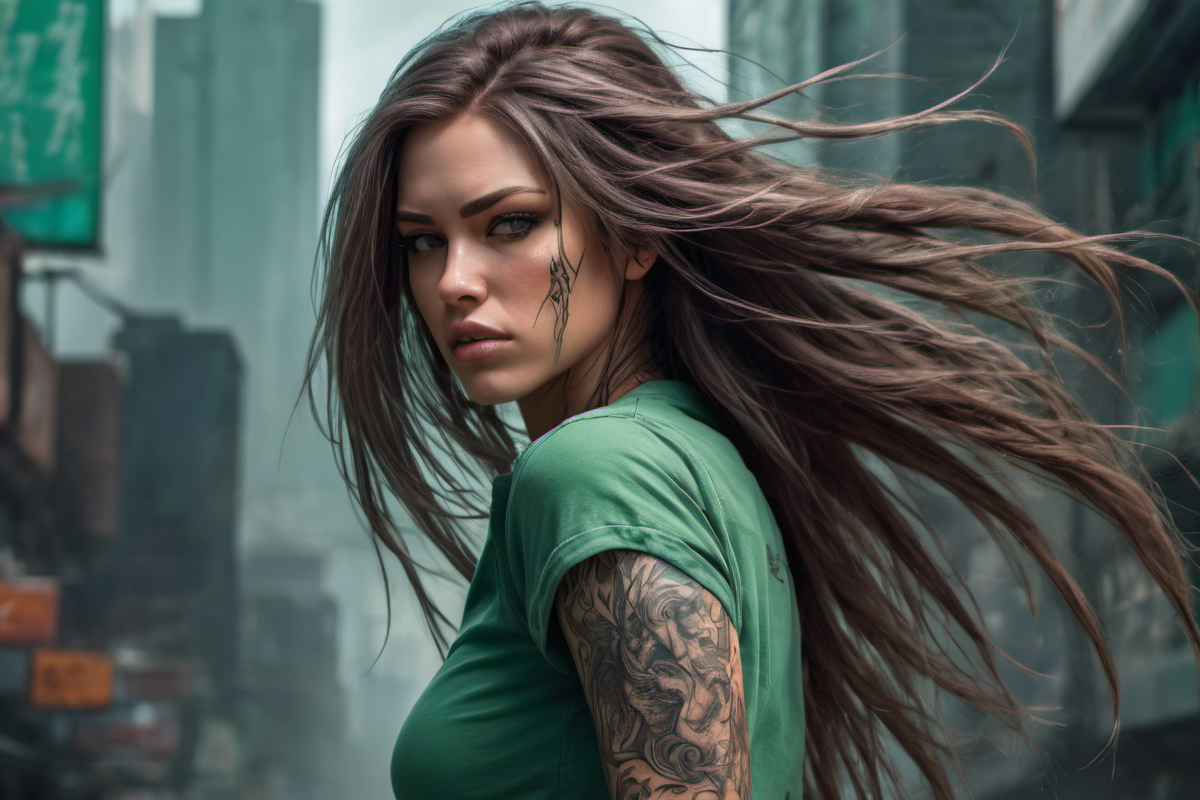
Step 1: Generate an initial image
You need an initial image of the video with 576 x 1024 pixels.
- Checkpoint model: juggernautXL_v7
- Prompt:
a woman with long hair windy and tattoos on her body, a green shirt , Clint Cearley, epic fantasy character art, cyberpunk art, fantasy art
- Sampling method: DPM++ 2M Karras
- Sampling Steps: 20
- CFG scale: 7
- Seed: -1
- Size: 576×1024
I used “windy” in the prompt so that her hair is blown up a little by the wind. That will help to add motion to the video.
Press the Send to SVD button under the image.

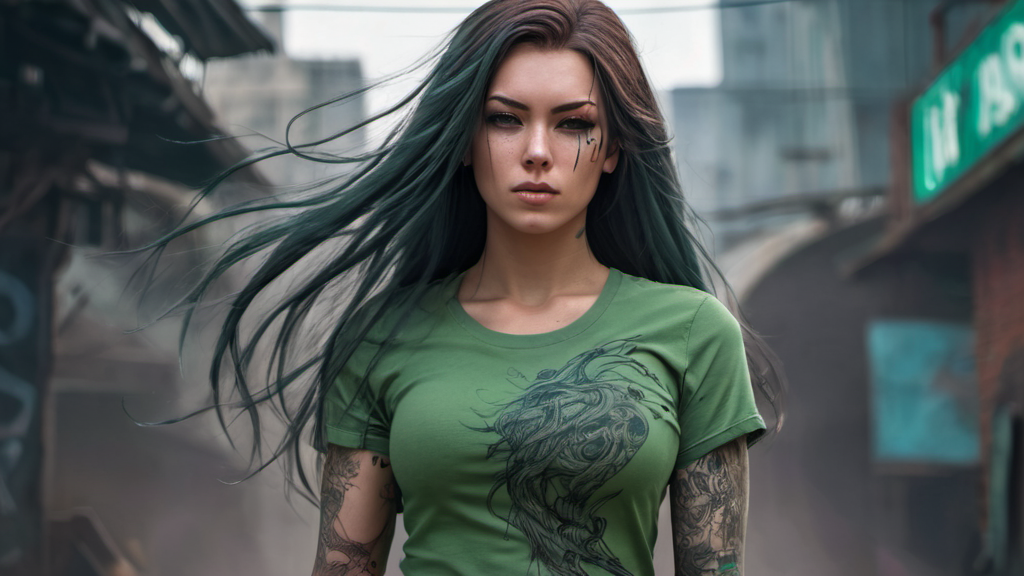
Step 2: Generate SVD video
Now, you should be on the SVD tab.
Make sure you see the SVD checkpoint selected.

You can leave the rest of the settings as default.
Press the Generate button.
You should get a video like this.
SVD settings
Below is a list of important parameters that control the video output.
Motion bucket id
The motion bucket id controls how much motion is in the video. A higher value means more motion. Accepts a value between 0 and 255.
FPS
The frames per second (fps) parameter controls the number of frames the model generates. Stay between 5 and 30 for optimal performance.
Augmentation level
The augmentation level is the amount of noise added to the initial image. Use it to change the initial image more or when generating videos that deviate from the default size.
Is there a possibility to control the motion of the result? To say – based on the image of the woman from your example above – you want the hair flowing; a little rotation; a shoulder movement etc.
Not for SVD. You can do that through prompt with the newer video models like Wan 2.1 and Hunyuan. See my tutorials.
Using SD reForge. I keep getting the following error:
TypeError: KSamplerX0Inpaint.__call__() got an unexpected keyword argument ‘cond’
I have found no solutions otherwise. Any idea how to fix this?
Having the same problem here as well.
Hello, I’m using Forge SD, but even after puting the file in SVD dir, nothing appends. I dont have the icon “movie director” between the ‘send image’ and the ‘upscale’ icon.
The function was removed recently, though you can jump through hoops to install it… https://github.com/lllyasviel/stable-diffusion-webui-forge/issues/996
Thanks for taking care ! I’m not skilled enough to try the fix, but I’ll wait for the native correction with hope.
Las imágenes son magnífica.
Cool! If I want to show someone bouncing or swaying (whole body), will the motion module handle that? Or is it for now subtle movements like hair, clothing, it part of the body (slight head turn)
Thanks,
V
It is a tall order but you can try!
How long does it take to generate a 2 second video (24fps) from a quality image?
its under 10 sec on my 4090