
ComfyUI Desktop makes it easier than ever to run ComfyUI locally without messing with the command line. It’s the most beginner-friendly way to start creating AI images and videos locally. No Python setup, Git installation, and configuration headaches.
If you just want to get started quickly, ComfyUI Desktop is the clear winner. The installation takes only a few clicks, and you’ll be up and running in minutes.
In this post, we’ll go through the pros and cons of ComfyUI Desktop, and then show you how to install it on Windows and Mac step by step.
Table of Contents
Pros and Cons
Why should you use ComfyUI Desktop? The benefits are:
- Ease of installation: This is probably the main reason you use ComfyUI Desktop. The installer make the installation process fool proof. You don’t need to worry about installing the corrrect version of Python and installing Git.
ComfyUI Desktop is the most straightforward way to install ComfyUI. But what have you given up?
- Less frequent Updates: You will need to wait for official releases to get new features. If you use the standalone installer or clone the GitHub repository, you can use
git pullto update as soon as new features are released. - Less flexibility in installing custom nodes: The ComfyUI Desktop environment cannot be changed. Some custom nodes require special versions of libraries or installation, and may not work correctly in the Desktop version.
- Not for code development: If you are a developer or a tinkerer, installing from GitHub allows you to use developer tools such as debugging in VSCode.
- Remote access: The Desktop version is designed to be accessed locally. While you may be still be able to access it remotely, the configuration is inflexible.
- Access through browser: Using the Desktop version means using ComfyUI in an App instead of using a browser. You won’t be able to access browsers’ developer feature for troubleshooting.
Install ComfyUI Desktop on Windows
To install ComfyUI Desktop on Windows, you should have a discrete NVIDIA GPU card with at least 4 GB VRAM.
Step 1: Download the ComfyUI installer
Visit https://www.comfy.org/download and download the installer for Mac.

Step 2: Install the App
Double-click the downloaded file to install the App.
Step 3: Launch the app
Launch the app, and you should see the Welcome screen.
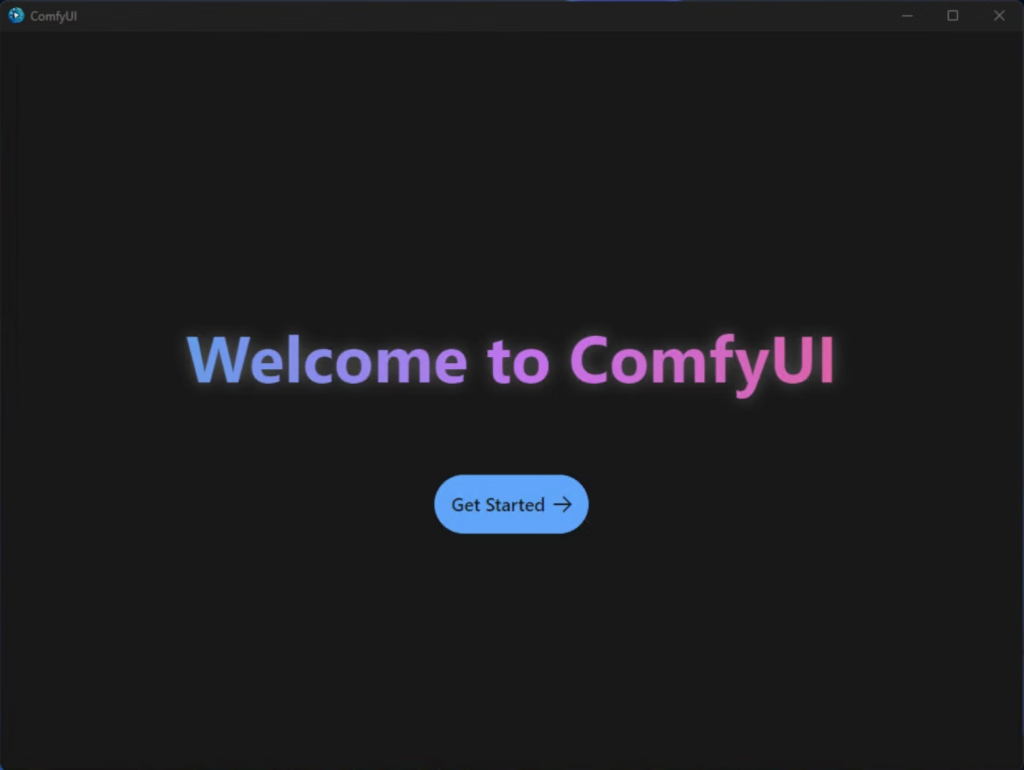
Click the Get Started button.
Step 4: Complete the setup in App
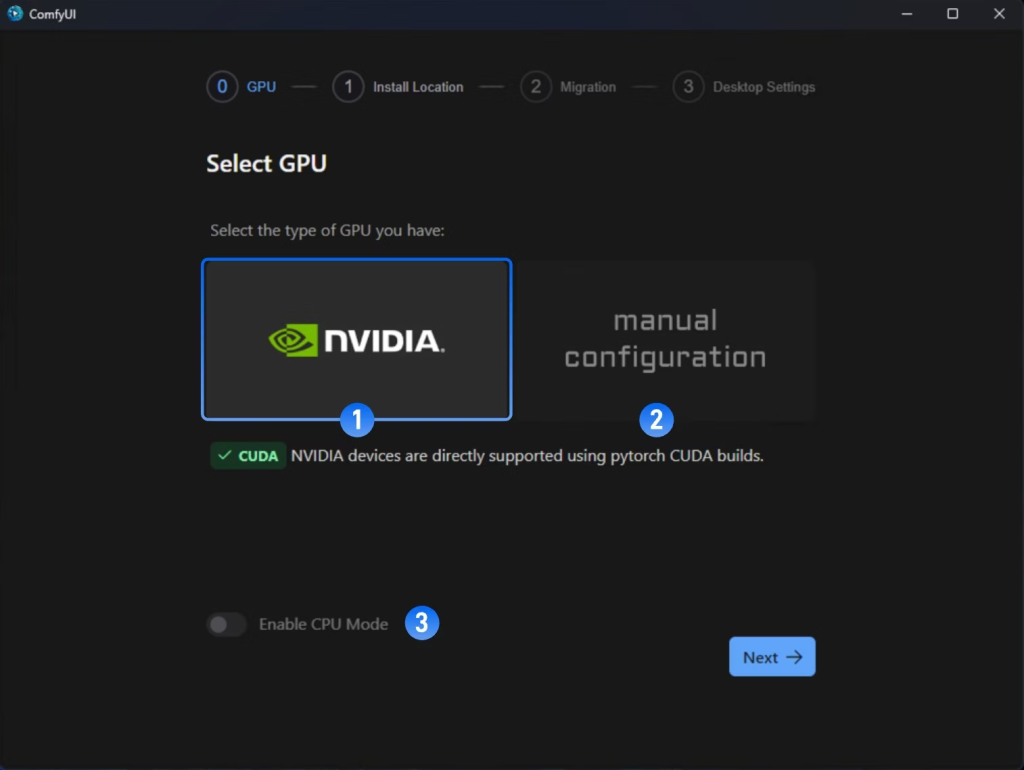
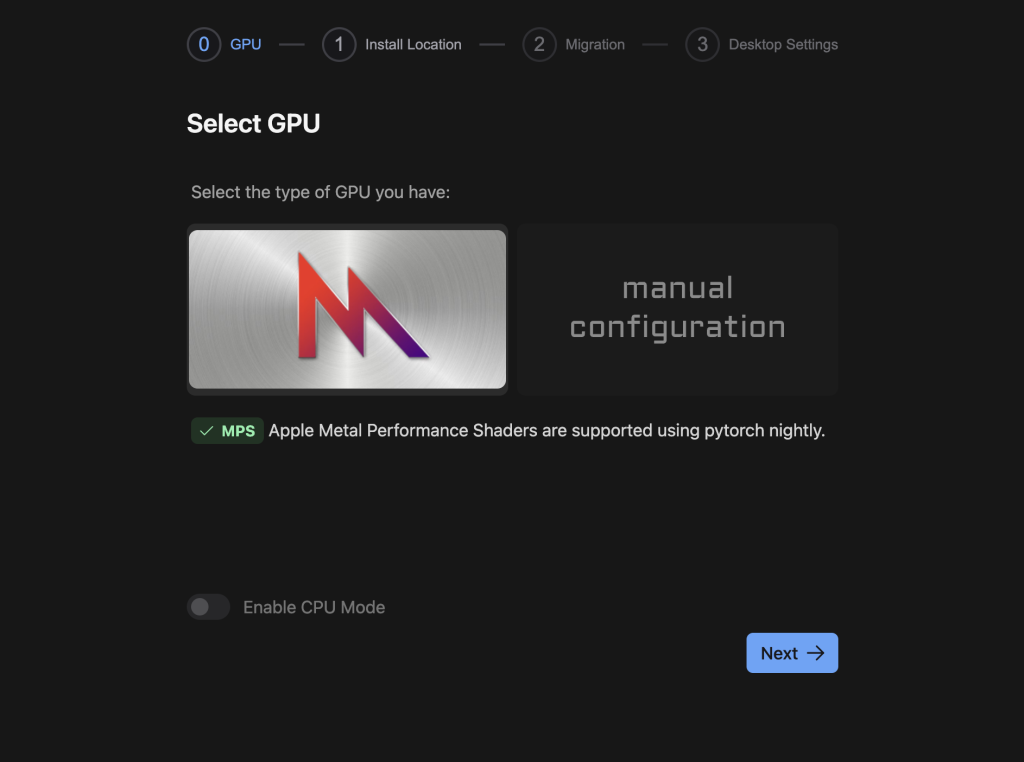
Select GPU:
- Nvidia GPU (Recommended): Automatically installs the required libraries.
- Manual Configuration: You must manually install and configure the Python environment. Don’t select this unless you know how to configure.
- Enable CPU Mode: Useful for Developers only.
Click Next.
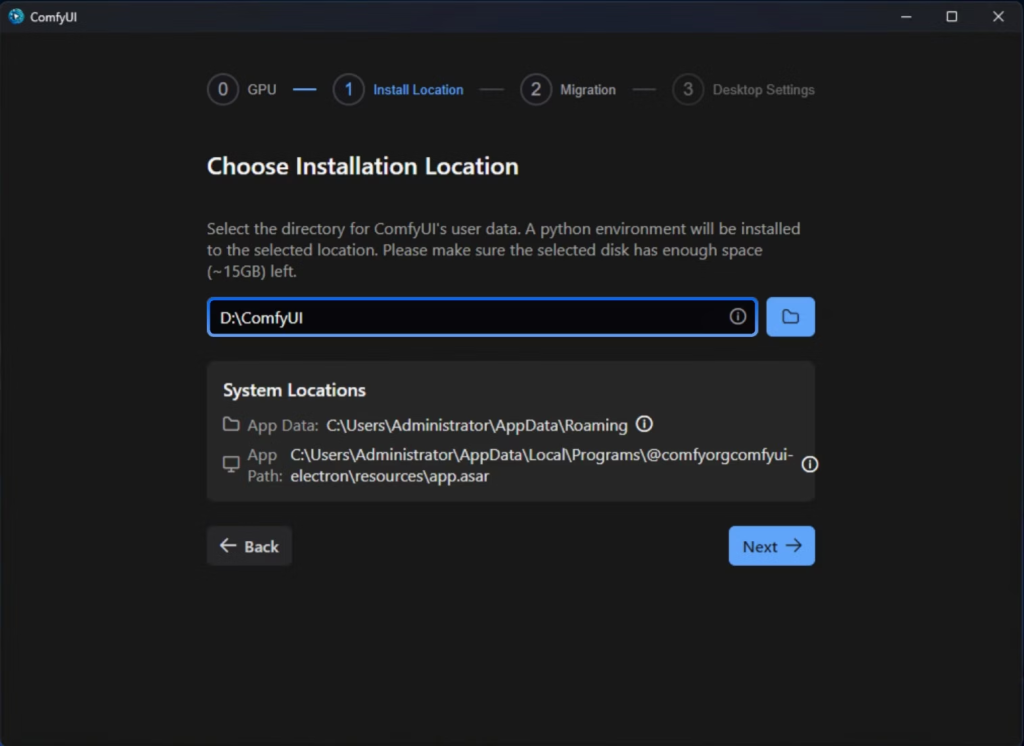
Choose Installation Location: Use the default location. Remember the folder path. You will put the downloaded model there.
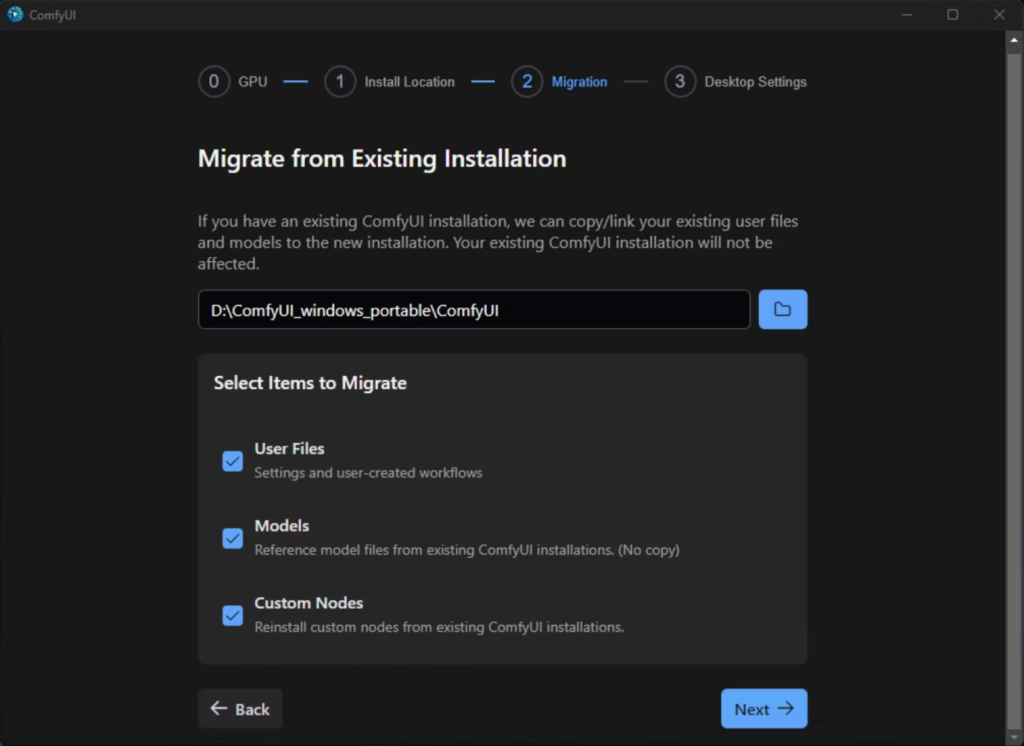
Migrate Existing Installation: Use this option only if you have previously installed ComfyUI and downloaded models. Leave it blank and press Next if this is your first time installing ComfyUI.
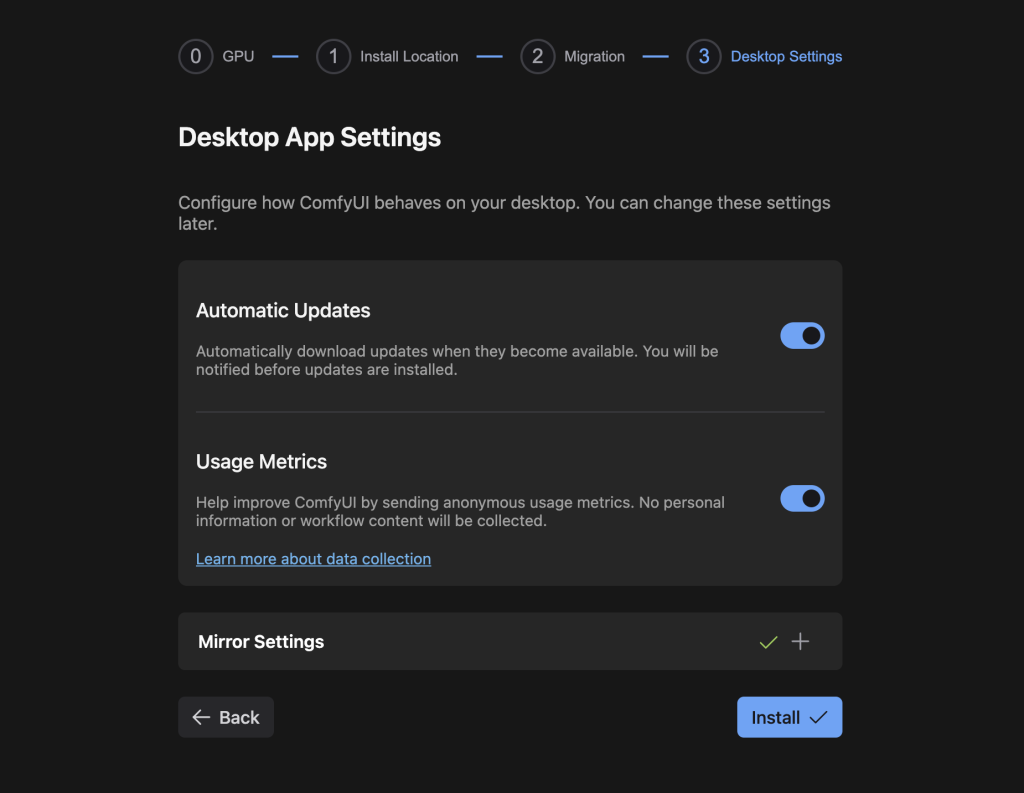
Desktop App Settings: Use the default settings and click Install.
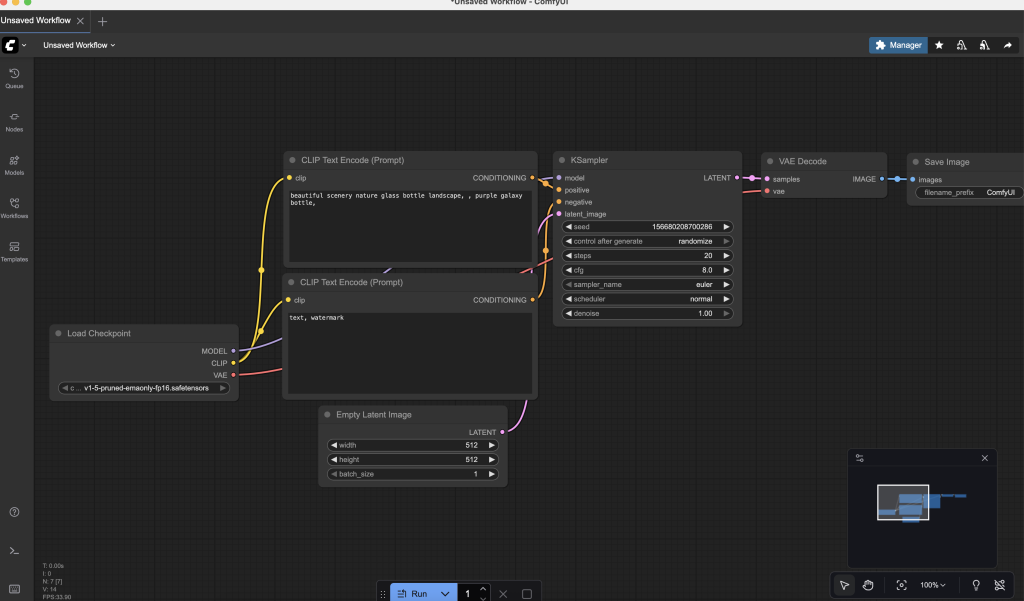
You should see the following default workflow if the installation is successful.
Install ComfyUI Desktop on Mac
To install ComfyUI Desktop on a Mac, you need a Mac with Apple Silicon (M-series).
Step 1: Download the ComfyUI installer
Visit https://www.comfy.org/download and download the installer for Mac.

Step 2: Install the App
Double-click the installer. A dialog box should appear.
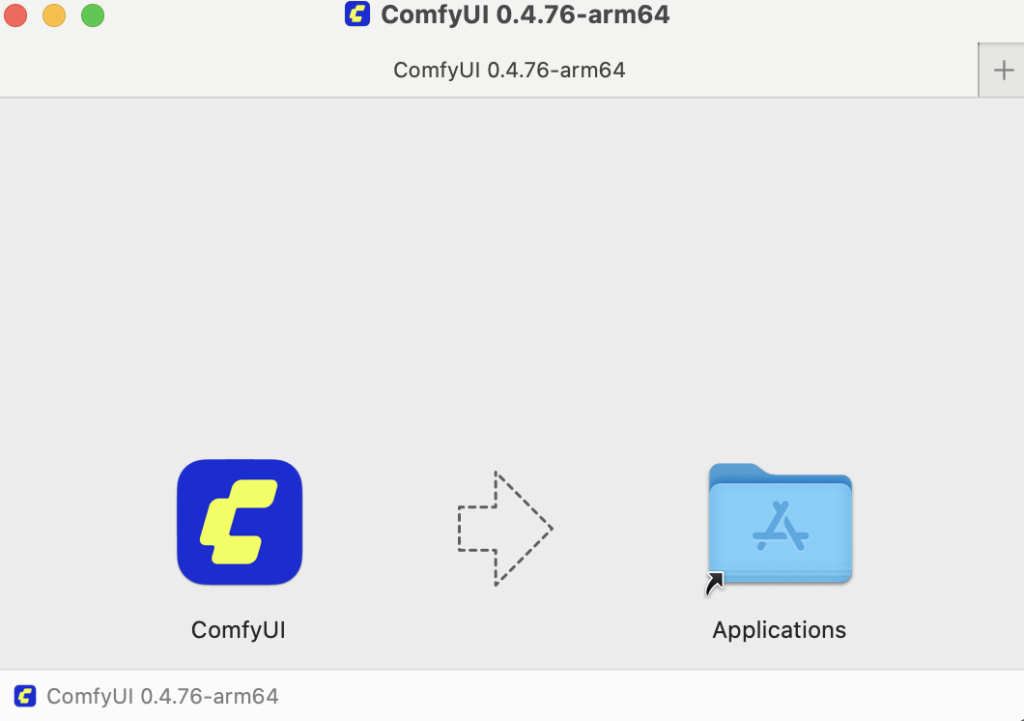
Drag the ComfyUI icon to the Applications folder to install the App.
Step 3: Launch the app
Now, you should be able to find the ComfyUI app in the Applications folder. Double-click to launch the app.
You can also use Spotlight search to find the app. Press Cmd + Space and type ComfyUI, then press Enter.
You should see the Welcome screen.
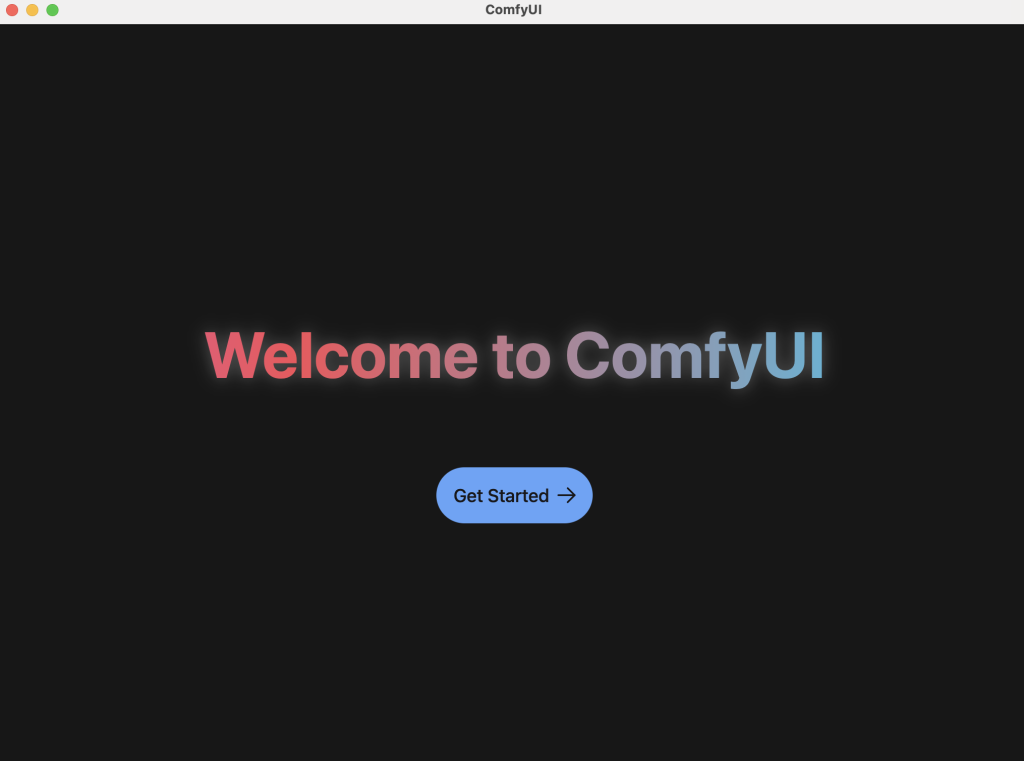
Click the Get Started button.
Step 4: Complete the setup in App
Select GPU: Click Next.
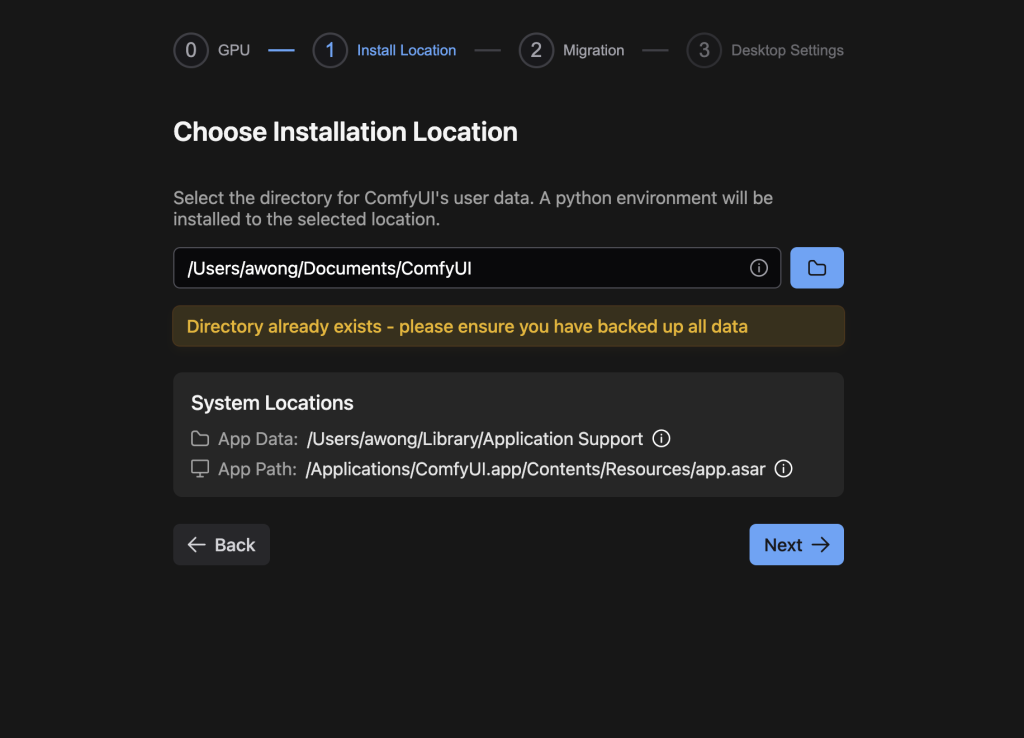
Choose Installation Location: Use the default location. Remember the folder path. You will put the downloaded model there.
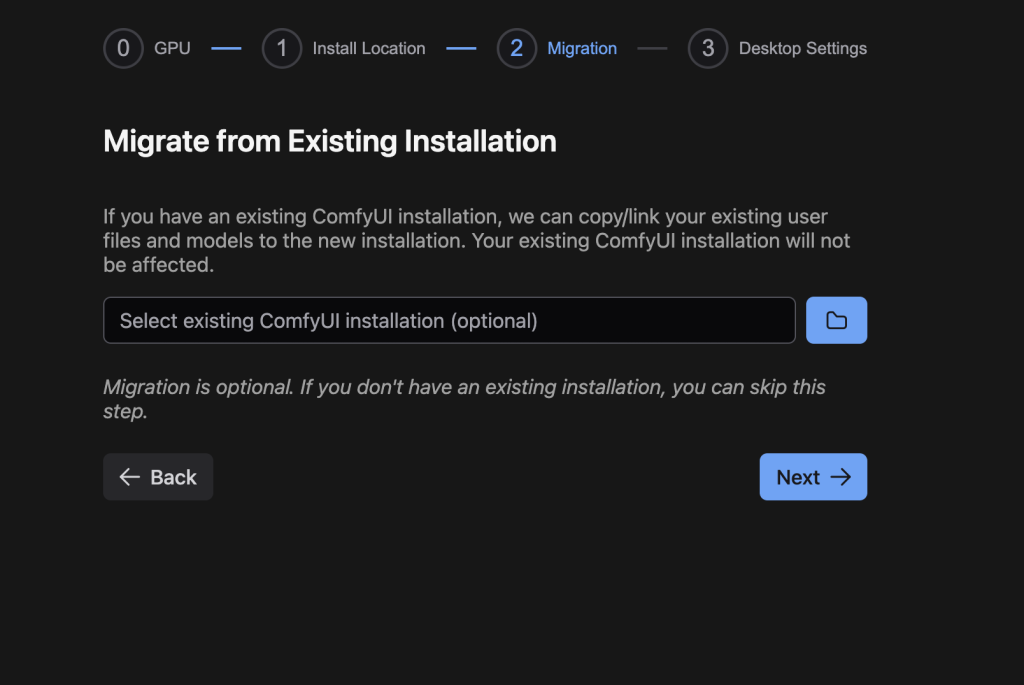
Migrate Existing Installation: Use this option only if you have previously installed ComfyUI and downloaded models. Leave it blank and press Next if this is your first time installing ComfyUI.
Desktop App Settings: Use the default settings and click Install.
You should see the following default workflow if the installation is successful.
Conclusion
In short:
- Choose ComfyUI Desktop if you want convenience and stability.
- Choose GitHub installation if you want flexibility and early access to new or developer features.
Either way, you’ll get the same powerful ComfyUI workflow engine.
As a fan of portable software, I don’t like this version at all. Especially since it looks like a web browser built into a separate GUI.
I guess the major appeal is ease of installation. It does make it harder to the tech savvies to fix conflicts.