Wan 2.1 Video is a generative AI video model that produces high-quality video on consumer-grade computers. Remade AI, an AI video company, has released some interesting special-purpose LoRA models for Wan 2.1 Video. The LoRAs create special effects for Wan 2.1 Video — they can rotate and squeeze a character, to name a few.
In this tutorial, I will show you how to use the Remade LoRA with Wan 2.1 Video to:
- Rotate a character or object
- Inflate a character or object
- Deflate a character or object
- Crush a character or object
Table of Contents
Software
We will use ComfyUI, a free AI image and video generator. You can use it on Windows, Mac, or Google Colab.
Think Diffusion provides an online ComfyUI service. They offer an extra 20% credit to our readers.
Read the ComfyUI beginner’s guide if you are new to ComfyUI. See the Quick Start Guide if you are new to AI images and videos.
Take the ComfyUI course to learn how to use ComfyUI step by step.
Remade LoRAs for Wan 2.1 Video
Wan 2.1 is an open-source video model. You can generate video locally on ComfyUI.
Remade AI has released a collection of LoRAs that can generate videos with special effects using a single input image.
Below are some videos from the official demo:

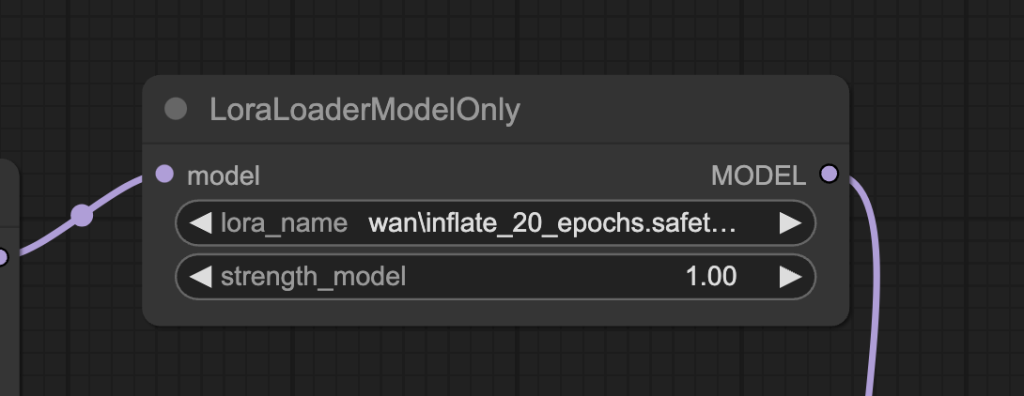
Adding a LoRA to the Wan 2.1 model
ComfyUI has native support for adding a LoRA to the Wan 2.1 model.
Add the LoraLoaderModelOnly node after the Load Diffusion Model node, as shown below.
Before:

After:

Remind that a LoRA model modifies the diffusion model. So, you add the LoRA after loading the diffusion model. It will be merged with the diffusion model by updating its weights.
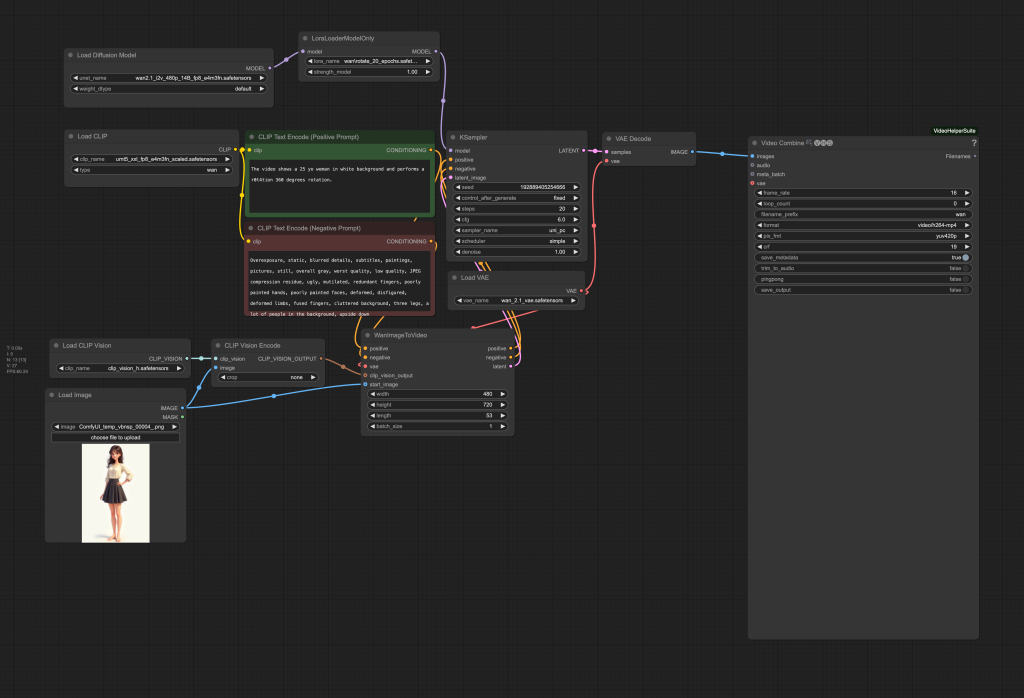
Use Wan 2.1 LoRA on ComfyUI
This workflow generates the following character rotation video using the 480p Image-to-Video model and Rotate LoRA with an input image and saves it as an MP4 video.
Step 1: Update ComfyUI
Before loading the workflow, make sure your ComfyUI is up-to-date. The easiest way to do this is to use ComfyUI Manager.
Click the Manager button on the top toolbar.

Select Update ComfyUI.
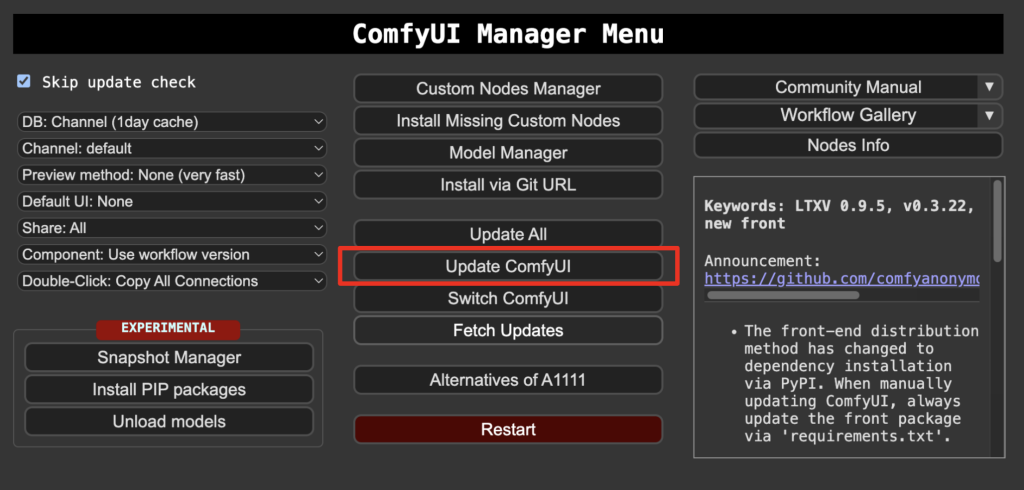
Restart ComfyUI.
Step 2: Download model files
Download the rotate_20_epochs.safetensors LoRA model and put it in ComfyUI > models > loras > wan.
If you have followed my Wan 2.1 tutorial, you should have the following models installed.
Download the diffusion model wan2.1_i2v_480p_14B_bf16.safetensors and put it in ComfyUI > models > diffusion_models.
Download the text encoder model umt5_xxl_fp8_e4m3fn_scaled.safetensors and put it in ComfyUI > models > text_encoders.
Download the CLIP vision model clip_vision_h.safetensors and put it in ComfyUI > models > clip_vision.
Download the Wan VAE model wan_2.1_vae.safetensors and put it in ComfyUI > models > vae.
Step 3: Load the Wan 2.1 img2vid LoRA workflow
Download the workflow JSON file below and drop it to ComfyUI to load.
Step 4: Install missing nodes
If you see red blocks, you don’t have the custom node that this workflow needs.
Click Manager > Install missing custom nodes and install the missing nodes.
Restart ComfyUI.
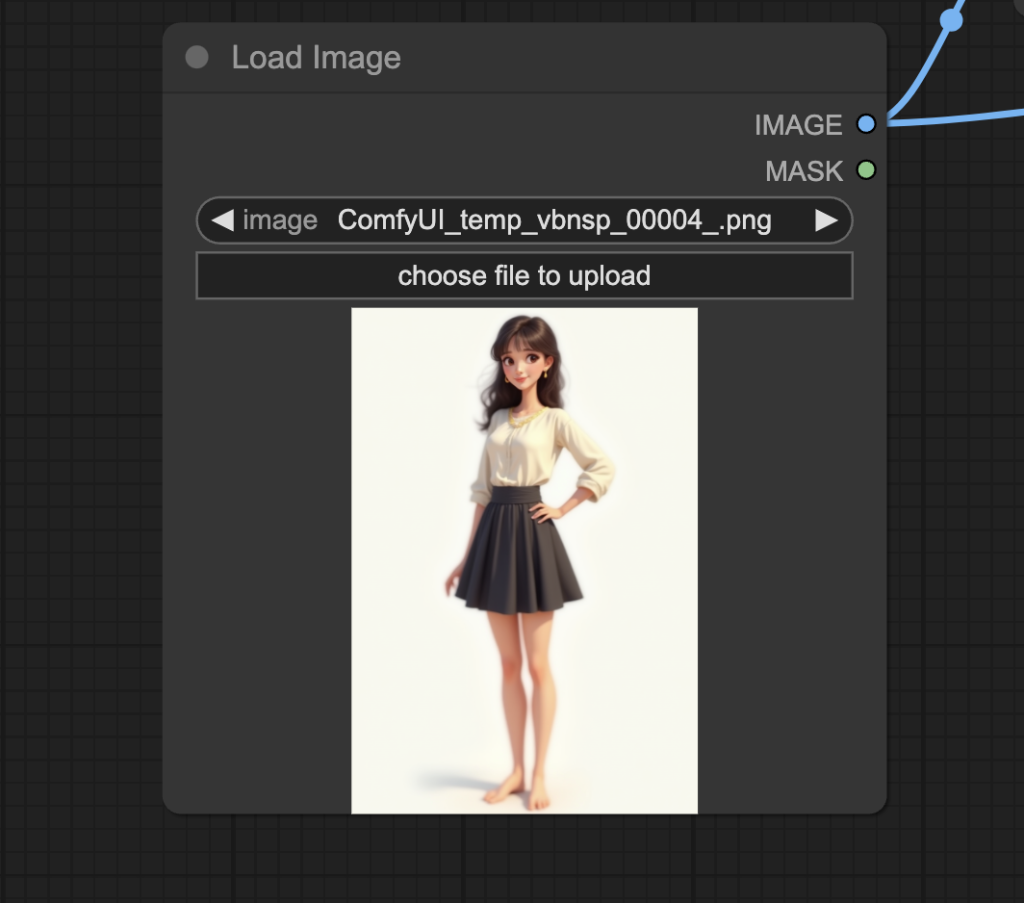
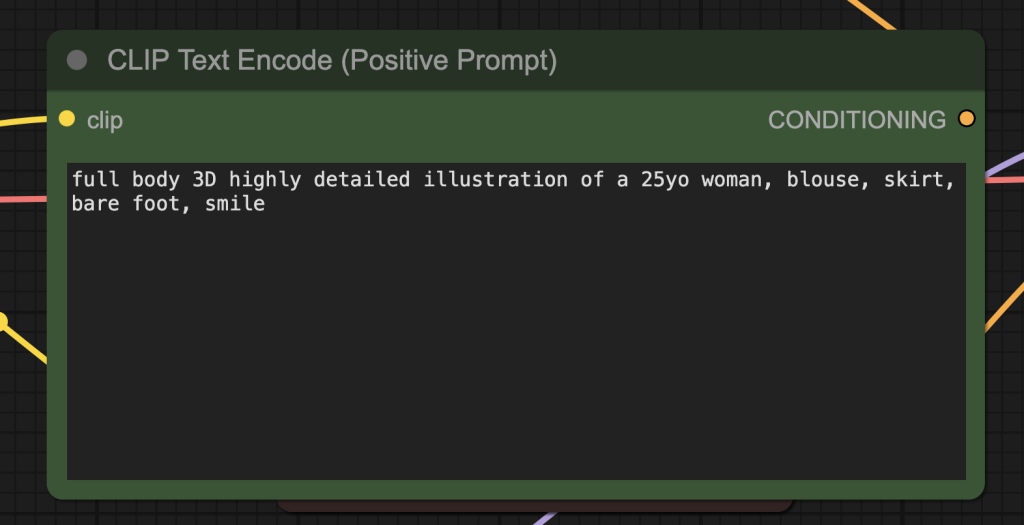
Step 5: Set the image image
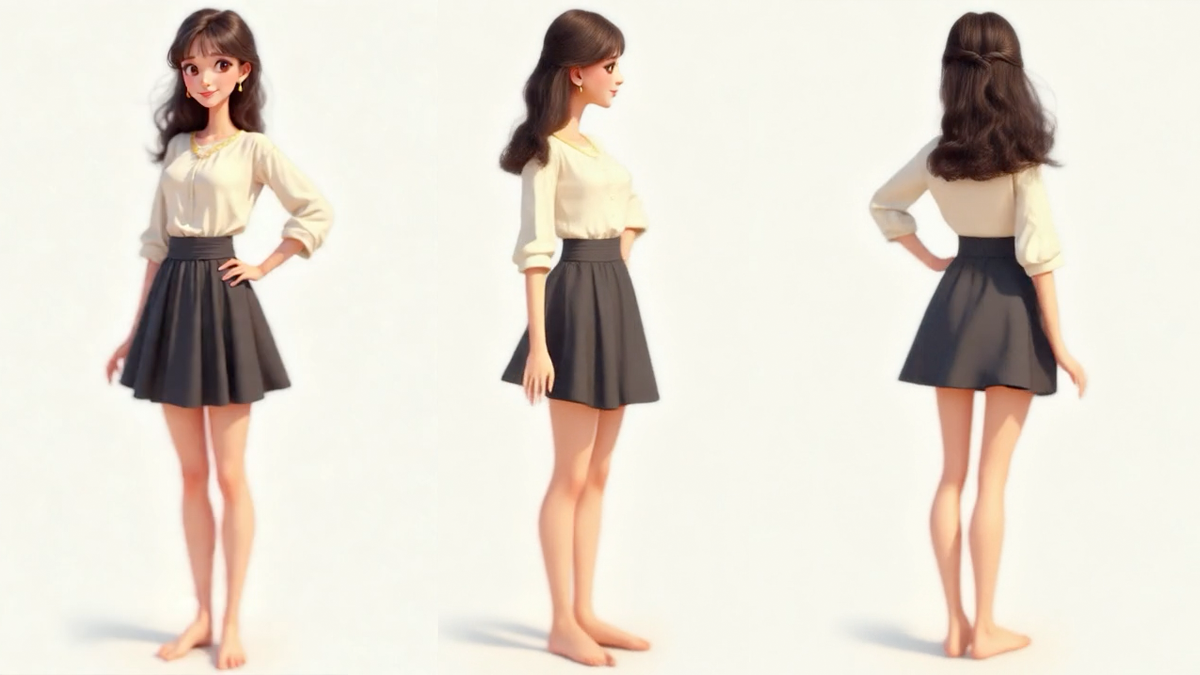
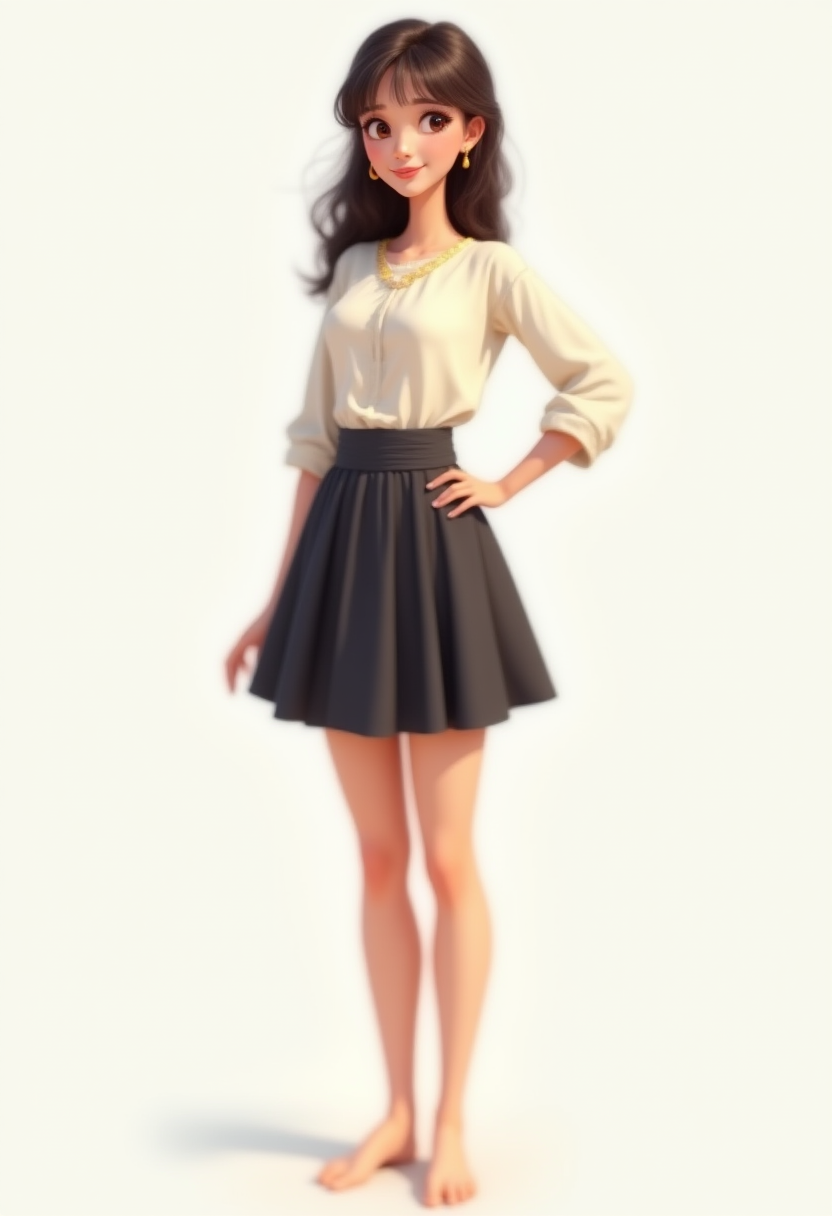
Upload an image you wish to use as the video’s initial frame. You can download my test image for testing.
The image is generated using the Flux Teacache workflow with the prompt:
full body 3D highly detailed illustration of a 25yo woman, blouse, skirt, bare foot, smile
Step 6: Revise the prompt
Revise the positive prompt to describe the video you want to generate. It needs to match the input image and include the trigger words for the LoRA model r0t4tion 360 degrees rotation.
The trigger words are different for different LoRA models. You can find them on the model page.

Step 7: Generate the video
Click the Queue button to run the workflow.

You should get this video.
Tips
- Change the seed value if you see artifacts like changing background.
- Don’t forget to include the trigger words.
Use other special LoRAs
You can use the workflow JSON file above for other special effect LoRAs. You will need to:
- Download the LoRA model.
- Revise the prompt to include the trigger words.
Below are some funny ones.
| LoRA Model link | Trigger words |
|---|---|
| squish_18.safetensors | sq41sh squish effect |
| inflate_20_epochs.safetensors | infl4t3 inflates it |
| crush_20_epochs.safetensors | c5us4 crushes it |
You can find the full list here.
The following uses the Inflate LoRA as an example.
Step 1: Download the LoRA model
Download the LoRA model inflate_20_epochs.safetensors and put it in ComfyUI > models > loras > wan.
Step 2: Load the workflow
Load the Wan 2.1 image-to-video LoRA workflow above.
Step 3: Select the LoRA model
Select the Wan 2.1 Inflate LoRA model in the LoRALoaderModelOnly node.
Step 4: Set the image image
Upload an image you wish to use as the video’s initial frame. You can download my test image for testing.
Step 5: Revise the prompt
Revise the positive prompt to describe the video you want to generate. It needs to match the input image and include the trigger words for the LoRA model infl4t3 inflates it. You can find the trigger words on the model page.
Step 6: Generate the video
Click the Queue button to run the workflow.
You should get this video.
Here’s the final workflow with the Inflate LoRA.
Hi Andrew, I can only generate 3s videos, how to increase the duration?