Resizing images is a common step in ComfyUI. An image model only works with a limited range of input image sizes. In this tutorial, I will show you how to use the Image Resize node to resize images.
Table of Contents
Software
We will use ComfyUI, an alternative to AUTOMATIC1111.
Read the ComfyUI installation guide and ComfyUI beginner’s guide if you are new to ComfyUI.
Take the ComfyUI course to learn ComfyUI step-by-step.
Resize an image to a specific size
This basic resize workflow uses the Image Resize node to stretch or squeeze the image into a specific size. For example, stretching and squeezing a 1280 x 912 image into a 1024 x 1024 one.
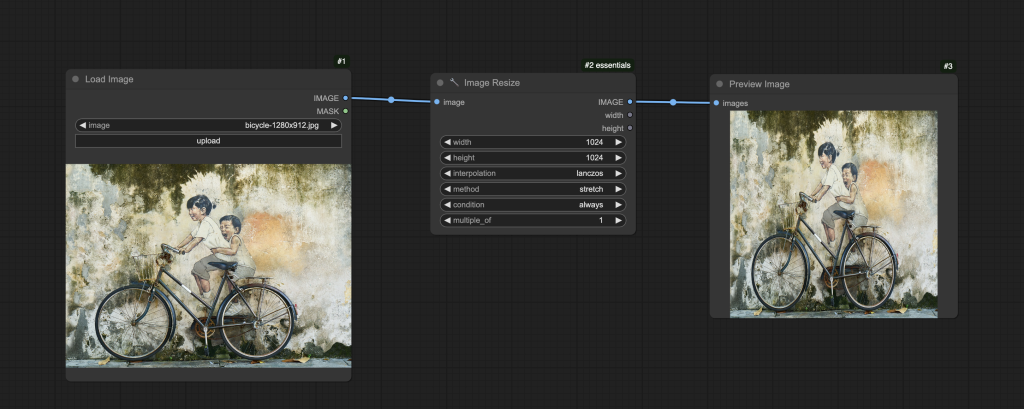
Step 1: Load JSON workflow
Download the JSON workflow below.
Drop it to ComfyUI to load the workflow.
Step 2: Install missing nodes
If you see nodes with red borders, you don’t have the custom nodes required for this workflow. You should have ComfyUI Manager installed before performing this step.
Click Manager > Install Missing Custom Nodes.
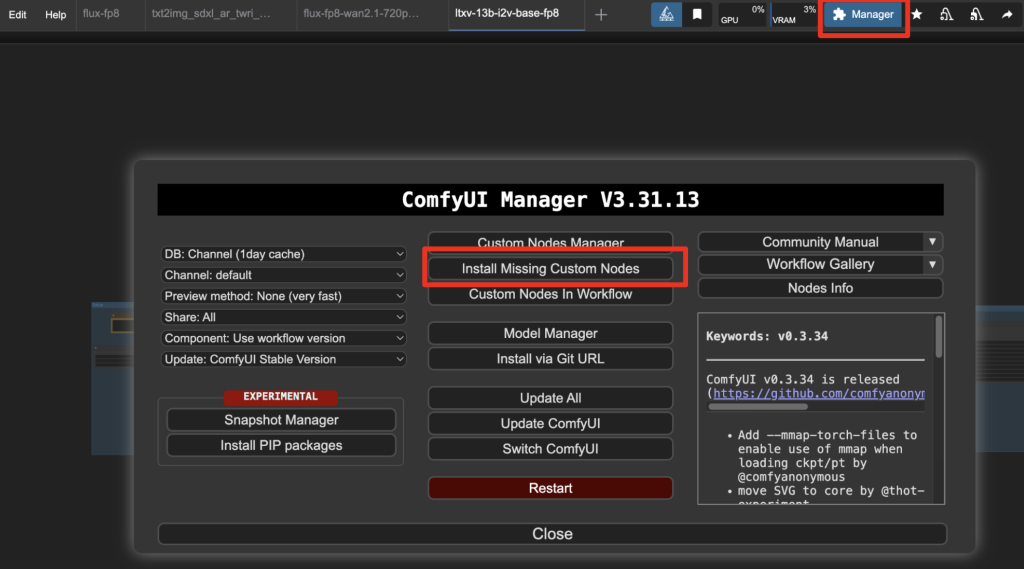
Install the nodes that are missing.
Restart ComfyUI.
Refresh the ComfyUI page.
Step 3: Run the resize workflow
You can download the test image here.
Drop the image to the Load image node.
Click the Queue button to run.
Method option
Instead of stretching the image, you can pad or crop the image using the method option in the Resize node.
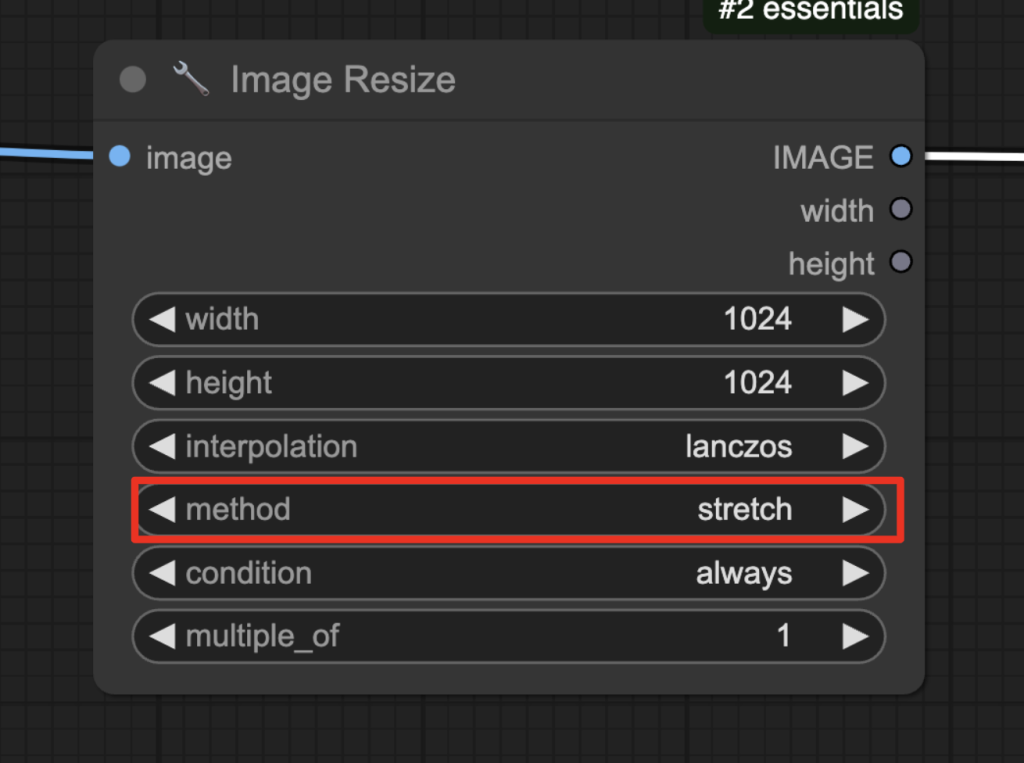
Method: Fill/Crop – Fill or Crop the image. See the image is cropped below while keeping size 1024×1024.

Method: Pad – Keep the whole image and pad the unused area with black pixels. The final image size is 1024×1024.

Resize and keep the aspect ratio
The JSON workflow below resizes an image while keeping the aspect ratio.
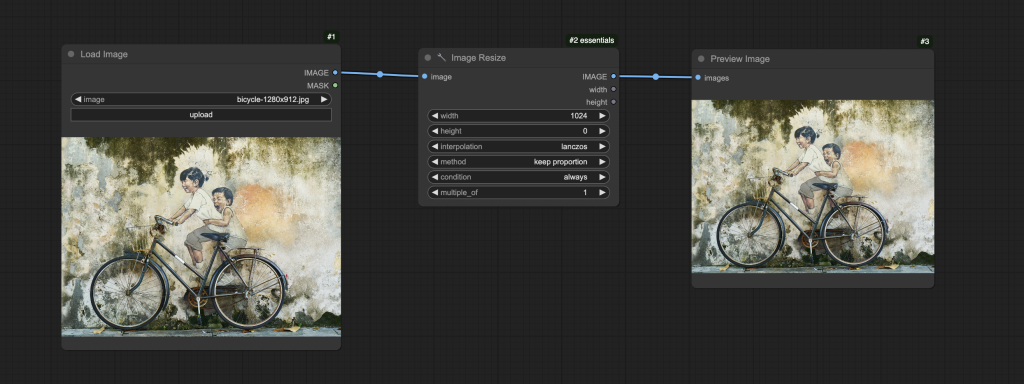
This workflow sets the method to “keep proportion,” which keeps the aspect ratio.
When using this workflow, set either width or height to 0. It will be automatically calculated based on the other input and the original image’s aspect ratio.
Other options
Multiple of
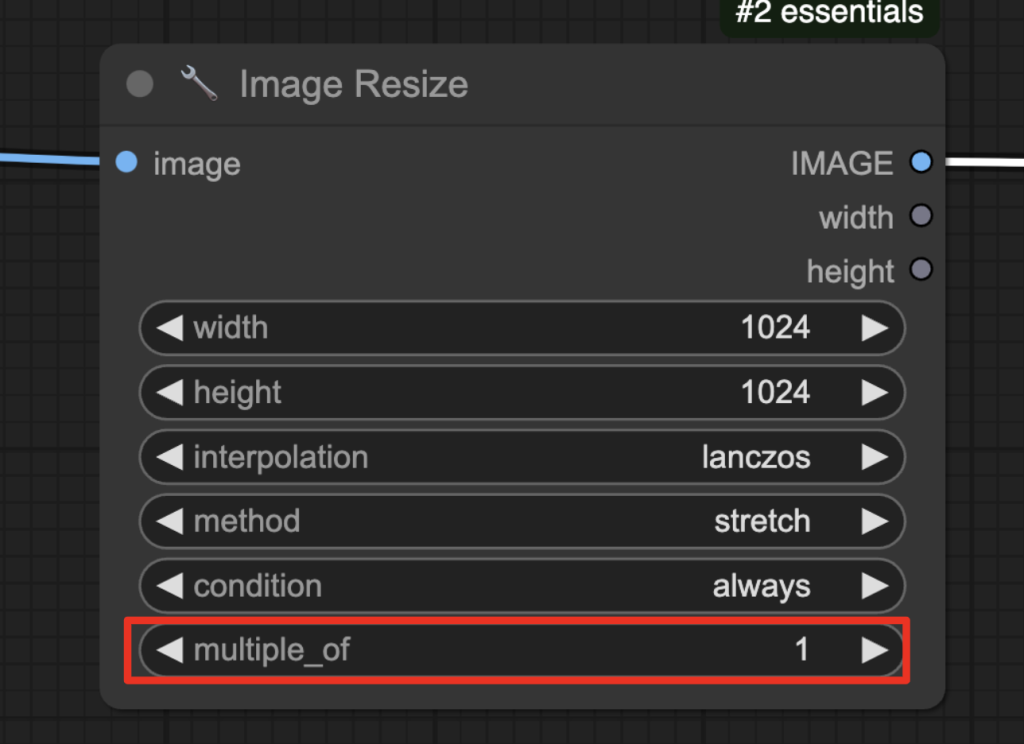
“Multiple of” mandates the output image’s width and height to be a multiple of this value. For example, a multiple of 10 forces the output image to be 1020 x 1020 instead of 1024 x 1024.
It is a handy feature to satisfy the constraints of models that require the size of the input image to be multiple of some values. For example, Stable Diffusion 1.5 models require the input image width and height to be a multiple of 8 in the image-to-image mode.
Condition
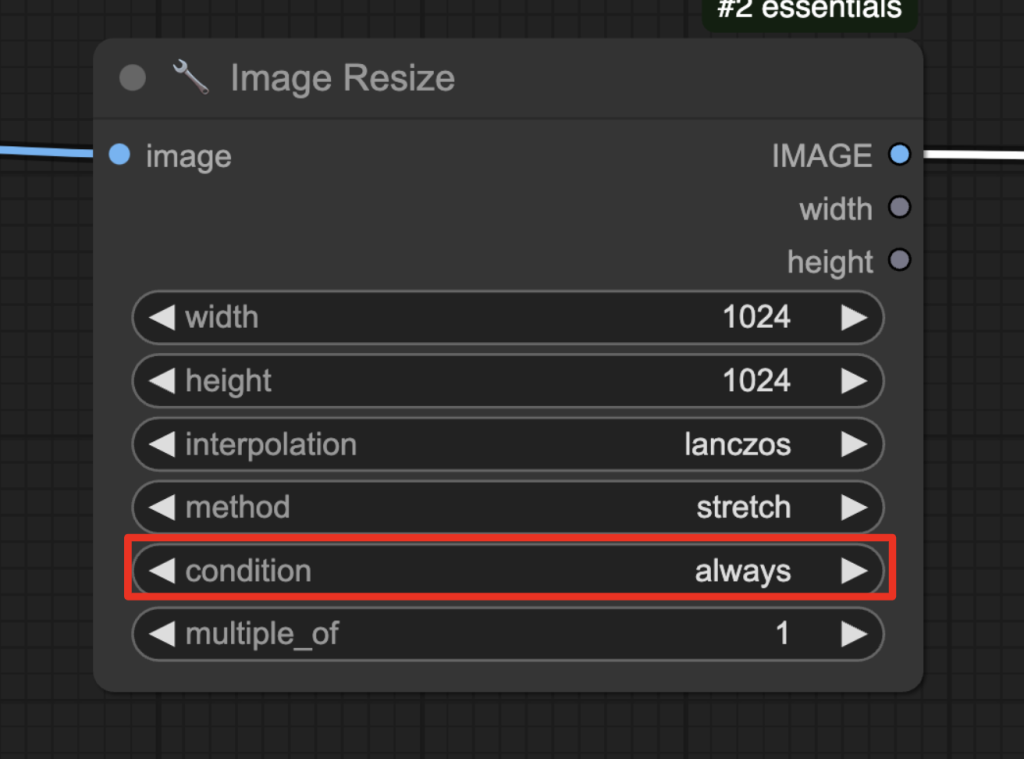
You can resize the image only when a condition is met.
- Always: Always resize the image.
- Downscale if bigger: Resize only if the original width or height exceeds the specified.
- Upscale if smaller: Resize only if the original width or height is smaller than the specified.
- If bigger area: Resize only if the original image area is bigger than the specified. (Downscale)
- If smaller area: Resize only if the original image area is smaller than the specified. (upscale)
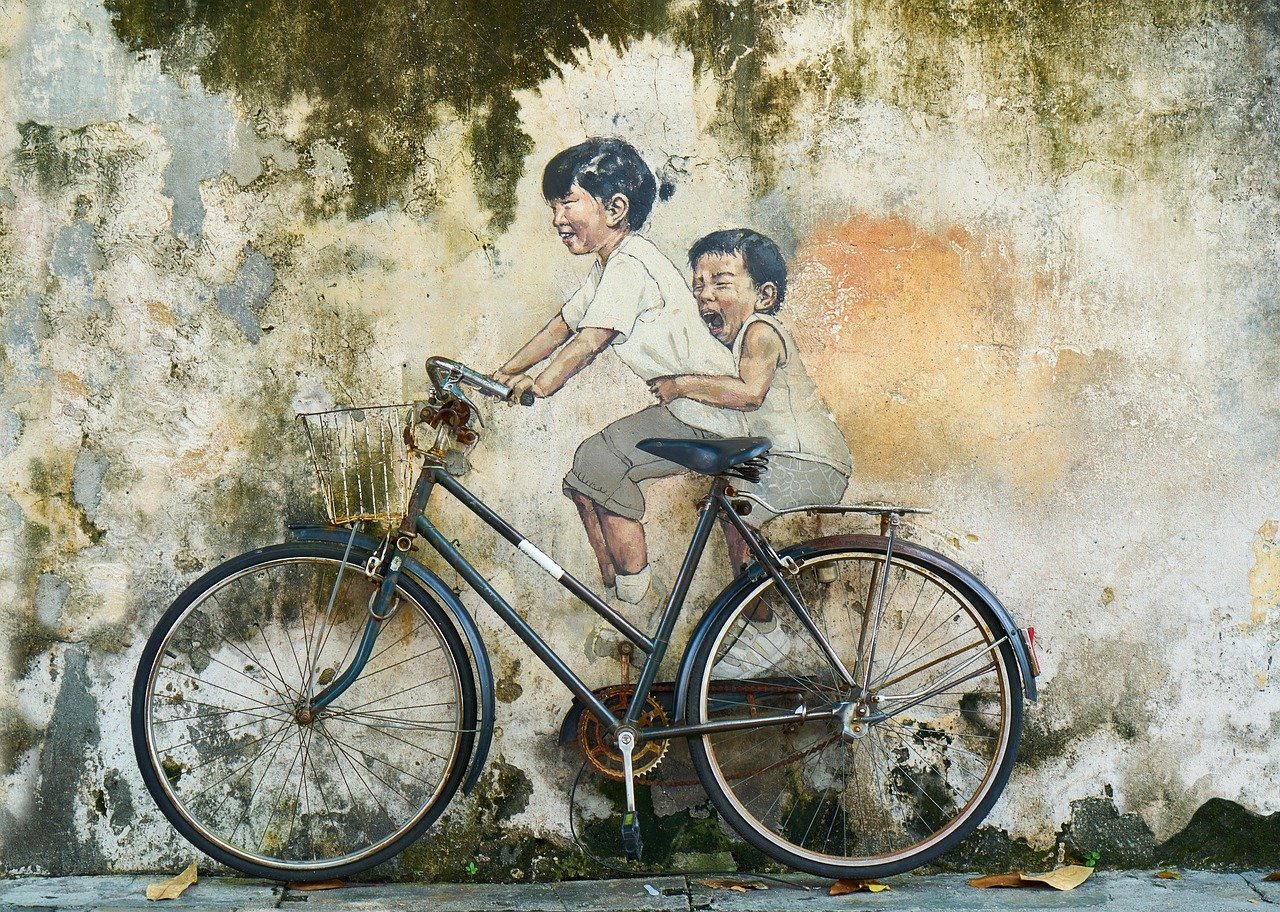
Panang island?
Some of the best food on earth I think.