
Qwen Image Edit is a competent AI image editing model. You can use it to edit images using a text prompt alone or with an editing mask.
In this tutorial, you will learn how to use Qwen Image Edit using multiple images.
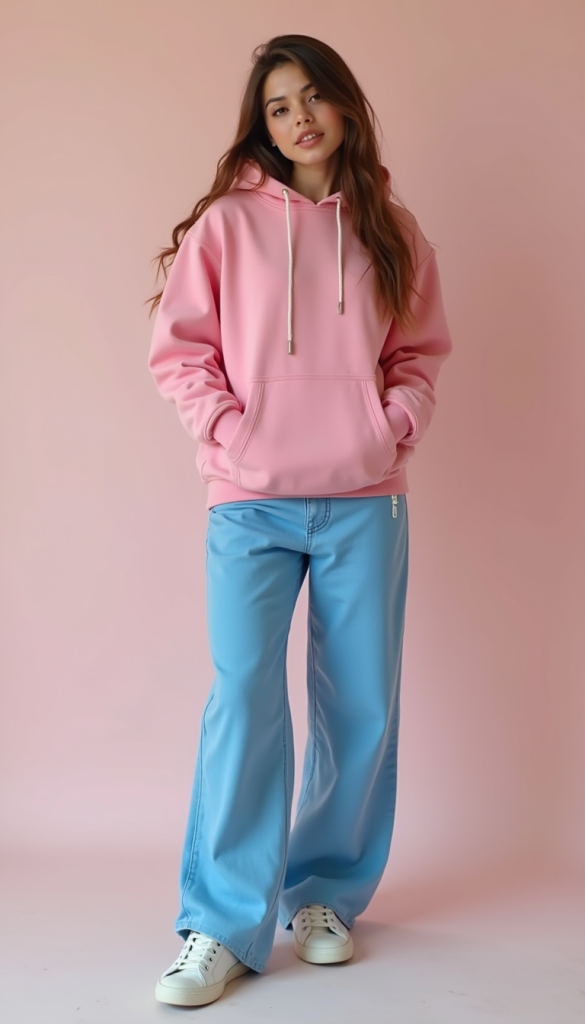
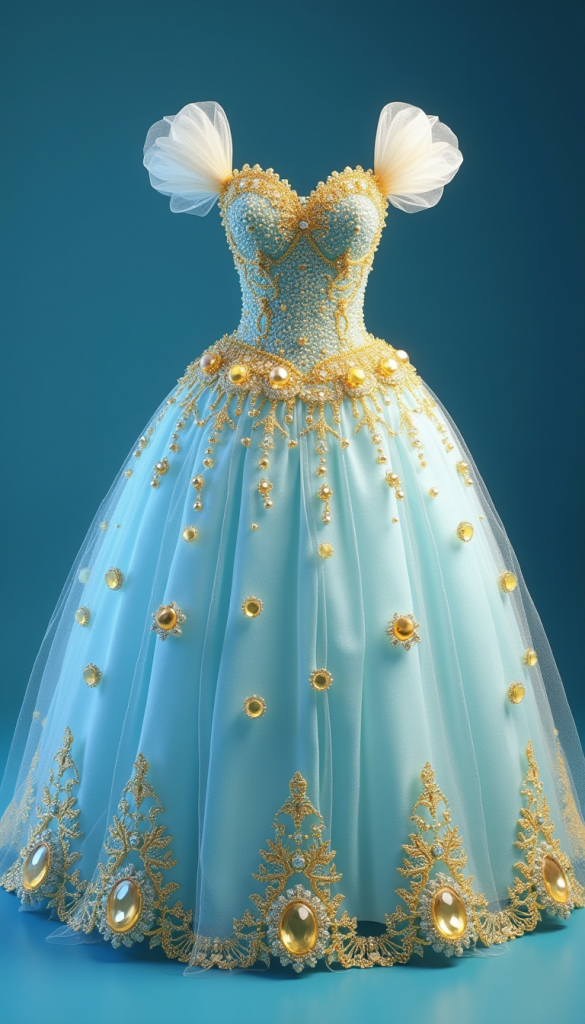
Workflow 1: Change a person’s clothes using a reference image.
Workflow 2: Interaction of two characters using two reference images
Inputs:

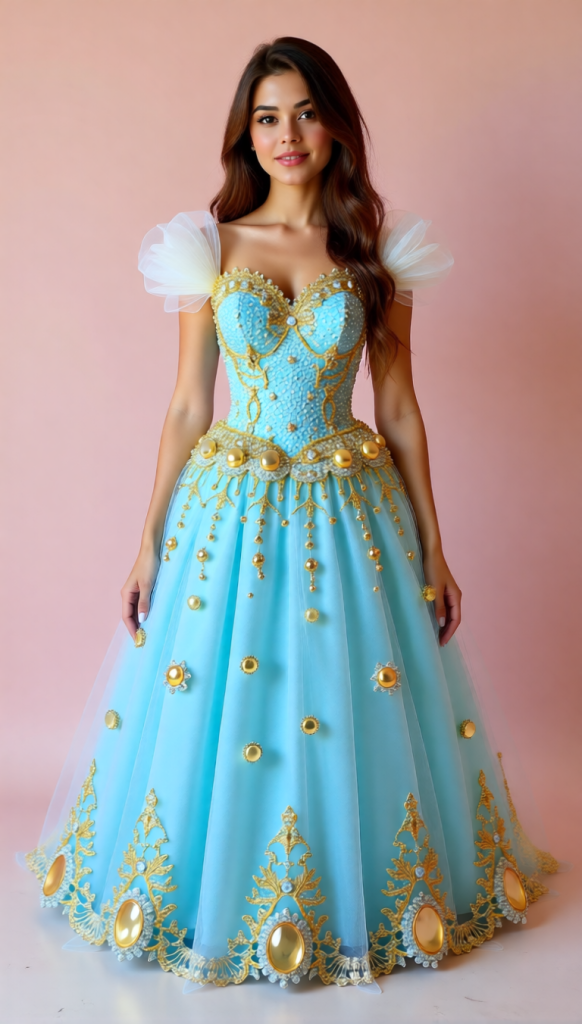
Qwen edited:

Table of Contents
Software
We will use ComfyUI, a free AI image and video generator. You can use it on Windows, Mac, or Google Colab.
Think Diffusion provides an online ComfyUI service. They offer an extra 20% credit to our readers.
Read the ComfyUI beginner’s guide if you are new to ComfyUI. See the Quick Start Guide if you are new to AI images and videos.
Take the ComfyUI course to learn how to use ComfyUI step by step.
ComfyUI Colab Notebook
If you don’t have a powerful GPU card, you can still run the Qwen Image model on Google Colab, Google’s cloud computing platform, with my ComfyUI notebook.
You don’t need to download the model as instructed below. Select the Qwen_Image_Edit model before running the notebook.

Qwen Image Edit – Multiple images
Overview
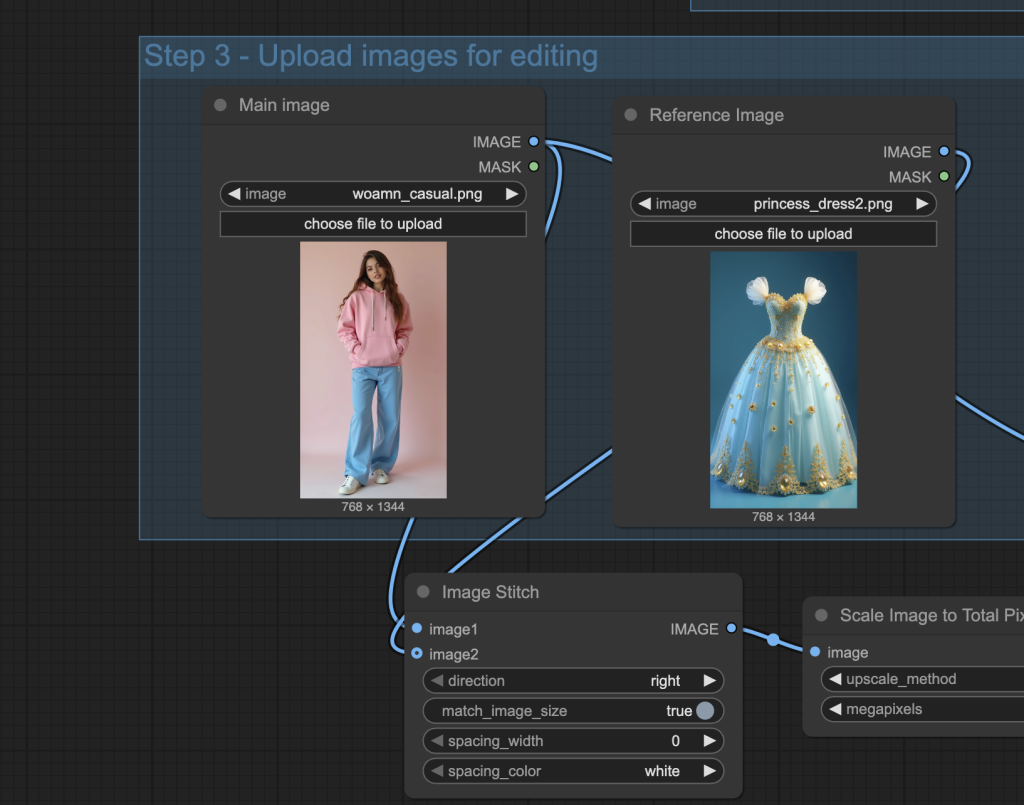
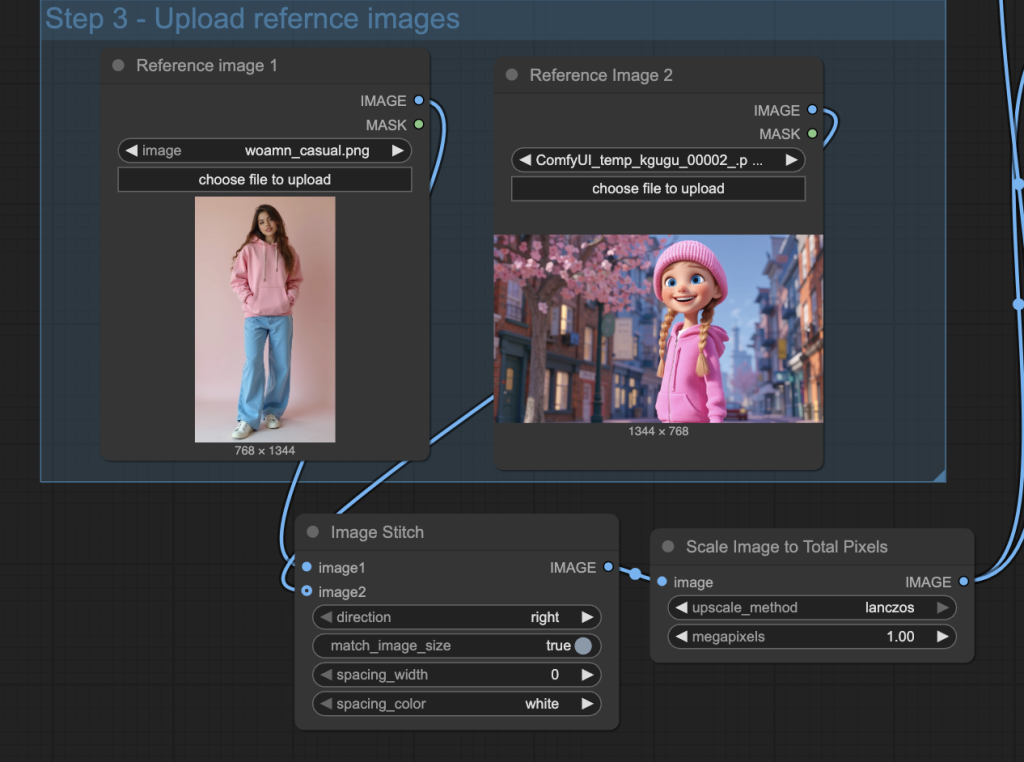
This workflow extends the Qwen Image Edit workflow to 2 images. The Qwen model only takes one image, so can you pull this off? Well, the trick is to combine two images side-by-side into a single image before feeding them into the model. You can use the Image Stitch node to do that.
After that, scale the image back to 1M pixels to avoid it being too large for the model. I used the Scale Image to Total Pixels node for that.
Because we are editing the girl’s image (the Main image node), the initial latent is set to the main image, NOT the combined one.

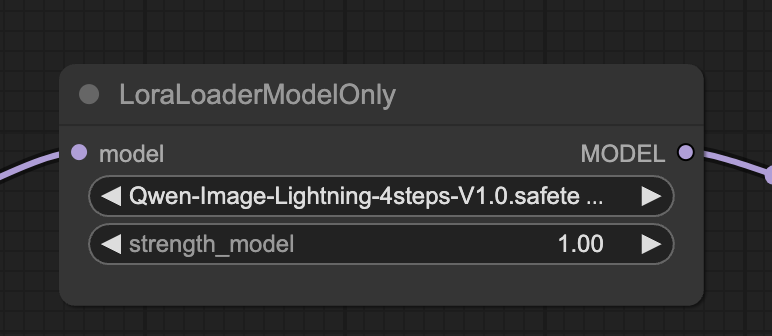
This workflow uses Qwen Image Lightning LoRA to reduce the number of steps to 4.
Step 0: Update ComfyUI
Before loading the workflow, make sure your ComfyUI is up to date. The easiest way to do this is to use ComfyUI Manager.
Click the Manager button on the top toolbar.

Select Update ComfyUI.
Restart ComfyUI.
Step 1: Install models
After loading the workflow JSON file, ComfyUI should prompt you to download the missing model files. You can use the dialog box to download the models, or use the links below.
Here are the models you need to download:
- Download qwen_image_edit_fp8_e4m3fn.safetensors and put it in ComfyUI > models > diffusion_models.
- Download qwen_2.5_vl_7b_fp8_scaled.safetensors and put it in ComfyUI > models > text_encoders.
- Download qwen_image_vae.safetensors and put it in ComfyUI > models > vae.
- Download Qwen-Image-Lightning-4steps-V1.0.safetensors and put it in ComfyUI > models > loras.
Step 2: Load the workflow
Download the workflow below. Drop it into ComfyUI to load.
Step 3: Upload images
- Upload the image you wish to edit to the main image node.
- Upload the reference image you want to use in the edit to the reference image node.
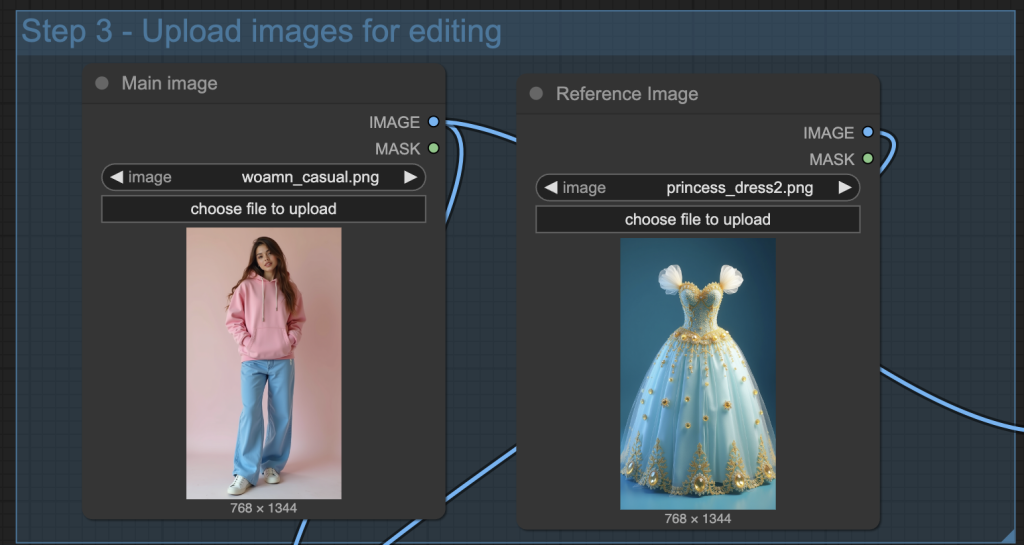
You can use the test images below.
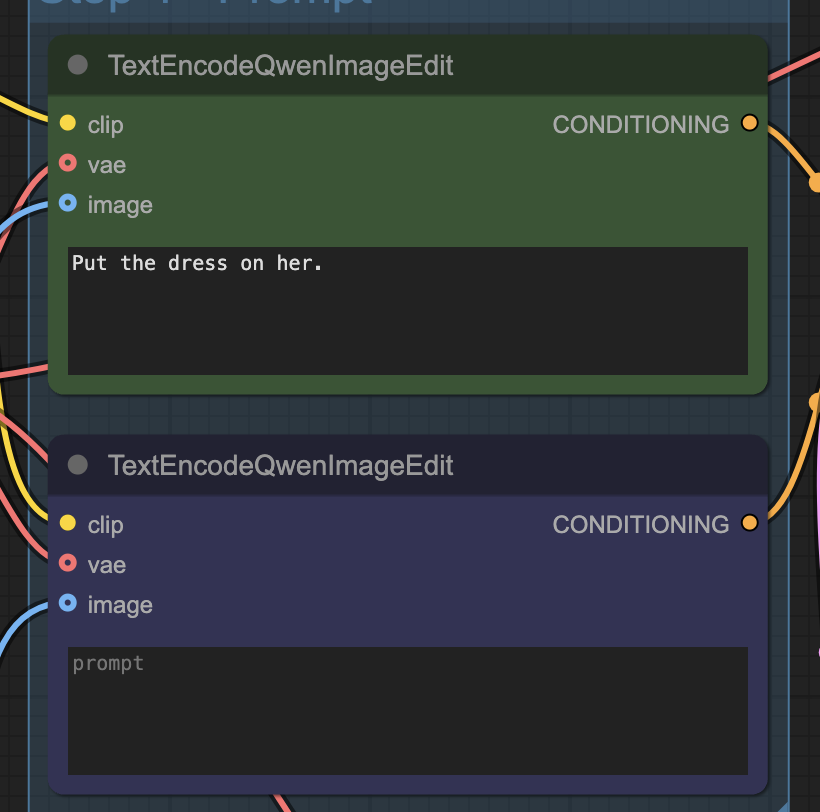
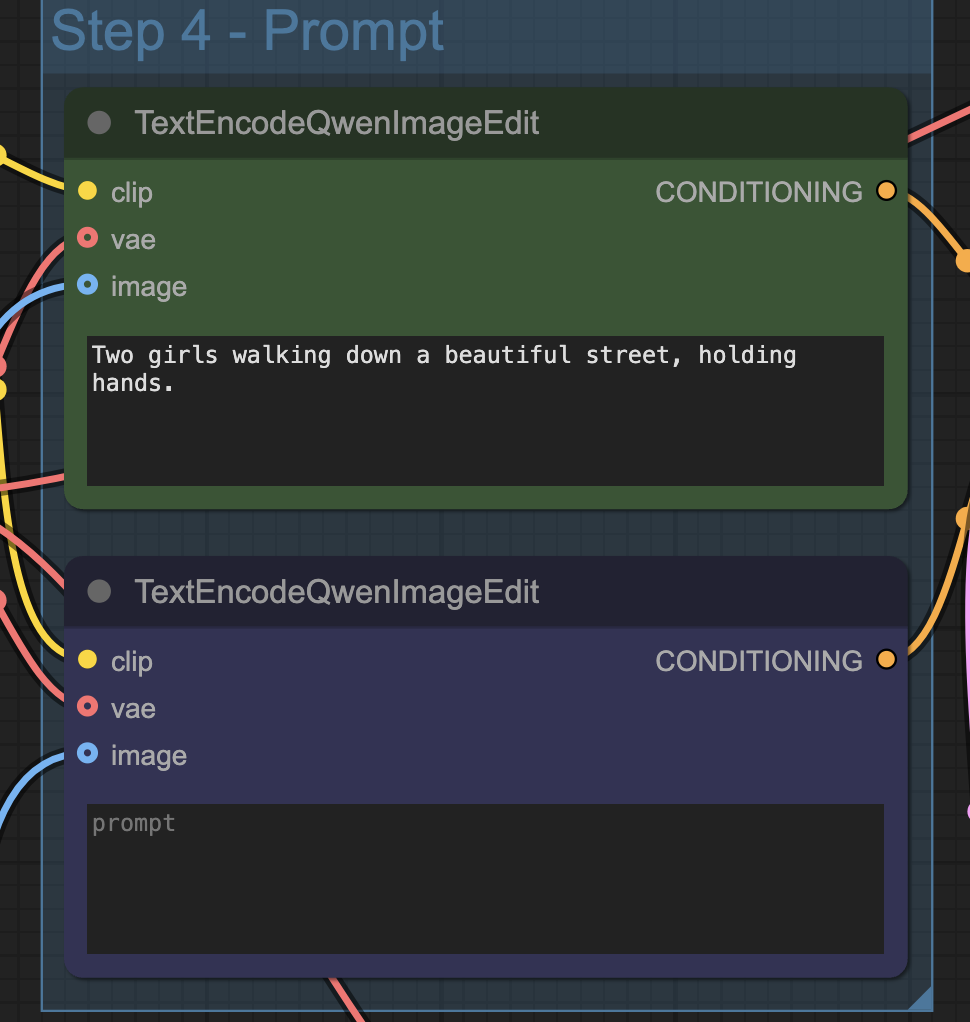
Step 4: Revise the prompt
Write the editing instructions in the prompt.
Step 5: Generate an image
Click the Run button to run the workflow.

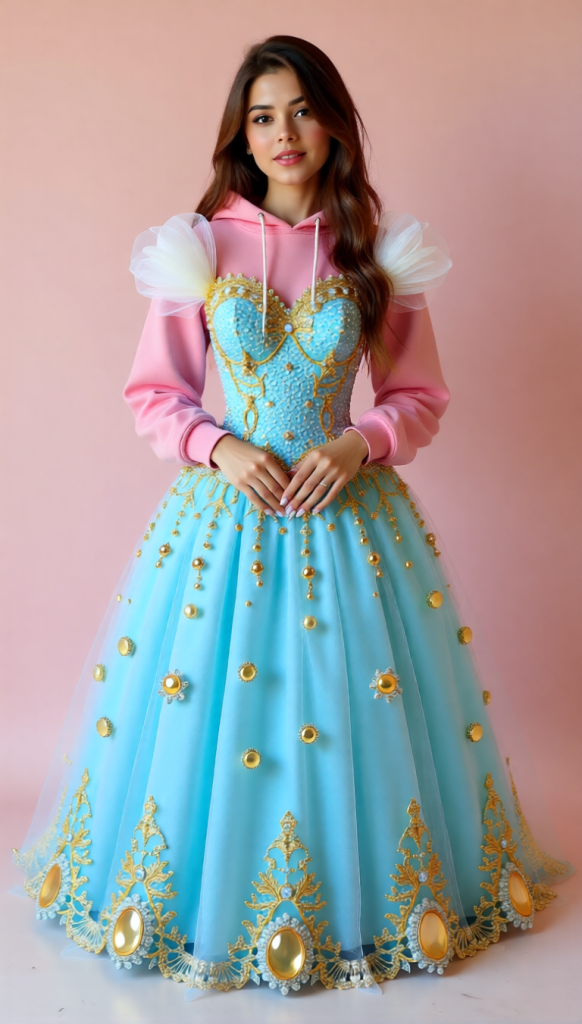
Well… Qwen took the task a bit too literally: it put the dress on her without taking off the hoodie!
Revise the prompt to:
Put the dress on her. Take off her hoodie.
Now it is better! (Luckily, the instructions don’t need to be in the correct order.)
Qwen Image Edit – Putting two characters together
Overview
This workflow uses two reference images equally with Qwen Image Edit.
Similar to the previous workflow, the two reference images are combined side-by-side using the Image Stitch node, and scaled down to 1 megapixels before feeding to the Qwen model.
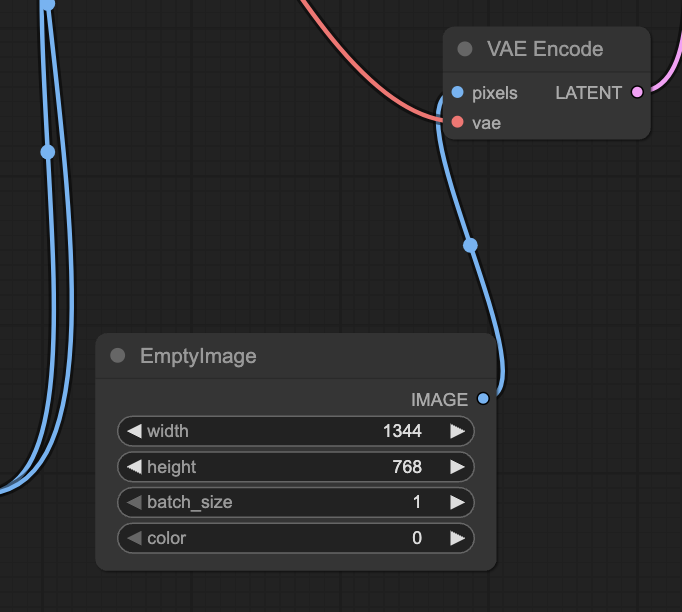
Instead of encoding one of the reference images as the initial latent image, it starts with a blank latent image. This serves two purposes:
- The output image is not biased towards one of the references.
- You can set an arbitrary output image size.
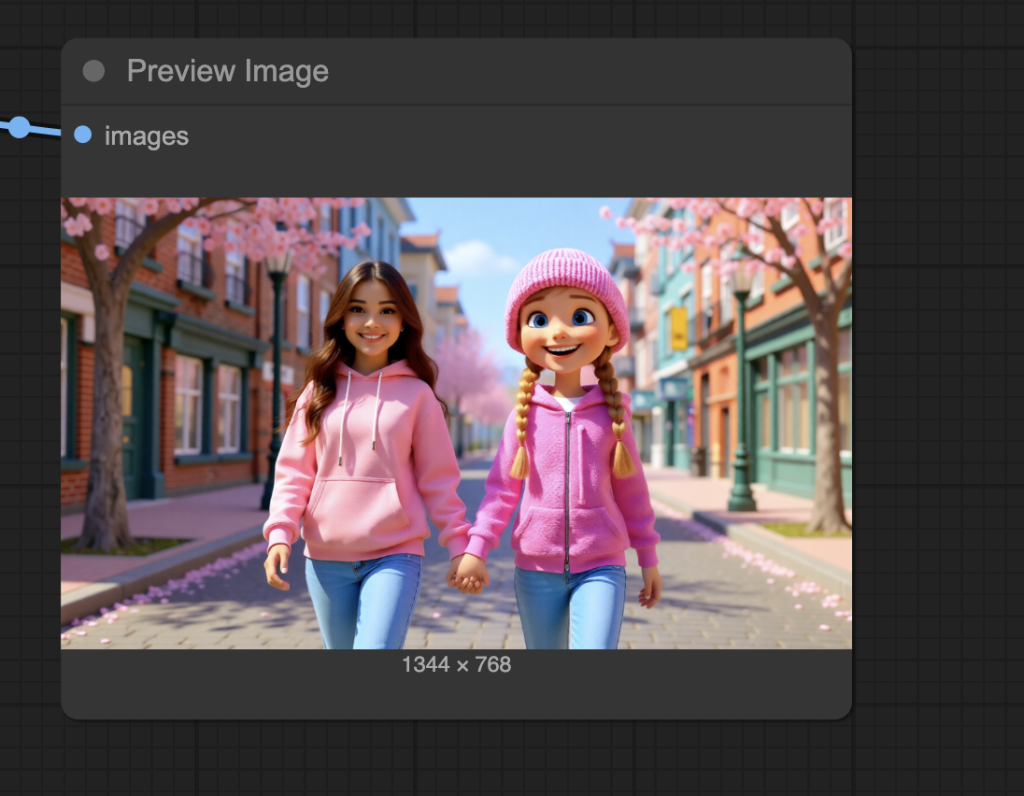
The output image combines two references and can be controlled by the text prompt. (e..g, “holding hands”)
Step 1: Install models
You have already installed these models if you used the previous workflow.
After loading the workflow JSON file, ComfyUI should prompt you to download the missing model files. You can use the dialog box to download the models, or use the links below.
Here are the models you need to download:
- Download qwen_image_edit_fp8_e4m3fn.safetensors and put it in ComfyUI > models > diffusion_models.
- Download qwen_2.5_vl_7b_fp8_scaled.safetensors and put it in ComfyUI > models > text_encoders.
- Download qwen_image_vae.safetensors and put it in ComfyUI > models > vae.
- Download Qwen-Image-Lightning-4steps-V1.0.safetensors and put it in ComfyUI > models > loras.
Step 2: Load the workflow
Download the workflow below. Drop it into ComfyUI to load.
Step 3: Upload images
Upload two reference images.
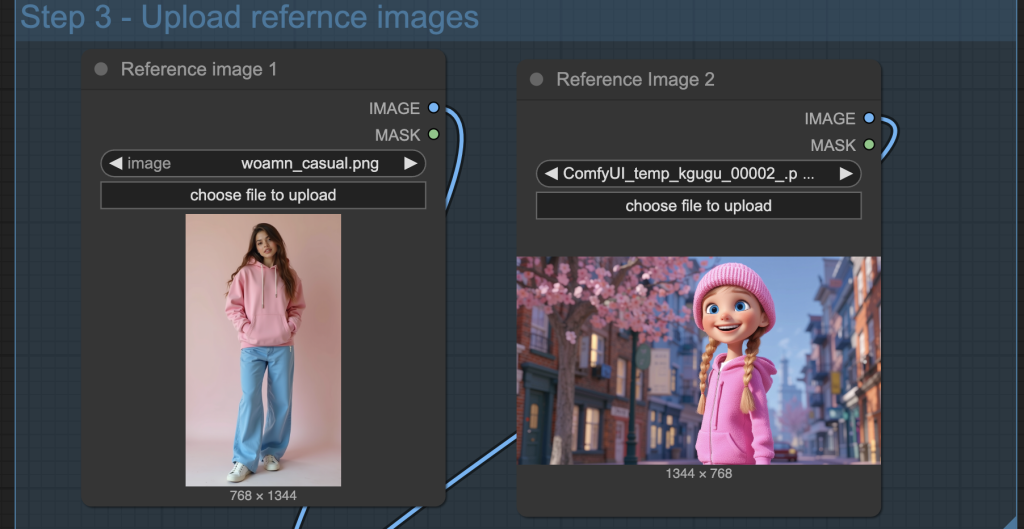
You can use the test images below.
Step 4: Revise the prompt
Write the editing instructions in the prompt.
Step 5: Generate an image
Click the Run button to run the workflow.
Andrew
When trying combine two images of people into one image, sometimes I get great results and sometimes one of both of the images get changes so as to be unrecognizable in the combined images. What could it be about the images I am trying to combine that makes them change when they are combined?
Thanks, Andrew, interesting applications. With combining two characters, for a given prompt I always get the same image, despite the seed being set to random. I thought it might be the denoise value but that just affects contrast. Can you tell me how to get variety between images?
Thanks
The edit follows prompt very closely in a particular way irrespective of the seed. One way I found is to slightly changing the prompt.
OK, I’ll try that. Thanks
Thank you so much! Incredible! This is the best way to change someone’s clothes based on an uploaded photo. It works on both children and cartoon characters!