
LTX Video is a popular local AI model known for its generation speed and low VRAM usage. The LTXV-13B model has 13 billion parameters, a 6-fold increase over the previous 2B model. This translates to better details, prompt adherence, and more coherent videos.
In this tutorial, I will show you how to install and run the LTXV-13B img2vid on ComfyUI.
Table of Contents
Software
We will use ComfyUI, a free AI image and video generator. You can use it on Windows, Mac, or Google Colab.
Think Diffusion provides an online ComfyUI service. They offer an extra 20% credit to our readers.
Read the ComfyUI beginner’s guide if you are new to ComfyUI. See the Quick Start Guide if you are new to AI images and videos.
Take the ComfyUI course to learn how to use ComfyUI step by step.
Improvement in LTXV 13B model
The LTXV 13B model is a huge step from the 2B model.
- Higher quality: The quality of the 13B model is noticeably higher than the 2B model.
- Speed is not bad: It takes under 3 minutes to generate a 4-second video on my RTX4090. It is slower than the 2B model, but it is still fast enough.
Alternative models
You may also consider the following models, which can turn an image into a video.
- Wan 2.1 Video: A workhorse in local image-to-video
- Hunyuan Video: Another high-quality choice
- FramePack: long AI video with low VRAM
- LTX Video 2B: The smaller version of LTXV. It is faster, but the quality is lower
LTX Video 13B Image-to-video workflow
Step 1: Download the workflow
Download the ComfyUI JSON workflow below.
Drag and drop the JSON file to ComfyUI.
Step 2: Install missing nodes
If you see nodes with red borders, you don’t have the custom nodes required for this workflow. You should have ComfyUI Manager installed before performing this step.
Click Manager > Install Missing Custom Nodes.
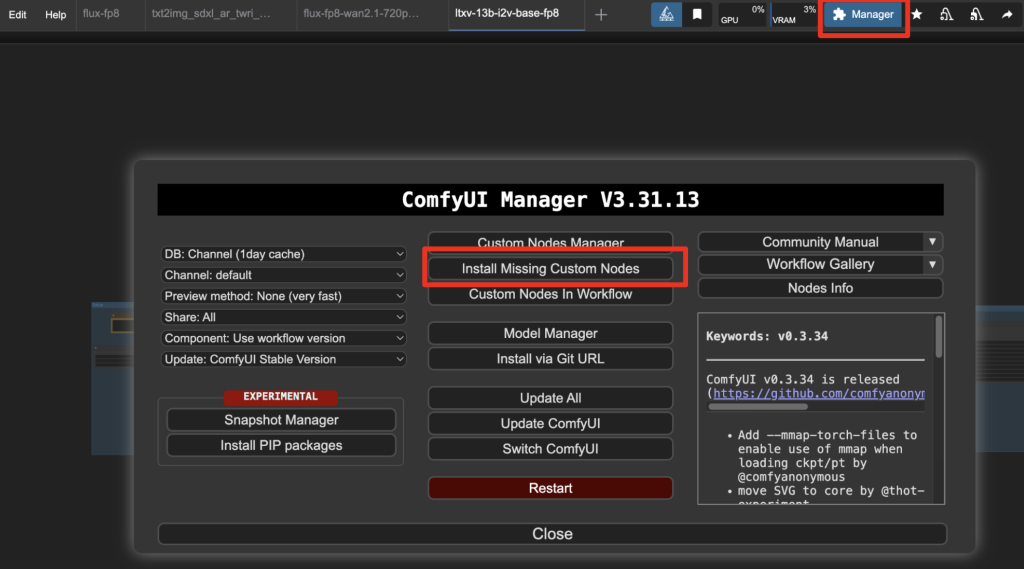
Install the nodes that are missing.
Restart ComfyUI.
Refresh the ComfyUI page.
Step 3: Download model files
Download the LTXV 13B model ltxv-13b-0.9.7-dev.safetensors. Put it in ComfyUI > models > checkpoints.
Download t5xxl_fp16.safetensors and put it in ComfyUI > models > text_encoders.
Now, you have installed all the software and models to run the workflow!
Step 4: Upload an image
The video model animates the first frame you upload. Upload an image to the Load Image canvas.
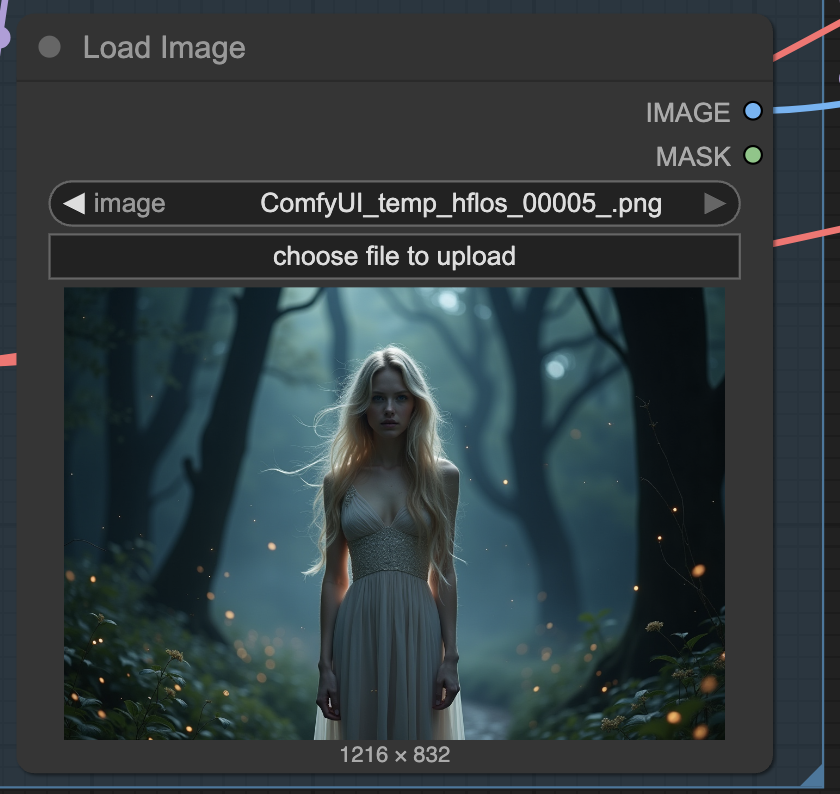
You can use the test image below.

Step 5: Run the workflow
Click the Run button to run the workflow.

Reference
- ComfyUI Custom Node: ComfyUI-LTXVideo: LTX-Video Support for ComfyUI
- Official repository for LTX-Video
Thanks for the tutorial. I was able to install all the necesesary components and run it. However, it seems to get stuck with 0% progress and not able to make progress. I was able to do text to image with this CompyUI configuration with no problems. Any suggestion would be appreciated
You may not have enough VRAM, and your PC is using the page memory? Try restarting the PC and open only ComfyUI. Try reducing the length or size of the video.
How do we control how closely it resembles the original image? Which seed controls the randomness (under set VAE decoder noise or …?)? What other areas can we modify? Do we control camera zoom, pan, etc in the prompt or in settings? I’m working on an RTX4070… have had some really cool results so far…
this is an image to video model so it uses the image as the first frame exactly as is.
For camera control, add camera keywords to the prompt. You may need to play with the seed value to make it work.
Boa Noite Andrew!
Consigo fazer esse trabalho sem GPU?
Not likely…
Ok. obrigado!
Hi Andrew,
I seem to be seeing what JM was seeing. Would I have to do a “fresh installation” of Comfy UI?
Seeing the installation as a “failure”, I was thinking that I would have to be logged-in Git, but I am seeing this even while logged-in. Below shows the terminal text. I see copied files in the “ComfyUI-LTXVideo” folder, it seems the installation is hanging up.
——terminal text —————————————————————
Download: git clone ‘https://github.com/Lightricks/ComfyUI-LTXVideo’
[!]
0it [00:00, ?it/s] Cmd(‘git’) failed due to: exit code(128)
0it [00:00, ?it/s] cmdline: git clone -v –recursive –progress — https://github.com/Lightricks/ComfyUI-LTXVideo C:\AI\ComfyUI\ComfyUI\custom_nodes\ComfyUI-LTXVideo
[ComfyUI-Manager] Installation failed:
Failed to clone repo: https://github.com/Lightricks/ComfyUI-LTXVideo
[ComfyUI-Manager] Queued works are completed.
{‘install’: 1}
After restarting ComfyUI, please refresh the browser.
—————————————————————————
Do you have any advise? Thanks
Perhaps it is caused by a mismatch in comfyui backend/frontend/manager. Installing a fresh copy is a good way to test it
I have this error
got prompt
Failed to validate prompt for output 1599:
* LTXVFilmGrain 1699:
– Required input is missing: images
Output will be ignored
Thanks, Andrew, it’s certainly quick – on Colab A100, a 4 sec video at 24 fps takes just 96 secs. I found the video quality to be ok and the model is good at interpreting a scene from an image and producing something from it without a prompt. But I couldn’t prompt it effectively either for content or camera movement. Perhaps because the influence of the image is too strong?
As the image is apparently optional I tried generating a video from just a text prompt but the results were very bad.
I tried 60 fps and found I got a smoother and more dynamic image, though it obvs takes longer to generate. I didn’t notice much reduction in quality.
A couple of questions:
– what is the reason for adding noise at the vae decoder stage and and what effect does changing the seed have?
– do you have any tips for getting prompting to work better?
Thanks
Hi David, thanks for reporting the generation time!
– This is an image-to-video model so it is not surprising to produce poor results without an input image.
– Adding noise to VAE is a technique to increase robustness and details.
– The result depends a lot on the noise seed. Sometimes a new seed would work.
After downloading your recommended files I drop the workflow into COMFY the below happens–
“When loading the graph, the following node types were not found
LTXVFilmGrain
STGAdvancedPresets
LTXVBaseSampler
STGGuiderAdvanced
LTXQ8Patch
Set VAE Decoder Noise
”
When using COMFY MANAGER to install missing nodes I get this error:
“Installation Error:
Failed to clone repo: https://github.com/Lightricks/ComfyUI-LTXVideo”
Any suggestions would be appreciated. I have updated Comfy, pythom, pip, changed my underware and washed behind my ears, but keep getting the same error.
The repos is functional so the problem is on your side. any detailed error message on the terminal?
I installed a fresh copy of COMFY and now it works. I have an idea of what was going on, but it is an involved long explaination. Nice looking vid
Thanks for reporting!
i cant run it. looks like oom, my vid card fail. maybe gguf model can. will try it now
Looks great, but after I installed ComfyUI it fails to run, making following your procedures impossible… No idea how to diagnose the error it’s returning while trying to load the diffusion models – where it’s missing “torch_directml”. (Similar to the long standing issue of never getting any Flux models working under the WebForgeUI either). I’ll just have to hope that someday an update comes out that may fix it?
You have an amd card? try: https://github.com/comfyanonymous/ComfyUI?tab=readme-ov-file#directml-amd-cards-on-windows
But I am not sure how well the model supports it.
Hi Andrew, please could you add LTX 13B to the Colab notebook
Thanks
Will do.
Could I give a gentle nudge on this. Thanks
OK, added.