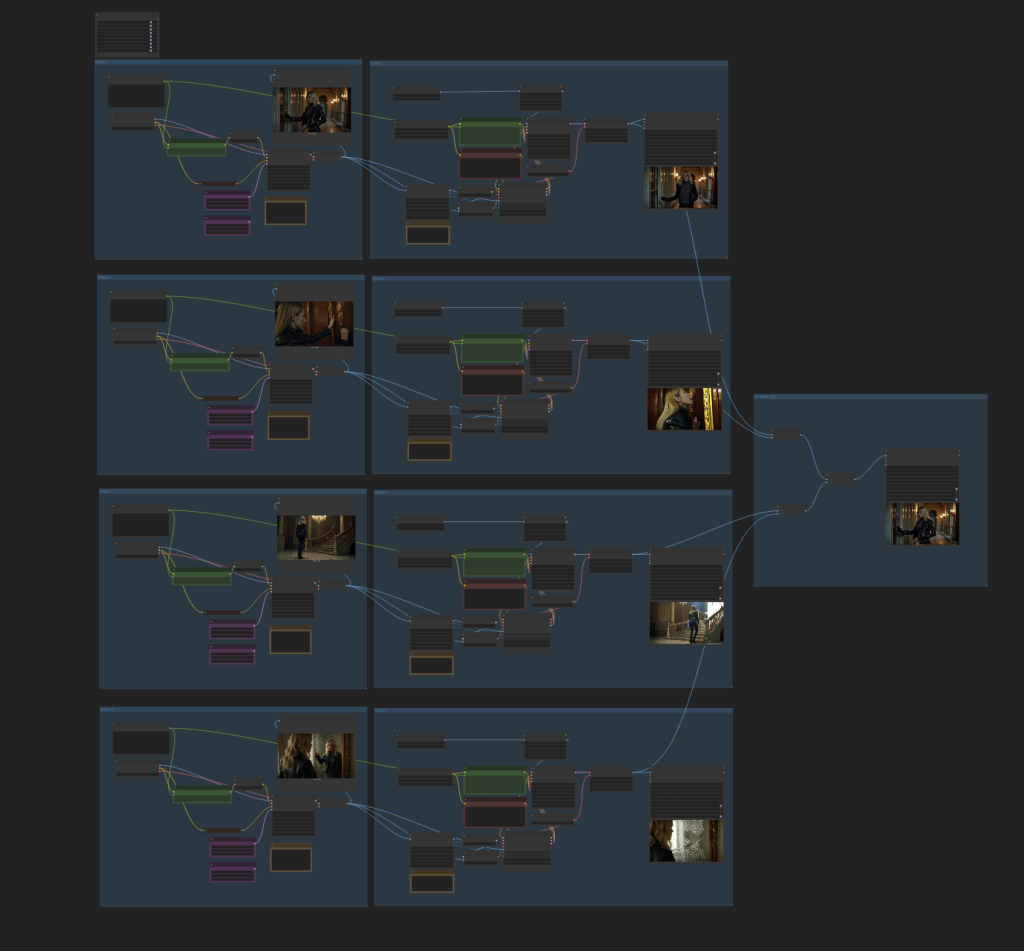
This workflow generates four video clips and combines them into a single video. To improve the quality and control of each clip, the initial frame is generated with the Flux AI image model, followed by Wan 2.1 Video with Teacache speed up.
You can run it locally or using a ComfyUI service.
You must be a member of this site to download the following ComfyUI workflow.
Table of Contents
Software
We will use ComfyUI, a free AI image and video generator. You can use it on Windows, Mac, or Google Colab.
Think Diffusion provides an online ComfyUI service. They offer an extra 20% credit to our readers.
Read the ComfyUI beginner’s guide if you are new to ComfyUI. See the Quick Start Guide if you are new to AI images and videos.
Take the ComfyUI course to learn how to use ComfyUI step by step.
How does this workflow work?
For each clip, Flux.1 Dev model creates the initial frame to ensure the highest quality.
The Wan 2.1 Image-to-Video model uses the initial frame to generate the whole clip.
This process is repeated 4 times to generate four short clips, each independently controlled by its prompt.
Alternative workflows
A single-clip version of this workflow:
A similar movie workflow with the Mochi video model:
Step-by-step guide
Step 1: Load workflow
Download the ComfyUI JSON workflow below.
Drag and drop the JSON file to ComfyUI.
Step 2: Install missing nodes
If you see nodes with red borders, you don’t have the custom nodes required for this workflow. You should have ComfyUI Manager installed before performing this step.
Click Manager > Install Missing Custom Nodes.
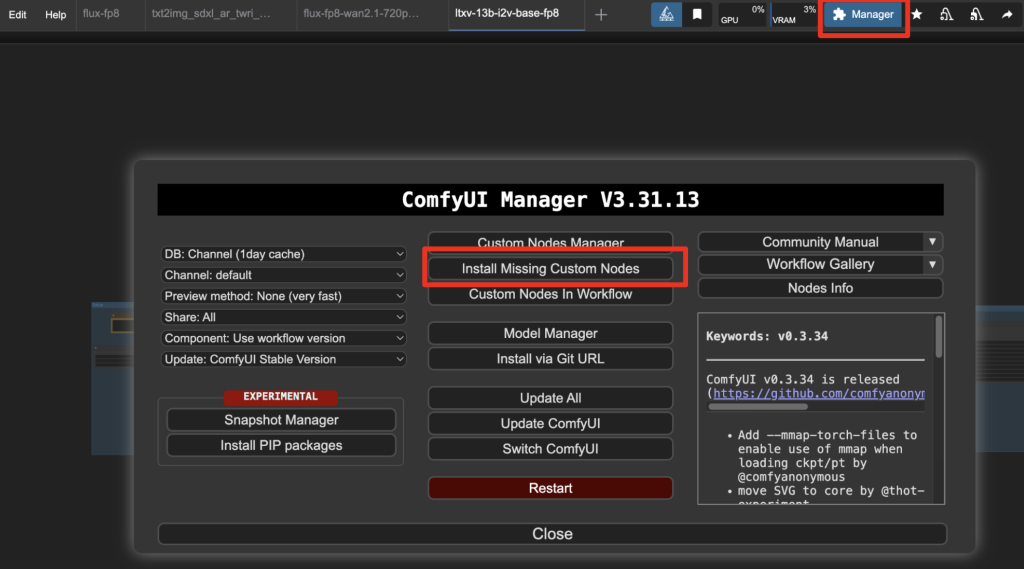
Install the nodes that are missing.
Restart ComfyUI.
Refresh the ComfyUI page.
Step 3: Download models
Flux
Download the flux1.Dev model flux1-dev-fp8.safetensors. Put it in ComfyUI > models > checkpoints.
Wan 2.1
Download the diffusion model wan2.1_i2v_720p_14B_fp8_e4m3fn.safetensors and put it in ComfyUI > models > diffusion_models.
Download the text encoder model umt5_xxl_fp8_e4m3fn_scaled.safetensors and put it in ComfyUI > models > text_encoders.
Download the CLIP vision model clip_vision_h.safetensors and put it in ComfyUI > models > clip_vision.
Download the Wan VAE model wan_2.1_vae.safetensors and put it in ComfyUI > models > vae.
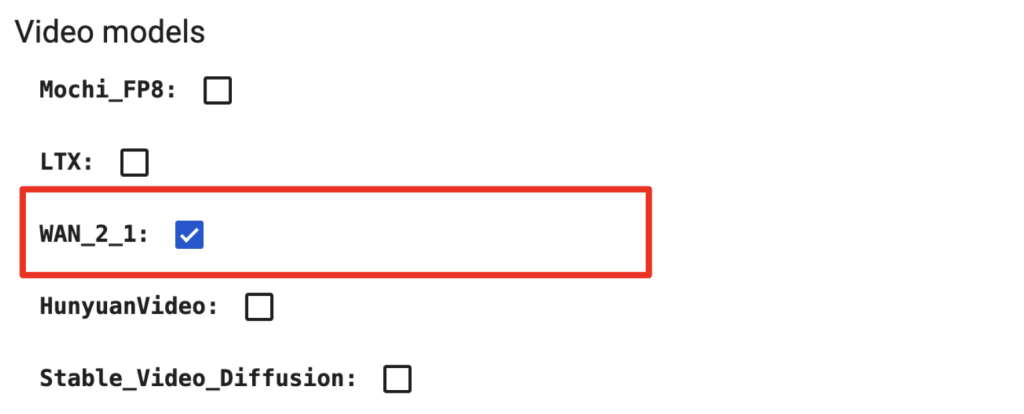
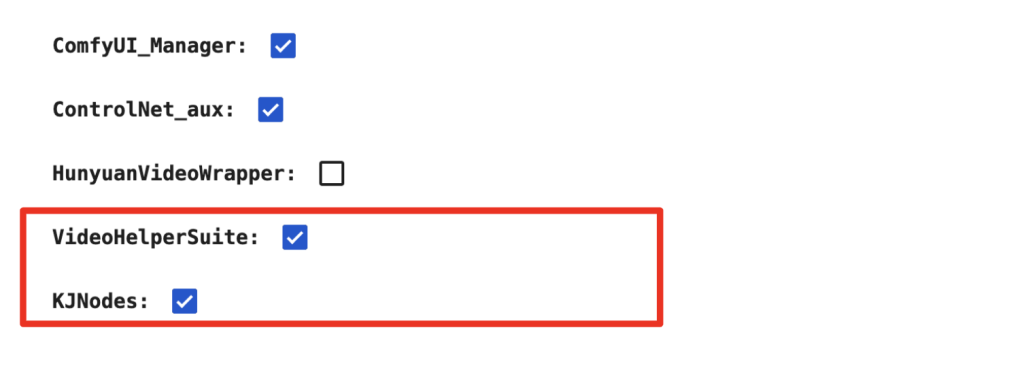
Google Colab
If you use my ComfyUI Colab notebook, you don’t need to download the model. Select
- the Flux1_dev model
- WAN_2_1 video models
- WAN_2_1 custom nodes
- VideoHelperSuite custom nodes
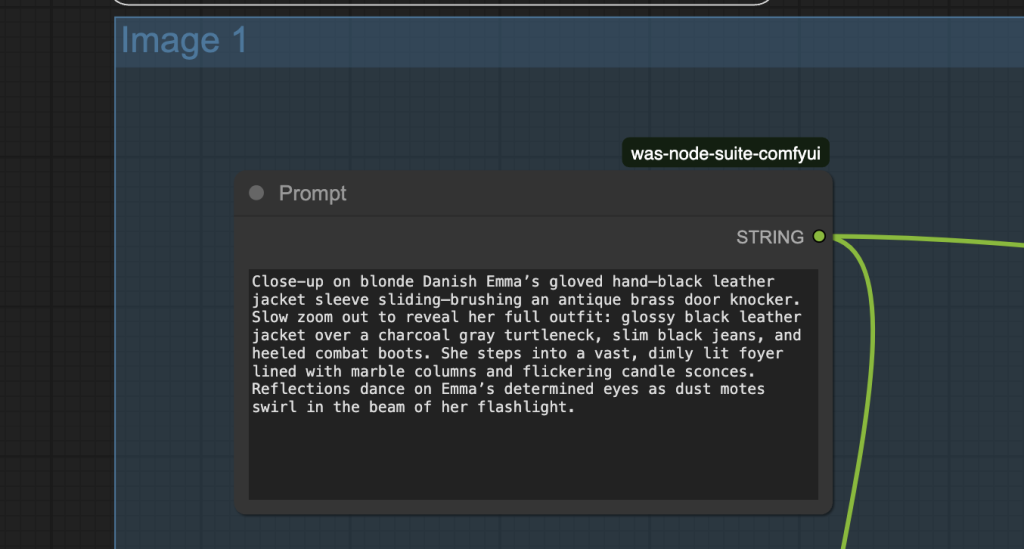
Step 4: Revise the prompts
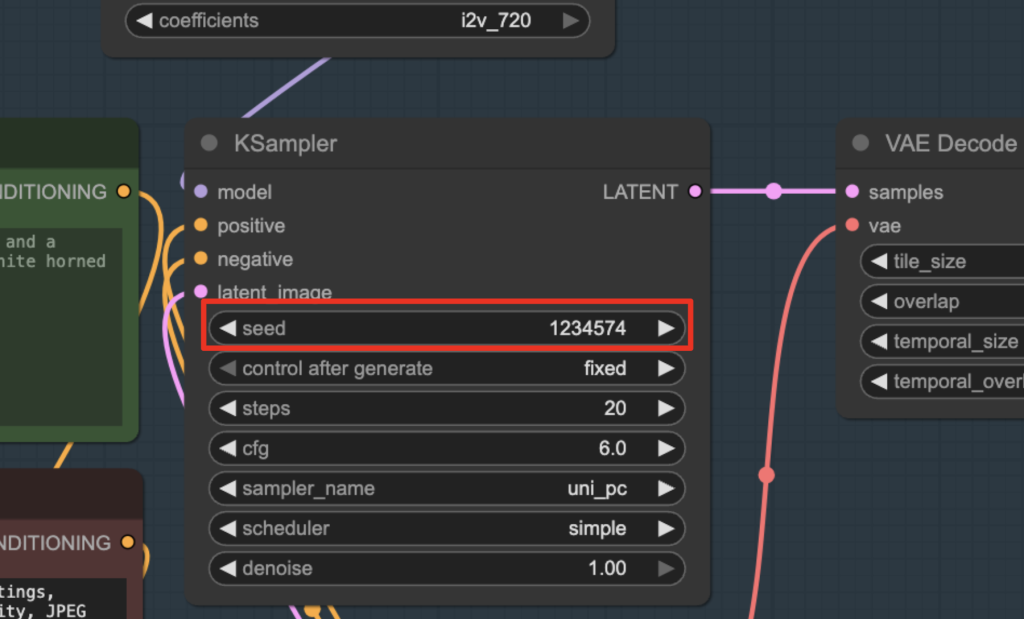
Revise the prompt in each image group. Each clip is solely determined by the prompt and the seed values.
Step 5: Run the workflow
Click the Run button to run the workflow.

Advanced usage
You can use the Fast Groups Muter node to control the video generation process more. You can first focus on the initial image generation. Once you are happy with it, go ahead and turn on the video generation.
Generate image only
Turn off the Video groups in the Fast Groups Muter.
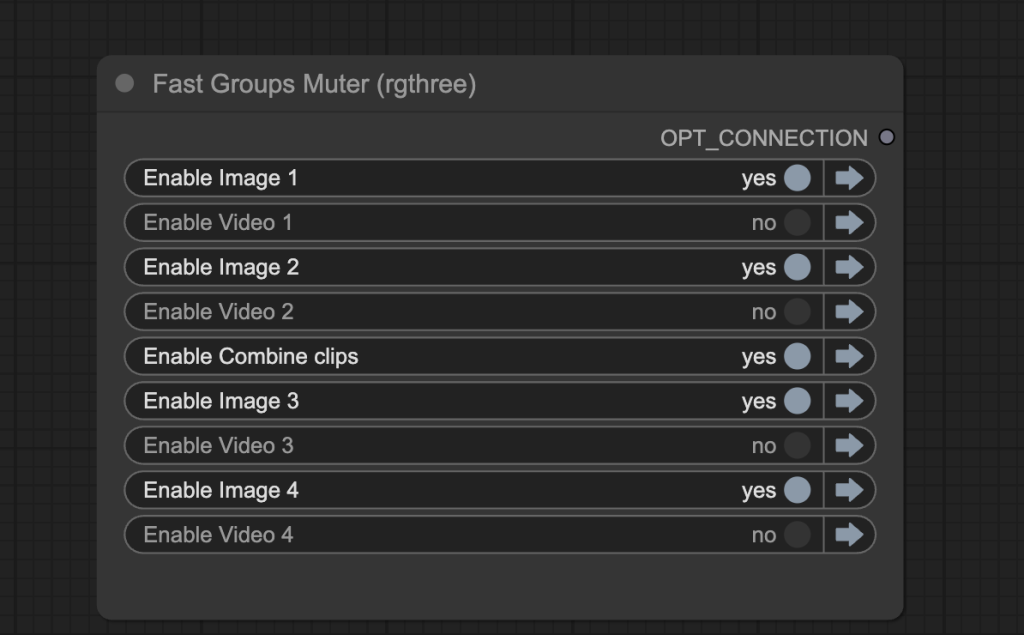
Click the Run button to run the workflow.
You should have run the image groups and seen the preview images.
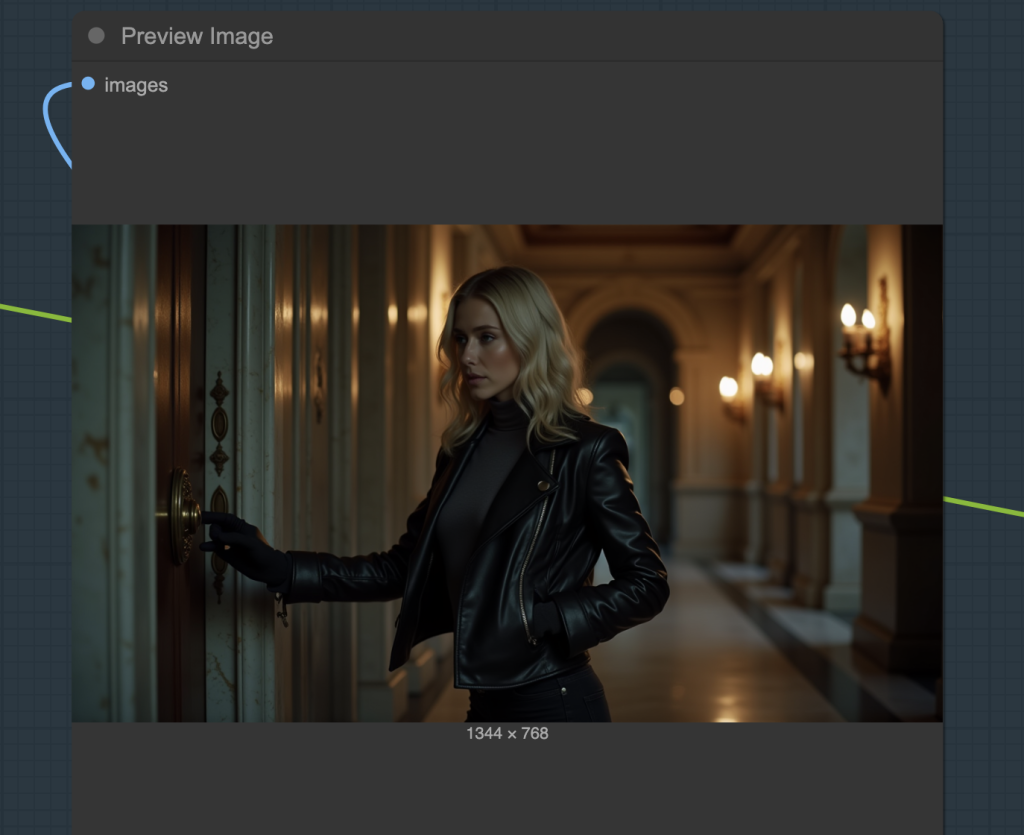
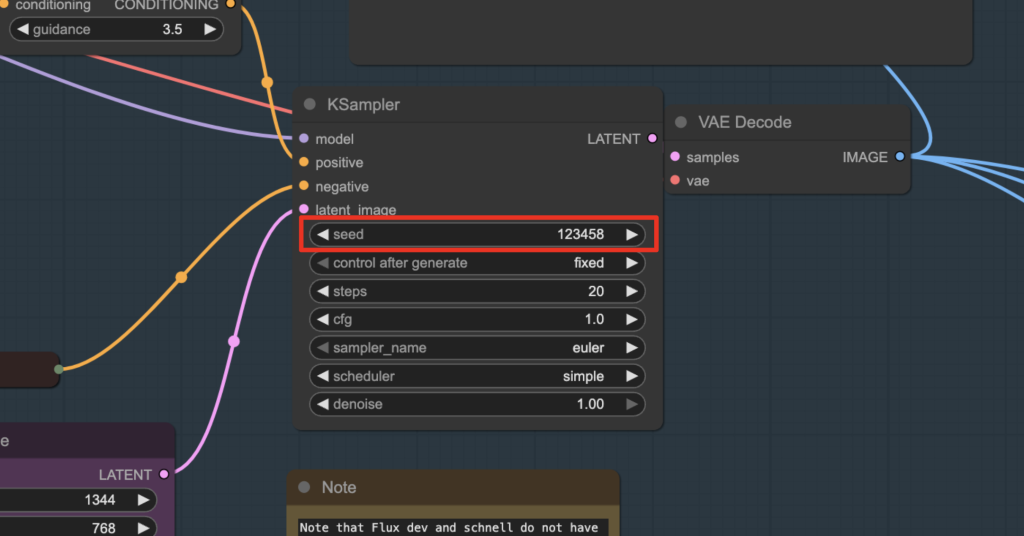
Revise the prompt and seed value in the KSampler node until you are happy with the result.
Enable the video generation
Now, turn the Video groups on.
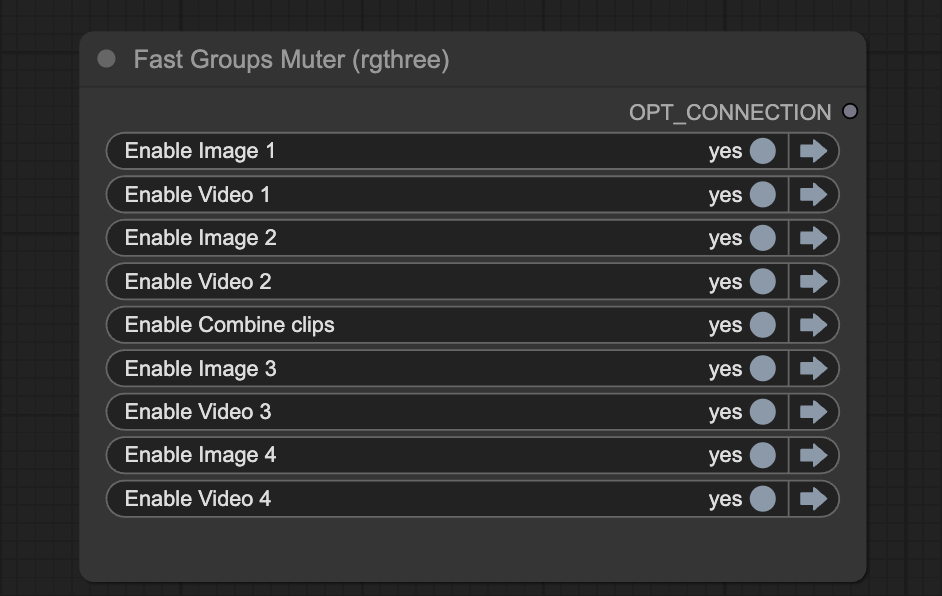
Click the Run button to run the workflow.
You now also get the individual and combined video.
Change the seed value of the KSampler in the Video group to generate a new video.
Tips
- To make the character consistent across clips:
- Specify the hair color (“Blonde”)
- Specify the race (“Danish”)
- Describe the outfit
- Use a name to pin down a face loosely (“Emma”)
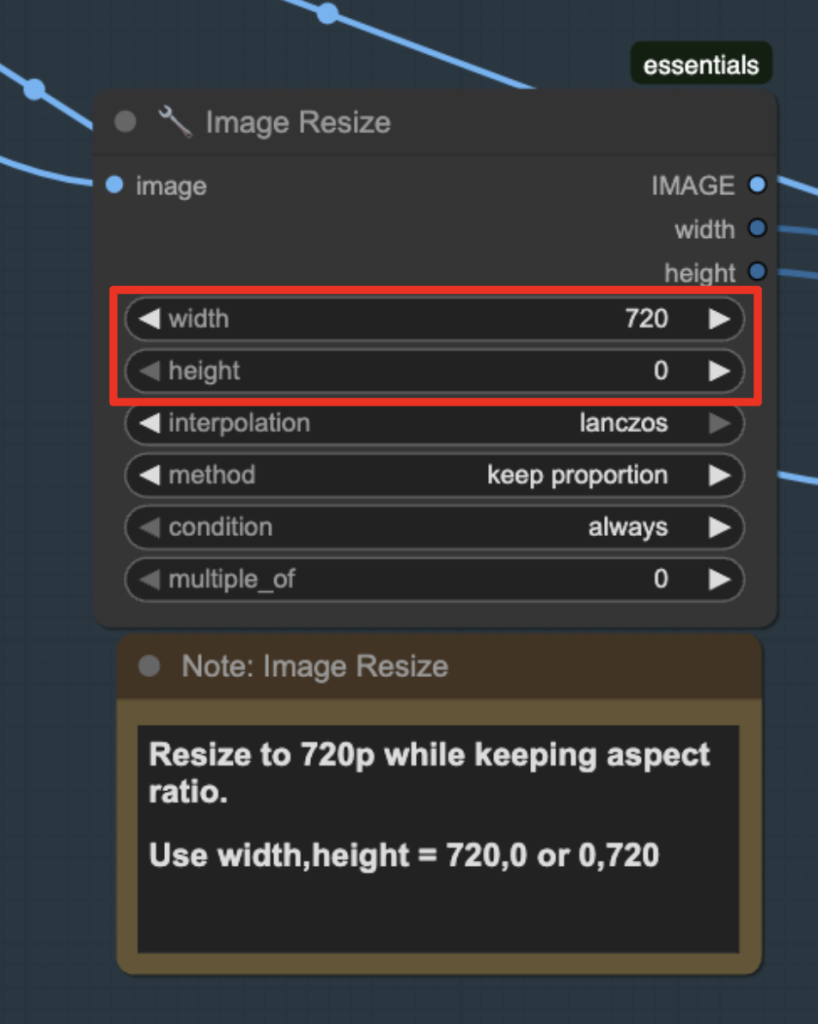
- Control the resolution of the video by choosing between:
- Width: 720, height: 0
- Width: 0, height: 720
- The choice depends on the initial image’s aspect ratio and whether you want to generate a higher resolution video.
- For example, a 16:9 landscape image with 720 width is lower resolution than one with 720 height.
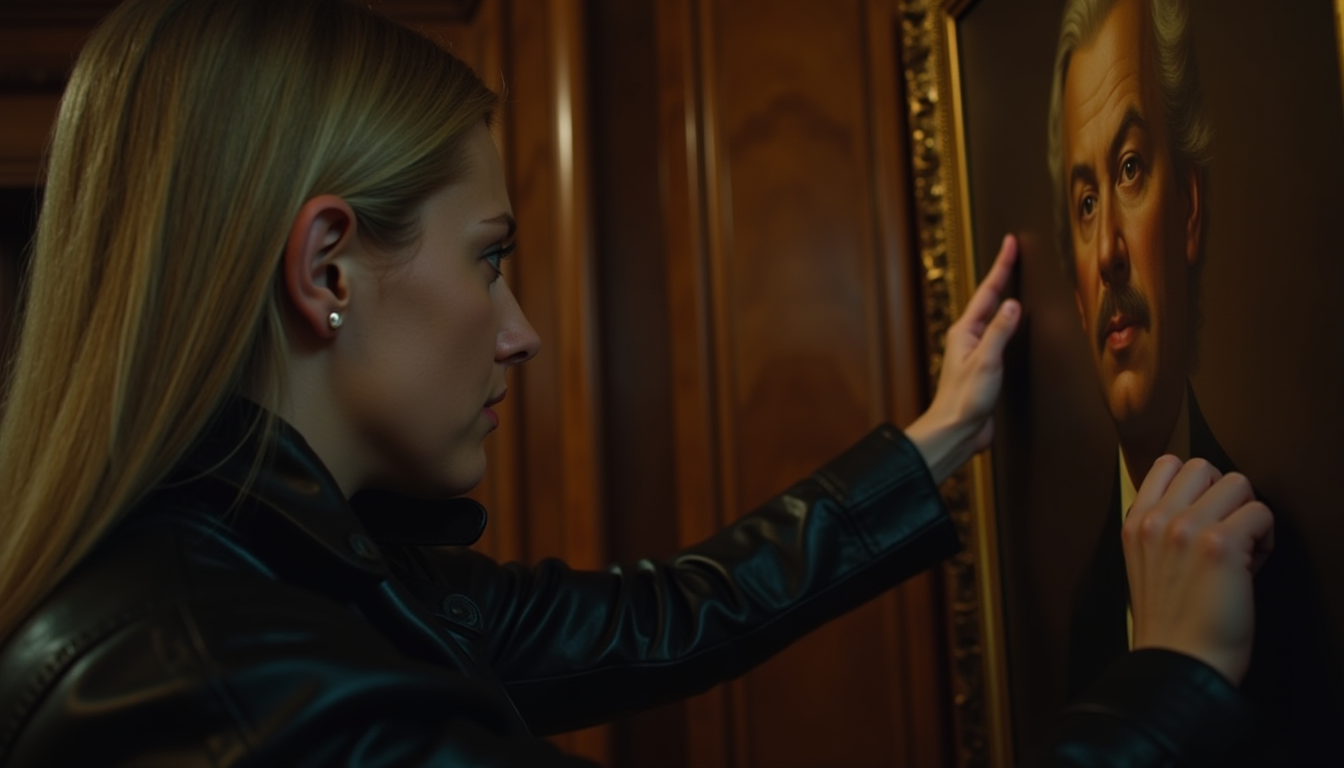
Thanks, Andrew, it’s fun to combine clips like this and doable with a fast machine (I am using A100 on Colab). But it’s hard to prompt the video scenes to get them to do what I want. I couldn’t get the final clip with the cracked mirror to work well. I guess prompting video is as much art as science? Worth a tutorial on it, perhaps.
It’s quite similar to the early days of stable diffusion that you prompt you can something around the ballpark.