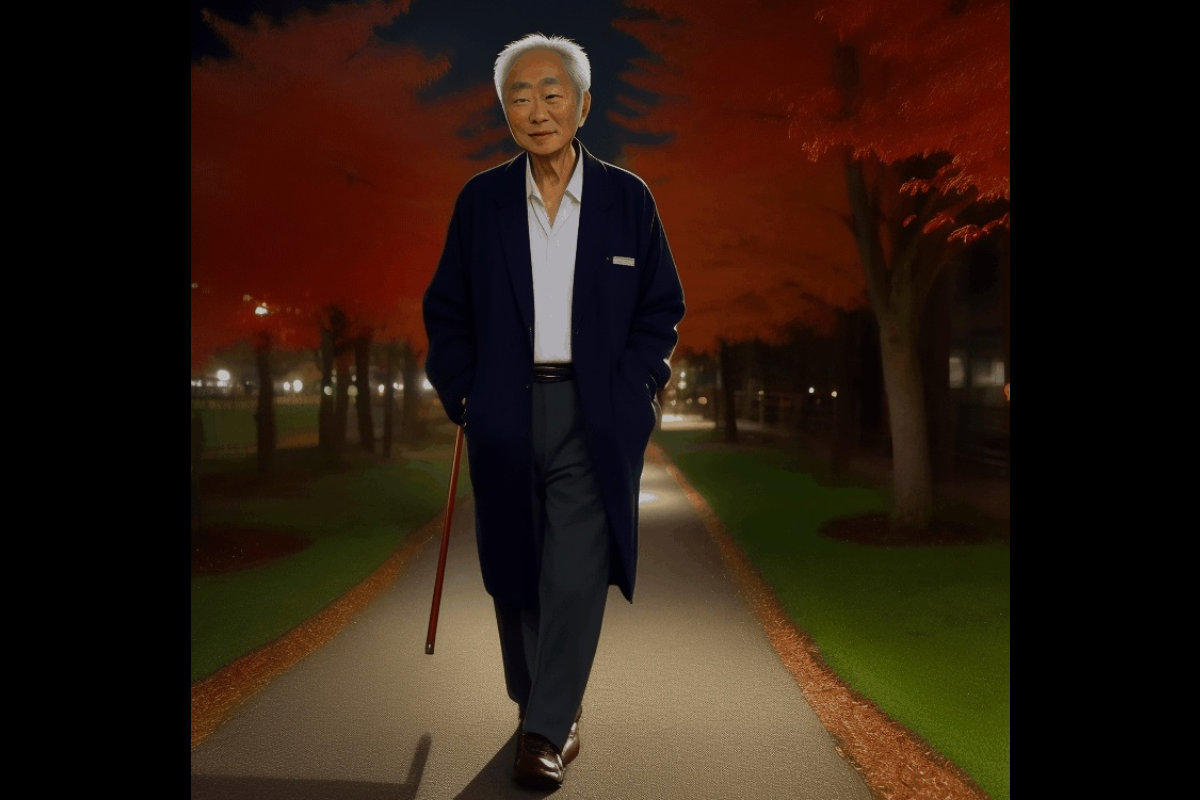
This ComfyUI AnimateDiff prompt travel workflow generates a high-resolution video of a person going reverse in time as he walks in the part.
The post includes:
- A downloadable ComflyUI workflow for AnimateDiff prompt travel video with high-res fix. It can generate videos with higher resolution, like 1024×1024.
- A step-by-step guide to using this workflow.
- Customization instructions.
The video looks like this:
You must be a member to download this workflow.
Table of Contents
Software setup
We will use ComfyUI to generate the AnimateDiff Prompt Travel video. See the ComfyUI installation guide and the ComfyUI beginner’s guide if you are new to it.
You should have the ComfyUI Manager installed before you start with the tutorial.
Step-by-step guide
Step 1. Load the workflow file
Step 2: Go through the drill…
Every time you try to run a new workflow, you may need to do some or all of the following steps.
- Install ComfyUI Manager
- Install missing nodes
- Update everything
Install ComfyUI Manager
Install ComfyUI manager if you haven’t done so already. It provides an easy way to update ComfyUI and install missing nodes.
To install this custom node, go to the custom nodes folder in the PowerShell (Windows) or Terminal (Mac) App:
cd ComfyUI/custom_nodesInstall ComfyUI by cloning the repository under the custom_nodes folder.
git clone https://github.com/ltdrdata/ComfyUI-ManagerRestart ComfyUI completely. You should see a new Manager button appearing on the menu.
If you don’t see the Manager button, check the terminal for error messages. One common issue is GIT not installed. Installing it and repeat the steps should resolve the issue.
Install missing custom nodes
To install the custom nodes that are used by the workflow but you don’t have:
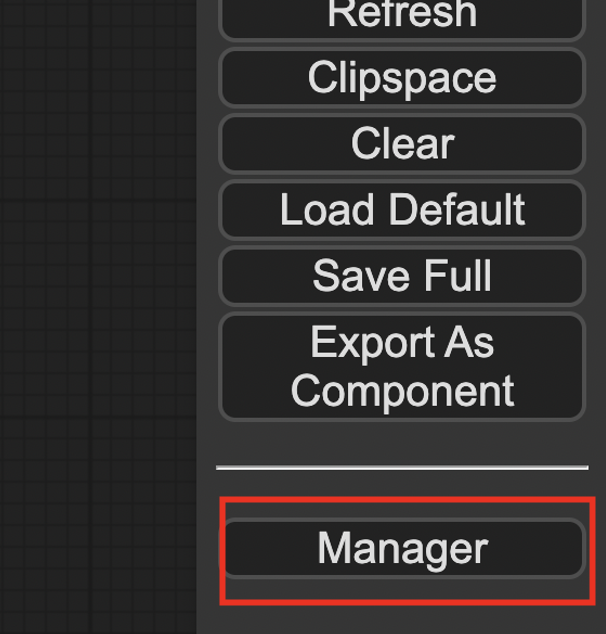
- Click Manager in the Menu.
- Click Install Missing custom Nodes.
- Restart ComfyUI completely.
Update everything
You can use ComfyUI manager to update custom nodes and ComfyUI itself.
- Click Manager in the Menu.
- Click Updates All. It may take a while to be done.
- Restart the ComfyUI and refresh the ComfyUI page.
Step 3: Select a checkpoint model
Download the checkpoint model DreamShaper 8. Put the safetensors file in the folder ComfyUI > models > checkpoints.
Refresh the browser tab.
Find the node Load Checkpoint. Click the ckpt_name dropdown menu and select the dreamshaper_8 model.

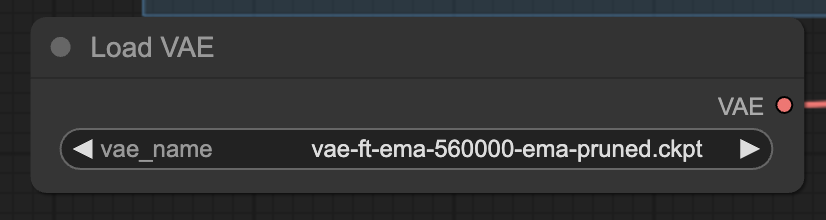
Step 4: Select a VAE
Download the vae-ft-ema-560000-ema-pruned VAE. Put the file in the folder ComfyUI > models > vae.
Refresh the browser page.
In the Load VAE node, select the file you just downloaded.
Step 5: Select the AnimateDiff motion module
Download the AnimateDiff v1.5 v2 motion model. Put it in the folder ComfyUI > custom_nodes > ComfyUI-AnimateDiff-Evolved > models.
Refresh the browser page.
In the AnimateDiff Loader node, Select mm_sd_v15_v2.ckpt in the model_name dropdown menu.
Step 6: Download the negative embedding
This workflow uses the BadDream negative embedding in the negative prompt. It is a negative embedding trained for the Dream Shaper model.
Download the BadDream embedding. Put the file in ComfyUI > models > embeddings.
Step 7: Generate the video
Click Queue Prompt to start generating a video.
The progress bar will appear at the KSampler node. When it is done, you will see the video appearing in the Video Combine node.
The workflow somehow connects the beginning and the end. Optionally trim off a small portion of the beginning and ending of the clip if you don’t like them.
This is what you should get:
Notes and customization tips
Change the prefix prompt in the BatchPromptSchedule node to customize the look of the person.
Each prompt is fixed for 10 frames on purpose to show the life stage for a brief amount of time. Without it, the scene would be changing too quickly.
Sometimes, the scenes do not transit smoothly. Change the seed value and generate a new video.

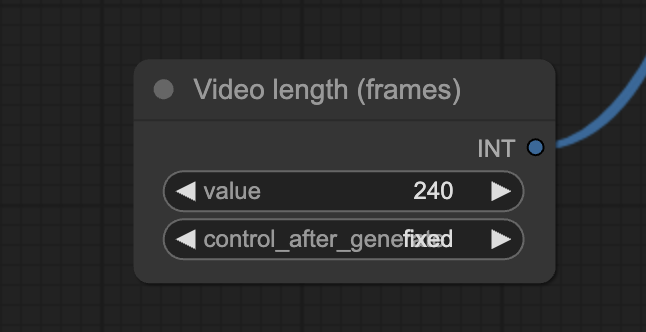
Adjust the video length by changing the video length node in the number of frames.
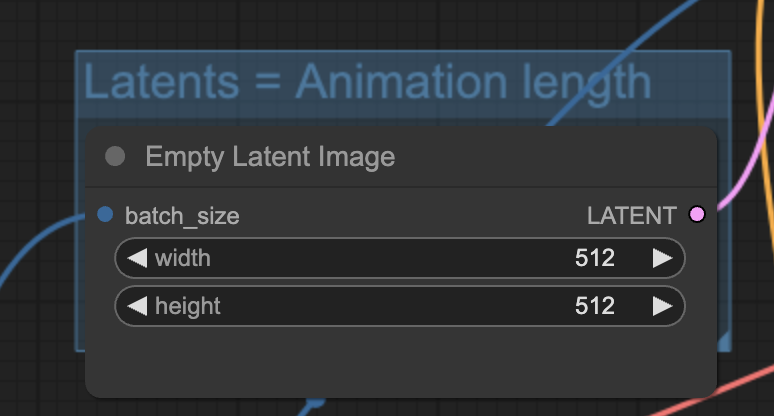
Adjust the initial size of the video by changing the following node.
Adjust the scaling factor of the Hires fix. This controls how much larger the final video size is.
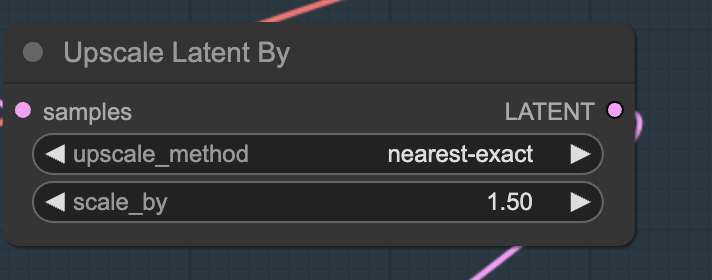
In this workflow, the final video size is 512×512 scaled by a factor of 1.5 = 768×768 pixels.
Hi Andrew,
Thanks for this marvelous workflow! I hope this workflow will be available for a long time but I noticed the two animatediff nodes it uses are both deprecated (Context Options and Loader). Will these nodes always be available? Thanks.
Zaffer (Member)
P.S. I solved the error: BatchPromptSchedule: expected a non-empty list of Tensors by changing end_frame from 0 to 1 as per this post: https://github.com/FizzleDorf/ComfyUI_FizzNodes/issues/129
change end_frame from 0 to 1.
Not a Reply — addendum:
Hi Andrew, I got “A Curious Case” working but the only figures I get are old men — sometimes two of them, sometimes a back view, but never a younger version. I changed the seed and I even tried updating everything; I changed the AnimateDiff nodes to the Evolved versions and upgraded Dreamshaper to the SDXL version with appropriate upgrades to other checkpoints. Is there something I’m doing wrong? Something I can change? Thanks.
Zaffer
SOLUTION! I found the solution to the problem of the prompt not traveling: All I did was change the end_frame number in the Batch Prompt Schedule node from 0 to 240. Now the prompt travel works!
Sorry for not getting back to you earlier. The workflow is working on my end but I have made the changes you suggested to avoid potential issues.
When i try to load the png comfy says no workflow found. Can you provide the json?
Hi, I replaced the png with a json file for the download button.
I am getting this error: Error occurred when executing BatchPromptSchedule: string index out of range. NOt sure what could be the reason for this. I am running this on comfyui, I am changing nothing. Any ideas?
Actually I got it resolved, the text in the png file has a comma at very end. That comma is creating the problem. If anyone else has this issue. You can remove the comma at end. It should work fine
Step 2: Install the missing nodes . I don’t see the Manage button
You need to install the comfyui manager. I have updated step 2. Please take a look and see if it is clear.
The animatediff isn’t working anymore, I get this error: “NansException: A tensor with all NaNs was produced in VAE. This could be because there’s not enough precision to represent the picture. Try adding –no-half-vae commandline argument to fix this. Use –disable-nan-check commandline argument to disable this check.”
are you using a1111 or comfyui?
a1111
this is a comfyui workflow.