Do you have a photo you want to turn it into an unique animation style? Long-time member Heinz Zysset kindly shares his stylization workflow to our site readers. It turns any images into the style of the Arcane animation series.
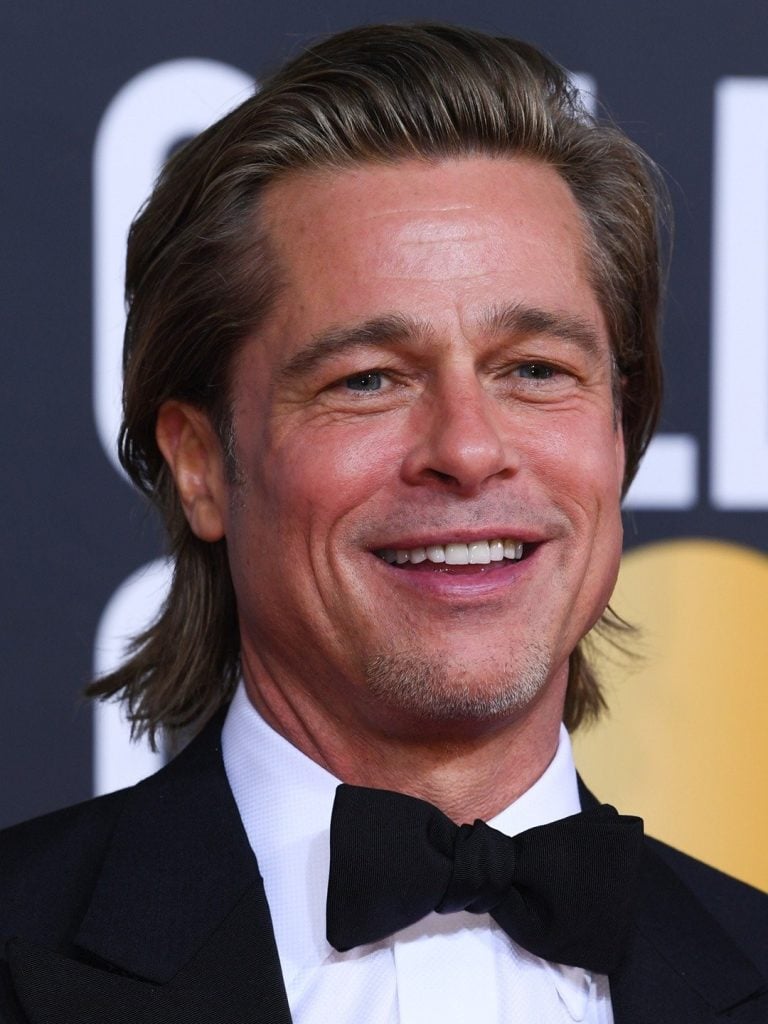

Table of Contents
Software needed
We will use ComfyUI, a free AI image and video generator. You can use it on Windows, Mac, or Google Colab.
Think Diffusion provides an online ComfyUI service. They offer an extra 20% credit to our readers.
Read the ComfyUI beginner’s guide if you are new to ComfyUI. See the Quick Start Guide if you are new to AI images and videos.
Take the ComfyUI course to learn how to use ComfyUI step by step.
Workflow overview
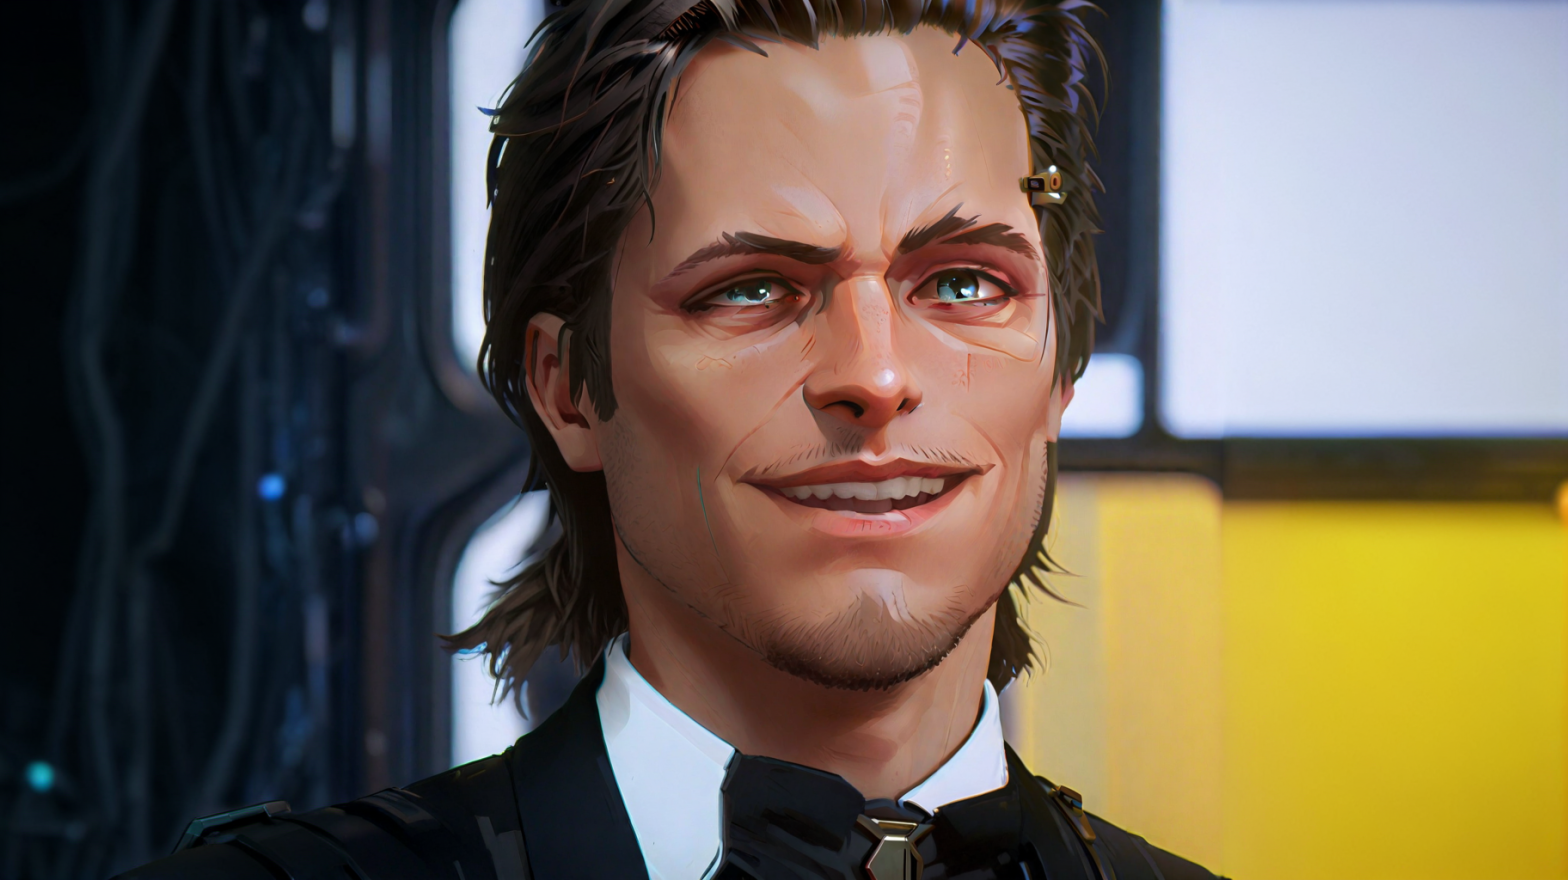
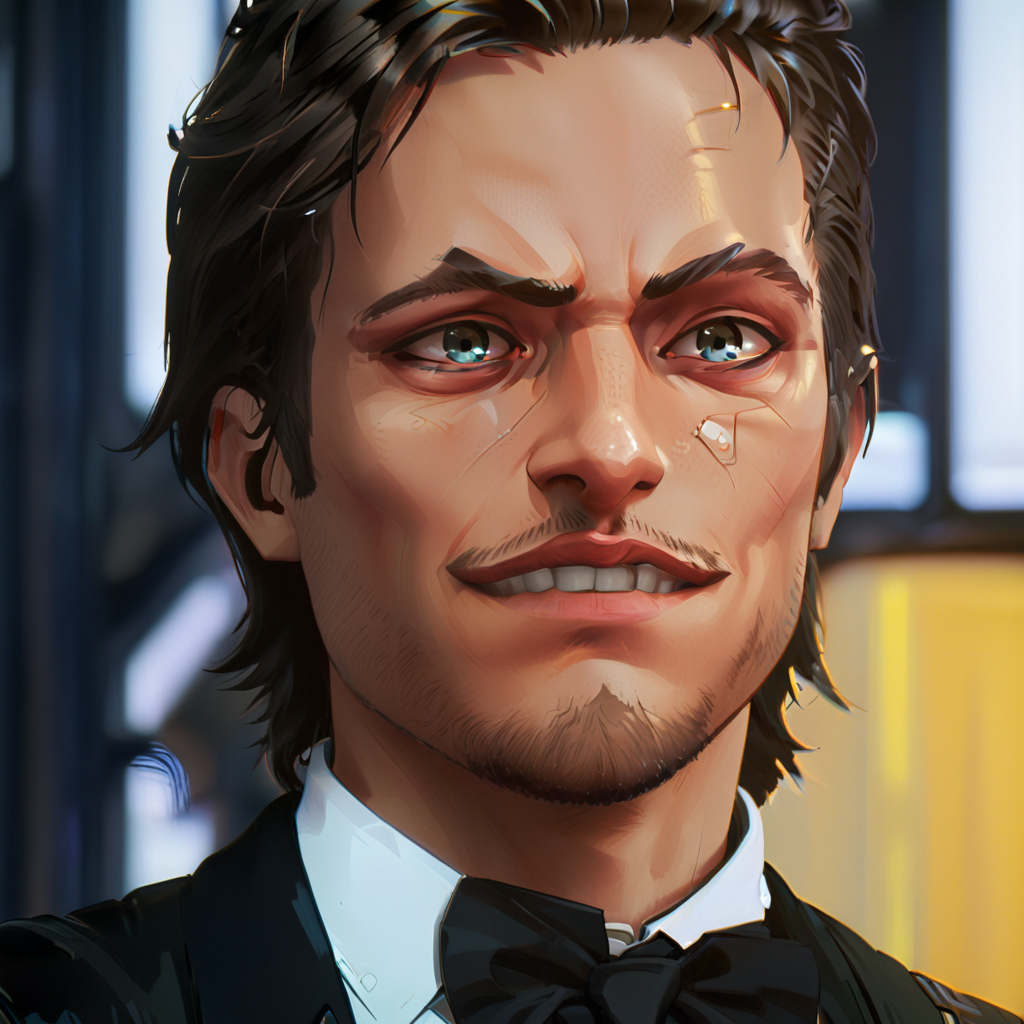
This workflow takes an input photo and turn it into Arcane style using image-to-image.

You can optionally use ControlNet to improve the likeness to the original image.
Arcane stylization workflow
Step 1: Download models
Download the Nevolution-SDXL checkpoint model. Save it to the ComfyUI > models > checkpoints folder.
Download the Arcane style XL LoRA. Put it in the ComfyUI > models > loras folder.
Download the XL more Art-Full LoRA. Put it in the ComfyUI > models > loras folder.
Download the 4x-Ultrasharp model. Put it in ComfyUI > models > upscale_models folder.
Step 2: Download the workflow
Download the workflow JSON file below.
Drop the file into ComfyUI to load the workflow.
Step 3: Install missing nodes
If you see nodes with red borders, you don’t have the custom nodes required for this workflow. You should have ComfyUI Manager installed before performing this step.
Click Manager > Install Missing Custom Nodes.
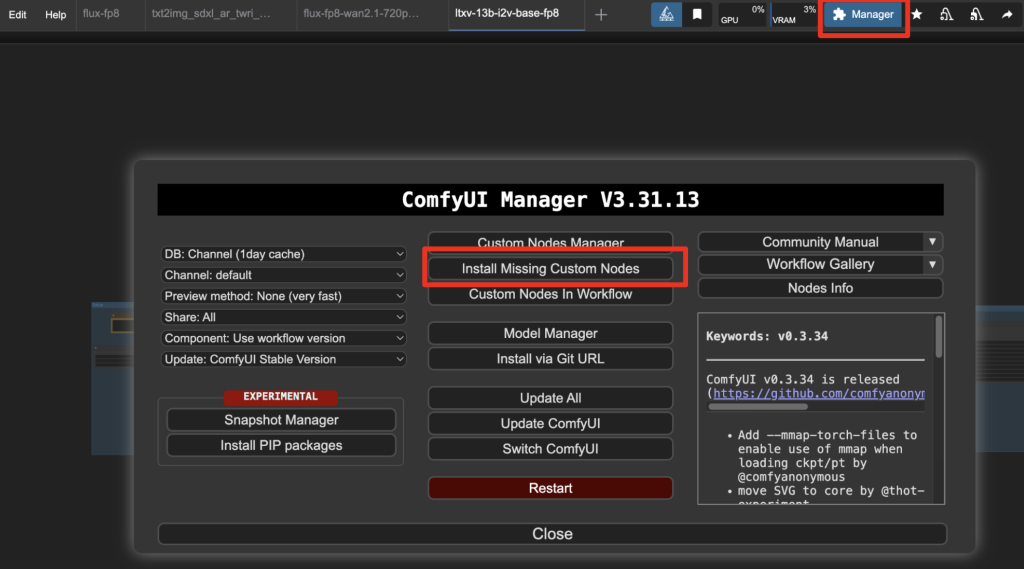
Install the nodes that are missing.
Restart ComfyUI.
Refresh the ComfyUI page.
Step 4: Update an image
Upload an image you wish to convert to the Load Initial Image node.
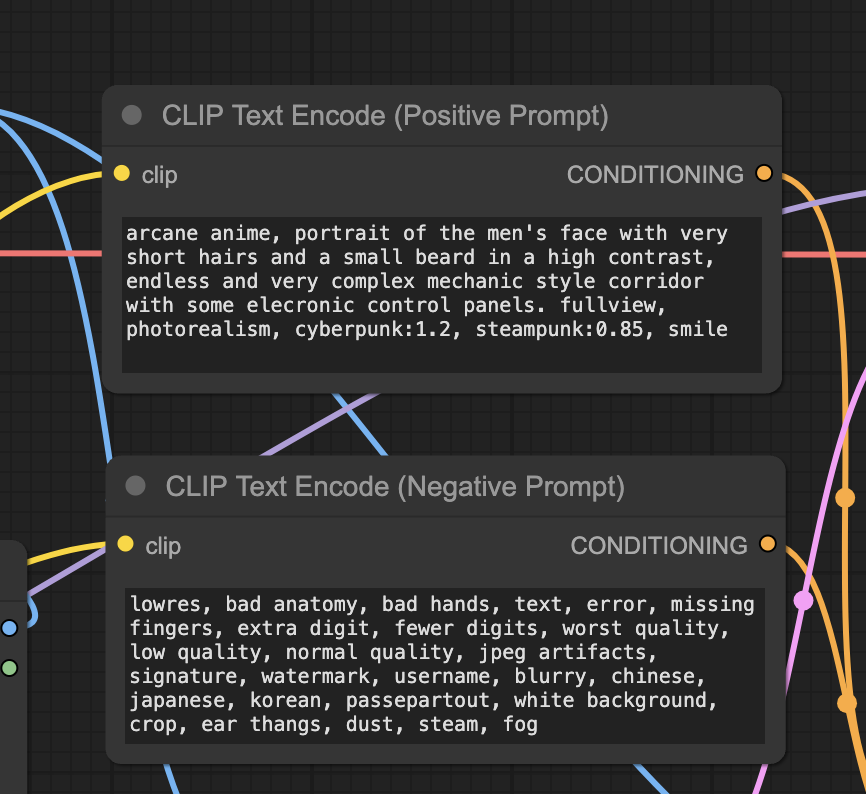
Step 5: Revise the prompt
Revise the prompt to match the image you want to generate.
Step 6: Generate an image
Click the Run button to run the workflow.

Optional: Follow the original image more closely
You can turn on ControlNet to force the generated images follow the input image more closely.
Step 1: Enable ControlNet
Unbypass the three ControlNet nodes at the bottom of the workflow. You can select the Bypass/Unbypass button or press Ctrl + B (Cmd + B for Mac) after selecting a node.
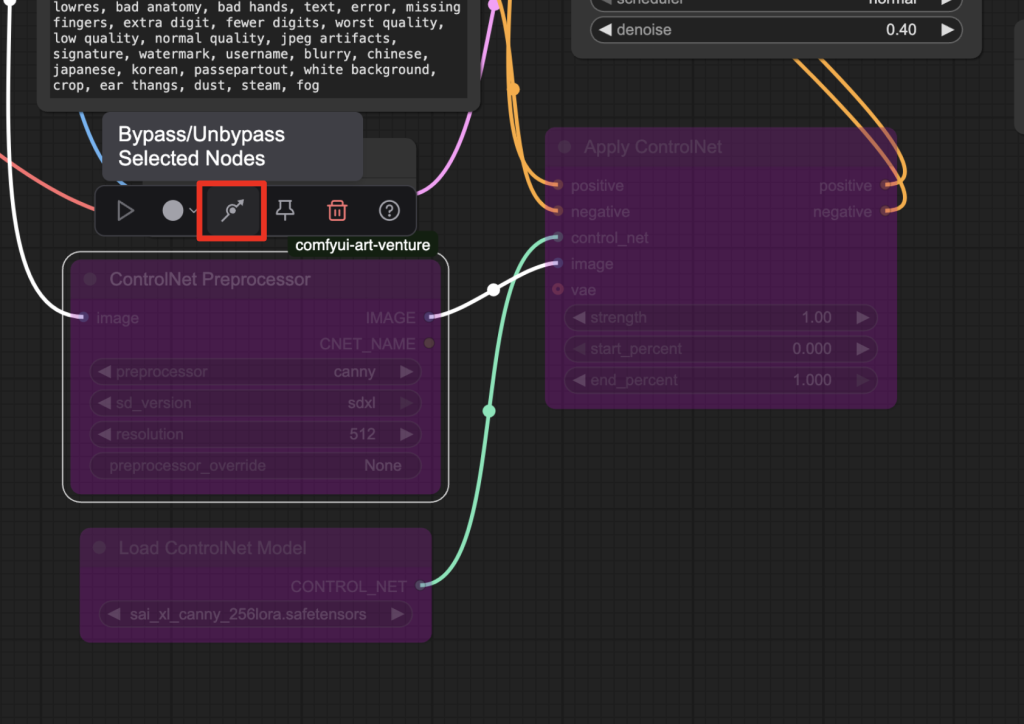
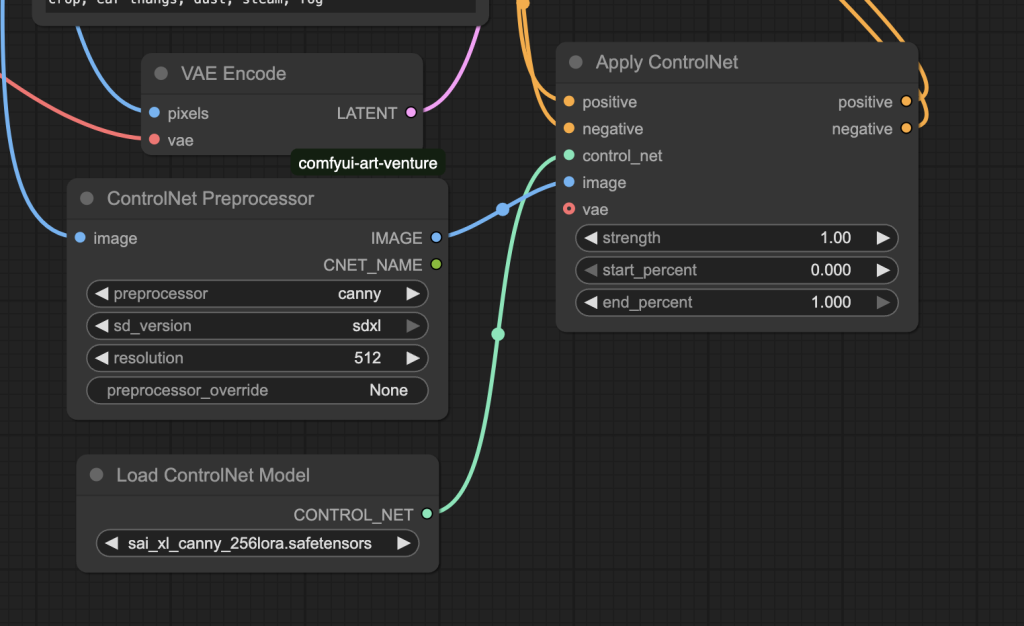
It should look like this:
Step 2: Download the ControlNet model
Download the Canny ControlNet XL model. Put it in the ComfyUI > models > controlnet folder.
Step 3: Run the workflow
Click the Run button to run the workflow.
Increase the likeness by:
- Reducing the denoising strength in the KSampler node.
- Increasing the ControlNet strength in the Apply ControlNet node.
Thanks, Andrew, a nice Checkpoint and Lora – I appreciate the work that went into getting this look