This workflow generates a short video clip with animated text like this:
You will learn:
- How to make the plain text video with free software (The project file is included for you to modify.)
- How to use a ComfyUI workflow (provided) to decorate the video.
You must be a member of this site to download the JSON workflow.
Table of Contents
Software
Video Editing Software
We will use Da Vinci Resolve to make a basic plain text animation. Download the free version to follow this tutorial.
Stable Diffusion GUI
We will use ComfyUI, a node-based Stable Diffusion GUI. You can use ComfyUI on Window/Mac or Google Colab.
Check out Think Diffusion for a fully managed ComfyUI/A1111/Forge online service. They offer 20% extra credits to our readers. (and a small commission to support this site if you sign up)
See the beginner’s guide for ComfyUI if you haven’t used it.
Step-by-step guide
Step 1: Make a plain text video
Here’s the Da Vinci Resolve project file that you can modify.
Follow the instructions below to make your own or understand what to change.
Start a new project in Da Vinci Resolve.
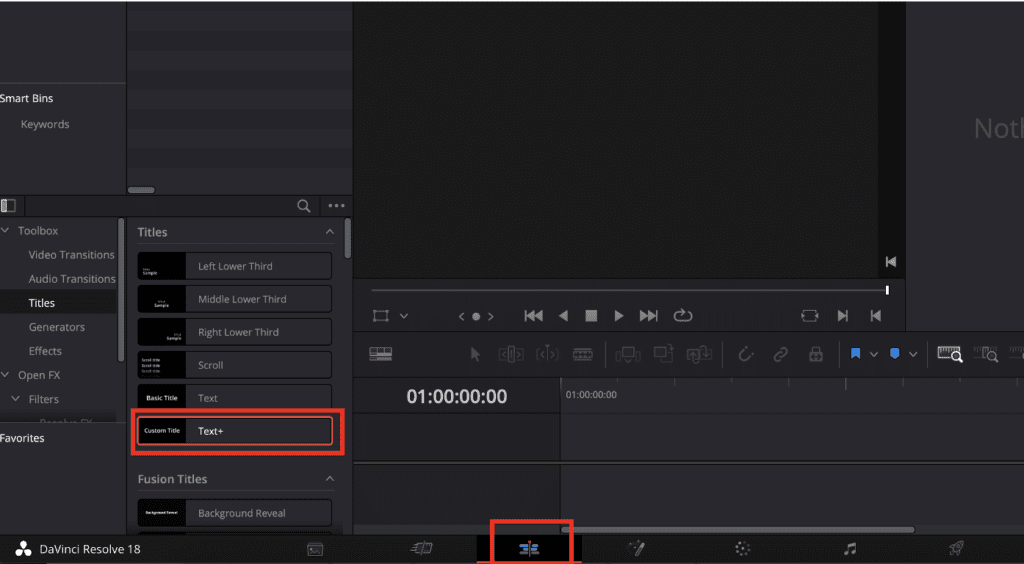
Go to the Edit page.
In Toolbox, select Titles > Text+. Drag it to the screen.
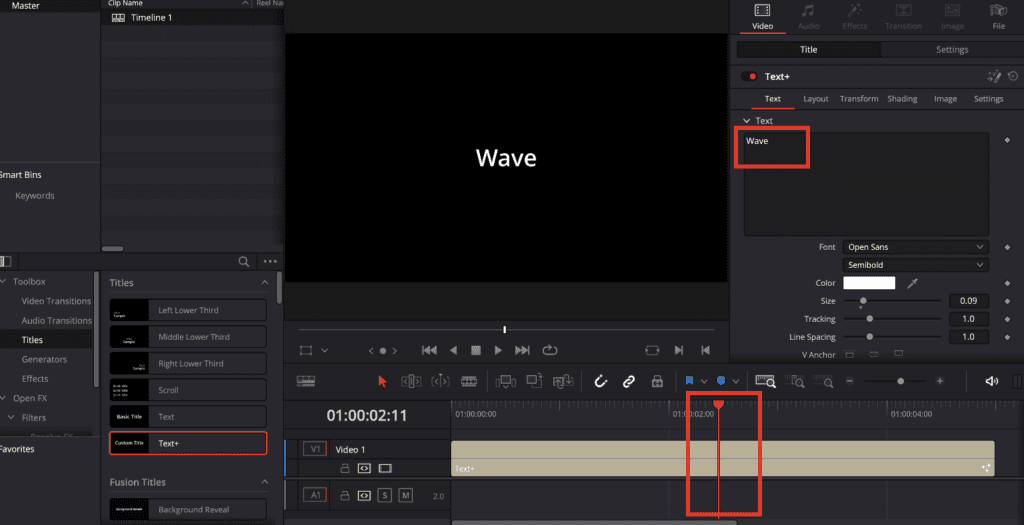
Change the text by selecting the block in the timeline and changing the Text box.
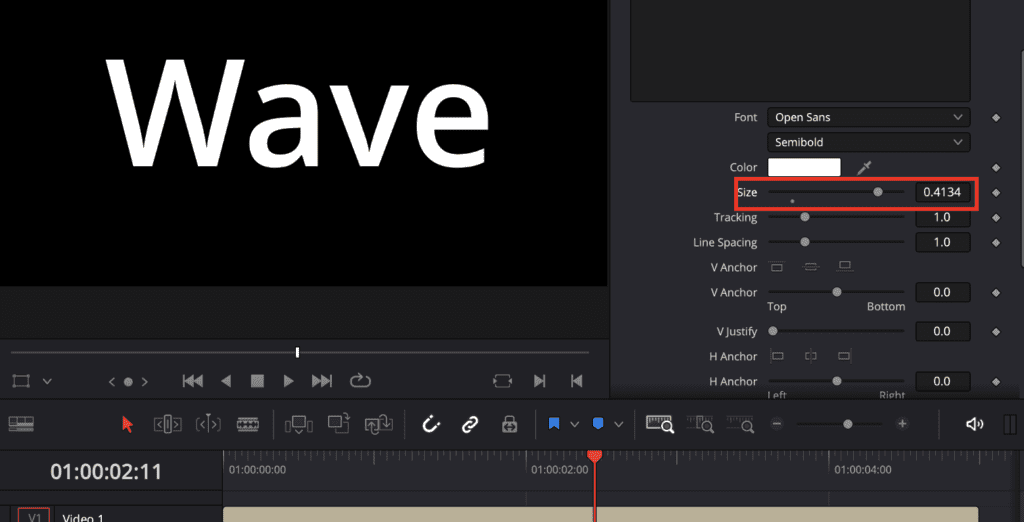
Adjust the font size by moving the Size slider.
Step 2: Add text movement
It is now a video with static text. Let’s add a tracking effect to the text.
Select the first frame in the timeline bar. Click the dot next to the Tracking to mark this frame as a keyframe. Adjust the Tracking slider so that the text is further apart in the beginning.
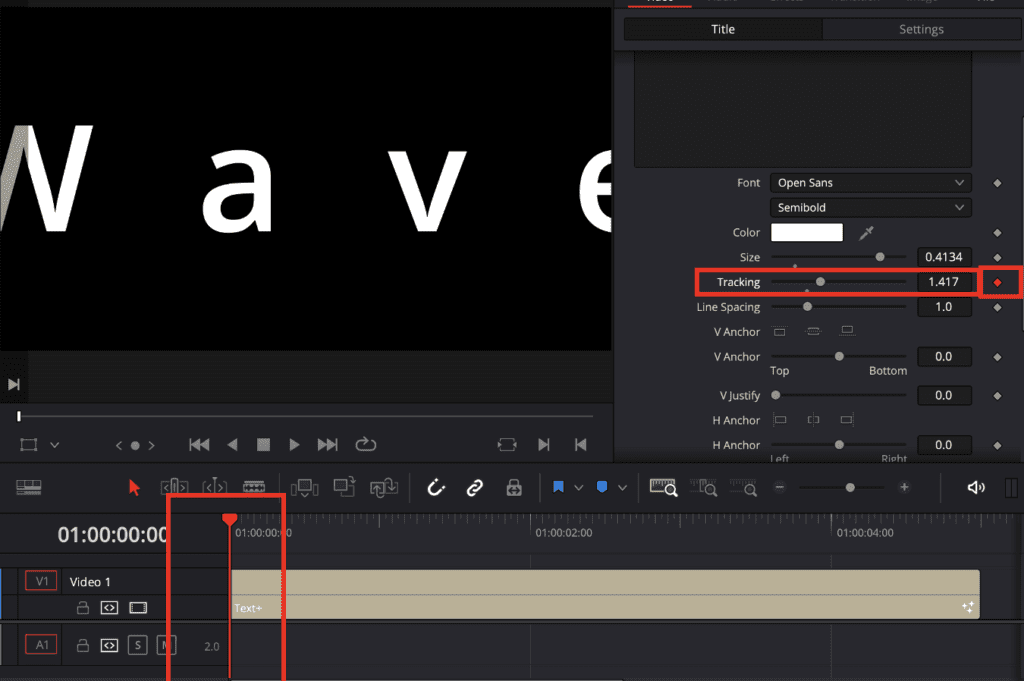
Adjust the video length by dragging the end of the timeline bar.

Drag the timeline pointer to where you want the animation to end. Mark the keyframe by clicking the little dot next to the Tracking slider. Move the Tracking slider to adjust how you want the text to look like at the end.
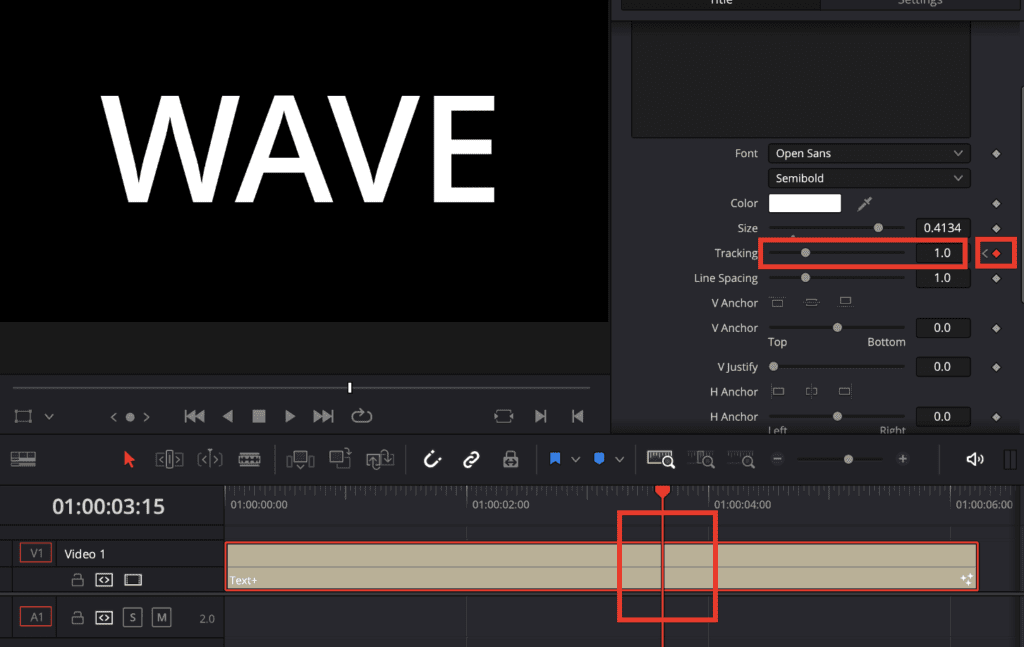
Optionally adjust the font and font weight.
Step 3: Export the video
Click the Rocket icon at the bottom to go to the Export page.
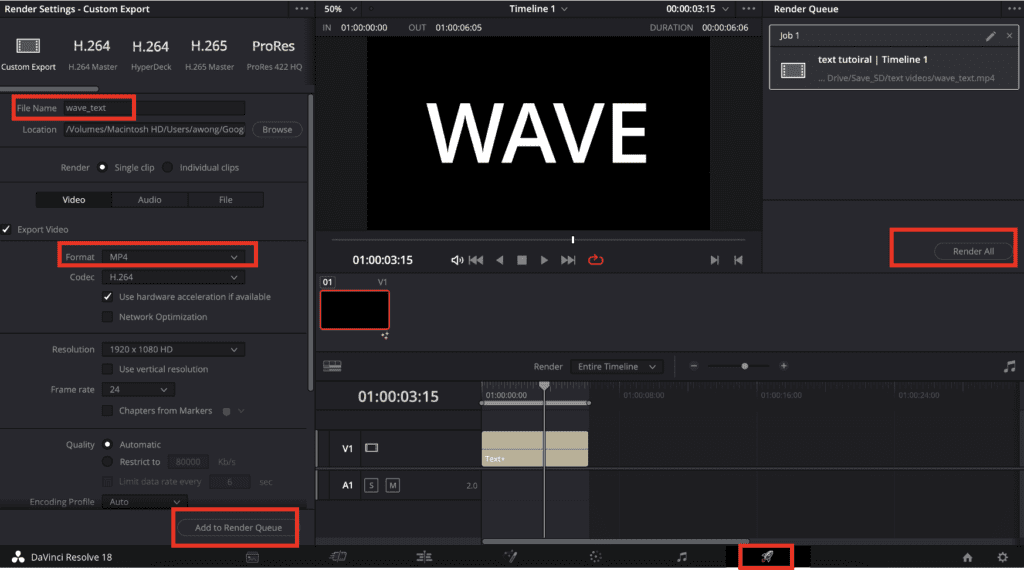
Enter the File Name of the video.
Select the video format as MP4.
Click Add to Render Queue.
Click Render All.
The video should be created. You should get a video like this:
This video will be used as the input of the ComfyUI workflow.
Step 4: Load the ComfyUI workflow
Download the workflow JSON file using the download button below.
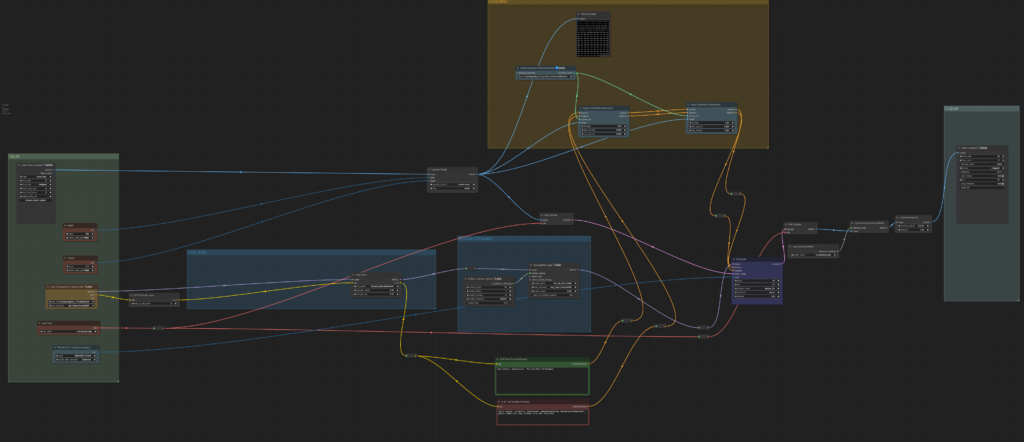
Drag and drop the JSON file to ComfyUI.
You may need to update ComfyUI, install missing custom nodes, and update all the custom nodes.
Step 5: Download models
Download the helloYoung25d checkpoint model. Put it in ComfyUI > models > checkpoints folder. Refresh the ComfyUI page and select the model.

Download the kl-f8-anime2 VAE. Put it in ComfyUI > models > vae folder. Refresh the ComfyUI page and select the model.

Download the add_detail LoRA. Put it in ComfyUI > models > loras folder. Refresh the ComfyUI page and select the model.

Download the QR monster ControlNet model. Put it in ComfyUI > models > controlnet folder. Refresh the ComfyUI page and select the model.

Download the 4x UltraSharp upscaler model. Put it in ComfyUI > models > upscale_models folder. Refresh the ComfyUI page and select the model.

Step 6: Generate ComfyUI video
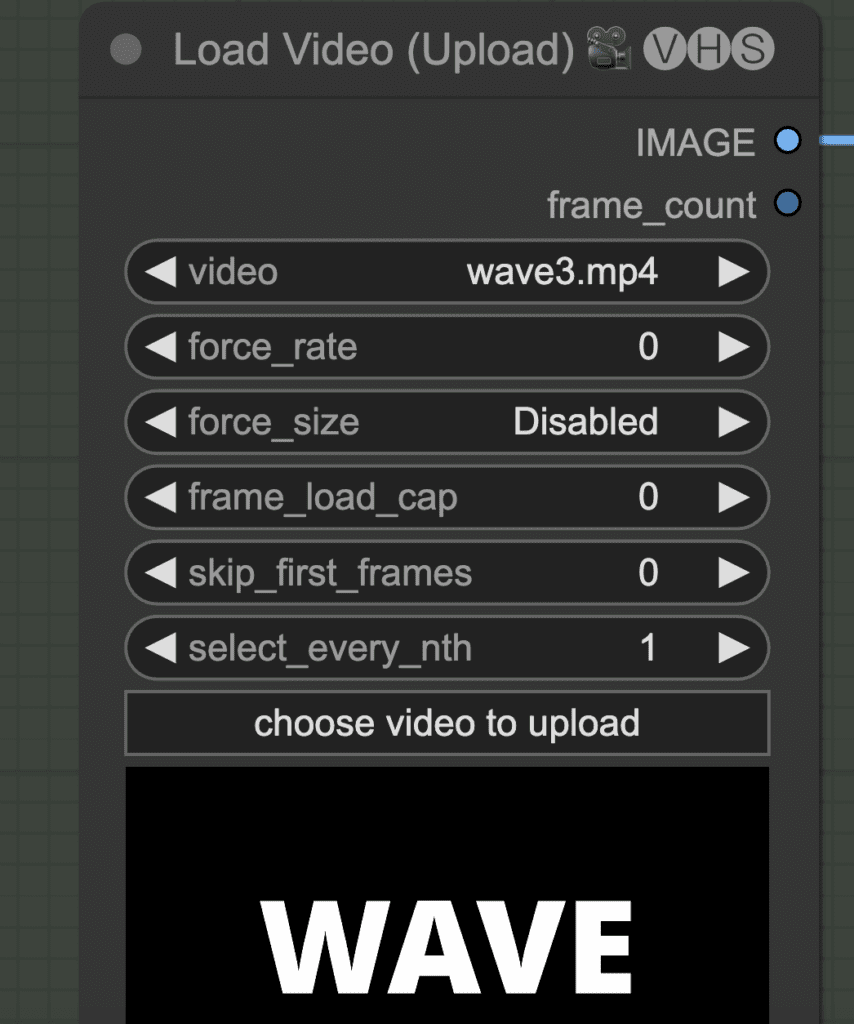
Select the video you created with Da Vinci Resolve in the Load Video (Upload) node.
Click Queue Prompt to start generating the video. You should get a video like this:
Customization
Change the prompt and negative prompts to customize the animation.
There are two ControlNet nodes using the QR monster ControlNet. The left one controls the beginning of the sampling steps. The right one controls the end of the sampling steps. Increase the strengths to make the text more visible.


Andrew, I can take your workflows and duplicate results. However, I have no intuition about most of these nodes. What they do and can I rearrange them differently etc.
Do you have a lecture or material explaining the architecture of all this.
Yes, if you are a Scholar member, you can take the comfyui course: https://stable-diffusion-art.com/courses/comfyui/
Good job! Are You using for input in workflow one image or sequence?
Hi, it takes an mp4 video as input to comfyui.
Would you be so kind to share input video for testing? Thanks.
Hi, you can download the video in step 3.
And, Thanks for making really cool stuff, whenever I find time , I look at these, you have done an excellent work here. Great, appreciate it !!
Thanks for your continued support!
I tried this, but I didn’t used the video which you have used, I created my own using manim (using python). However, It is not giving desired results. Any guesses, Here are how it is different, I used a different text with heart symbol around. It is a sinusoidal wavy text but my final outcome isn’t showing much of text, All I see a wave. Here is the video link that I am using. https://drive.google.com/file/d/1J6IQLQ3IDq89tB-YNerqWYiIXeLqHcBi/view?usp=sharing
You can try increasing the strengths of the two controlnet in the “Apply ControlNet (Advanced)” nodes.
https://stable-diffusion-art.com/animated-text-video-comfyui/#Customization